Flexfireleds RGB-MZ-COMBO User manual

MODE BRTSPEED
MODE BRTSPEED
7 8
4
I 2
3
5 6
PL AY
INPUT: DC12V-24V
DC
DC
MODEPAUSE MODE SPEED SPEED BRT BRT
TOUCH PANEL
MODEL:T3-5A
REMOTE CONTROL
•
•
•
•
•
Install in accordance with the National Electric Code, and local regulations.
This product should be installed and serviced by a qualified electrician.
Do not connect directly to high voltage 120V AC power.
This product is rated for indoor installation and is not protected against
moisture.
Proper heat dissipation will prolong the working lifespan of this product.
Install in a well-ventilated area.
1.
2.
3.
4.
Turn off 120V AC power at the main breaker prior to installation.
Connect your compatible driver to the Zone Receiver by attaching the negative output lead of your driver to the negative (DC-) input terminal of the
receiver, and positive output lead of your driver to the positive (DC+) input terminal of the receiver. If powering with a plug-in adapter, use a DC Splice Cable
to hard-wire the adapter to the receiver.
To install an RGB LED fixture, connect the red lead to the negative (R) terminal; the green lead to the negative (G) terminal;
& the blue lead to the negative (B) terminal of the Zone Receiver. Connect the remaining positive lead to the positive (+) terminal of the receiver.
Install additional components/accessories. Once complete, turn on 120V AC power.
1.
2.
3.
Turn on the Remote and Receiver by pressing the power button on each device.
Next, press and hold the power button on the Receiver for 3 seconds until you hear a short beep, and continue to hold. Once the Receiver short
beeps immediately hold down a zone number of your choice (1-8) on the Remote. Ensure to continue holding the power button on the Receiver
after it beeps, and then simultaneously choose a zone on the Remote.
To indicate pairing, the Receiver will long beep and a green indicator light will flash 3 times on the Remote.
•
•
•
A flashing red indicator light on the Zone Remote implies a low battery.
To charge the Zone Remote, connect the included USB 2.0A/Mini-B cable to the remote and to any USB compatible computer or mobile charger with a USB
port (not included).
Press the power button on the Zone Remote and a blue indicator light will flash continuously to indicate charging. Once the indicator light turns green,
charging is complete.
Only install compatible LED drivers and fixtures. Contact technical
support or visit the product page for compatible products.
Ensure applicable wire is installed between driver, fixture, and any
controls in between. When choosing wire, factor in voltage drop,
amperage rating, and type (in-wall rated, wet location rated, etc.).
Inadequate wire installation could overheat wires, and cause fire.
Utilize the wiring diagrams in this installation guide for basic installations.
SAFETY & WARNINGS
INSTALLATION
Charging the Zone Remote
Pairing the Zone Remote with a Zone Receiver
Always pre-test your LED light assembly prior to permanent installation. This will ensure all components are being joined properly and work correctly. Be sure to
check the amperage rating of RGB LED fixture you choose to install so the RGB Zone Receiver is not overloaded (Max 5A*3, 5A per channel). See installation
diagrams on the back of this page for sample installations.
The Zone Remote can control up to 8 different Zone Receivers. Only one remote can be paired to each receiver. To pair the Zone Remote
with a Zone Receiver:
Before you begin, read all warnings and installation instructions thoroughly.
•
•
•
DC5V(Built-in Lithium battery)
≤30mA
2.4GHZ
100 ft / 30m
Sync or zone control (8 zones)
1000mAh
≤6 months
30 days
5.7 × 2.2 × 0.8 in. (Lx Wx H)
7 oz
Input Voltage
Working Current
Working Frequency
Transmitting Distance
Remote Option
Battery Capacity
Standby Time
Normal Usage Time
Dimension
Weight (G.W)
12-24V DC
5A×3CH Max 15A
180W/360W(12V / 24V)
18 modes
8 touch buttons
-22° - 131°F
-4° - 104° F
8.3 × 1.5 × 1.2 in. (Lx Wx H)
6.4 oz
Input Voltage
Max Current Load
Max Output Power
Change Mode
Control Button
Operating Temperature
Ambient Temperature
Dimension
Weight (G.W)
Remote Receiver
V.2017.07.17Page 1 of 3
RGB Multi-Zone Combo
24v12v
INSTALLATION GUIDE

MODE BRTSPEED
MODE BRTSPEED
7 8
4
I 2
3
5 6
PL AY
RF
OPERATION
MODE DESCRIPTION CHART WIRING CONNECTIONS
•
•
•
•
•
•
•
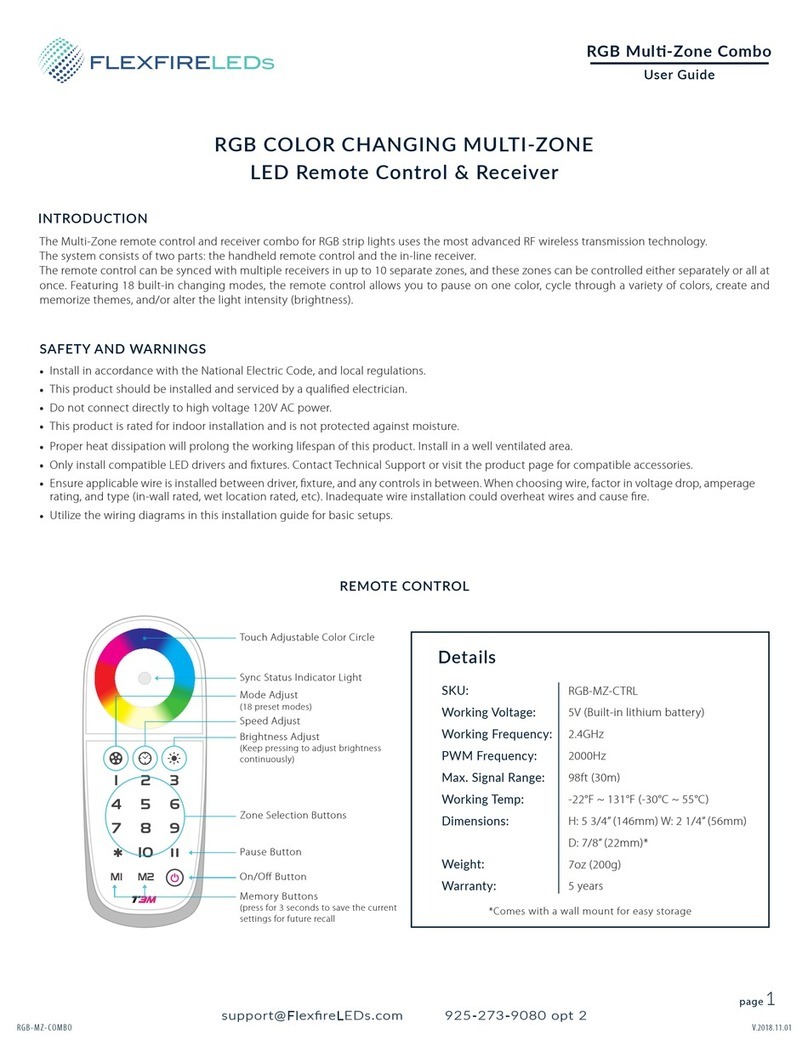
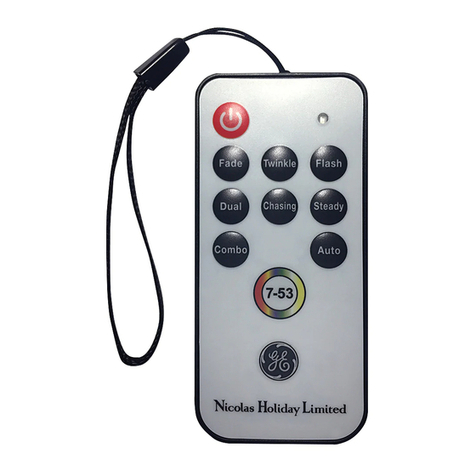
POWER: Turns the Zone Receiver and Zone Remote ON/OFF.
PAUSE: A quick press of the PAUSE key freezes the current MODE. Holding the PAUSE key on the Zone Remote for 3 seconds will turn the sound on
all Zone Receivers ON/OFF.
MODE: Cycles through 18 pre-programmed MODES. Holding MODE+ for 3 seconds until a long beep sounds will cycle the MODE to No. 1 of the Mode
Description Chart and adjust the SPEED to 5.
SPEED: Press to cycle through 8 different SPEEDS of any current MODE. Holding SPEED for 3 seconds until a buzzer sounds will adjust the SPEED to 5.
BRIGHTNESS: Press to cycle through 8 BRIGHTNESS levels of any current MODE or single color. A quick double-beep indicates maximum brightness if sound
is turned on (see PAUSE key for turning sound ON/OFF).
COLOR ADJUSTMENT WHEEL: Adjusts static colors. The LED indicator in the center of the COLOR ADJUSTMENT WHEEL displays the current static
color selected.
ZONE CONTROL: Selects a specific zone to control (1-8). To choose all 10 zones press“ * ” twice. To control a selected number of zones in sync press
“ * + any numeral + * ”. For example, if you would like to control zones 1, 5, & 9 together, press “ * 159 * ”.
TROUBLESHOOTING
•
•
•
•
•
LED lights do not light up or fixture does not emit correct colors: Make sure all connections are correct and secure (check for backwards polarity) and your
compatible drivers connected to 120V AC power. The four (R,G,B,V+) lead wires of the fixture should be stripped properly so the copper wires make direct
contact with the Zone Receiver terminal block.
Lights are flickering: Check that you have a compatible driver rated to power the attached load. Our Magnetic Dimmable Drivers are not compatible
with this product. Also, make sure all connections are secure.
Unable to pair remote with receiver: Please read the directions on the previous page thoroughly. Be sure the Zone Remote is fully charged and the
Zone Receiver is paired with a compatible driver.
This product is rated for indoor installation and is not protected against moisture.
Proper heat dissipation will prolong the working lifespan of this product. Install in a well-ventilated area.
If all else fails, shut off main power to the Zone Receiver and turn back on. If you have any other questions/concerns please contact technical support.
We are more than happy to assist you with any technical difficulties or concerns.
Static red
Static green
Static blue
Static yellow
Static purple
Static cyan
Static white
RGB skipping
7 colors skipping
White strobe
7 colors strobe
Red fade out and fade in
Green fade out and fade in
Blue fade out and fade in
Yellow fade out and fade in
Purple fade out and fade in
1
2
3
4
5
6
7
8
9
10
11
12
13
14
15
16
No. MODE
Cyan fade out and fade in
White fade out and fade in
RGB fade out and fade in
Red/Green color smooth
Red/Blue color smooth
Green/Blue color smooth
Red/Yellow color smooth
Green/Cyan color smooth
Blue/Purple color smooth
Green/Yellow color smooth
Blue/Cyan color smooth
Red/Purple color smooth
Blue/White color smooth
Yellow/Purple/Cyan color smooth
RGB color smooth
Full-color smooth
17
18
19
20
21
22
23
24
25
26
27
28
29
30
31
32
No. MODE
Description: Speed/Brightness adjustable.
DO NOT connect directly to 120VAC.
Install in accordance with the NEC,
and local regulations.
Multiple remotes cannot be paired to a single receiver.
Up to 8 receivers may be paired to a single remote.
Output to
LED Load
Input from
12 - 24V
LED Driver
V.2017.07.17Page 2 of 3
RGB Multi-Zone Combo
24v12v
INSTALLATION GUIDE

INPUT: DC12V-24V
DC
DC
MODEPAUSE MODE SPEED SPEED BRT BRT
TOUCH PANEL
MODEL: T3-5A
REMOTE CONTROL
LED CONTROLLER
INPUT: DC12V-24V
DC
DC
MODEPAUSE MODE SPEED SPEED BRT BRT
TOUCH PANEL
MODEL: T3-5A
REMOTE CONTROL
LED CONTROLLER
INPUT: DC12V-24V
DC
DC
MODEPAUSE MODE SPEED SPEED BRT BRT
TOUCH PANEL
MODEL: T3-5A
REMOTE CONTROL
LED CONTROLLER
INPUT: DC12V-24V
DC
DC
MODEPAUSE MODE SPEED SPEED BRT BRT
TOUCH PANEL
MODEL: T3-5A
REMOTE CONTROL
LED CONTROLLER
“Zone 1” Receiver
Zone Remote*
“Zone 2” Receiver
“Zone 3” Receiver
“Zone X” Receiver
RF
Mean Well
Power Supply
DC
AC
MODE BRT
SPEED
MODE BRT
SPEED
7 8
4
I 2
3
5 6
PL AY
SYSTEM DIAGRAM
The following diagram is provided as an example system design. Class 2 compliance may require a Class 2 Driver per one receiver (eg 60W @ 12V,
96W @ 24V). Install in accordance with the NEC and local regulations.
Zone remote has 8 total zones and may be paired to an unlimited number of receivers. Multiple remotes cannot be paired
to a single receiver (max 1 remote per receiver).
*
V.2017.07.17Page 3 of 3
FlexfireLEDs.com
Info@FlexfireLEDs.com
•
•
925
273 9080
RGB Multi-Zone Combo
24v12v
INSTALLATION GUIDE
Other Flexfireleds Remote Control manuals
