Flexicon PF7 User manual

PF7 Peristaltic Filler User Manual
m-PF7-Peristaltic Filler User
Manual-02:PB0439/2 1
Contents
1 Declaration of conformity 3
2 Declaration of incorporation 4
3 Safety notes 5
4 Peristaltic pumps - an overview 8
5 When you unpack your pump 9
5.1 Unpacking your pump 9
5.2 Packaging disposal 9
5.3 Inspection 9
5.4 Components supplied 9
5.5 Storage 9
6 Pump operation 10
6.1 Keypad 10
6.2 Glossary of icons 10
6.3 Switching the pump on for the first time 11
6.4 Switching the pump on in subsequent power cycles 15
6.5 Menu navigation 16
6.6 Recipe Mode 16
6.7 Priming and continuous pumping mode 18
6.8 Calibrate mode 19
6.9 Dispense Mode 21
6.10 Reports mode 26
6.11 Settings mode 26
7 Setting up the fluid path 30
7.1 Tube selection 30
7.2 Placing the product container 31
7.3 Y-connector selection 32
7.4 Loading the tube 32
EN EN EN EN EN EN EN EN EN EN EN EN EN EN EN EN EN
2m-PF7-Peristaltic Filler User
Manual-02:PB0439/2
8 Good pump installation practice 34
8.1 General recommendations 34
8.2 Dos and don'ts 34
9 Connecting to a power supply 35
10 Control wiring 36
11 Pump specifications 38
11.1 Specification ratings 38
12 Troubleshooting 39
13 Pump maintenance (including cleaning) 40
13.1 Service 40
13.2 Cleaning 40
13.3 Pumphead Removal 40
14 Warranty 41
15 Information for returning pumps 42
16 Name and address of manufacturer 42
17 Disclaimers 42

1 Declaration of conformity
m-PF7-Peristaltic Filler User
Manual-02:PB0439/2 3
EN EN EN EN EN EN EN EN EN EN EN EN EN EN EN EN EN
4m-PF7-Peristaltic Filler User
Manual-02:PB0439/2
2 Declaration of incorporation
3 Safety notes
This safety information should be used in conjunction with the rest of this operating
manual.
In the interests of safety, this pump and pumphead should only be used by
competent, suitably trained personnel after they have read and understood the
manual and considered any hazard involved. If the pump is used in a manner not
specified by Watson- Marlow Ltd, the protection provided by the pump may be
impaired. Any person who is involved in the installation or maintenance of this
equipment should be fully competent to carry out the work. In the UK this person
should also be familiar with the Health and Safety at Work Act 1974.
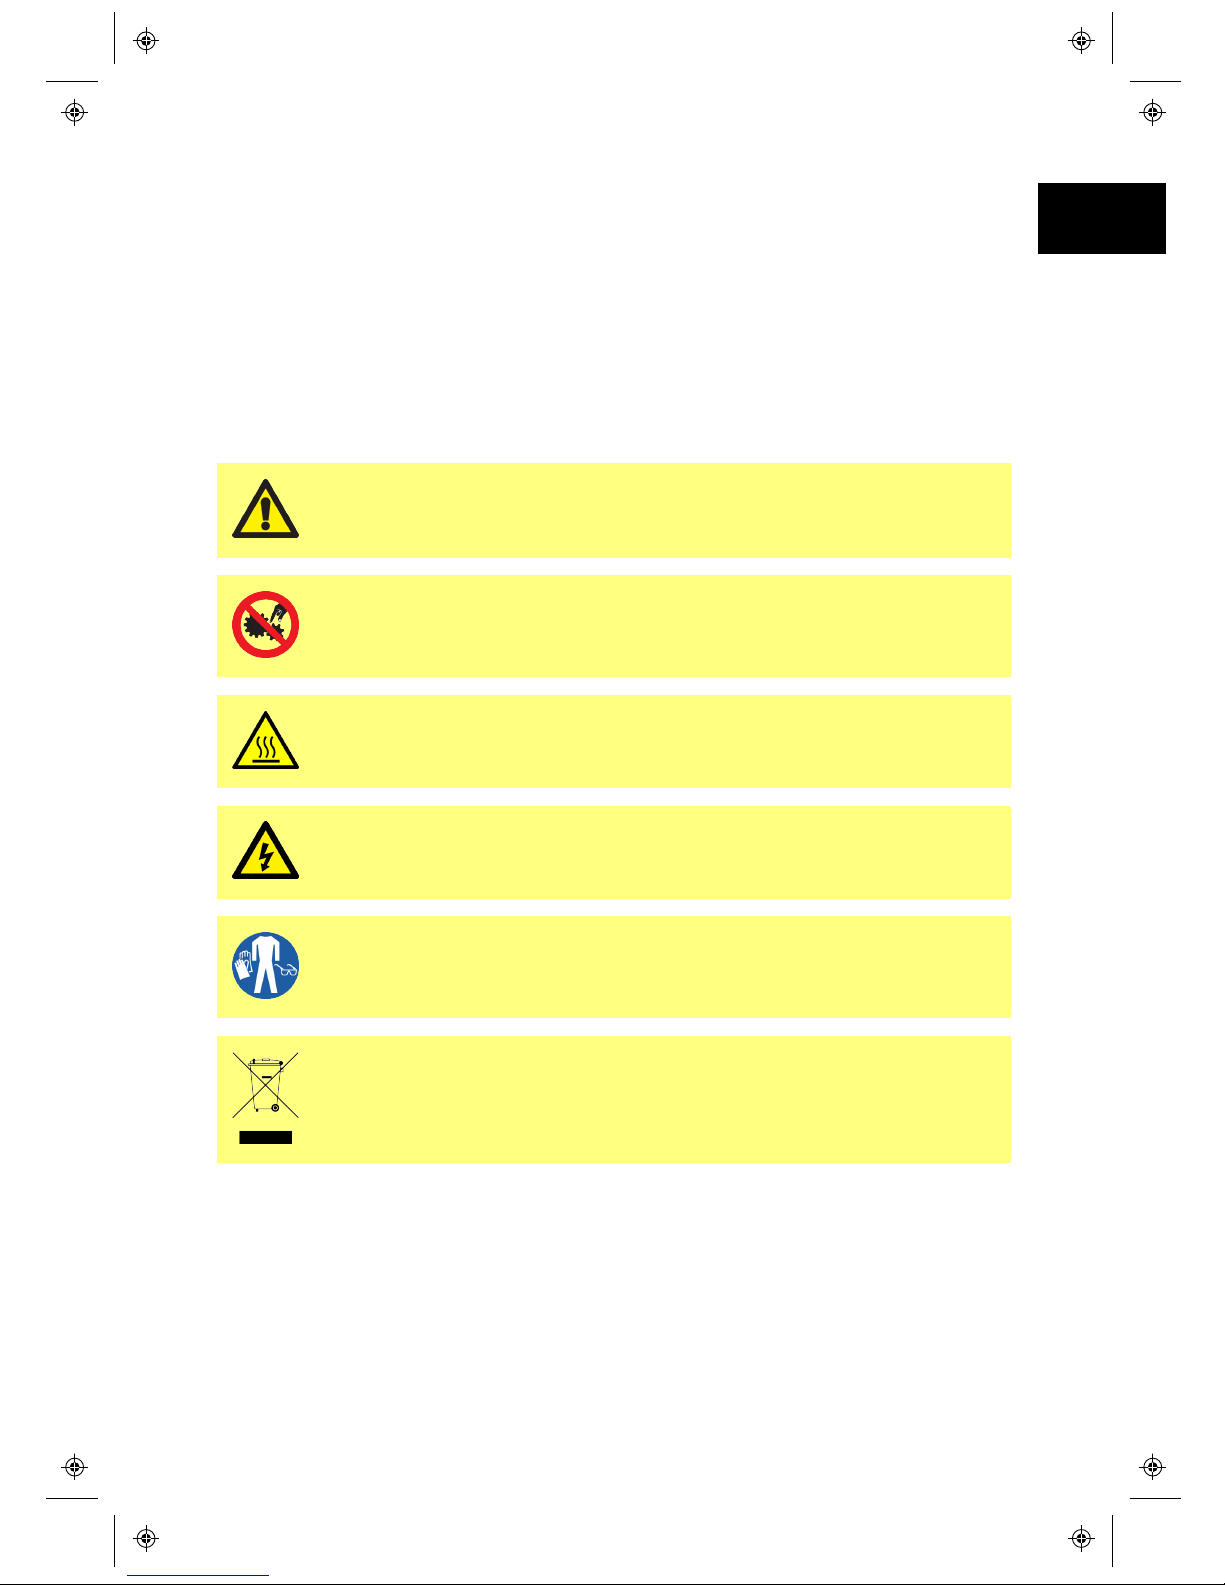
This symbol, used on the pump and in the manual, means: Caution,
refer to accompanying documents.
This symbol, used on the pump and in the manual, means: Do not
allow fingers to contact moving parts.
This symbol, used on the pump and in the manual, means: Caution,
hot surface.
This symbol, used on the pump and in the manual, means: Caution,
risk of electric shock.
This symbol, used on the pump and in the manual, means: Personal
Protective Equipment (PPE) must be worn.
This symbol, used on the pump and in the manual, means: Recycle
this product under the terms of the EU Waste Electrical and Electronic
Equipment (WEEE) Directive.
m-PF7-Peristaltic Filler User
Manual-02:PB0439/2 5
EN EN EN EN EN EN EN EN EN EN EN EN EN EN EN EN EN
6m-PF7-Peristaltic Filler User
Manual-02:PB0439/2
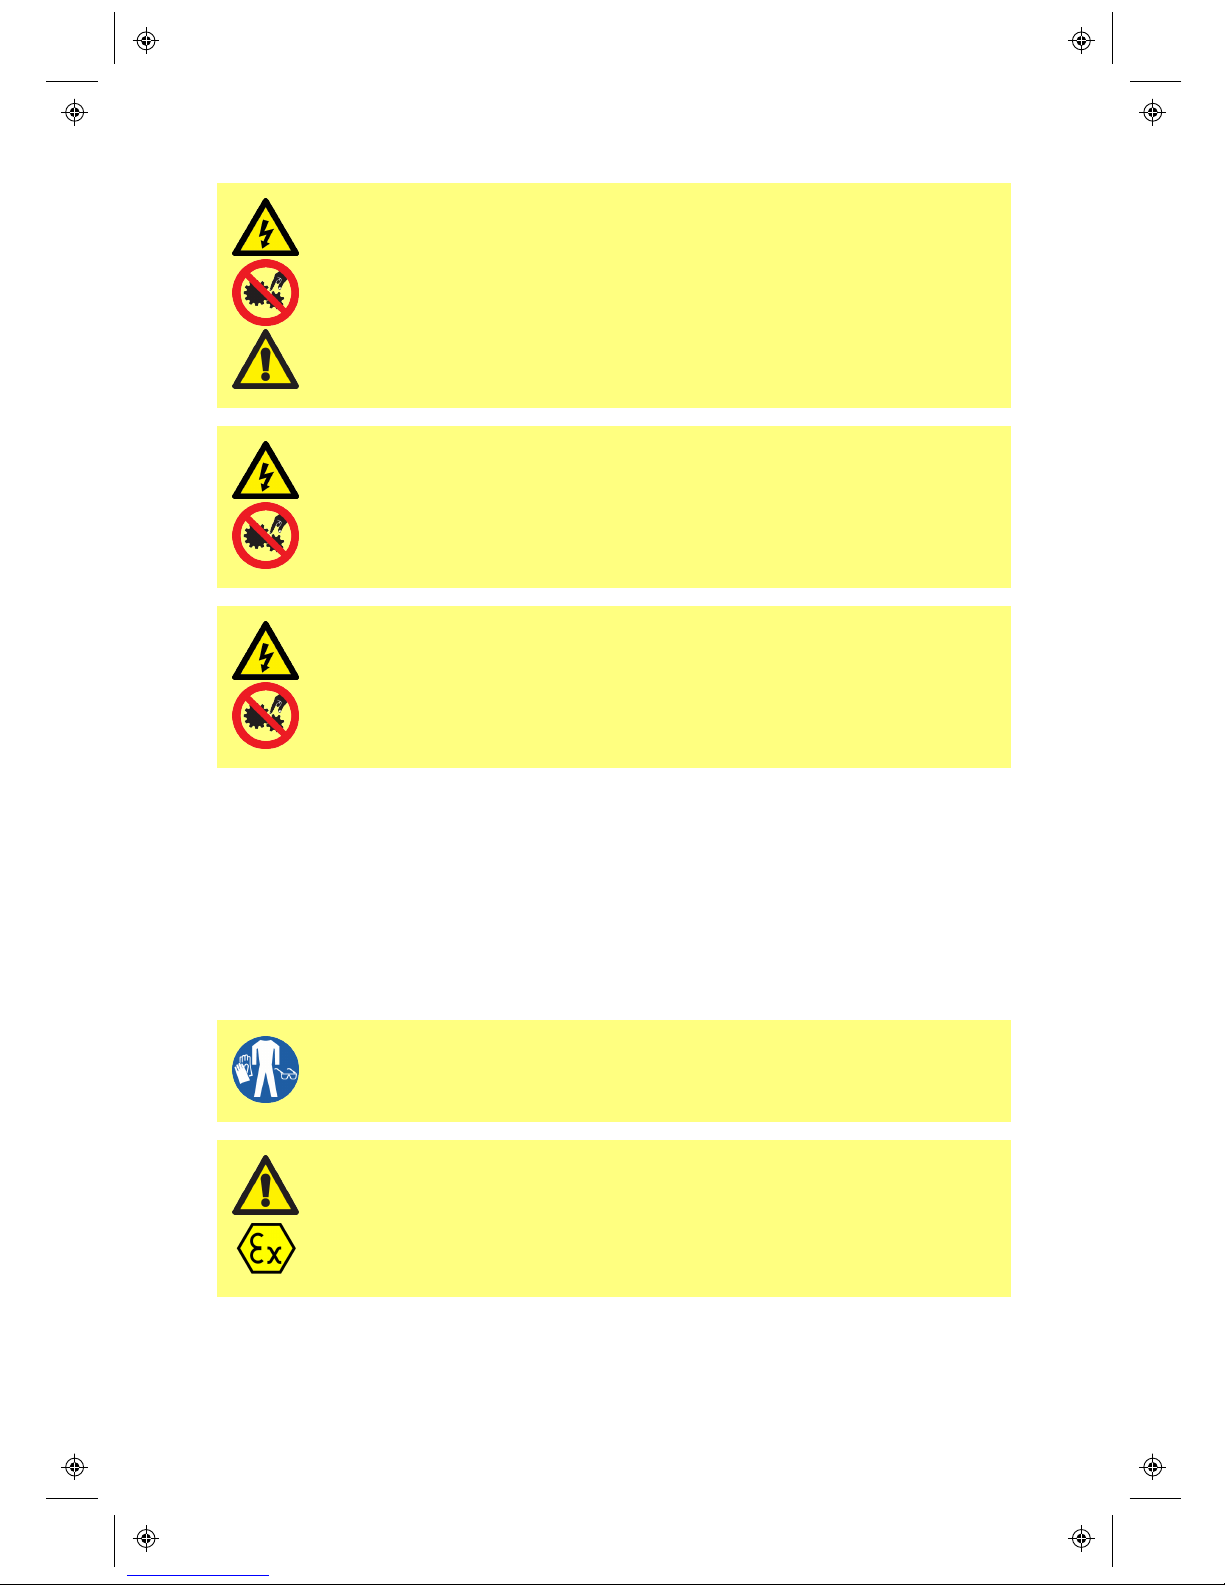
Fundamental work with regard to lifting, transportation, installation,
starting-up, maintenance and repair should be performed by qualified
personnel only. The unit must be isolated from mains power while
work is being carried out. The motor must be secured against
accidental start-up.
There is a user-replaceable type fuse in the fuse holder above the
power input connector at the back of the pump. In some countries, the
mains power plug contains an additional replaceable fuse.
There are no user-serviceable fuses or parts inside this pump.
This pump must be used only for its intended purpose.
The pump must be accessible at all times to facilitate operation and maintenance.
Access points must not be obstructed or blocked. Do not fit any devices to the drive
unit other than those tested and approved by Watson- Marlow Ltd. Doing so could
lead to injury to persons or damage to property for which no liability can be
accepted.
The pump's main plug is the disconnecting device (for isolating the motor drive
from the mains supply in an emergency). Do not position the pump so that it is
difficult to disconnect the mains plug.
If hazardous fluids are to be pumped, safety procedures specific to
the particular fluid and application must be put in place to protect
against injury to persons.
This product does not comply with the ATEX directive and must not be
used in explosive atmospheres.

The PF7 contains a non-replaceable Manganese Dioxide Lithium Battery (Li/MnO2),
IEC CR2032, with a typical capacity of 225mAh, containing 0.07g of Lithium.
Primary operator protection from rotating parts of this pump is
provided by isolating the pump from mains power before opening the
pump head tube bridge. The pump also provides a tube bridge open
indicator. If the tube bridge is opened, the tube bridge open screen is
displayed.
The tube bridge must be closed for the warning screen to clear and the pump to
start.
m-PF7-Peristaltic Filler User
Manual-02:PB0439/2 7
EN EN EN EN EN EN EN EN EN EN EN EN EN EN EN EN EN

8m-PF7-Peristaltic Filler User
Manual-02:PB0439/2
4 Peristaltic pumps - an overview
Peristaltic pumps are the simplest possible pump, with no valves, seals or glands to
clog or corrode. The fluid contacts only the bore of a tube, eliminating the risk of the
pump contaminating the fluid, or the fluid contaminating the pump.
How they work
A compressible tube is squeezed between a roller and a track on an arc of a circle,
creating a seal at the point of contact. As the roller advances along the tube, the
seal also advances. After the roller has passed, the tube returns to its original
shape, creating a partial vacuum which is filled by fluid drawn from the inlet port.
Before the roller reaches the end of the track, a second roller compresses the tube
at the start of the track, isolating a packet of fluid between the compression points.
As the first roller leaves the track, the second continues to advance, expelling the
packet of fluid through the pump’s discharge port. At the same time, a new partial
vacuum is created behind the second roller into which more fluid is drawn from the
inlet port.
Backflow and siphoning do not occur, and the pump effectively seals the tube when
it is inactive. No valves are needed.
The principle may be demonstrated by squeezing a soft tube between thumb and
finger and sliding it along: fluid is expelled from one end of the tube while more is
drawn in at the other.
Animal digestive tracts function in a similar way.
Suitable applications
Peristaltic pumping is ideal for most fluids, including viscous, shear- sensitive,
corrosive and abrasive fluids, and those containing suspended solids. They are
especially useful for pumping operations where hygiene is important.
Peristaltic pumps operate on the positive displacement principle. They are
particularly suitable for metering, dosing and dispensing applications. Pumps are
easy to install, simple to operate and inexpensive to maintain.

5 When you unpack your pump
5.1 Unpacking your pump
Unpack all parts carefully, retaining the packaging until you are sure all
components are present and in good order. Check against the components supplied
list, below.
5.2 Packaging disposal
Dispose of packaging materials safely, and in accordance with regulations in your
area. The outer carton is made of corrugated cardboard and can be recycled.
5.3 Inspection
Check that all components are present. Inspect components for damage in transit.
If anything is missing or damaged, contact your distributor immediately.
5.4 Components supplied
•PF7 pump drive unit, fitted with QC12 pumphead
•A QC12 pumphead tube clamp set
•The designated power cable
•Product manual
5.5 Storage
This product has an extended shelf life. However, care should be taken after
storage to ensure that all parts function correctly. Please observe the storage
recommendations and use-by dates which apply to tubing you may wish to bring
into service after storage.
m-PF7-Peristaltic Filler User
Manual-02:PB0439/2 9
EN EN EN EN EN EN EN EN EN EN EN EN EN EN EN EN EN

10 m-PF7-Peristaltic Filler User
Manual-02:PB0439/2
6 Pump operation
6.1 Keypad
The STOP key will immediately stop the pump, regardless of what screen is
currently displayed. If the pump is stopped part way through a fill, a message
stating this will be displayed.
6.2 Glossary of icons
The PF7 uses a range of graphical icons to help navigation, in both the smart key
function indicator area and the screen info bar area.
Smart key icons
BACK TO PREVIOUS SCREEN
NO / CANCEL
EDIT
MODE
NEXT
PAUSE
RUN
STOP
YES/CONTINUE
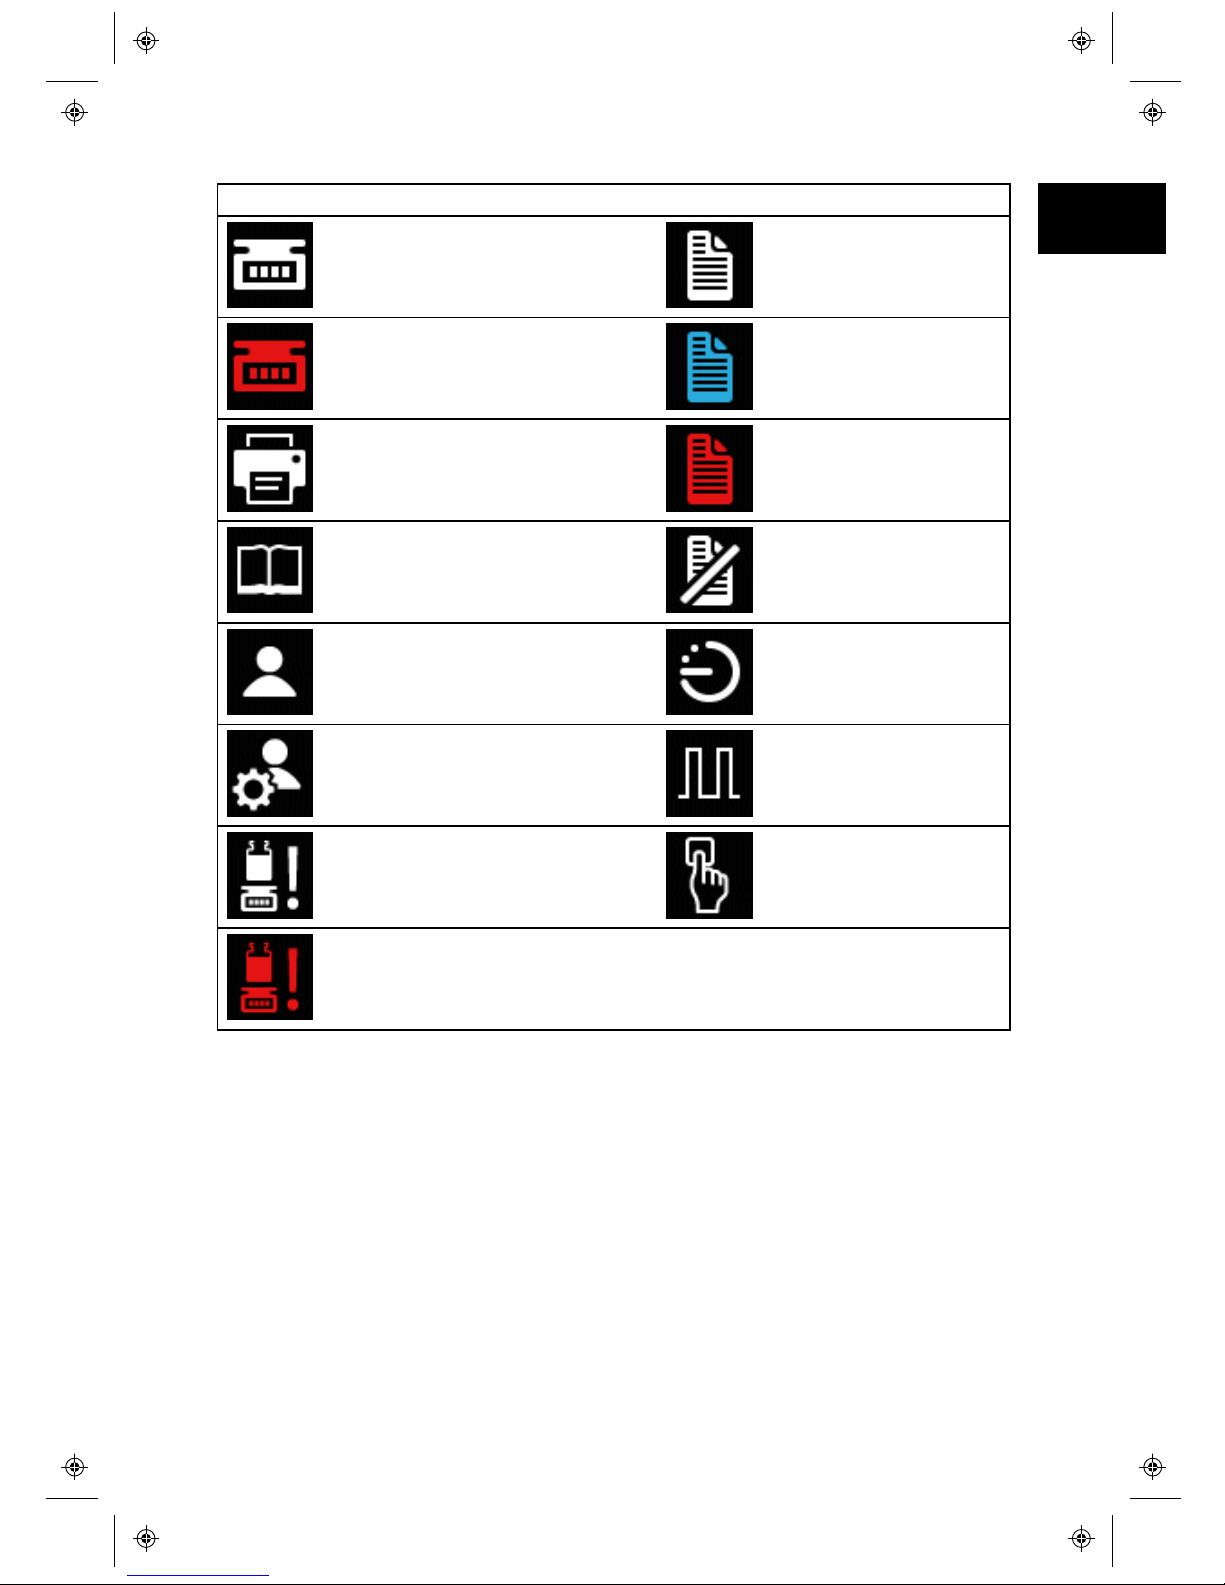
Screen info icons
BALANCE CONNECTED (White Icon) REPORTING ON (White
Icon)
BALANCE CONNECTED
BUT NOT USABLE (Red Icon)
REPORTING IN PROGRESS
(Blue Icon)
PRINTER CONNECTED REPORTING ERROR
(Red Icon)
RECIPE REPORTING OFF
USER FILL ACTIVATION BY TIME
DELAY
ADMINISTRATOR FILL ACTIVATION BY
EXTERNAL INPUT
RECALIBRATION REMINDER FILL ACTIVATION BY
KEYPAD
RECALIBRATION REQUIRED
(Red Icon)
6.3 Switching the pump on for the first time
Powering up
Power up the pump. The pump displays the start-up screen with the Flexicon logo.
m-PF7-Peristaltic Filler User
Manual-02:PB0439/2 11
EN EN EN EN EN EN EN EN EN EN EN EN EN EN EN EN EN

12 m-PF7-Peristaltic Filler User
Manual-02:PB0439/2
Language selection
Select the display language using the up and down keys (∧/∨) and then the
.
Setting the time and date
Enter the time and date using the numeric keypad. The time format is hh/mm/ss
and the date format is yyyy/mm/dd. The time is 24hr format.
Pressing will move the selection forward. Once the time and date is
correct, press . Pressing at any point returns to the previous
screen.
Setting the filling method
The filling method defines how each fill will be started.
Time delay between fills, the next fill starts automatically at a set time delay
after the previous fill ends.
Keypad to start each fill, requires to be pressed to start every fill.
External input to start each fill , starts a fill whenever a signal is received
through the start input pin.

The Filling method icon will be displayed in the screen info bar area.
Select the display language using the up and down keys ( ∧/∨) and then press
. The filling method can be reset in settings mode
Setting the pump administrator
Enter a username for the pump administrator. The default username is USER1.
Press to delete characters.
Use the up and down keys (∧/∨) to scroll through the available characters. After 1
second of inactivity the next character can be entered. Use the numeric keypad to
enter numbers. Once the username is correct, press .
Additional users can be set up in settings mode.
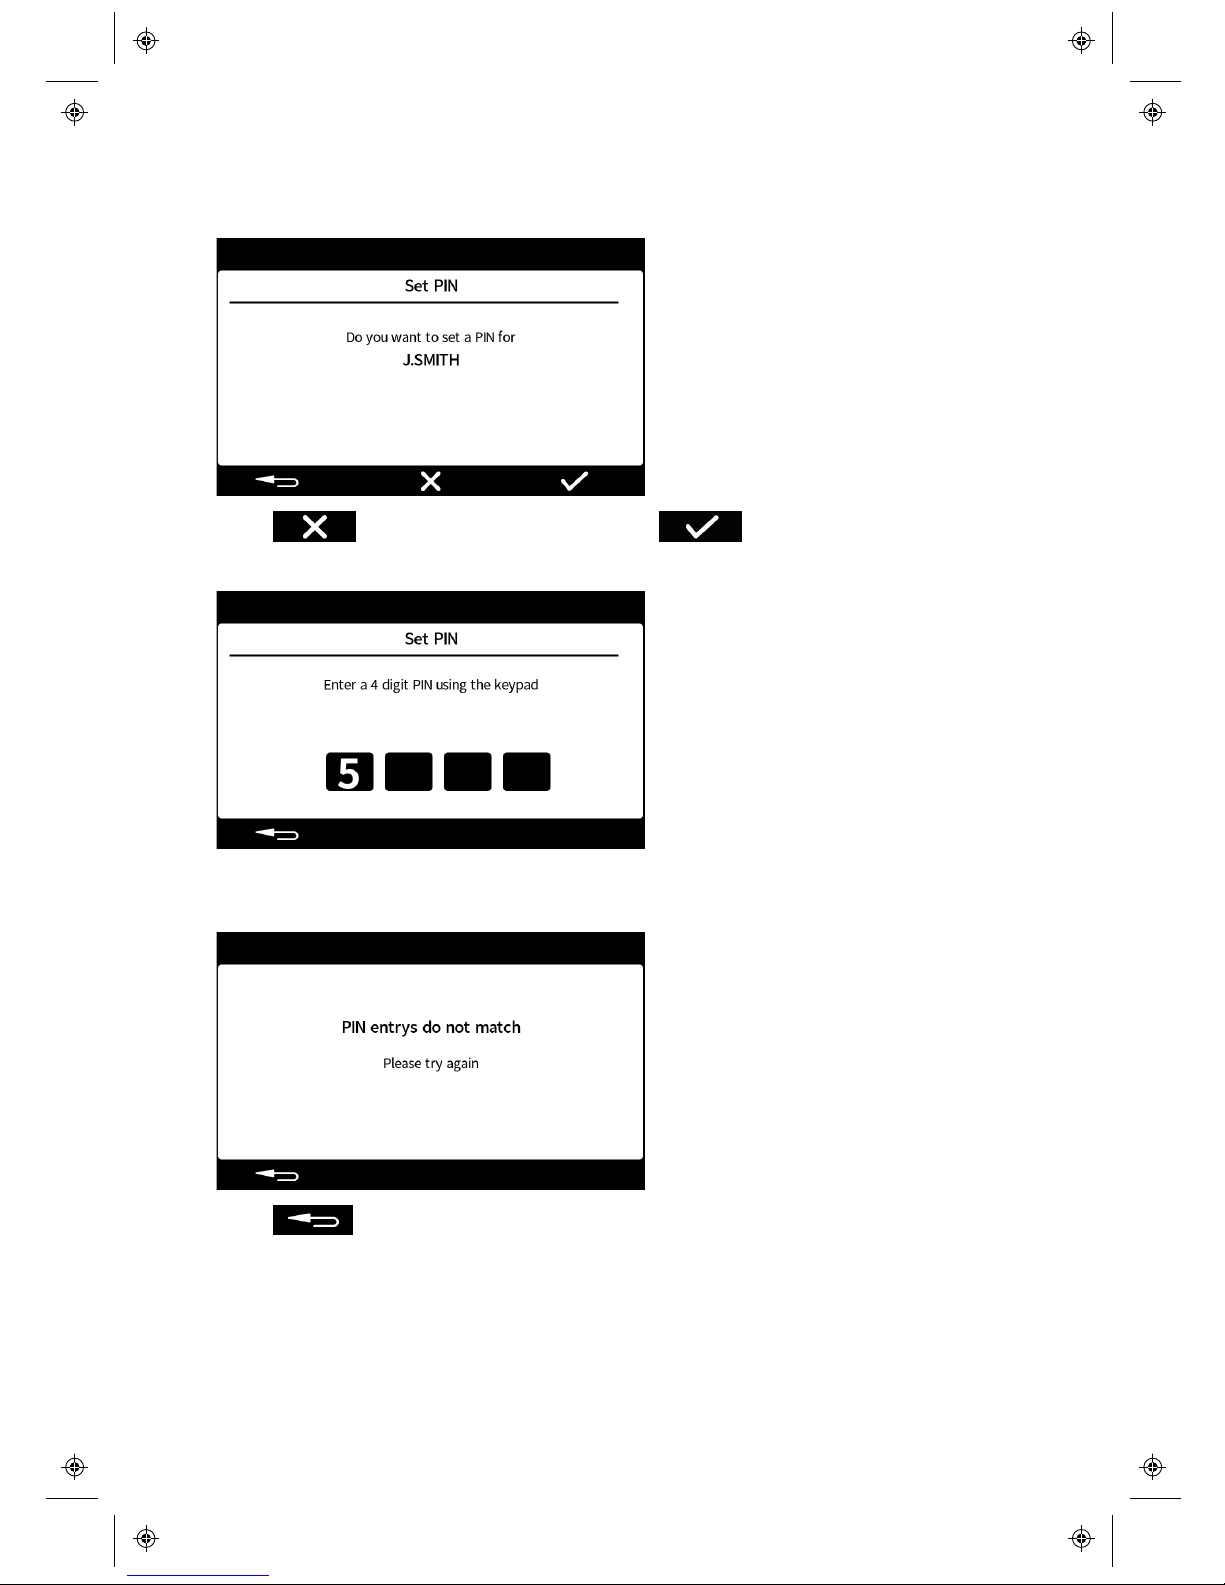
Setting a PIN
By setting a PIN number, a 4 digit number will be required to log in as the pump
administrator. A log in is required whenever the pump is powered on or a user has
logged out.
m-PF7-Peristaltic Filler User
Manual-02:PB0439/2 13
EN EN EN EN EN EN EN EN EN EN EN EN EN EN EN EN EN
14 m-PF7-Peristaltic Filler User
Manual-02:PB0439/2
Ensure you keep a record of PIN numbers. If you lose them contact your local
Watson-Marlow Ltd or Flexicon representative.
Press if a pin is not required or press if a PIN is required
If a pin is required, enter a 4 digit number using the numeric keypad
Re-enter the PIN when requested.
If the entry’s don’t match, the following screen will be displayed.
Press to return to the first PIN entry screen.

6.4 Switching the pump on in subsequent power cycles
Subsequent power-up sequences will show the initialisation screen and then the
Log-in screen.
Select the desired username using the up and down keys ( ∧/∨) and then press
.
The icon by the username indicates the type of user; either a pump administrator or
a user.
Entering your PIN number
If a PIN has been set for the selected user the following screen will be displayed.
Enter a 4 digit number using the numeric keypad and then press .
If an incorrect PIN is entered "Incorrect PIN, please try again" will be displayed.
m-PF7-Peristaltic Filler User
Manual-02:PB0439/2 15
EN EN EN EN EN EN EN EN EN EN EN EN EN EN EN EN EN
16 m-PF7-Peristaltic Filler User
Manual-02:PB0439/2
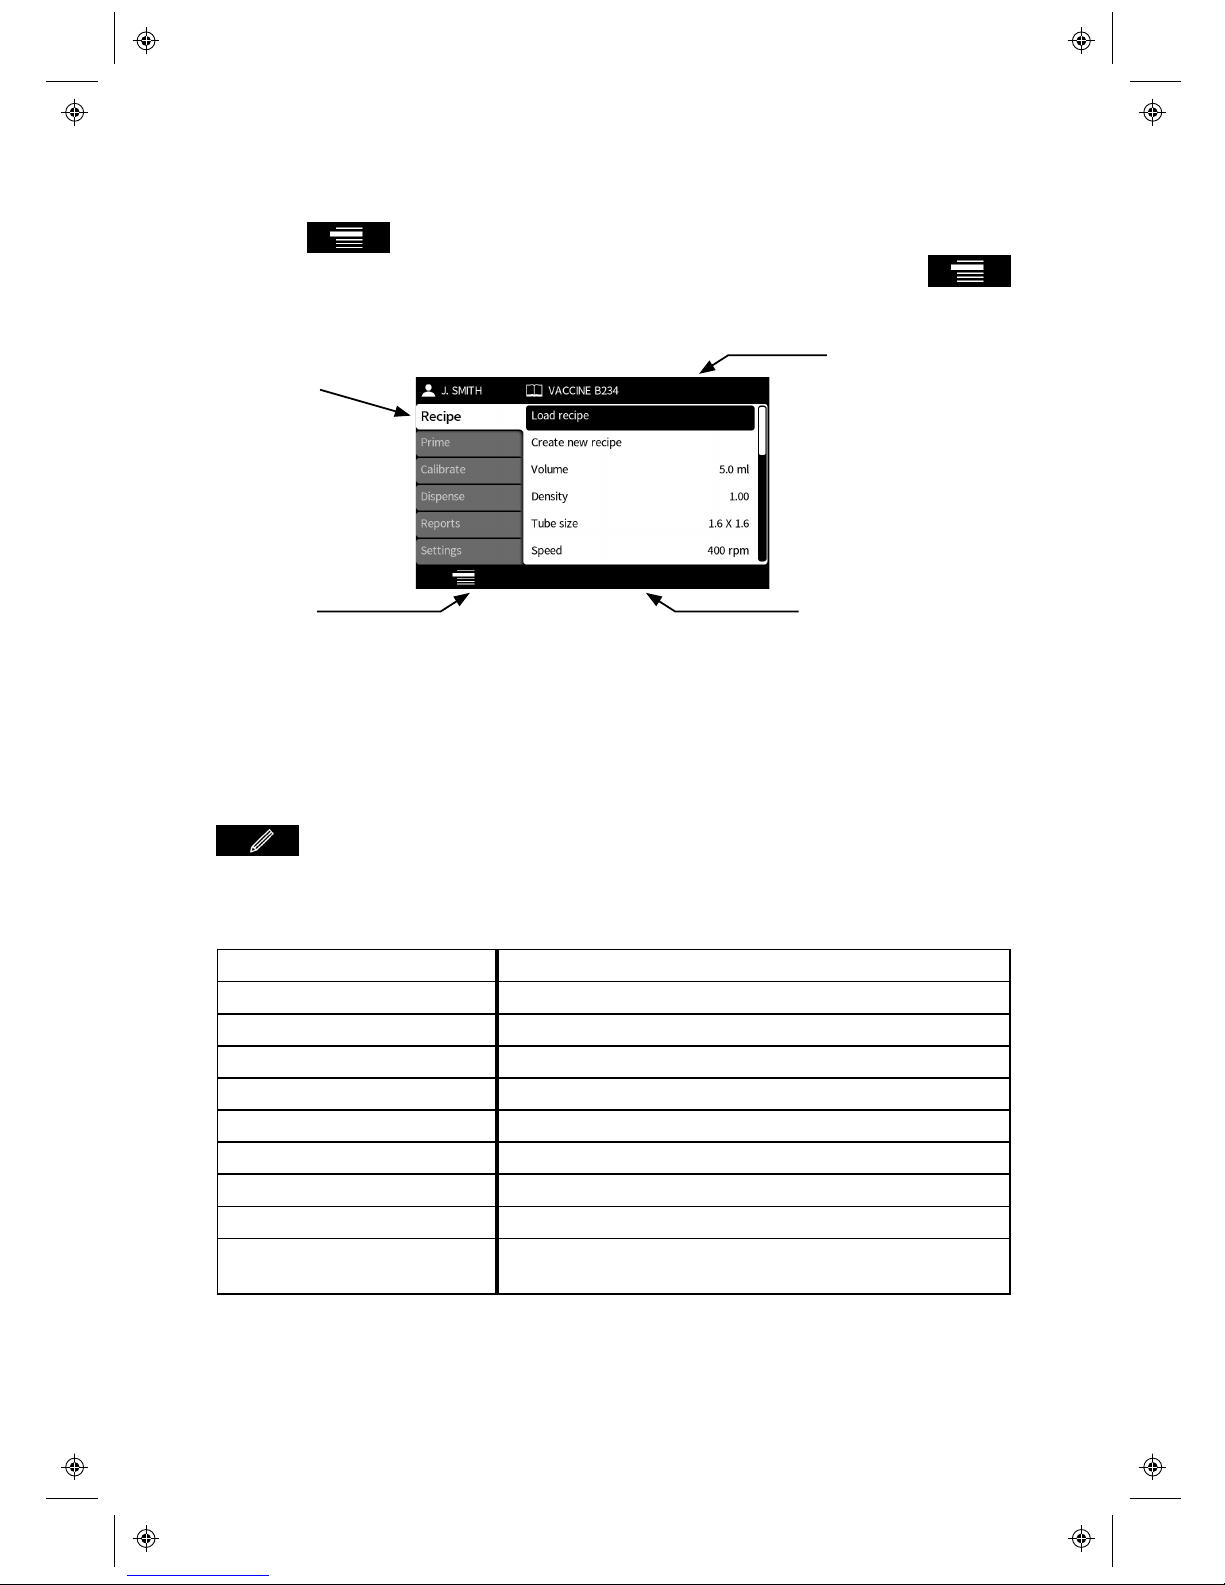
6.5 Menu navigation
Pressing scrolls through the PF7’s different modes. The active mode is
shown by the highlighted tab. The mode can be changed whenever the
icon is displayed. The PF7 has three smart keys, these change functionality
depending on the screen being displayed.
MODE tabs
MODE Icon Smart key icon bar
Screen info bar
6.6 Recipe Mode
Up to 200 recipes and 50 users can be stored in memory.
Editing a recipe
Select the Recipe tab to enter the recipe details.
Navigate through the recipe items using the up and down arrows (∧/∨) and press
to edit the value.
Each recipe item has clear entry instructions on the screen on how to edit or enter
details.
Recipe Item Description
Load recipe Load a recipe from a list of stored recipes
Create a new recipe Create a new recipe using the recipe items set
Volume Fill volume
Density Fluid density
Tube size Tube size selection
Speed Pumphead rotor speed
Acceleration Rate at which the motor accelerates
Deceleration Rate at which the motor decelerates
Anti-drip Relative amount at which the motor reverses at the end
of each dispense

Recipe Item Description
Start delay Length of time from the pump receiving a start signal
and the fill starting, (keypad or external input)
End delay Length of time from the motor stopping and the pump
being ready to start the next fill
First Fill delay The time between a start signal and the first fill starting
Between fill delay The time between one fill ending and the next fill
starting
Recalibration reminder Period between recalibrations after which a reminder
will be displayed
Recalibration pause Period between recalibrations after which the batch will
be paused until a recalibration is performed
Protected recipe If a recipe is set to be protected then it cannot be edited
in any way
Save recipe Saves the current filling parameters under a recipe
name
Print recipe Prints the current filling parameters
Delete recipe Deletes a saved recipe
Creating a new recipe
When the Create new recipe option is used, some of the recipe parameters are
automatically generated to give the recommended values for that fill. However, all
recipe parameters can be edited after the new recipe has been created.
Remember that filling accuracy can also be influenced by the length of the tubing
and the position of the product tank.
Whilst creating a new recipe, you will be asked if the viscosity of your liquid is most
closely represented by the range (less than) <50cP or by the range (greater than)
>50cP.
m-PF7-Peristaltic Filler User
Manual-02:PB0439/2 17
EN EN EN EN EN EN EN EN EN EN EN EN EN EN EN EN EN
18 m-PF7-Peristaltic Filler User
Manual-02:PB0439/2
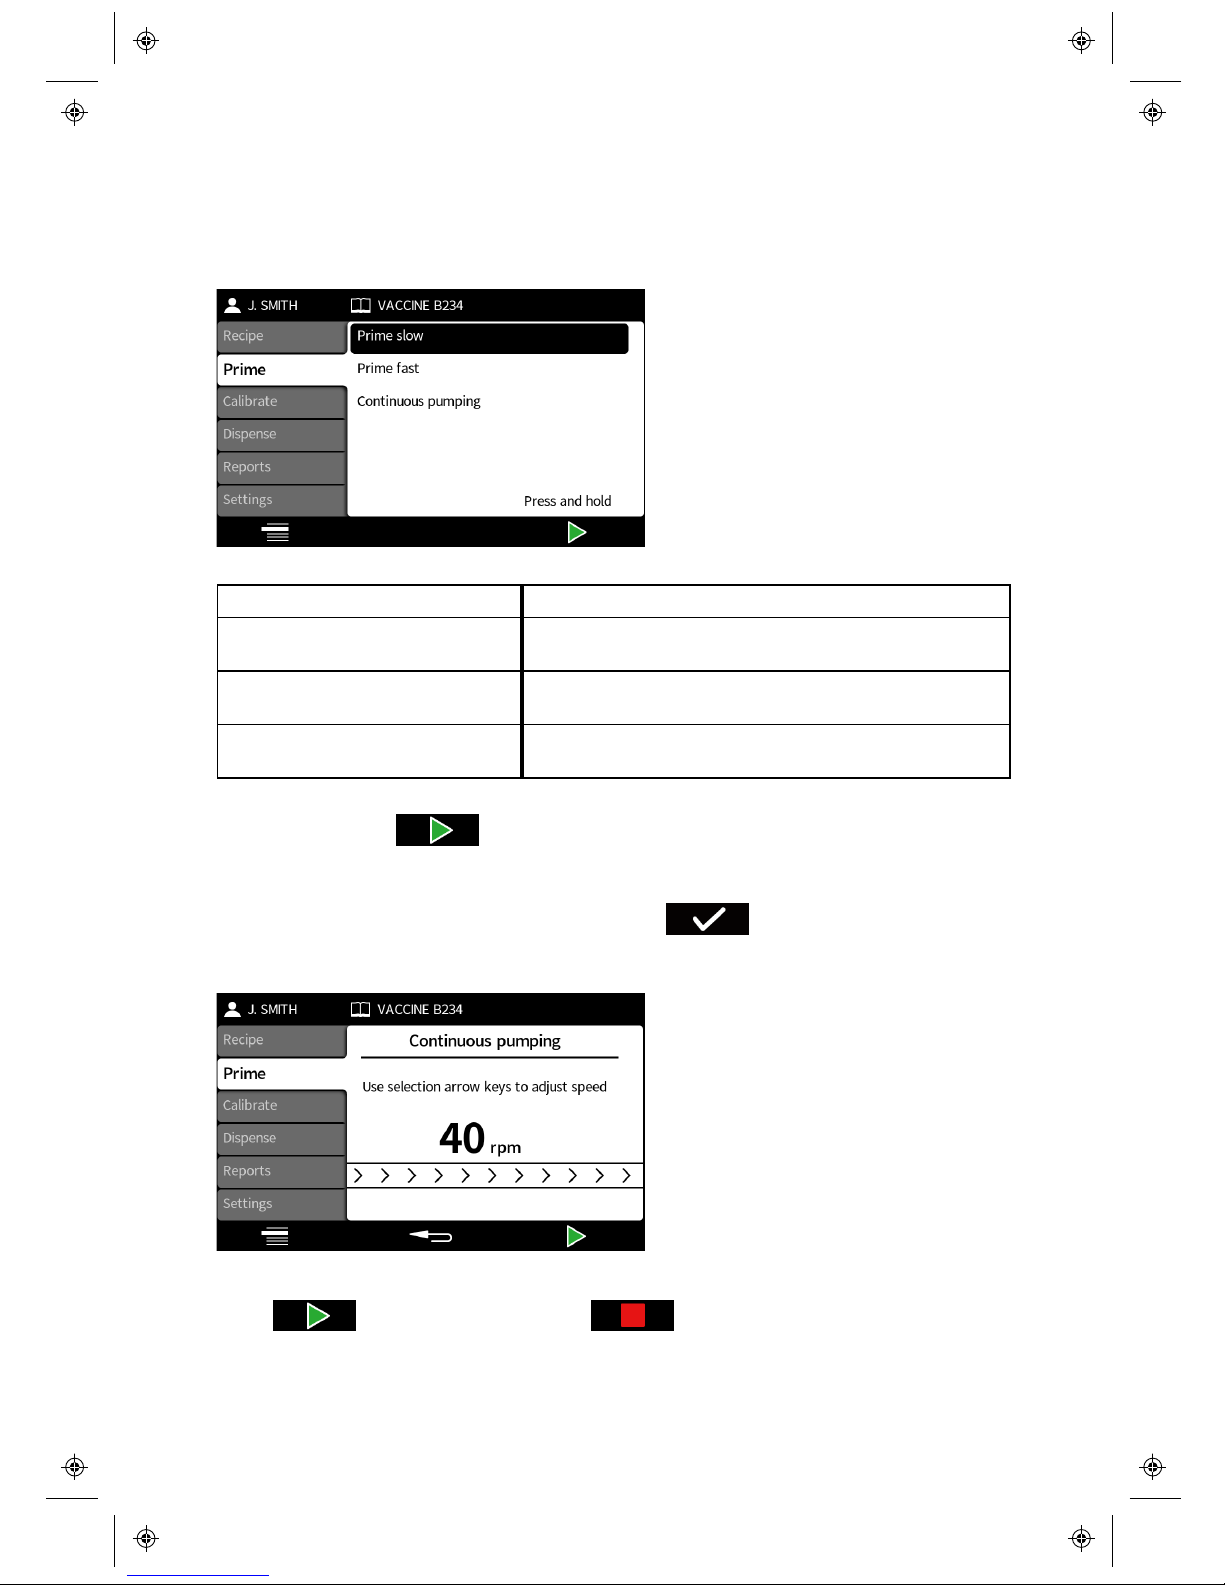
6.7 Priming and continuous pumping mode
The Prime mode allows you to prime the pump or run the pump continuously.
Navigate through the prime items using the up and down keys (∧/∨).
Prime item Description
Prime slow The pump will run forwards (slowly) as long as the
key is held down
Prime fast The pump will run forwards (fast) as long as the key
is held down
Continuous pumping The pump will run forwards at the set speed until the
stop key is pressed
Press and hold the key to prime the pump when using prime slow or prime
fast. The speed of the prime slow and prime fast can be adjusted in the settings
menu.
If continuous pumping is highlighted and the is selected the continuous
pumping screen is displayed. This allows you to select the speed the pump runs at
when continuously pumping.
Adjust the pump speed using the up and down keys (∧/∨).
Press to Start pumping. Press or the Stop key to stop pumping.
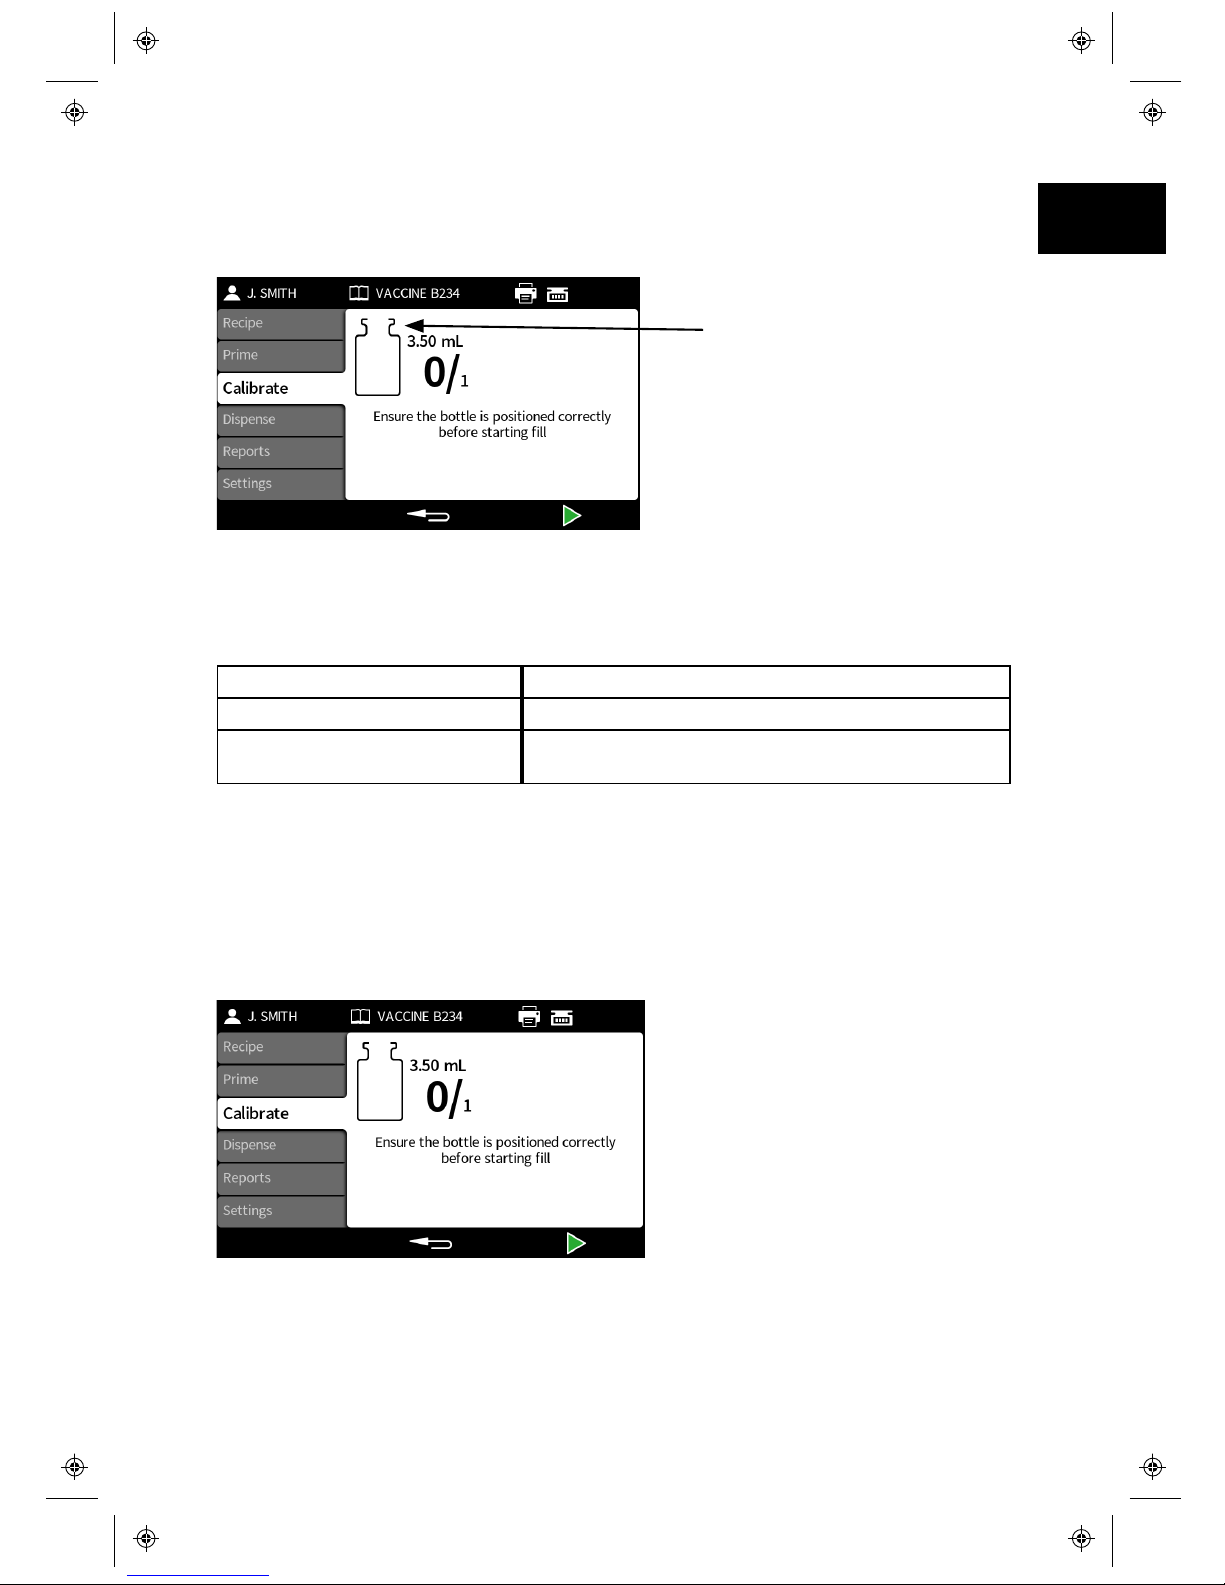
6.8 Calibrate mode
Calibrating the pump before starting a batch and following any change to the recipe
or fluid path is recommended to achieve the optimum filling accuracy.
Calibration icon: The number
within the vial shows how
many calibration fills have
been carried out since the last
batch or recipe parameters
change
The pump uses the current recipe parameters during the calibration process, i.e.
volume, density, tube size, speed, acceleration, deceleration, and anti-drip. The
units used in calibration can be volume or mass and are set through the settings
tab.
Calibrate item Description
Single fill calibration A calibration is done using a single fill
Multi-fill calibration A calibration is done using an average value
calculated from all the fills taken (2 and 99 fills)
If Multi-fill calibration is selected, a screen will be displayed to enter the number of
fills that will be used to create an average fill calibration value.
If a balance is being used, it should be tared (set to zero) using the bottle(s) that
will be used for the calibration fill(s)
Calibration fill(s)
How the fill(s) are started depends on the selected filling method.
m-PF7-Peristaltic Filler User
Manual-02:PB0439/2 19
EN EN EN EN EN EN EN EN EN EN EN EN EN EN EN EN EN
20 m-PF7-Peristaltic Filler User
Manual-02:PB0439/2
Time delay between fills - Press or use the external input to start the
first calibration fill. If doing a Multi- fill calibration, any further fills will start
automatically after the Between fill delay has elapsed.
Keypad to start each fill - Press to start the first calibration fill. If doing
a Multi-fill calibration, press to start any further fills.
External input start each fill - Press or use the external input to start
the first calibration fill. If doing a Multi-fill calibration, press or use the
external input to start any further fills.
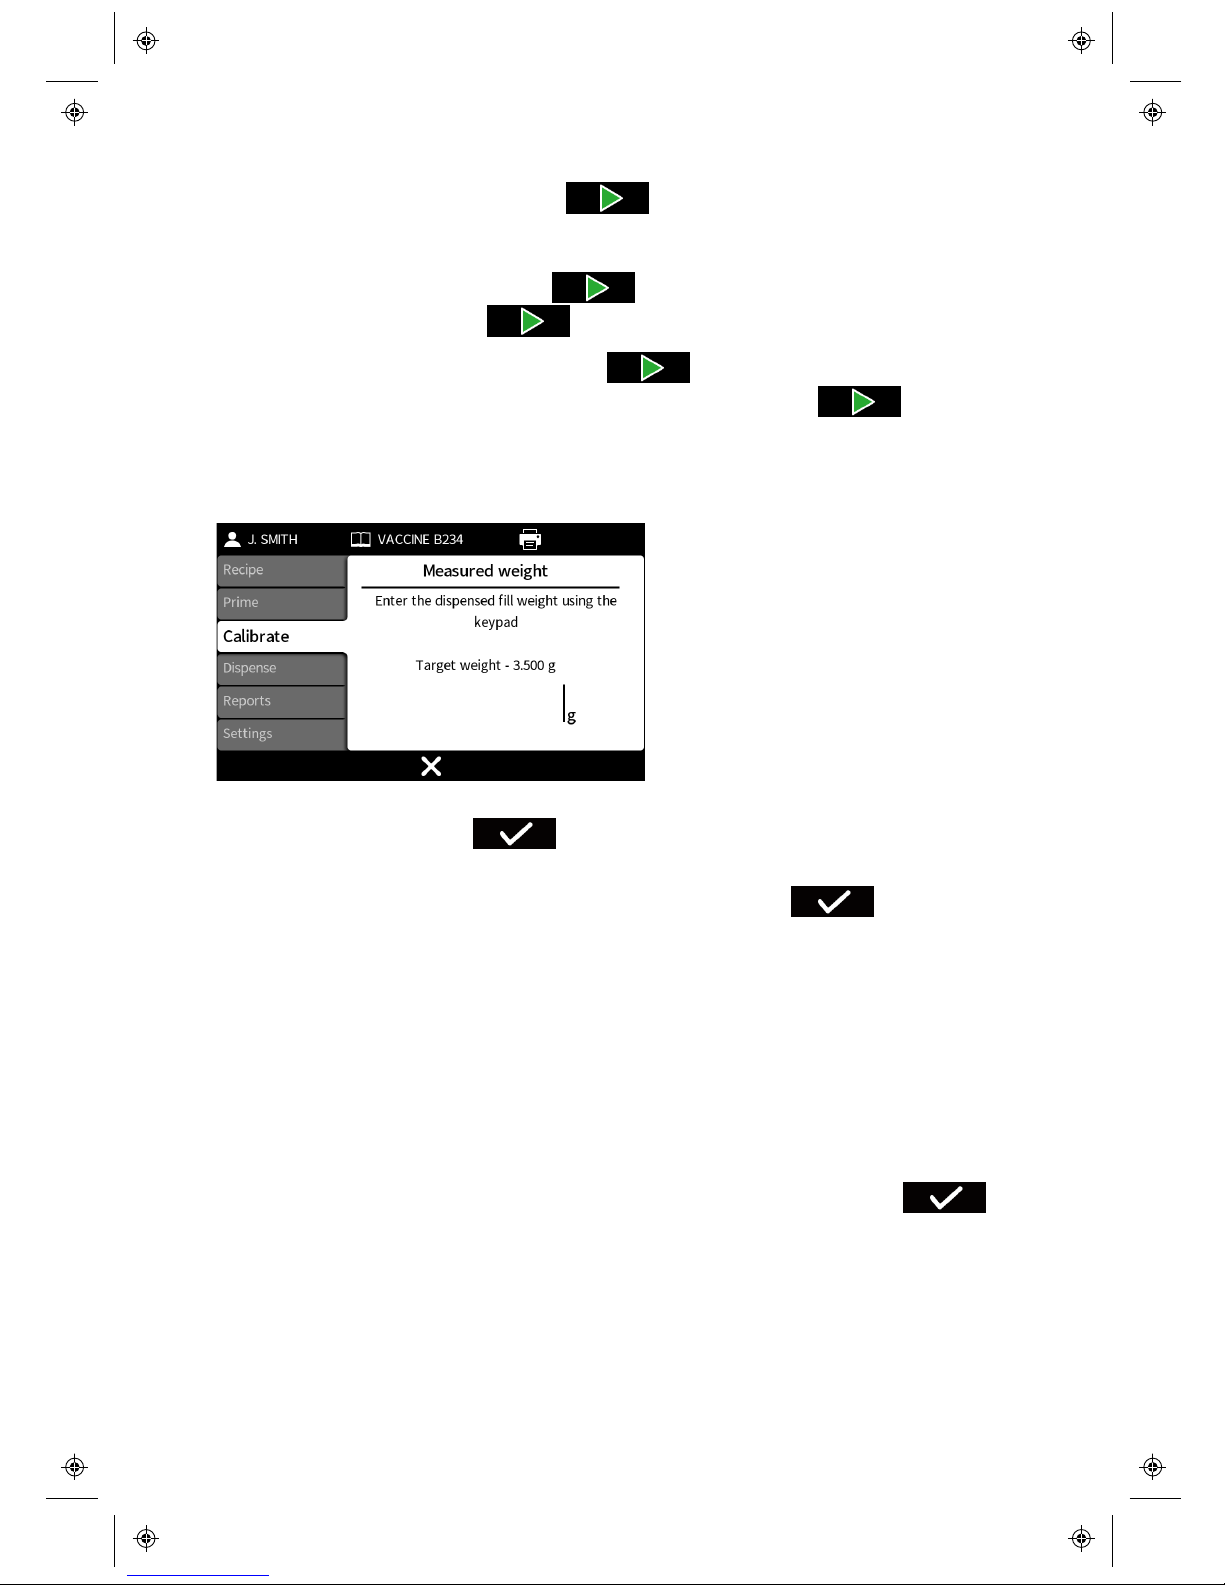
Calibration value entry
If not using a balance connected to the pump, enter the dispensed value using the
numeric keypad and press .
If a balance is connected to the pump, the balance value will be automatically
displayed. Place the filled bottle(s) on the balance and press .
If a multi-fill calibration has been performed, the entered value should be the total
value of all fills.
Calibration outside an acceptable level
If the calibration value entered is outside of the acceptable calibration range a
warning screen will be displayed.
Calibration summary
A calibration summary will be displayed. If the values are correct, press to
complete the calibration process.
Other manuals for PF7
1
Table of contents
Other Flexicon Laboratory Equipment manuals


Popular Laboratory Equipment manuals by other brands


Roland
Roland VersaUV LEF2-200 Product guide

Thermo Scientific
Thermo Scientific 88882015 operating manual

Metrohm
Metrohm Eco Dosimat product manual

Thermo Scientific
Thermo Scientific SmartView SV100A user guide

Agilent Technologies
Agilent Technologies 5100 ICP-OES Site preparation guide

Oxford Instruments
Oxford Instruments X-MET8000 Series user manual