Centurion Scientific C2006 User manual


•The centrifuge must only be opened by trained personnel competent in its use.
• Never use the centrifuge unless the rotor is properly mounted and secure.
• Never open, or attempt to open the lid while the centrifuge rotor is still turning.
• Only use original parts for the centrifuge.
• Never operate the centrifuge if components are missing or damaged.
• If the rotor shows visible signs of wear its use must be discontinued and
replacement fitted.
• The rotor must not be overloaded, the maximum allowed density of samples at
full operating speed is 1.2g/cm3.
• Always endeavour to make sure that opposite tubes are of the same weight to
avoid rotor imbalance. If the tubes are filled with the same material they must,
therefore, be filled with the same amount.
• No changes should be made to the mechanical or electrical components without
prior
consultation with and the written permission of Centurion Scientific.
• The centrifuge has not been manufactured from inert materials or to be explosion
proof.
Ensure that it is not operated within an environment, or with materials that makes
these a
requirement.
• During operation a “safe” zone of 30cm must be maintained around the
centrifuge. This zone should be clear of personnel and hazardous materials at all
times during the run.
• Substances of a radioactive, flammable or explosive nature must not be
centrifuged.
• Substances prone to react briskly with each other must not be centrifuged at the
same
time.
• Toxins and pathogenic micro-organisms must not be centrifuged unless the
proper precautions for their handling have been taken. These may include, but are
not limited to, biological seals.
Should toxins or pathogens enter the centrifuge or its parts the proper procedures
for disinfecting the centrifuge should be carried out.
• Strongly corrosive substances that may cause damage to or impair the
mechanical strength of the rotor may only be centrifuged inside protective vessels.
Should any doubt exist regarding the substance or the suitability of a particular
vessel for use with it, consult the Safety Inspector.

Before connecting the unit to the mains, ensure that the voltage and frequency of supply
match the specifications on the instrument. A mains plug, provided with a 5 amp fuse and of a
type suitable for use where the centrifuge is to be installed, should be fitted. This plug must be
wired up according to the international convention.
The instrument has been designed in such a way that installation should present no problems to
a technician familiar with equipment of this type.
Should any problems of questions arise during the installation of the instrument please refer to
Centurion Scientific for advice. During installation the record for the individual centrifuge (to be
found with our manual) must be completed.
The work surface must be stable and, where possible, resonance free – a standard laboratory
bench is usually suitable. The location of the centrifuge should be well ventilated and out of
direct sunlight, having sufficient room to allow air to circulate around it freely. A safety zone
extending for 30cm in all directions must be maintained around the centrifuge. This space
should be kept clear, in particular no hazardous material may be place in the area during
centrifugation.
The rotor assembly locates on to the tapered shaft of the drive shaft, being held securely in position
by a flat washer and locking screw. It is important that these items are assembled in the correct
order and that the washer is used as intended.
To locate the rotor first, check that both the exterior surface of the shaft and the tapered bore of the
rotor itself are free dire or any foreign debris.
The rotor should then be lowered into position on the tapered shaft, care being taken to ensure that
it seats firmly and evenly. The flat washer followed by the screw is then placed into the threaded
portion of the shaft, the assembly then being secured by the screw. The screw should be hand
tightened with the key provided.
Rotor bolt fixing

The centrifuge functions in the most efficient manner when unbalance of the rotor is minimised. The prevents undue
vibration perturbing the separation zones of the substance being centrifuged. It is therefore important that unbalance
due to loading unequal loading of the sample tubes is minimised as far as possible.
The maximum permissible imbalance of the rotor is 1g.
Imbalance may be minimised by following a few simple and quick procedures as described in the following paragraphs.
• The sample tubes should be filled as evenly as possible. Where practical, tubes containing the same substance should
be placed opposite each other.
• The rotor should be loaded symmetrically, this being best achieved by using all of the bores . When only partially
loading the rotor it must be ensured that opposite bores always receive tubes of the same weight.
The following pictures provide examples of correct and incorrect loading of the rotor.
EMERGENCY lid release in case of lid lock failure
In the unlikely event of the lid lock failing and the user being unable to remove their samples, an emergency lid release tool
is provided.
WARNING: OPERATION OF THE EMERGENCY LID RELEASE MSUT ONLY BE UNDERTAKEN BY QUALIFIED AND
APPROVED PERSONNEL.
UNDER NO CIRCUMSTANCES MAY THE CENTRIFUGE BE OPERATED IN THE CONDITION.
Wait until the rotor has stopped turning (view through the lid port) and switch off the power to the centrifuge.
Remove the black plastic seals to front underside of centrifuge and PULL BOTH CORDS DOWN.
WARNING: UNDER NO CIRCUMSTANCES MUST THE EMERGENCY LID RELEASE BE USED WHILE THE
CENTRIFUGE IS
RUNNING.
Cleaning, Disinfecting and Maintenance
WARNING: ISOLATE AND DISCONNECT THE POWER SUPPLY BEFORE CARRYING OUT CLEANING OR
MAINTENANCE.
CENTRIFUGE BODY
• Regularly wipe down the external surfaces with a mild detergent.
• Mop up any spillage with an absorbent cloth. Check to ensure that the liquid has not entered the main body of the
centrifuge.
WARNING : If any liquid has entered the main body of the centrifuge it MUST NOT be used. Contact the
supplier or Centurion Scientific Ltd immediately for advice.
ROTOR
• Remove the locking screw with the key provided.
• Remove the flat washer
• Pull the rotor off the shaft by applying equal force of both sides.
NOTE: If any stiffness or difficulty is experienced when attempting to remove the rotor this may be overcome by applying a
sharp
tap to the rotor shaft. A non-metallic object (eg plastic mallet) must be used to prevent damage to the shaft.
• Clean the rotor using a suitable detergent and hot water. Alternatively the rotor may be cleaning in an autoclave at a
maximum temperature of 120oC

Above shows 12000 (Rpm see dot bottom right) IE: 1200 x 10 and 30 minutes of time
Above shows Acceleration rate of 9, Decelleration rate of 9 and Memory number 1
To set speed in Rpm
Press up or down arrows below speed display.
To set in Rcf (G)
Press Function button (keep held down) then press Lid open button.
NOTE the direction of blue dot in the speed display
Top left for RCF program, bottom right for Rpm.
To set time
Press up or down arrows below time display.
To set:
acceleration or deceleration rates
Press Function button (keep held down) then
Press Speed Down arrow for acceleration
Press Speed Up arrow for Decelleration (brake)
Both show 0-9 inclusive, 9 is the highest rate
To set:
memory and store
(first set speed or rcf &time)
Press Function button (keep held down) then
Press Pulse button to select number 0-9
inclusive
Press Time down arrow to store
To recall memory
First recall memory number (see above)
Press Function button (keep held down) then
Press Time up arrow to recall memory
To use the centrifuge Follow safety instructions on previous pages. Always load samples evenly.
Load samples, Fit lid (if applicable) Set Speed or Rcf(G) then designated time.
Close the Centrifuge lid. Press down firmly on both left & right sides.
Press Start button (bottom left), the motor will now accelerate to the designated setting.
When time has counted down (time display right) the rotor will decelerate (brake).
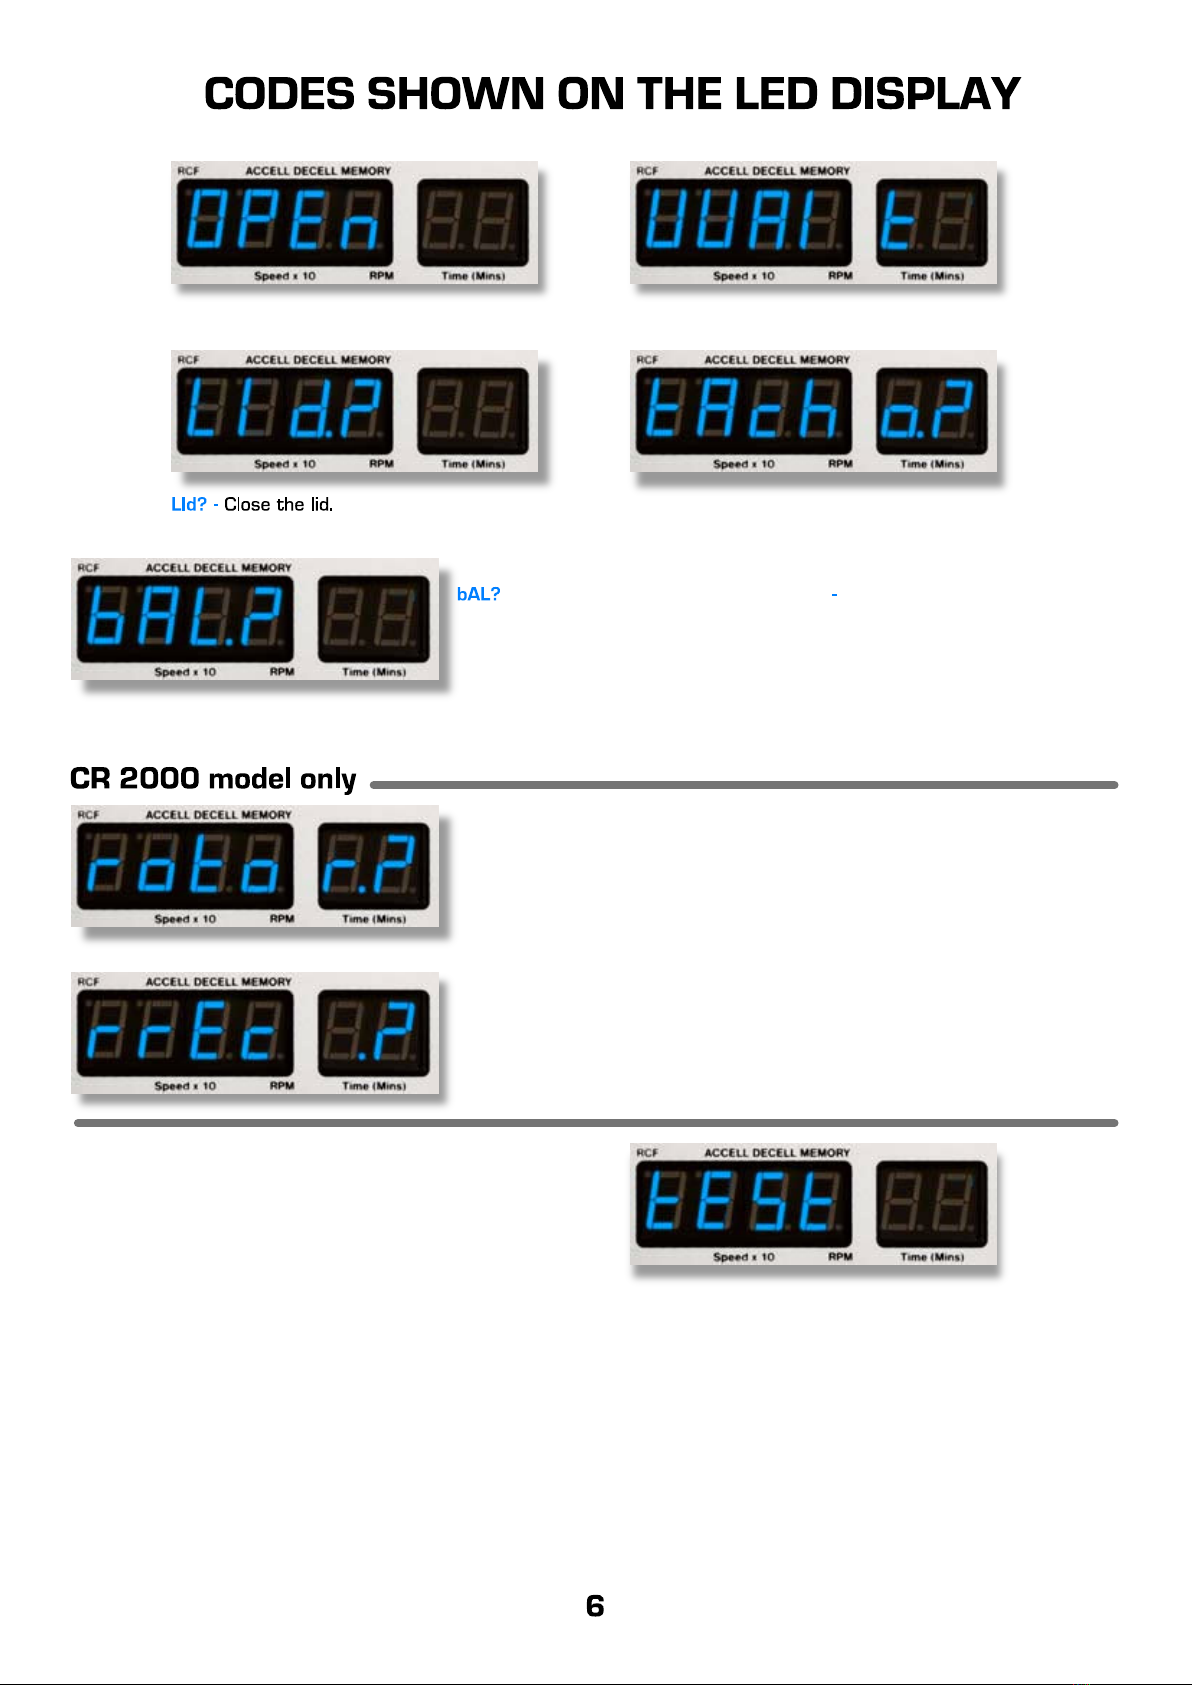
According to the setting you have made (9 is fastest) the rotor will stop and OpEn will appear on the display.
Press Lid open button and retrieve your samples.
You can stop the run at any time by pressing the Start / Stop button.
To use Pulse (short run)
This method allows very short runs mainly for “Pelleting” purposes.
Set your desired speed or RCF (G) Time is not relevant.
Load your samples. Fit lid (if applicable).
Press Pulse button (bottom right) keep held down, you will see the Time display counting up in seconds.
As long as you keep the button held down time will increase. On releasing the button centrifuge will brake.
Press Lid open when OpEn appears on the display , and retrieve your samples.

OPEn - You may now open the Lid. UUAIt - Wait 5 seconds press Lid open
tAcho? - Check that your tubes are not too
long and fouling the lid or anything else is
stopping rotation of the rotor.
-An imbalance has occurred Please check the tubes are
diagonally
opposite and of the same weight.
Check if the tubes are broken If so use better quality, or if glass
NOTE: If druc H or drIuE (drive) show please Contact Service Department, or refer to technical manual.
rotor? - The sensor has found the speed to be incorrect to the rotors
settings, it will have readjusted. Please recheck your speed and try
again.
If this continues contact the service department.
rrEc ? - A problem with the sensor or inverter has occurred please
contact the service department.
Test tEStRoutine
(all LED models)
This allows you to turn on or off the buzzer and to check
the sensors for, Tachometer, Rotor recognition, Lid open
& Imbalance detector.
See 23 Each go 0/1 as you turn rotor or operate Imbalance detector or shut lid.
Centrifuge lid in open position. Mains off at rear switch.
Press function (keep held down) whilst turning on at rear switch. When test shows release function button.
Press time up arrow See numbers in time display go to .............. 18
Buzzer off or on (0/1)................................................................................... 18
Set speed Rpm digits in 10 or 100 Rpm steps.................................. 19
EEtE St - E prom check Press Speed up arrow..................................................... Number not shown
8888 88 - LED display check increment speed up arrow.................................... Number not shown
Rotor rec Tacho Lid open Imbalance........................................ 24
Turn rotor Turn rotor Close lid Push rotor to one side..................... Display changes from 0 to 1
Bu2t St - Buzzer test press speed up arrow........................................................... Number not shown
Do9t St - Watchdog test Press speed up arrow. HELL 0 - (Hello) should display, then back to normal.
Table of contents
Other Centurion Scientific Laboratory Equipment manuals
Popular Laboratory Equipment manuals by other brands

Haufftechnik
Haufftechnik MIS 100/VT63-ND Assembly instruction

Yamato
Yamato Fish Analyzer PRO DFA110 Operation manual

Sakura Seiki
Sakura Seiki Cyto-Tek 2500 operating manual

Malvern
Malvern MicroCal iTC200 user guide

Air Science
Air Science UV-BOX UVB-15 User's operation manual

erlab
erlab Captair 834 Smart Assembly instructions