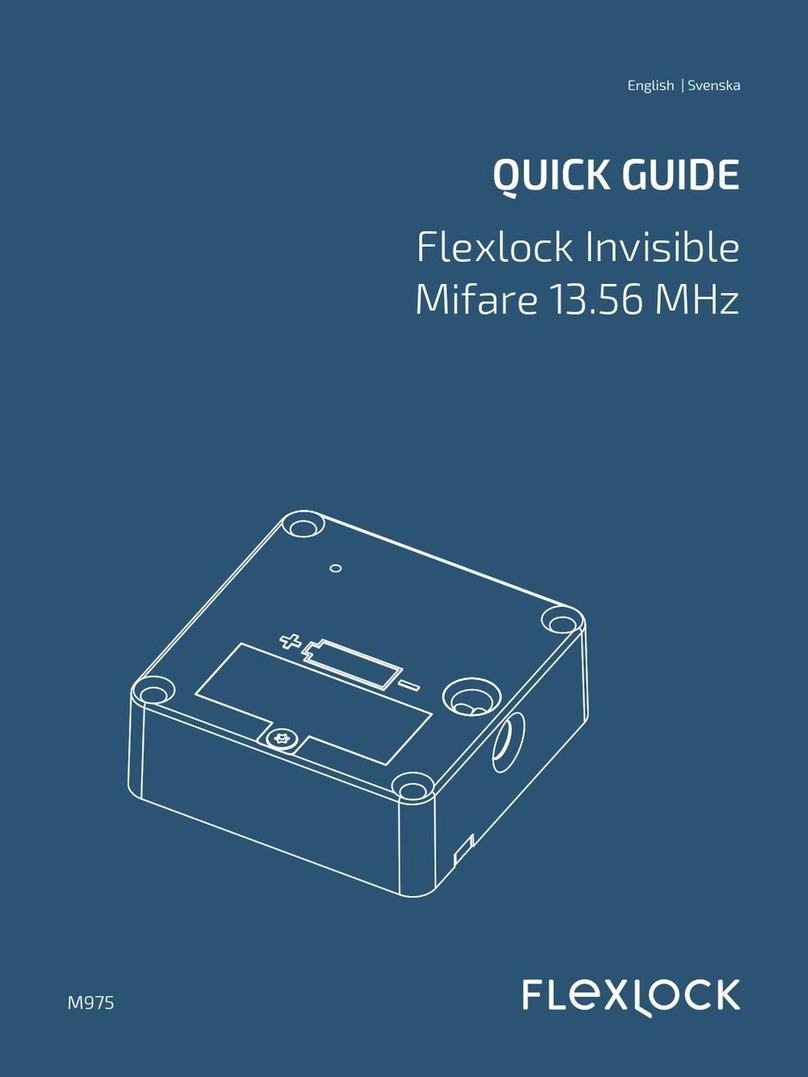
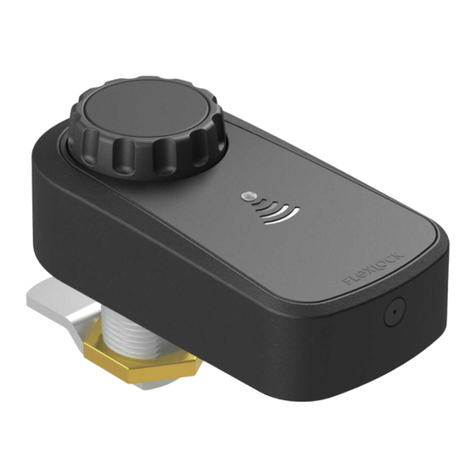
Flexlock Invisible User manual

Flexlock Invisible
Mifare 13.56 MHz
Manual
Bruksanvisning
Handbuch
M134-946 | 1:1
English/Svensk/Deutsch


English 3
Content
Innehåll
Inhalt
English........................................................4
Svensk.......................................................21
Deutch ..................................................... 37

4 English
Warranty
Swedstyle has a limited two year warranty starting from the date of the delivery month. The warranty
overs any defects in material or workmanship under normal use during the warranty period. If the
problem can be corrected by a replacement product the seller has fulfilled the guarantee responsibility.
Any costs incurred in connection with the replacement are the buyer’s responsibility. The replacement
product will be charged and the defective product must immediately be returned to the seller who then
will credit the buyer after approval. Deliveries are made according to NL 09.
The warranty applies provided that: the product has been installed in accordance with the prescribed
instructions, that the correct type of battery, as specified, is used and that the product has not been
opened or in any other way been handled without care.
This limited warranty covers replacement at no charge during the warranty period or alternatively,
reparation. Swedstyle will not cover any costs or risks due to transporting, installing or dismantling/
moving of the product. Any other possible costs incurred that can be attributed to replacement/repair is
not covered by the product warranty. Any costs incurred in the company dependent on product defects
are also not covered by the product warranty.
NOTE! When using your own existing cards or tags, always ensure in advance that they are
compatible with Flexlock and that their reading capacity is adequate. If the cards or tags are
faulty or inadequate, we cannot guarantee a correct functionality. Our recommendation is that
a suitable test is performed, with the cards or tags in question and also with the same type of
furniture with the material and thickness that will be used, to ensure a correct functionality.
NOTE! To ensure a correct functionality with Flexlock and its RFID technique together with our cards
or tags, it is important to only mount the lock on doors made from wood, plastic or other
non-conductive materials and with a thickness of no more than 25 mm. With other types of
cards or tags, materials and/or dimensions, there is no guarantee for a correct functionality.
CAUTION! Risk of explosion if battery is replaced by an incorrect type.
NOTE! When the battery is changed, the storage must not be closed until the function of the battery
is verified. If the battery is missing or broken, you might not be able to open the lock again.
Test the lock with the front open! The battery must be a lithium battery recommended by
Swedstyle AB (of the type CR123A, 3V, min 1400 mAh). See www.flexlock.se for more
instructions on how to change the battery.
Recycling is to be done in accordance with national laws and regulations concerning the
separation of electronics from other recyclable materials. Replaced batteries are to be left at
designated recycling stations or be returned to the place of purchase.
Congratulations on your purchase of Flexlock Invisible. Mifare 13,56 MHz.
Flexlock is developed and manufactured in Sweden. The software is especially
developed to suit office furniture and storages in all types of environments.
The lock is maintenance-free, dependable and durable with a long life span.

English 5
Content:
1 Components .........................................................................................................................................................6
1.1 Lock........................................................................................................................................................................................6
1.2 Lock plate.............................................................................................................................................................................6
1.3 Cards......................................................................................................................................................................................6
2 Functions...............................................................................................................................................................6
3 Handling................................................................................................................................................................. 7
3.1 General..................................................................................................................................................................................7
3.2 Locks in Mode 1 and 2......................................................................................................................................................7
3.3 Locks in Mode 3, 4 and 5 ................................................................................................................................................7
4 Startup ...................................................................................................................................................................8
4.1 Preprogrammed lock.......................................................................................................................................................8
4.2 Unprogrammed lock........................................................................................................................................................8
4.3 Installation ..........................................................................................................................................................................9
4.4 Checkpoints when installing Flexlock.......................................................................................................................9
5 Handling during transportation and storage............................................................................................ 10
6 Formulas for hole spacing:............................................................................................................................. 10
6.1 Outside attached front...................................................................................................................................................11
6.2 Inside attached front......................................................................................................................................................11
7 Programming...................................................................................................................................................... 12
7.1 Programming from Mode 1 (default setting) to Mode 2, 3, 4 or 5 ................................................................12
7.2 Reset the lock to Mode 1 (and erase all users in Mode 1 and 2)....................................................................12
7.3 Programming Ready to use (for locks in Mode 1 or 2) ......................................................................................13
7.4 Add users (Mode 1 and 2).............................................................................................................................................13
7.5 Remove users (Mode 1 and 2) .................................................................................................................................... 13
7.6 Sound on or off ................................................................................................................................................................13
7.7 Reset the lock with a pin (add a new programming card)...............................................................................14
8 Battery changing............................................................................................................................................... 14
9 Technical specification.................................................................................................................................... 15
10 Declaration of Conformity.............................................................................................................................. 16
11 Flexlock Troubleshooting ................................................................................................................................17
11.1 Basic Troubleshooting................................................................................................................................................... 17
11.2 Advanced troubleshooting – Service staff/Other responsible personnel................................................ 17
11.3 Troubleshooting mode 1 & 2.......................................................................................................................................18
11.4 Troubleshooting mode 3, 4 & 5..................................................................................................................................19
Detailed instructions and films are available at www.flexlock.se refer to these if there are any
uncertainties when reading this manual.

6 English
1 Components
More information on components
are available at www.flexlock.se
1.1 Lock
1.2 Lock plate
Flexlock is delivered with one of the following:
1.2 Cards
Programming cards, service cards,
Mode cards and user cards
can be ordered.
2 Functions
Mode 1 Default setting. Open as default. Can have 1-200 unique users. Programmed user cards/
tags are needed for opening and locking. Flexlock is delivered in Mode 1
if nothing else is requested.
Mode 2 Locked as default. Can have 1-200 unique users. Programmed user cards/tags
are needed for opening and locking. Locks itself 4 seconds after opening.
Mode 3 Open as default. For temporary use by one user with any compatible
RFID-card/tag. The exact same card/tag has to be used to open the lock again.
The lock is then ready for a new user.
Mode 4 Same as Mode 3, with the addition of a time limit. If the user doesn’t open
the lock within 12 hours, the lock will then automatically open.
Mode 5 Same as Mode 3, with the addition of a time limit. If the user doesn’t open
the lock within 2 hours, the lock will then automatically open.
Ready to use is used in Mode 1 or 2. The lock is prepared so that the first user to present a
card is added as a unique user in the lock. Added after installation.
LOCK PLATE CATAPULT
Suitable types of furniture:
Drawers, cabinets, lockers.
LOCK PLATE CATAPULT+
Suitable types of furniture:
Drawers, cabinets, lockers.
LOCK PLATE SLIDE
Suitable types of furniture:
Sliding fronts, sliding drawers
under desk tops.
Guest
Programming
Sound on/off
Auto lock
Ready to use
User
Timer 12 h
Timer 2 h
Service

English 7
3 Handling
More instructions are available at www.flexlock.se
3.1 General
3.1.1 Locks in Mode 1 and 2
A lock in Mode 1 or 2 has to have user cards programmed to the lock: Open the lock by placing the
correct user card straight onto the lock. To lock in Mode 1, place the card on the lock. In Mode 2 the lock
automatically locks after 4 seconds.
3.1.2 Locks in Mode 3, 4 and 5
When a lock is in Mode 3, 4 or 5, any compatible RFID-card (or tag) may be used (Examples of uses are
lockers at health clubs and leisure centers etc): The lock is locked by placing a compatible RFID-card
(or tag) onto the lock. To open again, the exact same RFID-card (or tag) has to be placed onto the lock
again. Once the lock has been opened again it is then ready for a new user.
Always place the card or tag straight and centered on the lock
Wait for 7 seconds if the attempt didn’t work before trying again.
OK! OK!
PLACEMENT OF LABELING:

8 English
4 Startup
4.1 Preprogrammed lock
To activate the lock, remove the plastic strip. The lock is now
ready for installation. Note that the service card and the
programming card is also added in advance (In Mode 1 and 2,
can a User card or Ready to use be added, see 7.3 or 7.4.)
4.2 Unprogrammed lock
1. Insert a lithium battery recommended by
Swedstyle AB (of the type CR123A, 3V,
min 1400 mAh). Make sure that the battery poles
are the right way around.
2. Fasten the battery lid with a Torx 10 screwdriver.
3. Turn the lock over and insert the activation pin in the
socket on the back, hold down for about 3 seconds.
The programming signal will sound for about
7 seconds.
4. Place the programming card onto the lock before
the 7 seconds are up. A confirmation signal will
sound and the programming card is registered to
the lock. The lock is now in Mode 1 (factory mode).
5. Place the programming card on the lock again.
Repeated signals will sound.
6. Place the service card on the lock within 7 seconds,
a confirmation signal is heard.
The lock is now ready to be used according to the
programmed mode.
7. Add users, see point 7.4 or change Mode, see point 7.1.
7 SEC
7 SEC
4.1
4.2-1
4.2-3
4.2-2
4.2-4
Programming
Programming
Service
Programming
3.
2.

English 9
4.3 Installation
After startup, the lock is ready for installation.
NOTE! For Flexlock and its RFID technology to work optimally
with our cards, the lock can only be installed on fronts made
of wood, plastic and other non-conductive materials with
a maximum thickness of 25 mm.
4.4 Check points when installing Flexlock
Storages, fronts, drawers, sliding doors etc. have to be mounted
in parallel. The lock plate and the lock have to be mounted in
a straight manner. See www.flexlock.se
INSTALLING: Begin by fastening two screws diagonally.
Close the front to see if the placing is correct, make any necessary
adjustments before the remaining screws are fastened.
PZ2
4,5x35mm (x4)
PZ2
4x12mm (x3)
PZ2
4x12mm (x2)
Min 14mm
0mm
= Justera ut Låsblecket
Justermån
3:e skruv låser placering!
OBS! dras efter injustering!
Justermån
Max åtdragningsmoment
MDF: 1,45Nm
Spånskiva: 0,8Nm
Min 12mm
Max åtdragningsmoment
MDF: 1,45Nm
Spånskiva: 0,8Nm
Min 12mm
Kontrollpunkter vid montage av Flexlock
Monteringssätt
Skruva 2st skruvar diagonalt
först. Provstäng förvaring och
justera ev. innan de 2
kvarvarande skruvarna dras!
2mm
Kontrollpunkter före montage av Flexlock
Kontrollpunkter före montage av Flexlock
OK!
Kontrollpunkter före montage av Flexlock
Kontrollpunkter före montage av Flexlock
Kontrollpunkter före montage av Flexlock
Kontrollpunkter före montage av Flexlock
3 rd screw will fix the position!
NOTE! Tighten after adjusting
Adjustment
range
Adjustment
range
OK! OK!

10 English
5 Handling during transportation and storage
6 Formulas for hole spacing:
See www.flexlock.se for information on placement in different types of furniture. Make sure that lock and
lock plate, fronts etc are mounted parallel and that they are correctly adjusted. Templates for installing
are available as an accessory.
With the battery mounted, we
recommend the following:
See www.flexlock.se for more
recommendations.
Vid Transport/Lagerhantering av Flexlock
Min 200mm
Vid monterat batteri gäller följande:
Vid Transport/Lagerhantering av Flexlock
Min 200mm
Vid monterat batteri gäller följande:
OK!
Vid Transport/Lagerhantering av Flexlock
Min 200mm
Vid monterat batteri gäller följande:
Vid Transport/Lagerhantering av Flexlock
Min 200mm
Vid monterat batteri gäller följande:

English 11
Y2
45
Z
Y1 = Space
X1 = Space
Y2 = Y + Y1 + 6 = ___
Z = Z1 + 33 = ___
-Lid assembled on the inside
A41:2
Skala:
Formula for placing FlexLOCK
Lockingplate placement
Y2 = 1 0(Y) + 1(Y1) + 6 = 17m m
Flexlockplac ement
Y = 10mm
X = 12 - 1 (X1) = 11m m Z = 16(Z1) + 33 = 49mm
Lid
___X = 12 - X1 = Y > 5 = ___
57
Y
X
57
Front
Z1
6.1 Outside attached front
(No pre-drilled holes). Take into account any gaps to ensure a correct placement.
The example refers to lock plate A, other lock plates, see www.flexlock.se.
6.2 Inside attached front
( No pre-drilled holes). Take into account any gaps to ensure a correct placement.
Y1
X1
33
Y2
45
Front
___X = X 1 + 12 = Y ≥ Y1 + 6 = ___
Y
X
57
57
Lockingplate placementFlexlockplacement
X = 16( X1 ) + 1 2 = 28mm
Y = 1 2(Y 1) + 6 = 18 mm
Depth =33mm -
Y2 = 1 8(Y) - 1 2(Y1) + 6 = 12 mm A41:2
Skala:
Lid assembly outside cabinet
Y2 = Y - Y 1 + 6 = ___
Formula for placing F lexLO C K
Y2
45
Z
Y1 = Space
X1 = Space
Y2 = Y + Y1 + 6 = ___
Z = Z1 + 33 = ___
-Lid assembled on the inside
A41:2
Skala:
Formula for placing FlexLOCK
Lockingplate placement
Y2 = 1 0(Y) + 1(Y1) + 6 = 17m m
Flexlockplac ement
Y = 10mm
X = 12 - 1 (X1) = 11m m Z = 16(Z1) + 33 = 49mm
Lid
___X = 12 - X1 = Y > 5 = ___
57
Y
X
57
Front
Z1
Y2
45
Z
Y1 = Space
X1 = Space
Y2 = Y + Y1 + 6 = ___
Z = Z1 + 33 = ___
-Lid assembled on the inside
A41:2
Skala:
Formula for placing FlexLOCK
Lockingplate placement
Y2 = 1 0(Y) + 1 (Y1) + 6 = 17m m
Flexlockplac ement
Y = 10mm
X = 12 - 1 (X1) = 11m m Z = 16(Z1) + 33 = 49mm
Lid
___X = 12 - X1 = Y > 5 = ___
57
Y
X
57
Front
Z1
Y2
45
Z
Y1 = Space
X1 = Space
Y2 = Y + Y1 + 6 = ___
Z = Z1 + 33 = ___
-Lid assembled on the inside
A41:2
Skala:
Formula for placing FlexLOCK
Lockingplate placement
Y2 = 1 0(Y) + 1(Y1) + 6 = 17m m
Flexlockplac ement
Y = 10mm
X = 12 - 1 (X1) = 11m m Z = 16(Z1) + 33 = 49mm
Lid
___X = 12 - X1 =
Y > 5 = ___
57
Y
X
57
Front
Z1
Y2
45
Z
Y1 = Space
X1 = Space
Y2 = Y + Y1 + 6 = ___
Z = Z1 + 33 = ___
-Lid assembled on the inside
A41:2
Skala:
Formula for placing FlexLOCK
Lockingplate placement
Y2 = 1 0(Y) + 1(Y1) + 6 = 17m m
Flexlockplac ement
Y = 10mm
X = 12 - 1 (X1) = 11m m Z = 16(Z1) + 33 = 49mm
Lid
___X = 12 - X1 = Y > 5 = ___
57
Y
X
57
Front
Z1
Y1
X1
33
Y2
45
Front
___X = X 1 + 12 =
Y ≥ Y1 + 6 = ___
Y
X
57
57
Lockingplate placementFlexlockplacement
X = 16( X1 ) + 1 2 = 28mm
Y = 1 2(Y 1) + 6 = 18mm
Depth =33mm -
Y2 = 1 8(Y) - 1 2(Y1) + 6 = 12 mm A41:2
Skala:
Lid assembly outside cabinet
Y2 = Y - Y 1 + 6 = ___
Formula for placing FlexLO C K
Y1
X1
33
Y2
45
Front
___X = X 1 + 12 =
Y ≥ Y1 + 6 = ___
Y
X
57
57
Lockingplate placementFlexlockplacement
X = 16( X1 ) + 1 2 = 28mm
Y = 1 2(Y 1) + 6 = 18mm
Depth =33mm -
Y2 = 1 8(Y) - 1 2(Y1) + 6 = 12 mm A41:2
Skala:
Lid assembly outside cabinet
Y2 = Y - Y 1 + 6 = ___
Formula for placing FlexLO C K
Y1
X1
33
Y2
45
Front
___X = X 1 + 12 = Y ≥ Y1 + 6 = ___
Y
X
57
57
Lockingplate placementFlexlockplacement
X = 16( X1 ) + 1 2 = 28mm
Y = 1 2(Y 1) + 6 = 18mm
Depth =33mm -
Y2 = 1 8(Y) - 1 2(Y1) + 6 = 12 mm A41:2
Skala:
Lid assembly outside cabinet
Y2 = Y - Y 1 + 6 = ___
Formula for placing FlexLO C K
Y2
45
Z
Y1 = Space
X1 = Space
Y2 = Y + Y1 + 6 = ___
Z = Z1 + 33 = ___
-Lid assembled on the inside
A41:2
Skala:
Formula for placing FlexLOCK
Lockingplate placement
Y2 = 1 0(Y) + 1(Y1) + 6 = 17m m
Flexlockplac ement
Y = 10mm
X = 12 - 1 (X1) = 11m m Z = 16(Z1) + 33 = 49mm
Lid
___X = 12 - X1 = Y > 5 = ___
57
Y
X
57
Front
Z1

12 English
7 Programming
When programming, you need a programming card, service card and Mode-card or user card depending
on what function you desire.
When changing between modes you always have to change via Mode 1.
Reset the lock to default mode according to 7.2. (E.g. Mode 3 -> Mode 2 needs to be:
Mode 3 -> Mode 1 -> Mode 2.)
7.1 Programming from Mode 1 (default setting) to Mode 2, 3, 4 or 5
1. Place the programming card on the lock. You will now hear
the programming signal.
2. Place the selected Mode card on the lock within 7 seconds
until you hear a double confirmation signal.
In Mode 1 and 2 you also have to add user cards to
the lock. See under 7.4.
7.2 Reset the lock to Mode 1 (and erase all users in Mode 1 and 2)
1. Hold the programming card on the lock for about
10 seconds. A reset signal is heard.
All users have been erased and the lock is now in Mode 1.
2. Wait for 10 seconds, then place the programming card
on the lock again. Repeated signals are heard for 7 seconds.
3. Place the service card on the lock within 7 seconds,
a confirmation signal is heard. The lock is now in
Mode 1 (default setting) and you may add users.
!
!
Programming
Mode
2.
1.
Programming
Service
Programming
3.
2.
7 SEC
7 SEC
7 SEC

English 13
7.3 Programming Ready to use (for locks in Mode 1 or 2)
1. Place the programming card on the lock. You will now hear
the programming signal.
2. Place the Ready to use card on the lock within 7 seconds
until you hear a double confirmation signal.
The lock is ready for a new unique user that will be
added to the lock.
7.4 Add users (Mode 1 and 2)
1. Place the programming card on the lock. You will now hear
the programming signal.
2. Place the user card on the lock within 7 seconds,
a confirmation signal is heard.
3. Continue adding users by repeating the above
(maximum 200 users).
7.5 Remove users (Mode 1 and 2)
1. Place the programming card on the lock. You will now
hear the programming signal.
2. Place the user card to be removed on the lock
until an erase signal sounds.
3. To check, wait for 5 seconds, place the user card
on the lock. If everything is correct, an error signal
will sound.
7.6 Sound on or off
By default, the confirmation sound for opening and closing is off.
1. Place the programming card on the lock. You will now
hear the programming signal.
2. Place the sound on/off card on the lock within 7 seconds.
A double confirmation signal is heard (only when
programming to sound on. When programming to sound
off, the programming signal is cut off).
Users will now hear a confirmation signal when opening or
closing the lock. To turn the sound off, repeat the above procedure.
Programming
Ready to use
2.
1.
Programming
User
2.
1.
Programming
User
2.
1.
Programming
Sound on/off
2.
1.
7 SEC
7 SEC
7 SEC
7 SEC

14 English
7.7 Reset the lock with a pin (add a new programming card)
(See 11.2 Advanced troubleshooting.) After resetting the lock
with a pin, it will remain in the same mode as before.
The old programming card is erased. Any user or service
cards will also be erased.
1. Turn the lock over and insert the activation pin in the
socket on the back, hold down for about 3 seconds.
The programming signal will sound for about 7 seconds.
2. Place the new programming card onto the lock before the
7 seconds are up. A confirmation signal will sound
and the new programming card is now registered to the lock.
3. Program the Service Card. See point 4.2.5-4.2.6.
8 Battery changing
When the battery is low, a warning signal will sound when locking and also
a beeping sound when open/close. This signal will sound more often as the battery level decreases,
from every 6 hours. If the battery isn’t changed, the lock will automatically open and stay open.
Use a a lithium battery recommended by Swedstyle AB (of the type CR123A, 3V, min 1400 mAh).
1. Detach the battery flap with a
torx 10 screwdriver.
2. Change the battery – make sure the battery
poles are the right way around.
Battery expiration date should be at least
5 years away.
NOTE! Do not close the storage until the function of the battery is verified.
If the battery is missing or broken, you might not be able to open the lock again.
Test the lock with the front open!
We recommend a scheduled battery change, for every third year or maximum after 30 000
openings. Do not wait for the battery warning as a routine procedure.
!
Programming
Programming
7 SEC

English 15
9 Technical specification
Flexlock is CE marked and meets the requirements
Size 67 x 67 x 23 mm
Weight (without battery) 54 g
Temperature, surrounding +17° to +30° C
Humidity 20% till 75% relative humidity, non condensing
Battery 3V, min 1400 mAh, Lithium recommended by Swedstyle
HF emission Max 20dBμA at 10m
IP-code IP 20
Number of users max 200 users
Battery lifespan 3 years or 30 000 openings
RFID 13,56 MHz, ISO/IEC 14443 A &B, ISO/IEC 180092, ISO/IEC 15693
Compatible with Mifare Classic 1k, Mifare Classic 4k, Mifare DESFire,
Mifare Plus, Mini, Ultra Light, HID iClass 2k, iClass 4k,
iClass SE 2k, 32k NFC *
Reading distance < 25 mm with Swedstyle-cards, other cards or tags may have
shorter and varied reading distance.
Lock standard SS-EN 16014:2011, Dimensioned for DIN 4547 Class B
Electrical safety IEC/EN/UL 62368, CSA 22.2
EMC and EMR radio test ETSI 300 330-1/-2 and 301 489-1/-3, FCC Part 15B, ICES-003

16 English
10 Declaration of conformity

English 17
11 Flexlock Troubleshooting
11.1 Basic Troubleshooting. Check the following:
11.2 Advanced troubleshooting – Service staff/Other responsible personnel
1. Are you standing by the correct storage? (Error signal = most likely wrong storage)
2. Are you using the correct user card? Are you handling it correctly? See heading 3!
3. Don’t ”Stress” the lock, wait for 7 seconds before trying again, then present
the card centered on the lock!
4. If you hear a buzzing sound from the motor or there is a confirmation signal when
presenting the user card, but the storage still won’t open, try the following:
• Something could be stuck between lock and lock plate! Push the door forcibly inwards as
you present the user card!
• The lock plate could be dislocated! Lift the front or drawer upwards or push
downwards, while simultaneously pulling outwards!
5. If you hear a buzzing sound from the motor or there is a confirmation signal when
presenting the user card, but the storage still won’t lock, try the following:
• The contents in the storage (drawer) might be too heavy!
• Try reducing the load!
6. If you hear a buzzing sound from the motor or there is a confirmation signal when
presenting the user card, but the storage still won’t lock, try the following:
• The lock plate might not reach the lock! Adjust the lock plate!
(Gap when locked should be ca 2 mm!)
• The storage might be assembled incorrectly! Adjust!
• The lock plate might not be straight! Adjust the lock plate!
7. If there is no confirmation – The lock is quiet. (Only at startup). Try the following:
• Check that the battery is installed.
• Make sure the battery poles are the right way around.
• Check for a battery insulator tab and remove it.
• Check that the thickness of the door is max 25 mm and that the material is non
conductive. (Try with the card directly on the lock!? Reaction?)
8. If nothing of the above works, check the following and then go on to:
· If the storage is for unique users, Mode 1 or 2: 11.3 Troubleshooting mode 1 & 2
· If the storage is for any user, Mode 3, 4 or 5: 11.4 Troubleshooting mode 3, 4 & 5

18 English
11.3 Troubleshooting mode 1 & 2 lock in mode 1 & 2 (unique users)
If nothing of the above works, contact your retailer!
1. USER CARD
Wait for 7 sec and present the user card
straight and centered! Listen for sound.
2. SERVICE CARD
Wait for 7 sec and present the service card
straight and centered! Listen for sound.
3. PROGRAMMING CARD
Wait for 7 sec and present the programming
card straight and centered! Listen for sound.
Motorbuzz/confirmation signal = Lock OK
Motorbuzz/confirmation signal = Lock OK
Programming signal = Lock OK
Error signal = Wrong user
Error signal = Wrong service card
Motorbuzz/confirmation signal =
Programming card is added as a service
card or user card.
No sound = Card might be defect
No sound = Card or lock might be defect
Error signal = Wrong programming card
No sound = Card or lock might be defect
1. Is it the correct storage?
2. Use the correct user card!
3. Add the user! See heading 7.4.
Add a new user! See heading 7.4.
Add new service card & user!
See the manual.
Reset the lock with a pin!
See heading 7.7.
1. Use the correct service card!
1. Use the correct programming card!
2. Reset with pin! See heading 7.7.
Change the lock!
2. Add the service card!
See the manual.
UserServiceProgramming

English 19
11.4 Troubleshooting mode 3, 4 & 5 lock in mode 3, 4 & 5 (any user)
If nothing of the above works, contact your retailer!
1. USER CARD
Wait for 7 sec and present the user card
straight and centered! Listen for sound.
2. SERVICE CARD
Wait for 7 sec and present the service card
straight and centered! Listen for sound.
3. PROGRAMMING CARD
Wait for 7 sec and present the programming
card straight and centered! Listen for sound.
Motorbuzz/confirmation signal = Lock OK
Motorbuzz/confirmation signal = Lock OK
Programming signal = Lock OK
Error signal = Wrong user
Error signal = Wrong service card
Motorbuzz/confirmation signal =
Programming card is added as a service
card or user card.
No sound = Card might be defect
No sound = Card or lock might be defect
Error signal = Wrong programming card
No sound = Card or lock might be defect
1. Is it the correct storage?
2. Use the correct user card!
Provide a new user card!
Add new service card & user!
See the manual.
Reset the lock with a pin!
See heading 7.7.
Open lock = OK
1. Use the correct programming card!
1. Use the correct
service card!
2. Add the
service card!
See the manual.
2. Reset with pin! See heading 7.7.
Change the lock!
Locked lock!
UserServiceProgramming

20 Svenska
Garanti
Swedstyle lämnar två års garanti räknat från leveransmånad. Garantin gäller mot normalt brukande.
Kan felet avhjälpas genom att produkten byts mot ersättningsprodukt så fullgör säljaren garanti
ansvaret. Alla kostnader som uppkommer i samband med utbyte sker uteslutande genom köparens
försorg. Utbytesvaran debiteras och den felaktiga varan skall omgående returneras till säljaren som
krediterar köparen efter godkännande. Leveranser sker enligt NL 09.
Garantin gäller förutsatt att: Produkten monteras enligt föreskrivna anvisningar, att en korrekt batterityp
enligt specifikation används samt att produkten ej öppnats eller på annat sätt hanterats ovarsamt.
Garantivillkoren för denna produkt är begränsade till kostnadsfritt utbyte alternativt reparation.
Swedstyle täcker ej kostnader och risker som uppkommer beroende av transport, montering och eller
demontering av produkten. Övriga eventuella uppkomna kostnader som kan härledas till utbyte/
reparation täcks ej av produktens garanti. Uppkomna kostnader i verksamheter beroende av produktfel
täcks ej heller av produktgarantin.
VIKTIGT! Vid användning av egna kort/taggar, kontrollera i förväg att de är kompatibla med Flexlock
och att de har en tillräckligt bra läsförmåga. Vid felaktiga eller svaga/dåliga kort/taggar
garanteras inte att en korrekt funktion uppnås. Vi rekommenderar att ett test utförs med
önskade kort/taggar och även med den typ av möbel med rätt material och tjocklek som ska
användas för att säkerställa funktionen.
VIKTIGT! För att Flexlock med dess RFID teknik skall fungera optimalt med kort/taggar, får låset
endast monteras på förvaringar av trä, plast eller annat ickekonduktivt material med en
maximal skivtjocklek av 25 mm. Vid andra typer av användarkort/taggar, materialval och/
eller dimensioner garanteras inte att en korrekt funktion uppnås.
VARNING! Risk för explosion om batteriet byts ut mot felaktig typ.
VIKTIGT! Vid batteribyte får inte förvaringen stängas innan du har verifierat att batteriet fungerar.
Ett lås utan batteri eller med ett icke-fungerande batteri kan gå i baklås.
Provkör låset med öppen förvaring! Batteriet måste vara av typen litiumbatteri anpassat
och av Swedstyle AB rekommenderad typ (variant av CR123A, 3V, min 1400 mAh).
Se www.flexlock.se för fler instruktioner vid batteribyte.
Återvinning av produkten skall ske enligt nationella lagar och bestämmelser
gällande separering av elektronik från övriga återvinningsbara material.
Exempelvis ska utbytta batterier deponeras i avsedda återvinningsstationer
alternativt återlämnas till inköpsstället.
Gratulerar till köpet av Flexlock Invisible. Mifare 13,56 Mhz.
Flexlock är utvecklat och tillverkat i Sverige. Programvaran är
specialutvecklad för att passa kontorsmöbler och förvaringar i alla miljöer. Låset är
underhållsfritt, driftsäkert och har lång livslängd
Table of contents
Languages:
Other Flexlock Lock manuals
Popular Lock manuals by other brands
Assa Abloy
Assa Abloy EMTEK EMTouch Classic Style Installation & programming guide
Salto
Salto SMILE Quick programming guide

Stanley
Stanley Omnilock 45HOM installation instructions

Igloohome
Igloohome Smart Keybox 3 Installer/user guide
Visionis
Visionis VS-SS1500-DL Installation & user guide

Safety 1st
Safety 1st HS294 manual
ViziT
ViziT ML400M Series operating instructions
Schlage
Schlage TouchScreen Deadboltwith Alarm user guide
Kaba
Kaba C-lever quick guide
Kaba Mauer
Kaba Mauer Varos 70040 Mounting instructions
Gianni Industries
Gianni Industries ML-210 installation instructions
Securiturk
Securiturk WT-M-1708-00IC quick start guide

