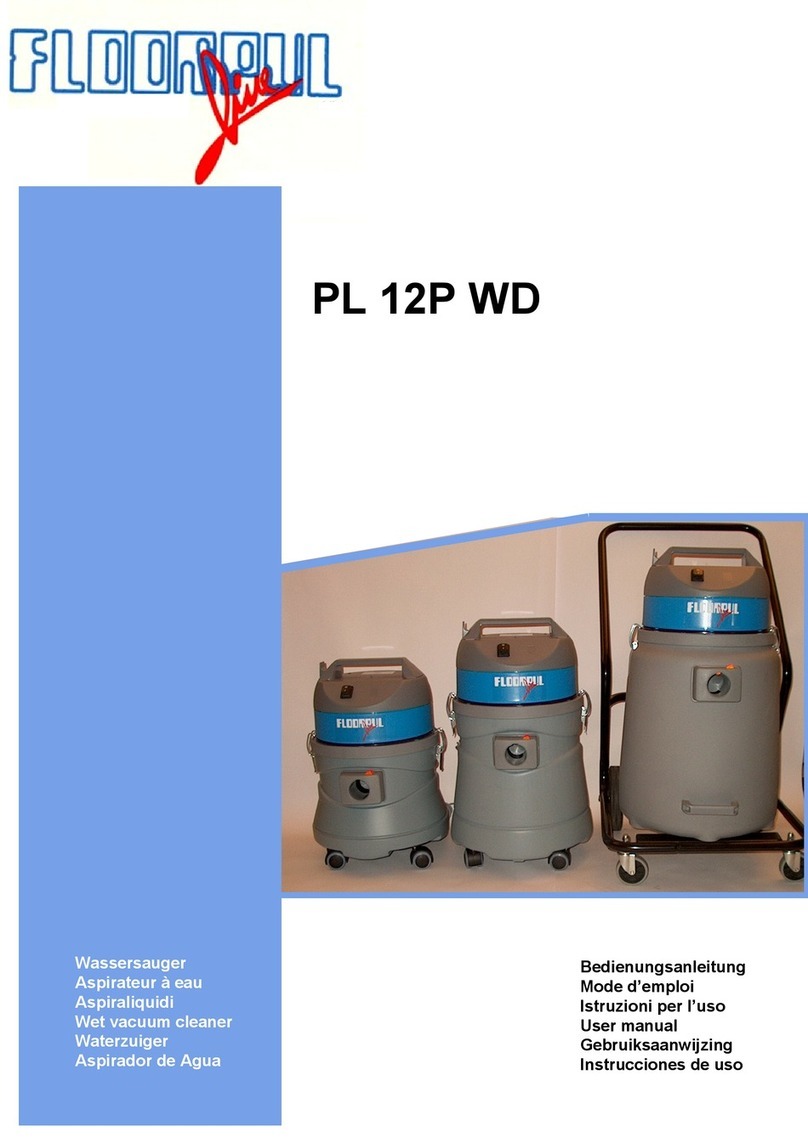
Floorpul PL603 I WD User manual

COMMERCIAL VACUUM CLEANERS
IT MANUALE USO E MANUTENZIONE
EN USE AND MAINTENANCE MANUAL
ES MANUAL DE USO Y MANTENIMIENTO
FR MANUEL D’UTILISATION ET D’ENTRETIEN
DE BEDIENUNGS- UND WARTUNGSANLEITUNG
NL GEBRUIK EN ONDERHOUDHANDLEIDING
PL603 I WD - PL604 I WD
INSTRUCTIONS ORIGINALES DOC. 10104847- Ver. AA - 10-2017

1
4
7
10
13
2
5
8
11
14
3
6
9
12
15
12614
411
13
17
10 5
9
12
7


4
IT
ATTENZIONE:
Le norme sotto indicate vanno seguite attentamente per evitare danni all’operatore e all’apparecchio.
AVVERTENZA:
• Quest’apparecchio non deve essere utilizzato da persone (bambini inclusi di età inferiore a
8anni) con ridotte capacità psichiche, sensoriali o mentali, oppure da persone senza esperienza
e conoscenza, a meno che non siano controllati o istruiti all’uso dell’apparecchio da persone
responsabili della loro sicurezza. I bambini devono essere supervisionati per assicurarsi che
non giochino con l’apparecchio.
• Leggere attentamente le etichette presenti sull’apparecchio, non occultarle per nessuna ragione,
sostituirle immediatamente in caso venissero danneggiate.
• L’apparecchio deve essere usato e riposto esclusivamente al chiuso.
• L’apparecchio deve essere utilizzato esclusivamente da personale autorizzato e istruito all’uso.
• In caso di pericolo agire tempestivamente nella rimozione della spina presente nel cavo di alimentazione
dalla presa di rete.
• Per ogni intervento di manutenzione spegnere l’apparecchio e scollegare il cavo di alimentazione dalla
presa.
• Per evitare un uso non permesso dell’apparecchio, l’alimentazione deve essere interrotta, spegnere
l’apparecchio e scollegare il cavo di alimentazione dalla presa.
• I bambini devono essere sorvegliati per accertarsi che non giochino con l’apparecchio.
• Durante il funzionamento dell’apparecchio fare attenzione alle altre persone e in particolare ai bambini.
• L’apparecchio deve essere alimentato esclusivamente con una tensione ed una frequenza pari a quella
riportata nella targa matricola.
• L’apparecchio lasciato incustodito deve essere protetto da movimenti non intenzionali.
• Non avvicinarsi alla macchina con indumenti che possono impigliarsi, EVITARE l’uso di sciarpe, scialli,
foulards e abiti larghi.
•
creare attriti.
ATTENZIONE:
• L’apparecchio non deve essere usato o tenuto all’esterno in condizioni di umidità o esposto direttamente
alla pioggia.
• La temperatura d’immagazzinamento deve essere compresa tra i -25°C e i +55°C, deve essere
immagazzinato solo in ambienti chiusi.
•
e 95%.
• Allacciare l’apparecchio solo ad un collegamento elettrico installato da un installatore elettrico in
•
diluiti! Rientrano tra questi benzina, diluenti pervernici e olio combustibile, che miscelati con l’aria di
aspirazione possono formare vapori o miscele esplosivi, ed inoltre acetone, acidi e solventi non diluiti,
polveri di alluminio e di magnesio. Queste sostanze possono inoltre corrodere i materiali usati per la
costruzione dell’apparecchio
NORME GENERALI DI SICUREZZA
Le descrizioni contenute nella presente pubblicazione non s’intendono impegnative. L’azienda pertanto, si riserva il diritto di apportare in qualunque
carattere costruttivo o commerciale. La riproduzione anche parziale dei testi e dei disegni, contenuti nella presente pubblicazione, è vietata ai sensi di
legge.
in termini di design e dotazione.

5
IT
• Evitare di danneggiare il cavo di alimentazione della macchina con schiacciamenti, piegature o
sollecitazioni.
• In caso d’impiego dell’apparecchio in zone di pericolo (p. Es. distributori di carburanti), devono essere
osservate le relative norme di sicurezza. È vietato l’uso dell’apparecchio in ambienti con atmosfera
potenzialmente esplosiva.
• Non appoggiare contenitori di liquidi sull’apparecchio.
• In caso d’incendio usare estintori a polvere. Non usare acqua.
• Non utilizzare l’aspiratore con il cavo di alimentazione attorcigliato sul coperchio.
• Quando si dovessero riscontrare anomalie nel funzionamento dell’apparecchio, accertarsi che non
siano dipendenti dalla mancata manutenzione ordinaria. In caso contrario richiedere l’intervento del
centro assistenza autorizzato.
•
Autorizzato.
• Ripristinare tutti i collegamenti elettrici dopo qualsiasi intervento di manutenzione.
• Ogni anno fare controllare l’apparecchio da un centro di assistenza autorizzato.
• Provvedere allo smaltimento dei materiali di consumo attenendosi scrupolosamente alle norme di
legge vigenti. Quando, dopo anni di prezioso lavoro, il Vostro apparecchio dovrà essere messo a
riposo, provvedere allo smaltimento appropriato dei materiali in esso contenuti, tenendo conto che
l’apparecchio è stato costruito con l’impiego di materiali integralmente riciclabili.
• Qualora si riscontrasse un danneggiamento del cavo di alimentazione bisogna fermare l’apparecchio,
se si è in fase di lavoro, togliere la spina dalla rete di alimentazione e far sostituire immediatamente il
cavo da un centro assistenza autorizzato.

6
Simbolo di luogo al coperto:
Simbolo del libro aperto con la i:
Simbolo del libro aperto:
Simbolo i:
SIMBOLOGIA UTILIZZATA NEL MANUALE
PROTEZIONE DELL'AMBIENTE
LEGENDA TABELLA DATI TECNICI
USO CONFORME
AVVERTIMENTO: L'apparecchio non si adatta all'aspirazione di polveri dannose alla salute.
•
• Questo apparecchio si adatta all'uso commerciale, professionale ed industriale, ad esempio in
• La temperatura ambiente non deve superare i 40 °C.
PARTI DELL'APPARECCHIO
1. Testata aspirante.
2. Maniglia sollevamento testata aspirante.
Interruttore comando motore aspirazione.
4. Cavo di alimentazione.
5. Spina cavo di alimentazione.
6. Supporto cavo di alimentazione.
7.
8. Filtro in spugna.
9. Galleggiante meccanico.
10.
11. Gancio fermo calotta aspirazione.
12. Fusto di raccolta.
Bocchetta.
14. Pulsante di sblocco tubo aspirazione.
15. Maniglia.
16. Carrello supporto contenitore dello sporco.
17. Ruota pivotante.
18. Ruota posteriore.
19. Manubrio comando carrello.
MESSA IN FUNZIONE DELL'APPARECCHIO
1. Posizionare la parte bassa dell’imballo esterno a contatto con il pavimento.
NOTA BENE
2. Aprire il cartone esterno.
Rimuovere gli accessori presenti all’interno del cartone ed adagiarli delicatamente a terra.
4. Estrarre l’apparecchio dagli imballi.
NOTA BENE:
PRUDENZA
PERICOLO
5. Inserire il tubo aspirazione nella bocchetta presente nel fusto di raccolta, premere il pulsante
presente nella bocchetta e inserire a fondo il tubo aspirazione (Fig.05).
6. Collegare il tubo prolunga al tubo aspirazione.
7.
Pulizia a secco
1.
portare l'interruttore in posizione spento (Fig.04).
2.
di alimentazione, in caso contrario provvedere a scollegarla.
AVVERTIMENTO:
Liberare la testata aspirante (Fig.06
(Fig.08).
NOTA BENE:
NOTA BENE:
4. Fissare la testata aspirante al fusto di raccolta (Fig.09-10).
5. Inserire la spina presente nel cavo di alimentazione nella presa della rete di alimentazione.
ATTENZIONE:
6.
(Fig.4).
NOTA BENE:
7. Iniziare il lavoro.
Se si utilizza l’accessorio “bocchetta combinata” impostare il commutatore presente nella spazzola
su “SUPERFICIE DURA” oppure “MOQUETTE”. Procedere nell’operazione di aspirazione.
NOTA BENE:
ATTENZIONE:
Se durante il lavoro si nota che la potenza di aspirazione risulta ridotta o il rumore dell’apparecchio
•
(Fig.04).
• Rimuovere la spina dalla presa di alimentazione.
AVVERTIMENTO:
SIMBOLOGIA UTILIZZATA NEL MANUALE ...............................................6
PROTEZIONE DELL'AMBIENTE .................................................................6
LEGENDA TABELLA DATI TECNICI ...........................................................6
USO CONFORME.........................................................................................6
PARTI DELL'APPARECCHIO.......................................................................6
MESSA IN FUNZIONE DELL'APPARECCHIO ............................................6
SVUOTAMENTO FUSTO DI RACCOLTA.....................................................7
MANUTENZIONE..........................................................................................7
RISOLUZIONE GUASTI ...............................................................................7
DICHIARAZIONE DI CONFORMITÀ CE....................................................24
DATI TECNICI .............................................................................................25

7
IT
• Allentare le cerniere fermo testata aspirazione (Fig.06) e rimuoverla (Fig.07).
• Fig.10).
NOTA BENE:
• Svuotare il fusto di raccolta.
NOTA BENE:
• Fig.08) e la testata aspirante (Fig.09).
• Riprendere a lavorare.
NOTA BENE:
Pulizia sul bagnato
1.
portare l’interruttore in posizione spento (Fig.04).
2.
di alimentazione, in caso contrario provvedere a scollegarla.
AVVERTIMENTO:
Liberare la testata aspirante (Fig.06 Fig.11).
NOTA BENE:
4. Fig.12).
NOTA BENE:
5. Fissare la testata aspirante al fusto di raccolta (Fig.09-10).
6. Inserire la spina presente nel cavo di alimentazione nella presa della rete di alimentazione.
ATTENZIONE:
7.
(Fig.4).
NOTA BENE:
8. Iniziare il lavoro.
Se durante il lavoro si nota che la potenza di aspirazione risulta ridotta o il rumore dell’apparecchio
•
(Fig.4).
• Rimuovere la spina dalla presa di alimentazione.
AVVERTIMENTO:
• Allentare le cerniere fermo testata aspirazione e rimuoverla (Fig.6-7).
• Svuotare il fusto di raccolta.
NOTA BENE:
• Fig.13), pulire anche il galleggiante meccanico (Fig.14).
• Fig.12).
• Rimontare la testata aspirante (Fig.9-10).
• Riprendere a lavorare.
Al termine del lavoro portare l’apparecchio nel luogo adibito al suo riposo.
ATTENZIONE:
SVUOTAMENTO FUSTO DI RACCOLTA
MANUTENZIONE
1. Portare l’apparecchio nel luogo adibito allo svuotamento del fusto di raccolta.
NOTA BENE
PRUDENZA
2.
portare l’interruttore in posizione spento (Fig.04).
di alimentazione, in caso contrario provvedere a scollegarla.
AVVERTIMENTO:
4. Liberare la testata aspirante (Fig.06) e adagiarla a terra.
5. Svuotare il fusto di raccolta.
1. Portare l’apparecchio nel luogo adibito alla sua manutenzione.
PRUDENZA
2.
portare l’interruttore in posizione spento (Fig.04).
di alimentazione, in caso contrario provvedere a scollegarla.
AVVERTIMENTO:
4. Liberare la testata aspirante (Fig.06) e adagiarla a terra.
5. Fig.11).
6.
sostituirlo.
NOTA BENE:
7. Fig.13).
8.
NOTA BENE:
9. Se presente all’interno del fusto di raccolta, con un panno umido pulire il galleggiante blocca
schiuma (Fig.14).
10. Rimontare il tutto.
RISOLUZIONE GUASTI
In questo capitolo vengono riportati i problemi più ricorrenti legati all’uso dell’apparecchio. Se non
riuscite a risolvere i problemi con le informazioni seguenti, vi preghiamo di contattare il centro
assistenza più vicino a voi.
PROBLEMA POSSIBILE CAUSA SOLUZIONE
L’APPARECCHIO NON SI
ACCENDE
L’interruttore generale non attivato. Premere l’interruttore generale.
La spina presente nel cavo di
alimentazione dell’apparecchio, non
correttamente inserita nella presa
della corrente di rete.
Collegare la spina presente nel cavo
di alimentazione dell’apparecchio
nella presa della corrente di rete.
dell’apparecchio non corrispondano
rete di alimentazione.
Controllare se i dati tecnici
presenti nella targa matricola
dell’apparecchio corrispondono con
i dati della rete di alimentazione.
Il cavo di alimentazione
danneggiato.
Contattare urgentemente un tecnico
specializzato.
L’ASPIRAZIONE INSUFFICIENTE
- PRODUZIONE ECCESSIVA DI
POLVERE
Il tubo aspirazione non è collegato
correttamente alla bocchetta
presente nel fusto di raccolta.
Collegare il tubo aspirazione
in modo corretto alla bocchetta
presente nel fusto di raccolta.
Il tubo aspirazione non è collegato
correttamente al tubo prolunga.
Collegare il tubo aspirazione in
modo corretto al tubo prolunga.
Il tubo prolunga non è collegato
correttamente all’accessorio
aspirante che si sta utilizzando.
Collegare il tubo prolunga in modo
corretto all’accessorio aspirante che
si sta utilizzando.
Vi siano impurità che ostruiscano
il circuito aspirazione (tubo
aspirazione; tubo prolunga;
accessorio aspirante).
Rimuovere l’impurità presente nel
circuito di aspirazione.
Vi siano impurità che ostruiscano i Rimuovere le impurità presenti nei
NOTA BENE:
NOTA BENE:
6. Rimontare il tutto.
SMALTIMENTO
Procedere alla rottamazione dell’apparecchio presso un demolitore o
centro di raccolta autorizzato.
Prima di rottamare l’apparecchio è necessario rimuovere e separare
• Parti elettriche ed elettroniche*
• Parti in plastica
• Parti metalliche
(*) In particolare, per la rottamazione delle parti elettriche ed
elettroniche, rivolgersi al distributore.
8
EN
The regulations below must be carefully followed in order to avoid harm to the operator and damage
to the appliance.
WARNING:
• This appliance should not be used by people (Including children under 8 years of age) with
reduced physical, sensorial and mental capabilities, or by people without any experience or
knowledge, unless they have been controlled and instructed in the use of the appliance by
people responsible for their safety. Children must be supervised to ensure they do not play
with the appliance.
• Carefully read the labels on the appliance. Do not cover them for any reason and replace them
immediately if they become damaged.
• The appliance must always be stored and used in a closed place.
• The appliance must be only used by authorised, trained personnel.
•
slopes.
• In the event of danger, quickly remove the power cable plug from the mains socket.
•
socket.
•
appliance and pull out the power cable from the socket.
• Children must be supervised to ensure they do not play with the device.
• When using the appliance, pay attention to other people and especially to children.
• The appliance must only be powered with a voltage and a frequency equal to that shown on the
serial number plate.
• When left unattended, the appliance must be protected from unintentional movements.
• Do not approach the machine with clothes that can get entangled, AVOID the use of scarves,
shawls, wraps and loose clothing.
WARNING:
• The appliance must not be used or kept outdoors, in damp conditions or directly exposed to rain.
• The appliance must be stored in a closed area with a temperature between -25°C and +55°C.
•
and 95%.
GENERAL SAFETY REGULATIONS
The descriptions contained in this document are not binding. The company therefore reserves
The reproduction, even partial, of the text and drawings contained in this document is prohibited
by law.
images are shown as a reference only, and are not binding as to the actual design and/or
equipment.

9
EN
• Only connect the appliance to an electrical connection installed by an electrical installer in
•
These include petrol, paint thinners and fuel oil, which mixed with suction air can form explosive
vapours or mixtures, and also acetone, undiluted acids and solvents, aluminium and magnesium
powders. These substances can also corrode the materials used for the construction of the
appliance.
• Avoid damaging the machine power cable by crushing or bending it, or by applying stress.
• If the appliance is used in dangerous areas (for example, gas stations), the relative safety norms
should be observed. The appliance must never be used in environments with a potentially explosive
atmosphere.
• Do not place any liquid containers on the appliance.
• Do not use the vacuum cleaner with the power cord twisted on the cover.
•
• If the appliance does not work properly, check this is not caused by failure to carry out routine
maintenance. Otherwise, ask for intervention of the authorised technical assistance centre.
• If you need to replace any components, request the ORIGINAL spare parts from an Authorised
• Restore all electrical connections after any maintenance interventions.
• Have the appliance checked by an authorised technical assistance centre every year.
• When disposing of consumable materials, observe the laws and regulations in force. When,
materials contained in it appropriately, bearing in mind that the appliance is made of fully recyclable
materials.
• If the power supply cable gets damaged, the appliance must be stopped if it is operating. Disconnect
the plug from the power supply, and have the cable replaced immediately by an authorised service
centre.

10
Covered place symbol:
Open book symbol with an "i":
Open book symbol:
Symbol i:
SYMBOLS USED IN THE MANUAL
ENVIRONMENT PROTECTION
TECHNICAL DATA TABLE KEY
COMPLIANT USE
WARNING:
•
• This appliance is suitable for commercial, professional and industrial use, such as workshops,
industries, schools and hotels.
• The ambient temperature must not exceed 40° C.
PARTS OF THE APPLIANCE
1. Vacuum head.
2. Handle bar for vacuum head lifting.
Vacuum motor control switch.
4. Power cable.
5. Power cable plug.
6. Power cable support.
7.
8.
9.
10.
11. Vacuum cap fastening hook.
12. Collection tank.
Nozzle.
14. Vacuum hose release button .
15. Handle.
16. Collection tank support trolley.
17. Pivoting wheel.
18. Rear wheel.
19. Trolley control handlebars .
INITIAL OPERATION OF THE APPLIANCE
1.
N.B.
2. Open the outer box.
Remove the accessories from the box and carefully lay them on the ground.
4. Remove the appliance from the packaging.
N.B.:
CAUTION
DANGER
5. Insert the vacuum hose into the nozzle on the collection tank, press the button on the nozzle and
insert the vacuum hose fully (Fig.05).
6. Connect the extension pipe to the vacuum hose.
7. Choose the most suitable attachment for the work to be carried out and connect it to the
extension pipe.
Dry cleaning
1.
Fig.04).
2. Check that the plug on the power cable is connected to the power supply socket, otherwise
disconnect it.
WARNING:
Free the vacuum head (Fig.06 Fig.08).
N.B.:
N.B:
4. Secure the vacuum head to the collection tank (Fig.09-10).
5. Plug the power cable into the mains socket.
ATTENTION:
6. Switch on the appliance by positioning the vacuum motor switch to position “I” (Fig. 4).
N.B.:
7. Start work.
If the “combined nozzle” accessory is used, set the switch in the brush to “HARD SURFACE” or else
“CARPET FLOORS”. Proceed with the vacuuming.
N.B:
ATTENTION:
If when working a reduction in the vacuuming power is noted or the noise of the appliance becomes
•Fig. 04).
• Remove the plug from the power socket.
WARNING:
SYMBOLS USED IN THE MANUAL ..........................................................10
ENVIRONMENT PROTECTION .................................................................10
TECHNICAL DATA TABLE KEY ................................................................10
COMPLIANT USE.......................................................................................10
PARTS OF THE APPLIANCE.....................................................................10
INITIAL OPERATION OF THE APPLIANCE ..............................................10
EMPTYING THE COLLECTION TANK ......................................................11
MAINTENANCE..........................................................................................11
TROUBLESHOOTING ............................................................................... 11
EC DECLARATION OF CONFORMITY .....................................................24
TECHNICAL DATA .....................................................................................25

11
EN
• Loosen the latch hinges of the vacuum head (Fig.06) and remove it (Fig.07).
• Fig.10).
N.B:
• Empty the collection tank.
N.B:
• Fig.08) and the vacuum head (Fig.09).
• Start work again.
N.B:
Cleaning wet surfaces
1.
Fig.04).
2. Check that the plug on the power cable is connected to the power supply socket, otherwise
disconnect it.
WARNING:
Free the vacuum head (Fig.06 Fig.11).
N.B:
4. Fig.12).
N.B:
5. Secure the vacuum head to the collection tank (Fig.09-10).
6. Plug the power cable into the mains socket.
ATTENTION:
7. Switch on the appliance by positioning the vacuum motor switch to position “I” (Fig. 4).
N.B:
8. Start work.
If when working a reduction in the vacuuming power is noted or the noise of the appliance becomes
• Fig. 4).
• Remove the plug from the power socket.
WARNING:
• Loosen the latch hinges of the vacuum head and remove it (Fig. 6-7).
• Empty the collection tank.
N.B:
• Fig.13 Fig.14).
• Fig.12).
• Reassemble the vacuum head (Fig.9-10).
• Start working again.
Take the appliance to the designated machine storage place after work is completed.
ATTENTION:
EMPTYING THE COLLECTION TANK
MAINTENANCE
At the end of the work, and before carrying out any type of maintenance, perform the following
1. Take the appliance to where its collection tank is emptied.
N.B
CAUTION
2.
Fig.04).
Check that the plug on the power cable is connected to the power supply socket, otherwise
disconnect it.
WARNING:
4. Free the vacuum head (Fig.06) and lay it on the ground.
5. Empty the collection tank.
1. Take the device to its maintenance area.
CAUTION
2.
Fig.04).
Check that the plug on the power cable is connected to the power supply socket, otherwise
disconnect it.
WARNING:
4. Free the vacuum head (Fig.06) and lay it on the ground.
5. Fig.11).
6.
N.B:
7. Fig.13).
8.
N.B:
9. Fig.14).
10.
TROUBLESHOOTING
PROBLEM POSSIBLE CAUSE SOLUTION
THE APPLIANCE DOES
NOT SWITCH ON
The main switch is not activated. Press the main switch.
The plug on the appliance's power
cable has not been correctly
inserted into the mains socket.
Connect the plug on the appliance's
power cable to the mains socket.
the appliance do not match the
supply network.
Check that the technical data on
the appliance's serial number plate
match the data of the mains supply.
The power cable is damaged. Contact a specialised technician
immediately.
INSUFFICIENT VACUUM
- EXCESSIVE DUST
PRODUCTION
The vacuum hose is not connected
correctly to the nozzle on the
collection tank.
Connect the vacuum hose correctly
to the nozzle on the collection tank.
The vacuum hose is not connected
correctly to the extension hose.
Connect the vacuum hose correctly
to the extension hose.
The extension hose is not
connected correctly to the vacuum
accessory being used.
Connect the extension tube
correctly to the vacuum accessory
being used.
The vacuum circuit is blocked
(vacuum hose; extension hose;
vacuum accessory).
Remove the obstruction in the
vacuum circuit.
There is a blockage in the vacuum Clear the obstruction in the vacuum
N.B:
N.B:
6.
DISPOSAL

12
FR
Les descriptions contenues dans cette publication ne sont pas contraignantes. La société se
exigence de caractère constructif ou commercial. La reproduction même partielle des textes et des
dessins contenus dans cette publication est interdite par la loi.
relatives aux équipements. Les images sont fournies à simple titre d'exemple et ne sont pas
contraignantes pour le design et les équipements.
Les règles indiquées ci-dessous doivent être respectées scrupuleusement pour éviter tout
dommage à l'appareil et à l'opérateur.
AVERTISSEMENT :
• Cet appareil ne doit pas être utilisé par des personnes (Y compris les enfants âgés de moins
de 8 ans) dotés de capacités psychiques, sensorielles ou mentales réduites, ou bien par des
personnes sans expérience et connaissance, à moins qu'elles ne soient contrôlées ou formées
à l'utilisation de l'appareil par des personnes responsables de leur sécurité. Les enfants doivent
•
immédiatement si elles sont endommagées.
• L’appareil doit être utilisé et rangé exclusivement dans un endroit fermé.
• L’appareil doit exclusivement être utilisé par des personnes possédant l'autorisation et la
formation adéquates.
• L'appareil n'est pas adapté au nettoyage de sols accidentés ou irréguliers. Ne pas utiliser
l'appareil sur des pentes.
•
secteur.
• Pour toute intervention d'entretien, éteindre l'appareil et débrancher le câble d'alimentation de
la prise.
• Pour éviter une utilisation non admise de l’appareil, l’alimentation doit être coupée, éteindre
l’appareil et débrancher le câble d'alimentation de la prise.
•
l’appareil.
• Pendant le fonctionnement de l’appareil, faire attention aux personnes à proximité et en
particulier aux enfants.
• L’appareil doit être alimenté exclusivement avec une tension et une fréquence égales à celles
indiquées sur la plaque matricule.
• L’appareil laissé sans surveillance doit être protégé de mouvements imprévus.
• Ne pas s’approcher de la machine avec des vêtements qui pourraient s’accrocher. ÉVITER de
porter des écharpes, des châles, des foulards et des vêtements larges.
ATTENTION :
• L’appareil ne doit pas être utilisé ou maintenu à l’extérieur en conditions d’humidité ou exposé
directement à la pluie.
• La température de stockage doit être comprise entre -25 °C et +55 °C, l’appareil doit être
emmagasiné uniquement dans des endroits fermés.
•
RÈGLES GÉNÉRALES DE SÉCURITÉ

13
FR
• Raccorder uniquement l’appareil à un raccordement électrique installé par un installateur
•
acides et des solvants non dilués! Il s’agit notamment de l’essence, des diluants à peinture et
du mazout, qui sont mélangés à de l’air d’aspiration peut former des vapeurs ou des mélanges
explosifs, ainsi que de l’acétone, des acides et des solvants non dilués, des poudres d’aluminium
et de magnésium. Ces substances peuvent également corroder les matériaux utilisés pour la
construction de l’appareil.
• Ne pas utiliser l’aspirateur avec le cordon d’alimentation tordu sur la tête
• Éviter d’endommager le cordon d’alimentation de la machine par des écrasements, pliages ou
contraintes.
• En cas d’utilisation de l’appareil dans des zones de danger (par ex. distributeurs de carburant),
il convient d’observer les normes de sécurité correspondantes. L’utilisation de l’appareil dans
des environnements à atmosphère potentiellement explosive est interdite.
• Ne pas poser de récipients contenant des liquides sur l’appareil.
• En cas d’incendie, utiliser un extincteur à poudre. Ne pas utiliser d’eau.
•
d’un manque d’entretien ordinaire. Dans le cas contraire, demander l’intervention du service
après-vente agréé.
• En cas de remplacement de pièces, demander des pièces de rechange D’ORIGINE à un
• Rétablir tous les branchements électriques après un entretien.
• Chaque année, faire contrôler l’appareil par un centre d’assistance agréé.
• Éliminer les consommables en suivant scrupuleusement les lois en vigueur. Quand, après des
années de précieux travail, votre appareil doit être mis au repos, procéder à la mise au rebut
appropriée des matériaux qu’il contient, en tenant compte du fait que l’appareil a été construit
en utilisant des matériaux intégralement recyclables.
• Si le câble d’alimentation est endommagé, arrêter l’appareil (s’il est en marche), le débrancher
de la prise et faire remplacer immédiatement le câble par un service après-vente agréé.

14
Symbole d’endroit à l’abri :
Symbole du livre ouvert avec le i :
Symbole du livre ouvert :
Symbole i:
SYMBOLES UTILISÉS DANS CE MANUEL
PROTECTION DE L'ENVIRONNEMENT
LÉGENDE DU TABLEAU DES DONNÉES TECHNIQUES
Avant d'utiliser l'appareil pour la première fois, lire ces instructions originales, les suivre et
les conserver pour pouvoir les consulter ultérieurement ou en cas de revente
de l'appareil.
•
• Ne pas observer les normes de sécurité ni suivre les instructions peut provoquer l'endommagement
de l'appareil et présenter des dangers pour l'utilisateur et les personnes autour.
• Les dommages éventuels dus au transport doivent immédiatement être communiqués au
revendeur.
UTILISATION CONFORME
AVERTISSEMENT :
PARTIES DE L'APPAREIL
1. Tête d'aspiration.
2. Poignée de soulèvement de la tête d'aspiration.
Interrupteur de commande du moteur d'aspiration.
4. Câble d'alimentation.
5. Fiche du câble d'alimentation.
6. Support du câble d'alimentation.
7. Filtre en tissu.
8. Filtre en éponge.
9. Flotteur mécanique.
10.
11.
12. Bidon de ramassage.
Embout.
14. Bouton de déverrouillage du tuyau d'aspiration.
15. Poignée.
16. Chariot de support du bac à déchets.
17. Roue pivotante.
18. Roue arrière.
19. Guidon de commande du chariot.
MISE EN MARCHE DE L’APPAREIL
1. Positionner la partie basse de l’emballage extérieur au contact du sol.
REMARQUE
2. Ouvrir le carton extérieur.
Enlever les accessoires présents à l'intérieur du carton et les poser délicatement au sol.
4. Extraire l'appareil de l'emballage.
REMARQUE :
PRUDENCE
DANGER
5. Introduire le tuyau d'aspiration de la buse du bidon de ramassage, appuyer sur le bouton situé sur la buse
et introduire le tuyau d'aspiration à fond (Fig.05).
6. Raccorder la rallonge au tuyau d'aspiration.
7. Choisir l'accessoire le plus mieux adapté à la tâche à exécuter et le raccorder à la rallonge.
Nettoyage à sec
1.
contraire, commuter l'interrupteur sur la position éteinte (Fig.04).
2.
AVERTISSEMENT:
Libérer la tête d'aspiration (Fig.06 Fig.08).
REMARQUE :
REMARQUE :
4. Fixer la tête d'aspiration au bidon de ramassage (Fig.09-10).
5.
ATTENTION :
6.
(Fig.4).
REMARQUE :
7. Commencer le travail.
En cas d'utilisation de l'accessoire “bouche combinée”, déplacer le commutateur de la brosse sur “SURFACE
DURE” ou MOQUETTE”. Procéder à l'opération d'aspiration.
REMARQUE :
ATTENTION :
•Fig.04).
•
AVERTISSEMENT:
• Desserrer les charnières qui verrouillent la tête d'aspiration (Fig.06) et retirer cette dernière (Fig.07).
•Fig.10).
REMARQUE :
SYMBOLES UTILISÉS DANS CE MANUEL..............................................14
PROTECTION DE L'ENVIRONNEMENT ...................................................14
LÉGENDE DU TABLEAU DES DONNÉES TECHNIQUES .......................14
UTILISATION CONFORME ........................................................................14
PARTIES DE L'APPAREIL .........................................................................14
MISE EN MARCHE DE L'APPAREIL .........................................................15
VIDANGE DU BIDON DE RAMASSAGE...................................................15
ENTRETIEN ................................................................................................15
DÉPANNAGE..............................................................................................15
DÉCLARATION DE CONFORMITÉ CE .....................................................24
DONNÉES TECHNIQUES ..........................................................................25

15
FR
• Vider le bidon de ramassage.
REMARQUE :
• Fig.08) et la tête d'aspiration (Fig.09).
• Reprendre le travail.
REMARQUE :
Nettoyage sur sol mouillé
1.
le cas contraire, commuter l'interrupteur sur la position éteinte (Fig.04).
2.
la débrancher.
AVERTISSEMENT:
Libérer la tête d'aspiration (Fig.06 Fig.11).
REMARQUE :
4. Fig.12).
REMARQUE :
5. Fixer la tête d'aspiration au bidon de ramassage (Fig.09-10).
6.
ATTENTION :
7. Mettre l'appareil en marche en commutant l'interrupteur de commande du moteur d'aspiration
Fig.4).
REMARQUE :
8. Commencer le travail.
Si on remarque que la puissance d'aspiration diminue ou que le bruit de l'appareil augmente durant
•
(Fig.4).
•
AVERTISSEMENT:
• Desserrer les charnières qui verrouillent la tête d'aspiration et retirer cette dernière (Fig.6-7).
• Vider le bidon de ramassage.
REMARQUE :
• Fig.13 Fig.14).
• Fig.12).
• Remonter la tête d'aspiration (Fig.9-10).
• Reprendre le travail.
ATTENTION :
VIDANGE DU BIDON DE RAMASSAGE
ENTRETIEN
REMARQUE
PRUDENCE
Fig.04
AVERTISSEMENT:
Fig.06
REMARQUE :
PRUDENCE
Fig. 04
AVERTISSEMENT:
Fig.06
Fig.11
REMARQUE :
Fig.13
REMARQUE :
Fig.14
RÉSOLUTION PANNES
PROBLÈME CAUSE POSSIBLE SOLUTION
L’APPAREIL NE S'ALLUME
PAS
L’interrupteur général n'est pas
activé. Appuyer sur l’interrupteur général.
de l'appareil n'est pas correctement
montée sur la prise de courant de
secteur.
d'alimentation de l'appareil sur la
prise de courant de secteur.
de l'appareil ne correspondent aux
réseau d'alimentation.
Contrôler si les données techniques
de l'appareil correspondent aux
données du réseau d'alimentation.
Le câble d’alimentation est
endommagé.
Contacter immédiatement un
technicien spécialisé.
L’ASPIRATION INSUFFISANTE -
PRODUCTION EXCESSIVE DE
POUSSIÈRE
Le tuyau d'aspiration n'est pas bien
branché sur l'embout du bidon de
ramassage.
Brancher le tuyau d'aspiration de
manière correcte sur l'embout du
bidon de ramassage.
Le tuyau d'aspiration n'est pas
correctement branché au tuyau de
rallonge.
Brancher le tuyau d'aspiration de
manière correcte sur le tuyau de
rallonge.
Le tuyau de rallonge n'est
pas correctement branché à
l’accessoire d'aspiration utilisé.
Brancher correctement le tuyau de
rallonge à l’accessoire d'aspiration
utilisé.
Il y a des impuretés qui bouchent
le circuit d'aspiration (tuyau
d'aspiration ; tuyau de rallonge ;
accessoire d'aspiration).
Enlever les impuretés présentes
dans le circuit d'aspiration.
Il y a des impuretés qui bouchent
d'aspiration.
REMARQUE :
ÉLIMINATION
Procéder à la mise au rebut de l'appareil auprès d'un démolisseur ou
d'un centre de collecte agréé.
Avant d'éliminer l'appareil, retirer et séparer les matériaux suivants et
les envoyer aux centres de collecte et de tri en respectant les normes
• Parties électriques et électroniques*
• Pièces en plastique
• Pièces métalliques
(*) En particulier, pour la mise au rebut des pièces électriques et
électroniques, s'adresser au distributeur.

16
DE
baulicher oder geschäftlicher Art für angebracht hält. Die auch nur teilweise Wiedergabe der Texte
Das Unternehmen behält sich vor, Änderungen technischer Art und / oder an der Ausstattung
vorzunehmen. Die Abbildungen sind als reine Beispiele zu betrachten und sind hinsichtlich
Design und Ausstattung unverbindlich.
Die unten angeführten Vorschriften müssen strikt befolgt werden, um Sach- und Personenschäden zu
vermeiden.
HINWEIS:
•
psychischen, sensorischen oder mentalen Fähigkeiten, oder von unerfahrenen und ungeschulten
Personen verwendet werden, wenn sie nicht von für ihre Sicherheit zuständigen Personen überwacht
um zu gewährleisten, dass sie nicht mit dem Gerät spielen.
• Lesen Sie aufmerksam die am Gerät angebrachten Schilder, verdecken Sie diese auf keinen Fall und
ersetzen Sie diese umgehend, wenn sie beschädigt oder unleserlich sind.
• Das Gerät darf nur in geschlossenen Räumen verwendet und abgestellt werden.
• Das Gerät darf nur durch befugtes Personal verwendet werden, das auf die Bedienung eingeschult
wurde.
•
auf abschüssigem Gelände.
•
•
• Um einen unzulässigen Gebrauch des Geräts zu vermeiden, muss die Stromzufuhr unterbrochen, das
Gerät abgeschaltet und das Netzkabel aus der Steckdose gezogen werden.
•
•
• Das Gerät darf nur mit einer Spannung und Frequenz gespeist werden, die den Angaben am Typenschild
entsprechen.
• Ist das Gerät unbeaufsichtigt, muss es vor unabsichtlichen Bewegungen geschützt werden.
•
ACHTUNG:
• Das Gerät darf nicht im Freien bei Feuchtigkeit oder direkt dem Regen ausgesetzt verwendet oder
aufbewahrt werden.
• Die Lagertemperatur muss zwischen -25°C und +55°C liegen, das Gerät muss in überdachten Bereichen
eingelagert werden.
•
•
Belastungen.
•
ALLGEMEINE SICHERHEITSVORSCHRIFTEN

17
DE
• Verwenden Sie den Staubsauger nicht mit dem Netzkabel, das auf dem Deckel.
• Niemals Gas, Flüssigkeiten oder explosive oder brennbare Stäube und auch unverdünnte Säuren und
Lösemittel Absaugen! Dazu gehören Benzin, Farbverdünner und Heizöl, die mit Ansaugluft vermischt
werden können, explosive Dämpfe oder Mischungen, und auch Aceton, unverdünnte Säuren und
des Gerätes verwendeten Materialien korrodieren.
• Bei Einsatz des Gerätes in Gefahrenbereichen (z.B. Tankstellen) müssen die entsprechenden
Sicherheitsvorschriften beachtet werden. Der Gebrauch des Geräts in Bereichen mit potenziell
explosiver Atmosphäre ist verboten.
•
•
• Sollten Sie während des Betriebsstörungen feststellen, vergewissern Sie sich, dass die Störungen
verständigen.
• Bestellen Sie für den Austausch von Bauteilen ORIGINAL-Ersatzteile bei einem autorisierten
•
•
• Entsorgen Sie die Verbrauchsmaterialien unter genauer Beachtung der gültigen gesetzlichen
für die Herstellung des Gerätes zur Gänze wiederverwertbare Materialien verwendet wurden.
• Sollten Sie eine Beschädigung am Netzkabel bemerken, das Gerät sofort stoppen, wenn es in Betrieb
austauschen lassen.

18
Symbol für überdachten Ort:
Symbol i:
IM HANDBUCH VERWENDETE SYMBOLE
UMWELTSCHUTZ
ZEICHENERKLÄRUNG TECHNISCHE DATENTABELLE
RICHTIGER GEBRAUCH
HINWEIS:
TEILE DES GERÄTS
1. Saugkopf.
2.
Saugmotor-Steuerschalter.
4. Netzkabel.
5. Netzkabelstecker.
6. Netzkabelhalterung.
7.
8.
9. Mechanischer Schwimmer.
10.
11. Befestigungshaken für die Saughaube.
12. Sammelbehälter.
Stutzen.
14. Saugschlauch-Entriegelungstaste.
15.
16. Stützschlitten für Schmutzbehälter.
17. Schwenkrad.
18. Hinterrad.
19.
INBETRIEBNAHME DES GERÄTS
1.
ANMERKUNG
2.
4. Ziehen Sie das Gerät aus der Verpackung.
ANMERKUNG:
VORSICHT
GEFAHR
5. Stecken Sie den Saugschlauch in den Stutzen im Sammelbehälter, drücken Sie die Taste im
Stutzen und setzen Sie den Saugschlauch bis zum Anschlag ein (Abb.05).
6.
7.
es an das Verlängerungsrohr an.
Trockenreinigung
1.
stellen (Abb.04).
2. Prüfen Sie, ob der im Netzkabel vorhandene Stecker mit der Netzsteckdose verbunden ist,
HINWEIS:
Lösen Sie den Saugkopf (Abb.06
(Abb.08).
ANMERKUNG:
ANMERKUNG:
4. Befestigen Sie den Saugkopf am Sammelbehälter (Abb.09-10).
5. Verbinden Sie den Netzkabelstecker mit der Netzsteckdose.
ACHTUNG:
6. Abb.4).
ANMERKUNG:
7. Nun können Sie mit der Arbeit beginnen.
ANMERKUNG:
ACHTUNG:
Wenn Sie während der Arbeit feststellen, dass die Saugleistung verringert ist oder sich die
•Abb.04).
• Ziehen Sie den Netzstecker aus der Netzsteckdose.
HINWEIS:
• Lösen Sie die Feststellscharniere des Saugkopfs (Abb.06) und entfernen Sie den Saugkopf (Abb.07).
IM HANDBUCH VERWENDETE SYMBOLIK ........................................... 18
UMWELTSCHUTZ ......................................................................................18
ZEICHENERKLÄRUNG TECHNISCHE DATENTABELLE........................18
KONFORMER GEBRAUCH .......................................................................18
GERÄTETEILE ...........................................................................................18
INBETRIEBNAHME DES GERÄTS............................................................18
ENTLEEREN DES SAMMELBEHÄLTERS ................................................19
WARTUNG ..................................................................................................19
FEHLERBEHEBUNG..................................................................................19
EG-KONFORMITÄTSERKLÄRUNG ..........................................................24
TECHNISCHE DATEN ................................................................................25

19
DE
• Abb.10).
ANMERKUNG:
• Entleeren Sie den Sammelbehälter.
ANMERKUNG:
• Abb.08) und den Saugkopf (Abb.09).
• Nun können Sie die Arbeit fortsetzen.
ANMERKUNG:
Nassreinigung
1.
stellen (Abb.04).
2. Prüfen Sie, ob der im Netzkabel vorhandene Stecker mit der Netzsteckdose verbunden ist,
HINWEIS:
Lösen Sie den Saugkopf (Abb.06 Abb.11).
ANMERKUNG:
4. Abb.12).
ANMERKUNG:
5. Befestigen Sie den Saugkopf am Sammelbehälter (Abb.09-10).
6. Verbinden Sie den Netzkabelstecker mit der Netzsteckdose.
ACHTUNG:
7. Abb.4).
ANMERKUNG:
8. Nun können Sie mit der Arbeit beginnen.
Wenn Sie während der Arbeit feststellen, dass die Saugleistung verringert ist oder sich die
• Abb.4).
• Ziehen Sie den Netzstecker aus der Netzsteckdose.
HINWEIS:
• Lösen Sie die Feststellscharniere des Saugkopfs und entfernen Sie den Saugkopf (Abb.6-7).
• Entleeren Sie den Sammelbehälter.
ANMERKUNG:
• Abb.13), reinigen Sie auch den
mechanischen Schwimmer (Abb.14).
• Abb.12).
• Montieren Sie den Saugkopf wieder (Abb.9-10).
• Nun können Sie die Arbeit fortsetzen.
Verbringen Sie das Gerät nach der Arbeit an seinen Abstellplatz.
ACHTUNG:
ENTLEEREN DES SAMMELBEHÄLTERS
WARTUNG
1. Bringen Sie das Gerät an den für die Entleerung des Sammelbehälters vorgesehenen Ort.
ANMERKUNG
VORSICHT
2.
stellen (Abb.04).
Prüfen Sie, ob der im Netzkabel vorhandene Stecker mit der Netzsteckdose verbunden ist,
HINWEIS:
4. Lösen Sie den Saugkopf (Abb.06) und stellen Sie ihn am Boden ab.
5. Entleeren Sie den Sammelbehälter.
1. Verbringen Sie das Gerät an den für seine Instandhaltung vorgesehenen Ort.
VORSICHT
2.
stellen (Abb.04).
Prüfen Sie, ob der im Netzkabel vorhandene Stecker mit der Netzsteckdose verbunden ist,
HINWEIS:
4. Lösen Sie den Saugkopf (Abb.06) und stellen Sie ihn am Boden ab.
5.
(Abb.11).
6. Reinigen Sie den Filter mit Luftstrahl aus einer Entfernung von mehr als 20 Zentimeter. Falls er
beschädigt ist, muss er ausgetauscht werden.
ANMERKUNG:
7. Abb.13).
8.
werden.
ANMERKUNG:
9. Ist der Schaumhemmer-Schwimmer im Sammelbehälter vorhanden, reinigen Sie ihn mit einem
feuchten Lappen (Abb.14).
10. Bauen Sie alle Teile wieder ein.
FEHLERBEHEBUNG
PROBLEM MÖGLICHE URSACHE LÖSUNG
ANMERKUNG:
ANMERKUNG:
6. Bauen Sie alle Teile wieder ein.
ENTSORGUNG
Entsorgen Sie das Gerät bei einem Verschrottungsbetrieb oder einer
zugelassenen Sammelstelle.
Vor der Verschrottung des Geräts müssen folgende Materialien
entfernt und getrennt. Diese müssen unter Einhaltung der gültigen
Bestimmung zum Umweltschutz einer getrennten Sammlung
• Elektrische und elektronische Teile*
•
• Metallteile
(*) Wenden Sie sich insbesondere für die Verschrottung der
elektrischen und elektronischen Teile an den Vertriebshändler.

20
NL
en/of van technische aard. De afbeeldingen zijn slechts een voorbeeld en zijn niet bindend
voor het design en de levering.
De onderstaande normen moeten nauwkeurig gevolgd worden om letsels aan de bediener en
WAARSCHUWING:
•
instaan voor hun veiligheid. Zorg er voor dat kinderen niet met het toestel kunnen spelen.
•
• Het toestel mag uitsluitend gebruikt en bewaard worden in een afgesloten plaats.
• Het toestel mag uitsluitend gebruikt worden door bevoegd personeel, dat een opleiding voor het
gebruik genoot.
• Het toestel is niet geschikt voor de reiniging van losse bevloeringen of vloeren met hoogteverschillen.
Gebruik het toestel niet op hellingen.
•
worden.
• Voordat eender welke onderhoudshandeling wordt uitgevoerd, moet de stekker van de stroomkabel
uit het stopcontact gehaald worden.
•
toestel uit en haal de stekker van de stroomkabel uit het stopcontact.
• Zorg er voor dat kinderen niet met het toestel kunnen spelen.
•
• Het toestel mag uitsluitend gevoed worden met een spanning en frequentie die wordt aangeduid
op de plaat met het serienummer.
• Wanneer het toestel onbewaakt wordt achtergelaten, moet er voor gezorgd worden dat het niet
toevallig kan bewegen.
•
kleding.
OPGELET:
• Het apparaat mag niet buiten in vochtige omstandigheden worden bewaard of gebruikt of direct
worden blootgesteld an regen.
•
•
• Sluit het apparaat alleen aan op een elektrische aansluiting die is geïnstalleerd door een elektrisch
ALGEMENE VEILIGHEIDSNORMEN
Other manuals for PL603 I WD
1
This manual suits for next models
1
Table of contents
Languages:
Other Floorpul Vacuum Cleaner manuals

Floorpul
Floorpul W1 User guide

Floorpul
Floorpul PL603 I WD User manual

Floorpul
Floorpul PL 40P WD User manual

Floorpul
Floorpul ROXY User manual

Floorpul
Floorpul RX eco FORCE 380e User manual

Floorpul
Floorpul SC 604 PVC User manual

Floorpul
Floorpul Commercial 14 User manual

Floorpul
Floorpul PL 12P WD User manual

Floorpul
Floorpul Mikros User manual