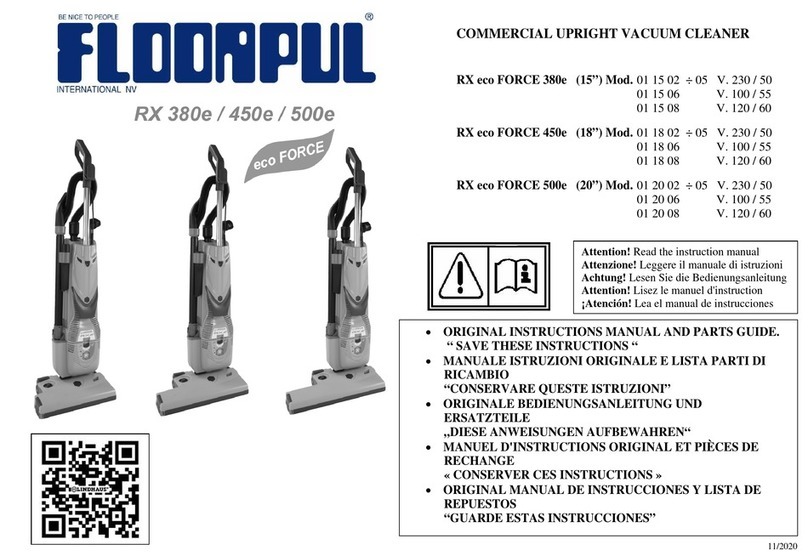
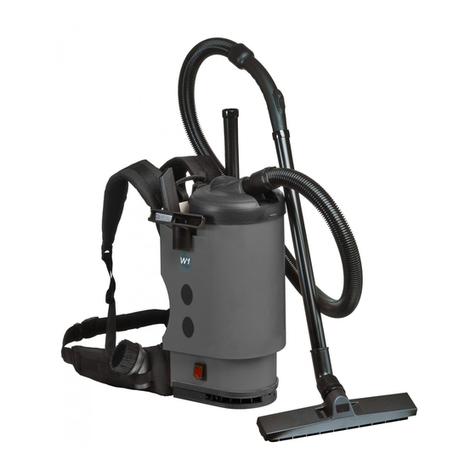
Floorpul Commercial 14 User manual

COMMERCIAL
Manuale d’istruzioni • Instruction manual
Bedienungshandbuch • Mode d’emploi
14” 16” EU

L’osservanza dei consigli qui sotto riportati,
garantisce il massimo rendimento dell’apparec-
chio, la massima durata e un’elevata sicurezza.
• Non pulire l’apparecchio con solventi, il corpo e gli acces-
sori sono in materiale plastico e pertanto possono essere
danneggiati.
• Non immergere mai l’apparecchio in acqua.
• Non pulire l’apparecchio in acqua.
• Non lasciare l’apparecchio incustodito mentre
è in funzione.
• Non riporre l’apparecchio vicino a fonti di calore.
• Togliere la spina di alimentazione dalla presa di corrente
dopo ogni uso dell’apparecchio.
• Se il cavo di alimentazione e la presa di corrente risultas-
sero danneggiati, provvedere subito a farli sostituire pres-
so un centro di assistenza autorizzato.
• Non utilizzare l’apparecchio come aspiraliquidi.
• Prima di ogni operazione di manutenzione o sostituzione,
staccare la spina dell’apparecchio dalla presa di alimen-
tazione.
• Non aspirare mozziconi accesi o materiali infiammabili.
• Staccare la spina agendo solo sul corpo della stessa e
non sul cavo.
• Usare solo ed esclusivamente sacchetti e filtri originali.
N.B.
La ditta costruttrice si riserva di poter apportare
qualsiasi modifica senza preavviso
If you observe the recommendations listed below,
this will ensure maximum performance by the
appliance, the longest possible life and a high level
of safety.
• Do not clean the appliance with solvents - the body and
accessories are in plastic and, therefore, may get dama-
ged.
• Never immerse the appliance in water.
• Do not clean the appliance in water.
• Do not leave the appliance unattended while it is running.
• Never put the appliance near to heat sources.
• Remove the power plug from the power socket after each
use of the appliance.
• If the power lead and power socket are damaged, replace
them immediately at an authorised service centre.
• Do not use the appliance as a liquid-suction device.
• Before every maintenance or replacement job, remove the
appliance’s power plug from the power socket.
• Do not suck in lighted cigarette ends or inflammable
materials.
• Remove the plug by pulling the plug body and not the
power lead.
• Strictly use original dust-bags and filters.
NOTE
The manufacturer reserves the right to make any
modifications without prior notice.
ATTENZIONE!!
Prima di effettuare qualsiasi manutenzio-
ne, staccare sempre la spina di alimenta-
zione.
Rivolgetevi sempre, per ogni manutenzio-
ne, ai centri assistenza autorizzati.
IMPORTANT!!
Before attempting any maintenance job,
always remove the power plug.
For all maintenance jobs, always contact
our authorised service centres.

1
2
3
5
8
6
4
7
9
12
13
10
11
ALLACCIAMENTO
DEL TUBO FLEX
Inserire il manicotto girevole nel
manicotto porta sacco, inserire il
secondo manicotto girevole nella
telescopica e agganciare il tubo flex
al manico.
CONNECTING THE HOSE
Insert the rotating sleeve into the
bag-holding sleeve, insert the second
rotating sleeve into the telescoping
element, and hook the hose to the
handle.
COMMERCIAL
1 Impugnatura ergonomica
2 Cavo alimentazione
3 Tubo flex
4 Prolunga telescopica
5 Interruttore
6 Maniglia trasporto
7 Avvolgicavo
8 Portina
9 Griglia di ventilazione
10 Cassonetto
11 Contenitore motore
12 Elettrospazzola
13 Basamento
COMMERCIAL
1 Ergonomic handle
2 Power cord
3 Hose
4 Telescoping extension
5 Switch
6 Carrying handle
7 Cord winding device
8 Cover
9 Vent grid
10 Container
11 Engine housing
12 Electric brush
13 Base
FUNZIONAMENTO DELLA
PROLUNGA TELESCOPICA
Allungare la prolunga tirandola e
bloccarla ruotando l’apposita ghiera
in senso antiorario.
OPERATING THE TELESCOPING
EXTENSION
Extend the telescoping extension by
pulling it; block it by turning the
dedicated ring nut counter-clockwise.
MESSA IN FUNZIONE SYSTEM START-UP

AVVIAMENTO
DELLA SPAZZOLA
Appoggiare il piede sulla scritta PUSH
e inclinare il corpo aspirante.
STARTING THE BRUSH
Put your foot on the PUSH sign and
tilt the vacuum-cleaner body.
INDICATORE RIEMPIMENTO
FILTRO
Se la valvolina sacco pieno diventa
rossa verificare:
a) se il sacchetto raccoglipolvere è pieno
b) se la spazzola è intasata
c) se il tubo aspirante è intasato, in
tal caso eliminare l’intasamento
d) se il filtro Hepa è completamente intasato
È normale che, durante l’aspirazione, la
valvolina sacco pieno diventi parzialmen-
te rossa in quanto il tubo viene chiuso
quasi completamente.
FILTER FULL INDICATOR
If the “bag full” gauge turns red,
please verify:
a) whether the dust bag is full, or
b) whether the brush is clogged, or
c) whether the vacuuming hose is
clogged; in these cases, remove
the obstruction
d) whether the Hepa filter is fully
clogged.
It is normal that during vacuuming the
“bag full” gauge partially turns red,
because the hose is closed.
CONTROLLO DELLA SPAZZOLA
Il dispositivo di controllo della spaz-
zola regola costantemente il funzio-
namento della stessa:
Luce verde: la spazzola funziona cor-
rettamente
Luce rossa: la spazzola è bloccata
o è sottoposta ad eccessive
sollecitazioni.
Spegnere l’apparecchio, staccare
la spina e controllare la causa del
blocco.
CHECKING THE BRUSH
The brush-checking device
continuously monitors the operation
of the brush:
Green light: the brush is working
correctly
Red light: the brush is either blocked
or it is undergoing excessive stress.
Turn the machine off, detach the plug
from the mains, and look for the
cause of the blocking.
SOSTITUZIONE DEL SACCHETTO
FILTRO
Rimuovere la portina. Posizionare il
sacco carta nel contenitore inserendo
il manicotto portasacco nel foro del
sacco carta e spingendo l’anello di
sicurezza finchè non è a fine corsa.
Se il sacchetto filtro non è posiziona-
to correttamente non sarà possibile
richiudere la portina.
REPLACING THE FILTER BAG
Remove the cover. Place the dust bag
into the container, by inserting the
bag-holding sleeve into the dust bag
hole and by pushing the safety ring
all the way in.
If the filter bag is not placed
correctly, closing the cover will be
impossible.
MANUTENZIONE MAINTENANCE

ELIMINAZIONE DI INTASAMENTI
DEL CONDOTTO ESTERNO
Eventuali intasamenti del condotto si
eliminano sfilando la prolunga tele-
scopica dalla sua sede, mettendo in
funzione l’aspirazione, chiudendo l’a-
spirazione con la mano ad intermit-
tenza. Evitare di inserire oggetti per
eliminare l’occlusione del tubo.
REMOVING CLOGGING DEBRIS
FROM THE OUTER DUCT
Any material clogging the duct can
be removed by extracting the tele-
scoping extension from its seat,
operating the vacuuming function,
and intermittently opening and
closing the vacuuming by hand.
Do not insert objects into the duct in
order to remove any clogging.
A
SOSTITUZIONE DEL FILTRO
Sfilare il supporto del filtro e sostituirlo
o pulirlo sbattendolo leggermente
(sostituirlo circa ogni 20 sacchetti).
REPLACING THE FILTER
Pull out the filter holder and replace
the filter, or clean it by tapping it
lightly (replace it approximately every
20 bags).
SOSTITUZIONE DEL FILTRO HEPA;
SOSTITUZIONE O PULIZIA DEL
PREFILTRO
Azionare il cursore “A” per sganciare
la griglia di ventilazione e contempo-
raneamente fare slittare la stessa (nel
senso della freccia) liberandola.
Il prefiltro è alloggiato nel vano di
uscita aria sotto il filtro Hepa.
Sostituire o pulire il prefiltro lavandolo
con acqua, asciugarlo e riposizionarlo
con cura nel vano. Rimontare il filtro
Hepa e la griglia di ventilazione facen-
dola slittare fino a sentire lo scatto del
cursore agganciato.
REPLACING THE HEPA FILTER;
REPLACING OR CLEANING THE
PRE-FILTER
Pull latch “A” in order to unhook the
vent grid; at the same time, slide it
(in the direction shown by the arrow)
so that it comes free. The pre-filter is
housed in the air exhaust under the
Hepa filter. Replace the pre-filter or
clean it, by washing it with water;
dry it and carefully replace it in its
housing. Assemble the Hepa filter and
the vent grid again, by sliding it all the
way in until you hear the latch
snapping into place.
ELIMINAZIONE DI INTASAMEN-
TI DEL CONDOTTO INTERNO
Portare il gruppo aspirante in oriz-
zontale allineato con l’elettrospazzo-
la. Togliere le viti del basamento,
togliere il basamento.
Disintasare il condotto aiutandosi con
uno scovolino flessibile.
REMOVING CLOGGING DEBRIS
FROM THE INNER DUCT
Lay the vacuuming body down
horizzontally, flush with the electric
brush. Unscrew the base screws,
remove the base. Remove any
clogging material from the duct by
using a flexible cleaning rod.

SOSTITUZIONE DEL RULLO
Rimuovere le viti del basamento,
togliere il basamento e togliere il
rullo sfilando i supporti. Inserire il
rullo facendo attenzione a posiziona-
re correttamente sia i supporti rullo
nelle apposite sedi che la cinghia,
tenendola in guida prima sulla puleg-
gia motore e poi sulla puleggia del
rullo. Rimontare il basamento.
REPLACING THE ROLLER
Unscrew the base screws, remove
the base, and remove the roller by
sliding the holders off.
Insert the roller, paying attention to
the correct installation of both the
roller holders into their seats and of
the belt, keeping it in the guide on
the engine pulley first and then on
the roller pulley. Reassemble the
base.
INSTALLAZIONE DEL MOTORE
Posizionare il blocchetto in gomma
del supporto motore sull’apposito
sostegno orientato, appoggiare sopra
il motore ruotandolo fino a trovare
l’incastro corretto nella sua sede.
Montare il primo anello di guarnizio-
ne sul motore, poi il distanziale e
successivamente il secondo anello di
guarnizione.
INSTALLING THE ENGINE
Place the rubber block of the engine
holder onto its dedicated, oriented
supporting element. Place the engine
over it, rotating it until you find the
correct joint into its seat. Install the
first grommet ring on the engine,
then the spacer, and finally the
second grommet ring.
Per staccare il contenitore motore
togliere la portina sacco carta, sgan-
ciare la griglia di ventilazione e
rimuovere le quattro viti dal guscio.
In order to disassemble the engine
housing, remove the dust bag cover,
unhook the vent grid and unscrew
the four screws from the shell.
RIMOZIONE DEL COPERCHIO
DELL’ ELETTROSPAZZOLA
Svitare le viti dal fondo rimuovendo il
coperchio.
REMOVING THE ELECTRIC
BRUSH COVER
Unscrew the screws from the bottom
and remove the cover.

SOSTITUZIONE DELLA SCHEDA
ELETTRONICA
Sfilare la scheda dalle guide e scolle-
gare il connettore. Staccare dal mor-
setto i due cavetti di alimentazione, e
sostituire la scheda.
REPLACING THE ELECTRONIC
BOARD
Slide the board off the guides and
detach the connection. Disconnect
the supply wires from the terminal
and replace the board.
SMONTAGGIO DELLO SNODO
Rimuovere le viti dal carter. Sollevare
il coperchio e liberare lo snodo.
Rimuovere le viti dal bloccacavo del
gruppo aspirante. Sfilare lo snodo.
Togliere le viti dal bloccacavo dell’e-
lettrospazzola e liberare i fili dalla
scheda. Sfilare lo snodo dal cavo.
DISASSEMBLING THE JOINT
Unscrew the case screws. Lift the
cover and free the joint. Unscrew the
cable-holder screws from the vacuu-
ming device. Slide the joint off.
Unscre the cable-holder screws from
the electric brush and free the board
wires. Slide the joint off the cable.
ATTENZIONE!!
Prima di effettuare qualsiasi
manutenzione, staccare sempre
la spina di alimentazione.
Rivolgetevi sempre, per ogni
manutenzione, ai centri assistenza
autorizzati.
IMPORTANT!!
Before attempting any maintenance
job, always detach the power plug
from the mains.
For all maintenance jobs, always
contact our authorised service cen-
tres.

1
5
2
4
3
PARTI DI RICAMBIO
1 - Filtro Hepa
2 - Profumatore
3 - Sacchetto filtro
4 - Filtro
5 - Prefiltro
SPARE PARTS
1 - Hepa filter
2 - Perfume dispenser
3 - Filter bag
4 - Filter
5 - Pre-filter
1
2
3
4
5
ACCESSORI IN DOTAZIONE
1 - Pennello
2 - Lancia
3 - Manicotto curvo
4 - Tubo flex
5 - Prolunga estensibile
ACCESSORIES PROVIDED
1 - Small brush
2 - Thin tip
3 - Curved sleeve
4 - Hose
5 - Telescoping extension
DATI TECNICI /
SPECIFICATION
Potenza motore di aspirazione /
Vacuum motor power
Potenza motore di trazione /
Traction motor power
Capacità sacco carta /
Dust bag capacity
Larghezza della superficie pulente /
Working surface
Peso /
Weight
Livello di rumorosità /
Noisiness level
Voltaggio /
Voltage
Scheda elettronica, blocco motore /
Electronic card, motor blocking
14”
1000 W
150 W
6,5 l
350 mm
6,94 Kg
68,2 dB(A)
Inclusa
16”
1000 W
150 W
6,5 l
400 mm
7,04 Kg
68,2 dB(A)
Provided
100-120-230 Volt / 50-60 Hz
La ditta costruttrice si riserva di poter apportare qualsiasi modifica senza preavviso /
The manufacturer reserves the right to make any modification without prior notice.
MM
MM
ON
OFF
On/Off switch
Electronic board
Vacuuming
engine
Electric
brush
engine
Electric brush
microswitch
SCHEMA ELETTRICO
Attenzione, interventi sull’impianto
elettrico devono essere eseguiti sol-
tanto da personale esperto.
ELECTRIC DIAGRAM
Caution! Any job involving the elec-
tric plant must be carried out only by
qualified personnel.


Die Beachtung der hier unten angeführten
Ratschläge garantiert die maximale Leistung, die
maximale Dauer und hohe Sicherheit des Geräts.
• Das Gerät nicht mittels Lösungsmitteln reinigen, der
Körper und das Zubehör sind aus Plastik und können
dadurch beschädigt werden
• Das Gerät nicht ins Wasser eintauchen.
• Das Gerät nicht im Wasser reinigen.
• Das Gerät während des Betriebs nicht unbeachtet lassen.
• Das Gerät nicht neben Wärmequellen ablegen.
• Nach jeder Benutzung des Geräts den Speisestecken aus
der Steckdose ausziehen.
• Falls der Speisestecker und die Steckdose beschädigt
wären, sie gleich bei einem berechtigten Hilfezentrum
ersetzen lassen.
• Das Gerät nicht als Flüssigkeitssauger benutzen.
• Vor jeder Wartungs- und Ersetzungstätigkeit, den Stecker
des Geräts aus der Steckdose ausziehen.
• Brennende Stummeln oder entzündliche Stoffe nicht sau-
gen.
• Den Stecker nur durch die Betätigung auf dem Körper des
selben und nicht auf dem Kabel ausziehen.
• Nur und ausschließlich Original- Beutel und Filter benut-
zen.
N.B.
Die Baufirma behält sich vor, jegliche Änderung ohne
Vorankündigung durchführen zu können.
L’observation des conseils mentionnés ci-dessous
garantit un rendement optimal de l’appareil, une
durée maximale et une sécurité élevée.
• Veuillez ne pas utiliser de solvants pour nettoyer l’appa-
reil car le corps et les accessoires sont en matières pla-
stiques et ils risquent donc de s’endommager.
• Veuillez ne pas plonger l’appareil dans l’eau.
• Veuillez ne pas laisser l’appareil sans surveillance pen-
dant qu’il est en fonction.
• Veuillez ne pas placer l’appareil près des sources de cha-
leur.
• Veuillez décrocher la fiche d’alimentation de la prise de
courant après toute utilisation de l’appareil.
• Si le câble d’alimentation et la prise de courant semblent
endommagés, veuillez agir de façon à ce qu’ils soient
remplacés auprès d’un centre d’assistance autorisé.
• Veuillez ne pas utiliser l’appareil pour l’aspiration des
liquides.
• Avant toute opération de maintenance ou de remplace-
ment, veuillez décrocher la fiche de l’appareil de la prise
d’alimentation.
• Veuillez ne pas aspirer de mégots qui ne sont pas com-
plètement éteints ou de matières inflammables.
• Veuillez décrocher la fiche en agissant seulement sur le
corps et non pas sur le câble.
• Veuillez utiliser des sachets et des filtres seulement si
originaux.
N.B.
La société constructrice se réserve le droit de faire
des modifications à tout moment sans préavis.
ACHTUNG!!
Vor jeder Wartung, den Speisestecker
immer abziehen.
Für jede Wartung sich immer an die
berechtigten Hilfezentren wenden.
ATTENTION !!
Avant d’effectuer toute opération de main-
tenance et d’entretien, veuillez toujours
décrocher la fiche d’alimentation.
Adressez-vous toujours, pour toute opéra-
tion de maintenance et d’entretien, aux
centres d’assistance autorisés.
1
2
3
5
8
6
4
7
9
12
13
10
11
ANSCHLUß DES SCHLAUCHS
Die drehbare Muffe in die
Beutelträgermuffe einsetzen, die
zweite drehbare Muffe in die
Teleskopische einsetzen und den
Schlauch am Handgriff einhängen.
BRANCHEMENT DU TUYAU FLE-
XIBLE
Vous devez emboîter le manchon
pivotant dans le manchon porte
sachet, puis introduire le second
manchon pivotant dans la rallonge
télescopique et enfin accrocher le
tuyau flexible au manchon.
COMMERCIAL
1 Ergonomischer Handgriff
2 Speisekabel
3 Schlauch
4 Teleskopische Verlängerung
5 Schalter
6 Handgriff für den Transport
7 Kabelwickler
8 Türchen
9 Luftkühlungsgitter
10 Container
11 Motorhülle
12 Elektrobürste
13 Basis
COMMERCIAL
1- Poignée ergonomique
2- Câble d’alimentation
3- Tuyau flexible
4- Rallonge télescopique
5- Interrupteur
6- Poignée pour le transport
7- Enrouleur de câble
8- Petite porte
9- Grille de ventilation
10- Petite caisse
11- Boîtier conteneur du moteur
12- Brosse électrique
13- Base
ANWENDUNG DER TELESKOPI-
SCHEN VERLÄNGERUNG
Die Verlängerung durch Ziehen
erweitern und sie durch
Linksdrehung der geeigneten
Nutmutter einspannen.
FONCTIONNEMENT DE LA RAL-
LONGE TELESCOPIQUE
Tirez la rallonge et bloquez-la en vis-
sant l’embout correspondant dans le
sens contraire des aiguilles d’une
montre.
INBETRIEBSETZUNG MISE EN FONCTION

INBETRIEBSETZUNG DER
BÜRSTE
Den Fuß auf die Schrift PUSH drüc-
ken und den Sauger schrägstellen.
MISE EN MARCHE DU BALAI
Appuyez sur la touche PUSH avec
vos pieds et inclinez le corps qui
aspire.
DER ANZEIGER FÜR FILTERVER-
STOPFUNG
Wenn das Ventil für Voll-Beutel rot
wird, prüfen:
a) ob der Staubbeutel voll ist
b) ob die Bürste verstopft ist
c) ob das Saugrohr verstopft ist, in
diesem Fall die Verstopfung entfernen
d) ob der Hepa Filter ganz verstopft ist
Es ist normal dass, während des
Saugens das Vollbeutel-Ventil teilwei-
se rot wird, da das Rohr fast ganz
geschlossen wird.
INDICATEUR DE NIVEAU MAXIMAL
DE REMPLISSAGE DU FILTRE
Si la petite soupape qui indique que le sachet
est plein devient rouge veuillez vérifier :
a) si le sachet ramasse-poussières est plein
b) si le balai est bouché
c) si le tuyau qui aspire est bouché et dans
ce cas vous devez éliminer l’obstruction
d) si le filtre Hepa est complètement bouché
Il est tout à fait normal que, pendant l’aspira-
tion, la petite soupape qui indique que le
sachet est plein devienne en partie rouge
étant donné que le tuyau est presque com-
plètement bouché.
KONTROLLE DER BÜRSTE
Die Bürstenkontrollvorrichtung regu-
liert ständig den Betrieb derselben:
Grünes Licht: Die Bürste arbeitet
richtig
Rotes Licht: Die Bürste ist blockiert
oder ist übermäßigen Aufforderung
ausgesetzt.
Den Apparat abstellen, den Stecker
ausziehen und die Ursache der
Blockung prüfen.
CONTROLE DU BALAI
Le dispositif de contrôle du balai
règle de façon constante le fonction-
nement de celui-ci :
- Lumière verte : le balai fonctionne
correctement
- Lumière rouge : le balai est bloqué
ou bien il est soumis à des contrain-
tes excessives.
Eteignez l’appareil, décrochez la
fiche et contrôlez la cause de l’arrêt.
ERSETZUNG DES FILTERBEUTELS
Das Türchen entfernen. Den
Papierbeutel in den Container setzen
die Beutelträger-Muffe in das
Papierbeutelloch einsteckend und
den Sicherheitsring bis zum
Laufende schieben. Wenn der
Filterbeutel nicht korrekt eingesetzt
ist, wird es nicht möglich sein das
Türchen zuzumachen.
REMPLACEMENT DU SACHET FILTRE
Enlevez d’abord la petite porte. Ensuite vous
devez placer le sachet en papier dans le boî-
tier approprié en emboîtant le manchon
porte sachet dans le trou du sachet en papier
et en poussant la bague de sécurité jusqu’à
ce qu’elle soit en fin de course. Si le sachet
filtre n’est pas placé de façon correcte il vous
sera impossible de fermer la petite porte.
WARTUNG ENTRETIEN

ENFERNUNG VON VERSTOP-
FUNGEN DES ÄUSSEREN
ROHRS
Eventuelle Verstopfungen des Rohres
werden entfernt durch Herausziehen
der teleskopischen Verlängerung aus
ihrem Sitz, die Ansaugung inbetrieb-
setzend, mit der Hand die Ansaugung
intermittierend versperrend.
Vermeiden, Dinge hineinzustecken,
um die Verstopfung des Rohres zu
entfernen.
ELIMINATION DES OBSTRUC-
TIONS DU CONDUIT EXTERNE
Les obstructions éventuelles du con-
duit s’éliminent en défilant la rallon-
ge télescopique de son logement, en
mettant en fonction l’aspiration, en
bloquant l’aspiration à l’aide de la
main à intermittence. Evitez d’intro-
duire des objets pour éliminer l’ob-
struction du tuyau.
A
ERSETZUNG DES FILTERS
Den Filterträger herausziehen und
ersetzen oder ihn leicht klopfend reini-
gen (ihn ungefähr nach 20 Beutel
ersetzen)
REMPLACEMENT DU FILTRE
Faites glisser le support du filtre et
remplacez-le ou bien nettoyez-le en le
secouant légèrement (veuillez pourvoir
à le remplacer environ tous les 20
sachets).
ERSETZUNG DES HEPA FILTERS;
ERSETZUNG ODER REINIGUNG
DES PREFILTERS
Den Cursor „A” betätigen, um das
Luftkühlungsgitter loszulösen und
gleichzeitig dasselbe freilassend gleiten
lassen (in der Richtung des Pfeiles)
Der Vorfilter ist im Luftraum unter dem
Hepa Filter eingesetzt. Den Vorfilter
ersetzen oder ihn mit Wasser waschen,
ihn trocknen und in den Raum sorgfäl-
tig wiedereinsetzen. Den Hepa Filter
und das Luftkühlungsgitter wiederein-
setzen, es bis zum Klicken des ange-
henkten Cursors gleiten lassen.
REMPLACEMENT DU FILTRE
HEPA ; REMPLACEMENT OU
NETTOYAGE DU PREFILTRE
Activez le curseur « A » afin de décro-
cher la grille de ventilation et faites-la
glisser simultanément (en suivant le
sens de la flèche) en la libérant.
Le préfiltre est placé dans la boîte de
sortie d’air sous le filtre Hepa. Veuillez
remplacer et nettoyer le préfiltre en le
lavant avec de l’eau, en l’essuyant et
en le plaçant à nouveau avec soin
dans la boîte. Montez à nouveau le fil-
tre Hepa et la grille de ventilation en
la faisant glisser jusqu’à entendre le
déclic du curseur accroché.
ENTFERNUNG VON VERSTOP-
FUNGEN DES INNEREN ROHRS
Den Saugsatz in Horizontal-Stellung,
mit der Elektrobürste ausgerichtet,
bringen. Die Schraube von der Basis
entfernen, die Basis entfernen. Das
Rohr mittels einer biegsamen
Flaschenbürste frei machen.
ELIMINATION DES OBSTRUC-
TIONS DU CONDUIT INTERNE
Amenez le groupe qui aspire dans la
position horizontale, aligné avec la
brosse électrique. Enlevez les vis de
la base, retirez la base. Enlevez les
éléments qui bouchent le conduit par
l’intermédiaire d’une petite brosse
flexible.

ERSETZUNG DER WALZE
Die Schrauben von der Basis entfer-
nen, die Basis entfernen und die
Walze durch das Ausziehen des
Trägers entfernen. Die Walze einset-
zen, Achtung geben, sowohl die
Walzeträger in der geeigneten Sitz
als auch den Riemen richtig einzu-
setzen, den Riemen erst in Bahn an
der Motorscheibe und dann an der
Walzescheibe haltend. Die Basis wie-
dermontieren.
REMPLACEMENT DU ROULEAU
Veuillez retirer les vis de la base,
enlever la base et enfin le rouleau en
retirant les supports. Introduisez le
rouleau en faisant attention à placer
correctement soit les supports du
rouleau dans les logements adéquats
soit la courroie en la tenant avant sur
la poulie du moteur et puis sur la
poulie du rouleau. Montez à nouveau
la base.
EINSETZUNG DES MOTORS
Den Gummiblock des Motorträgers
auf den geeigneten ausgerichteten
Träger stellen, auf den Motor lehnen
und bis zum richtigen Schlitz in sei-
nem Sitz drehen. Den ersten
Dichtungsring am Motor einsetzen,
dann das Zwischenstück und später
den zweiten Dichtungsring (einset-
zen).
INSTALLATION DU MOTEUR
Placez l’élément en caoutchouc du
support du moteur sur le support
correspondant orienté, ensuite
posez-le sur le moteur et faites-le
tourner jusqu’à ce que l’emboîture
dans le logement soit correcte.
Montez le premier joint sur le moteur,
puis l’élément séparateur et par la
suite le deuxième joint.
Um die Motorhülle abzuhängen, das
Papierbeutel-Türchen entfernen, das
Luftkühlungsgitter abhängen und die
vier Schrauben von der Schale ent-
fernen.
Afin de détacher le boîtier conteneur
du moteur enlevez la petite porte du
sachet en papier, détachez la grille
de ventilation et enlevez les quatre
vis de la coquille.
ENFERNUNG DES DECKELS DER
ELEKTROBÜRSTE
Die Schrauben von dem Boden
aufschrauben zur Entfernung des
Deckels.
ENLEVEMENT DU COUVERCLE
DE LA BROSSE ELECTRIQUE
Dévissez les vis du fond en enlevant
le couvercle.

ERSETZUNG DER ELEKTRONI-
SCHEN KARTE
Die Karte von den Schienen auszie-
hen und den Verbinder lösen. Von
den Klammern die zwei Speisekabel
abnehmen und die Karte ersetzen.
REMPLACEMENT DE LA FICHE
ELECTRONIQUE
Retirez la fiche des guides et décro-
chez le connecteur. Décrochez de la
borne les deux fils d’alimentation et
remplacez la fiche.
DEMONTAGE DES GELENKS
Die Schrauben vom Kasten entfer-
nen. Den Deckel heben und das
Gelenk lösen. Die Schrauben vom
Kabelhalter des Saugsatzes entfer-
nen. Das Gelenk ausziehen. Die
Schrauben vom Kabelhalter der
Elektrobürste entfernen und die
Drähte von der Karte lösen. Das
Gelenk aus dem Hohlraum ziehen.
DEMONTAGE DE LA ROTULE
Enlevez les vis de la boîte (carter).
Soulevez le couvercle et libérez la
rotule. Enlevez les vis de l’élément
qui bloque le câble du groupe qui
aspire. Faites glisser la rotule.
Enlevez les vis de l’élément qui blo-
que le câble de la brosse électrique
et libérez les fils de la fiche. Faites
glisser la rotule du câble.
ACHTUNG!!
Vor jeder Wartung, immer den
Speisestecker ausziehen.
Für jede Wartung sich immer an die
berechtigten Hilfezentren wenden.
ATTENTION
Avant d’effectuer toute opération
d’entretien et de maintenance, veuil-
lez toujours décrocher la fiche d’ali-
mentation.
Adressez-vous toujours, pour toute
opération de maintenance, aux cen-
tres d’assistance autorisés.

1
5
2
4
3
ERSATZTEILE
1- Hepa Filter
2- Deodorant
3- Filterbeutel
4- Filter
5- Vorfilter
PIECES DE RECHANGE
1- Filtre Hepa
2- Parfumeur
3- Sachet filtre
4- Filtre
5- Préfiltre
1
2
3
4
5
ZUBEHÖR IN DER AUSSTAT-
TUNG
1- Pinsel
2- Düse
3- Gebogene Muffe
4- Schlauch
5- Ausziehbare Verlängerung
ACCESSOIRES COMPRIS
1- Pinceau
2- Lance
3- Manchon courbe
4- Tuyau flexible
5- Rallonge extensible
TECHNISCHE DATEN / DONNEES TECHNIQUES
Kraft des Saugmotors /
Puissance du moteur d’aspiration
Kraft des Antriebmotors /
Puissance du moteur de traction
Nutzbares Papierbeutelvolumen /
Capacité du sachet en papier
Breite der Reinigungsfläche /
Largeur de la surface nettoyante
Gewicht /
Poids
Geräuschentwicklung /
Niveau de la bruyance
Spannungsversorgung /
Voltage
Elektronische Karte, Motorblockung /
Fiche électronique, bloc du moteur
14”
1000 W
150 W
6,5 l
350 mm
6,94 Kg
68,2 dB(A)
anliegend
16”
1000 W
150 W
6,5 l
400 mm
7,04 Kg
68,2 dB(A)
Incluse
100-120-230 Volt / 50-60 Hz
Die Baufirma behält sich vor, jegliche Änderungen ohne Vorankündigung durchführen zu können.
La société constructrice se réserve le droit de faire des modifications à tout moment sans préavis.
MM
MM
ON
OFF
On/Off switch
Electronic board
Vacuuming
engine
Electric
brush
engine
Electric brush
microswitch
ELEKTRISCHES SCHEMA
Achtung, Eingriffe an der elektri-
schen Anlage dürfen nur von berech-
tigten Personen durchgeführt wer-
den.
SCHEMA ELECTRIQUE
Attention, les interventions sur l’in-
stallation électrique doivent être
effectuées par le personnel expert en
la matière.
This manual suits for next models
1
Table of contents
Other Floorpul Vacuum Cleaner manuals

Floorpul
Floorpul PL 40P WD User manual

Floorpul
Floorpul W1 User guide

Floorpul
Floorpul PL603 I WD User manual

Floorpul
Floorpul ROXY User manual

Floorpul
Floorpul PL 12P WD User manual

Floorpul
Floorpul RX eco FORCE 380e User manual

Floorpul
Floorpul SC 604 PVC User manual

Floorpul
Floorpul PL603 I WD User manual

Floorpul
Floorpul Mikros User manual
Popular Vacuum Cleaner manuals by other brands

Black & Decker
Black & Decker NSVA315J manual

Morphy Richards
Morphy Richards GrimeBuster steam cleaner instructions

LG
LG VK8820UHAY owner's manual

Nilfisk-ALTO
Nilfisk-ALTO SSE 350 operating instructions

Taski
Taski vacumat 44T user guide

cecotec
cecotec CONGA ROCKSTAR MULTICYCLONIC XL ANIMAL PLUS instruction manual