pag. 5
PL 12P WD
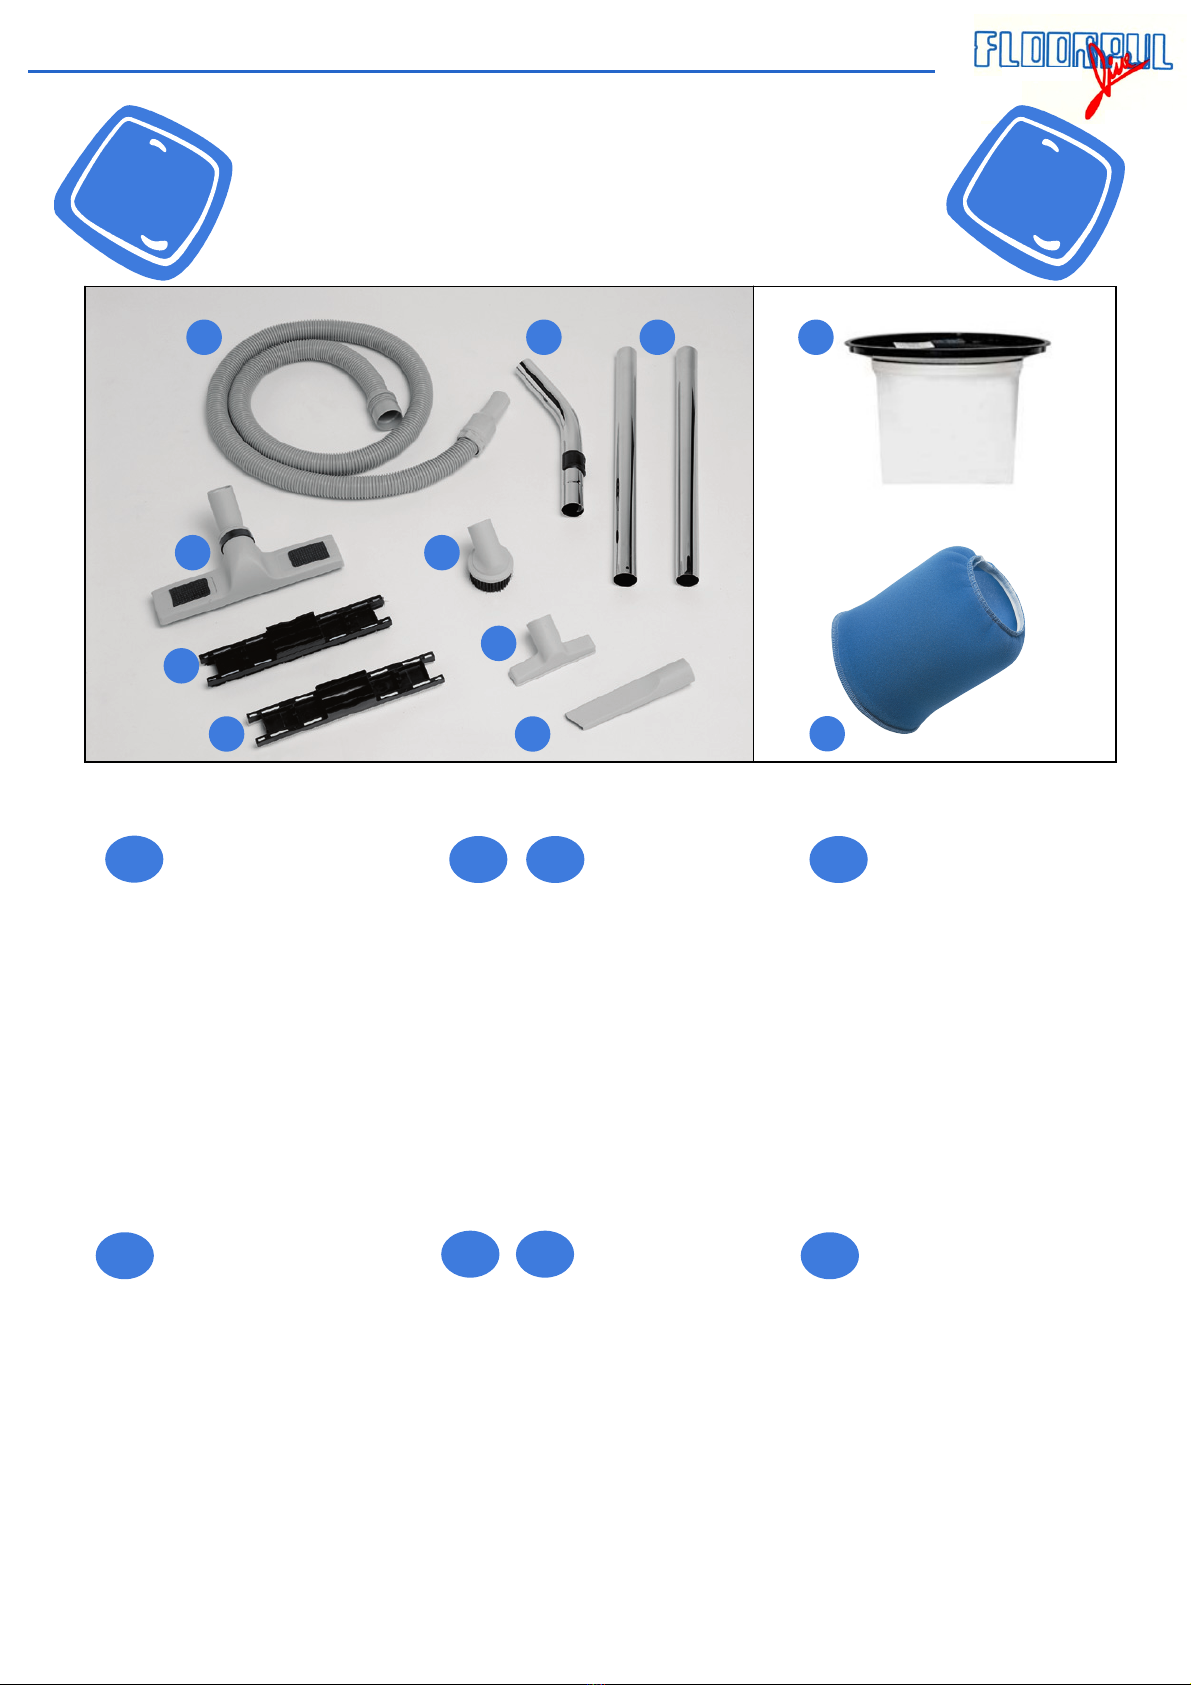
Gerätebeschreibung, Description, Descrizione dell’apparecchiatura,
Description, Omschrijving, Descripción
BD I
F
GB BNL E
2
1 - 2
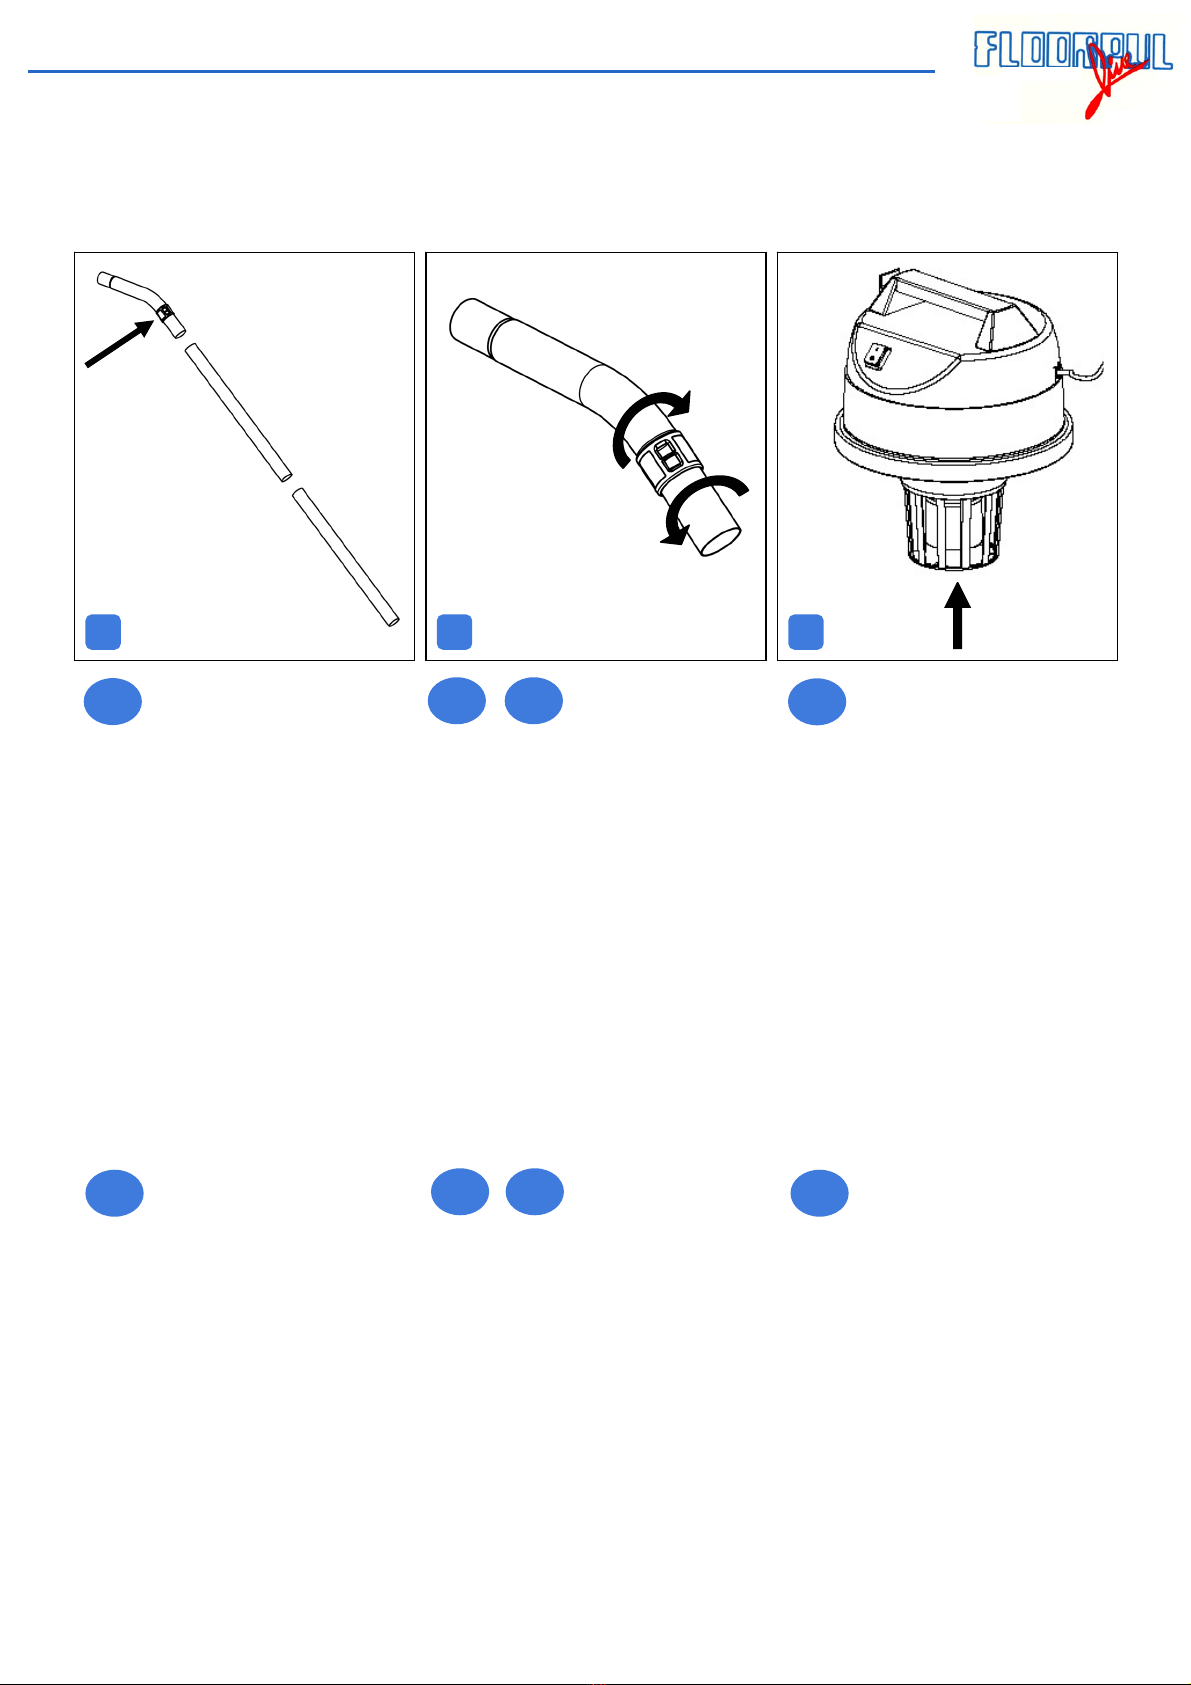
Regolazione meccanica della forza
aspirante: si può regolare la forza
aspirante, a seconda delle necessità,
agendo sulla parte superiore dell’asta
di aspirazione.
3
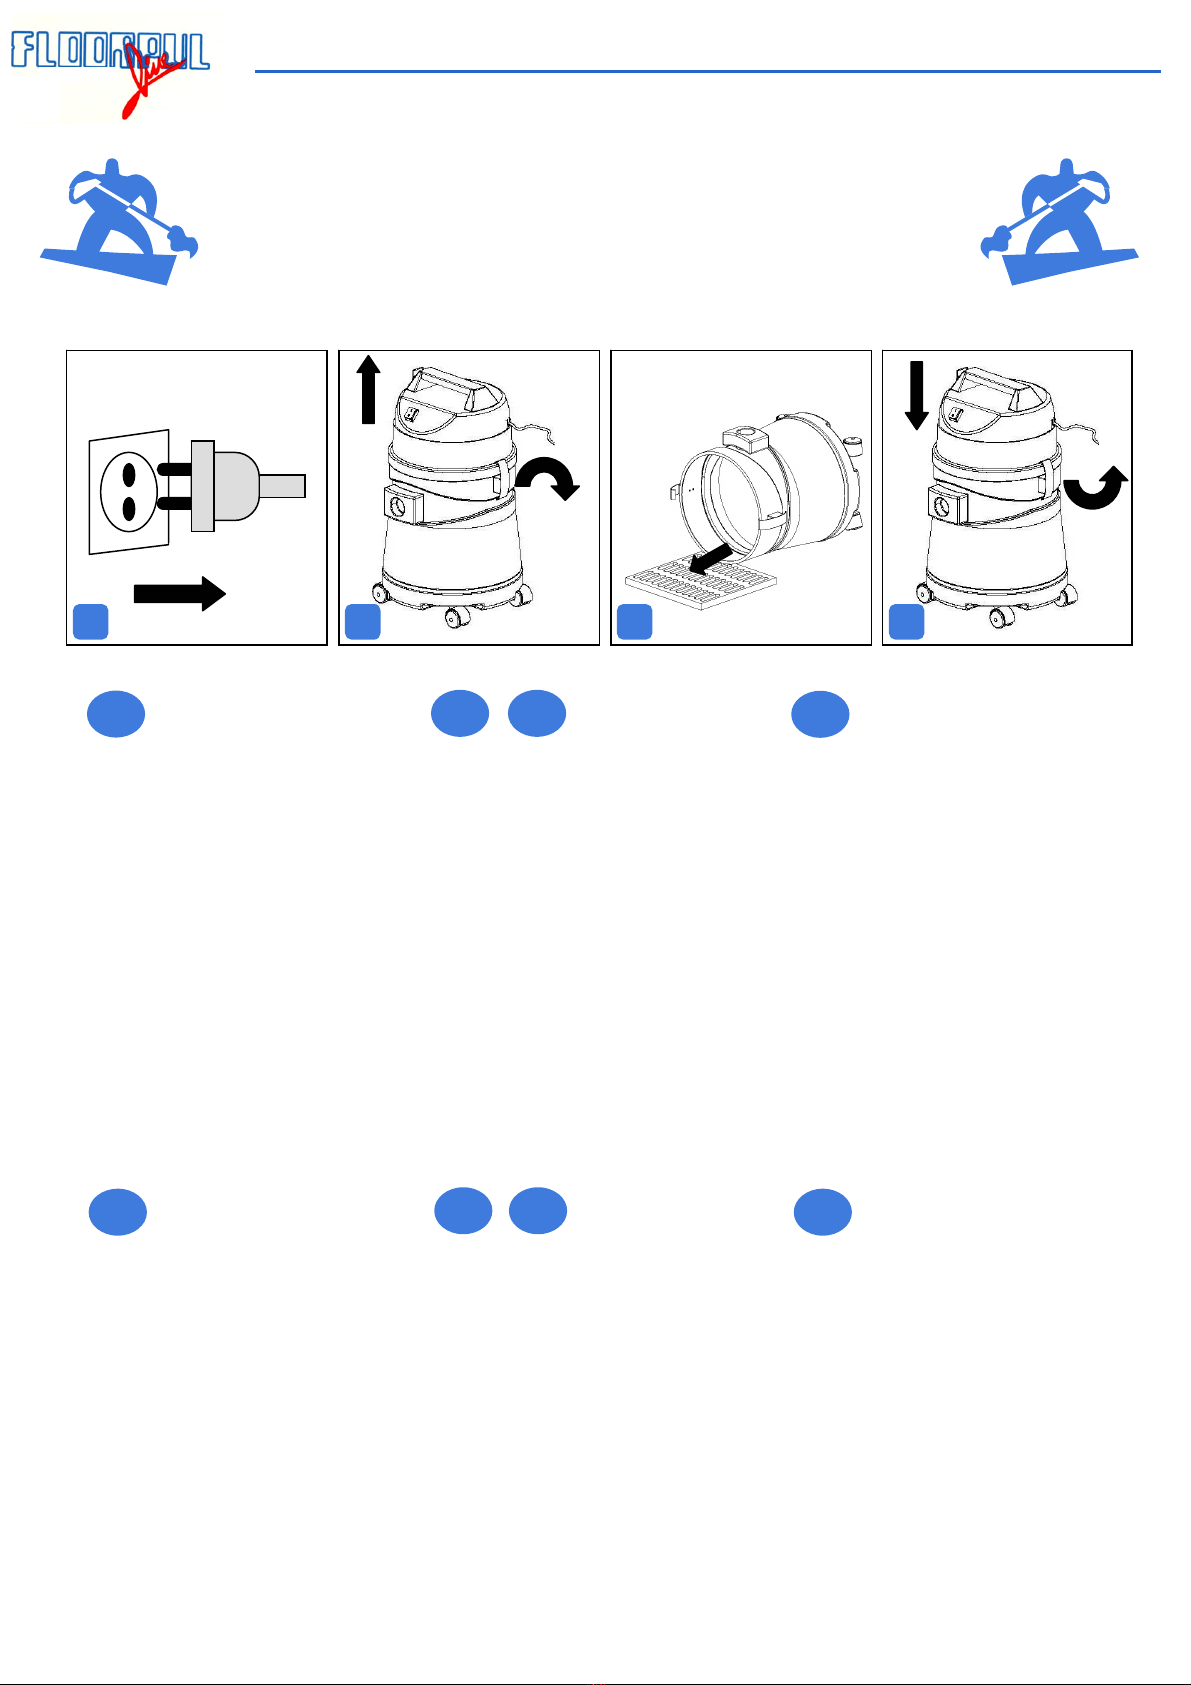
L'apparecchio è dotato di uno speciale
dispositivo che interrompe
l'aspirazione quando il fusto ha
raggiunto la massima capienza. Per
svuotare il fusto seguire le istruzioni.
Attenzione: per aspirare liquidi
particolarmente densi (acqua chimica
con trucioli, fango, foglie) utilizzare lo
speciale filtro in nylon (optional).
1 - 2
Réglage mécanique de la puissance
d’aspiration: un dispositif monté sur
la partie supérieure de la canne
d’aspiration permet d’adapter la
puissance d’aspiration au type de
travail à effectuer.
3
L'aspirateur est doté d'un dispositif
spécial qui interrompt l'aspiration
quand la cuve est arrivée à sa
capacité maximale; dans ce cas
vider la cuve comme illustré.
Attention: pour aspirer des liquides
très dense (eau avec déchets, boue,
feuilles) utiliser le filtre nylon
spécifique (en option).
1 - 2
With the mechanical suction control
on the upper part of the suction
tube, suction power can be adjusted
to the type of surface to be
vacuumed.
3
The vacuum cleaner is equipped
with a system which stops the
suction when the tank has reached
its maximum capacity. When this
occurs empty the tank, following the
instructions. Attention: for suction
of particular thick liquids (chemical
water with shavings, mud, leaves)
use the special nylon filter
(optional).
1 - 2
Mechanische Saugkraftregulierung:
Am oberen Teil des Saugrohres
kann die Saugleistung, je nach
Arbeitseinsatz, reguliert werden.
3
Der Wassersauger ist mit einem
Sicherungssystem ausgestattet,
dass das Saugen einstellt, wenn die
maximale Kesselkapazität erreicht
ist. Für das Aufsaugen von
besonders dickflüssigen
Flüssigkeiten (verunreinigtes
Wasser mit Grobpartikeln, Schlamn,
Laubresten) bitte den speziell dafür
vorgesehenen Nylon – Filter
benutzen.
1 - 2
Regulación mecánica de la fuerza de
aspiración: en la parte superior del
tubo de aspiración se puede regular la
fuerza de aspiración para adaptarla al
tipo de trabajo que se realice en cada
caso.
3
El aparato está dotado de un
dispositivo especial que interrumpe la
aspiración cuando el bidón alcanza su
máxima capacidad. Vaciar el bidón
como se indica. Atención: para la
aspiración de líquidos particularmente
densos (agua química con virutas,
barro, hojas) utilizar el filtro especial
de nylon (opcional).
1 - 2
Mechanische zuigkrachtregeling:
men kan met behulp van de
zuigkrachtregelaar aan de
bovenzijde de zuigkracht regelen,
afhankelijk van de toepassing
3
De waterzuiger heeft een
beveiliging, die de werking van de
machine onderbreekt wanneer de
maximum capaciteit is bereikt, als
dit gebeurd tank legen.
Let op: Voor opzuigen van dikke
vloeistoffen (met spaanders/modder
of bladeren) de speciale optionele
nylon filter gebruiken.
1
Min
Max
3