Page 8 of 18
www.florencemailboxes.com
93421 Rev C
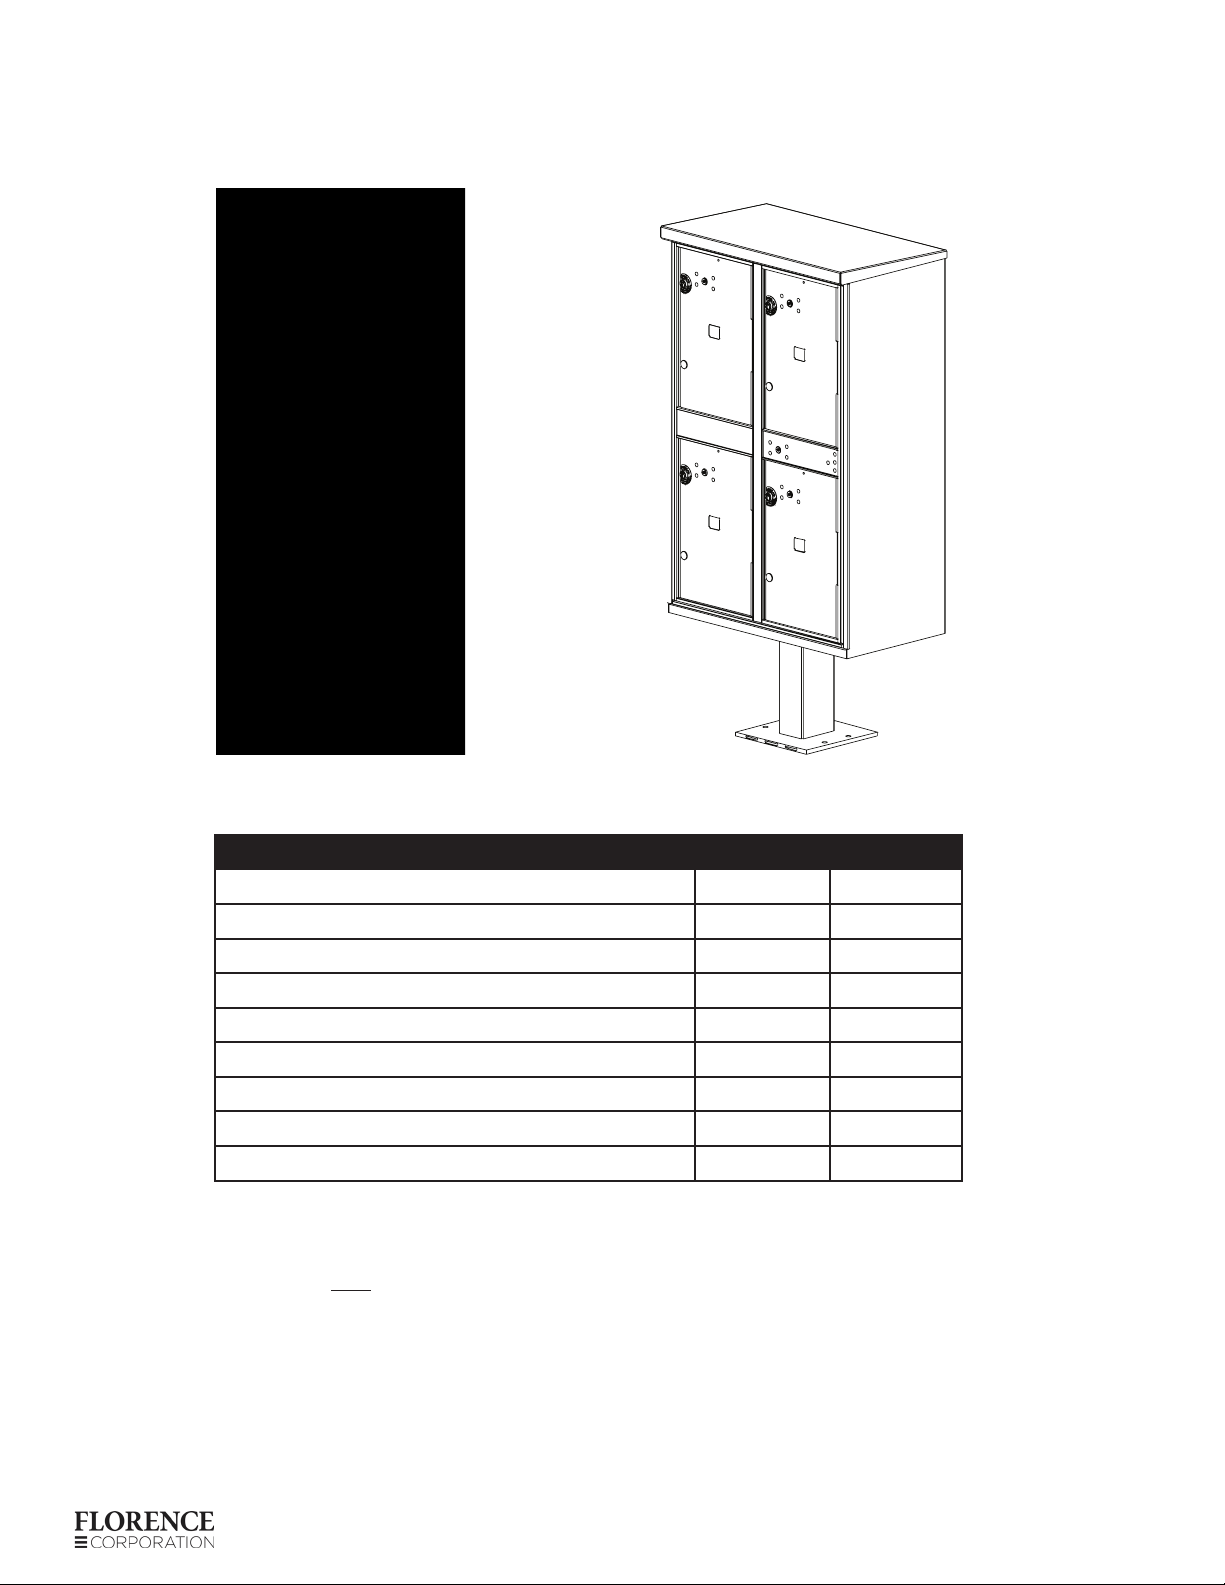
PEDESTAL INSTALLATION AND LEVELING
valiant™outdoor parcel locker - 1590 Series
In the event the concrete pad the OPL is being installed on is not level, the pedestal may be adjusted.
There are a number of leveling techniques used by construction professionals; however, the following
leveling method is being suggested as one alternative to consider.
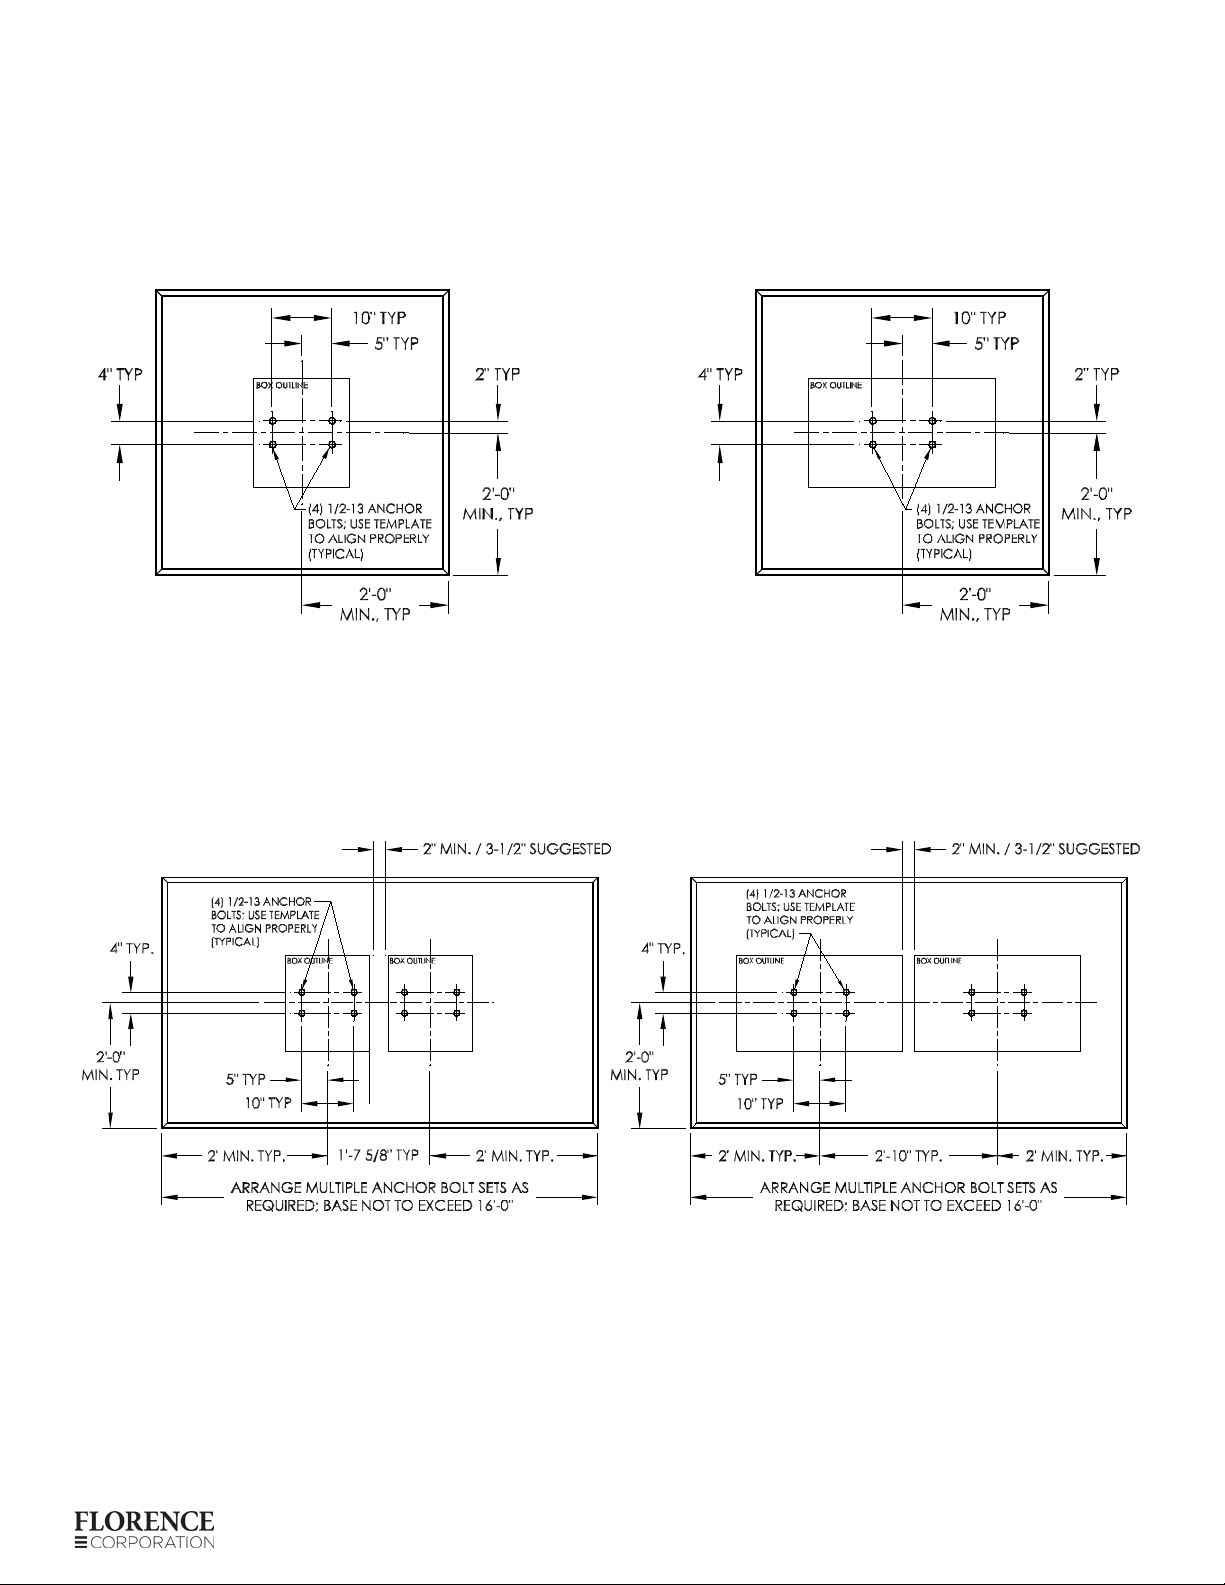
If embedded anchors are not already in place in existing concrete, determine placement and location
for anchors. (See “Concrete Foundation Preparation” guide in prevous section for anchor recommen-
dations and placement dimensions.)
•Tape pedestal base template to concrete in proper location(s).
•Drill holes through template to proper depth.
•Remove template and debris.
•Pound anchors in place.
1. Install Anchors (Skip if existing concrete and anchors are already in place)
•Place rubber pad over anchors onto concrete pad.
•Place pedestal over rubber pad and check if level.
•If leveling is required, shim pedestal with up to 3 washers on a given bolt.
•Washers, if required, should be placed between rubber pad and bottom of pedestal base.
•Check for level.
2. Use Pedestal to Check for Level
•Pedestal can now be installed according to anchoring hardware manufacturer’s
instructions. (Anchor hardware shown for illustration purposes and is not included with unit.
For anchoring system information, please see “Concrete Foundation Preparation” section,
page 7.)
•Continue to next section to install OPL cabinet to pedestal.
3. Install Pedestal to Concrete
PART # DESCRIPTION
91121 PEDESTAL
91500 RUBBER PAD
REQUIRED TOOLS
REFER TO ANCHORING MFG INSTRUCTIONS