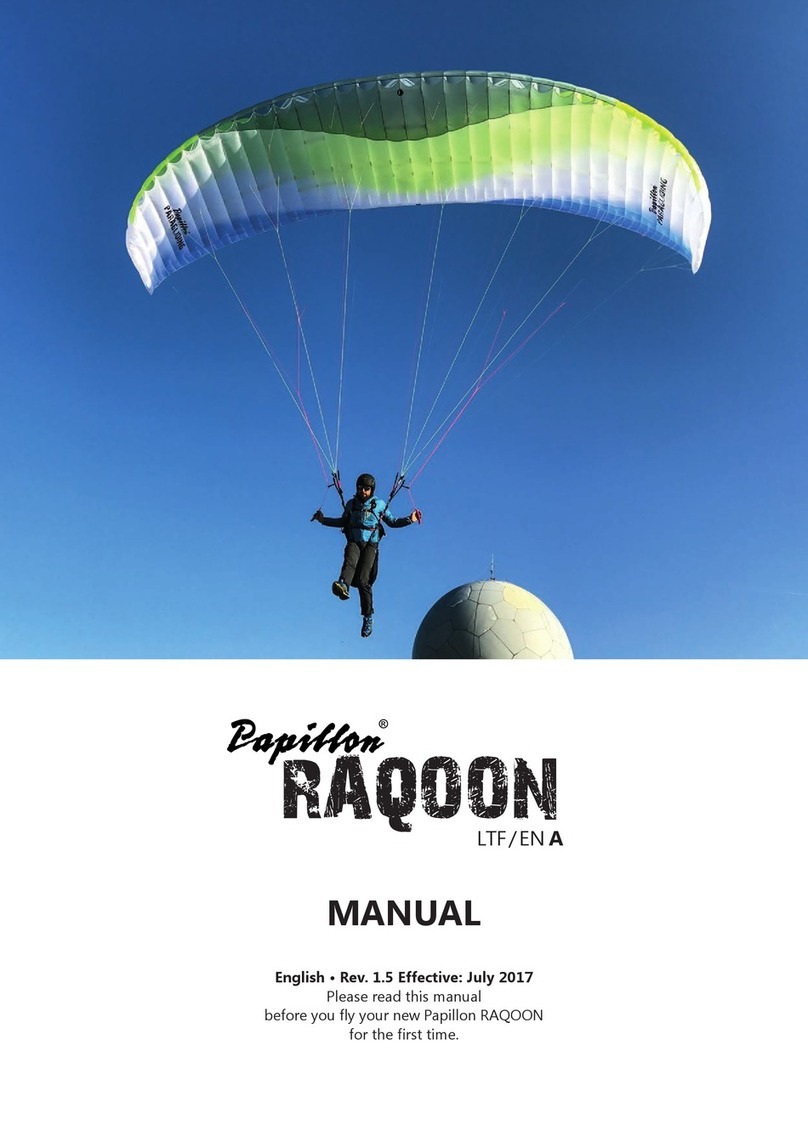
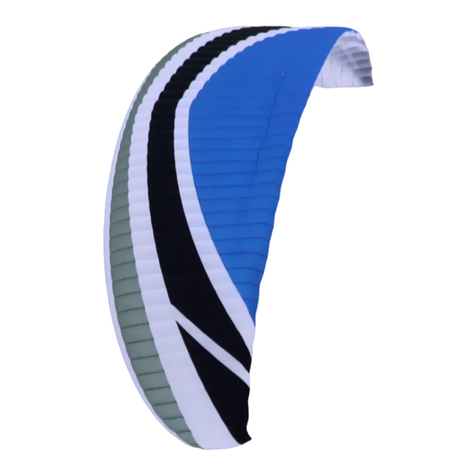
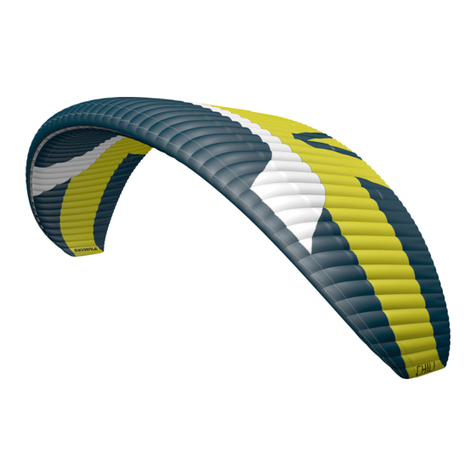
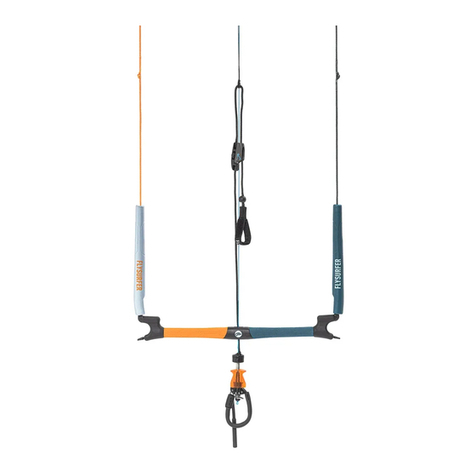
Flow Paragliders freedom2 XS User manual


WELCOME
“Flow is a term used to describe the complete (body-mind-soul) feeling of being so totally engaged in an activity that there is a sense of complete
immersion in the experience. Self-conscious thoughts give way to feeling at one with the activity and the environment, and time is no longer an
ever-present consideration.”
The experience of flying a paraglider is what inspires us. The pure, focused concentration, the feeling of complete immersion with the environment,
and the intrinsic pleasure in the activity itself are all sure signs of the flow experience.
Thank you for flying Flow Paragliders. We recommend that you read this manual before the first flight. This manual is designed to help you to
quickly familiarize with this beautiful glider.

Table of Contents
1. General Information ...................................................................1
2. Certification ................................................................................1
3. Pilot’s Profile...............................................................................2
4. Specifications ..............................................................................3
5. Take-off and Flying Techniques....................................................5
5.1. Before Take-off ........................................................................5
5.2. Take-off ...................................................................................5
5.3. Landing ....................................................................................6
5.4. Turning.....................................................................................6
6. Rapid Descent .............................................................................6
6.1. Spiral Dive ................................................................................6
6.2. B-line Stall ...............................................................................7
6.3. Big Ears ...................................................................................7
7. Performance ...............................................................................7
7.1. Use of Brakes ..........................................................................7
7.2. Use of Speed Bar .....................................................................7
7.3. C Riser Steering – Ergonomic handles .....................................8
8. Asymmetric & Frontal Collapses .................................................8
8.1. Asymmetric Collapse ...............................................................8
8.2. Frontal Collapse ......................................................................9
9. Full Stall .....................................................................................9
10. Flying without Brakes .................................................................9
11. Cravats .................................................................................... 10
12. SIV............................................................................................ 10
13. Adjustment of the Harness ....................................................... 11
14. Maintenance & Checks ............................................................. 12
14.1. Maintenance Tipps..........................................................12
14.2. Periodic Inspections ........................................................13
15. Warranty.................................................................................. 13
16. Summary.................................................................................. 13
17. Line Plan................................................................................... 14
18. Riser Diagram ........................................................................... 15
19. Overall Illustration .................................................................... 16
20. Materials .................................................................................. 17
21. Overall Measurements.............................................................. 18
21.1. Bridle Check Lengths Freedom2 XS (mm) .......................18
21.2. Bridle Check Lengths Freedom2 S (mm) .........................19
21.3. Bridle Check Lengths Freedom2 M (mm) .......................20
21.4. Bridle Check Lengths Freedom2 L (mm) .........................21
22. Line Types ................................................................................ 22
22.1. Line type and individual measurements XS (mm) ..........22
22.2. Line type and individual measurements S (mm) ............23
22.3. Line type and individual measurements M (mm) ...........24
22.4. Line type and individual measurements L (mm) ............25

1
General Information
User manual for Freedom2 XS, S, M and L.
This manual offers all the necessary information that will familiarise you with the main characteristics of your FREEDOM2. Although this manual
informs you about your glider, it does not offer the instruction requirements necessary for you to be able to pilot this type of wing. Flying instruction
can only be taught at a paragliding school recognized by the flying federation of your country. Nevertheless, we remind you that it is important
that you carefully read all the contents of the manual for your new Freedom2.
The Freedom2 has been certified as EN B, having met all the requirements of EN 926-2 / 2022 and LTF NFL II 91/09.
Please note that any changes to the paraglider will invalidate the result of the certification. Correct usage of the glider is the pilot‘s responsibility.
The manufacturer and distributor do not accept liability for loss or damage as a result of the misuse of this paraglider. It is the pilot’s responsibility
to comply with legal regulations and to maintain the airworthiness of the aircraft.
User manual version V01.05, dated: 06/2022.
Flow Paragliders PTY LTD – 7/249 Scottsdale Drive, Robina QLD 4226, Australia – [email protected]om.au

2
PILOT’S PROFILE
Freedom2 is fun and exciting paraglider with class-leading performance designed as a safe mid to high end EN-B class glider. It has numerous
technological advancements that are of easy operation to extract its full potential.
Freedom2 is a beginner/ intermediate type glider, especially designed for pilots looking to progress safely and consolidate their flying skills; either
chasing their first long-distance XC flights or honing their competency at their local hill.
The Freedom2 is a EN B and has a high level of passive safety nonetheless “active flying” is required when flying this glider, especially in thermic
air. It should not be used as a school glider.
Despite Freedom2 being an EN-B glider, we have used the technology learnt from our high performance 2-liners, like the XCRacer and Spectra2
and combined them in an accessible package. The Freedom2 is a hybrid 3 to 2 liner where we used the best of both technologies in one glider.
Freedom2 has its race pedigree on an obedient platform allowing increased levels of safety and glider control.
On cascade one and two we have a traditional 3 liner layout and on the outermost cascade, we have a 2-liner layout. To combine those 2 distinct
line-layouts we designed a sophisticated yet simple to use risers.
Freedom2’s efficient and easy to use riser setup brings the connection Pilot / glider to the EN-B class, only experienced on 2-liners before.
The ergonomic C handles will help the pilot feel more connected to the glider while gliding at speed. Freedom2 risers allow the pilot to fly the
glider while on bar, changing AoA rather than distorting the profile. The result is a more enjoyable and efficient exercise and less need to come off
the bar to use the brakes in severe turbulence.
We opted to use a pitch stable air-foil translating to a much more enjoyable experience. Which gives to the package a glider which is less prone to
collapses and oscillations, so the pilot is let to concentrate on what is more important, to read the conditions and fly with a freer mind.
New “A-attachment points” offering better structural integrity and geometrical support to the leading edge. Increasing stability not only at trim
but especially at speed when the profile is at extreme angles of attack. This ultimately translates to a more enjoyable and comfortable flying
experience.

3
The combination of all the design solution and technology results in a glider which is both a dream to fly but with an excellent level of true
performance of its class and it’s a GAME CHANGING glider for the EN B class. Special attention was also given on the handling, especially the turn
ability whilst circling in thermals. For us at Flow paragliders we are delighted by how the glider behaves and it is hands down one of the most
pleasant gliders we’ve ever flown, simply a joy to fly.
Please note that any changes to the paraglider will invalidate the result of the certification. Correct usage of the glider is the pilot‘s responsibility.
The manufacturer and distributor do not accept liability for loss or damage as a result of the misuse of this paraglider. It is the pilot’s responsibility
to comply with legal regulations and to maintain the airworthiness of the aircraft.

4
SPECIFICATIONS
XS
S
M
L
FLAT AREA
22.40 m2
24.00 m2
26.00 m2
27.50 m2
PROJECTED AREA
19.10 m2
20.47 m2
22.12 m2
23.45 m2
FLAT WINGSPAN
11.35 m
11.74 m
12.23 m
12.57 m
PROJECTED SPAN
9.21 m
9.53 m
9.92 m
10.20 m
ASPECT RATIO
5.75
5.75
5.75
5.75
PROJECTED AR
4.44
4.44
4.44
4.44
MAX CHORD
2.48
2.57
2.68
2.75
NUMBER OF CELLS
60
60
60
60
GLIDER WEIGHT
4.5 kgs
4.75 kgs
4.9 kgs
5.2 kgs
TAKE OFF WEIGHT
65-80 kgs
70-95 kgs
85-108 kgs
105-122 kgs
CERTIFICATION
LTF/EN B
LTF/EN B
LTF/EN B
LTF/EN B

5
TAKE-OFF, FLIGHT, AND FLYING TECHNIQUES
Freedom2 should be flown as a normal paraglider. However, there are several points listed below which should help you to familiarize with your
new paraglider.
Freedom2 was designed as a foot launchable solo paraglider and can also be tow-launched. It is the pilot’s responsibility to use suitable harness
attachments and release mechanisms and to ensure that they are correctly trained on the equipment and system employed.
Before Take-off
•Check that the lines are not damaged or tangled.
•Check that the risers are not damaged or twisted.
•Check that the brake handles are correctly attached and that each line runs freely through the pulley
•Check if the quick links connection between lines to the risers are undamaged and tightened.
•Check if the speed system works freely and that the lines are long enough.
•Check the canopy for rips or tears. Also, inspect the internal structure (ribs, diagonals) and seams.
Take-off
Lay the paraglider out with the leading edge in a horseshoe shape. Hold the A risers close to the quick links and move forward until the lines get
stretched. You should now be perfectly centred with your wing. With no wind or light headwind, with lines stretched, The Freedom2 inflates
rapidly and rises over your head easily. We recommend that you do not pull risers too forward or down, which could cause a collapse of the leading
edge, but simply follow them until the glider reaches its angle of flight. It is important that the centre of gravity of your body stays in front of your
feet during the inflation of the glider to constantly load the risers. A controlled inflation allows you to check the canopy and lines during the last
phase as it comes up a quick check on the brakes helps the wing to overshoot. Depending on the wind conditions or the slope, an adequate use
of brakes can help you to take-off quicker.

6
Landing
Because of the exceptional glide for this type of glider, high caution is recommended in the stages of approaching and landing. The Freedom2 is a
reasonably fast glider, and precision on with brakes inputs is required, especially when near the ground. It is therefore recommended to execute
the first flights in a familiar environment and under easy conditions. With negative steering, there is more time for the manoeuvres to be
performed steadily, which results in reducing the pendulum movements of the paraglider. Reminder: Negative steering involves applying the
brakes symmetrically by about 25% of the maximum range to slow the paraglider and a simultaneous turning by means of releasing the outside
brake. Speeding up just prior to landing allows a more effective flare and therefore a gentler landing.
Turning
Freedom2 was designed to perform well in turns. Negative steering (see above) on one hand slows the paraglider in certain phases of the flight
and on the other hand reduces excessive rolling during turn reversals. It is not only designed to turn (with approx. 25% brake) but also to fly slowly
in order to help identify the areas of lift and to keep the paraglider flatter to minimize the sink rate in a turn (with 15% brake). Symmetrical brake-
input at 20-25 % enables you to keep your wing under control – to brake further when pitching and to release when the canopy banks up.
RAPID DESCEND
Techniques
In order to descend, the paraglider must fly away from the areas of lift. In case any problems occur, the following techniques might be used to
increase the sink rate.
•
Spiral Drive
:The Flow Freedom2 is a manoeuvrable wing which responds to any input easily. To initiate the spiral, apply one brake
progressively to about 35% and hold it in its position. The speed of rotation will increase progressively as well as the pressure on the brake
and the centrifugal force that is perceived. The angle or the speed of rotation can be decreased or increased by releasing or pulling the
brake by several centimetres. Once mastered the spiral allows you to descend by more than 10 m/s. Movements which are extremely
abrupt, or badly synchronized or very quick initiation of the spiral can result in an asymmetrical collapse or a spin. CAUTION:Spiral Dives
should be executed with care. To exit the spiral dive, the kinetic energy must be converted to potential energy by slowly releasing the
inside brake.

7
•
B-line Stall:
Due to the hybrid 3-2 line layout, B–line stall is not an efficient and stable descent manoeuvre on the Freedom2, therefore
not recommended.
•
Big Ears
: Big ears is a moderate descent method, reaching -3 or -4 m/s, speed reduces slightly between 3 and 5 km/h and piloting becomes
limited. The angle of attack and the wing loading also increases.
Push on the accelerator to restore the wing’s horizontal speed and the angle of attack. To activate ears, take the line
amain3
and
simultaneously, smoothly pull them outward and downward. The wingtips will fold in. Let go of the lines and the ears will re-inflate
automatically. If they do not re-inflate, gently pull on one of the brake lines first and then on the opposite side. For directional control while
using the Big Ears, use weight shift.
We recommend the pilot to re-inflate asymmetrically, to avoid unnecessary change on the angle of attack, more so if you are flying near
the ground or flying in turbulence.
PERFORMANCE & USE OF BRAKES
Use of Brakes
Freedom2 best glide is at a trim speed (no brakes) – about 39 km/h. The minimum sink rate is achieved by applying approx. 15% of the brakes.
When using more than 30% of the brakes, the aerodynamics and the performance of the glider are likely to deteriorate and the effort to
manoeuvre will increase quickly. In case of extremely high brake pressure there is a great risk of a stall. Which occurs at a full brake travel (100%
of the brakes) 65cm. In normal flying conditions the optimal position for the brakes, in terms of performance and safety, is within the top third
level of the braking range.
Use of Speed Bar
Flow Freedom2 is equipped with a speed system. The profile of Freedom2 has been designed to fly stable through its entire speed range. It is
useful to accelerate when flying in strong winds or in extreme descending air. For fitting and positioning the speed bar consult the instructions of
the harness manufacturer. Before every flight check that the speed bar works freely and that the lines are long enough to ensure that it is not
engaged permanently. Use of the speed bar increases the maximum speed of the paraglider by up to 30% of the trim speed. However, it does

8
reduce the angle of attack making the likelihood of having collapses higher than at trim speed. We therefore do not advise to use the speed bar
near the ground.
C Riser Steering – ergonometric handles
Freedom2 can be flown efficiently on rear riser handles. When gliding using the speed bar, the C handles can be used to steer the glider and
control the pitch to a more efficient glide. The C handles can also be used to catch deflations and for directional control while gliding at speed.
We recommend using the C handles every time when gliding at speed (when gliding using the speed system).
We do not recommend controlling the glider with the C handles when at trim speed. (only in case of failure of brake lines)
ASSYMETRIC & FRONTAL COLLAPSES
Despite the tests proving Freedom2 recovers on its own after collapses, it is a EN B glider therefore active piloting is recommended in real life, in
case of an asymmetric or frontal collapse. Active piloting will reduce the loss of altitude and a change of direction.
Asymmetric Collapse
Despite the great stability of the profile of the Freedom2, heavy turbulent conditions may cause part of the wing to collapse asymmetrically. This
usually happens when the pilot has not foreseen this possible reaction of the wing. To prevent the collapse from happening (or the catch the
collapse before it occurs), pull the brake line quickly and firmly corresponding to the affected side of the wing, this will increase the angle of attack
and pressurize the wing and most cases, if the reaction is swiftly, the collapse can be prevented.
If the collapse does happen, the Freedom2 will not react violently, the turn tendency is very gradual, and it is easily controlled. Most of the time,
asymmetric collapses are uneventful, and it will reopen quickly without the pilot’s input.
In case it doesn’t reopen instantly, the correct procedure is the following: Lean your body towards the side that is still flying to counteract the turn
and to maintain a straight course, if necessary, slightly slow down the opened side by applying brake. The collapse will normally open by itself but
if that does not happen, pump the side that is closed by using the brakes. Do this with a firm movement. You may have to repeat this operation to

9
provoke the re-opening. Take care not to over-brake on the side that is still flying. When the collapse has been solved; remember “hands-up” to
let the wing recover its flying speed.
Another great technique is to bring both brakes down symmetrically, quickly and swiftly, to speed up the reopening of the paraglider, and then
raise your hands back up immediately.
Frontal (Symmetric) Collapse
The profile of the Freedom2 has been designed to widely tolerate extreme changes in the angle of attack. A symmetric collapse may occur in
heavy turbulent conditions, on entry or exit of strong thermals. Symmetrical collapses usually re-inflate without the glider turning, but you can
symmetrically apply the brake with a quick deep pump to quicken the re-inflation. Release the brake lines immediately to recover optimum flight
speed.
FULL STALL
Certain behaviour or weather conditions can cause a full stall. This is a serious deviation from normal flight and can be difficult to manage. If a stall
occurs at less than 100 m above the ground, throw your reserve parachute. Main causes of a full stall:
•A poorly timed or an extensive use of brakes when the air speed of the wing is reduced.
•Soaked or heavily drenched leading edge (from rain or a cloud) can result in a stall due to an uneven airflow over the leading edge.
Whatever the cause, a full stall can be either symmetrical or a in a configuration of a spin.
Your first reaction should be to fully raise both hands. This normally allows the glider to return to normal flight but If nothing happens after a few
seconds, apply the speed bar to encourage the wing to regain normal flight. Ensure the glider has returned to normal flight (check your airspeed)
before using the brakes again.
FLYING WITHOUT BRAKES
If a brake line or pulley breaks, it is possible to fly the Freedom2 using the C-risers (rear riser). The movements must be well controlled as the
deformation of the wing, due to the traction on the C-risers, is greater than that produced by using the brakes.

10
CRAVATS
If your wingtip gets stuck in the lines, this is called a cravat. Due to the large amount of drag, cravats can turn your wing into a spiral dive very
quickly. This can be disorientating and difficult to control if allowed to develop. To recover from a cravat immediately, anticipate the movement
of the wing, first stabilise the direction of your wing, by applying opposite (outside) brake and weight shift. Once you have control of the rotation
and sink rate, and you are flying in a straight line or gentle turn, you’ll have 2 options:
1. Pull the stabilo line, the bright orange line, to clear the cravate.
2. Apply strong deep pumps of the brake on the cravated side whilst weight shifting away from the cravat. It is important to lean away from
the cravat otherwise you risk spinning or deepening the spiral. The aim is to empty the air out of the wing tip whilst it is unloaded. Correctly
done, this action should clear the cravat. If it is a very large cravat and the above options have not worked, then a full stall is another option.
This should not be attempted unless you know what you are doing and have a large amount of altitude. Remember, if the rotation is
accelerating and you are unable to re-open the wing or control the decent rate, you should throw your reserve parachute whilst you still
have enough altitude.
SIV
All manoeuvres should be carried out under supervision of experienced paragliding instructors, above water and with a rescue boat. We highly
recommend to all pilots.

11
ADJUSTMENT OF THE HARNESS
For test flights, the pilots used ABS harnesses with the following set-up:
SIZE
Distance from seat board
Distance between hang points
FREEDOM2 XS
43cm
44cm
FREEDOM2 S
43cm
46cm
FREEDOM2 M
43cm
46cm
FREEDOM2 L
43cm
46cm
We recommend adjusting the harness in a very similar way to the test adjustment. Excessive cross-bracing increases the risk of twisting the risers.
A looser setting will result in a tendency to lean towards the collapsed side. Lower hang points reduce the roll-stability of your harness and can
slow down the reopening of asymmetric collapses. Higher hang points (+ 2 up to +4 cm) have no influence on inflight safety and can therefore be
tolerated.

12
MAINTENANCE & CHECKS
Freedom2 is built semi-lightweight long lasting and yet robust ripstop, it is a fragile flying equipment and extra care should be taken. Special
attention to its maintenance should also be observed and as any flying aircraft it should be technically periodically checked to ensure proper
airworthiness.
Maintenance Tips
The life of your paraglider therefore depends largely on the care which you maintain and use it. To maximize life span of your wing, respect the
following rules:
•Avoid dropping the canopy on its top on its leading-edge during inflation or landing.
•Avoid dragging it across the ground when moving it.
•Avoid exposing your glider unnecessarily to sunlight.
•Choose a packing technique that doesn‘t damage the plastic rods and that doesn‘t crease the internal structure excessively. A
concertina type bag is the ideal bar for folding the Freedom2.
•Always use the protective bag to avoid direct contact with the harnesses and buckles of any friction between the paragliding ripstop and
the rucksack.
•Never store your paraglider when it is damp.
If immersed in sea water rinse immediately with fresh water. Do not use any detergents. Dry your paraglider away from direct light in a dry and
well-aired place.
Empty any foreign bodies from your paraglider regularly, for example sand, stones or animal or vegetable matter which may eventually decay.
Twigs, sand, pebbles, etc may damage the materials and ripstop in successive folds. Organic debris of vegetable and animal origin (insects) can
promote mould growth.

13
Periodic Inspections
The paraglider has undergone a series of tests during the production process and consequent flight tests before the delivery. It is delivered with
a standard brake setting same to the one used during the testing. Periodic Checks & Repairs: for safety reasons, it is recommended that the
paraglider is checked after 24 months, or after 100 hours. Whichever comes first. If anytime, however, there is a change in its behaviour your
paraglider should be checked immediately. The person performing the check should inform you about the condition of your glider and if some
parts will need to be checked or changed before the next normal service check period.
WARRANTY
Flow paragliders’ warranty covers any material defects or any production fault for two years or 250 hours since the date of purchase.
The guarantee does not cover:
•Damage caused by misuse
•Neglecting the regular maintenance
•Overloading or misuse of the glider
•Damage caused by inappropriate landings
SUMMARY
Safety is the single most important thing in our sport. We recommend to always be alert of the weather, fly as regularly as you can and ground
handle as much as possible. Practicing ground handling will keep your skills alive and will support your quick reactions and feel of the glider
especially when conditions at launch aren't perfect or the site is difficult.
Please always respect the weather! Monitor the conditions and the forecast closely and understand which conditions are right for your level of
flying or for flying in general. Lots of pilots get hurt due to misjudging weather conditions and we don't want you to be one of them.
We would also like to emphasise respecting our beautiful nature and wildlife is paramount, please look after your flying sites keeping pristine and
sustainable. If you need to dispose the wing, please don't dispose of it in the normal household waste but in an environmentally responsible way.
If you are unsure, please contact your local council.

14
LINE PLAN

15
RISER DIAGRAM
Size XS, S
*Difference should not be more than +/- 5mm
Size M, L
*Difference should not be more than +/- 5mm
NON-ACCELERATED
ACCELERATED
A
530mm
A
382mm
A1
530mm
A1
382mm
B
530mm
B
434mm
C
530mm
C
530mm
NON-ACCELERATED
ACCELERATED
A
530mm
A
365mm
A1
530mm
A1
365mm
B
530mm
B
424mm
C
530mm
C
530mm

16
OVERALL ILLUSTRATION

17
MATERIALS
In case of any doubts regarding the information in the manual contact your FLOW PARAGLIDERS dealer.
For spare parts or information in how to obtain them get in contact with us directly or with your local dealer.
Flow Paragliders PTY LTD – 7/249 Scottsdale Drive, Robina QLD 4226, Australia – info@flowparagliders.com.au
CANOPY
FABRIC CODE
SUPPLIER
Upper surface – Leading Edge
Porcher Skytex 38g
Porcher Industries - France
Upper surface
Porcher Skytex 32g
Porcher Industries - France
Bottom Surface
Porcher Skytex 32g
Porcher Industries - France
Internals
Porcher Skytex 32g
Porcher Industries - France
Leading Edge Reinforcement
2.5/1.8/ Nylon rods
Porcher Industries - France
Thread
210D/3, 420D/3
Coats Thread - Thailand
SUSPENTION LINES
FABRIC CODE
SUPPLIER
Upper Cascades
Liros DC 35,DC 60
LIROS GmbH - Germany
Middle Cascades
Edelrid 8000U /130/090/070/050kg
Liros PPSLS 65/125
EDELRID – Germany
LIROS GmbH - Germany
Main Lines
Liros PPSLS 180/125/65
LIROS GmbH - Germany
RISERS
FABRIC CODE
SUPPLIER
Shackles
Maillon Rapide
ANSUNG PRECISION - Korea
Riser Webbing
12mm zero stretch polyester webbing
Guth&Wolf GmbH - Germany
Pulleys
Pulleys Ronstan ball bearing
Ronstan - Australia
This manual suits for next models
3
Table of contents
Other Flow Paragliders Aircraft manuals
Popular Aircraft manuals by other brands
Ozone
Ozone Geo Pilot's manual
bautek Fluggeräte
bautek Fluggeräte Pico Owner's handbook
QuiQue's Aircraft
QuiQue's Aircraft Semi Scale Yak-54 Assembly manual
Gradient
Gradient BiGolden4 user manual

Strong Enterprises
Strong Enterprises DHT SET-400 with Canopy owner's manual
Piper
Piper SENECA II Service manual


