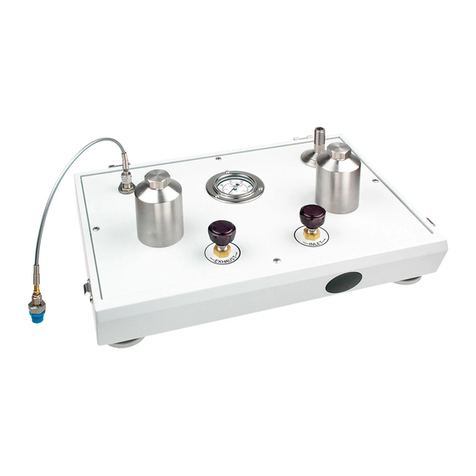
Fluke P5521 User manual

PN 3952208
November 2010
© 2010 Fluke Corporation. All rights reserved. Printed in USA. Specifications are subject to change without notice.
All product names are trademarks of their respective companies.
P5521 & P5522
Liquid Separator
Users Manual
Test Equipment Depot - 800.517.8431 - 99 Washington Street Melrose, MA 02176
TestEquipmentDepot.com

LIMITED WARRANTY AND LIMITATION OF LIABILITY
Each Fluke product is warranted to be free from defects in material and workmanship under normal use and
service. The warranty period is one year and begins on the date of shipment. Parts, product repairs, and
services are warranted for 90 days. This warranty extends only to the original buyer or end-user customer of
a Fluke authorized reseller, and does not apply to fuses, disposable batteries, or to any product which, in
Fluke's opinion, has been misused, altered, neglected, contaminated, or damaged by accident or abnormal
conditions of operation or handling. Fluke warrants that software will operate substantially in accordance
with its functional specifications for 90 days and that it has been properly recorded on non-defective media.
Fluke does not warrant that software will be error free or operate without interruption.
Fluke authorized resellers shall extend this warranty on new and unused products to end-user customers
only but have no authority to extend a greater or different warranty on behalf of Fluke. Warranty support is
available only if product is purchased through a Fluke authorized sales outlet or Buyer has paid the
applicable international price. Fluke reserves the right to invoice Buyer for importation costs of
repair/replacement parts when product purchased in one country is submitted for repair in another country.
Fluke's warranty obligation is limited, at Fluke's option, to refund of the purchase price, free of charge repair,
or replacement of a defective product which is returned to a Fluke authorized service center within the
warranty period.
To obtain warranty service, contact your nearest Fluke authorized service center to obtain return
authorization information, then send the product to that service center, with a description of the difficulty,
postage and insurance prepaid (FOB Destination). Fluke assumes no risk for damage in transit. Following
warranty repair, the product will be returned to Buyer, transportation prepaid (FOB Destination). If Fluke
determines that failure was caused by neglect, misuse, contamination, alteration, accident, or abnormal
condition of operation or handling, including overvoltage failures caused by use outside the product’s
specified rating, or normal wear and tear of mechanical components, Fluke will provide an estimate of repair
costs and obtain authorization before commencing the work. Following repair, the product will be returned to
the Buyer transportation prepaid and the Buyer will be billed for the repair and return transportation charges
(FOB Shipping Point).
THIS WARRANTY IS BUYER'S SOLE AND EXCLUSIVE REMEDY AND IS IN LIEU OF ALL OTHER
WARRANTIES, EXPRESS OR IMPLIED, INCLUDING BUT NOT LIMITED TO ANY IMPLIED WARRANTY
OF MERCHANTABILITY OR FITNESS FOR A PARTICULAR PURPOSE. FLUKE SHALL NOT BE LIABLE
FOR ANY SPECIAL, INDIRECT, INCIDENTAL, OR CONSEQUENTIAL DAMAGES OR LOSSES,
INCLUDING LOSS OF DATA, ARISING FROM ANY CAUSE OR THEORY.
Since some countries or states do not allow limitation of the term of an implied warranty, or exclusion or
limitation of incidental or consequential damages, the limitations and exclusions of this warranty may not
apply to every buyer. If any provision of this Warranty is held invalid or unenforceable by a court or other
decision-maker of competent jurisdiction, such holding will not affect the validity or enforceability of any other
provision.
Fluke Corporation
P.O. Box 9090
Everett, WA 98206-9090
U.S.A.
Fluke Europe B.V.
P.O. Box 1186
5602 BD Eindhoven
The Netherlands
11/99
To register your product online, visit register.fluke.com

i
Table of Contents
Chapter Title Page
1 Preparation .......................................................................................... 1-1
Introduction........................................................................................................ 1-1
How to Contact Fluke ........................................................................................ 1-1
Operating Fluid Compatibility........................................................................... 1-2
Safety Information ............................................................................................. 1-2
Safety Summary ............................................................................................ 1-2
Compressed Liquid........................................................................................ 1-2
Personal Protective Equipment...................................................................... 1-2
Symbols Used in this Manual ............................................................................ 1-2
Applying Pressure Corrections .......................................................................... 1-3
2 Connections......................................................................................... 2-1
Introduction........................................................................................................ 2-1
Test Port Insert .............................................................................................. 2-4
3 Operation ............................................................................................. 3-1
Priming .............................................................................................................. 3-1
Operation ........................................................................................................... 3-2
4 Maintenance & Servicing.................................................................... 4-1
Introduction........................................................................................................ 4-1
Diaphragm Replacement.................................................................................... 4-1
5 Ancillary Equipment............................................................................ 5-1
Angle Adapter, P5543........................................................................................ 5-1
Pointer Remover/Punch, P5551......................................................................... 5-2

P5521 & P5522
Users Manual
ii

iii
List of Tables
Table Title Page
1-1. Operating Fluid Compatibility ............................................................................... 1-2
1-2. Symbols.................................................................................................................. 1-2
2-1. Test Port Insert Parts .............................................................................................. 2-4
4-1. P5521/P5522 - Parts List........................................................................................ 4-5

P5521 & P5522
Users Manual
iv

v
List of Figures
Figure Title Page
1-1. Schematic of Separator/Deadweight Tester Arrangement ..................................... 1-3
2-1. Connecting the Gauge ............................................................................................ 2-2
2-2. Screw Assembly Down .......................................................................................... 2-2
2-3. Adjust the Gauge.................................................................................................... 2-3
2-4. Tighten the Gauge .................................................................................................. 2-3
2-5. Hand Tighten Only................................................................................................. 2-3
2-6. Test Port Insert ....................................................................................................... 2-4
3-1. Diagram of Stage 1................................................................................................. 3-2
3-2. Diagram of Stage 2................................................................................................. 3-2
3-3. Diagram of Stage 3................................................................................................. 3-3
4-1. Screw Torque Sequence......................................................................................... 4-2
4-2. Reservoir Assembly ............................................................................................... 4-3
4-3. Pressure Chamber Assembly.................................................................................. 4-4
5-1. Angle Adapter ........................................................................................................ 5-1
5-2. Pointer Remover/Punch.......................................................................................... 5-2

P5521 & P5522
Users Manual
vi

1-1
Chapter 1
Preparation
Introduction
This manual applies to the P5521 and P5522 Liquid Separators.
The Liquid Separator is used to separate the working fluid of the deadweight tester to
which it is fitted, from the working fluid in the device under test. This prevents
contamination of either hydraulic system, and allows calibration of the device in its
specific working fluid. See Schematic, 1-1, at the end of this Chapter.
Note
The term “Device Under Test (DUT)” in this document refers to any
pressure-measuring instrument such as Gauges, Transfer Standards,
Digital Calibrators and Transducers.
The two liquids are separated by flexible diaphragm held across the internal chamber.
How to Contact Fluke
To order accessories, receive operating assistance, or get the location of the nearest Fluke
distributor or Service Center, call:
•Technical Support USA: 1-800-99-FLUKE (1-800-993-5853)
•Calibration/Repair USA: 1-888-99-FLUKE (1-888-993-5853)
•Canada: 1-800-36-FLUKE (1-800-363-5853)
•Europe: +31-402-675-200
•China: +86-400-810-3435
•Japan: +81-3-3434-0181
•Singapore: +65-738-5655
•Anywhere in the world: +1-425-446-5500
Or, visit Fluke's website at www.fluke.com.
To register your product, visit http://register.fluke.com.
To view, print, or download the latest manual supplement, visit
http://us.fluke.com/usen/support/manuals.

P5521 & P5522
Users Manual
1-2
Operating Fluid Compatibility
The table below details the sealing materials used in the two versions of this instrument.
The P5521 is designed to work with a wide range of fluids compatible with Viton, but the
P5522 is specifically designed for use with Skydrol, brake fluids and other, similar
aggressive fluids compatible with PTFE and EPDM. The maximum working pressure of
the P5522 is limited to 7,000 psi / 500 bar, due to the PTFE diaphragm.
Table 1-1. Operating Fluid Compatibility
Model Diaphragm O Rings
P5521 (MWP 10,000 psi / 700 bar) Viton Viton
P5522 (MWP 7,000 psi / 500 bar) PTFE Ethylene Propylene
Safety Information
Safety Summary
The following are general safety precautions that are not related to any specific
procedures and do not appear elsewhere in this publication. These are recommended
precautions that personnel must understand and apply during equipment operation and
maintenance to ensure safety and health and protection of property.
Compressed Liquid
Use of compressed liquids can create an environment of propelled foreign matter.
Pressure system safety precautions apply to all ranges of pressure. Care must be taken
during testing to ensure that all hydraulic connections are properly and tightly made prior
to applying pressure. Personnel must wear eye protection to prevent injury.
Personal Protective Equipment
Wear eye protection approved for the materials and tools being used.
Symbols Used in this Manual
In this manual, a Warning identifies conditions and actions that pose a hazard to the
user. A Caution identifies conditions and actions that may damage the Liquid Separator.
Symbols used on the Liquid Separator and in this manual are explained in Table 1-2.
Table 1-2. Symbols
Symbol Description
BAC (Alternating Current)
JEarth Ground
WImportant Information: refer to manual
~Do not dispose of this product as unsorted
municipal waste. Go to Fluke’s website for
recycling information.

Preparation
Applying Pressure Corrections 1
1-3
Applying Pressure Corrections
For ease of operation, the liquid separator is designed to be mounted directly to the test
port on a deadweight tester. This creates an additional head of fluid above the pressure
reference level on the deadweight tester, which means that 0.15 psi / 0.1 bar
(or equivalent) should be deducted from the reading of the deadweight tester to maintain
accuracy.
The flexible diaphragm will be displaced from the center of the chamber during normal
operation, but its elastic properties will always tend to try to return it to central, neutral
position. This “spring” effect exerts a small force on the fluid. As there is no way to
determine the diaphragm’s position relative to the center of the chamber at any given
time, a “diaphragm rating” uncertainty of ±0.15 psi / 0.1 bar (or equivalent) should be
applied to the pressure reading to maintain accuracy.
Both of the above effects are relatively small “constant” errors, which can be important
when calibrating at low pressures, but become less significant as the pressure increases.
SEPARATOR
RESERVOIR
DEVICE
UNDER
TEST
SEPARATOR
DEAD WEIGHT
TESTER
RESERVOIR
DEAD WEIGHT
TESTER
SCREW PUMP
DEAD WEIGHT
TESTER
PCU
gkq005.eps
Figure 1-1. Schematic of Separator/Deadweight Tester Arrangement

P5521 & P5522
Users Manual
1-4

2-1
Chapter 2
Connections
Introduction
Fit the device under test (DUT) to the test port using the method described below:
WCaution
Ensure that all devices are internally clean and free from
contamination before connecting to the separator.
Particle contamination can damage or puncture the diaphragm
causing cross-contamination of both systems.
WWarning
DO NOT use Teflon/PTFE tape on these connections as this will
prevent correct sealing. The Gauge Adapter sealing system is
designed for hand-tight sealing up to 20,000 psi / 1,400
bar-wrenches or similar tools are not required—over tightening
can cause damage to threads or sealing faces.
Before connection, ensure that there is an O-ring fitted to the
test port.
Check that the sealing face of the device to be fitted is clean
and undamaged, as scratches or dents can form leak-paths.
Note
The thread on the test port, and the lower part of the gauge adapters is
LEFT-HANDED. The following procedure details the correct method for
mounting devices using these adapters:

P5521 & P5522
Users Manual
2-2
gkq006.bmp
Figure 2-1. Connecting the Gauge
1. Screw the appropriate gauge adapter fully on to the instrument to be tested.
2. Screw assembly down COUNTER-CLOCKWISE on to test port.
gkq007.bmp
Figure 2-2. Screw Assembly Down
Note
Hand-tight is sufficient; ensure that the bottom face contacts the O-ring on
the test port.

Connections
Introduction 2
2-3
gkq009.bmp
Figure 2-3. Adjust the Gauge
3. To adjust the position to face forward, hold the gauge adapter and turn the instrument
COUNTER-CLOCKWISE, so that it faces forward.
4. Hold the instrument steady, while turning the gauge adapter
COUNTER-CLOCKWISE until it pulls down onto the O-ring.
gkq010.bmp
Figure 2-4. Tighten the Gauge
gkq011.bmp
Figure 2-5. Hand Tighten Only

P5521 & P5522
Users Manual
2-4
Test Port Insert
For devices with 1/8 BSP or NPT mounting threads, the diameter of the thread is very
close to the effective sealing diameter of the O-ring fitted to the test port.
This can make it difficult to achieve a good seal. When mounting these devices, use the
test port insert as shown in Figure 2-6.
1
2
3
4
gkq013.eps
Figure 2-6. Test Port Insert
Table 2-1. Test Port Insert Parts
PART
Item Description
P5521 P5522
1 O Ring 3865163 3867888
2 Test Port Insert 3919892 3919892
3 O Ring 3883521 3867895
4 Test Port 3921119 3921119
To calibrate panel-mounted gauges with pressure connections in the rear, use an Angle
Adapter, (See Chapter 5, Ancillary Equipment).

3-1
Chapter 3
Operation
Priming
WWarning
To avoid damage to the instrument, the operator should check
the quality of the operating fluid during use. If the fluid
becomes discolored, cloudy or particles appear in the reservoir,
the system should be drained and flushed with clean fluid.
1. Fit the separator to the deadweight tester using the adapter supplied, as described in
Chapter 2, above.
2. Fit the DUT to the test port of the separator.
3. Rotate reservoir dust cover through ½ turn and fill reservoir (6) approximately ¾ full
with the appropriate fluid. Rotate dust cover back to cover reservoir.
4. Open separator reservoir valve (1) one turn counter-clockwise.
5. Open deadweight tester reservoir valve one turn counter-clockwise, and turn screw
press fully in.
6. Close reservoir valves on both separator and deadweight tester, and turn screw press
fully out.
7. Open separator reservoir valve.
8. Repeat steps 4 through 7 at least three times to fully prime the deadweight tester side
of the separator chamber.
Note
For devices with large or complex internal volumes, it may be necessary to
additionally repeat steps 4 through 7.
9. Close deadweight tester reservoir valve, turn screw press in to drive trapped air into
the separator reservoir.
WWarning
Ensure that the system pressure does not exceed 15 psi / 1 bar.
10. Open deadweight tester reservoir valve, and turn screw press fully in.
11. Close deadweight tester reservoir valve, turn screw press fully out, then close
separator reservoir valve (1).

P5521 & P5522
Users Manual
3-2
12. Open deadweight tester reservoir valve; wait for a few seconds to allow the system
pressure to equalize, then close the deadweight tester reservoir valve.
Operation
WWarning
Do not exceed the maximum working pressure of the
instrument.
Both sides of the hydraulic system are now primed, perform calibration of the DUT in
accordance with the normal operation of the deadweight tester.
Separator as first mounted to deadweight tester.
gkq002.eps
Figure 3-1. Diagram of Stage 1
The liquid is drawn into upper section of separator chamber (above diaphragm), from the
reservoir.
gkq001.eps
Figure 3-2. Diagram of Stage 2

Operation
Operation 3
3-3
The liquid from the deadweight tester is forced into lower section of separator chamber
(below diaphragm), displacing liquid and trapped air above diaphragm back into
reservoir.
gkq020.eps
Figure 3-3. Diagram of Stage 3

P5521 & P5522
Users Manual
3-4
This manual suits for next models
1
Table of contents
Other Fluke Water Filtration System manuals
Popular Water Filtration System manuals by other brands

Kingspan
Kingspan BF BIODISC Installation guidelines

Fresh Water Systems
Fresh Water Systems NWTS4 Series Operation & installation instructions

Prozone Water Products
Prozone Water Products Complete Sanitation System 15 instructions

SpectraPure
SpectraPure MAXCAP RO Installation and operating manual

Pentair
Pentair FLECK 2815 Service manual

Pneumatic Division
Pneumatic Division IS-F35 Installation & service instructions