Fluotec VegaLux 200 HP User manual

Stand Fitting 5/8”
G6FLT057
2 Safety Cables:
1 for barndoor
1 for fixture
G6FLT059
Barndoors - 8 Blades
G6LED121
Filter Holder
G6LED096
C-Clamp
G6FLT262
G6LED173
G6LED182 (Pole Operated)
VegaLux 200® HP
Tungsten StudioLED
FRESNEL®3100K
2.5
120VAC
G6LED174
G6LED183 (Pole Operated)
VegaLux 200® HP
Daylight StudioLED
FRESNEL®5700K
90-240V
MECHANICAL CHARACTERISTICS
MODEL DIMENSIONS WEIGHT
ELECTRICAL MEASUREMENTS
MAXIMUM VALUES
Peak Current [A]
Current [A]
Power [W]
Voltage [V]
11.22”x 11.29”x 18.46”
30.7 cm x 28.7 cm x 46.9 cm
7.28 kg
16.04 lb
1.64
197
VegaLux 200®HP StudioLED FRESNEL®is not a color mixing LED system.
There are dedicated Tungsten and Daylight color models.
Tungsten
Code: G6LED173
Code Pole Operated: G6LED182
Color Temperature: 3100K
Color Rendering Index (CRI): +93
Weight: 16.04 lb (7.28 kg)
Specs & Performance: Daylight & Tungsten Models
Daylight
Code: G6LED174
Code Pole Operated: G6LED183
Color Temperature: 5700K
Color Rendering Index (CRI): +93
Weight: 16.04 lb (7.28 kg)
Fuses & Power Consumption
Note - Most electrical equipment briefly consumes a higher amount of electrical
current during startup (ignition). Consult the chart below to confirm that your
electrical wiring is sufficient for the fixtures used. All fuses must be rated at
250VAC. VegaLux 200®HP StudioLED FRESNEL®auto-set from 90-240 VAC.
Each fixture comes with: Optional Accessories:
Display & Buttons
Functions
The VegaLux 200®HP StudioLED FRESNEL®has one display, and four (4) buttons
that allow to perform various functions.
Display
Handle
Button Function
“MENU”
AC input connector
90-240 VAC
DMX input signal
connector “DMX IN”
Power ON/OFF Fuse-holder
Safety Cable
Holder
Button Function
“ENTER”
Button Function
“UP”
AC output connector
90-240 VAC
DMX output signal
connector “DMX OUT”
Button Function
“DOWN”
Mounting the Fixture
On Grid:
Attach clamp tightly to yoke of fixture, according to clamp mfrs.
instructions. Hang clamp on pipe or grid and tighten the large screw
so that the clamp and fixture are securely mounted. Do not loosen
bolt attaching clamp to fixture, to position light. Attach safety cable
between the fixture and the rail for necessary security.
On Stand:
Using the 5/8" female (not included) stand fitting. Choose proper size
stand for fixture. Always use sufficient stabilizing weight on stand base.
Allows mounting the fixture on 5/8" (not included) male stand stud.
Make sure the stand is large enough to support the weight of the
fixture while maintaining good balance at the desired height. Attach
the female stand-fitting tightly to the yoke and rotate yoke so it is on
the underside of the fixture. Tighten yoke, clamp locking lever, and
place female stand-fitting over stand, making sure that its locking
screw is loosened enough to allow the fitting to completely fit over
the 5/8" stand stud. Tighten knob, making sure its screw is under the
safety cut of the stand fitting stud. Add additional weight to base of
stand for increased stability.
AN4910073 - REV “A”
11.29”
28.7 cm
17”
43.2 cm
11.22”
30.7 cm
18.46”
46.9 cm
Pole Operated
G6LED123
High-Performance StudioLED FRESNEL
®
Motorized Zoom
AC cord with POWERCON
Conector 16 ft (4.82 m)
G6CNT154
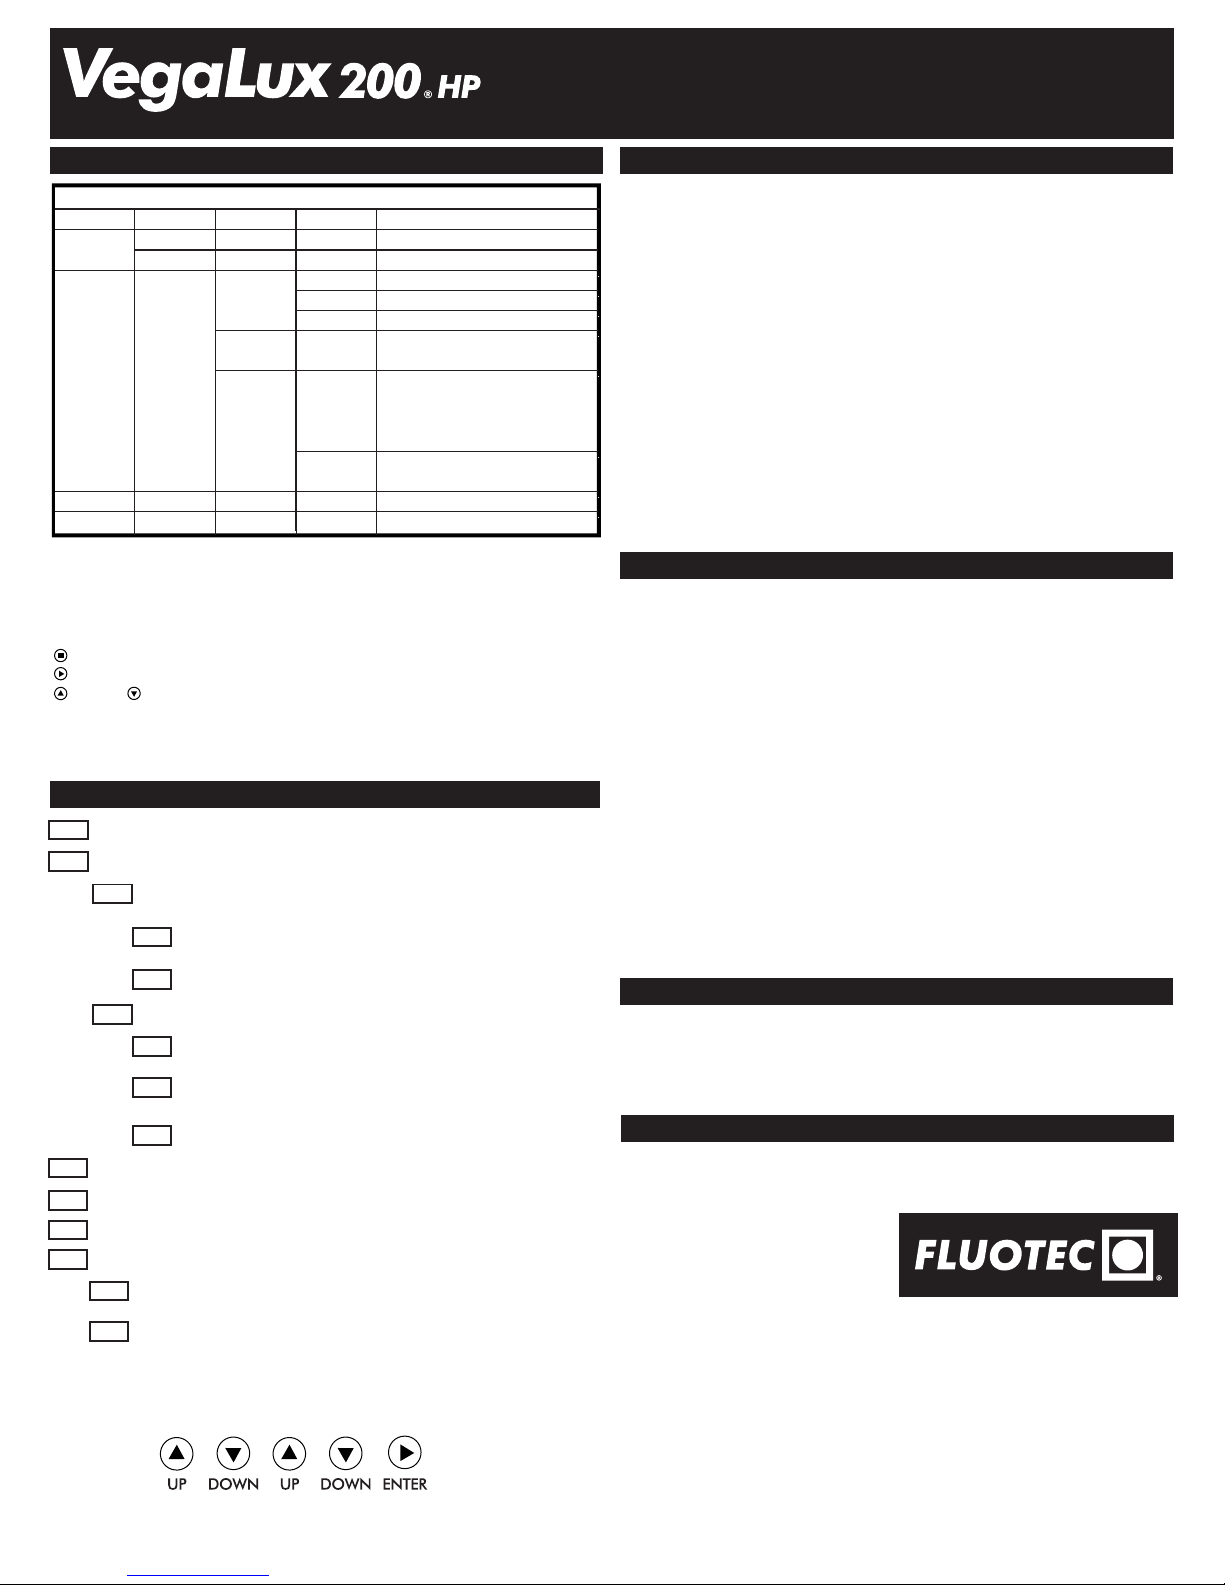
Table 1. Menu VegaLux 200®HP StudioLED FRESNEL®
Menu VegaLux 200®HP StudioLED FRESNEL®
REST
POWR
LIVE
STDO
ON
OFF
RUN
SET PASS
DIMM
ZOOM
ADDR
MODE
SLAVE
DMX
(001,512) DMX Adress
DMX MODE Execution
SLAVE MODE Execution
STUDIO MODE Performance
LIVE MODE Performance
Maximum Performance
Reset all default values.
Password required
Enables keyboard blocking after
a determined time. You will only
be able to unlock with password.
Disable keyboard blocking.
Motorized zoom control Spot-Flood
Dimming
(0,100)
(0,100)
1
2
KEY
VegaLux 200®HP StudioLED FRESNEL®has four buttons to control its functions:
MENU: Return to previous menu.
ENTER: Next submenu or function.
UP and DOWN: Navigation buttons in the same level of the menu or
submenu and serve us to select some value.
Fixture operates with two DMX Channels:
• DMX Channel 1 - DIMMER
• DMX Channel 2 - ZOOM
Main keyboard menu functions:
ADDR
SET
KEY
ON
OFF
MODE
STDO
LIVE
POWR
Here we can assign the initial DMX Address to our unit (D.000 D.512)
Here we can configure the unit it has 9 functions
Enables function “Keyboard blocking”
Enables “Keyboard blocking”. If this option is selected the
keyboard will be blocked and it will not function unless
the password is introduced
Disable “Keyboard blocking”
DMX
SLAV
RSET
DIMM
Reset all default values to factory settings. Password required
Illumination power adjust (Dimming) (D.000-D.100)
Zoom adjust (Z.000-Z.100)
ZOOM
RUN Here you can configure the DMX or SLAVE MODE of use
All units set to DMX will receive and answer DMX signals
according to the channel selected
All units set to SLAV will receive and answer the signals of other
connected Fresnels
Enables function “Performance mode”
STUDIO MODE. When you need the less noise possible
LIVE MODE. Increases the power of the unit and the
ventilation power (some noise may be heard)
POWER MODE. Maximum lighting and ventilation power
(some noise may be heard)
Password
All menus where PASSWORD is required have to enter the following sequence.
Warnings
VegaLux 200®HP StudioLED FRESNEL®equipment is a professional lighting
system. Read these instructions, as well as accessory instructions and applicable
warnings before operating.
• Do not leave fixture unattended.
For fixed (stationary) use in studios, theaters, and similar locations.
• Not for household use. Use only for photographic lighting (television, video
& film).
• Always unplug unit before changing fuse.
• Do not use near standing water.
• Never bypass plug’s ground pin.
• Do not interfere with unit’s ventilation.
• Do not operate unit with Accessory Barndoors closed.
• Make sure clamp is tightened at yoke.
• Always use Safety Cable, when attaching to overhead pipes or grids.
• Always use with supplied AC Cable.
LED Warnings
• Avoid looking directly at the LED's for extended periods of time.
General Recommendations
1. Do not operate this product if it’s damaged.
2. To protect yourself from an electrical discharge, avoid contact with water
or other liquids.
3. The UNIT HAS TO BE POWERED OFF before you connect it to the
electrical grid, also when striking the UNIT turn it off before disconnecting it
from the power grid.
4. In case of failure or malfunction to avoid electrical discharge, DO NOT
disassemble this UNIT call your FLUOTEC®AUTHORIZED SERVICE CENTER.
Wrong reassembly or disassembly of this unit may cause a malfunction.
5. The use of accesories not designed or recommended by FLUOTEC can
cause hazardous conditions or damage the fixture.
Cleaning
CHASIS.
Use a moist, almost dry cloth to remove dust and any stain.
NEVER USE ANY ABRASIVE FIBER PAD AND NEVER USE SOLVENTS.
They can damage the fixture or it’s finish.
International Sales
Tel. 1 (877) 556 5554
Email [email protected]
Problems, repairs & info
FLUOTEC®www.fluotec.net
Repairs, problems, suggestions and requests for brochures/catalogs,
instructions and parts lists can be handled through your Authorized FLUOTEC®
Dealer/Distributor or directly through FLUOTEC®. Electrical repairs should be
made only by FLUOTEC®or by a qualified electrician.
High-Performance StudioLED FRESNEL
®
Motorized Zoom
This manual suits for next models
4
Other Fluotec Lighting Equipment manuals

Popular Lighting Equipment manuals by other brands

Light Emotion
Light Emotion Phantomrgb1700 manual

Bresser
Bresser F001341SH instruction manual

Chauvet
Chauvet Nexus 4x4 user manual

HUBBELL LIGHTING
HUBBELL LIGHTING Dual-Lite EVE Series Installation, operation and maintenance instructions

Uwatec
Uwatec Nova 720 WIDE Guide

Cooper Lighting
Cooper Lighting Portfolio LD4A installation instructions


