Flytec 3040 User manual

Flytec 3040 / TT34
Operation Manual
11.30.2011
© Flytec USA 2007-2012
All rights reserved.
No part of this manual may be reproduced, stored in a retrieval system, or transmitted in any
form or by any means, electronic, mechanical, photocopying, recording, or otherwise without
permission in writing from Flytec USA. This manual is protected under U.S. and International
Copyright Laws.

© Flytec USA 2007-2012 All rights reserved 2Printed on 100% post-consumer recycled paper
Warning! Read before you proceed! Warning!
This instrument should not be used as an indicator of safe flying parameters. This instrument
should only be used for informational purposes. Aviation can be a hazardous and possibly fatal
activity. As a pilot, you are entirely responsible for your own safety and the safety of others
around you. Pilots should abide by applicable aviation authority regulations and use best
judgment for safe flying at all times, irrespective of instrument readings. Flytec is not responsible
for loss or injury caused by the use of this instrument. You assume all risks associated with
flying and the use of this instrument. Individuals who ignore this warning do so at their own risk
and may suffer serious personal injury, property damage, or death. If you are unwilling to
assume all of the risks associated with the use of this instrument, do not use the instrument.
Return it immediately, unused with all of its included items, within 30 days of the date of
purchase, for a full refund. Please note that instruments showing signs of use or those that have
been damaged or modified in any way cannot be accepted for return.
Table of Contents
Warning! Read before you proceed! Warning! ..................................................................................... 2!
1.!Instrument overview........................................................................................................................... 3!
2.!Basic operation................................................................................................................................... 4!
2.1!Turning on the Instrument............................................................................................................... 4!
2.2!Turning OFF the Instrument............................................................................................................ 4!
2.3!Automatic switch Off: ...................................................................................................................... 4!
2.4!Multifunction keypad ....................................................................................................................... 5!
2.5!Operating modes ............................................................................................................................ 5!
3.!The Altimeter....................................................................................................................................... 6!
3.1!Altimeter.......................................................................................................................................... 6!
3.2!Setting the Altimeter........................................................................................................................ 6!
4.!Variometer........................................................................................................................................... 7!
4.1!Graphic Variometer......................................................................................................................... 7!
4.2!Digital Variometer ........................................................................................................................... 7!
4.3!Descent tone................................................................................................................................... 8!
5.!Wind speed ......................................................................................................................................... 8!
6.!Time functions .................................................................................................................................... 8!
6.1!real time clock ................................................................................................................................. 9!
6.2!Set time........................................................................................................................................... 9!
6.3!Stopwatch (Chrono) ........................................................................................................................ 9!
7.!Temperature...................................................................................................................................... 10!
7.1!Ambient temperatur (AMB TEMP): ............................................................................................... 10!
7.2!Envelope Temperature Sensor (TT34) ......................................................................................... 10!
7.2.1!Envelope Temperature Display (ENV TEMP) ..................................................................... 11!
7.2.2!Pairing to a 3040 ................................................................................................................. 11!
7.2.3!Temperature sensor failure .................................................................................................12!
7.2.4!Mounting TT34 .................................................................................................................... 12!
7.3!Personal Temperature Alarm........................................................................................................ 12!
7.3.1!Set Threshold...................................................................................................................... 13!
7.4!Never-Exceed Temperature Alarm ............................................................................................... 13!
8.!Batteries ............................................................................................................................................ 13!
9.!Maintenance...................................................................................................................................... 14!
10.!Warranty .......................................................................................................................................... 14!
11.!Technical data.................................................................................................................................14!
12.!Mounting instructions for TT34 Temperature Transmitter ......................................................... 16!
13.!QNH Correction .............................................................................................................................. 17!
14.!Temperature Boundary layer on a Balloon envelope .................................................................18!

© Flytec USA 2007-2012 All rights reserved 3Printed on 100% post-consumer recycled paper
1. Instrument overview
1
On/Off switch (ON2-OFF-ON1)
2
Keypad
3
Lanyard
4
TT34 Receiver On/Off switch
5
Wind speed sensor jack
6
Envelope / Ambient temperature / Real-time clock / Stopwatch display
7
Altimeter feet / Altimeter meters / QNH display
8
Graphic variometer display
9
Battery compartment (2 x 9 Volt battery)
10
Digital variometer / Wind speed display (with optional sensor)
2
1
3
4
5
6
7
8
9
10

© Flytec USA 2007-2012 All rights reserved 4Printed on 100% post-consumer recycled paper
2. Basic operation
2.1 Turning on the Instrument
The 3040 is equipped with two independent 9V batteries. The device is switched on by moving
the main power switch to the position ON1 or ON2 (battery 1 or battery 2)
After moving the power switch to either ON1 or ON2,
the device performs a self-test and shows the battery
condition of the activated battery in the graphic
variometer display.
Startup screen
The Startup screen shows the battery status, and the
current time and date:
Insufficient battery power is indicated by one or more
segments in the red (sink) sector of the graphic
variometer scale and the 3040 should not be used with
a battery in this state. During flight, low battery is
indicated by showing Po in the digital variometer
display every 5 seconds. In this case, move the power
switch to the OFF position for a few seconds and then
to the other battery position.
2.2 Turning OFF the Instrument
Slide the main power switch to the center (OFF) position
2.3 Automatic switch-off:
The 3040 will automatically power down if there are no flight activities (less than a 25-meter
altitude change) over a 30-minute period. To restart the 3040 after an automatic switch-off,
move the power switch to the center OFF position for at least 2 seconds and then to the desired
battery. If the automatic power down interval (30 min) is too short for your type of flight (e.g.,
tethering),contact Flytec for instructions for changing the interval (up to 20 hrs is possible).
Battery status (Power)
5 = 100%
0 = 0%
Battery is 60% in the example.
hh:m = hours & minutes
dd:m = day & month
YYYY = year
Time is 18.52 (6:52) in the example.
hh!nn
18!52
Po

© Flytec USA 2007-2012 All rights reserved 5Printed on 100% post-consumer recycled paper
2.4 Multifunction keypad
With the instrument in Run-mode,the keypad responds to two types of button presses:
Short press: less than 1-second press, used to make selection. For example, repeatedly
pressing the ALTI ft. / QNH hPa / ALTIm. key scrolls the upper line of the lower display
window through these three numerical values. The selected value is indicated by an
indicator arrow along the left side of the numerical value.
Long press: greater than 3-second press, used to set the value of the selected function.
For example, a long press of the ALTI ft. key (when altitude in feet is displayed) will bring
up the ability to set the altimeter in feet.
2.5 Operating modes
The device has three operating modes: Run-mode, Set-mode and Configuration-mode.
Run-mode: After switching on the 3040, it goes through its startup sequence and then enters
the Run-mode. In this mode, the altitude, temperature or time and the vertical speed are
continuously displayed. This is the normal flight mode.
Set-mode: Set-mode is entered with a long press of the respective function key. The relevant
display field will flash and can be altered with the !"keys. Short-pressing the arrow key will
increment the value one unit per press, pressing and holding the arrow key will steadily
increment the value, and continuing to hold down the arrow key will cause the value change to
accelerate. Short-press the corresponding function key to accept the changed value and return
to Run-mode.
Configuration-mode: Configuration-mode is used to enter correction factors and make
changes to the operation of the 3040 such as changing the automatic power down interval,
calibrating the altimeter, changing the display units, etc. This mode is intended for to be
accessed by qualified technicians only and therefore is not readily accessed by the user.
Short-press to
change function
Short-press to turn
alarms on/off
Short-press to start, stop
and reset stop watch
#
#
#
2645
86
1"4

© Flytec USA 2007-2012 All rights reserved 6Printed on 100% post-consumer recycled paper
3. The Altimeter
How does an altimeter work?
A barometric altimeter calculates altitude (elevation) from the actual air pressure of the
atmosphere at a given location. Air pressure decreases with increasing elevation; however,
since air is compressible, the pressure change is exponential not linear. Altimeters designed for
aviation use the CINA (Commision International de Navigation Aérienne) formula to derive
altitude from air pressure. In this calculation the CINA–atmosphere is used where standard
atmospheric pressure at sea level is 1013.25 hPa (Hecto-pascal) at a temperature of 15°C.
Temperature also decreases with increasing altitude and must also be considered in the altitude
calculation. A constant temperature decrease of 0.65°C per 100 m ascent is also assumed in
the CINA equation. Because of these assumptions with respect to pressure and temperature,a
barometric aviation altimeter only indicates the actual altitude when the weather conditions
correspond to the standard atmosphere and lapse rate. In reality the atmosphere rarely
corresponds to the CINA standards.
To further complicate matters, the air pressure over a given location changes as weather
systems move across the area. To compensate for pressure changes induced by changes in
the weather,an altimeter must be adjusted prior to each flight. This can be done by setting the
altimeter to a known elevation (e.g., launch). Another method of setting an altimeter is to enter
the current QNH pressure value. QNH is the barometric pressure at a measuring station
reduced to sea-level. If an altimeter was set to the QNH at a measuring station (regardless of
elevation) and then brought to sea-level it would read zero. The QNH value is constantly
updated and can be obtained from flight service stations or requested from airfields over an
aeronautical radio. Keep in mind that the atmospheric pressure can change up to five millibars
over the course of a day (such as with the passage of a cold front), corresponding to a change
in elevation of more than 130 ft.
3.1 Altimeter
The 3040 is equipped with three altitude dispays:
ALTI ft Absolute altimeter in feet
QNH QNH pressure in inHg or hPa
ALTI m Absolute altimeter in meters
Short-press the yellow altimeter key to alternate between displaying ALTI ft,
QNH, and ALTI m. The arrow indicator on the left side, in the upper line of
the lower display window,indicates the selected altitude function.
3.2 Setting the Altimeter
The altimeter indicates the absolute altitude above sea level in ft or m. When you adjust the
altimeter, the QNH value is automatically adjusted. The QNH display shows the barometric
pressure reduced to sea level. Consequently,if your current altitude is unknown it can be set by
setting the QNH available from weather reporting stations or
flight service. When you change the value of QNH, the
altimeter is automatically adjusted.
To set the altimeter, select the desired altitude value with short
presses of the ALTI ft./ QNH hPa / ALT m.key (altitude in feet
in the example). Long-press the same key to enter Set-mode,
and the current altitude will begin to flash.
#
2645
ALTI ft
QNH hpa
ALTI m

© Flytec USA 2007-2012 All rights reserved 7Printed on 100% post-consumer recycled paper
Use the !"keys to adjust your current altitude/QNH. Press
and hold either the !"key buttons to accelerate the setting
in that direction.
Note: Altitude can only be adjusted to within approximately
±1200 ft of the actual elevation, and QNH can only be
adjusted within the range from 950 to 1060 hPa.
Short-press the ALTI ft / QNH hPa / ALT m key to accept the
changes and return to Run-mode.
4. Variometer
The variometer informs the pilot about the actual ascent/descent rate. It is displayed graphically
in the dial display,and digitally in the small window just to the right of the dial. If desired, the
descent rate can also be indicated acoustically.
4.1 Graphic Variometer
The rate of ascent/descent is shown graphically in the vario dial where each gradation on the
scale equals 40 ft/min. The analog vario display has a range of 2,000 ft/min in two scale passes.
Up to a rate of 1,000 ft/min,the dial display fills from the zero line out, indicating the
ascent/descent rate on the 1-10 scale (x100 ft/min). At an ascent/descent rate of 1,000 ft/min
the dial display will be full from 0 to 10. When ascents or descents greater than 1,000 ft/min are
encountered, the dial display will start to empty from the 0 ft/min line out, indicating the
corresponding ascent/descent value on the 10-20 scale (x100 ft/min).
4.2 Digital Variometer
The digital vario display is the small window just to the right of the dial display. It shows the
ascent/descent rate with a range of 0.0 to 20.0 (x100 ft/min) and with a resolution of 20 ft/min
(0.2 x 100 ft/min).
!
"
ALTI ft
QNH hpa
ALTI m
360 ft/min
#
VARIO
SPEED
3"6
1,000 ft/min
#
VARIO
SPEED
10"0
1,320 ft/min
#
VARIO
SPEED
13"2

© Flytec USA 2007-2012 All rights reserved 8Printed on 100% post-consumer recycled paper
4.3 Descent Tone
The descent tone is a steady beeping,where the pitch of the beep decreases as the rate of
descent increases. Using this tone the pilot can monitor the descent rate without looking at the
instrument. The descent tone can be set so that there is no tone unless the decent rate exceeds
a set threshold. The volume of the tone can be easily set or turned off in flight. Each time the
3040 is turned on the descent tone setting will the same as the last use.
Short-press the Sink Alarm key to toggle trhough the descent
tone options (off, volume I and volume II). A sample beep will
be given and the descent tone threshold will be shown in the
dial display when volume I and II are selected.
Setting Descent Tone threshold
Long-press the Sink Alarm key to bring the instrument into
Set-mode. The descent tone threshold point is indicated in the
dial display with a blinking segment. Use the !"keys to
adjust the threshold between 40 ft/min and 2,000 ft/min. The
threshold in the example is 480 ft/min. Note: When adjusting
the threshold between 1000 and 2000 ft/min,all of the
segments will be flashing between the zero line and the
desired setting as read on the 10-20 scale.
Short-press the Sink Alarm key to accept the
adjusted value and return to Run-mode.
5. Wind speed
The hand-held wind speed sensor is available as an accessory. The sensor plug
is located on the left side of the instrument. When the sensor is plugged in, the
digital vario display will automatically switch to the speed display and the
indicator arrow will point to SPEED. The wind speed sensor is very accurate and
will measure speeds between 1 and 74 mph. It is ideal for measuring the wind at
the take-off site.
6. Time functions
The 3040 has two time functions: a 24-hour real-time clock and a stopwatch. The real-time clock
is maintained as long as there is at least one 9V battery installed. When replacing batteries, if
they are done one-at-a-time, the time setting will not be lost in the process. The stopwatch
functions only while the instrument is on;any time value on the display will be lost when the
instrument is switched off.
SINK ALARM
-O-I-II

© Flytec USA 2007-2012 All rights reserved 9Printed on 100% post-consumer recycled paper
6.1 Real-time clock
To bring up the real-time clock, short-press the ENV TEMP
/ AMB TEMP / CHRONO key to toggle through the
functions until the time is shown in the lower line of the
lower display window. The indicator arrow will point at
CHRONO. Note: When the stopwatch is activated, the
stopwatch time is shown instead of real-time.
6.2 Set time
To set the time, select CHRONO using short presses of the
ENV TEMP / AMB TEMP / CHRONO. Long-press the same
key to enter Set-mode.
1. The top line of the lower display window will show hh:m.
The bottom line will flash the hours and minutes setting.Use
the !"keys to adjust the time of day. Confirm the entry
and advance to date setting by pressing the Chrono key.
2. The top line will now show dd:m. The bottom line will
flash the day and month. Use the !"keys to adjust the
date. Confirm the entry and advance to the year setting by
pressing the Chrono key.
3. The top line of the lower display window will show YYYY.
Use the !"keys to adjust the year. Confirm the entry and
return to Run-mode by pressing the Chrono key.
6.3 Stopwatch (Chrono)
The stopwatch can be started any time the instrument is in Run-mode by pressing the
Start/Stop key. If CRONO is not currently displayed, a running stopwatch will be indicated with a
flashing indicator arrow (pointing at CHRONO). If the stopwatch is paused using the STOP or
LAP key,the indicator arrow will be steady.
ENV TEMP
AMB TEMP
CHRONO
#
#
2645
16!25
ENV TEMP
AMB TEMP
CHRONO
!
"
#
hh!NN
16!25
ENV TEMP
AMB TEMP
CHRONO

© Flytec USA 2007-2012 All rights reserved 10 Printed on 100% post-consumer recycled paper
A short press of the START key will start the elapsed time. A short press of the STOP key will
stop the elapsed time. Pressing the START key again will resume the elapsed time. This
function can be used to exclude stopovers so only actual flight time is measured.
Alternatively, a short press of the LAP key while the stopwatch is running will freeze the display
so that the elapsedtime to that point may be read while the chronometer continues to run in the
background. Pressing the LAP key a second time switches the display back to the running
stopwatch.
Pressing the RESET key (when the stopwatch is stopped) will reset the stopwatch to zero and
will automatically switch the display back to real-time display.
7. Temperature
7.1 Ambient temperature(AMB TEMP):
The 3040 has a temperature sensor inside its housing for the purpose of measuring the
temperature of the circuit board and the pressure sensor. This enables the measured altitude to
be properly compensated for changes in temperature. Themeasured temperature can be
shown in the lower display by short-pressing the ENV TEMP / AMB TEMP / CHRONO key so
that the indicator arrow is pointing to AMB TEMP.
Note:The internal temperature sensor measures the circuit board temperature and does not
directly measure the outside air temperature. The temperature inside the housing may be higher
or lower than the ambient air temperature when the instrument is moved rapidly from one air
mass to another (e.g., taking the instrument from heated/air-conditioned vehicle into outside
conditions, rapid ascents/descents, etc.). Additionally, the ambient temperature will read much
higher than actual if the 3040 is exposed to direct sunlight.
7.2 Envelope Temperature Sensor (TT34)
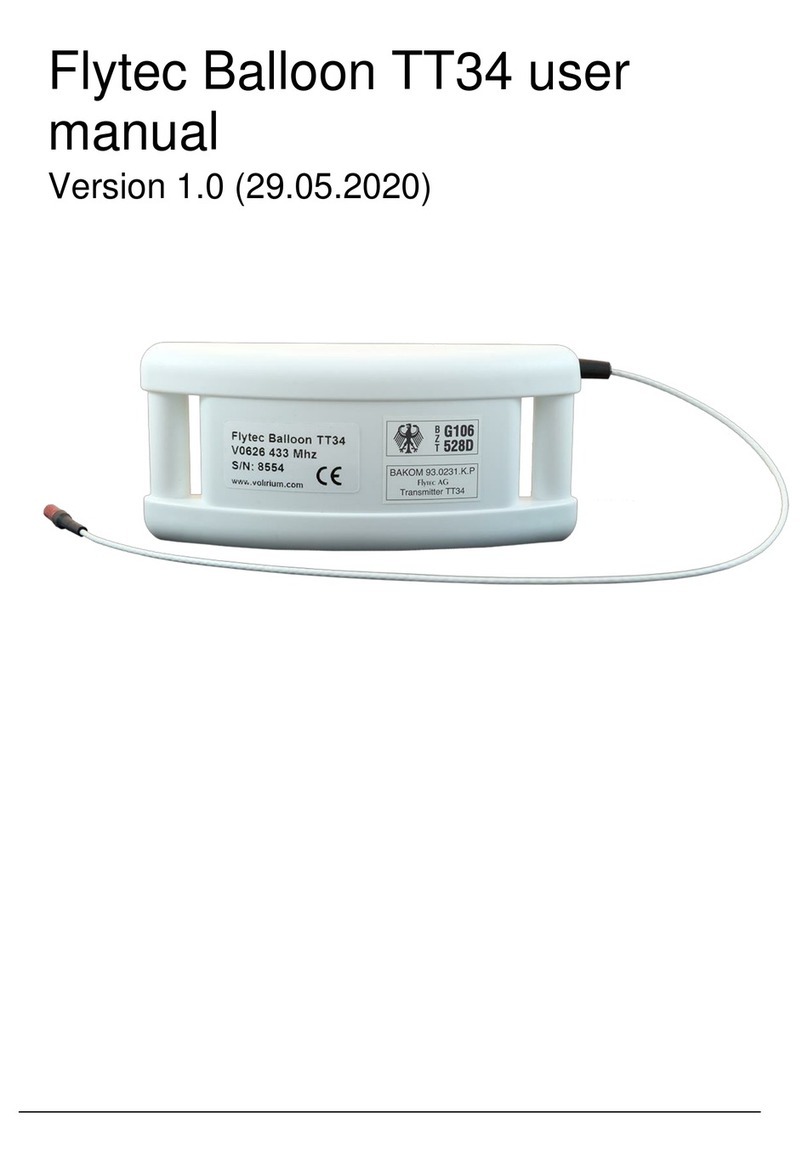
The 3040 will display envelope temperature if it is used with the TT34 wireless temperature
sensor. The TT34 is mounted to the top of the envelope and will transmit the measured
envelope temperature by radio frequency to the 3040. Each TT34 is coded with a unique ID
number (s/n) which can be entered into a 3040. When this is done the 3040 will receive
temperature only from the paired TT34. This feature allows many balloons equipped with Flytec
systems to fly near one another without
reading each other’s envelope temperatures.
The TT34 is powered by a 9V battery
with an operation time of ~200 hours.
It is recommended that the battery
be tested at each annual inspection
and replaced at least every other
Annual Inspection.See Section 8for
battery replacement.
The TT34 will automatically switch on when the envelope temperature is ~30ºF greater than
ambient,and it will automatically shut off ~45 minutes after the envelope temperature falls
below this threshold. When active, the TT34 transmits its data every four seconds.

© Flytec USA 2007-2012 All rights reserved 11 Printed on 100% post-consumer recycled paper
7.2.1 Envelope Temperature Display (ENV TEMP)
The 3040 will only receive data from a TT34 if the receiver (REC) switch is in the ON position.
Since the internal receiver is switched offwhen the main power switch is off, it is recommended
that if the 3040 is used with a TT34, the REC switch be left
in the ON position. In that case the 3040 will display the
envelope temperature as soon as a valid signal is
detected.
Note: No envelope temperature is displayed and all
temperature alarms are disabled if the REC switch is OFF.
When the REC switch is off, the display cannot be set to
ENV TEMP; only AMB TEMP and CHRONO can be
selected.
Maximum in-flight temperature: To see the maximum envelope temperature of a flight, switch
off the receiver. The arrow indicator will flash,and the maximum temperature will be shown in
the ENV TEMP display. If the maximum temperature is checked during flight,you must turn the
receiver back to on to receive actual envelope temperature and for the temperature alarms to
work. Maximum envelope temperature is not saved when the main power is turned off.
7.2.2 Pairing to a 3040
In order for the 3040 to receive data from a TT34 it must first be paired. This is accomplished by
setting the TT34 ID code (serial number) into the 3040.
With the receiver set to ON, select ENV TEMP with short
presses of the ENV TEMP/AMB TEMP/CHRONO key (the
arrow indicator pointing to ENV TEMP).
Long-press the ENV TEMP key to enter Set-mode; the
TT34 ID code will be flashing.Use the !"keys to adjust
the number to the s/n of the desired TT34. Short presses
of an arrow key will increment the value in the direction of
the arrow pressed, whereas holding down an arrow key will
accelerate the number change in that direction until the
key is released. Press the ENV TEMP key to confirm the
entry and return to Run-mode.
If you do not know the TT34 code, or if the setting is inadvertently lost in flight, enter Set-mode
as above and set the ID code to 0 by simultaneously pressing the !" keys (0 is the automatic
scan mode). Short-press the ENV TEMP key;the 3040 will return to Run-mode and will self-
install the first received TT34. This method should only be employed when there are no other
balloons using a TT34 in close proximity,to avoid self-installing another pilot’s TT34 code. For
this reason it is recommended that the s/n of the TT34 be marked somewhere in the balloon
basket. This way it will be available in flight, in the event the code is inadvertently lost.
ENV TEMP
AMB TEMP
CHRONO
7262
5
#

© Flytec USA 2007-2012 All rights reserved 12 Printed on 100% post-consumer recycled paper
If -Id - appears in the ENV TEMP field,it means that either the 3040 is receiving data from a
TT34 other than one with which it is paired, or it is receiving strong RF interference
(radio/TV/microwave tower, 2-way radio, cell phone, etc.). If this happens, enter Set-mode as
described above to check the code and correct it if necessary. If the correct TT34 code is
displayed, then RF interference is likely present. Try turning off the 3040 for several seconds to
clear the interference. If it does not clear, try again in a few minutes after the interference is
gone (e.g., you have flown away from the tower,or the radio/cell phone communication has
concluded).
7.2.3 Temperature sensor failure
If - $$- is shown in the ENV TEMP display,it indicates that the external temperature sensor of
the TT34 is malfunctioning. In this case the TT34 should be sent to Flytec for service. However,
since strong radio interference can cause this symbol,the TT34 should first be checked in
another location.
7.2.4 Mounting the TT34
The TT34 unit is mounted on the outside of the envelope at the top near the parachute opening
(see section 12 for installation diagram). The temperature sensor is routed through the envelope
and must be attached so that the sensor touches the envelope fabric. Installation of the TT34
should only be done by the balloon manufacturer or by a qualified repair station designated by the
balloon manufacturer. Improper installation will result in incorrect temperature readings. A
temperature sensor that is not in contact with the fabric will read temperatures higher than the
actual temperature of the fabric.
The temperature of the hot air within an envelope cools quite rapidly near the surface of the
fabric. If the sensor is off of the fabric just a small distance,the temperature readings could be
significantly hotter than the actual fabric. To understand the extent of the temperature difference
relative to the distance from the envelope fabric, see the Thermal Boundary Layer graph in
Section 14. For example: if the temperature 1 inch away from the inside of the envelope is
±116ºC (241ºF) the temperature at the inside surface of the envelope is ±90ºC (194ºF). This is a
~47ºF difference in just one inch!
7.3 Personal Temperature Alarm
When used with a TT34, the 3040 will alert you with an audible alarm if the temperature in the
envelope exceeds a preset threshold. The threshold can be set between 104° F andthe preset
never-exceed temperature established by the envelope manufacturer. A short press of the
TEMP ALARM OFF key will mute the alarm for 20 seconds. If the envelope temperature
remains above the threshold,the alarm will be given again. Generally,the threshold for the
personal alarm is set to the Max-Continuous temperature recommended by the balloon
manufacturer.

© Flytec USA 2007-2012 All rights reserved 13 Printed on 100% post-consumer recycled paper
7.3.1 Set Threshold
Long-press the TEMP ALARM key to enter Set-mode — the
temperature alarm threshold will flash.Use the !"keys to
adjust the number to the desired alarm threshold. Short
presses of an arrow key will change the value in the direction
of the arrow pressed, whereas holding the down an arrow key
will accelerate the number change in that direction until the
key is released. Short-press the ENV TEMP key to save the
alarm threshold and return to Run-mode.
7.4 Never-Exceed Temperature Alarm
The Never-Exceed temperature alarm is similar to the Personal Alarm but it is higher pitched (to
give a sense of urgency) and cannot be muted with a button pressed. The never-exceed alarm
can only be terminated by reducing the temperature inside the envelope below the alarm
threshold. The alarm threshold is established by the balloon manufacturer and is preset into the
3040. It cannot be altered by the user.
8. Batteries
3040: The 3040 operates on two independent 9V batteries. You can select which battery to use
by selecting either ON1 or ON2. It is recommended that you use the same battery each time
you fly so that the second battery is kept in reserve. This way,if the primary battery becomes
depleted in flight you will have a good second battery to switch to. The depleted battery should
be replaced prior to the next flight and should become the new reserve battery. Thus the
batteries will be depleted in alternating succession, greatly reducing the possibility of both
batteries being dead during a flight.
When it becomes necessary to change a battery, verify that the 3040 is switched off prior to
removing either battery. To access the battery compartment, remove the battery door screw
(centered between and just below the two upper housing screws) and remove the battery door.
The steel clip must be pulled away from the battery door to allow the door to lift out of its recess.
If the above recommendation is followed it should only be necessary to replace one battery;
however, if both batteries are being replaced they should be replaced one-at-a-time (i.e.,
remove and replace one battery before replacing the second battery). That way the time and
date will be preserved and will not need to be reset. If the 3040 does not show the correct
time/date after replacing the batteries,please follow the procedure for setting the time and date
(Section 6.2).
TT34: The TT34 operates on one 9V battery with an operation time of ~200 hours. It is
recommended that the battery be tested at each annual inspection and replaced at least every
other Annual Inspection. During flight, if -Po -is shown in the ENV TEMP display it indicates
that the battery in the TT34 is weak and must be replaced prior to the next flight.
To replace the battery in the TT34 remove the four housing screws, set TT34 flat side down on
a work surface and lift off the top housing. Remove and properly discard the spent battery and
replace with a new alkaline battery. Make sure the sensor wire grommet is properly seated in
the grommet recess, replace top housing and replace the four housing screws.
Prior to prolonged periods of non-use, the batteries should always be
removed to eliminate the chance of damage resulting from battery leaks.
249!8
!0

© Flytec USA 2007-2012 All rights reserved 14 Printed on 100% post-consumer recycled paper
9. Technical data
Variometer
Analog Display: ± 2,000 ft/min, Resolution: 40 ft/min
Digital Display: Digital ± 1980 ft/min, Resolution: 20 ft/min
Acoustic: Descent tone threshold: 40 to 2,000 ft/min
Altimeter
Altimeter range: -1,500 to +26,000 ft, Resolution: 5 ft
QNH: 28.05 to 31.30 inHg
Wind Speed (w/ optional sensor)
Range: 0 to 74 mph
Units: mph, km/h or knots
Resolution: 1 mph, 1 km/h or 1 knot, correctable ± 50%
Time
Real time clock: 24 hr w/ date and year
Stop watch: 59 min, 59 sec
Temperature
Ambient: -4°F to 140ºF, Resolution: 1°F
Envelope: 68ºF to 311ºF, Resolution: 1.8ºF
Temperature alarm
Never-exceed alarm: 104ºF to 302ºF (preset)
Personal alarm: 104ºF to never-exceed threshold (user adjustable)
Power supply
Batteries: 2 x 9V alkaline batteries
Operation time: 2 x ~50hr or 10 years stand-by
Housing
Dimension: 6-1/2%x 3-5/8%x 1-3/4%
Weight: 13 oz (incl. 2 x 9V Batteries)
Operating temperature: -4 ºF to 140°F
Storage temperature: -22ºF to 158°F
Warranty: 24 Months
Included: TT34, Velcro strap, 2x 9V battery, carry bag, documentation
Technical data may be altered anytime without notice.
10. Warranty
The 3040 is warranted against material and manufacturing defects for two years. Physical
damage such as a broken housing or display window, as well as damage resulting from abuse,
water entering the housing, battery leakage, improper care, exposure to excessive heat or
opening the housing is excluded from this warranty. In the event a defect is encountered during
the two-year warranty period, please contact Flytec for service instructions. Please carefully
read this operation manual before you contact Flytec for operation or service issues.

© Flytec USA 2007-2012 All rights reserved 15 Printed on 100% post-consumer recycled paper
11. Maintenance
The 3040 is a high-quality multi-function instrument equipped with sensitive sensors that
preclude excessively rough treatment. Avoid storing the instrument in a humid environment.
Cleaning of the housing should be limited to non-abrasive and non-solvent based cleaners
using a soft cloth. When not in use, the 3040 should be stored in the supplied carry bag; of
course the bag must be kept clean and dry. If the instrument is to be stored for an extended
period it is recommended that the batteries be removed to eliminate the possibility of a battery
leak.
Exposure to Water: If water enters the 3040 housing, damage is likely and the warranty is void.
To minimize the extent of the damage and prevent a destructive short-circuit, remove the
batteries immediately. The following steps should be performed as soon as reasonably possible:
•Remove the housing screw and carefully open the housing.
•If salt water has entered the housing, thoroughly rinse affected areas with clean fresh water.
•Dry the instrument carefully with warm air (e.g., a hair dryer, 140° F max).
•Return the instrument to Flytec USA or Flytec AG for service.
Never place the instrument into a microwave oven!
Microwaves will destroy the instrument instantly!

© Flytec USA 2007-2012 All rights reserved 16 Printed on 100% post-consumer recycled paper
12. Mounting instructionsfor TT34 Temperature Transmitter

© Flytec USA 2007-2012 All rights reserved 17 Printed on 100% post-consumer recycled paper
13. QNH Correction
The pressure sensor in the 3040 is extremely accurate and very stable and should give many
years of service without need for calibration. Over time, it may become necessary to calibrate
the altimeter relative to the displayed QNH. If you notice that after setting the QNH from a
reliable weather source (e.g., nearby flight service or weather station) there is a discrepancy
between the displayed altitude and the confirmed current elevation of the 3040, the following
procedure can be used to correct the altitude relative to the QNH. Calibration should only be
performed by a qualified technician. If in doubt please contact Flytec. Note: the following
instructions apply to units with firmware 59418 only — older units should be sent to Flytec.
Setaltimeter display to ALTIft
Long-press the altimeter key until altimeter display is
flashing.
Simultaneously short-press the four keys marked in
red. The current offset will now be flashing.
Adjust the QNH offset value with the !" key. One
step = 0.1 hPa ~2.7 ft. For example, if you need to
increase the displayed altitude by 27 ft,then reduce
the offset by 1.0 hPa.
Short-press the ALT key to store the QNH correction
and return to the altimeter mode.
Short-press the ALT key again to return to Run-mode.
Set the altitude to your current elevation and confirm that the displayed QNH
corresponds to the QNH reported by a reliable weather reporting station.
ALTI ft
QNH hpa
ALTI m
!
"
78
#
#
545
ALTI ft
QNH hpa
ALTI m
ALTI ft
QNH hpa
ALTI m

© Flytec USA 2007-2012 All rights reserved 18 Printed on 100% post-consumer recycled paper
14. Temperature Boundary Layer on a Balloon Envelope
~90ºC (194ºF)
1%(2.54 cm)
~116ºC(241ºF)
This manual suits for next models
1
Table of contents
Other Flytec Measuring Instrument manuals

Flytec
Flytec ELEMENT User manual

Flytec
Flytec 3005 SI User manual

Flytec
Flytec Balloon TT34 User manual

Flytec
Flytec Balloon 4 User manual

Flytec
Flytec Element Track User manual

Flytec
Flytec Element Alto User manual

Flytec
Flytec 6005 User manual

Flytec
Flytec Element Track User manual

Flytec
Flytec Element Alto User manual

Flytec
Flytec Element Speed User manual