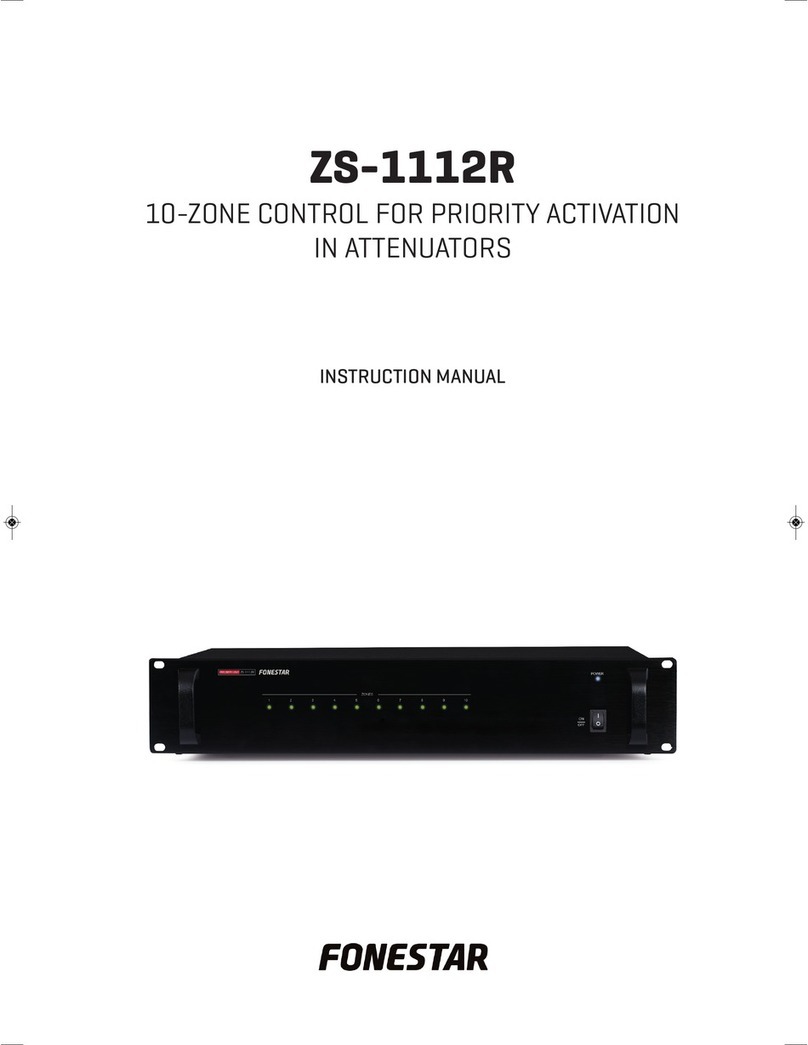
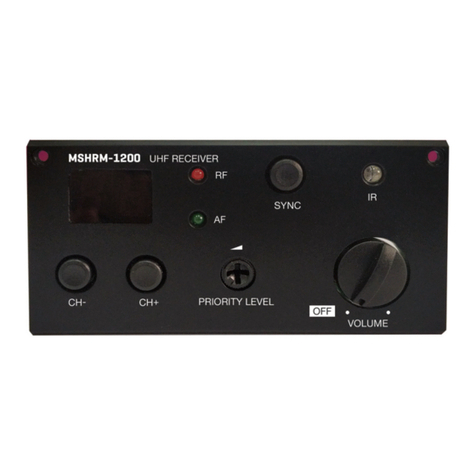
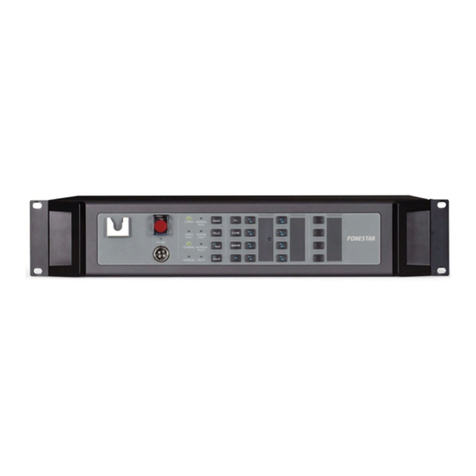
FONESTAR ZS-2000M User manual

INSTRUCTION MANUAL/MANUAL DE INSTRUCCIONES
ZS-2000M
PA AND EN 54 PAVA ALARM SYSTEM CONTROL UNIT
CENTRAL MEGAFONÍA Y ALARMA POR VOZ EN 54
ZS-2000M_MANUAL_(Installation)_(EN_ES)_A5c_20210623-2021.qxp_Maquetación 1 21/2/22 12:19 Página 1

PREFACE
Thanks for buying the Digital Public Address and Voice Alarm system. Please carefully read this manual prior
to system use so as to ensure correct use of the system.
BRIEF INTRODUCTION
This manual describes the appearance, installation, and wiring of the Digital Public Address and Voice Alarm
System equipment. The manual includes the following chapters:
-Chapter 1: System Overview
Describes the Digital Public Address and Voice Alarm System structure and product assembly.
-Chapter 2: Preparation for Installation
Describes preparing to install the Public Address and Voice Alarm System.
-Chapter 3: System Installation
Describes installing the Digital Public Address and Voice Alarm System along with related precautions.
Include Connecting the System Components, Connecting the Power Supply Cables, Connection with Fire
Alarm Control Panel.
-Chapter 4: Installation Inspection
This chapter describes the ZS-200M characteristics, functions, appearance and specifications.
-Chapter 5: IO Interface(ZS-4328IO)
Describes inspecting the installation of the Digital Public Address and Voice Alarm System and system
commissioning.
INTENDED READER
This manual is mainly for personnel who are to install, operate, and maintain the Public Address and Voice
Alarm System.
RELEVANT DOCUMENTS
The following documents can be used as a reference when reading this manual:
- Digital Public Address and Voice Alarm System Product Description.
- Digital Public Address and Voice Alarm System Configuration Manual.
- Digital Public Address and Voice Alarm System Operation Manual.
USE INSTRUCTIONS
- All content including figures in this manual are to be used only for reference.
- The product may be subject to change from time to time without notice.
- Users of this product are recommended to carefully read all warnings and precautions in this manual.
- Carefully read this manual before using the product and keep it as a reference for future use.
-This manual has been reviewed with its accuracy is ensured. In case of any doubt or dispute of the product
description, the final interpretation given by FONESTAR SISTEMAS, S.A. shall prevail.
-FONESTAR SISTEMAS, S.A. is not liable for any consequences caused by user mistakes when using the
product or user misunderstandings of the manual content
SYSTEM OVERVIEW
The Digital Public Address and Voice Alarm System provides a complete multiple sound source public audio
management solution. Centralized network management is achieved through the system software, and all
system states are monitored. The Digital Public Address and Voice Alarm System is hereby referred to as the
“System” throughout the remainder of this manual.
The system includes the following product components:
- ZS-2000M Main Control Unit.
The ZS-2000M is this system control equipment designed for expanding the number of loudspeaker zones,
and can support multiple sound source files for broadcasting. The system integrates with functions such
as the sound source file storage system, the network audio broadcasting system, the loudspeaker zone
control system, and the system for monitoring and diagnosing faults.
- 2 -
EN
ZS-2000M_MANUAL_(Installation)_(EN_ES)_A5c_20210623-2021.qxp_Maquetación 1 21/2/22 12:19 Página 2

- ZS-1500/ ZS-2250/ ZS-4125 1x150W/2x250W/4x125W Class-D Amplifier.
In the system, the ZS-1500/ ZS-2250/ ZS-4125 are used to amplify audio signal power and drive many
broadcasting loudspeakers.
- ZS-200M Paging Microphone
The ZS-200M is used to page zones and control broadcasts for the system on an Ethernet network.
- ZS-4328IO IO Interface
ZS-4328IOis an external interface expansion control equipment in the system. It has many kinds of audio
interfaces and control ports, so it can send the audio and control signal which from the peripheral
equipment through the Ethernet network to the system.
Figure 1, Figure 2 and Figure 3show the connection schematic diagrams of the ZS-2000M and ZS-1500/
ZS-2250/ZS-4125.
Figure 1 Connection Schematic Diagram of the ZS-2000M and ZS-1500
- 3 -
EN
ZS-2000M_MANUAL_(Installation)_(EN_ES)_A5c_20210623-2021.qxp_Maquetación 1 21/2/22 12:19 Página 3

Figure 2 Connection Schematic Diagram of the ZS-2000M and ZS-2250
Figure 3 Connection Schematic Diagram of the ZS-2000M and ZS-4125
PREPARATION FOR INSTALLATION
Before installing the system, appropriate preparation is required to ensure a smooth installation process:
- Gathering Information
- Preparing Tools
- Preparing Auxiliary Materials
- Preparing Cables and Auxiliary Equipment
- Packing List Inspection
GATHERING INFORMATION
Installation personnel are required to be familiar with functional components of the product equipment. It is
recommended to first read the product information found in the Digital Public Address and Voice Alarm
System Product Description.
PREPARING TOOLS
Prepare the following tools before installing the system equipment:
- Electrostatic proof wrist band
- Electrostatic proof gloves
- Wire stripping pliers
- Wire cutting pliers
- RJ45 crimp tool
- Slotted screwdriver (M2)
- Phillips screwdriver (P1)
- 4 -
EN
ZS-2000M_MANUAL_(Installation)_(EN_ES)_A5c_20210623-2021.qxp_Maquetación 1 21/2/22 12:19 Página 4

PREPARING AUXILIARY MATERIALS
Prepare the following auxiliary materials before installing the system equipment:
- Insulating tape
- Wire buckles
- Cable labels
- Plastic ties
PREPARING CABLES AND AUXILIARY EQUIPMENT
Note: It is recommended to select high quality and professional-grade transmission cables for large
scale loudspeaker systems.
The longer the distance, the thicker the cable must be used, as more power is required to
transmit. Please select appropriate cables according to the distances involved.
Prepare the following cables and auxiliary equipments before installing the system equipment:
- CAT-5 Ethernet cable
Cables are required to be no longer than 100m with diameters of 0.51mm (wire gauge of 24AWG). Shiel-
ded twisted pair cables are recommended. The connectors should comply with TIA/EIA 568A or TIA/EIA
568B, and the cable can be straight through or cross.
Refer to Table 1 for the Ethernet pin types.
Table 1 RJ45 Cable Pin Definition Descriptions
- 4 wires RS-485 cable
Cables are required to be no longer than 1000m with diameters of 0.51mm (wire gauge of 24AWG). Twis-
ted pair cables are recommended.
Table 2 RS-485 Cable Pin Definition Descriptions
- 100V audio connection cable
This cable is used to connect the ZS-2000M to the ZS-1500/ ZS-2250/ ZS-4125 as well as the ZS-2000M
to the loudspeakers in the broadcasting zones. Shielded cables with a cross- section of 1.3mm2 (wire
gauge of 16AWG) are recommended to connect the external sound source devices, such as CD/DVD pla-
yers and tuners
- 5 -
EN
ZS-2000M_MANUAL_(Installation)_(EN_ES)_A5c_20210623-2021.qxp_Maquetación 1 21/2/22 12:19 Página 5

- ZS-1500/ ZS-2250/ ZS-4125 standby power supply cable
The ZS-1500/ ZS-2250/ ZS-4125 standby power supply cable specification is required to be the same as
that of the main power supply line.
- Power amplifier audio input cable
Audio input cables are provided in the package containing the ZS-1500/ ZS-2250/ ZS-4125, but the lengths
of these cables are limited. If these cables cannot meet the requirements of the system wiring situation,
users need to obtain or create appropriate cables themselves. Please prepare such audio input cables
with the specifications as listed in Table 3. This cable should be direct connection.
Table 3 Power Amplifier Input Cable Pin Definition Descriptions
- Power amplifier output cables
Unshielded cables with a cross-section of 1.3mm2 (wire gauge of 16AWG) are recommended for the power
amplifier output.
Table 4 Power Amplifier Output Cable Pin Definition Descriptions
- Dry contact input/output cables and related external equipment (Optional)
The necessity of dry contact connections depends on the system situation. If the ZS-2000M and external
equipment, such as three-wire volume controllers and four-wire single-channel controllers, must be
connected through dry contacts, this equipment and the appropriate cables must be prepared beforehand.
- Noise detector (Optional)
When needing to collect environmental noise and automatically regulate the volume of broadcasts, a noise
detector and appropriate cables must be prepared. The maximum cable distance between the ZS-2000M
and noise detector is required to be no more than 250m, and shielded twisted pair cables must be used.
PACKING LIST INSPECTION
Please check the external packages for intactness before unpacking them for content inspection. Use the
“Packing list” to check the package contents. Contact the carrier or supplier promptly in case of any package
or package content problems.
- 6 -
EN
ZS-2000M_MANUAL_(Installation)_(EN_ES)_A5c_20210623-2021.qxp_Maquetación 1 21/2/22 12:19 Página 6

SYSTEM INSTALLATION
This chapter describes the system equipment installation, cable connections, and relevant precautions:
- Installing the ZS-200M on a Fixed Surface (Optional)
- Connecting the Protective Grounding Cabinet Wires
- Installing the ZS-2000M and ZS-1500/ ZS-2250/ ZS-4125 in the Appliance Cabinet
- Connecting the Protective Grounding
- Connecting the System Components
- Connecting the Power Supply
Note:
-The electricity and power sources must be turned off when performing the following tasks to avoid
electric shocks and damage to the equipment.
- Turn off all equipment power supply switches prior to wiring.
- Correctly connect the wiring terminals and tighten the screws.
-The power supply cables and signal data lines must be separated, and cannot be laid in the same
slot or piping.
-Control signal cables must be positioned away from 100V audio or power supply cables to avoid
signal interference.
-Appropriate materials, such as plastic ties, must be used for all connection cables for reinforcement
to avoid looseness. When moving the cables, prevent the power supply cables from coming in
contact with the signal data cables.
-Install appropriate electrical cables bushings at the cabinet opening before installing the cables in
the appliance cabinets.
-Appropriate materials must be used to block the spaces reserved for the cables at the cabinet
opening if these spaces are not used.
INSTALLING THE ZS-200M ON A FIXED SURFACE (OPTIONAL)
If it is unnecessary to move the ZS-200M often, mount the ZS-200M in a fixed surface, such as a desk. The
installation steps are as follows:
1. Cut a slot for the ZS-200M to fit in on the desk surface. The slot is required to be 198mm long and 100mm
wide, as shown in Figure 4.
Figure 4 Schematic Diagram of Creating a Slot for Seating the ZS-200M (Level Surface)
Figure 5 Schematic Diagram of Creating a Slot for Seating the ZS-200M (Slanted Surface)
2. Adequate space for wires connecting to the ZS-200M must be reserved on the rear side of the unit. If the
surface thickness is greater than 10mm, the space reserved for the wires must be about 80mm long and
10mm wide, as shown in Figure 6.
Figure 6 Schematic Diagram of the Reserved Space for the Rear Panel Wire Connections
- 7 -
EN
ZS-2000M_MANUAL_(Installation)_(EN_ES)_A5c_20210623-2021.qxp_Maquetación 1 21/2/22 12:19 Página 7

3. Installing the Microphone Pole.
- Connect the microphone pole at one end in the gooseneck microphone socket of the ZS-200M, and
tighten the pole, as show in Figure 7.
Figure 7 Microphone Pole Installation Diagram
INSTALLING THE ZS-200M ON A CABINET (OPTIONAL)
If it is necessary, the users can choose a rack mount (ZS-200RK) fittings to mount the ZS-200M in a cabinet.
The installation steps are as follows: Buckle the ZS-200M in the rack panel groove, and then cover the rear
cover, and tighten the screws. Refer to Figure 8. After finish the rack mount installation, the ZS-200M can
be installed on a cabinet. Besides, the ZS-200P (Optional) has to be selected instead of removable gooseneck
microphone.
Figure 8 ZS-200M Rack Mount (ZS-200RK) Installation Diagram
CONNECTING THE PROTECTIVE GROUNDING CABINET WIRES
The cabinet door shaft contains one yellow screw as shown in Figure 9, identified with marker ①. Figure 9,
marker ②, represents another grounding terminal in the same position in the cabinet. Connect the two
terminals with a wire.
Connect the grounding screw of all devices in the cabinet to the grounding terminal. For safety reason, it is
recommended to connect an external specified grounding terminal to the one on the cabinet.
Caution:
To prevent a grounding loop, be careful to not let a short circuit occur over the grounding wires.
- 8 -
EN
ZS-2000M_MANUAL_(Installation)_(EN_ES)_A5c_20210623-2021.qxp_Maquetación 1 21/2/22 12:19 Página 8

Figure 9 Schematic Diagram of Cabinet Grounding
INSTALLING THE ZS-2000M AND ZS-1500/ ZS-2250/ ZS-4125 IN THE APPLIANCE CABINET
Install the ZS-2000M and ZS-1500/ ZS-2250/ ZS-4125 into the associated appliance cabinet. This process
is described in the following steps:
1. Connect and hang the PTT microphone in place on the front panel of the ZS-2000M. An installed PTT
microphone is shown in Figure 10.
Figure 10 PTT Microphone Installation Diagram
2. Install brackets on the left and right sides of the ZS-2000M, as shown in Figure 11.
Figure 11 Schematic Diagram of the ZS-2000M Bracket Installation
3. Put the ZS-2000M appliance into the cabinet, and tighten the screws to secure the unit, as shown in
Figure 12.
- 9 -
EN
ZS-2000M_MANUAL_(Installation)_(EN_ES)_A5c_20210623-2021.qxp_Maquetación 1 21/2/22 12:19 Página 9

Figure 12 Schematic Diagram of Installing the ZS-2000M in the Cabinet
4. Install brackets on the left and right sides of the ZS-1500/ZS-2250/ZS-4125, as shown in Figure 11.
5. Install the ZS-1500/ZS-2250/ZS-4125 appliance into the cabinet, and tighten the screws to secure the unit,
as shown in Figure 12.
Note: 1U (1U=44.45mm) of space is required right above the ZS-1500/ZS-2250/ZS-4125 to allow for
proper appliance ventilation.
It is recommended to use an empty panel to close and open the installation space of the cabinet.
CONNECTING THE PROTECTIVE GROUNDING APPLIANCE WIRES
The ZS-2000M and ZS-1500/ZS-2250/ZS-4125 grounding terminals must be connected to the terminal
blocks through flexible cables with a cross-section of 1.5mm2 within the cabinet, as shown in Figure 9.
Note: Do not connect the grounding output cable with the grounding input cable as a short circuit can
occur.
CONNECTING THE SYSTEM COMPONENTS
This section describes the connections between the following system components:
- Connecting the Sound Source Equipment to the ZS-2000M or ZS-4328IO
- Connecting the ZS-2000M to the ZS-1500/ZS-2250/ZS-4125
- Connecting the ZS-2000M and ZS-4328IO to the ZS-200M
- Connecting the Dry Contacts (Optional)
- Connecting the Noise Detector (Optional)
- 10 -
EN
ZS-2000M_MANUAL_(Installation)_(EN_ES)_A5c_20210623-2021.qxp_Maquetación 1 21/2/22 12:19 Página 10

Connecting the Sound Source Equipment to the ZS-2000M or ZS- 4328IO
Connect the external sound source equipment to the ZS-2000M or ZS-4328IO appliance as necessary.
The sound source connected to the ZS-2000M will be used for broadcasting in this device zones .The
sound source connected to the ZS-4328IO will be used for broadcasting in the all zones of the system.
Figure 13 Schematic Diagram of Connecting the ZS-2000M External Sound Source Equipment
Figure 14 Schematic Diagram of Connecting the ZS-4328IO External Sound Source Equipment
Connecting the ZS-2000M to the ZS-1500/ ZS-2250/ ZS-4125
Note: The ZS-2000M can be connected to the power amplifier in the following configurations:
-Connect the PA1/2 and PA2 port of the single-channel power amplifier to the ZS-2000M control
port using two twisted-pair cables, as shown in Figure 1.
-Connect the PA1/2 port of the two-channel power amplifier to the ZS-2000M control port using
one network cable. Refer to 1, Figure 2.
-Connect the PA1/2 and PA3/4 port of the four-channel power amplifier to the ZS-2000M control
port using two network cables, as shown in 1, Figure 3.
1. Connect the ZS-1500/ZS-2250/ZS-4125 RJ45 port to the ZS-2000M control port using the audio input
lines that are included in the package containing the ZS-1500/ZS-2250/ZS-4125, as shown in Figure 15.
Figure 15 Connecting the RJ45 Audio Cable to the ZS-2000M and ZS-1500/ ZS-2250/ ZS- 4125
- 11 -
EN
ZS-2000M_MANUAL_(Installation)_(EN_ES)_A5c_20210623-2021.qxp_Maquetación 1 21/2/22 12:19 Página 11

2. Connecting the ZS-1500/ ZS-2250/ ZS-4125 audio output to the ZS-2000M.
a. Strip one end of the prepared audio output cable jacket by 10mm, and feed the cable through the
protective cover of the power amplifier, as shown in Figure 16.
Figure 16 Schematic Diagram of a Feeding the Audio Output Cable Through the Protective Terminal Cover
b. Take the end of the cable that was fed through the protective cover of the power amplifier wiring
terminal connect the cable to the power amplifier output wiring terminal (7P green euroblock connector
of 5.08mm), and tighten the screws. Refer to Figure 17.
Figure 17 Connecting the Audio Output Cable to the Power Amplifier Input Wiring Terminal
c. Feed the other end of the audio output cable through the ZS-2000M protective cover of the terminal.
Refer to Figure 16.
d. Connect the end of the cable that was fed through the protective cover of the ZS-2000M to the power
amplifier input wiring terminal (4P green euroblock connector of 5.08mm), and tighten the screws.
Refer to Figure 17.
e. Insert the power amplifier audio output wiring terminal of the installed audio output cable into the ZS-
1500/ ZS-2250/ ZS-4125 audio output port, as shown in Figure 18.
Figure 18 Schematic Diagram of the Audio Output Wiring Terminal Installation
- 12 -
EN
ZS-2000M_MANUAL_(Installation)_(EN_ES)_A5c_20210623-2021.qxp_Maquetación 1 21/2/22 12:19 Página 12

f. Insert the power amplifier input wiring terminal of the installed audio output cable into the ZS-2000M
PA audio input port, as shown in Figure 19.
Figure 19 Schematic Diagram of the Audio Input Wiring Terminal Installation
g. Cover the power amplifier terminal with the protective terminal cover and tighten the screws, as shown
in Figure 20. This same operation applies to the ZS-2000M terminal and related protective cover.
Figure 20 Schematic Diagram of the Protective Audio Input Terminal Cover
Connecting the Dry Contacts (Optional)
This section describes connecting the external equipment or switch through the dry contacts.
ZS-2000M Dry Contact Input Preparation
1. Connect the dry contact cable to the dry contact input terminal.
Strip the wire jacket off one end of the prepared dry contact connection cable by about 10mm, insert
the wires into the dry contact wiring terminal (8P green euroblock connector of 3.81mm), and tighten
the screws. Refer to Figure 17 for more information.
2. Insert the dry contact input wiring terminal of the installed input cable into the ZS-2000M dry contact
port.
3. Connect the external dry contact equipment or switch to the other end of the dry contact input cable,
as shown in Figure 21.
- 13 -
EN
ZS-2000M_MANUAL_(Installation)_(EN_ES)_A5c_20210623-2021.qxp_Maquetación 1 21/2/22 12:19 Página 13

Figure 21 Connect External Dry Contact or Switch
ZS-4328IO Dry Contact Input Preparation
IO dry contact inputs are mainly used to connect the fire alarm system, realizes the fire fighting linkage. The
connection mode of dry contact cable is similar to ZS-2000M, but in order to meet the dry contact cable
monitoring need, the resistance has to be increased in the third party equipment, the connection diagram
as follows:
The detailed setting of the fire alarm relation that is triggered through IO dry contact input, please refer to
Digital Public Address and Voice Alarm System Configuration Manual.
ZS-2000M Dry Contact Output Preparation
1. Strip off the wire jacket of one end of prepared dry contact output cable by about 10mm, insert dry
contact wiring terminal (8P green euroblock connector of 3.81mm), and tighten the screws.
2. Insert the dry contact output wiring terminal of the installed output cable into the ZS-2000M dry contact
port.
3. Connect the external equipment or switch to the other end of the dry contact output cable. Figure 22
is schematic diagram of the ZS-2000M and three-line volume controller connection. Figure 23 is
schematic diagram of the ZS-2000M and four-line volume controller connection.
- 14 -
EN
ZS-2000M_MANUAL_(Installation)_(EN_ES)_A5c_20210623-2021.qxp_Maquetación 1 21/2/22 12:19 Página 14

Figure 22 Schematic Diagram of the ZS-2000M and Three-Line Volume controller Connection
Figure 23 Schematic Diagram of the ZS-2000M and Four-Line Volume controller Connection
ZS-4328IO Dry Contact Output Preparation
The dry contact output of ZS-4328IO can be configured as fault signal output which will be connected with
fire alarm system, and delivery the system fault status. The NO and COM of a dry contact output will be
used.
1. Strip off the wire jacket of one end of prepared dry contact output cable by about 10mm, insert dry
contact wiring terminal (6P green euroblock connector of 3.5mm), and tighten the screws.
2. Insert the dry contact output wiring terminal of the installed output cable into the ZS-4328IO dry contact
port.
3. Connect the fire alarm system. Figure 24 is schematic diagram of the ZS-4328IO and fire alarm system
connection.
Figure 24 Schematic Diagram of the ZS-4328IO and fire alarm system Connection
- 15 -
EN
ZS-2000M_MANUAL_(Installation)_(EN_ES)_A5c_20210623-2021.qxp_Maquetación 1 21/2/22 12:19 Página 15

Connecting the Noise Detector (Optional)
If detecting the environmental noise is required, the noise detector can be connected through the AVC port.
1. Insert the prepared AVC connection cable into the AVC input wiring terminal and tighten the screws.
2. Insert the AVC wiring terminal of the installed cable into the ZS-2000M AVC port.
3. Install the noise detector on the other end of the AVC cable, as shown in Figure 25.
Figure 25 Schematic Diagram of the Noise Detector Connection
Connecting the Loudspeakers
The ZS-2000M can be directly connected to loudspeakers. The following steps describe this process:
1. Strip off the wire jacket of one end of the prepared audio cable by about 10mm, insert the loudspeaker
wiring terminal, and tighten the screws.
2. Insert the loudspeaker wiring terminal of the installed audio cable into the MCU loudspeaker port.
3. Connect the loudspeaker to the other end of the audio cable, as shown in Figure 26.
Figure 26 Schematic Diagram of the Loudspeaker and Audio Cable Connection
Connecting the ZS-2000M and ZS-4328IO to the ZS-200M
The ZS-2000M and ZS-4328IO can be connected to the ZS-200M in the following two ways:
- Directly connecting the ZS-2000M and ZS-4328IO to the ZS-200M
- Connecting the ZS-2000M and ZS-4328IO to the ZS-200M through a network switch
DIRECTLY CONNECTING THE ZS-2000M AND ZS-4328IO TO THE ZS-200M
Connect the ZS-2000M and ZS-4328IO to the ZS-200M using 2 twisted-pair cables. The following
describes this process:
- 16 -
EN
ZS-2000M_MANUAL_(Installation)_(EN_ES)_A5c_20210623-2021.qxp_Maquetación 1 21/2/22 12:19 Página 16

Insert one end of the prepared twisted-pair cable into the network port located on the rear panel of the
ZS-2000M, and the other end of the cable into the RJ45 port located on the rear panel of the ZS-200M,
and connect the network port of ZS-2000M to the ZS-4328IO’s network port using another twisted-pair
cable. As shown in Figure 27.
Figure 27 Schematic Diagram of Directly Connecting the ZS-2000M and ZS-4328IO to the ZS-200M
- 17 -
EN
ZS-2000M_MANUAL_(Installation)_(EN_ES)_A5c_20210623-2021.qxp_Maquetación 1 21/2/22 12:19 Página 17

Connecting the ZS-2000M and ZS-4328IO to the ZS-200M through a Network Switch
Connect the ZS-2000M and ZS-4328IO to the ZS-200M through a network switch. The ZS-2000M and
network switch must be on the same network. Refer to Figure 28:
Figure 28 Schematic Diagram of Connecting the ZS-2000M and ZS-4328IO to the ZS-200M Through a
Network Switch mode 1
The ZS-200M can get the power supply from ZS-2000M directly. Connect one end of the prepared standby
power supply cable to the ZS-2000M standby power supply output port, and connect the other end of the
cable into the ZS-200M power supply input port. Refer to Figure 29:
Figure 29 Schematic Diagram of Connecting the ZS-2000M and ZS-4328IO to the ZS-200M Through a
Network Switch mode 2
- 18 -
EN
ZS-2000M_MANUAL_(Installation)_(EN_ES)_A5c_20210623-2021.qxp_Maquetación 1 21/2/22 12:19 Página 18

CONNECTING THE POWER SUPPLY CABLES
The power supply cables for the main system components include the following items:
- ZS-2000M or ZS-4328IO Main and Standby Power Supply Cables
- ZS-1500/ZS-2250/ZS-4125 Main and Standby Power Supply Cables
- ZS-200M Power Supply Cable
ZS-2000M or ZS-4328IO Main and Standby Power Supply Cables
CONNECTING THE MAIN POWER SUPPLY CABLE
1. Strip off the wire jacket of one end of the AC power supply cable by 20mm and connect the cable to
the main power supply wiring terminal, as shown in Figure 30.
Figure 30 Schematic Diagram of the ZS-2000M or the ZS-4328IO Main Power Supply Cable Connection
Note: The wires are identified as L (Live wire), N (Null wire), and E (Earth wire).
2. Tighten the screws to prevent the power supply cable from coming loose, and cover the power supply
interface set.
3. Insert the wiring terminal of the installed power supply cable into the main power supply input port of
the ZS-2000M or the ZS-4328IO, and tighten the screws at both ends.
4. Insert the other end of the power supply cable into the main power supply equipment.
CONNECTING THE STANDBY POWER SUPPLY CABLE
Connect one end of the prepared standby power supply cable to the ZS-2000M or the ZS-4328IO standby
power supply input port, and the other end of the cable to the emergency power supply (such as the fire alarm
system power supply). The power supply cable must support DC 24V. Pay special attention to the
connections of the positive and negative poles of the power supply. Refer to Figure 31 and Figure 32.
- 19 -
EN
ZS-2000M_MANUAL_(Installation)_(EN_ES)_A5c_20210623-2021.qxp_Maquetación 1 21/2/22 12:19 Página 19

Figure 31 Schematic Diagram of the ZS-2000M Standby Power Supply Cable Connection
Figure 32 Schematic Diagram of the ZS-4328IO Standby Power Supply Cable Connection
- 20 -
EN
ZS-2000M_MANUAL_(Installation)_(EN_ES)_A5c_20210623-2021.qxp_Maquetación 1 21/2/22 12:19 Página 20
Other manuals for ZS-2000M
2
Table of contents
Languages:
Other FONESTAR Control Unit manuals
Popular Control Unit manuals by other brands

Motorola
Motorola M68EM05D32 user manual

Siemens
Siemens Milltronics BW500 operating instructions

entegris
entegris Integra 201-38 instruction sheet

National Instruments
National Instruments NI 9227 Operating instructions and specifications

Danfoss
Danfoss AK-CC 550A Troubleshooting Guidelines

BENDIX
BENDIX PP-DC PARK CONTROL VALVE manual