fontastic 253393 User manual

GB
Improvement and changes of the technical specications and other data’s could be made without prior notice Fontastic, by D-Parts Mobilphon & Zubehör GmbH ● Birkenweiherstr, 16 ● 63505 Langenselbold, Germany / V1_10_18
WLAN Repeater
Quick Guide
Thank you for choosing Fontastic®products.
This document explains the operation and functions of the WiFi repeater.
Please take a moment to read this quick guide.
Please observe the safety instructions.
Note: Operating instructions for the product are available at www.d-parts.de.
Overview
This compact WiFi repeater used to increase the
range of a WiFi network can also integrate non
WiFi capable devices into the WiFi by using the
network interface or Act as a access point to
create an independent WiFi network.
LED functions
Connected Lights up permanently
Not connected Flashing slowly
WPS Search Flashes fast
Powered off LED is off
Get Started
Plug the device into an easily accessible power outlet. The repeater is ready to operate as soon as
the blue LED is slowly blinking.
Reinforcing an existing WiFi network (Repeater mode)
In repeater mode you can increase the range of an existing WiFi by reproducing the radio signal. Two
conguration options are available. Use WPS if your router supports this function.
By using WPS
1. Make sure that the reception is good with the existing WiFi at the repeater location. For example,
you can check this with your smartphone by opening the WiFi settings and checking the
reception.
2. Activate the WPS function on your WiFi router by either pressing the WPS button on your router or
activating the function via the web interface. Refer to your router‘s user guide for more information
on how to activate WPS.
3. After WPS has been activated on your router, press and hold the WPS button on the repeater for
about 1 second. The blue LED will start to ash quickly.
4. As soon as the blue LED lights up permanently, the connection is established. The repeater now
retransmits the radio signal of your router‘s existing WiFi network.
Note: For security reasons, the WPS function of your router only remains active for a few minutes.
If the connection is not established within 3 minutes, place the repeater closer to your router and
repeat the procedure. Please note that the repeater only supports WiFi networks with 2.4GHz. If your
existing WiFi network is hidden, you should make it visible for the conguration in the settings of your
router. If your router does not support WPS, congure the repeater by manually entering network
information.
By manually entering network information
1. Make sure that the reception is good with the existing WiFi at the repeater
location. For example, you can check this with your smartphone by
opening the WiFi settings and checking the reception.
2. Connect your WiFi enabled device (e.g. smartphone, notebook) to the
„Wireless-N“ network automatically created by the repeater or connect
your device to the repeater with a network cable.
3. Open your Internet browser and access the repeater‘s web interface at http://192.168.10.1,
http://ap.setup or scan the QR code.
4. Select the language and log in. The default password is „admin“.
5. Select „Wizard“ and then „Repeater“. The repeater will list all available networks.
6. Select the network you want to reinforce, enter the password of the network and click „Connect“.
You can change the network identier (SSID) if desired. However, we recommend using the same
SSID that your WiFi uses.
7. The repeater restarts. As soon as the blue LED lights up permanently, the connection is establis-
hed. The repeater now retransmits the radio signal of your router‘s existing WiFi network.
Integrating non WiFi capable devices to the existing WiFi
If you want to integrate a non WiFi capable device into the network, you can connect it to the repeater
using the network cable.
1. Connect the repeater to your existing WiFi network as described above and make sure that the
blue LED lights up permanently.
2. Connect the device to be integrated with a network cable and the repeater.
3. The connected device should now be connected to the network.
Creating an independent WiFi (Access point mode)
In case you do not have a WiFi in your existing wired network or would like to expand an existing
WiFi by cable, you can create a WiFi using the Access Point mode.
1. Connect your WiFi enabled device (e.g. smartphone, notebook) to the „Wireless-N“ network auto-
matically created by the repeater or connect your device to the repeater with a network cable.
2. Open your Internet browser and access the repeater‘s web interface at http://192.168.10.1, http://
ap.setup or scan the QR code.
3. Select the language and log in. The default password is „admin“.
4. Select „Wizard“ and then „AP“ to start the access point conguration.
5. Enter the network ID under „WiFi SSID“, set the encryption to „WPA2-PSK“ for maximum security,
and enter a secure password for the WiFi to be created under „Password“.
6. Click on „Apply“ to save the settings.
7. the repeater restarts and is now accessible under the network identication you have set.
8. You may now connect the repeater to your existing wired network.
Changing the repeater password
For your safety, you should change the repeater‘s default password after setup to prevent unautho-
rized access to the repeater conguration.
1. Connect your WiFi enabled device (e.g. smartphone, notebook) to the repeater via WiFi or network
cable.
2. Open your internet browser and access the web interface of the router via the address http://
ap.setup or scan the QR code.
3. Select the language and log in. The default password is „admin“.
4. Go to „System“ and then „System Safety“.
5. Enter the old password, enter the new password twice and conrm the change by clicking on
„Apply“.
Reset device to factory settings
To reset the device to factory settings and delete WiFi settings, hold down the WPS key for 6 seconds
and release the button. Alternatively, you can reset the device via the web interface.
No commitment for any damage at misuse.
In case you need technical support, please contact our support team at our website under support.
fontastic.eu.
Safety advice
• Do not open the device.
• Do not immerse the device in water and protect it from humidity.
• Never use force to connect or disconnect the plug.
• Keep the device away from children.
• Disconnect electronic devices from the power when not using them for longer time.
• The power outlet which the device is to be used must be easily accessible.
• Never use the device if it is visibly damaged.
• Do not operate the unit outdoors or in rooms with high humidity.
Technical Data
• Input voltage: 100-240V~ 50/60Hz
• Frequency: 2400-2483.5MHz (2.4GHz)
• Two 3dBi omnidirectional antennas
• One 100-Mbit/s Fast Ethernet network connection
• WiFi standard: 802.11b/g/n with WEP/WPA-PSK/WPA2-PSK
• Status LED: Blue (can be switched off)
• Firmware updateable
• Dimensions: 42x42x68mm
• Weight: 46g
Open Source Software
Some software components of this product incorporate source code covered under GNU General
Public License (GPL), GNU Lesser General Public License (LGPL), OpenSSL License, BSD License
and other open source licenses. To obtain the source code covered under the open source licenses,
contact us at [email protected] and we will send you the source code on a physical medium,
the production costs of which we claim in return.
Registration and Safety
Certifcation/General Information
We hereby declare, that this device carries the CE mark in accordance with the regulations
and standards. It conforms with the fundamental requirements of the (RED) 2014/53/EU
directive.
Note on environmental protection:
After the implementation of the European Directive 2012/19/EC in the national legal system,
the following applies: Electrical and electronic devices may not be disposed of with domestic
waste. Consumers are obliged by law to return electrical and electronic devices at the end of
their service lives to the public collecting points set up for this purpose or point of sale. Details
of this are defned by the national law of the respective coun-try. This symbol on the product, the ins-
truction manual or the package indicates that a product is subject to these regulations. By recycling,
re-using the materials or other forms of utilising old devices, you are making an important contribution
to protecting our environment.
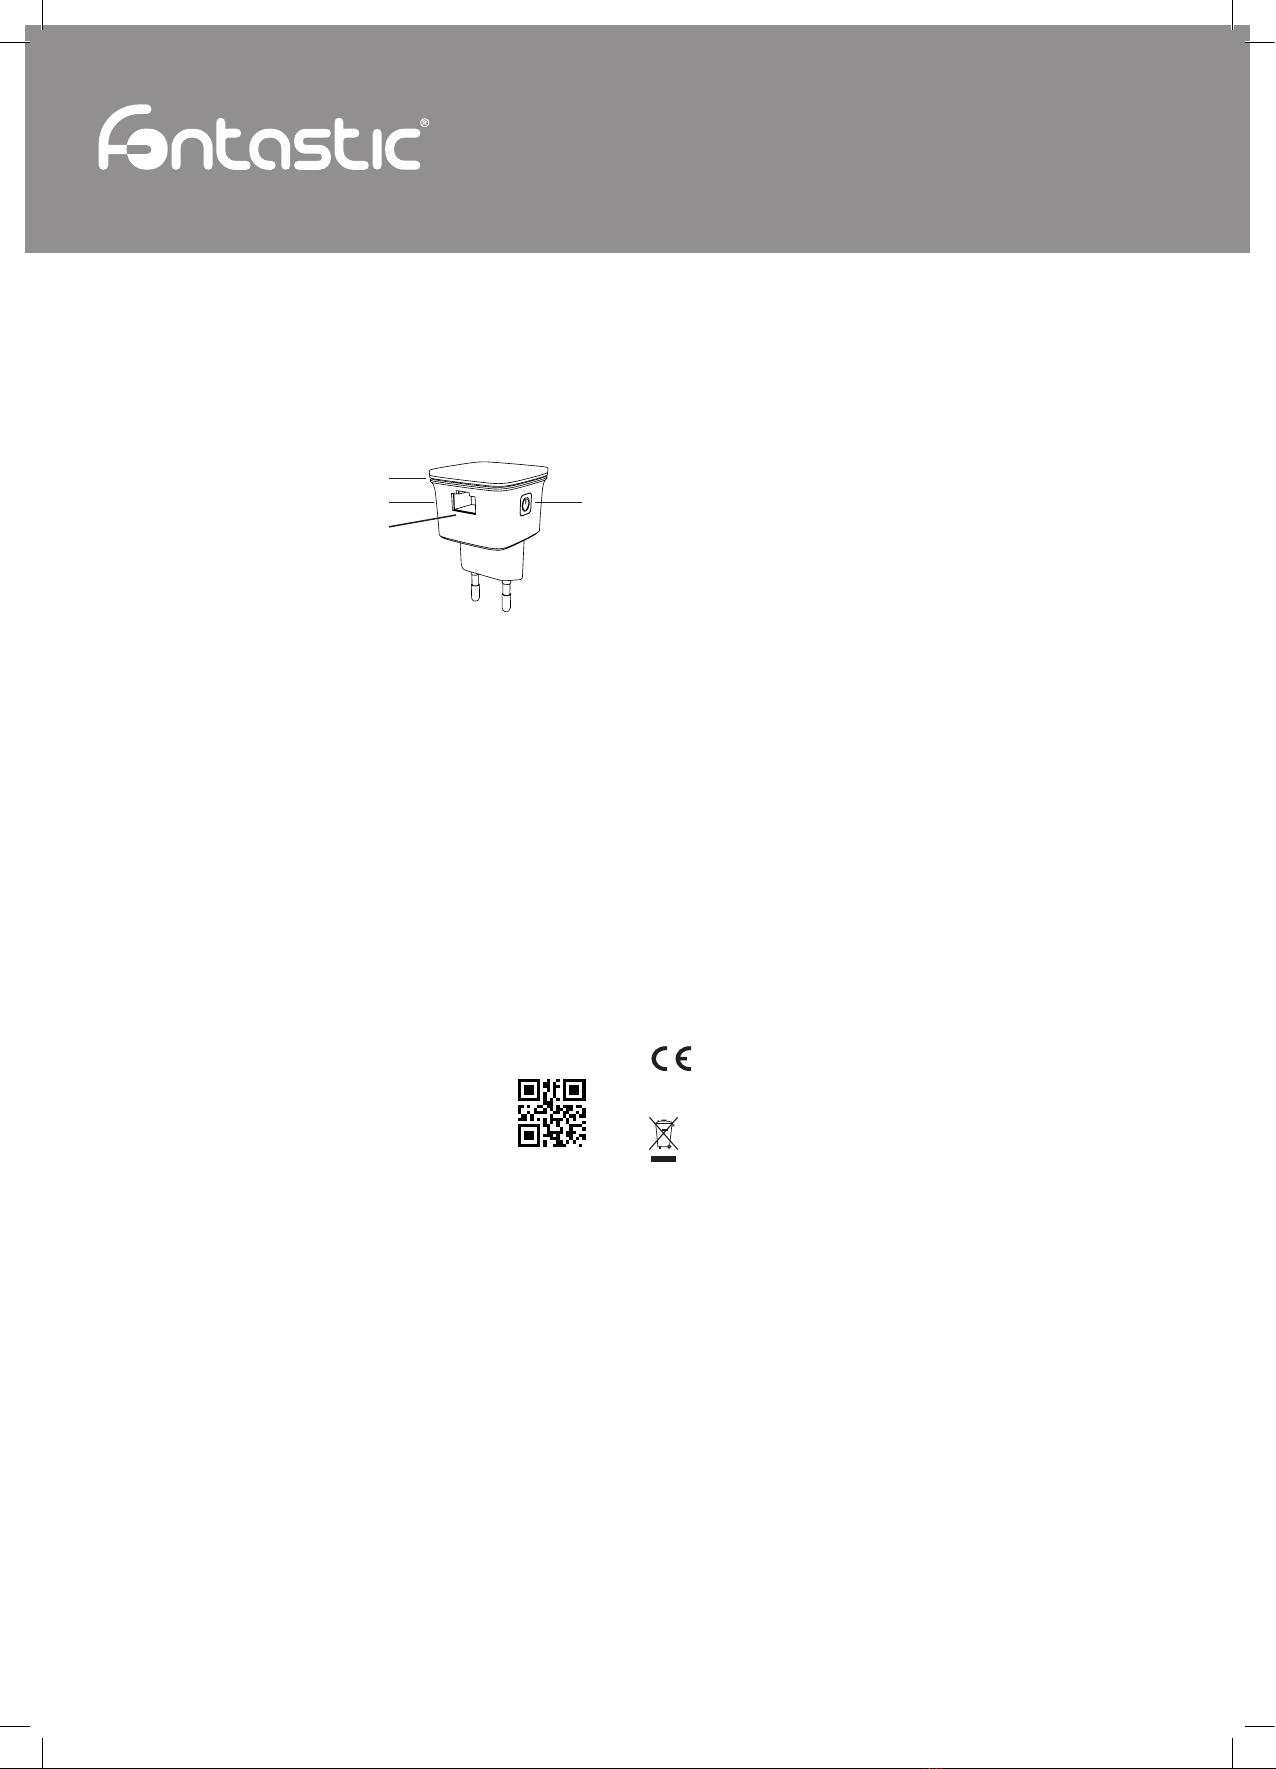
1. Status LED 3. Network interface
2. WPS button
1
2
3
4
4. On/Off button


