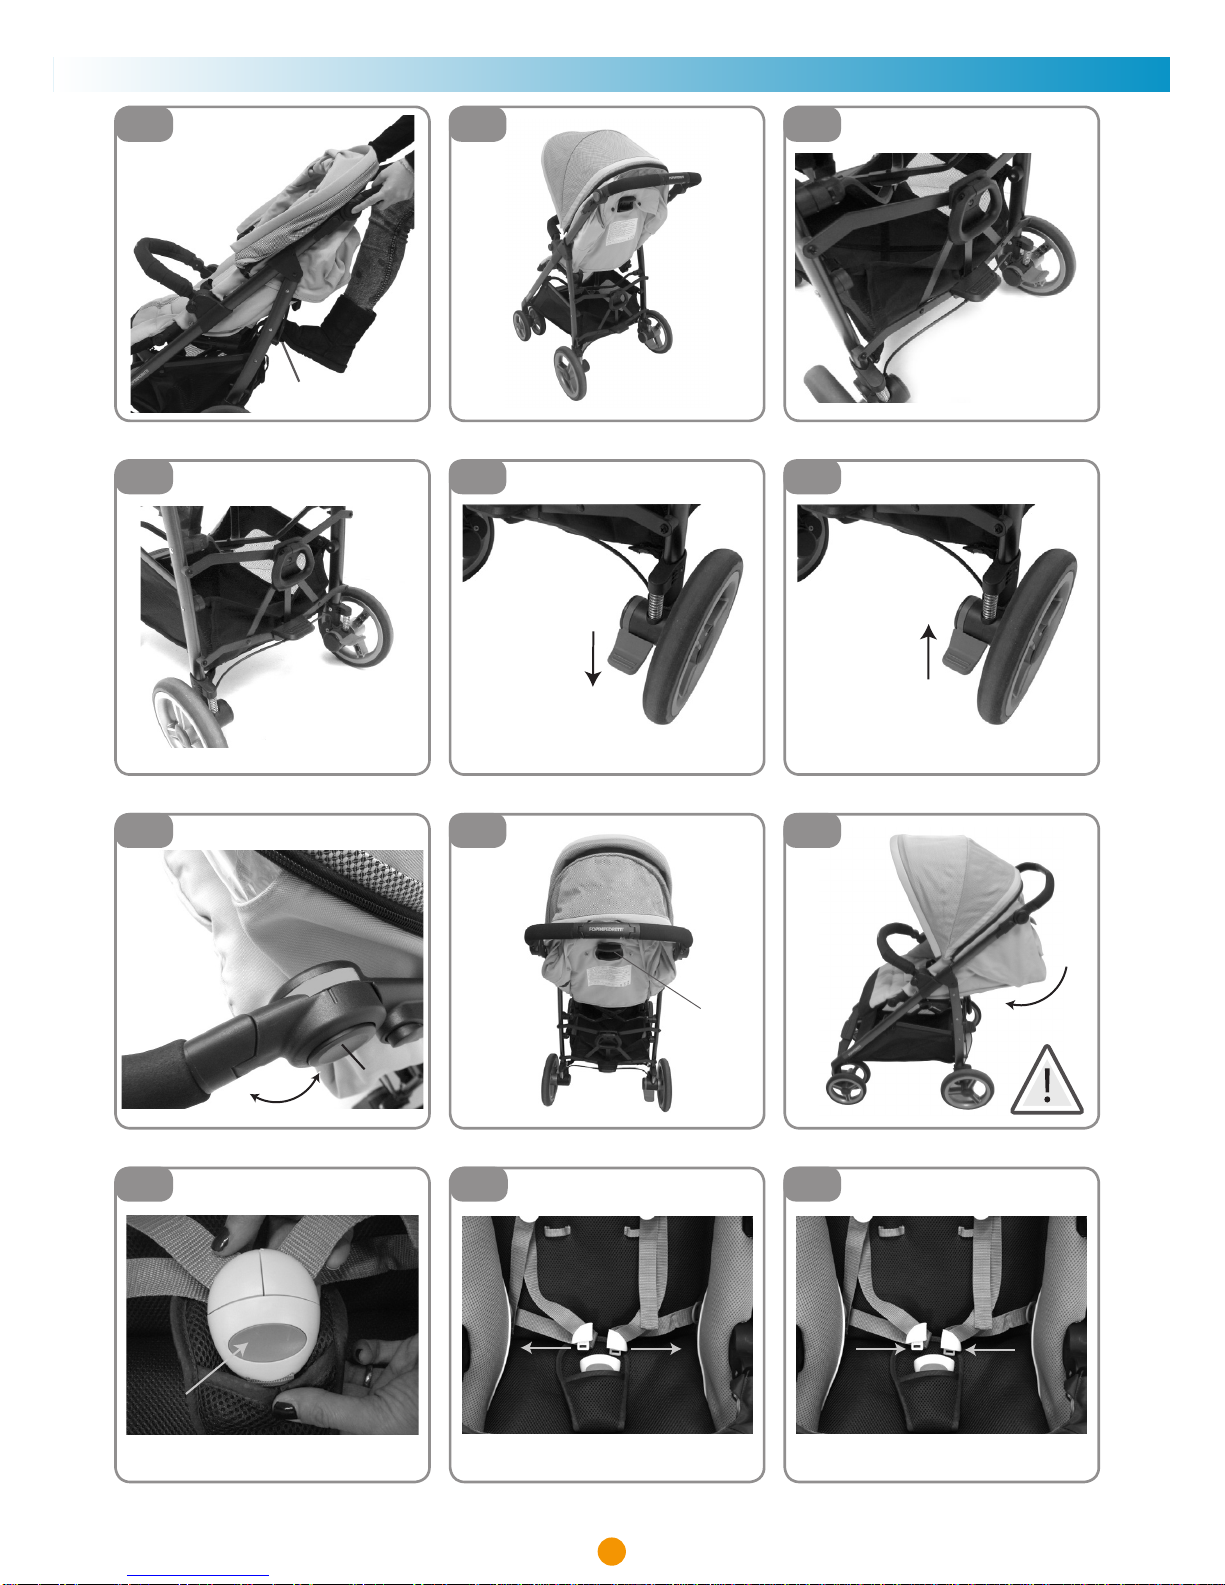
APERTURA ( g.1 - g.2 - g.3 - g.4): Premere entrambi i pulsanti laterali del manubrio “A” e
ruotare il manubrio nella posizione 1, 2 o 3 un click vi indicherà il bloccaggio.
Premere entrambe le leve (gancio di chiusura) “B” e sollevare il telaio verso l’alto,
contemporaneamente premere con il piede il pedale di bloccaggio posteriore “C” verso il basso,
no a completa apertura.
Vericare che il passeggino sia correttamente aperto, premendo il manubrio ai lati, la struttura
deve essere bloccata, se un lato non si è agganciato correttamente, afferrare il manubrio dal lato
non agganciato e tirare per far agganciare correttamente il telaio.
RUOTE ANTERIORI
Montaggio ruote anteriori (g.5): Sollevare il telaio con una mano ed inserire le ruote anteriori,
con la leva di bloccaggio rivolta verso l’alto sul mozzo ruota. Uno scatto vi indicherà il corretto
innesto. Vericare il corretto aggancio di entrambe le ruote, tirando verso il basso non devono
sganciarsi.
Smontaggio ruote anteriori(g.6): premere il dispositivo di bloccaggio, nella parte inferiore della
ruota e mantenendolo premuto, rimuovere la ruota dal mozzo.
RUOTE POSTERIORI
Montaggio ruote posteriori (g.7): Inserire il perno della ruota nel foro, sentirete un click ad
innesto avvenuto. Assicurarsi che la ruota sia correttamente agganciata, tirandola verso l’esterno
non deve slarsi.
Smontaggio ruote posteriori (g.8): Premere la leva “A” in metallo sul mozzo ruota e
contemporaneamente slare la ruota.
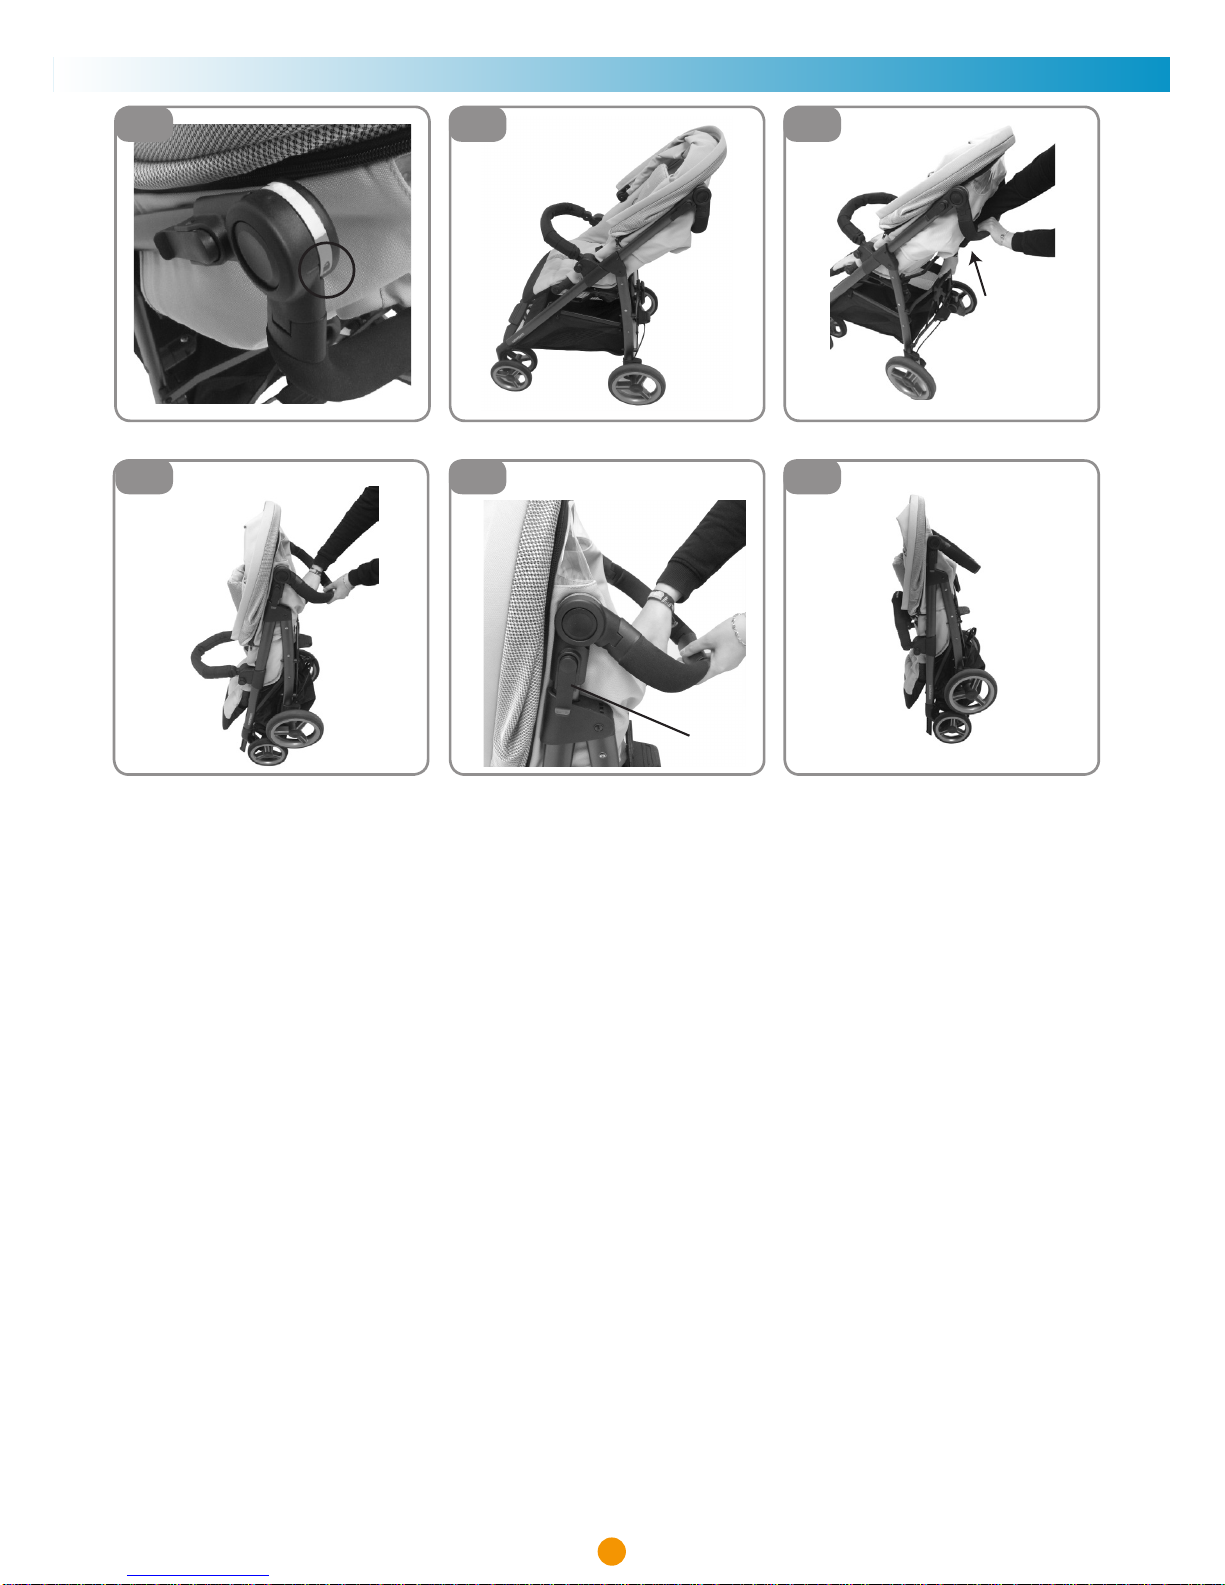
INSERIMENTO SEDUTA (utilizzo come passeggino)
Montaggio seduta (g.9 - g.10): per agganciare la seduta, posizionare la seduta come indicato in
gura.
Allineare ed inserire i connettori in plastica della seduta nelle proprie sedi sul telaio del passeggino.
Premere no a quando non sentire click, questo vi indicherà il corretto aggancio.
AVVERTENZA: Prima dell’utilizzo assicurarsi sempre che entrambi i supporti della seduta siano
correttamente agganciati al telaio, sollevando la seduta verso l’alto non deve sganciarsi.
Smontaggio seduta (g.11): premere, da ambo i lati, i pulsanti “A” e rimuovere la seduta
sollevandola.
MONTAGGIO BRACCIOLO DI PROTEZIONE
Montaggio(g.12): allineare il bracciolo alle proprie sedi e premere da ambo i lati, un click vi
indicherà il corretto aggancio.
Smontaggio(g.13): premere il pulsante “A” da ambo i lati del bracciolo e contemporaneamente
tirare per rimuoverlo .
Apertura da un solo lato (g.14): premere il pulsante A da un lato del bracciolo e tirare per aprirlo
a cancelletto.
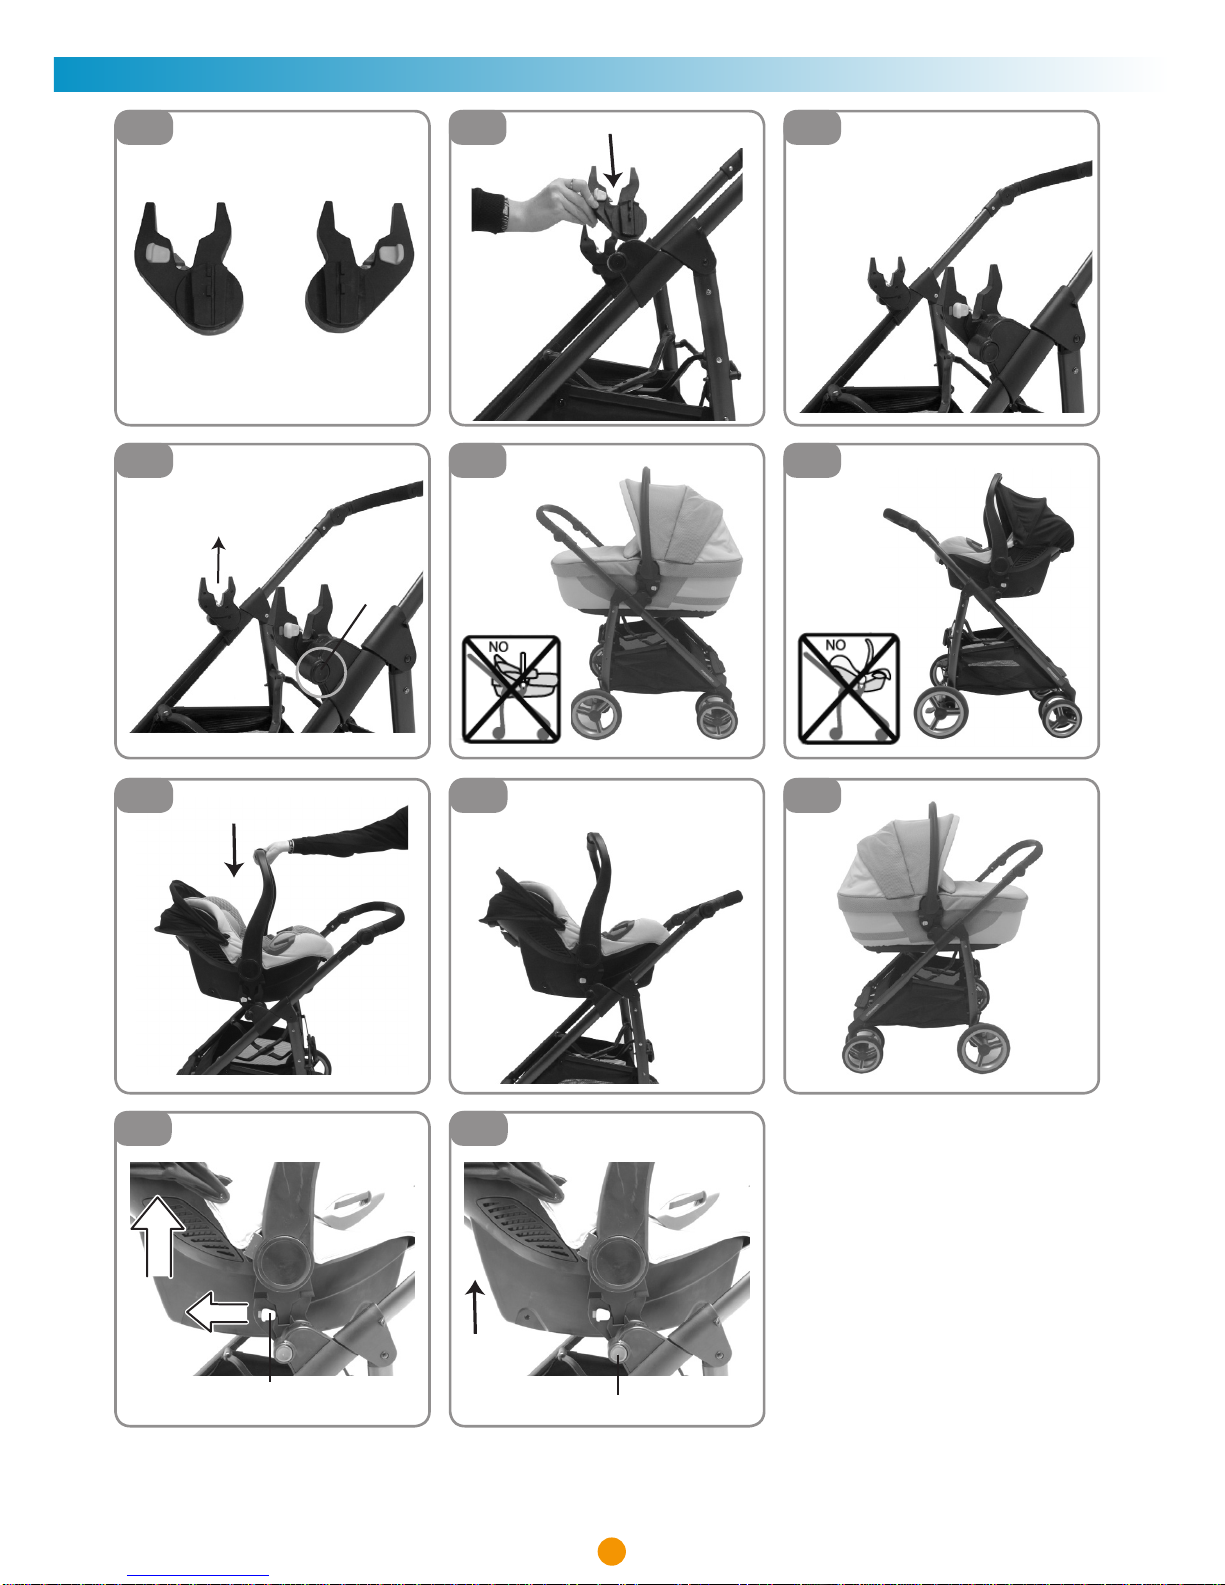
MONTAGGIO CAPOTTINA
Montaggio (g.15a/b): agganciare al telaio il supporto della capottina da ambo i lati.
Agganciare i bottoni automatici della capottina sul retro schienale.
Smontaggio (g.16): tirare e sganciare il supporto della capottina dal telaio, da ambo i lati.
MONTAGGIO