Foppapedretti Classic User manual

NAVICELLA - Istruzioni di montaggio
CARRY COT - Assembly instrucons
NACELLE - Noce d’ulisaon
KORB - Montageanweisungen
MOISÉS - Manual de instrucciones
ΚΑΛΑΘΆΚΙ - Οδηγιεσ χρησησ
ЛЮЛЬКА-ПЕРЕНОСКА - Инструкция по установке
KOŠARA ZA NOŠENJE - Upute za sastavljanje
IT
EN
FR
DE
ES
EL
RU
HR
Classic
EN 1888-1:2018
EN 1466:2014+AC:2015

2
IMPORTANTE – LEGGERE
ATTENTAMENTE E CONSERVARE PER
FUTURO RIFERIMENTO.
IMPORTANT - READ CAREFULLY AND
KEEP FOR FUTURE REFERENCE.
IMPORTANT – A LIRE
ATTENTIVEMENT ET A CONSERVER
POUR REFERENCE ULTERIEURE.
WICHTIG – BITTE SORGFÄLTIG LESEN
UND FÜR SPÄTERES NACHLESEN
UNBEDINGT AUFBEWAHREN.
I T.
EN.
FR.
DE.

3
IMPORTANTE - LEER
DETENIDAMENTE Y MANTENERLAS
PARA FUTURAS CONSULTAS.
ΣΗΜΑΝΤΙΚΟ - ΚΡΑΤΗΣΤΕ ΤΙΣ ΟΔΗΓΙΕΣ
ΓΙΑ ΝΑ ΤΙΣ ΣΥΜΒΟΥΛΕΥΕΣΤΕ
ΣΤΟ ΜΕΛΛΟΝ - ПРОЧТИТЕ
ВНИМАТЕЛЬНО.
ВАЖНАЯ ИНФОРМАЦИЯ!
ВНИМАТЕЛЬНО ПРОЧТИТЕ И
СОХРАНИТЕ ДЛЯ ДАЛЬНЕЙШЕГО
ПОЛЬЗОВАНИЯ
VAŽNO!
PAŽLJIVO PROČITAJTE UPUTE I
ČUVAJTE SE BUDUĆE REFERENCE
ES.
EL.
RU.
HR.

4
2
1
7
6
1
2 3
54

5
8 9
10 11
13 14
12

• ITALIANO • • ITALIANO •
6
ATTENZIONE: La navicella è utilizzabile per il trasporto in auto solo se si utilizza il “KIT NAVICELLA
CLASSIC” cod. 9700372010 (venduto separatamente).
Fare riferimento al manuale d’uso del kit per tutte le informazioni relative al montaggio del “KIT
NAVICELLA CLASSIC” sulla navicella, per l’installazione in auto.
A- Asole per inserimento cintura di sicurezza a 3 punti “KIT NAVICELLA CLASSIC” (venduto separatamente)
B- Perno di aggancio bbie metalliche KIT NAVICELLA CLASSIC (venduto separatamente)
Nota importante: le immagini e le istruzioni contenute in questo libretto si riferiscono ad una versione della navicella;
alcuni componenti ed alcune funzionalità qui descritte possono variare a seconda della versione da voi acquistata.
A
B

• ITALIANO • • ITALIANO •
7
Regolazione maniglia (g. 1)
Premere i pulsanti laterali e regolare la maniglia nella nuova posizione, rilasciare i pulsanti e assicurarsi
dell’avvenuto bloccaggio (A).
Montaggio capottina (g. 2, g.3, g 4, g.5)
Allineare ed inserire i perni della capottina, nelle apposite sedi a lato della struttura.
Premere verso il basso, un click indicherà l’avvenuto bloccaggio.
Agganciare i bottoni automatici della capottina.
Per rimuovere la capottina, premere la parte inferiore del perno di ssaggio della capottina e
contemporaneamente slare la capottina dalla sede (g. 5).
Copertina (g.6, g.7, g.8)
Fissare la copertina alla navicella mediante i bottoni automatici (a).
Agganciare i lembi con bottoni automatici (b) (g. 7).
Sollevare il lembo in tessuto anteriore della copertina per una maggiore protezione (c), agganciare i
bottoni automatici (g. 7).
Regolazione capottina (g. 9)
Reclinare o sollevare la capottina per ottenere la posizione desiderata.
Ventilazione (g. 10)
Sollevare il lembo in tessuto, per ottenere una ventilazione all’interno della navicella
Aerazione interna (g. 11)
E’ possibile regolare l’aerazione interna per mezzo della leva (A).
Regolazione schienale (g. 12)
Premere e regolare la leva nella nuova posizione per sollevare o reclinare lo schienale della navicella.
Assicurasi del corretto bloccaggio dello schienale, nella posizione scelta.
Sistema a dondolo (g. 13 - g. 14)
Nella base sono presenti due piedini di appoggio, ripiegare entrambi i piedini verso l’interno per impedire
il movimento a dondolo, spiegare entrambi i piedini verso l’esterno per ottenere il movimento oscillante.
Entrambi i piedini devono essere o ripiegati verso l’interno o spiegati verso l’esterno.
MANUTENZIONE E PULIZIA
Controllare regolarmente la navicella e vericare che non ci siano parti danneggiate o con segni di usura.
Sostituire la navicella qualora siano presenti delle parti danneggiate.
Rivestimento
• Le parti in tessuto possono essere lavate seguendo le indicazioni riportate sull’etichetta di lavaggio.
• Pulire il tessuto con acqua, un detergente neutro e una spugna.
• Non utilizzare mai prodotti per la pulizia abrasivi o a base di ammoniaca, candeggina o acquaragia.
• Pulite il tessuto con una spazzola piuttosto che lavarlo.
• Non riporre il prodotto se ancora bagnato e non lasciarlo in ambienti umidi in quanto potrebbe formarsi
mua.
• Conservare il prodotto in un luogo asciutto.
• Proteggere il prodotto da agenti atmosferici, acqua, pioggia o neve; inoltre l’esposizione continua e
prolungata al sole potrebbe causare cambiamenti di colore in molti materiali.
• Consigliamo di lavare il rivestimento separatamente da altri articoli.
USO NAVICELLA

• ITALIANO • • ITALIANO •
8
• Rispettare le norme per il lavaggio del rivestimento tessile riportate sulle apposite etichette.
• Asciugare perfettamente il rivestimento tessile prima di utilizzarlo o riporlo.
• Per prevenire l’eventuale formazione di mue, si consiglia di arieggiare periodicamente la culla.
Fibbia
Cibo, bevande e altri residui, accumulandosi all’interno della bbia possono inuire sul corretto
funzionamento. Lavare con acqua calda no a quando la bbia torna pulita. Assicurarsi di sentire un click
che indica il corretto aggancio.
Imbracatura e scocca in plastica
Le parti in plastica e in metallo possono essere pulite con acqua tiepida, un detergente neutro e una
spugna.

• ITALIANO • • ITALIANO •
9
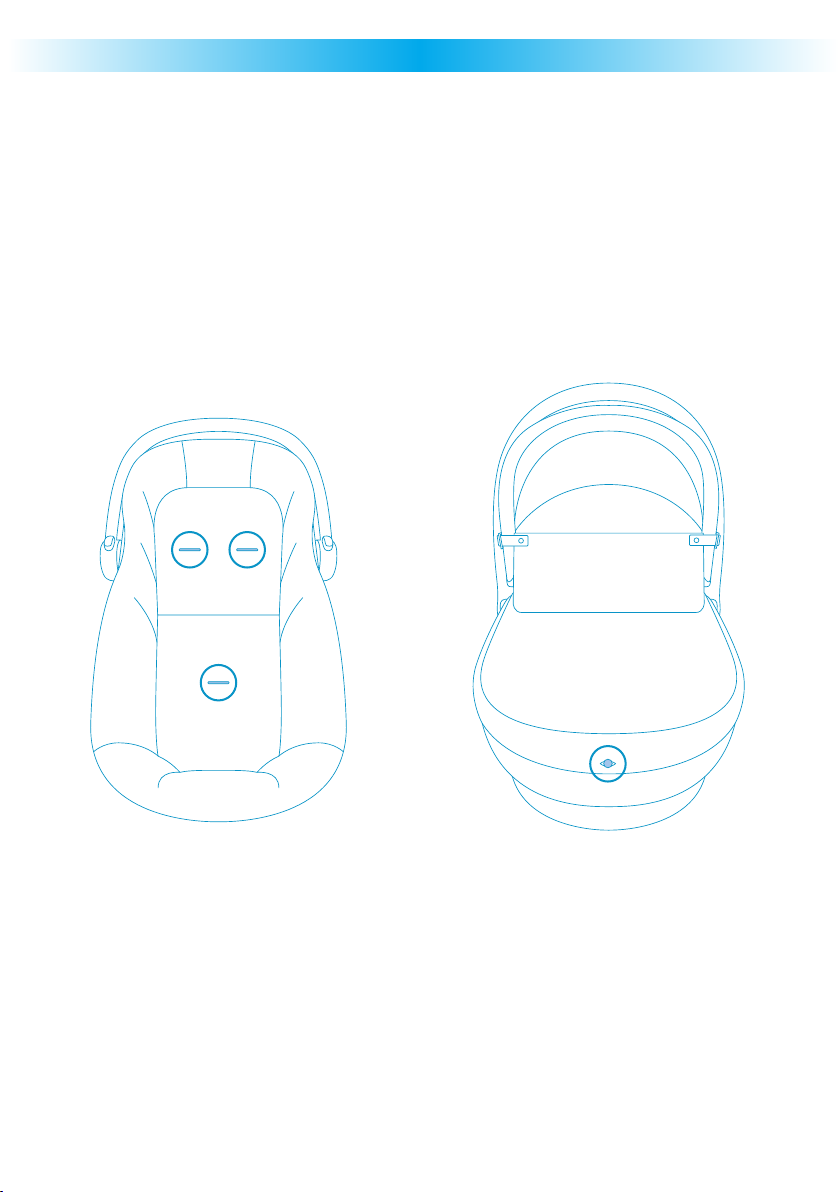
• Nota importante: le immagini e le istruzioni contenute in questo libretto si riferiscono ad una versione
della navicella; alcuni componenti ed alcune funzionalità qui descritte possono variare a seconda della
versione da voi acquistata.
• Importante – Leggere attentamente e conservare per futuro riferimento.
• La sicurezza del vostro bambino può essere compromessa se non seguite attentamente queste
istruzioni.
• AVVERTENZA: QUESTO PRODOTTO È ADATTO A UN BAMBINO CHE NON È IN GRADO
DI STARE SEDUTO AUTONOMAMENTE
• AVVERTENZA: UTILIZZARE SOLTANTO SU UNA SUPERFICIE STABILE, ORIZZONTALE,
PIANA E ASCIUTTA.
• AVVERTENZA: NON LASCIARE CHE ALTRI BAMBINI GIOCHINO SENZA SORVEGLIANZA
VICINO ALLA NAVICELLA.
• AVVERTENZA: NON UTILIZZARE SE UNA QUALSIASI PARTE È ROTTA, STRAPPATA O
MANCANTE.
• AVVERTENZA: SIETE RESPONSABILI DELLA SICUREZZA DEL VOSTRO BAMBINO.
• AVVERTENZA: Non lasciare mai il bambino incustodito. Tenete sempre sotto controllo il bambino quando
collocato nella navicella.
• AVVERTENZA: Questo prodotto è adatto solamente ad un bambino che non è in grado di sedersi da solo,
di girarsi e di tirarsi su appoggiandosi alle mani e alle ginocchia. Peso massimo del bambino: 9 kg.
• AVVERTENZA: Adatta per bambini con età inferiore ai 6 mesi.
• AVVERTENZA: Per neonati, non regolate lo schienale nella posizione verticale, da seduto (dovrebbe
essere regolato nella posizione completamente sdraiato) in quanto il bambino a quest’età non ha la
capacità di tenere la testa eretta.
• AVVERTENZA: Assicurarsi che tutti i dispositivi di bloccaggio siano correttamente agganciati prima
dell’utilizzo.
• Non utilizzate pezzi di ricambio o accessori non forniti o approvati dal fabbricante, in quanto potrebbero
rendere il prodotto poco sicuro.
• Assicuratevi che tutti gli utenti abbiano familiarità con il funzionamento del prodotto.
• AVVERTENZA - E’ pericoloso: avvicinare il prodotto a fonti di calore (apparecchi a gas o elettrici), che
• possano creare rischi d’incendio.
• Prima di sollevare o trasportare la navicella, vericare che il maniglione da trasporto sia in posizione
• verticale e correttamente agganciato da entrambi i lati.
• AVVERTENZA: Non lasciare altri bambini a giocare incustoditi vicino alla carrozzina.
• Le maniglie e il fondo della culla devono essere ispezionati regolarmente per vericare la presenza di segni
di usura e danni.
• AVVERTENZA: Non usare mai la navicella su un supporto.
• Quando il bambino è nella navicella, la sua testa non deve mai essere più bassa del corpo.
• Non aggiungere materassini oltre a quello fornito con la navicella o approvato dal Costruttore.
• PERICOLO DI SOFFOCAMENTO: la navicella potrebbe ribaltarsi su superci morbide e soocare il bambino.
• Non posizionare MAI la navicella su letti, divani o altre superci morbide.
• Controllare regolarmente l’integrità della culla, non utilizzare se una parte fosse danneggiata, usurata o
mancante.
• Utilizzare solamente parti di ricambio approvate dal costruttore.
ATTENZIONE: La navicella è utilizzabile per il trasporto in auto solo se si utilizza il “KIT NAVICELLA CLASSIC”
cod. 9700372010 (venduto separatamente). Per l’impiego come carrozzina rimuovere il “KIT NAVICELLA
CLASSIC”.
AVVERTENZE

• ENGLISH •
10
WARNING: The carrycot can be used for transporting baby in the car only if the “KIT NAVICELLA CLASSIC”
cod. 9700372010 is used (sold separately).
Refer to the kit instruction manual for all the information concerning how to t the “KIT NAVICELLA
CLASSIC” on the carrycot and how to t it in the car.
A Slots to insert the lap belt of the “KIT NAVICELLA CLASSIC” (sold separately)
B Fastening pin for the metal buckles of the “KIT NAVICELLA CLASSIC” (sold separately)
Important note: the images and instructions contained in this handbook refer to one version of the carrycot; some
components and functions described herein may vary ac¬cording to the version of the stroller you have purchased.
A
B

• ENGLISH • • ENGLISH •
11
Handle adjustment (g. 1)
Press the buttons at the side and adjust the handle into the new position, release the buttons and check
that the handle is locked in place.
Assembling the hood (g. 2, g.3, g 4, g.5)
Line up the pins of the hood and insert them into the slots at the side of the carrycot.
Press downwards, a click indicates the hood has been secured in place.
Fasten the press fasteners of the hood.
To remove the hood, press the lower part of the hood securing pin and at the same time remove the hood
from its slot (g. 5).
Cover (g. 6 - g. 7 - g. 8)
Fit the cover on the carrycot using the press fasteners (a).
Attach the aps with the press studs to the hood (b),(g. 7).
Lift up the front fabric ap of the cover for added protection (c), attach the press studs (g. 7).
Hood adjustment (g. 9)
Lower or lift the hood to achieve the required position.
Ventilation (g. 10)
Lift up one ap, to ventilate the inside of the carrycot.
Internal ventilation (g. 11)
It is possible to adjust internal ventilation by using the lever (A)
Backrest adjustment (g. 12)
To lift or recline the carrycot backrest, press and adjust the lever into the new position.
Make sure the backrest has been secured correctly in place, in the chosen position.
Rocking system (g. 13 - g. 14)
Two supporting feet are located in the base; fold them both out to prevent the rocking movement, open
both of the feet inwards to allow the rocking movement.
Both feet must be folded inwards or opened outwards.
CARE AND MAINTENANCE
Check the carrycot regularly and make sure that there are no damaged or worn parts.
Replace the carrycot if there are damaged parts.
Lining
• The fabric parts can be washed following the instructions on the washing label.
• Clean the fabric with water, a mild soap and a sponge.
• Never use abrasive or ammonia, bleach or white spirit-based cleaning products.
• Clean the fabric with a brush rather than washing it.
• Do not store the product if it is still wet and do not leave it in humid environments since mildew may
form.
• Store the product in a dry place.
• Protect the product against weather agents, water, rain or snow; moreover, continuous and prolonged
exposure to sunlight can cause changes in the colour of many materials.
• It is recommended to wash the lining separately from other items.
• Follow the lining washing instructions on the labels.
USING THE CARRYCOT

• ENGLISH •
12
• Dry the textile lining completely before using or storing it.
• To prevent formation of mildew, it is advisable to air the carrycot periodically.
Buckle
Food, drink, or other debris may collect inside the harness buckle which can aect proper function.
Wash in warm water until clean. Be sure you can hear an audible click to make sure the buckle is working
properly.
Harness and plastic seat shell
The plastic and metal parts can be cleaned with warm water, a sponge and a neutral detergent.

• ENGLISH • • ENGLISH •
13
• Important note: the images and instructions contained in this handbook refer to one version of the
carrycot; some components and functions described herein may vary ac¬cording to the version of
the stroller you have purchased.
• Read the instructions carefully before use and keep for future reference.
• Your baby’s safety may be at risk unless these instructions are followed carefully.
• WARNING: THIS PRODUCT IS ONLY SUITABLE FOR A CHILD WHO CANNOT SIT UP
UNAIDED.
• WARNING: ONLY USE ON A FIRM, HORIZONTAL LEVEL AND DRY SURFACE.
• WARNING: DO NOT LET OTHER CHILDREN PLAY UNATTENDED NEAR THE CARRYCOT.
• WARNING: DO NOT USE IF ANY PART OF THE CARRY COT IS BROKEN, TORN OR
MISSING.
• WARNING: YOU ARE RESPONSIBLE FOR YOUR BABY’S SAFETY.
• WARNING: Never leave child unattended. Always keep baby under supervision when he is in the
carrycot.
• WARNING: This product is suitable only for a child who cannot sit up unaided, roll over and cannot push
itself up on its hands and knees. Maximum weight of the child: 9Kg.
• WARNING: Suitable for children under 6 months of age.
• WARNING: For newborn babies, do not regulate the backrest in the vertical sitting position (it should
be set in the lie at position) as baby is unable to keep his headupright at this age.
• WARNING: Make sure that all the locking devices have been fastened correctly before use.
• Do not use spare parts or accessories other than those supplied or approved by the manufacturer, as they
may make the product unsafe.
• Make sure that everyone using the product is familiar with how it works.
• WARNING - It is dangerous to bring the product close to heat sources (gas or electric appliances), which
can create re hazards.
• Before lifting or transporting the carrycot, check that the carrying handle is in a vertical position and
correctly attached on both sides.
• WARNING: Do not let other children play unattended near the carry cot.
• The handles and the bottom of the crib must be inspected regularly to check for signs of wear and
damage.
• WARNING: Never use this carry cot on a stand.
• When the child is in the carrycot, their head must never be lower than their body.
• Do not add mattresses other than the one supplied with the carrycot or approved by the manufacturer.
• RISK OF SUFFOCATION: the carrycot could tip over on soft surfaces and suocate the child. NEVER place
the carrycot on beds, sofas or other soft surfaces.
• Check regularly that the crib is intact, do not use if a part is damaged, worn or missing.
• Only use the spare parts approved by the manufacturer.
WARNING: The carrycot can be used for transporting baby in the car only if the “KIT NAVICELLA CLASSIC”
cod. 9700372010 is used (sold separately). When using the product as a carriage, remove the “KIT
NAVICELLA CLASSIC”.
WARNINGS

• FRANÇAIS • • FRANÇAIS •
14
ATTENTION: Cette nacelle s’utilise pour le transport en voiture mais uniquement si elle est accompagnée
du “KIT NAVICELLA CLASSIC” cod. 9700372010 (vendu séparément).
Se reporter au mode d’emploi kit pour toutes les informations relatives au montage de “KIT NAVICELLA
CLASSIC” sur la nacelle, à l’installation en voiture.
ABrides pour l’introduction de la ceinture abdominale “KIT NAVICELLA CLASSIC” (vendu séparément)
B Goujon d’accrochage pour les boucles en métal “KIT NAVICELLA CLASSIC” (vendu séparément)
Note importante : les images et les instructions contenues dans ce mode d’emploi se réfèrent à un modèle spécique
de la nacelle; les composants et les fonctions décrites peuvent varier en fonction du modèle choisi.
A
B

• FRANÇAIS • • FRANÇAIS •
15
EMPLOI NACELLE
Réglage de la poignée (g. 1)
Appuyer sur les boutons placés sur les côtés et ajuster la poignée dans sa nouvelle position, relâcher les
boutons et s’assurer que le blocage a été eectué correctement.
Montage capote (g. 2, g.3, g 4, g.5)
Aligner et insérer les goujons de la capote dans leur propre siège qui se trouve sur les côtés de la
structure. Appuyer vers le bas, un déclic indiquera que le blocage à été eectué correctement.
Accrocher les boutons automatiques de la capote.
Pour retirer la capote appuyer sur la partie inférieure du goujon de xage de la capote et enlever
simultanément la capote de son siège (g. 5).
Tablier (g. 6 - g. 7 - g. 8)
Fixer le tablier à la nacelle au moyen des boutons automatiques (a).
Accrocher les rabats à la capote (b) (g. 7).
Soulever le rabat en tissu avant du tablier pour une meilleure protection (c), accrocher les boutons-
pression (g. 7).
Ajustement de la capote (g. 9)
Incliner ou soulever la capote pour obtenir la position souhaitée.
Ventilation (g. 10)
Soulever un rabat, pour obtenir une ventilation à l’intérieur de la nacelle.
Ventilation interne (g. 11)
On peut régler la ventilation interne en utilisant le levier (A).
églage du dossier (g. 12)
Pour soulever ou incliner le dossier de la nacelle, sil sut d’appuyer sur le levier et de le régler dans sa
nouvelle position. S’assurer que le blocage du dossier dans sa nouvelle position a été eectué correctement.
Système à balancelle (g. 13 - g. 14)
Deux petits pieds d’appui se trouvent sur la base de la nacelle, il faut déplier ces deux petits pieds vers
l’intérieur pour empêcher le mouvement à balancelle, replier les deux petits pieds vers l’extérieur pour
obtenir le mouvement de bascule.
Les deux petits pieds doivent être ou repliés vers l’intérieur ou dépliés vers l’extérieur.
ENTRETIEN ET NETTOYAGE
Contrôler régulièrement la nacelle et vérier qu’aucun élément n’est abîmé ou ne présente de signes
d’usure. Remplacer la nacelle si certains éléments sont abîmés.
Housse
• Les parties en tissu peuvent être lavées en suivant les indications gurant sur l’étiquette de lavage.
• Nettoyer le tissu avec de l’eau, un produit nettoyant neutre et une éponge.
• Ne jamais utiliser de produits abrasifs ou à base d’ammoniaque, eau de javel ou térébenthine pour le
nettoyage.
• Il est préférable de nettoyer le tissu avec une brosse plutôt que de le laver.
• Ne pas garder le produit s’il est encore mouillé et ne pas le laisser dans des ambiances humides car il
peut se former de la moisissure.
• Garder le produit dans un endroit sec.
• Protéger le produit contre les agents atmosphériques, eau, pluie ou neige; en outre, l’exposition continue

• FRANÇAIS • • FRANÇAIS •
16
et prolongée au soleil pourrait causer des changements de couleur chez beaucoup de matériaux.
• Nous conseillons de laver le revetement separement des autres articles.
• Respecter les normes pour le lavage du revetement textile indiquees sur les etiquettes appropriees.
• Secher parfaitement le revetement textile avant de l’utiliser ou de le garder.
• Pour prevenir l’eventuelle formation de moisissures, il est conseille d’aerer regulierement la nacelle.
Boucle
La nourriture, les boissons et d’autres résidus, accumulés à l’intérieur de la boucle peuvent en
compromettre le bon fonctionnement. Laver la boucle avec de l’eau chaude. S’assurer d’entendre le clic
indiquant le bon accrochage.
Harnais et coque en plastique
Sur les parties en plastique et en métal utilisez une éponge avec de l’eau tiède et un détergent neutre.

• FRANÇAIS • • FRANÇAIS •
17
AVERTISSEMENT
• Note importante : les images et les instructions contenues dans ce mode d’emploi se réfèrent à un
modèle spécique de la nacelle; les composants et les fonctions décrites peuvent varier en fonction
du modèle choisi.
• Lire attentivement les instructions avant l’emploi et les conserver soigneusement à portée de main
pour une utilisation ultérieure.
• La sécurité de votre enfant peut être compromise si vous ne respectez pas attentivement ces
instructions.
• AVERTISSEMENT : CET ARTICLE CONVIENT POUR UN ENFANT QUI NE SAIT PAS
S’ASSEOIR SEUL.
• AVERTISSEMENT : NE POSER QUE SUR UNE SURFACE PLANE, HORIZONTALE, FERME
ET SÈCHE.
• AVERTISSEMENT : NE PAS LAISSER D’AUTERS ENFANTS JOUER SANS SURVEILLANCE
À PROXIMITÉ DE COUFFIN.
• AVERTISSEMENT : NE PAS UTILISER SI L’UN DES ÉLÉMENT DU COUFFIN EST CASSÉ,
DÉCHIRÉ OU MANQUANT.
• AVERTISSEMENT: VOUS ETES RESPONSABLE DE LA SECURITE DE VOTRE ENFANT.
• AVERTISSEMENT : Ne jamais laisser votre enfant sans surveillance. Faites toujours bien attention à
votre bébé quand il se trouve dans sa nacelle.
• AVERTISSEMENT Ce produit est adapté uniquement pour un enfant qui ne sait pas s’asseoir tout seul,
rouler sur lui même, ni se redresser en appui sur les mains et lex genoux. Poids Poids maximum e l’enfant:
9 kg.
• AVERTISSEMENT: Cette nacelle a été conçue pour des enfants âgés de moins de 6 mois.
• AVERTISSEMENT: Pour les nouveau-nés n’ajustez pas le dossier dans la position verticale, mais dans la
position complètement allongée car les nouveau-nés assis ne peuvent pas tenir leur tête droite.
• AVERTISSEMENT: Avant l’emploi, s’assurer que tous les dispositifs de blocage ont été accrochés
correctement.
• Ne pas utiliser de pièces de rechange ou accessoires qui n’ont pas été fournis ou approuvés par le fabricant,
car cela pourrait compromettre la sécurité de l’article.
• AVERTISSEMENT - Il est dangereux : d’approcher le produit de sources de chaleur (appareils à gaz ou
électriques), qui pourraient provoquer un risque d’incendie.
• Avant de soulever ou transporter la nacelle, vérier que la poignée de transport est en position verticale
• et bien accrochée des deux côtés.
• AVERTISSEMENT: Ne pas laisser d’autres enfants jouer sans surveillance près du landau.
• Les poignées et le fond du berceau doivent être inspectés régulièrement de façon à vérier la présence de
signes d’usure et de dégâts.
• AVERTISSEMENT: Ne jamais poser le coun sur un support.
• Lorsque l’enfant se trouve dans la nacelle, sa tête ne doit jamais être plus basse que son corps.
• Ne pas ajouter de matelas en plus de celui qui est fourni avec la nacelle ou approuvé par le Fabricant.
• RISQUE D’ÉTOUFFEMENT : si elle se trouve sur des surfaces molles, la nacelle pourrait se retourner et
étouer l’enfant. Ne JAMAIS placer la nacelle sur des lits, des divans ou d’autres surfaces molles.
• Contrôler régulièrement que le berceau est intact. Ne pas l’utiliser si un élément est abîmé, usé ou absent.
• N’utiliser que des pièces détachées ayant été approuvées par le fabricant.
ATTENTION: Cette nacelle s’utilise pour le transport en voiture mais uniquement si elle est accompagnée
du “KIT NAVICELLA CLASSIC” cod. 9700372010 (vendu séparément). En cas d’utilisation comme landau,
enlever le “KIT NAVICELLA CLASSIC”.

• DEUTSCH • • DEUTSCH •
18
ACHTUNG: Das Körbchen kann für den Transport im Auto nur verwendet werden, wenn man das “KIT
NAVICELLA CLASSIC” cod. 9700372010 benutzt, das getrennt verkauft wird.
Für alle Informationen bezüglich der Montage des set auf das Körbchen, nehmen Sie, beim Einbau im
Auto, Bezug auf das Anwendungshandbuch “KIT NAVICELLA CLASSIC” .
A Ösen für die Einführung des Bauchgurtes “KIT NAVICELLA CLASSIC” (getrennt verkauft).
B Metall-Schnallen-Verschluss-Haken “KIT NAVICELLA CLASSIC” (getrennt verkauft)
Wichtiger Hinweis: Die in diesem Heft enthaltenen Bilder und Anweisungen beziehen sich auf eine Produktversion
des Korb. Einige hier beschriebene Komponenten, Zubehör und Funktionen können je nach der von Ihnen gekauften
Version variieren.
A
B

• DEUTSCH • • DEUTSCH •
19
Einstellung des Gries (Abb. 1)
Die Druckknöpfe an der Seite drücken und den Gri in der neuen Position einstellen, die Druckknöpfe
loslassen und das erfolgte Einrasten sicherstellen.
Montage der Haube (Abb. 2, Abb.3, Abb 4, Abb.5)
Die Zapfen der Haube ausrichten und in die entsprechenden Sitze an den Seiten des Gestells einführen.
Nach unten drücken. Ein Klick wird das erfolgte Einrasten anzeigen.
Die automatischen Knöpfe der Haube.
Um die Haube zu entfernen, den unteren Teil des Befestigungszapfens der Haube drücken und die Haube
gleichzeitig aus dem Sitz herausnehmen (Abb. 5).
Abdeckung (Abb. 6 - Abb. 7 - Abb.8)
Die Abdeckung mit Hilfe der automatischen Knöpfe am Körbchen anbringen (a).
Säume mit Automatikknöpfen am Verdeck befestigen (b) (Abb. 7).
Den vorderen Stosaum der Decke für mehr Schutz anheben (c), die Automatik knöpfe befestige (Abb.7).
Einstellung der Haube (Abb. 9)
Die Haube nach hinten senken oder anheben, um die gewünschte Position zu erhalten.
Belüftung (Abb. 10)
Saum anhebe, önen, um das Innere des Korb zu belüften.
Innenbeluftung (Abb. 11)
Es ist moglich, die Innenbeluftung durch den Hebel (A) zu regeln.
Einstellung des Rückenteiles (Abb. 12)
Den Hebel drücken und auf die neue Position einstellen, um das Rückenteil des Körbchens anzuheben
oder abzusenken. Das korrekte Einrasten des Rückenteiles in der gewählten Position sicherstellen.
Schaukelsystem (Abb. 13 - Abb. 14)
In der Basis benden sich zwei Stützfüßchen. Beide Füßchen nach innen drehen, um die Schaukelbewegung
zu verhindern. Beide Füßchen nach außen drehen, um die Schaukelbewegung zu erhalten.
Beide Füßchen müssen entweder nach innen oder außen gedreht sein.
WARTUNG UND REINIGUNG
Den Kinderwagenaufsatz regelmäßig überprüfen und sicherstellen, dass keine Schäden oder Anzeichen
von Verschleiß vorhanden sind. Bei beschädigten Teilen muss der Kinderwagenaufsatz ausgewechselt
werden.
Bezug
• Die Stoteile können nach den Angaben auf dem Waschetikett gewaschen werden.
• Den Sto mit Wasser, Neutralreiniger und einem Schwamm reinigen.
• Niemals scheuernde Reinigungsmittel oder Reiniger verwenden, die Ammoniak, Bleichmittel oder
Terpentin enthalten.
• Den Sto besser abbürsten als waschen.
• Das Produkt nur trocken lagern und nicht in feuchten Umgebungen abstellen, da sich sonst Schimmelbilden
kann.
• Das Produkt an einem trockenen Ort aufbewahren.
• Das Produkt vor Witterung, Wasser, Regen oder Schnee schützten. Eine dauerhafte und lange
Sonnenaussetzung kann Farbveränderungen bei vielen Stoen verursachen.
• Es wird empfohlen, den Bezug getrennt von anderen Artikeln zu waschen.
VERWENDUNG DES KÖRBCHENS

• DEUTSCH • • DEUTSCH •
20
• Die auf den entsprechenden Etiketten angegebenen Anweisungen zur Reinigung des Textilüberzugs
beachten.
• Vor dem Gebrauch oder der Lagerung, den Textilüberzug vollkommen trocknen lassen.
• Zur Vermeidung von Schimmelbildung die Babywanne regelmäßig lüften.
Schnalle
Lebensmittel, Getränke und andere Reste, die sich im Inneren der Schnalle ansammlen können, können
deren korrekte Funktion beeinträchtigen. Reinigen Sie sie mit heißem Wasser, bis die Schnalle sauber ist.
Stellen Sie sicher, dass der korrekte Verschluss mit einem Klick angezeigt wurde.
Sitzgurt und plastikschale
Reinigen Sie diese mit einem feuchten Schwamm und einem sanften Reinigungsmittel.
Table of contents
Languages:
Other Foppapedretti Baby Carrier manuals