Force1 VELOCITY X RC User manual

USER MANUAL
Visit us online at force1rc.com for product information, replacement parts, and tutorials.
FOR MORE INFORMATION


FORCE1 RC
2
CONTENTS
Important Statement & Safety Warnings······················3
Important Safety Notice for RC Boat Battery ···············4
Li-Ion Battery Care Instructions ····································5
Charging Instructions for Boat Battery ·························6
Box Contents & Boat Overview····································7
Transmitter Overview & LCD Overview························8
Transmitter Battery Installation·····································9
Boat Battery Installation ·············································10
Maintenance and Propeller Installation······················11
Spindle Tube Lubrication············································12
Pairing Boat with Transmitter······································13
Left Hand Basic Operation Controls··························· 14
Left Hand Trim Adjustments·······································15
Right Hand Basic Operation Controls ························16
Right Hand Trim Adjustments·····································17
Spare Parts ································································· 18
FCC Information & Warning······································· 19

VELOCITY X RC BOAT User Manual
3
IMPORTANT STATEMENT
SAFETY WARNINGS
Thank you for buying a Force1 RC boat. Please read this manual carefully before operating the RC
Boat. By reading this manual it is assumed you are accepting all content in this user manual when using
this RC Boat.
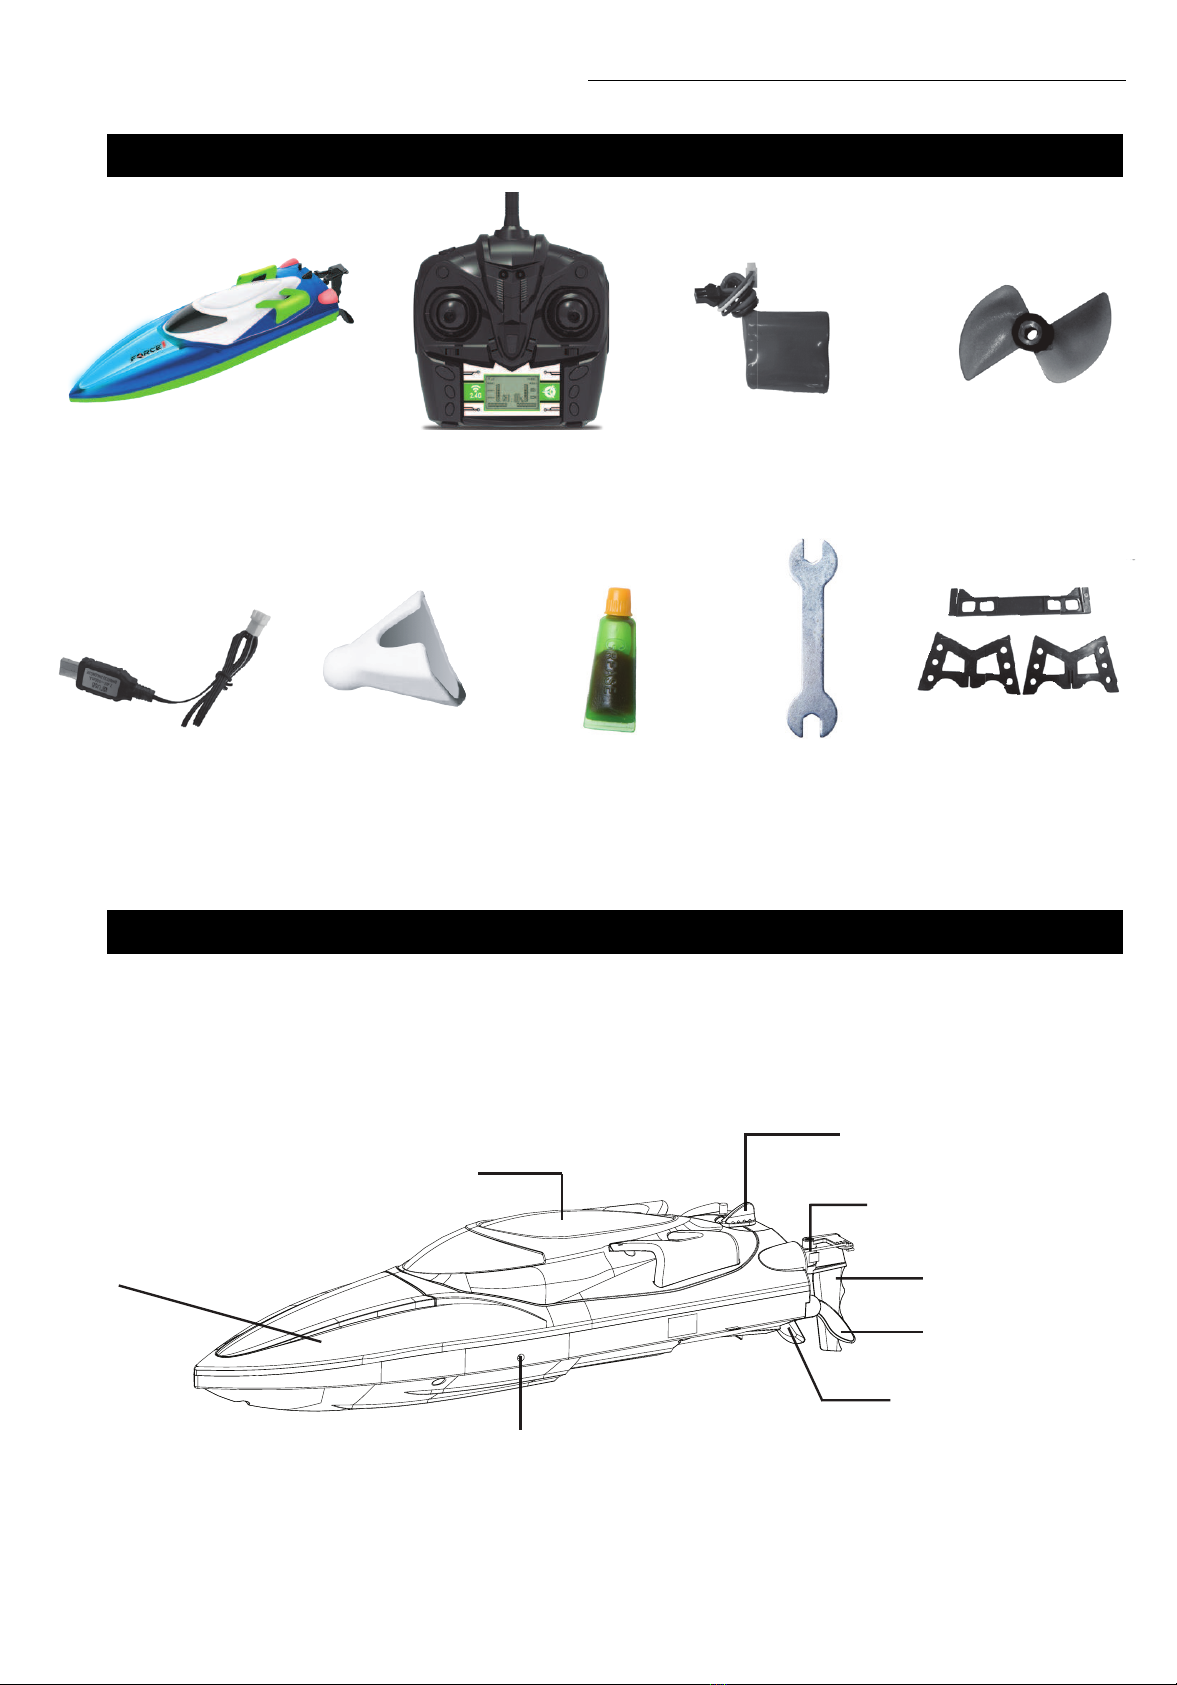
(1) This product is not a toy but a piece of complicated equipment. Parts should be installed and adjusted
correctly to avoid accidents. The user must always operate in a safe manner. We undertake no liability
for human injury or property damage caused by improper operation, as we have no control over setup,
use and operation of this RC boat.
(2) This product is suitable for people of the age of 14. Anyone younger than 18 must be supervised by
an adult when operating.
(3) The location that you use the RC Boat must be waters approved by your local government.
If you have any questions about use, operation, technical support, repair, after-sale service, etc., Please
contact us at support@force1rc.com
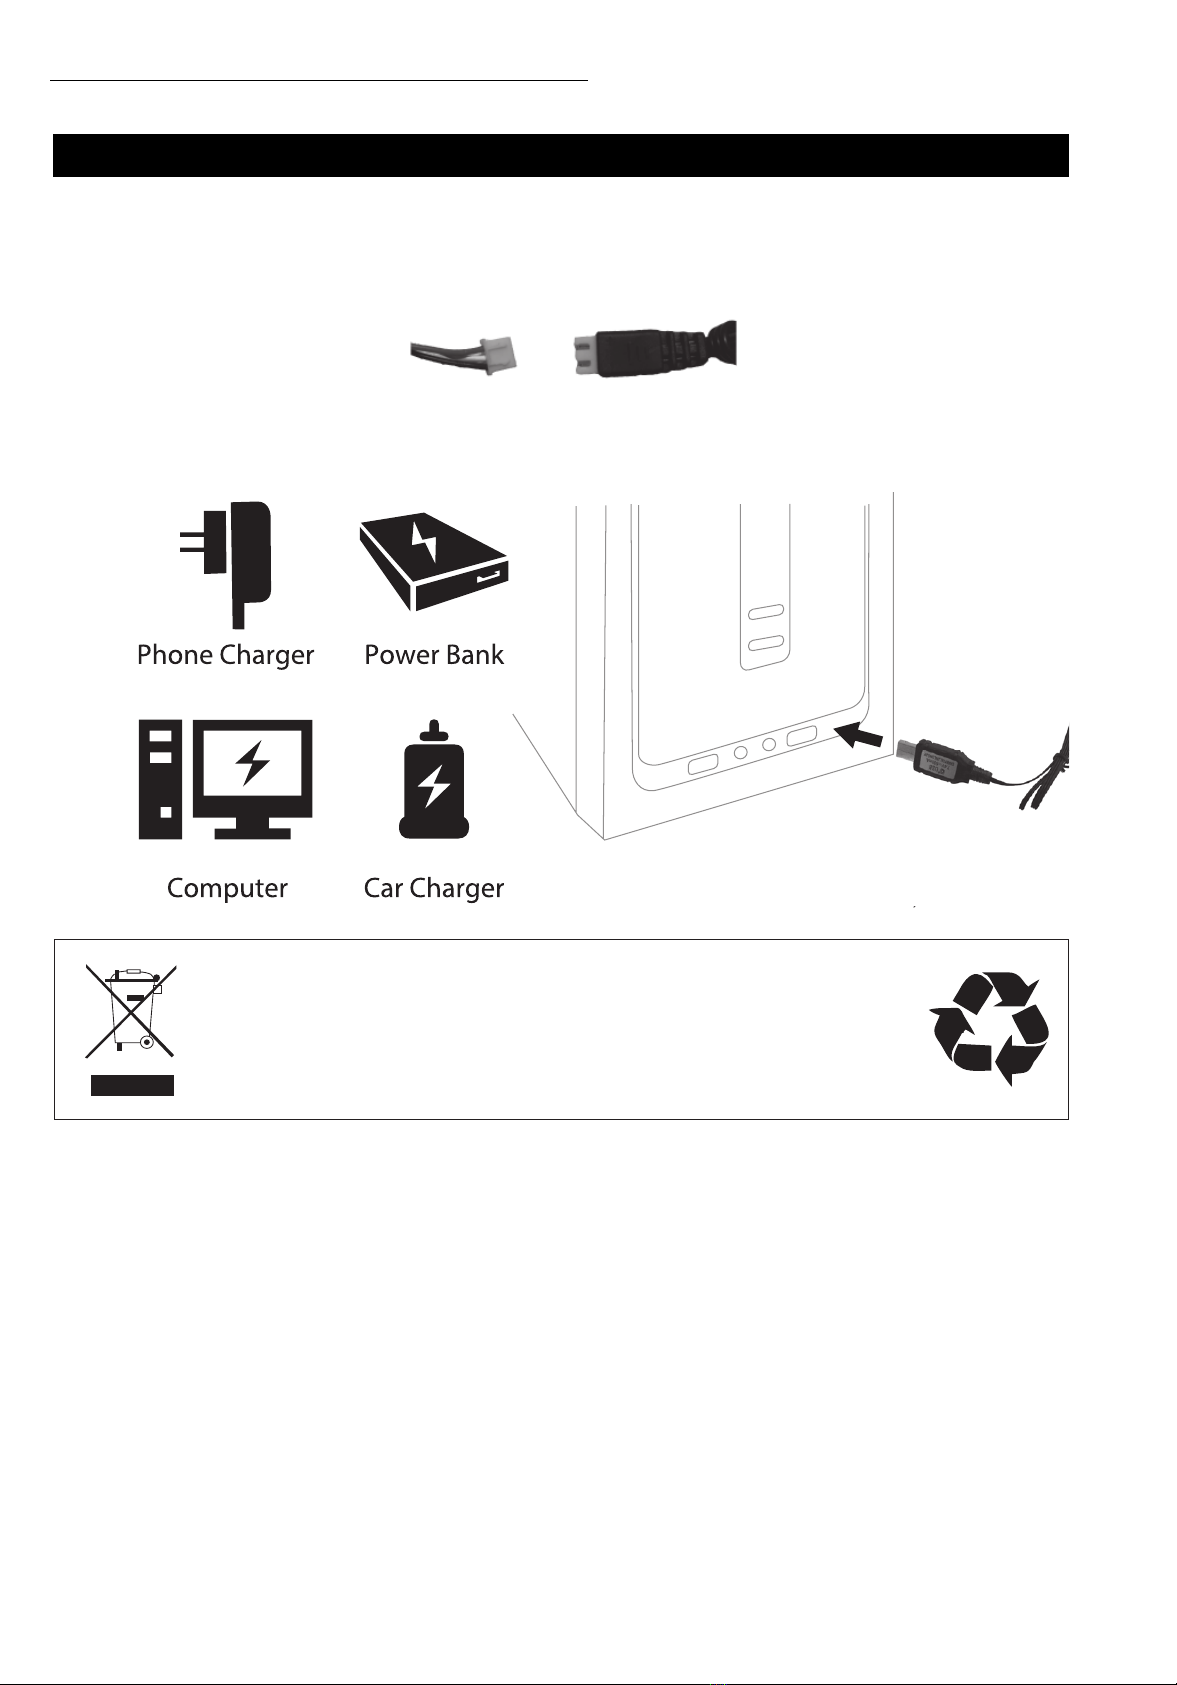
*Please use only original Force1 spare parts and accessories. Force1 does not assume any
responsibility for any accidents caused by using non-genuine parts and accessories.
*Keep the packaging and user manual for future reference.
Improper assembly, broken main boat, defective electronic equipment, or unskilled operation may cause
unpredictable accidents such as boat and property damage or human injury.
Please pay special attention to the following safety procedures:
(1) After operating the boat, DO NOT RECHARGE BATTERY until it has cooled down.
(2) When operating the boat, observe the area. Do not operate boat near people or debris in the
water, as collison could damage the boat and result in injuries.
(3) This product contains small parts and are a choking hazard. Keep away from young children.
(4) Please keep a safe distance from propeller to avoid injury. The high speed propeller can cause harm.
(5) After operation, DO NOT TOUCH MOTOR. The motor heats up and can burn your skin.
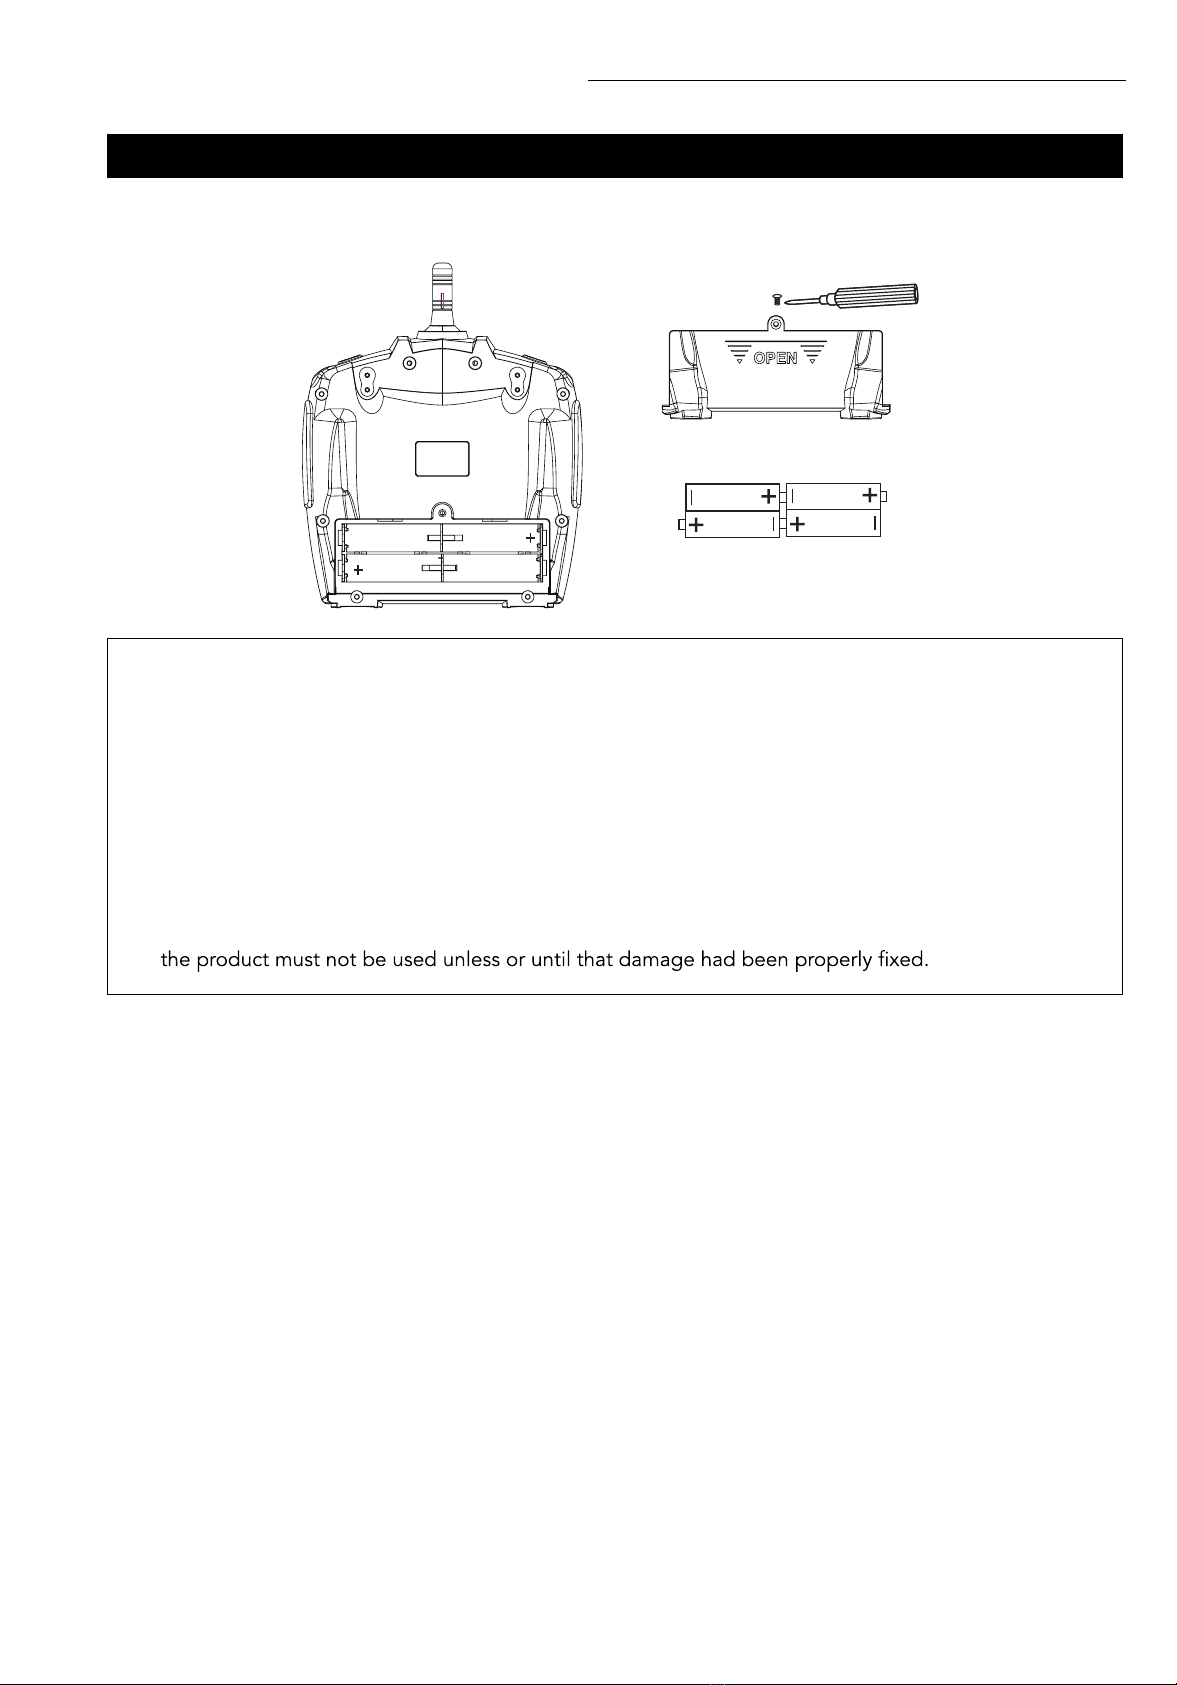
(6) Regularly check parts for damage. Replace any broken parts before operating.
(7) This is a high-speed boat that requires adequate space to navigate. Use caution when operating in
pools or near pool liners. Damage to person or property is the sole responsibility of the user.
(8) This boat has a safety feature disabling the propeller from operating while not in the water. If there
propeller at all times. When changing the propeller, turn the remote off, remove the boat battery,
and make sure the unit is completely dry before proceeding.
(9) Avoid salt water. Some water in the hull is normal after use.

FORCE1 RC
4
IMPORTANT SAFETY NOTICE FOR RC BOAT BATTERY
* Keep Li-Ion batteries away from children and animals.
* Never use or charge a Li-Ion battery that has ballooned or swelled.
* Never use or charge a Li-Ion battery that has been punctured or damaged.
* After a crash, inspect the battery pack for signs of damage.
* Never overcharge a Li-Ion battery.
* Do not put the battery in a high temperature place or in dire
by storing Li-Ion batteries inside a Li-Ion safe bag.
* Do not put battery packs in pockets or bags where they can short circuit or can come into contact with
sharp or metallic objects.
* Do not attempt to disassemble or modify or repair the Li-Ion battery.
* Do not use the battery to break or hit a hard surface.
* Do not put the battery in water and keep it stored at room temperature in a dry place.
* Do not leave the battery unsupervised while charging.
* Make sure that there is no short circuit of the power wire.
* Please use the recommended charger only. Do not charge on a gaming console. Only use your
computer’s USB port, power bank or phone wall charger to charge the battery.
* To avoid trickle charging, always unplug the battery from the USB charger when storing or leaving
unattended.
* Check the charger’s wire, plug, and surface regularly. Do not use a broken charger.
* If you are going more than one week without using Li-Ion batteries it is best to keep them stored at a
50% charge.

VELOCITY X RC BOAT User Manual
5
LI-ION BATTERY CARE INSTRUCTIONS
Temperature:
charging, problems could occur which may damage the cell.
down before recharging.
Storage:
• When storing LiPo / Li-Ion batteries for any length of time, they should ideally be stored at a temperature
of between 5ºC/40°F & 27ºC/80°F.
Usage:
• Leave time between charging and using the battery.
• To extend the lifetime of the battery, plan to end operation with about 20% power remaining in the
batteries (rather than completely draining them)
• If the battery is pushed beyond its limits, the battery could get hot and the performance will drop.
• When using the battery for a long time, the battery will increase in temperature. If it is sealed, the air
Charging:
• If you feel like the battery is not charging properly, try plugging it into another charger if one is available
and see if the issue persists. If the charger is defective, you should discard it immediately and go to
Force1RC.com to purchase a replacement.
You may also contact our support team at [email protected] so we can arrange to ship you
a replacement charger and/or batteries if within the warranty period.
WARNING:
DO NOT LEAVE BATTERY
CHARGING UNSUPERVISED

FORCE1 RC
6
CHARGING INSTRUCTIONS FOR BOAT BATTERY
LI-ION BATTERY DISPOSAL & RECYCLING
1. Plug the white battery cable into the charging cable.
2. Choose one of the methods as pictured below to connect with USB plug.
Lithium-Ion batteries must not be placed with household trash.
Please contact local environmental or waste agency or
your nearest Li-Ion battery recycling center.
WARNING:
DO NOT LEAVE
BATTERY CHARGING
UNSUPERVISED

VELOCITY X RC BOAT User Manual
7
BOAT OVERVIEW
BOX CONTENTS
RC BOAT TRANSMITTER 1100mAh 7.4v LiPo BATTERY PROPELLER
USB CHARGER CABLE NOSE GUARD LUBRICATION OIL RC TOOL DISPLAY RACK
WITH SCREWS
BOAT COVER
BOAT
OUTFALL
PROPELLER
HATCH SWITCHES
STEERING ENGINE BAR
STEERING RUDDER
GUIDING RUDDER

FORCE1 RC
8
TRANSMITTER OVERVIEW
LCD OVERVIEW
LEFT/RIGHT HAND MODE
THROTTLE DIRECTION DISPLAY
CH 1: FORWARD DISPLAY
CH 2: BACKWARD DISPLAY
CH 3: TURN LEFT DISPLAY
CH 4: TURN RIGHT DISPLAY
SIGNAL
FORWARD/BACKWARD TRIM
LEFT/RIGHT TRIM
BATTERY CHARGE
LED
LEFT TRIM
BACKWARDS TRIM
THROTTLE ROCKER
LED
RIGHT TRIM
FORWARD TRIM
DIRECTION ROCKER
TURNING DEGREE / DEMO

VELOCITY X RC BOAT User Manual
9
TRANSMITTER BATTERY INSTALLATION
Unscrew and open the battery cover on the back side of the transmitter and put 4 alkaline batteries (AA,
not included) into the box in accordance with electrode instructions, as shown below.
• The transmitter needs 4 X AA batteries to work. Non rechargeable batteries are not to be charged.
• Insert batteries with correct polarity.
• Do not mix old and new batteries.
• Do not mix alkaline, standard (carbon-zinc), or rechargeable (nickel-cadmium) batteries.
• Rechargeable batteries are to be removed from the toy before being charged;
• Rechargeable batteries are only to be charged under adult supervision;
• Exhausted batteries are to be removed from the toy;
•The charging wire to be used with the product should be regularly examined for potential hazard, such
as damage to the cable or cord, plug, enclosure of other parts and that in the event of such damage,
CAUTION:
--++BATTERY COVER
4 X “AA”

FORCE1 RC
10
BOAT BATTERY INSTALLATION
1. Turn the cabin switch either right or left to unlock. Remove the Cabin Cover (Picture 3).
2. Turn the 4 switches to unlock the Inner Hatch. Remove the Inner Hatch (Picture 4).
3. Put the Boat Battery into the battery holder of the hull (Picture 5).
4. Connect the battery and power plug (Picture 6).
5. Insert the Inner Hatch at a diagonal angle to the boat body (Picture 7) and lock switches (Picture 8).
6. Insert the Cabin Cover at a diagonal angle to the boat body (Picture 9)
and lock the cabin switch (Picture 10).
PICTURE 3
PICTURE 6
PICTURE 4
PICTURE 8PICTURE 7
PICTURE 9
PICTURE 5
PICTURE 10

VELOCITY X RC BOAT User Manual
11
MAINTENANCE
PROPELLER INSTALLATION
1. After operation, please remove the battery.
2. After operation, dry the outside of the boat with a clean cloth.
3. If storing for extended periods of time, remove the transmitter battery to avoid battery leakage.
4. Keep the inside of the boat dry. After operation, dry the inside of the boat with a clean cloth
(Picture 11). Using desiccant will ensure the boat is dry while not in use (Picture 12).
1. Remove both hull covers, disconnect and remove the battery, then unscrew the battery compartment
(Picture 13).
2. Hold down the propeller or the spindel connector shaft and remove the bolt with the included wrench
(Picture 14).
PICTURE 11
PICTURE 14PICTURE 13
PICTURE 12
PICTURE 15
For more information on how to replace the propeller, check out our video
by using the QR Code below:

FORCE1 RC
12
SPINDLE TUBE WALL LUBRICATION
PICTURE 16 PICTURE 17 PICTURE 18
PICTURE 21
PICTURE 24
PICTURE 27
PICTURE 19
PICTURE 22
PICTURE 25
PICTURE 20
PICTURE 23
PICTURE 26
1. Unscrew the battery holder from the hull (Picture 16).
2. Unscrew the motor cover (Picture 17).
3. Unplug the motor (Picture 18) and unscrew the motor and the spindel cover (Picture 19).
4. Remove the rubber cooling hose from the hull (Picture 20).
5. Remove the motor from the hull and set aside from the boat (Picture 21).
6. Hold the propeller in place and unscrew the bolt on the spindel with the included wrench (Picture 22).
7. Hold down the spindel connector shaft (Picture 23), unscrew the propeller, and remove it (Picture 24).
8. Pull the spindel out and apply a moderate amount of lubrication to the spindel (Picture 25).

VELOCITY X RC BOAT User Manual
13
PAIRING BOAT WITH TRANSMITTER
PICTURE 28 PICTURE 29 PICTURE 30
1. Put the RC boat into the water.
2. Turn on the transmitter. The transmitter LED indicator will flash and make a beep sound.
3. The transmitter will make three beep sounds and the LED indicator will be solid, meaning it has paired.
9. Apply lubrication to the spindel tube from the tail end as well (Picture 26). Push and rotate the spindel
in and out of the tube in order to evenly distribute lubrication throughout the tube.
10. When finished, replace the motor into the hull and pull the rubber cooling hose into the boat body
(Picture 27).
11. Screw the spindel cover (1), motor (2) and motor cover (3) back into place, reconnect the motor wire,
then tuck the spare wiring into the side compartment (Picture 28).
12. Hold down the spindel connector shaft and screw the propeller back in (Picture 29).
12. Continue holding down the spindel connector shaft or propeller and use the included wrench to
reconnect the bolt (Picture 30).
(1)
(2)(3)

FORCE1 RC
14
MODE 1 OPERATION CONTROLS
MOVE FORWARD OR BACKWARD
Push the THROTTLE STICK up and the boat
moves forward. Pull the THROTTLE STICK down
and the boat moves backward.
TURN LEFT OR RIGHT
While pushing the THROTTLE STICK ,drawrof
pulling the left DIRECTION STICK left will make
the boat turn to the left. Pulling the DIRECTION
STICK right will make the boat turn to the right.
CORRECTION
FLIP RECOVERY
Push the THROTTLE STICK left and the
DIRECTION STICK right. When you hear a beep
sound, it means correction was successful.
DIRECTION STICK up (Picture 31).
2. Keep the DIRECTION STICK up and push the
THROTTLE STICK up and down until the boat
is right-side up (Picture 32). PICTURE 31 PICTURE 32

VELOCITY X RC BOAT User Manual
15
TRIM FORWARD OR BACKWARD
When the boat is veering to the front or
back, use the TRIM BUTTONS to correct the
direction. When the boat is moving forward
without touching the THROTTLE STICK, press
the BACKWARD TRIM BUTTON until the boat
stops moving forward. When the boat is moving
backward without touching the THROTTLE
STICK, press the FORWARD TRIM BUTTON
until the boat stops moving backward.
TURN LEFT OR RIGHT
When the boat is veering to the left or right, use
the TRIM BUTTONS to correct the direction.
When the boat is moving to the left without
touching the DIRECTION STICK ehtsserp,
RIGHT TRIM BUTTON until the boat stops
moving left. When the boat is moving to the right
without touching the DIRECTION STICK, press
the LEFT TRIM BUTTON until the boat stops
moving right.
MODE 1 TRIM ADJUSTMENTS
BACKWARD
TRIM
FORWARD
TRIM
LEFT
TRIM
RIGHT
TRIM
ADDITIONAL FEATURES
TURNING DEGREE
DEMO MODE
Short press the TURNING DEGREE button in
order adjust the degree at which the boat turns.
There are 8 total degrees to which this boat can
be adjusted. Press 4 times to the left to increase
the turning degree or 4 times to the right to
decrease the turning degree.
Long pressing the TURNING DEGREE button
for 3 seconds will engage Demo Mode. This will
TURNING
DEGREE
(SHORT PRESS)
(LONG PRESS)
DEMO
MODE

FORCE1 RC
16
MODE 2 OPERATION CONTROLS
MOVE FORWARD OR BACKWARD
Push the THROTTLE STICK up and the boat
moves forward. Pull the THROTTLE STICK down
and the boat moves backward.
Switching to Mode 2 on your remote (Left/Right Hand Mode - Page 8) will reverse the controls.
TURN LEFT OR RIGHT
While pushing the THROTTLE STICK ,drawrof
pulling the left DIRECTION STICK left will make
the boat turn to the left. Pulling the DIRECTION
STICK right will make the boat turn to the right.
CORRECTION
Push the THROTTLE STICK right and the
DIRECTION STICK left. When you hear a beep
sound, it means correction was successful. FLIP RECOVERY
DIRECTION STICK up (Picture 33).
2. Keep the DIRECTION STICK up and push the
THROTTLE STICK up and down until the boat
is right-side up (Picture 34).
PICTURE 33 PICTURE 34

VELOCITY X RC BOAT User Manual
17
TRIM FORWARD OR BACKWARD
When the boat is veering to the front or
back, use the TRIM BUTTONS to correct the
direction. When the boat is moving forward
without touching the THROTTLE STICK, press
the BACKWARD TRIM BUTTON until the boat
stops moving forward. When the boat is moving
backward without touching the THROTTLE
STICK, press the FORWARD TRIM BUTTON
until the boat stops moving backward.
TURN LEFT OR RIGHT
When the boat is veering to the left or right, use
the TRIM BUTTONS to correct the direction.
When the boat is moving to the left without
touching the DIRECTION STICK ehtsserp,
RIGHT TRIM BUTTON until the boat stops
moving left. When the boat is moving to the right
without touching the DIRECTION STICK, press
the LEFT TRIM BUTTON until the boat stops
moving right.
MODE 2 TRIM ADJUSTMENTS
FORWARD
TRIM
LEFT
TRIM
BACKWARD
TRIM
RIGHT
TRIM
TURNING DEGREE
DEMO MODE
Short press the TURNING DEGREE button in
order adjust the degree at which the boat turns.
There are 8 total degrees to which this boat can
be adjusted. Press 4 times to the left to increase
the turning degree or 4 times to the right to
decrease the turning degree.
Long pressing the TURNING DEGREE button
for 3 seconds will engage Demo Mode. This will
TURNING
DEGREE
(SHORT PRESS)
(LONG PRESS)
DEMO
MODE
ADDITIONAL FEATURES

FORCE1 RC
18
SPARE PARTS
Recieving Plate
0001
USB Charger
0005
Motor
0002
Discharge Pipe
0006
Battery
0003
Steering Engine Bar
0007
Steering Engine
0004
Propeller
0008
Nose Guard
0009
Screw
0010
Stern Rudder Position Tube
0012
Steering Rudder
0016
Body
0013
Guiding Rudders
0017
Silicone Waterproof Plug
0018
Charging Cable
0019
Spindle Tube
0011
Hatches
0014
Display Racks
0015

This equipment has been tested and found to comply with the limits for a Class B digital device,
pursuant to part 15 of the FCC Rules. These limits are designed to provide residential protection against
harmful interference in a residential installation. This equipment generates, uses and can radiate radio
frequency energy and, if not Installed and used in accordance with the instructions, may cause harmful
interference to radio communications. However, there is no guarantee that interference will not occur
in a particular installation. If this equipment does cause harmful interference to radio or television
reception. Which can be determined by turning the equipment off and on, the user is encouraged to try
to correct the interference by one or more of the following measures:
• Reorient or relocate the receiving antenna.
• Increase the separation between the equipment and receiver.
• Connect the equipment into an outlet on the circuit different from that to which the receiver is
connected.
• Consult the dealer or an experienced technician for help.
The equipment may generate or use radio frequency energy. Changes or modifications to this
equipment may cause harmful interference unless the modifications are expressly approved in the
instruction manual. Modifications not authorized by the manufacturer may void user’s authority to
operate this device.
This device complies with part 15 of the FCC Rules. Operation is subject to the following two conditions:
1. This device may not cause harmful interference, and
2. This device must accept any interference received, including interference that may cause undesired
operation.
FCC INFORMATION
FCC WARNING
force1rc.com
Table of contents
Other Force1 Motorized Toy Car manuals