Formulatrix NT8 User manual
NT8
User’s Guide
Original Instructions
Applies to LCP & Plate Copy Options
Third Edition, Revised June 2018
NTG-V263R115
© 2018Formulatrix. All Rights Reserved.

ii
Formulatrix Product Information
Formulatrix.com
Formulatrix Corporate Headquarters
10 DeAngelo Drive, Bedford, MA 01730 USA Phone: +1 781 788 0228
For information requests, email [email protected]. For sales inquiries, email [email protected]. For support, email
Formulatrix European Representative
Flip Hoedemaeker
Support, Europe
Phone: +31 652 451106
Acknowledgements
The NT8 was developed in collaboration with Vadim Cherezov of The Scripps Research Institute (TSRI) and the JCIMPT Center
led by Ray Stevens and supported by the NIH Common Fund in Structural Biology.

iii
Introduction...............................................................................................................................................1
Symbols and Conventions............................................................................................................................................2
Safety Information....................................................................................................................................3
Regulatory Compliance..................................................................................................................................................3
Introduction........................................................................................................................................................................3
Equipment Safety Guidelines.......................................................................................................................................4
Mechanical Hazards........................................................................................................................................................4
Electrical Hazards.............................................................................................................................................................4
Specifications.............................................................................................................................................5
Dimensions.........................................................................................................................................................................5
Weight..................................................................................................................................................................................5
Computer Requirements...............................................................................................................................................5
Electrical Requirements..................................................................................................................................................6
Overview.....................................................................................................................................................7
Key Features.......................................................................................................................................................................7
Options.................................................................................................................................................................................8
Hardware Overview...................................................................................................................................9
The NT8 Deck....................................................................................................................................................................9
The NT8 Head.................................................................................................................................................................11
Initial Setup..............................................................................................................................................13
Setting Up the NT8.......................................................................................................................................................13
Preparing the NT8 for a Dispense ..........................................................................................................................15

iv
Adding Plate Types......................................................................................................................................................17
Adding Commands to the Task List......................................................................................................................18
Liquid Class Guidelines...............................................................................................................................................22
Attaching LCP Attachments......................................................................................................................................23
Configuring Humidifiers........................................................................................................................24
Emptying and Filling System Liquid and Humidifier Chambers.................................................................24
Software Overview.................................................................................................................................26
The Experiment Designer Tab..................................................................................................................................26
The Rock Maker Integration Tab............................................................................................................................37
Sitting Drop Experiments......................................................................................................................42
Hanging Drop Experiments...................................................................................................................45
Creating Daughter Plates (Plate Copying)...........................................................................................50
Mixing LCP Drops...................................................................................................................................53
LCP Experiments.....................................................................................................................................56
Running Rock Maker Experiments with NT8.......................................................................................60
System Maintenance..............................................................................................................................62
Sterilizing the Liquid Lines........................................................................................................................................62
Lubricating the Plate Copy Plungers.....................................................................................................................64
Lubricating the O-rings..............................................................................................................................................67
Enabling the Programmatic Tab.............................................................................................................................68
Troubleshooting and FAQs....................................................................................................................70
Aspiration or Dispense Problems...........................................................................................................................70
NT8 Doesn't Recognize the Device.......................................................................................................................71
Wash Station Problems..............................................................................................................................................71
FAQs...................................................................................................................................................................................71
Accessories..............................................................................................................................................72
Toolbar Buttons......................................................................................................................................74

1
Thank you for purchasing the NT8, an automated nanoliter volume liquid handler with drop
dispensing capabilities.
Your NT8 must be used in the manner described in this user’s guide. Any other use may
result in damage to your NT8 or personal injury. Formulatrix, Inc. is not responsible in whole or
in part for any damages caused by: improper use, unauthorized alterations, adjustments or
modifications, failure to comply with the procedures outlined in the NT8 User’s Guide, or use of
the products in violation of applicable laws, rules or regulations. Except as otherwise expressly
provided in this user guide, any alteration, adjustment or modification to the products will void
the product warranty.
Read, understand and observe all safety information and instructions in this manual before
using your NT8. Please note specific safety requirements as explained in this user’s guide. Failure
to follow these instructions could result in serious personal injury.
Please save this guide for future reference and have it available to all operating personnel.
The NT8 is manufactured to the current technical safety-relevant regulations.
2
NT8 User's Guide | Chapter 1: Introduction
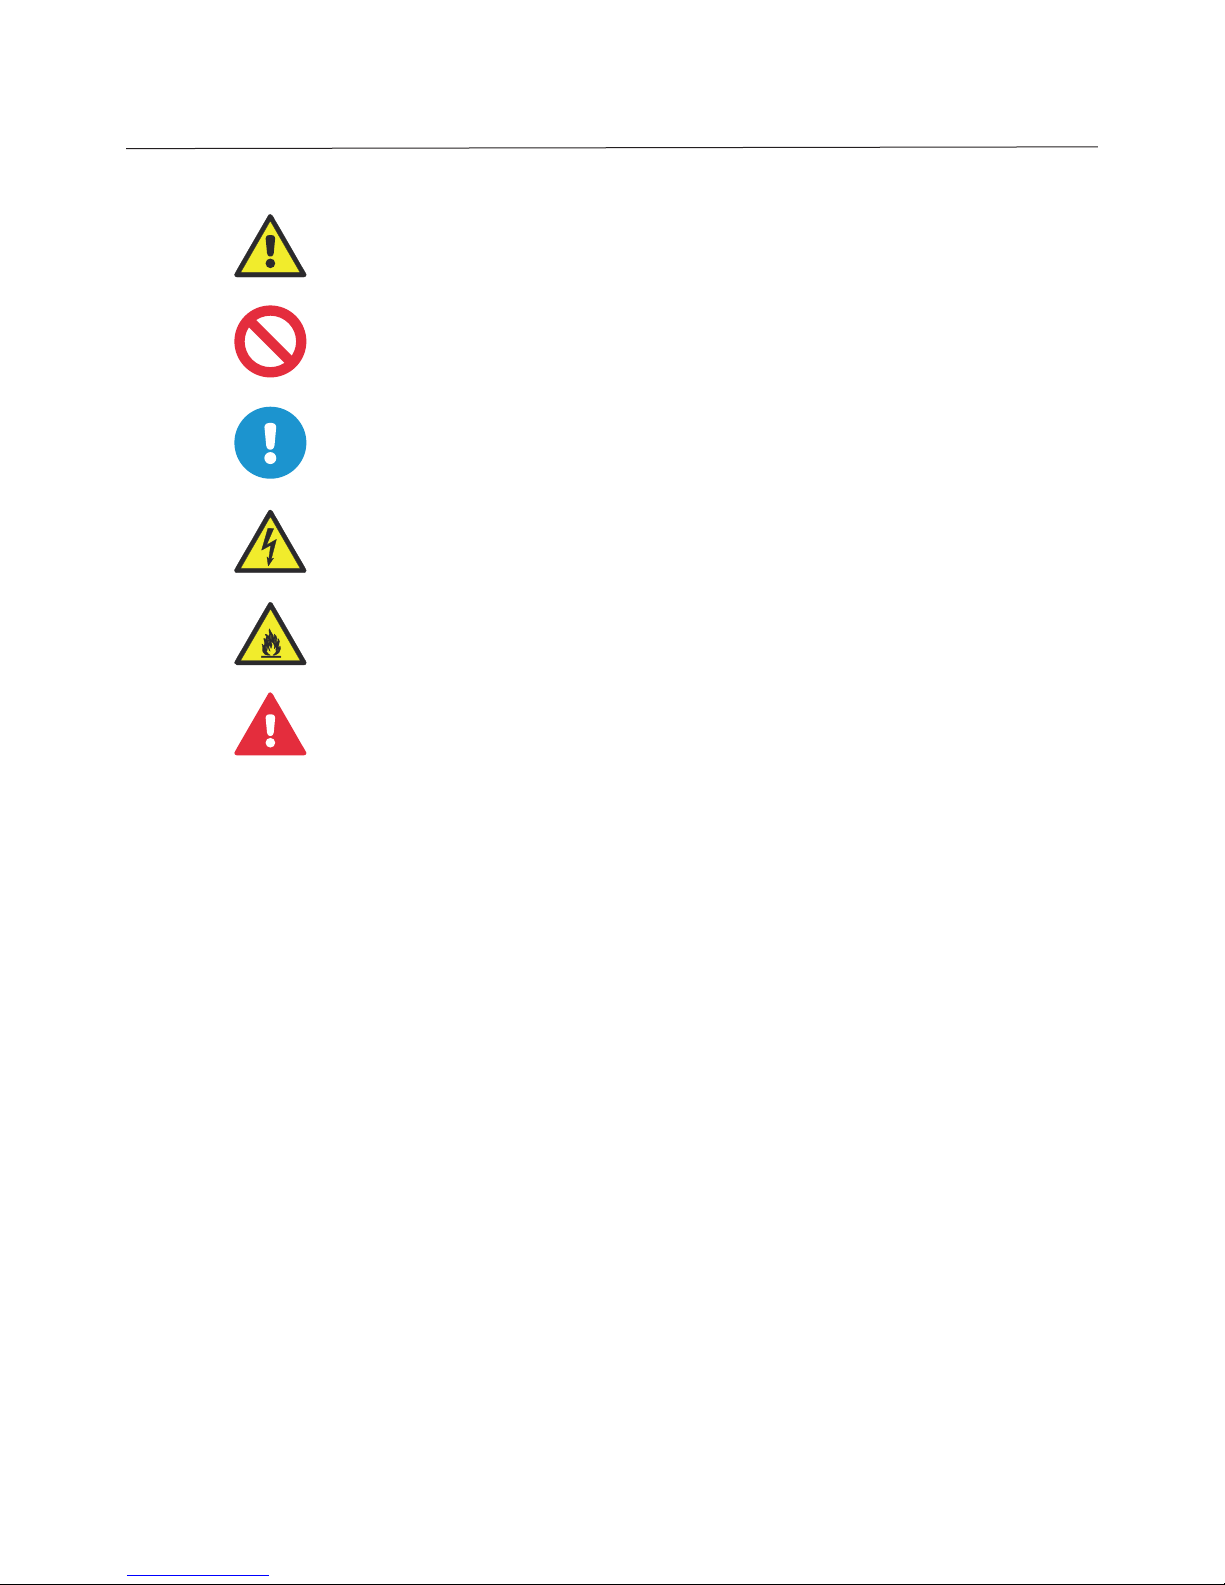
This icon denotes a caution and advises you of precautions to take.
This icon denotes a prohibited action.
This icon denotes a compulsory action and advises you of actions you
must take.
This icon denotes a caution relating to electric shock and advises you of
precautions to take.
This icon denotes a fire hazard, and advises you of precautions to take.
This icon denotes a warning.
Bold text denotes items you must select or click in the software, such as
menu items and dialog box options. Bold text also denotes parameter
names.
bold
Text in this font denotes text or characters you should enter from the
keyboard.
monospace
Symbols and Conventions
3
The safety recommendations in this guide are basic guidelines. If the lab where the NT8 is to
be kept has additional safety guidelines they should be followed as well, along with all
applicable national and international safety codes.
Formulatrix products are CE (Conformité Européenne) Machinery, Low Voltage, and EMC
directive compliant. If necessary, request the official Declaration of Conformity (DOC) from
Formulatrix. The product is also CDRH Chapter 21 CFR 1040.10 compliant.
Regulatory Compliance
Introduction
Only Formulatrix personnel are permitted to transport, assemble, or service the NT8.
Use only parts supplied or recommended by Formulatrix in this document or via email.
4
NT8 User's Guide | Chapter 2: Safety Information
●Read all safety and operating instructions before operating the NT8.
●Do not place the NT8’s facilities connections (power, waste lines and communications
cables) where they could cause a safety hazard.
●Do not place the product in a location where it may be subject to physical damage.
●Ensure that all power connections to the product are properly grounded.
●Do not remove the nameplate, or any warning, hazard, or Equipment Identification
labels.
●Turn OFF power before inserting or removing power cables.
The NT8 is a complex electromechanical device. Only persons with the proper training should
service or operate the product.
All facilities to the product must be disconnected before servicing, or injury may result from the
automatic operation of the equipment.
The proper precautions for operating electrical equipment must be observed.
Equipment Safety Guidelines
Mechanical Hazards
Electrical Hazards
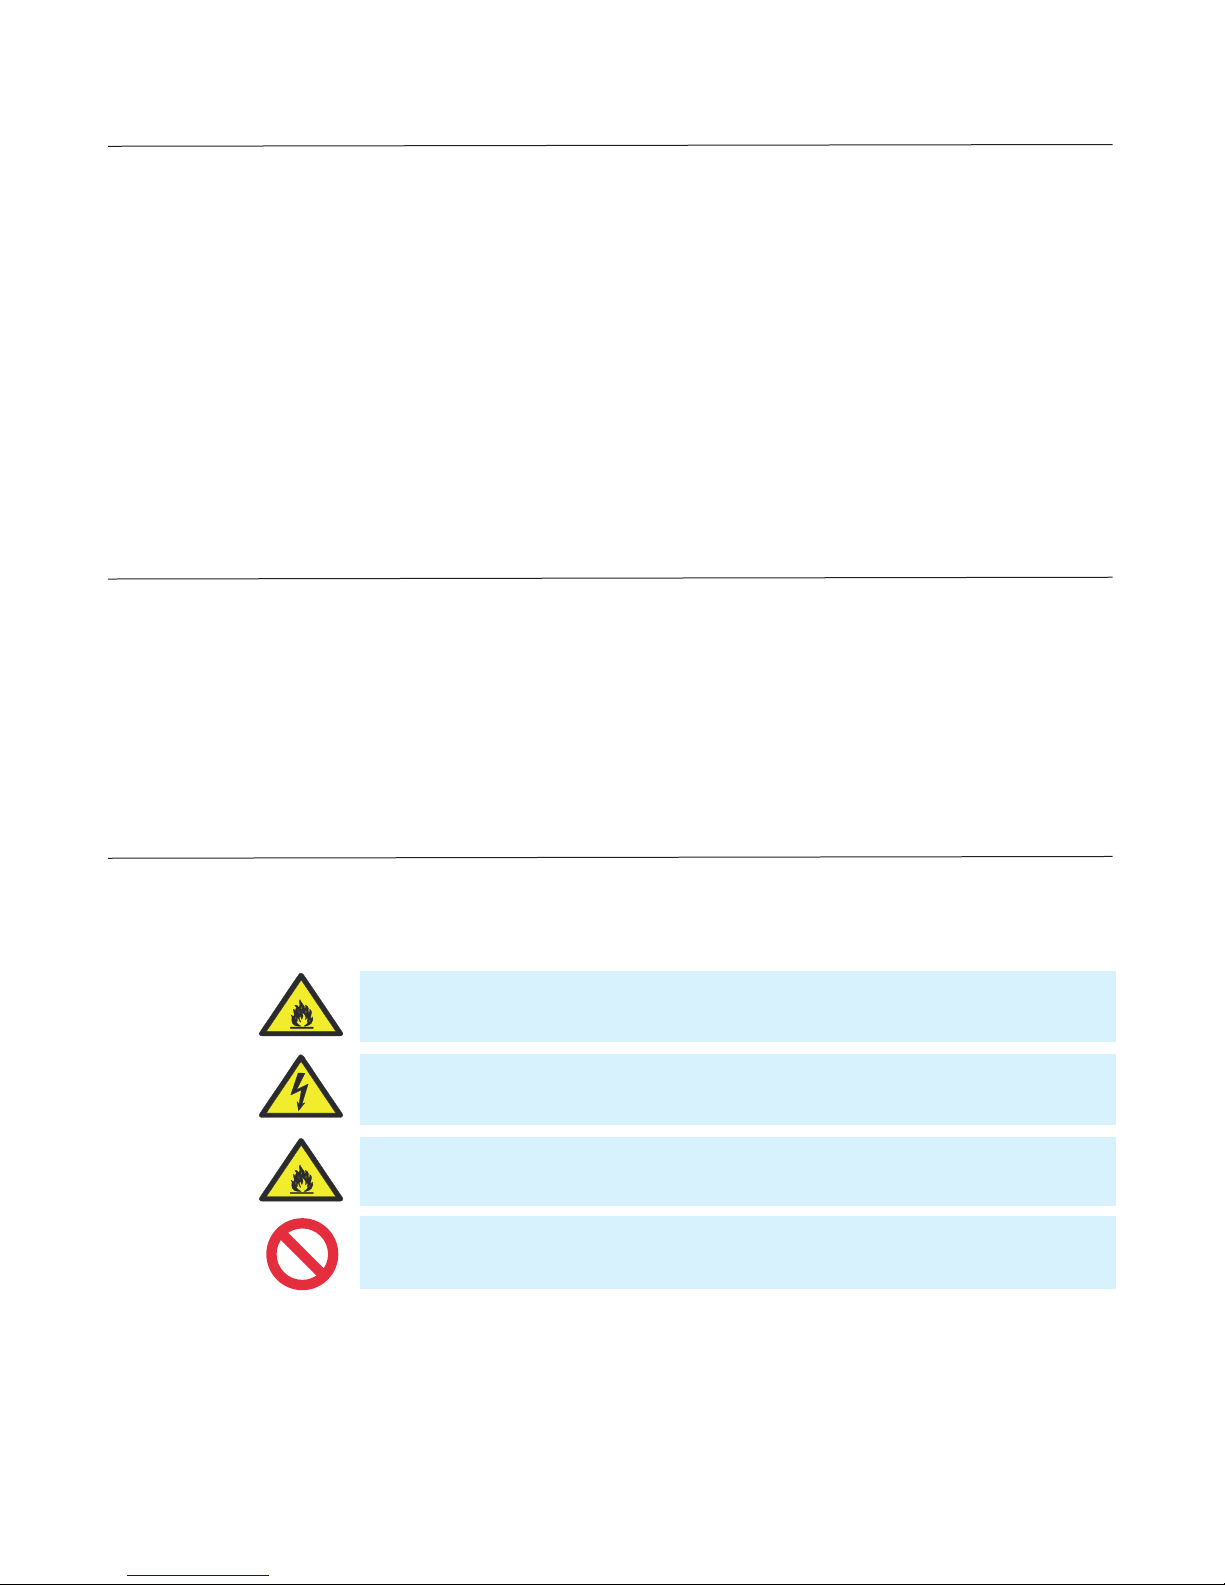
Avoid damage to the power cables. Do not apply unnecessary stress, place heavy objects on,
or crush the cables or fire may occur.
Do not use extension cables unless approved by Formulatrix.
Switch off all power sources before removing connectors or electric shock may occur.
Arrange cables in accordance with the Technical Standard for Electric Properties and Extension
Rules or fire may occur.

5
The NT8 should be placed on a sturdy table that has dimensions of at least 120 cm (47.2”) wide
by 80 cm (32.5”) long. The water carboy should be placed to either the left or right of the NT8.
The waste carboy should be placed under the table.
Ambient Temperature Range: 4 °C to 30 °C.
Operating Humidity: 0 - 95% non-condensing.
Storage Humidity : 0 - 95% non-condensing.
653 mm x 511 mm x 431 mm
(6.9” x 8.5” x 9.3”)
38 kg (83.8 lb)
●Windows 7, Windows Vista, or Windows XP
●1 open USB Port
Dimensions
Weight
Store the NT8 within the specified ranges of temperature and humidity where it is not
exposed to direct sunlight.
Computer Requirements

6
NT8 User's Guide | Chapter 3: Specifications
●At least 1 GB RAM
●1 GB Hard drive space
●FTDI 2.08.24
●110 V - 240 V, 50 Hz - 60 Hz, 130 W typical, 200 W max
●Standard or European electrical outlet
Electrical Requirements
Confirm that the power supply requirements are properly met to avoid material damage and
fire.
The power supply for the system must meet or exceed electrical requirements of the system
to avoid damage and risk of fire.

7
Ultra-Low Volume Dispense Head
At the core of the NT8 is an eight-channel nanopipettor that reliably dispenses drops from 50
nL to 1.8 µL with CVs averaging 5%. The NT8’s pipette tips feature a very small geometry and a
hydrophobic coating, ensuring precise dispensing across the full range of buffers and reagents
encountered in protein crystallization.
The low volume head uses liquid displacement pipetting, which means the tips can be quickly
washed from the inside out and reused, or discarded for zero cross-contamination.
The small geometry of the tips results in small dead volumes. The total dead volume for the
NT8 is less than 3 µL, depending on the viscosity of the ingredient.
Flexible Finger Technology
In order to ensure that drops wick to the crystallization plate, all eight tips must touch the
plate. To achieve this, each tip is attached to a flexible finger that can travel +/- 0.5 mm
vertically, enabling the dispense head to contour to each dispense surface. Each tip also has a
sensor that indicates when the tip contacts a surface. These sensors allow the NT8 to drive
down precisely to the point where all tips touch the plate.
Plate Copy Dispensing
The NT8’s plate copy option, used for creating daughter plates from deep well blocks,
automatically loads tips and can aspirate and dispense up to 200 µL from the block to either
one or two daughter plates.
Equipped with eight individual pressure sensors, the plate copy head accurately detects when
each tip contacts liquid, allowing the NT8 to aspirate from just below the liquid surface. This
feature prevents viscous liquids from coating the outside of the tips and dripping while in
transit to the dispense location.
Key Features

8
NT8 User's Guide | Chapter 4: Overview
LCP Dispensing
The NT8’s LCP option can accurately and quickly dispense drops as low as 30 nL. Its fully-
automated calibration system ensures that the syringe tip is centered to within 50 µm of the
target drop location, and it can dispense LCP and well solution drops to a 96-drop LCP plate in
about 7 minutes.
Active Humidification
The NT8 prevents sample evaporation with three powerful, fully-enclosed humidifiers that
actively control humidity from ambient to 95%. You can set humidity on/off manually or “set it
and forget it” and let the NT8 do the work.
The NT8 can increase humidity from 60% to 85% in under 20 seconds. The humidifiers are
positioned away from active samples so your drops are protected from condensation and
buildup.
User-Friendly Software
The NT8 software is designed to be user-friendly. See Software Overview for further details.
The NT8 can be configured for LCP dispenses and for plate copying.
LCP
The lipid cubic phase (LCP) option includes a dispensing attachment that can dispense LCP
drops as small as 25-200 nL. The dispenser uses an 8 mm barrel syringe, which a sensor
monitors for proper positioning before dispensing begins.
The LCP model dispenses a complete 96-drop LCP plate in fewer than 6 minutes for both the
lipid drop setting well solution drop setting.
LCP models include a lipid mixer and an automatic LCP calibration system. The lipid mixer
attaches to the NT8’s deck, and is controlled by the software to ensure the right number of
mixing cycles are applied to the syringe. The automatic calibration system ensures the syringe
tip is centered to within 50 µm.
Plate Copy
The plate copy option includes a specialized head that includes a mount for HV tips. The plate
copy head can aspirate and dispense up to 200 µL of reagent from a deep well block to a
crystallization plate. The plate copy head consists of eight positive displacement syringes
capable of dispensing viscous reagents.
The NT8 deck can accommodate one rack of standard 200 µL pipette tips and can
automatically load and eject tips. While most tips are washable, plate copy tips are not and
must be disposed of after use.
Options
9
Before you set up the hardware, you'll need to understand the names of the components and
where each component is located.
To begin, the two major components of the NT8 are the head and deck. Both are located at the
front of the NT8. The head primarily contains tools to aspirate and dispense liquids, and the
deck contains plates, tip caddies, the protein source, and the wash and waste stations.
Located at the front of the instrument, the NT8 deck contains everything needed for your
dispenses including the plates, protein source and tips.
The NT8 Deck
10
NT8 User's Guide | Chapter 5: Hardware Overview
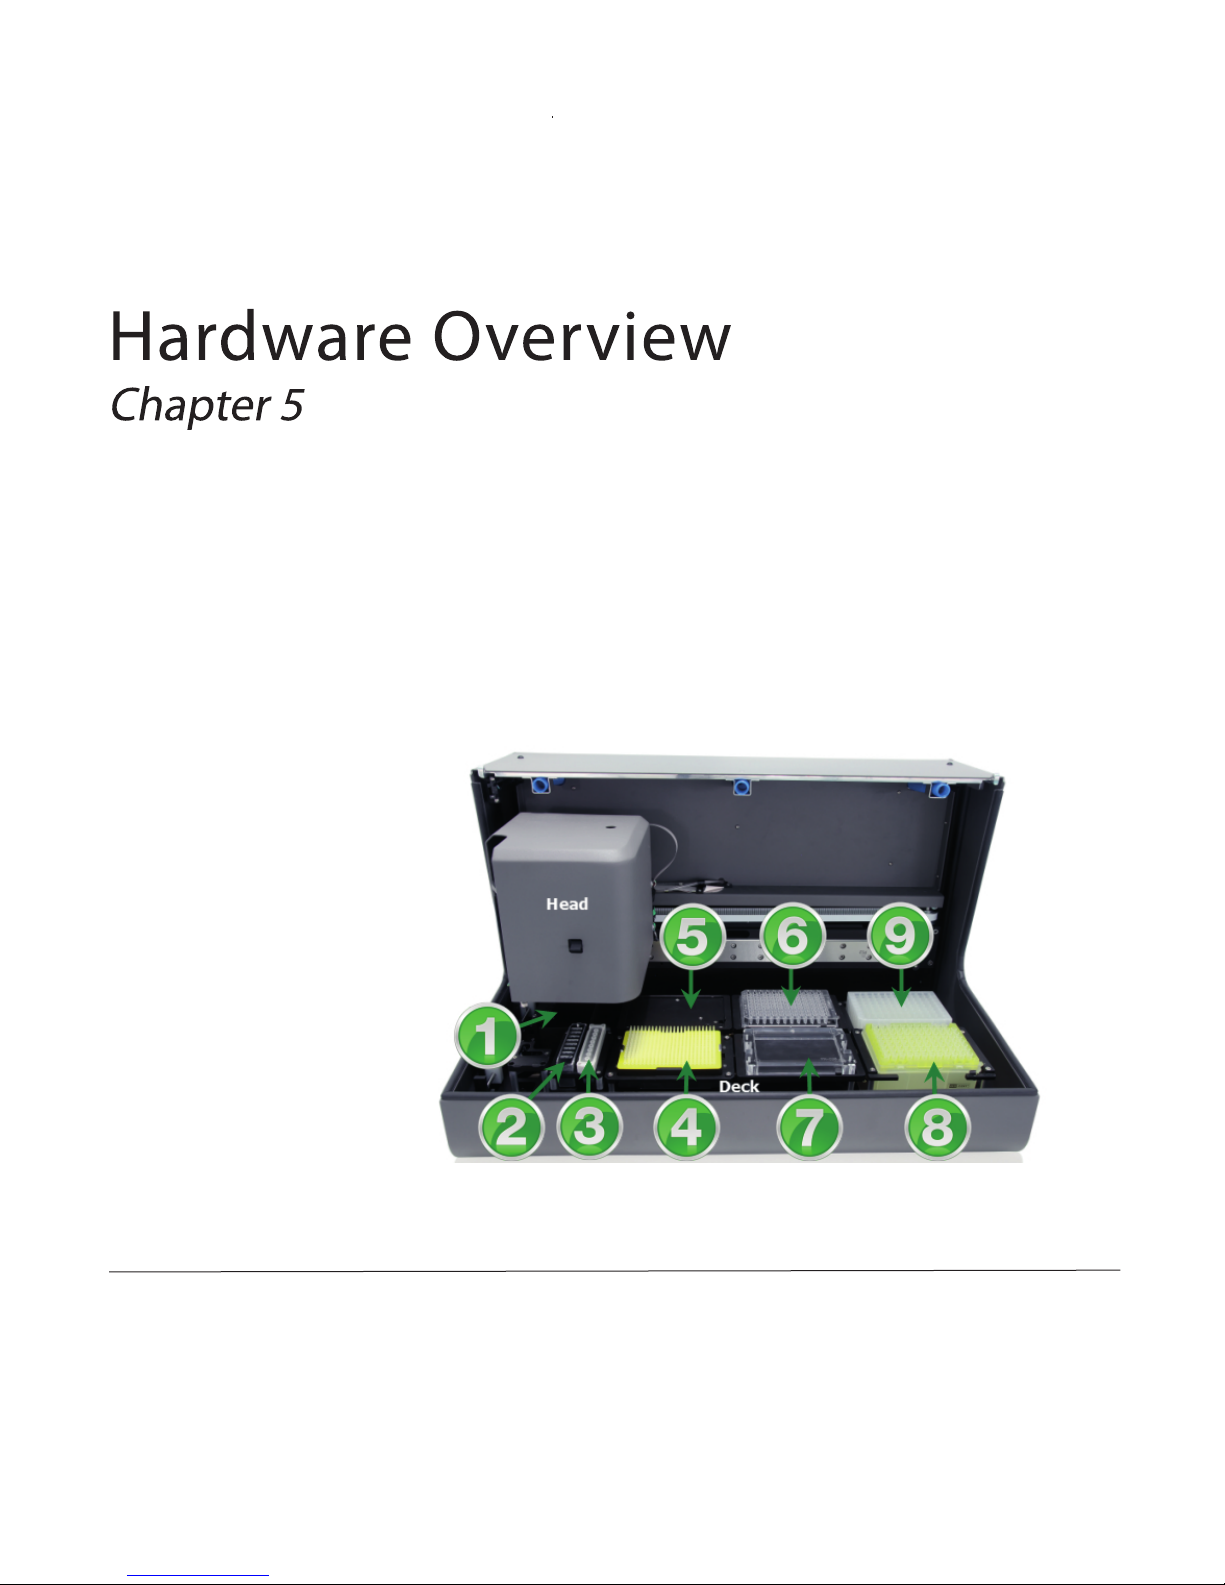
The NT8 deck is divided into the following stations:
1 – Waste Station. The waste station is where the NT8 disposes of LV tips.
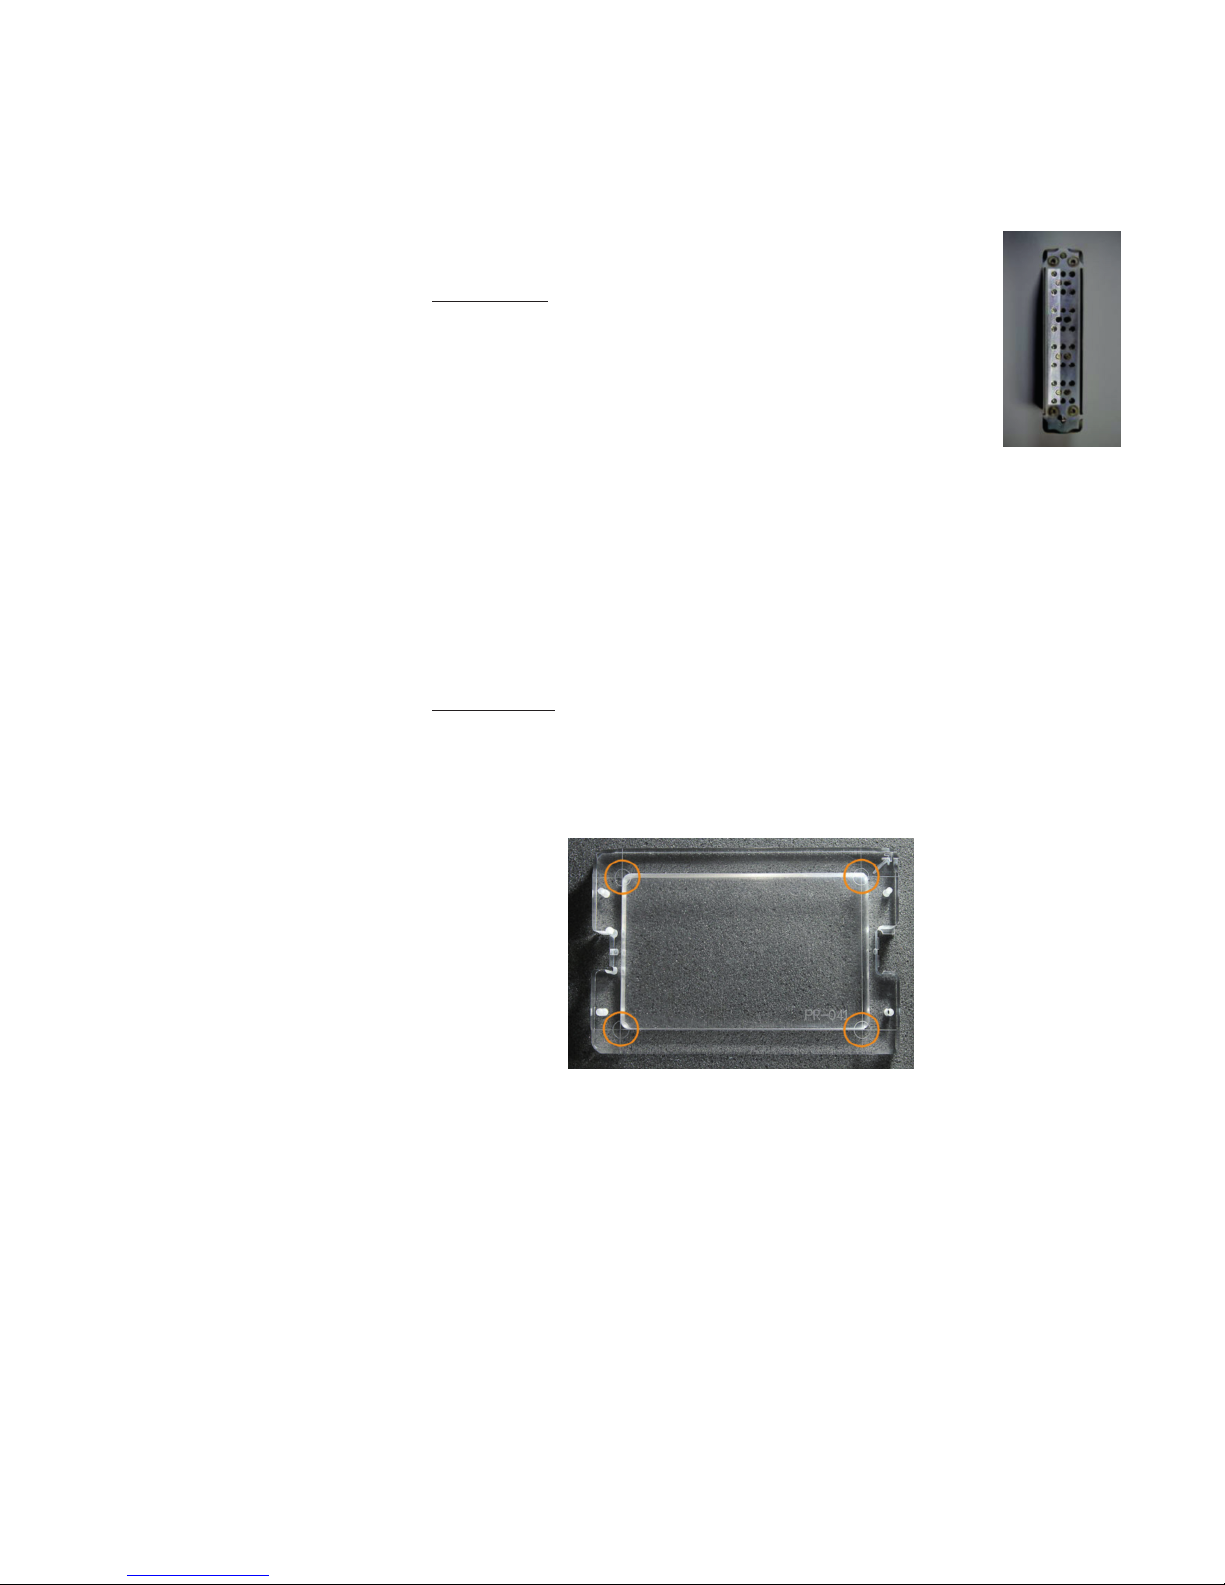
2 – Protein Source Station. A protein sources station is a station for the
protein source that is included in the NT8 accessory kit.
Protein Source
The NT8 supports for low volume protein block and high volume
protein block. The protein source has three columns of eight drops
each (24 total), each well capable of holding 3 µL (LV protein block) or
13 µL (HV protein block); the protein source is required for the protein
source calibration. Use wells #1 through #8 at the first column (on the
left) of the protein source as the reference tuning points.
3 – Wash Station. The Wash Station is a location on the NT8 for washing low volume
pipette tips.
4 – Low Volume (LV) Tip Caddy Station. The low volume (LV) tip caddy station is a
repository that holds up to 384 replacement LV tips.
5, 6, 7 – Microplate Stations. On the deck of the NT8 there are designated areas for three
SBS footprint microplates. Three microplates can be placed on the deck to transfer
reagents from one plate to another. A hanging drop cover sheet can be placed on station
#1 for setting hanging drops.
Reference Plate
Use the reference plate that is included in the NT8 accessory kit. The reference plate
has cross hairs in every corner for reference points (see the picture below, indicated by
orange circles). Use the top-left, top-right, and bottom-left cross hairs as the tuning
points.
8 – High Volume (HV) Tip Caddy Station. The HV tip caddy station holds up to 96
replacement HV tips for the system.
9 – Deep Well Station. The deep-well station is compatible with 96 deep-well plates,
which are used in daughter plates creation.
11
NT8 User's Guide | Chapter 5: Hardware Overview
The NT8 Head
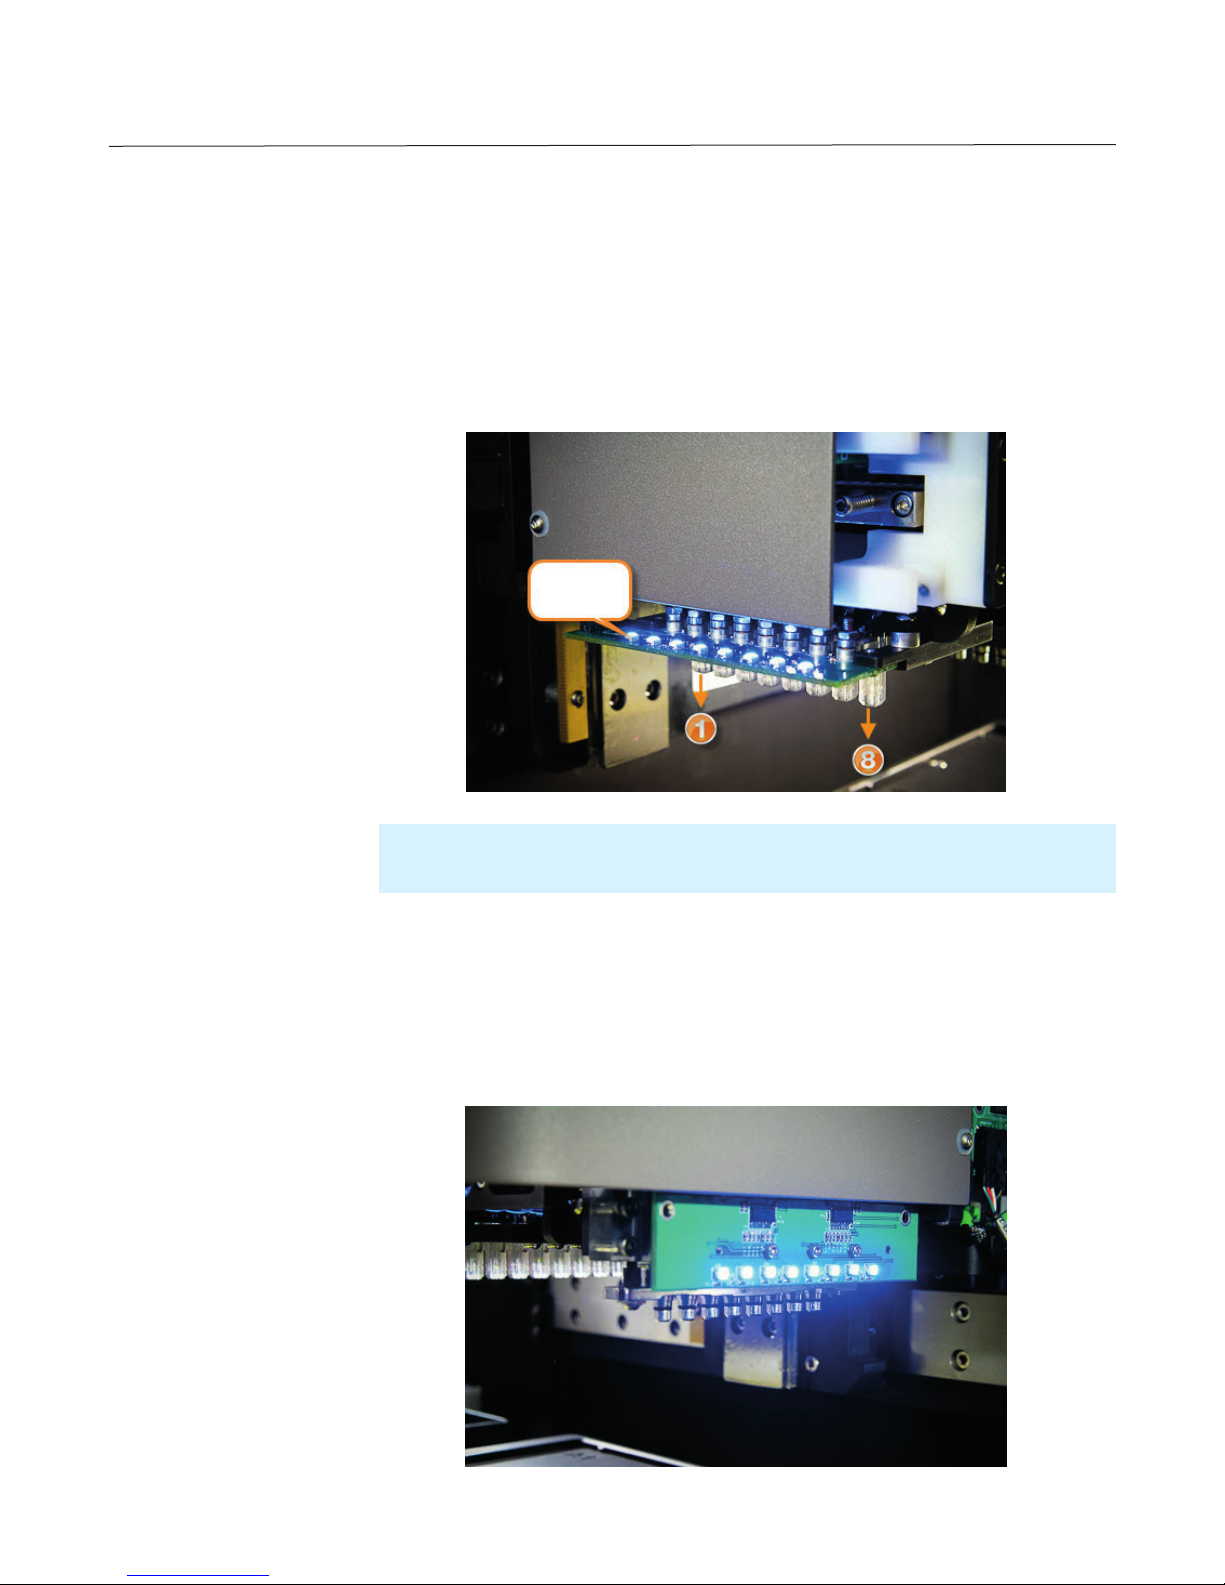
What you can find on the NT8 head:
●Low Volume (LV) Tip Attachments
Located at the bottom-left of the NT8's head, each LV tip attachment is equipped
with a sensor that indicates when a tip touches a surface. Indicator lights are placed
on the board that holds the LV tip attachments.
If the tip is touching, the sensor will be off and bright blue otherwise (see the picture
below).
●Optional: High Volume (HV) Tip Attachments
HV tips are located at the bottom-right of the NT8's head. Each HV tip attachment is
equipped with a sensor that detects any existing liquid in a deep well plate. The HV
tip attachment uses 200 µL pipette tips (eight at a time) to aspirate liquid from a
deep well block and transfer it to a crystallization plate.
Sensor
indicator
Note: When you see a tip number referenced in the text, 1 is the tip closest to the back of
the instrument and 8 is the one closest to the front.

12
NT8 User's Guide | Chapter 5: Hardware Overview
●Optional: Lipidic Cubic Phase (LCP) Lever
Adjusts the LCP syringe mount.
●Optional: Lipidic Cubic Phase (LCP) Syringe Mount
Compatible with Hamilton LCP syringe.
Note: You can adjust the lever speed and height to fit the LCP syringe by clicking on
the toolbar and moving the lever button on the NT8's head up and down as necessary.
13
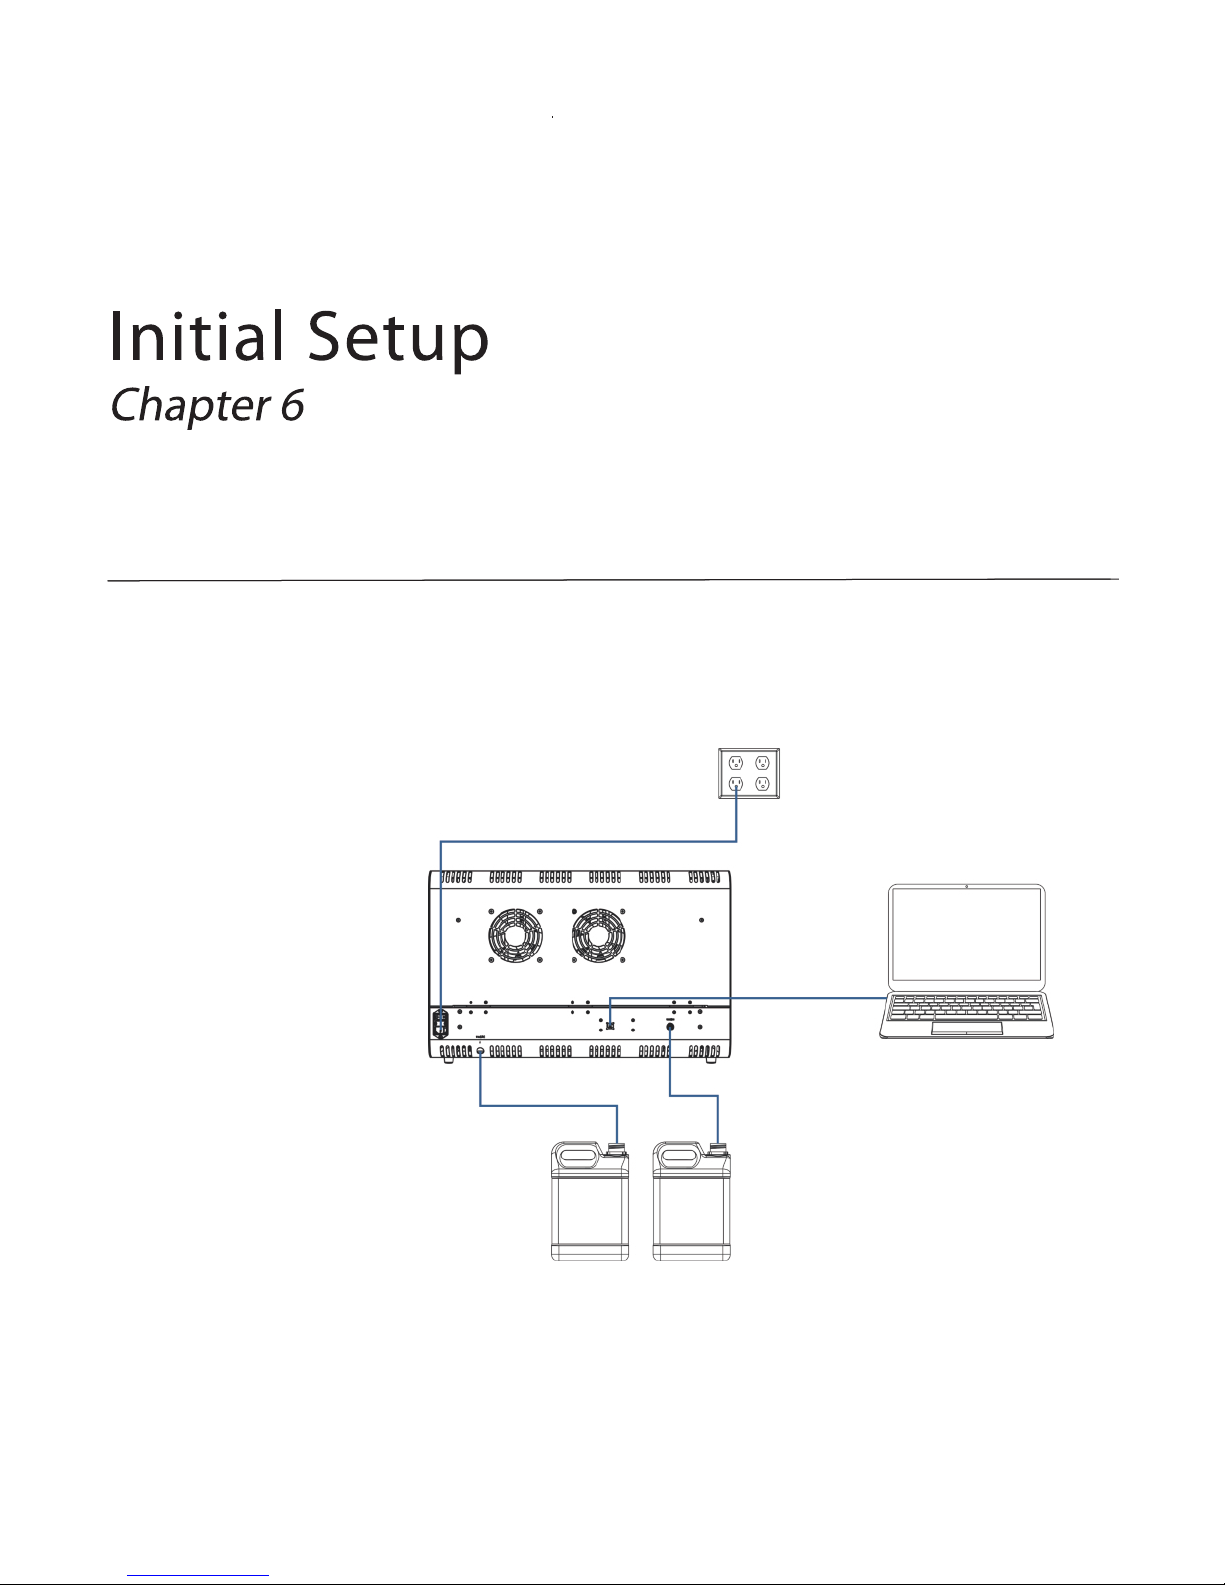
Setting up the NT8 for initial use means connecting all of the cables, setting up the water and
waste carboys and installing the .NET framework as well as the FTDI drivers to your computer.
A diagram of the setup is shown below for reference.
To set up the NT8 for initial use:
1. Prepare the water and waste carboys. Please note that the water carboy must only be
filled with distilled water. Place the water carboy near the NT8 and the waste carboy
under the table.
Power
Outlet
Computer Laptop
USB Cable
Wash
Tank
Waste
Tank
Power Cable
Setting Up the NT8

14
NT8 User's Guide | Chapter 6: Initial Setup
2. Connect the wash and waste tubes to the water and waste carboys, and the other
ends of the tubes to their respective input and output locations on the back of the
NT8.
3. Plug the power cord into the cable power port, and then plug the other end into a
power outlet.
4. Connect the NT8 to the computer using the USB cable.
5. Power-on the NT8 by flipping the power switch to the ON position. The power switch
is located at the back-right side of the NT8.
6. Navigate to the NT8 USB drive from your computer and open the NT8 Prerequisites
folder. You will see two files: .NET Framework 3.5 and CDM20824.
7. Double-click the .NET Framework 3.5 installer to begin installation. Follow the on-
screen instructions.
8. Check to see if the FTDI driver is already installed on your computer. Note: The
following instructions are based on Windows Vista and may vary based on your version
of Windows.
●Go to the Device Manager in Windows and click Continue (if Windows User
Active Control is active).
●If you DO NOT have the FTDI driver on your computer, your NT8 will show up
twice as “NT8V3.1” with a yellow warning symbol. Proceed to step 9.
●If you DO have the FTDI driver installed, your NT8 will show up As “USB Serial
Converter A” and “USB Serial Converter B”. Proceed to Step 10.
9. Install the FTDI driver: Right-click the NT8V3 device and select Update Driver
Software.
10. Verify that you have the latest version of the FTDI driver:
a. Double-click Universal Serial Bus controllers.
b. Double-click USB Serial Converter A.
c. Click the Driver tab.
d. Check the version. If the version is older than 2.8.x, you must follow the steps
below otherwise no updated version is needed.
e. Click Update Driver tab.
f. Click the Browse button and then navigate to the NT8’s prerequisite folder.
g. Select the FTDI driver. The driver updates.
h. Repeat steps a-g for USB Serial Converter B.
Your NT8 is now ready for use. If you want to, you can find the NT8’s icon in the NT8’s files
and make a shortcut for your desktop by right-clicking the icon, selecting Send to and
clicking Desktop.
15
NT8 User's Guide | Chapter 6: Initial Setup
Preparing the NT8 for a Dispense
Before running a dispense, you need to prepare the hardware. If you're not familiar with the
components, please see Hardware Overview.
This topic will explain how to station every possible component of the NT8. You may not have
to set up each component for a dispense, so make sure to read the quick start guide before
prepping your hardware to avoid unnecessary hardware setup.
Prerequisites
You are familiar with the NT8 hardware.
This tutorial covers the following topics:
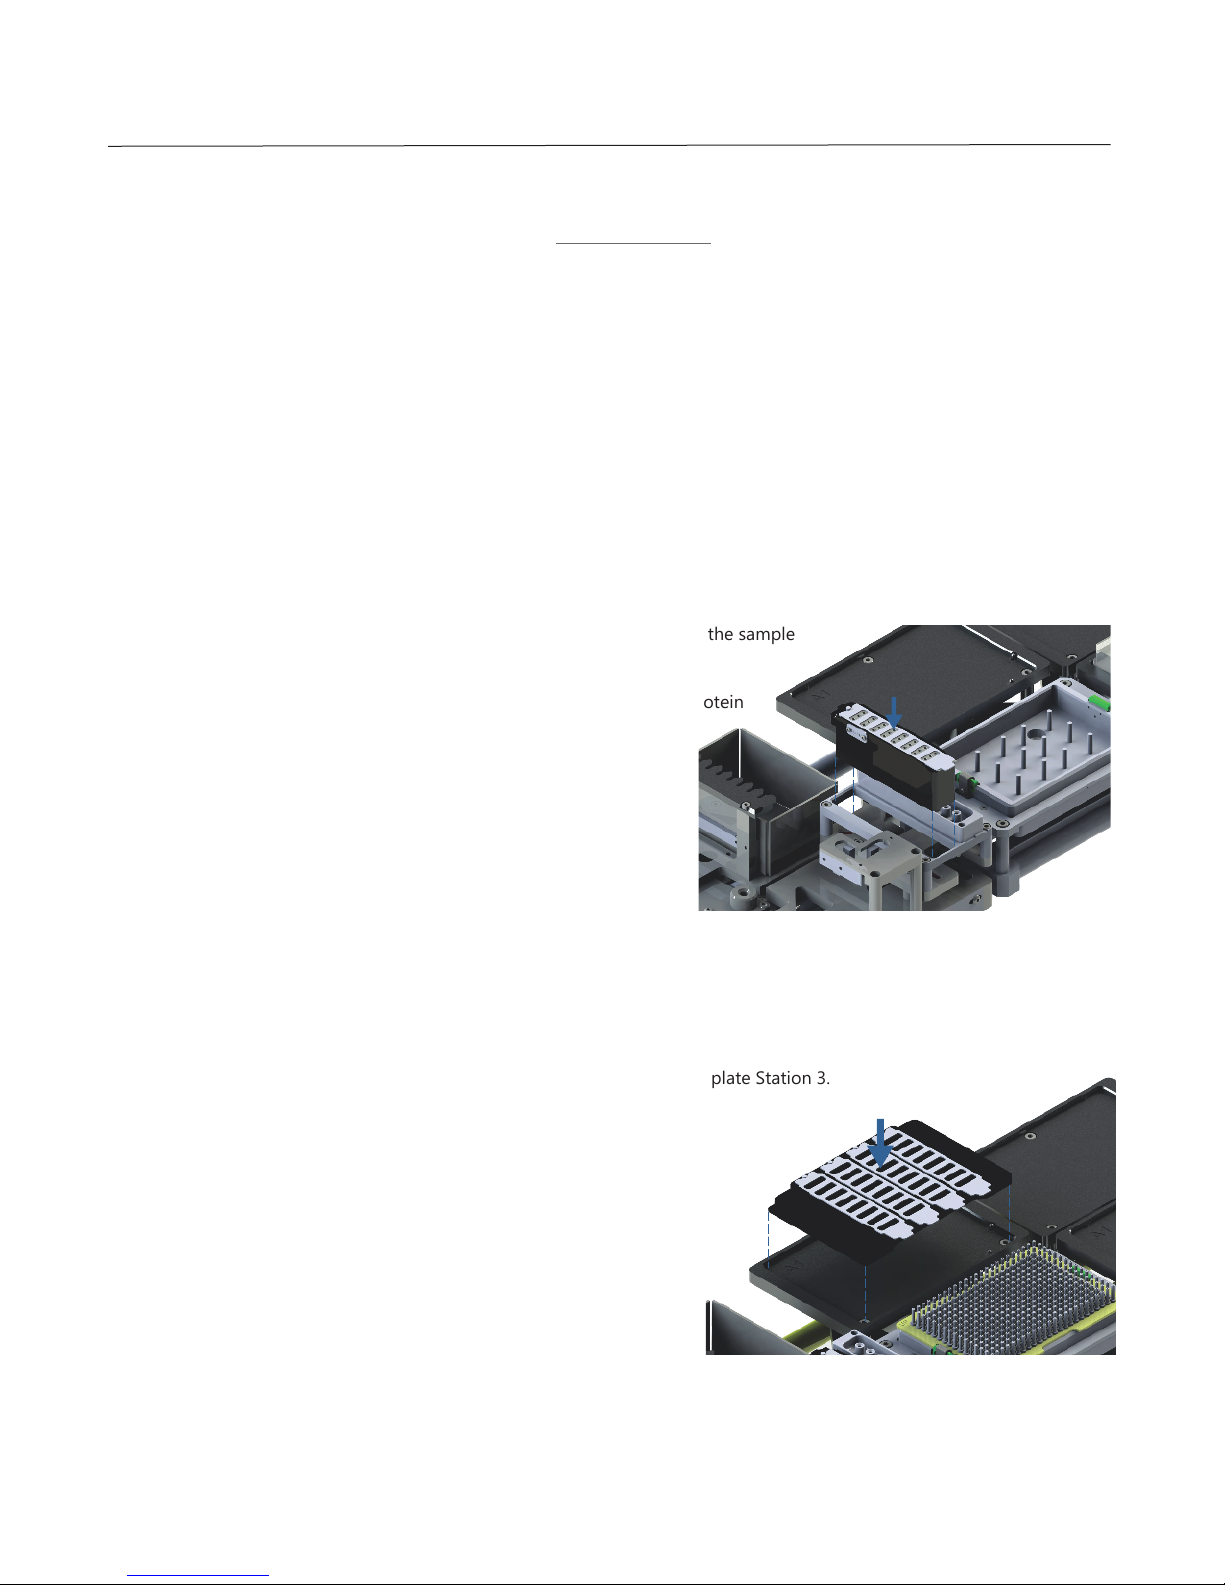
Installing the LV Protein Block
1. Make sure that you have attached the sample
blocks to the protein source.
2. Place the protein source on the protein
source station.
Installing the HV Protein Block
1. Place the HV Protein Tray on Microplate Station 3.
2. Make sure it is secure.

16
NT8 User's Guide | Chapter 6: Initial Setup
Installing the LV Tip Caddy
1. Place the LV tip caddy on the LV tip caddy station.
2. Make sure it is secure.
Installing the Reference Plate
1. Put the reference plate on the desired microplate station.
2. Make sure the arrow mark position is on the top-
right corner.
Installing the HV Tip Caddy
1. Click the button to move the NT8's head to the left and stage
back. This will allow you to slide the HV tip caddy into place.
2. Slide the tip caddy into position.
1
2
H
Other manuals for NT8
1
Table of contents
Other Formulatrix Medical Equipment manuals

Popular Medical Equipment manuals by other brands


Courtney Thorne
Courtney Thorne Altra Wear user guide

Shukla Medical
Shukla Medical Xtract-All Maxi Surgical Technique Guide

Drucker Diagnostics
Drucker Diagnostics DASH COAG Operator's manual

Darco
Darco CBO Instructions for use

MES
MES SQA-V Gold user guide

Care of Sweden
Care of Sweden CuroCell AREA Zone Instructions for use


