7 8 9
1211 13
10
14
To disable recording, uncheck the channel checkbox on the
Manual Record interface.
Note
Note
This product supports 32-bit IE8 or later versions and does not
support 64-bit browsers.
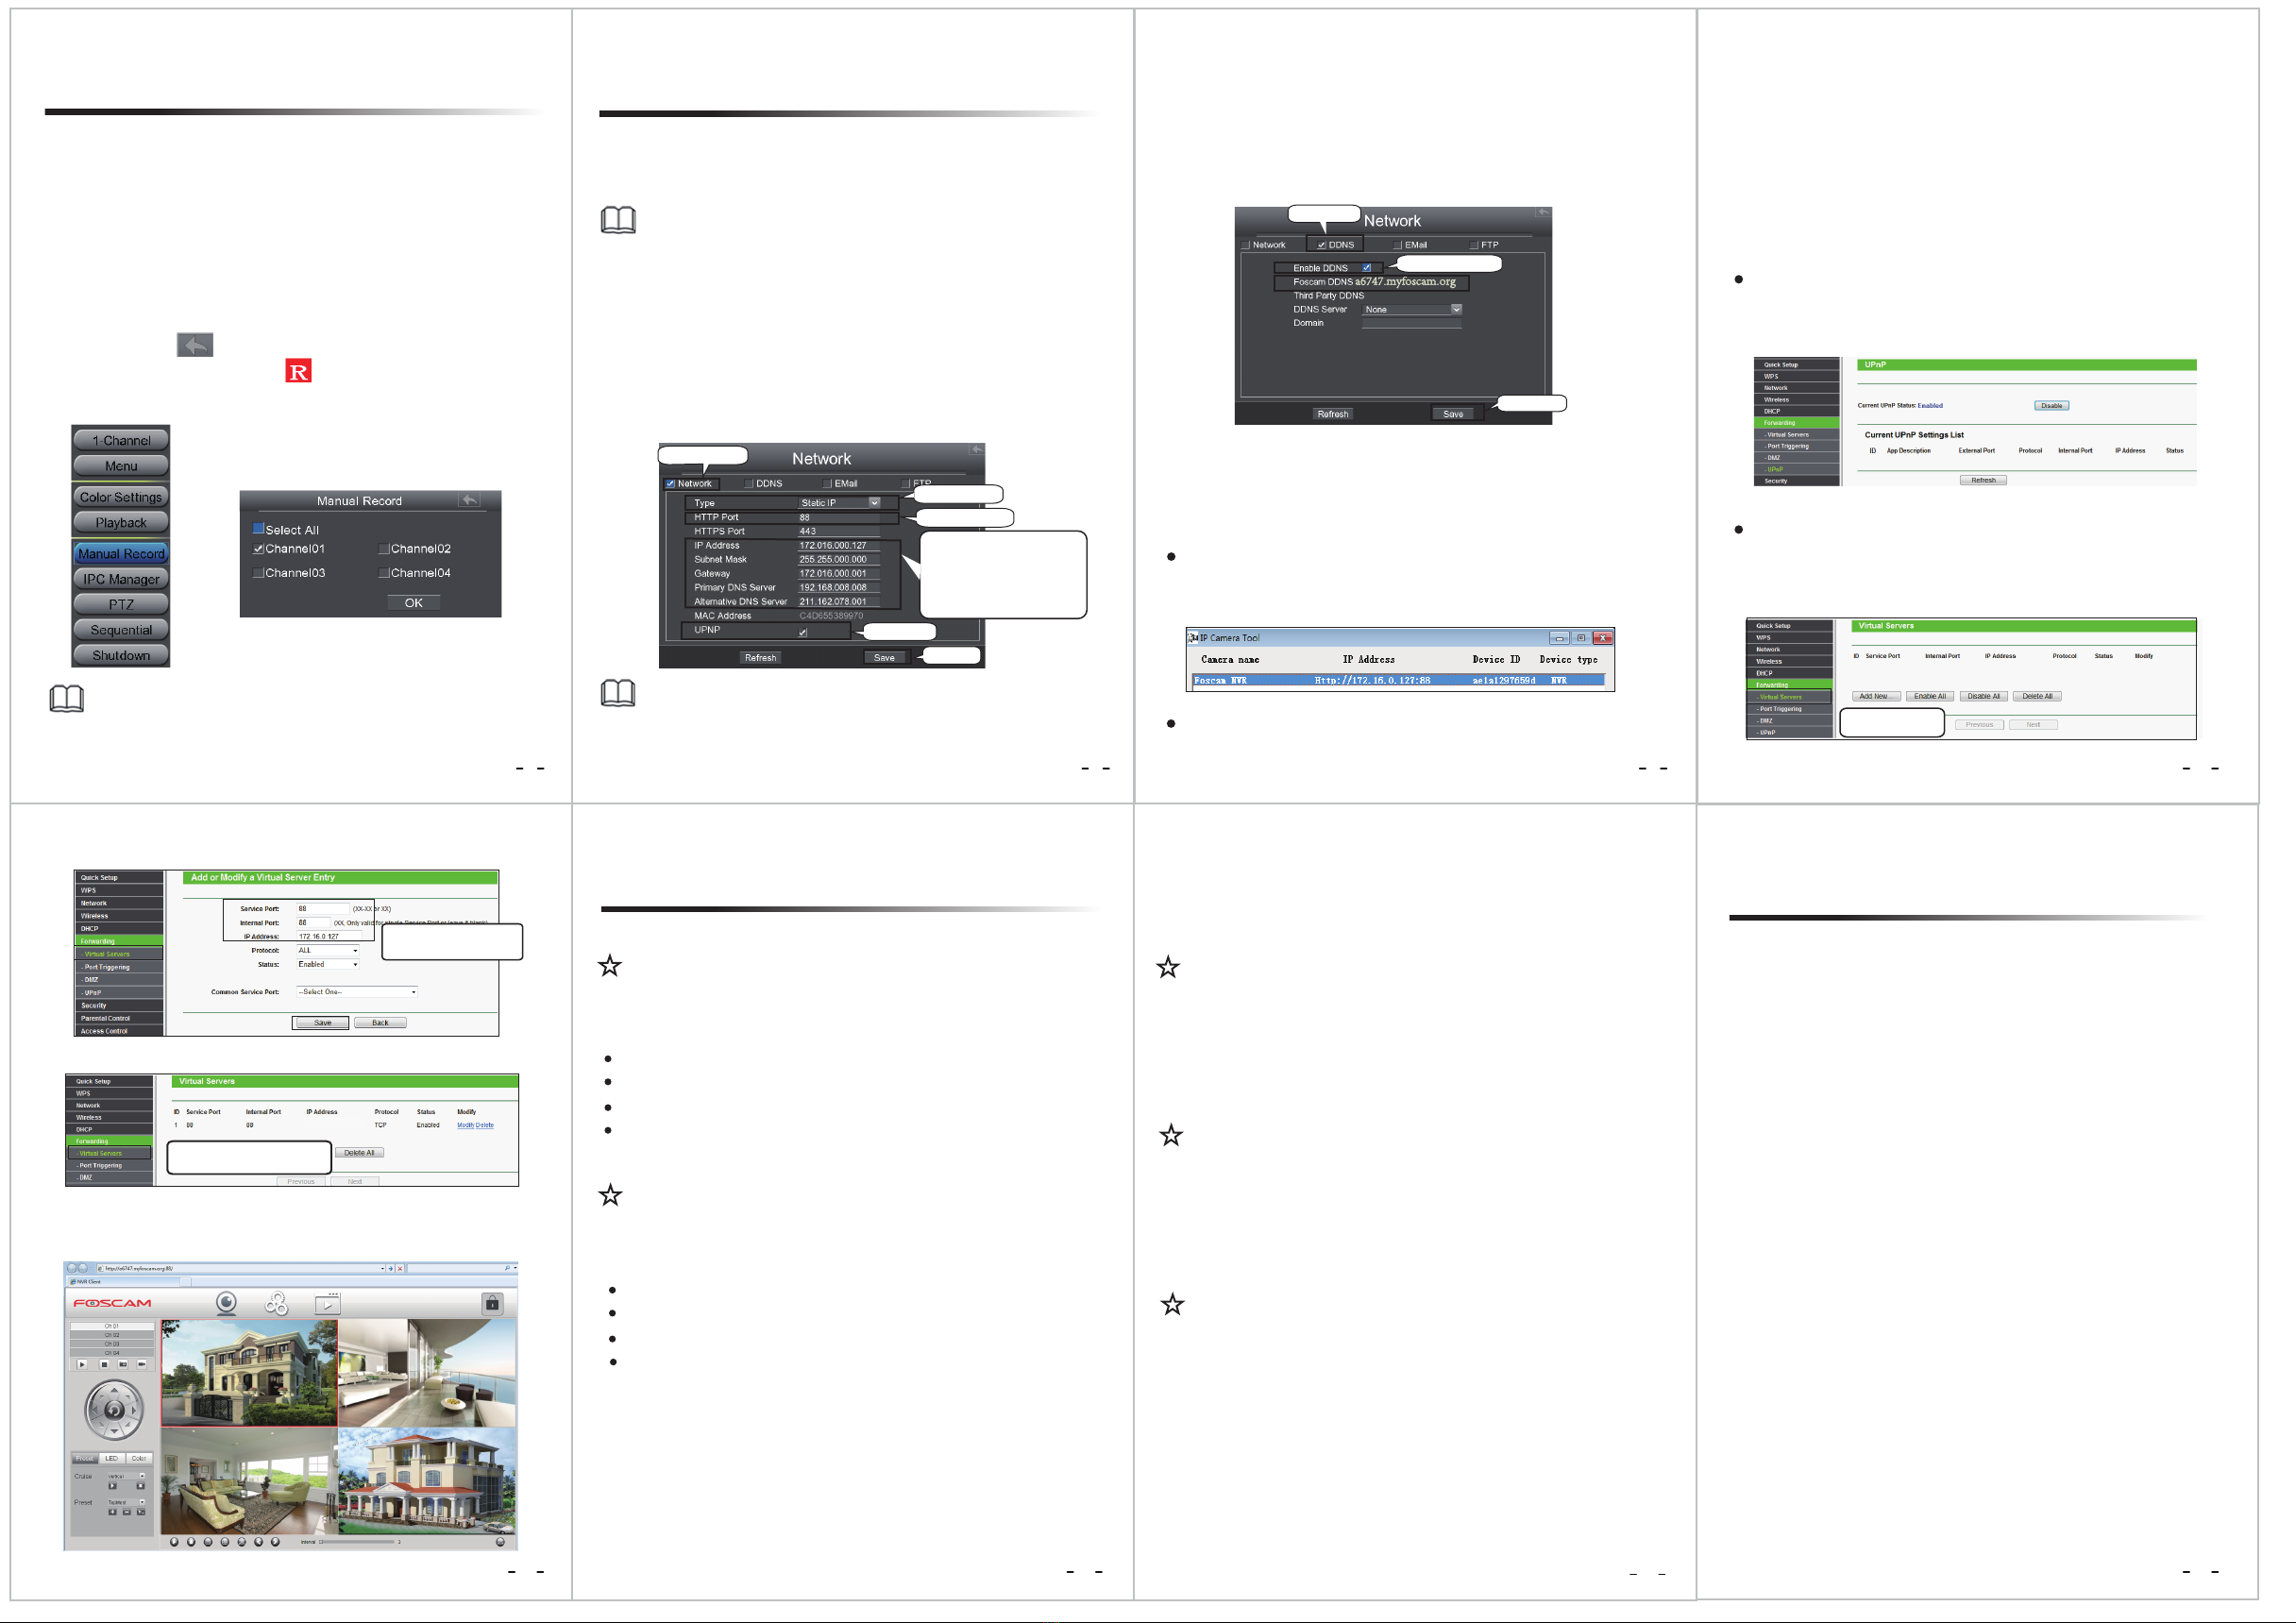
6.1 Network Conguration
6.2 Access to the NVR in LAN
Now you can access to your NVR by http://domain name:HTTP port
via the browser. eg, http://a6747.myfoscam.org:88
Click Add New...
There are two ways to access to the NVR via the browser in LAN.
Open the IP Camera Tool program in the resource CD. It will display
the NVR’s IP address and port in your LAN. Double click the NVR list
here, and your default browser will open up to the login page.
You can also access to your NVR by http://IP address:HTTP port via
the browser. eg, http://172.16.0.127:88
6.3 Access to the NVR in WAN
If there is no UPnP function in your router.
You need to manually add port(HTTPS port) forwarding, refer to the
following steps. You need go to the “Forwarding > Virtual Servers”
panel for setup.
Choose “Forwarding > UPnP”, make sure that the Current UPnP
Status is Enabled.
If there is a UPnP function in your router.
If UPnP has been enabled in the router, you do not need to perform
the following steps. If UPnP is disabled, you need to select one of
the following methods to congure port forwarding on your router.
For these steps, we will be using the TP-LINK brand wireless router as
an example.
After the IPC device is added successfully to the NVR, you can enable
the manual recording function in the live view mode.
Assume you need to log in to your NVR from another network outside
the LAN via the browser. You need to perform following congurations:
6Remote Access Congure the DDNS.
2.
Congure network information.
1.
Right click the mouse in the live view mode, and the shortcut
menu will pop up.
1.
Select the Manual Record to enter the Manual Record page.
2.
Check the channel which you want to enable recording. Click OK
button.
3.
Then click icon to exit the interface.
4.
In the live view mode, the icon is at the right bottom of the
screen for the channel, indicating recording is on going.
Right click the mouse in the live view mode, choose “Menu >
Settings > Network”. Check the Network checkbox, congure the
following information.
Note
It is highly recommended to set the HTTP Port range from 5000 to 65535,
and the value of the HTTP Port No. for each device should be unique.
Right click the mouse in the live view mode, choose “Menu > Settings
> Network”. Check the DDNS checkbox. Enable DDNS of the NVR. We
recommend you to use the DDNS by factory default.
172.16.0.127
Here you have nished the Port
Forwarding setup.
8Technical Support
If you have problems with your Foscam device, please contact the
Foscam reseller you purchased from, or you can e-mail the Foscam
Your valuable comments and suggestions on improving Foscam
products are welcomed!
Input the port and IP address
of your NVR and click Save.
On the “Motion Detection” page, check whether the following are
correctly set:
★Why recording is not performed after motion detection is enabled?
Check whether enable is selected. Check whether recording is selected.
Check whether the motion detection channel is correct.
Check whether a trigger time segment is set.
Check whether a detection area is set.
On the “IPC management” page, check whether the following are
correctly set:
★Why can the NVR search the IPC but cannot connect the IPC?
Check whether the user name and password for the IPC are correct.
Check whether the web page port for the IPC is correct.
Check whether the IPC also supports the protocol selected in the NVR.
Check whether the IPC video is normal. When the NVR server switches to the 1080P mode, some
functions can take eect only after the server reboots. In this case,
log out of the Web client and log in to it again. In similar cases, for
example, changing the IP address and HTTP port of the NVR, you
need to log in to the client again.
★Why can’t opened web pages on the client be used properly after
the NVR server switches to the 1080P mode?
To save consumed resources, the server limits concurrency of video
playback and le download. In this case, stop video playback and then
download les or play back videos after video les are downloaded.
★Why can’t video les be downloaded during video playback or
downloaded les cannot be played back properly?
Make sure that the IPC display mode is not more than NVR display
mode. For example: NVR display mode for the 4 * 960P, the IPC
display mode can not be 1080P.
★After the adding of the IPC successfully, the video of the
corresponding channel has lost in the live view mode.
Select the Type
Check Network
Set the HTTP Port
IP Address: Set it to an IP address
of NVR in the range of the router
address pool, or keep it as default.
Subnet Mask: Keep it as default.
Gateway and DNS Server: Set it
to the IP address of your router.
Check UPNP
Click Save
7 FAQ
5
Manual Record
Click Save
a6747.myfoscam.org
Check DDNS
Check Enable DDNS


