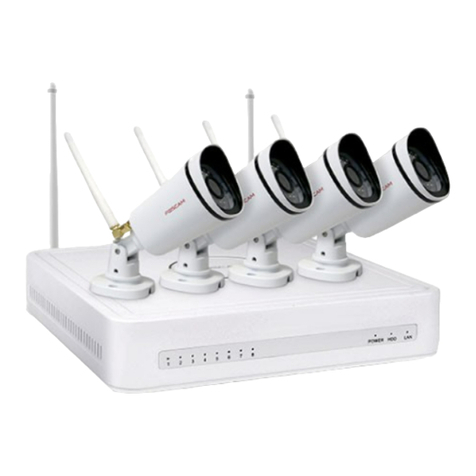
Foscam FN9108HE User manual

Network Video Recorder
FN9108HE
User Manual • Uživatelský manuál •
Užívateľský manuál • Használati utasítás •
Benutzerhandbuch

2
English
3 –21
Čeština
22 –40
Slovenčina
41 –59
Magyar
60 –78
Deutsch
79 –97

3
Dear customer,
Thank you for purchasing our product. Please read the following instructions carefully before
first use and keep this user manual for future reference. Pay particular attention to the safety
instructions. If you have any questions or comments about the device, please contact the
customer line.
✉www.alza.co.uk/kontakt
✆+44 (0)203 514 4411
Importer Alza.cz a.s., Jankovcova 1522/53, Holešovice, 170 00 Praha 7, www.alza.cz

4
Packaging
1× Network Video Recorder
1× DC Power Adapter
1× Quick Setup Guide
1× Warning Card
1× Ethernet Cable
1× USB Mouse
1× Screw Pack
1× Hard Disk Data and Power Wire
Safety Recommendation
Ensuring the security and privacy of your Foscam cameras and NVRs is essential.
Implementing good security practices is vital in safeguarding your privacy. Regularly
changing your camera or NVR password, using a combination of numbers, letters, and
symbols, is a crucial step.
Additionally, it's essential to keep your camera or NVR up to date by regularly updating its
firmware. By doing so, you ensure that your device has the latest enhancements and fixes for
your specific model, providing you with a better overall experience.

5
Hard Disk Mounting
Be Aware:
Prior to installing a hard disk drive (HDD), ensure that the NVR is disconnected from the
power source.
For optimal performance, it is advisable to use a hard drive with a speed of 7200 RPM or
higher.
1. Open the NVR cover by unscrewing the screws located at the rear and bottom of the
device.
2. Attach one end of the data cable and power cable to the NVR's motherboard and the
other end to the HDD.
HDD
Data Cable
Power Cable

6
3. Carefully position the HDD at the bottom of the device and secure it in place by
tightening the screws on the bottom.
4. Replace and secure the NVR cover by fastening the screws back into their original
positions.

7
Diagram
Alarm Indicator
Power Indicator
Recording Indicator
VGA Output
Audio Output
HD Output
Power Switch
GND
Power Input (DC48V)
USB Port
Network
RJ45

8
Device Connection
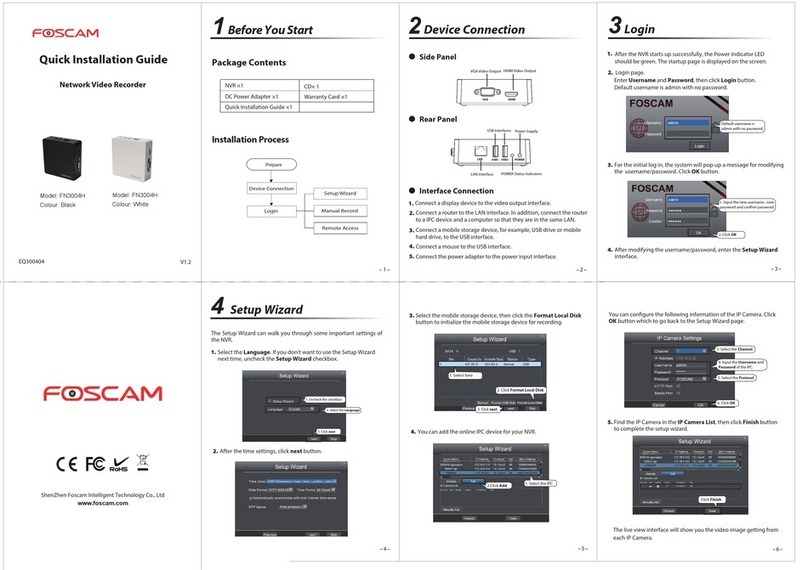
Step-by-Step Guide to Setting Up Your Foscam NVR and IPC
1. Connect Your NVR to a Router: For utilizing Foscam VMS or App, ensure your NVR is
connected to a router. Both the NVR and IPC (IP Camera) should be in the same LAN to
allow easy detection and addition of IPC to the NVR.
2. Connect Your Display: Attach your display to one of the video outputs (VGA or HD-OUT
interface) on the NVR.
3. Backup with External Storage: For backup purposes, connect an external storage device to
the USB interface of the NVR.
4. Connect a Mouse: Easily navigate and control the NVR by connecting a mouse to the USB
interface.
5. Ethernet Cable Connections: Certain devices, such as the NVR, PC, and IP Camera, need to
be connected to your router using an Ethernet cable. Please ensure the necessary
connections are established.
6. Power Up: Connect the power adapter to the power input port of the NVR.
Computer
TV
Router
Ethernet
Cable
Ethernet
Cable
Ethernet
Cable
HD Output Cable
NRV Power Adapter (DC
48V)
NVR
VGA Cable
Monitor
Mouse
USB HDD
PoE Camera

9
7. NVR DHCP Server Settings: If the NVR does not detect and connect to a router within 30
seconds, the NVR DHCP server will activate. This is used for searching and connecting to
the IPC on the PoE NVR or switch. If a router is connected during this time, the NVR may
not be found when adding it via the APP or VMS. In such cases, restarting the NVR is
necessary. Note: Users have the option to customize the startup time or disable the NVR
DHCP server as per their requirements.
Logging In
1. Power Up Your NVR: Flip the power switch located on the rear panel to turn on the NVR.
Upon successful startup, the power LED and HDD LED indicators will illuminate in green,
and the startup page will appear on the screen.
2. Set a New Username and Password: To ensure your security, it is vital to establish a fresh
user name and password for your NVR before logging in.
3. Logging In: Access the login page and provide your newly set Username and Password.
Click on the OK button to proceed.
4. Accessing the Setup Wizard: After modifying your password, you will automatically be
directed to the Setup Wizard for further configuration.

10
Setup Wizard
The NVR Setup Wizard simplifies crucial settings on your NVR. It will walk you through the
following steps:
1. Time Settings: Configure the accurate time for your NVR.
2. HDD Formatting: Click the Format button to initialize the HDD. Please be aware that this
action will erase all files stored on the HDD. Set the HDD Full Setting to either "Stop
Record" or "Overwrite."

11
3. P2P Configuration: If you wish to obtain the UID of your device, scan the QR code
provided. To skip using the Setup Wizard in the future, uncheck the Setup Wizard
checkbox. Click the Finish button to finalize the setup wizard.
Alternatively: Right-click →Main Menu →Configuration →uncheck the Setup Wizard
checkbox →Click the Finish button to complete the setup wizard.
Uncheck the checkbox

12
Adding an IP Camera
1. To begin, right-click on the main interface and choose "Channel Config.
2. Next, select your IP Camera from the list or opt for "Auto Added IPC" if available.
3. Click on the "Add" option to initiate the camera addition process.
4. If your camera requires a username and password, provide the necessary credentials.
However, if your camera is in the factory default state, entering a username and password
may not be necessary.
5. Click on the “OK”to confirm your settings and save the changes.
Depending on the type of IP Camera you have, select the corresponding protocol:
FOSCAM Protocol: Opt for the FOSCAM protocol if you are using High Definition (HD) IP
Cameras specifically designed for Foscam.
ONVIF Protocol: For IP Cameras that support the ONVIF protocol, select this option.
ONVIF is a standard protocol that enables interoperability between different IP cameras
and network video recorders.
1. Select your IP camera
2. Click on Add

13
Recording
Once the IP Camera is successfully added to the NVR, proceed to activate the Scheduled
Record functionality for the specified methods while in Live View mode.
Scheduled Recording
To enable scheduled recording on the NVR system, follow these steps: Right-click →Main
Menu →Record →Choose the recording channel →Save. Note that the NVR system has a
default setting of 24-hour scheduled recording.
In the Live View mode, you'll find the icon located at the bottom right of the screen for
each channel, indicating that recording is currently in progress.

14
Event Recording
To start event recording, choose "Event" under Type and use the left mouse button to select
the desired time (turned to green). If you want the other channels to have the same settings,
simply click on "Copy".
Note: The default alarm type is Motion Detect.
In Live View mode, you will notice the icon located at the bottom right of the screen
for each channel, indicating that recording is currently in progress.
To set up the event alarm, follow these steps: Right-click →Main Menu →Event →Motion
Detect →Choose the target channel →Configure the settings for Schedule, Delay, Record
Channel, Tour, PTZ Activation, Send Email, and Buzzer →Save.

15
Playback
To view the recording information, including Manual Record, Alarm Record, and Schedule
Record, follow these steps: Right-click →Main Menu →Playback →Choose the desired
channel and date →Click on the timeline to review the recorded content.
Note: You have reached the maximum number of 8 playback video channels. To proceed,
please deselect other channels first.
Remote Access
Additionally, you can access the NVR or IP Camera directly through Foscam VMS (Video
Management Software) and Foscam App.
Access Via Foscam VMS
Foscam VMS is a newly introduced tool designed for PC, offering plug-in-free compatibility
with both Windows and Mac systems. It provides support for all Foscam HD cameras and
allows the simultaneous management of up to 36 cameras. For those seeking to handle
multiple cameras efficiently, we recommend installing Foscam VMS. To download the
software, visit https://foscam.com/vms . For Mac users, you can find the "Foscam VMS" Mac
version on the APP store at:
https://apps.apple.com/cn/app/foscamvms/id1521202507?mt=12.

16
Note: Please note that for the optimal experience, it is highly recommended to update
Foscam VMS to the latest version available. This ensures that you can benefit from the latest
features, improvements, and bug fixes provided by the updated version.
Adding The NVR
1. Launch Foscam VMS and create a local administrator account to log in.
2. Click on the "+" button in Foscam VMS and follow the setup wizard to add your NVR. For
more detailed steps on adding your NVR, please consult the user manual.
3. To preview, select the device from the LAN Device list and enter the preview interface.
Choose a channel to view its picture. Click on the button to proceed, as illustrated
below: (Please note that the specific details of the preview interface may vary depending
on the version of Foscam VMS used).

17
Access Via Foscam App
1. To get the Foscam app on your smartphone, you have two options. You can either go to
the App Store (for iOS devices) or Google Play (for Android devices) and search for
"Foscam." Alternatively, you can use the QR code provided below, which will direct you to
the download page for installing the Foscam app.
2. After downloading the Foscam app, launch it, and proceed to register for a Foscam
account.
3. Once you're logged in, tap the "+" button within the app. Next, scan the QR code located
at the bottom of your NVR to add the device.
4. To preview your cameras, click on the device in the list to enter the preview interface.
From there, select a specific channel to view its picture, as demonstrated below:
Note: Please be aware that the Foscam app is regularly updated to the latest version, and its
functionalities are continuously improved through iterations. Therefore, it is recommended to
keep the app updated to ensure you can access the latest features and enhancements.

18
Upgrading NVR and Firmware
It is possible to perform system upgrades for your NVR and cameras using local software.
NVR Upgrade:
To upgrade your NVR, download the firmware to a U disk and insert it into the NVR's USB
port. Then, right-click on the NVR, access the Main Menu, and choose Upgrade. Click on
Refresh to detect the firmware on the U disk and proceed by clicking Upgrade to initiate the
NVR upgrade process.
Note: Do not power off the device during the upgrade process. After the upgrade is
complete, the NVR will restart automatically.
You have the option to upgrade your NVR's firmware using Foscam VMS. Simply open
Foscam VMS, log in, and then navigate to Setup > System > System Upgrade to proceed
with the firmware upgrade.
1. Click the button to choose and save
the firmware onto the U-disk
2. Click the button to
upgrade

19
Firmware Upgrade:
1. Click on the "Download the latest firmware" button to download the most recent
firmware version to your computer.
2. On the web page, click the "Browse" button to select the firmware file version you wish to
upgrade.
3. After choosing the file, click the "Upgrade" button and wait until the upgrade process is
complete.
With the Foscam App, you have the ability to upgrade both your NVR and cameras' firmware.
Simply open the Foscam App, log in to your NVR, and navigate to Settings > NVR Firmware
Upgrade to initiate the firmware upgrade process.
Note: Regardless of the upgrade method you choose, it is crucial not to power off the device
during the upgrade process. Once the upgrade is completed, the NVR will restart
automatically. It is essential to allow the upgrade process to finish without any interruptions
to ensure a successful and stable firmware update.

20
Specifications
Power Supply
DC 48V 2,0A 96W
Technical Support
Should you encounter any issues with your Foscam device, kindly reach out to the reseller
from whom you made the purchase. Alternatively, you can also contact the headquarters
technical support team via email at support@foscam.com for further assistance and
guidance. They will be happy to help you resolve any problems you may be facing with your
Foscam device.
Warranty Conditions
A new product purchased in the Alza.cz sales network is guaranteed for 2 years. If you need
repair or other services during the warranty period, contact the product seller directly, you
must provide the original proof of purchase with the date of purchase.
The following are considered to be a conflict with the warranty conditions, for which
the claimed claim may not be recognized:
Using the product for any purpose other than that for which the product is intended or
failing to follow the instructions for maintenance, operation, and service of the product.
Damage to the product by a natural disaster, the intervention of an unauthorized person
or mechanically through the fault of the buyer (e.g., during transport, cleaning by
inappropriate means, etc.).
Natural wear and aging of consumables or components during use (such as batteries,
etc.).
Exposure to adverse external influences, such as sunlight and other radiation or
electromagnetic fields, fluid intrusion, object intrusion, mains overvoltage, electrostatic
discharge voltage (including lightning), faulty supply or input voltage and inappropriate
polarity of this voltage, chemical processes such as used power supplies, etc.
If anyone has made modifications, modifications, alterations to the design or adaptation
to change or extend the functions of the product compared to the purchased design or
use of non-original components.
Table of contents
Languages:
Other Foscam Network Hardware manuals

Foscam
Foscam FN3104H User manual

Foscam
Foscam FN7108HE User manual

Foscam
Foscam FN3108E User manual

Foscam
Foscam FN3004H User manual

Foscam
Foscam FN3104W User manual

Foscam
Foscam FN8108H User manual

Foscam
Foscam FN3104W-B4 User manual
Foscam
Foscam FN3004H User manual
Foscam
Foscam FN3004H User manual

Foscam
Foscam FN3109H User manual
Popular Network Hardware manuals by other brands

Tandberg Data
Tandberg Data RDX QuikStation 4 Quick start guides

General DataComm
General DataComm OCM-2000 Installation & operation manual

FieldServer
FieldServer FS-8700-22 X30 Driver manual

CommScope
CommScope FOSC-OC-6 installation instructions

Elan
Elan WRITER instructions

Hihome
Hihome WPP-10S1 quick start