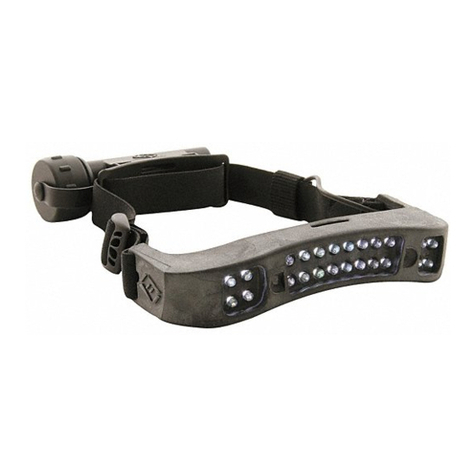
Foxfury Lighting Solutions DISCOVER SERIES User manual

PRODUCT MANUAL
480-L06 |480-T09
DISCOVER SERIES

TABLE OF CONTENTS
INTRODUCTION
Discover Reference Guide 3
Physical Characteristics & Warnings 4
BATTERY
Battery Installation 5
Reassembling the Battery Pack 5
OPERATION
Operational Modes 6
Battery Life 6
INSTALLING STRAPS
Elastic Strap 8
Silicone Strap 9
MAINTENANCE 6
WARRANTY 10–11
CONTACT FOXFURY 11

3
DISCOVER REFERENCE GUIDE
DISCOVER LO•PRO LIGHT HEAD (P/N 480-L06)
DISCOVER TILT LIGHT HEAD (P/N 480-T09)
DISCOVER BATTERY PACK
LENS
FOAM PADDING
POWER/MODE
SWITCH
BUCKLE SLOT
(3 EACH)
TILT PLATE
LED
LENS
LED
POWER/MODE
SWITCH
BUCKLE SLOT
(2 EACH)
BATTERY PACK COVER
BATTERY PACK
TABS (6 EACH)
REAR
FLASHING
LED
BUCKLE SLOT
(3 EACH)

4
PHYSICAL CHARACTERISTICS
Please read below before using your Discover headlamp as it relays beneficial
operating and safety information.
P/N NAME WEIGHT DIMENSIONS
(L x W x H)
480-L06 Discover LoPro 11.5 oz (326 g)
Silicone Strap
5.4 x 0.7 x 0.6 in
(138 x 18 x 15 mm)
480-T09 Discover Tilt
10.7 oz (303g)
Elastic Strap
12.1 oz (343 g)
Silicone Strap
6.3 x 0.9 x 0.7 in
(160 x 23 x 18 mm)
WARNINGS
Do not stare into LEDs for long periods of time or from a close range of
less than 2 ft (0.6 m).
!

5
BATTERY
The Discover Series requires four (4) AA batteries. Acceptable battery
types include: Alkaline or rechargeable Alkaline, rechargeable NiMH or
LiFeS2 (all are 1.2 to 1.6 volts each).
Do not leave batteries in the Battery Pack for periods longer than three
(3) months without use.
Be sure to check the Battery Pack every month for battery corrosion.
NOTE: Corrosion from leaking batteries is NOT covered by the warranty.
NOTE: Mixing of new and used, or different brand batteries is not
recommended as this could lead to leakage or explosion.
BATTERY INSTALLATION (WATCH THE VIDEO: FOXFURY.COM/VIDEOS)
1. Open all six (6) of the Battery Pack Tabs.
2. Insert four (4) AA batteries. Reference the plus (+) and minus (-) symbols
located on the inside of the Battery Pack for proper installation.
REASSEMBLING THE BATTERY PACK
1. Once batteries are installed, test the light’s performance by activating the
Power/Mode Switch located on the top of the light.
2. Secure the Battery Pack Cover by snapping all six (6) Battery Pack Tabs.
A ‘click’ should be heard as the snaps are shut.
NOTE: Make sure the Battery Pack is properly closed to maintain a
water tight seal.
1
1
1
2
2
2

6
ON/LOW mode: Press the Power/Mode switch once. All 3 LEDs will turn
on.
HIGH mode: From LOW mode, press the Power/Mode Switch once. All 3
LEDs will increase in brightness. From HIGH mode press once more to
turn headlamp OFF.
NOTE: All P/Ns listed above will power OFF after HIGH mode. When ON (for all
modes), the rear LED (located on Battery Pack) will flash.
DISCOVER TILT & LO•PRO BATTERY LIFE
MODE BATTERY LIFE LUMENS
HIGH POWER 5 hours 200
LOW POWER 12 hours 54
*Battery life may vary according to mode selected, battery quality & type, and prevailing
ambient conditions.
BATTERY CORROSION
Battery leakage may cause corrosion to build inside the Battery Pack, causing
the light not to function properly. In case of corrosion, please follow the
suggested steps below:
1. Remove the batteries from the Battery Pack.
2. Make a mixture of 50% vinegar and 50% water. Then, pour the mixture into
the Battery Pack and let it soak for five (5) minutes.
3. Drain the mixture from the inside the Battery Pack. Dry the inside of the
Battery Pack (make sure no liquid residue is left inside Battery Pack).
4. Re-install all four (4) batteries. Test the light’s performance.
5. Secure the Battery Pack Cover by snapping all six (6) Battery Pack Tabs.
NOTE: Corrosion from leaking batteries is NOT covered by the warranty.
OPERATIONAL MODES
MAINTENANCE
1
2
3
4
5

7
NOTES

8
INSTALLING THE ELASTIC STRAP |5 MINS (APPROX)
(WATCH THE VIDEO: FOXFURY.COM/VIDEOS)
Place the headlamp on a flat surface. Position the Light Head so the Power/
Mode Switch is on the left and the LEDs face forward. NOTE: Make sure the
FoxFury logo on the Battery Pack is correctly oriented before beginning.
1. Begin with the end of the strap that does not have the Buckle attached.
With the FoxFury logo side of the strap facing right, feed the strap through
the left Buckle Slot of the Light Head.
2. Run the free side of the strap back through the Buckle. NOTE: The
FoxFury logo on the strap will now be facing to the left.
3. Run the remaining bit of strap through the left Buckle Slot on the Battery
Pack (on the cable side). Then continue through the Buckle Slot on the
right side of the Battery Pack.
4. Continue to run the strap through the Buckle Slot on the right side of the
Light Head. Firmly press the velcro together to finish installing the Strap.
Adjust the Battery Pack position and strap length at the Buckle for the
desired fit.
1
4
1
2
3
4
2 3
FoxFury logo
on strap should
face inward for
STEP 1

9
INSTALLING THE SILICONE STRAP |5 MINS (APPROX)
(WATCH THE VIDEO: FOXFURY.COM/VIDEOS)
Place the headlamp on a flat surface. Position the Light Head so the Power/
Mode Switch is on the left and the LEDs face forward. NOTE: Make sure the
FoxFury logo on the Battery Pack is correctly oriented before beginning.
1. The Silicone Strap comes with two (2) buckles. Attach the first buckle
onto one end of the strap (about six (6) inches from the end). Then, take
that end of the strap and run it through (from the inside) the Buckle Slot
on the left of the Light Head.
2. Once the strap is through the left Buckle Slot of the Light Head, feed the
strap back through the Buckle.
3. Run the opposite end of the strap through the left Buckle Slot on the
Battery Pack (on the cable side). Then continue through the Buckle Slot
on the right side of the Battery Pack.
4. Repeat Steps 1-2 for the right side of the strap. Adjust the Battery Pack
position and strap length at the Buckle for the desired fit.
1
4
1
2
3
4
2 3

10
Lights are strong enough to
cause damage to the human eye.
Do not stare into LEDs for long
periods of time or from a close
range (less than 2 ft).
FoxFury, LLC is not responsible
for any injury or damage caused
during the use of this product.
Usage of this product must be
supervised by an adult when it is
being used by a minor.
Any FoxFury product should
be operated at speeds safe
enough to maneuver around
surrounding obstacles.
Do not use under the influence
of drugs or alcohol.
LIMITED LIFETIME
WARRANTY
FoxFury, LLC (“FoxFury”) warrants
this product to be free from defects
in material for a lifetime of use except
for batteries, LEDs, abuse, and
normal wear. We will repair or replace
this product should we determine it
to be defective. This limited lifetime
warranty excludes rechargeable
batteries, chargers, switches, and
electronics, which have a 2-year
warranty with proof of purchase.
This limited lifetime warranty is
given only to the original end user of
the accompanying product. If you
purchased a product from someone
other than an authorized FoxFury
reseller/distributor or if the product
WARRANTY AND OTHER
INFORMATION
IPX7
3 M 3 M
PRODUCT DURABILITY
Meets NFPA 1971 Guidelines and can
sustain exposure to 500°F (260°C) for
30 minutes (w/ silicone strap).
CARE/CLEANING
Your FoxFury product is a
professional tool, but regular
maintenance and care of your light
will maximize performance for you. As
needed, wash your FoxFury product
using a soft washcloth, clean water
and a mild soap. Be sure that both
the Light Bar and Battery Pack
are reassembled securely before
washing. When done, pat dry with a
damp cloth.
AVAILABLE ACCESSORIES
Elastic Strap, P/N 60-019
Silicone Glow Strap,
P/N 600-026
Silicone Black Strap
P/N 600-027
Chin & Overhead Strap Set
P/N 600-1002
Discover Replacement Lens
P/N 60-120
WARNINGS
FoxFury, LLC is not responsible for
the incorrect use of any FoxFury
Lighting product.
11
was used, (including but not limited
to demo models, show models or
refurbished product by someone
other than FoxFury) prior to your
purchase, you are not the Original
Purchaser and the product that you
purchased is not covered by this
warranty. This limited warranty is
VOID if this Product has been altered
or modified in any way (including but
not limited to attempted warranty
repair without authorization from
Foxfury and/or alteration/removal
of the serial number). To expedite
warranty concerns, we encourage
the end user to register their FoxFury
Product at www.foxfury.com/pages/
warranty-registration.
THIS IS THE ONLY WARRANTY,
EXPRESSED OR IMPLIED,
INCLUDING ANY WARRANTY OF
MERCHANTABILITY OR FITNESS
FOR A PARTICULAR PURPOSE.
INCIDENTAL, CONSEQUENTIAL
OR SPECIAL DAMAGES ARE
EXPRESSLY DISCLAIMED EXCEPT
WHERE SUCH LIMITATION IS
PROHIBITED BY LAW.
You may have other specific legal
rights which vary by jurisdiction. Go
to www.foxfury.com/pages/warranty
for a complete copy of the warranty.
Retain your receipt for proof of
purchase.
CONTACT FOXFURY
FoxFury, LLC
Oceanside, CA 92056 USA
Toll-Free: 844-FOXFURY
Tel: 760.945.4231
Fax: 760.433.3650
Email: service@FoxFury.com
Web: FoxFury.com
All FoxFury products are designed in
Oceanside, CA. All FoxFury products
are manufactured with the highest
quality USA and foreign parts.
Products are assembled in either
FoxFury’s controlled plant in Asia or
the USA, under strict quality control.

FOXFURY.COM 10/2018
This manual suits for next models
2
Table of contents
Other Foxfury Lighting Solutions Headlamp manuals

Foxfury Lighting Solutions
Foxfury Lighting Solutions Signature Series User manual

Foxfury Lighting Solutions
Foxfury Lighting Solutions Performance Series User manual

Foxfury Lighting Solutions
Foxfury Lighting Solutions COMMAND SERIES User manual

Foxfury Lighting Solutions
Foxfury Lighting Solutions D3060 FOR AUTEL EVO II User manual

Foxfury Lighting Solutions
Foxfury Lighting Solutions COMMAND STEALTH SERIES User manual