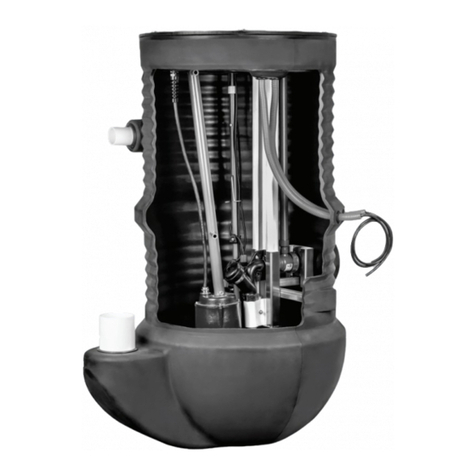
FPS 300/4 Manual

1
GB
E
I
F
D
INSTALLATION AND MAINTENANCE MANUAL
MANUAL DE INSTALACIÓN Y MANTENIMIENTO
MANUEL DINSTALLATION ET DENTRETIEN
EINBAU-UND BETRIEBSANLEITUNG
MANUALE DI INSTALLAZIONE E MANUTENZIONE
NAVODILA ZA MONTIRANJE IN UPORABO
KÈZIKÖNYV BESZERELÈSRE ÈS FENNTARTÀSÀRA
SLO
.25
300/4 - 400/6 - 500/8 - 500/10 - 500/12 - 600/17
H

2
FPS 300/4 - 400/6 - 500/8 - 500/10 - 500/12 - 600/17
Installation and operating instructions
1. THE PRODUCT
The FPS series filters with pumps (drawing 1) are employed in filtering above ground and in-ground
pools, where careful and expert water cleaning is required.
2. FIELD OF USE
The filter/pump is positioned at least 3.5 m from the edge of the pool. The water temperature must not
exceed 35° and must not go under 4°.
Disconnect the plug before starting to do any work.
3. FILTER/PUMP INSTALLATION
The filter/plug is made up of the following parts (drawing 2):
1 - a pump
2 - a valve
3 - a gasket
4 - a closing flange
5 - a container
6 - a tube with a manifold
7 - small sand guard filters
8 - a drain cock
9 - a spigot
10 - a supporting base
Before installing the filter pump unit identify the position in which it is to be installed, as once it has been
filled up with sand, the filter is hard to move due to its weight.
Filter part installation
Insert the tube with the manifold into the container (drawing 3) and screw the small sand guard filters
to the manifold (drawing 4).
Place the completed manifold on the foundation and add a span of water to stabilize it.
Place the spigot on the mouth of the container, making sure the tube is centred on the manifold. Fill with
sand to a span from the container neck (drawing 5).
Remove the spigot, clean the filter mouth carefully and insert the 4-way valve (drawing 6), making sure
there is no sand. Insert the flange and tighten the fastening screws (drawing 7).
The filter is now ready.
4. PUMP AND WALL SKIMMER CONNECTIONS
The pump must be positioned on its special seat on the supporting base and fixed to the base with the
screws it is equipped with (1 drawing 8).
1) Connect the OUT delivery side of the pump with the PUMP union of the valve. Use the coupling and
the clamps it is equipped with (1-2 drawing 9).
2) Connect the Skimmer union with the IN suction of the pump.
ENGLISH

3
ENGLISH
3) Connect the union of the mouth for water entry into the pool with the RETURN union of the 4-way
valve.
4) Connect an adequate tube with the WASTE mouth when the backwash function is desired so that
dirty water can be drained out to a chosen site.
All tubes must be fastened with safety clamps.
Fill up the pool – make sure the water level covers about halfway the suction mouth of the wall skimmer.
Now the system can be started up. Follow the instructions below.
5. STARTING UP THE FILTER/PUMP
1) Make sure the plug is disconnected. Set the lever on the BACKWASH position. Switch the pump on
and carry out a backwash for a few minutes to eliminate any sand that could have settled during
filling up. Switch the pump off.
2) Now set the lever on RINSE; switch the pump on and rinse for a minute. Switch the pump off.
3) Set the lever on FILTER. Switch the pump on. The filter is now operating normally and is carrying out
its function at an optimum level.
We recommend you to use the filter at least twice a day for 3-4 hours and to do a backwash for a few
minutes after each cycle.
6. CLEANING THE BOTTOM OF THE POOL
Switch the pump off and insert the skimmer in the special brush holder (vacuum). Make sure all the air
comes out.
Set the lever on FILTER. Switch the pump on and brush the bottom and the walls. Make sure no air
enters as it could defuse the pump or cause damage to it by making it work without water.
When cleaning is finished, stop the pump, turn the lever to BACKWASH, switch the pump on and wash
for one minute to eliminate dirt. Switch the pump off, set the lever on RINSE, switch the pump on for half
a minute for a light rinse. Cleaning operations are now finished.
7. STORING IN WINTER
At the end of the summer season, disconnect the tubes, remove water from the filter by opening the
tap.
Water must also be emptied from the pump and it must be placed in a dry place, where it cannot be
damaged by the cold.
The sand may be left and reused during the next season.
8. SAFETY RULES
The pump must be connected to the electric network by a 30 mA differential switch.
Always disconnect the pump from the electric network before carrying out any kind of operation on the
filter or pump.

4
ESPAÑOL
FPS 300/4 - 400/6 - 500/8 - 500/10 - 500/12 - 600/17
Instrucciones para el montaje y uso
1. El PRODUCTO
Los filtros con la bomba del modelo FPS (fig 1) se usan para la filtración de piletas apoyadas sobre
tierra o enterradas, allí donde es necesario efectuar una limpieza cuidadosa y profesional.
2. CAMPO DE UTILIZACIÓN
El filtro /bomba debe ser colocado a una distancia de por lo menos 3,5 mt del borde de la pileta. La
temperatura del agua no debe superar los 35 ° y no debe ser inferior a los 4°.
Desconectar el enchufe cada vez que se efectúe cualquier operación.
3. MONTAJE DEL FILTRO/BOMBA
El filtro /bomba está compuesto por las siguienttes partes (fig 2):
1 - Bomba
2 - Válvula
3 - Guarnición
4 - Arandela de sujeción
5 - Contenedor
6 - Tubo con colector
7 - Filtros de arena
8 - Grifo de desagote
9 - Centrado
10 - Base de soporte
Antes de empezar a montar el grupo filtro bomba es mejor localizar la posición para la instalación,
porque una vez que se llena el filtro con arena, debido a su peso, es difícil moverlo.
Montaje de las partes del Filtro
Insertar el tubo con el colector dentro del contenedor (fig 3) y enroscar los filtros de arena al
colector (fig 4). Apoyar en el fondo el colector completo y colocar una pequeña cantidad de agua
para estabilizarlo.
Coger el centrado, colocarlo en la boca del contenedor, centrar el tubo del colector. Llenar con una
pequeña cantidad de arena el cuello del contenedor del tubo del colector (fig 5).
Quitar el centrado, limpiar bien la boca del filtro e introducir la válvula de 4 vías (fig 6), tener
cuidado que no haya arena, introducir la arandela y ajustar los tornillos (fig 7).
A este punto el filtro está listo.
4. CONEXIÓN DE LA BOMBA Y DEL SKIMMER DE PARED
La bomba debe ser posicionada en el asiento que está en la base del soporte y se debe sujetar usando
los tornillos suministrados (1 fig 8)
1) Conectar la descarga OUT de la bomba con el codo PUMP de la válvula usando el manguito y las
abrazaderas en dotación.(1-2 fig 9).
2) Conectar el tubo del Skimmer con la aspiración IN de la bomba.

5
ESPAÑOL
3) Conectar el tubo de la boca de la entrada de agua en la pileta con el tubo RETURN de la válvula de
4 vías.
4) Conectar a la boca WASTE, cuando de desee usar la función de contralavado (backwash), un
tubo adecuado para descargar el agua sucia en el lugar deseado.
Todos los tubos se deben sujetar con abrazaderas de seguridad.
Llenar la pileta, teniendo cuidado que el nivel del agua cubra aproximadamente la mitad de la boca de
aspiración del skimmer de pared.
Ahora se puede poner en marcha el sistema. Respetar las siguientes instrucciones.
5. PUESTA EN MARCHA DEL FILTRO/BOMBA
1) Con el enchufe desconectado, poner la palanca en la posición BACKWASH . Encender la bomba y
efectuar un contralavado por algunos minutos, para eliminar eventuales restos de arena. Apagar
la bomba.
2) Posicionar después la palanca en RINSE, encender la bomba y efectuar un enjuague de un minuto.
Apagar la bomba.
3) Posicionar la palanca en FILTER. Encender la bomba. El filtro ahora trabaja en modo normal y
funciona optimamente.
Es aconsejable, usar la función Filtro , por lo menos dos veces al día por 45 minutos y efectuar algunos
Backwash por un par de minutos después de cada ciclo.
6. LIMPIEZA DEL FONDO DE LA PILETA
Con la bomba apagada, injertar en el skimmer el tubo porta cepillo (vacuum), prestando atención que
salga todo el aire.
Colocar la palanca en la posición FILTER. Encender la bomba y pasar el cepillo por el fondo y por las
paredes, teniendo cuidado que no entre aire, que puede desactivar la bomba y hacer que funcione a
seco, creando daños a la misma.
Efectuar la limpieza, parar la bomba, girar la palanca a la posición ACKWASH , encender la bomba y
efectuar un lavado por un minuto para eliminar la suciedad. Apagar la bomba, colocar la palanca en
posición RINSE , encender la bomba por 30 segundos para efectuar un rápido enjuague.
La operación de limpieza se ha terminado.
7. ALMACENAMIENTO INVERNAL
Cuando se termina el verano, desconectar los tubos, y abrir el grifo para sacar toda el agua.
Vaciar también la bomba y colocarla en un lugar seco,y al reparo del hielo.
La arena se puede dejar y utilizarla nuevamente el verano sucesivo.
8. NORMAS DE SEGURIDAD
La bomba se conecta a la red eléctrica trámite un interruptor diferencial de 30 mA.
Desconectar siempre la bomba de la alimentación eléctrica, antes de efectuar cualquier operación en
el filtro o en la bomba.

6
FRAN AIS
FPS 300/4 - 400/6 - 500/8 - 500/10 - 500/12 - 600/17
Instructions pour montage et utilisation
1. PRODUIT
Les filtres avec pompe de la série FPS (fig 1) sont utilisés pour filtrer les piscines hors terre et
enterrées lorsque le nettoyage doit être effectué avec soin et de manière professionnelle.
2. CHAMP D’UTILISATION
Le filtre/pompe doit être placé à au moins 3,5 m du bord de la piscine. La température de l’eau ne doit pas
être supérieure à 35° ni inférieure à 4°.
Le courant doit être débranché à chaque intervention.
3. MONTAGE DU FILTRE/POMPE
Le filtre/pompe est composé de (fig 2):
1 - Pompe
2 - Soupape
3 - Garniture
4 - Bride de fermeture
5 - Conteneur
6 - Tuyau avec collecteur
7 - Petits filtres à sable
8 - Robinet de décharge
9 - Centrage
10 - Base de support
Avant de commencer le montage du groupe filtre/pompe s’assurer d’avoir bien choisi le positionnement
de l’installation car il est difficile de déplacer le filtre une fois monté en raison de son poids.
Montage des parties du Filtre
Insérer le tuyau avec collecteur à l’intérieur du conteneur (fig 3) et visser les petits filtres à sable au
collecteur (fig 4). Placer le collecteur complet sur le fond avec environ une vingtaine de cm d’eau pour
que l’ensemble soit bien stable.
Prendre le centrage, le placer sur la goulotte du conteneur de façon à centrer le tuyau du collecteur.
Remplir avec du sable jusqu’à environ 20 cm de la goulotte du conteneur (fig 5).
Enlever le centrage, nettoyer avec soin la goulotte du filtre et insérer la soupape à 4 voies (fig 6) et
s’assurer qu’il n’y a pas de sable. Insérer la bride et visser les vis de serrage (fig 7).
Le filtre est prêt.
4. RACCORDEMENT DE LA POMPE ET DU SKIMMER DE PAROI
La pompe doit être placée sur le logement prévu sur la base de support et la fixer au moyen des vis
fournies (1 fig 8)
1) Connecter la conduite de refoulement OUT de la pompe avec le raccord PUMP de la soupape en
utilisant le manchon et les petits colliers fournis. (1-2 fig 9)
2) Connecter le raccord du Skimmer avec l’admission IN de la pompe

7
3) Connecter le raccord de la petite goulotte d’entrée d’eau dans la piscine avec le raccord RETURN
de la soupape à 4 voies.
4) Connecter à la petite goulotte WASTE, lorsque la fonction contrelavage (backwash) est mise
en marche, une tuyauterie adéquate pour décharger l’eau sale à l’endroit voulu.
Toutes les tuyauteries doivent être équipées de petits colliers de sécurité.
Procéder au remplissage de la piscine et s’assurer que le niveau de l’eau couvre environ la moitié de
la goulotte d’admission du skimmer de paroi.
On peut alors mettre en marche le système. Suivre les instructions suivantes.
5. MISE EN MARCHE DU FILTRE/POMPE
1) Débrancher la prise et placer le levier en position BACKWASH. Allumer la pompe et faire un
contrelavage pendant quelques minutes pour enlever le sable qui n’a pas été, éventuellement,
éliminé pendant la phase de remplissage. Eteindre la pompe.
2) Placer ensuite le levier sur RINSE, allumer la pompe et faire un rinçage d’une minute . Eteindre la
pompe.
3) Placer le levier sur FILTER. Allumer la pompe, le filtre marche maintenant normalement et fonctionne
au mieux.
On recommande d’utiliser la fonction Filtre au moins deux fois par jour pendant 3 à 4 heures et de faire
des Backwash de deux minutes après chaque cycle.
6. NETTOYAGE DU FOND DE LA PISCINE
La pompe étant éteinte, insérer dans le skimmer le tuyau porte brosse (vacuum) prévu et s’assurer
que tout l’air est bien sorti.
Placer le levier en position FILTER. Allumer la pompe et passer la brosse sur le fond et sur les parois et
ne pas faire passer d’air qui pourrait débrancher la pompe ou l’endommager en la faisant fonctionner
à sec.
Après nettoyage, arrêter la pompe, placer le levier sur BACKWASH, allumer la pompe et faire un
lavage d’une minute pour éliminer la saleté. Eteindre la pompe, placer le levier sur RINSE, allumer la
pompe pendant une demie minute pour un rinçage léger. L’opération de nettoyage est terminée.
7. STOCKAGE EN HIVER
A fin été, déconnecter les tuyauteries, ouvrir le robinet pour faire écouler l’eau du filtre.
La pompe doit aussi être vidée de son eau et placée dans un lieu sec, à l’abri du froid.
Le sable peut être laissé et réutilisé l’année suivante.
8. NORMES DE SÉCURITÉ
La pompe doit être connectée au secteur électrique au moyen d’un interrupteur différentiel de 30 mA.
Avant toute intervention sur le filtre ou sur la pompe, toujours déconnecter la pompe du secteur
électrique.
FRAN AIS

8
DEUTSCH
FPS 300/4 - 400/6 - 500/8 - 500/10 - 500/12 - 600/17
Montage- und Gebrauchsanleitungen
1. DAS PRODUKT
Die Filter mit Pumpe der Serie FPS ( Abb. 1 )werden zum Filtern von eingegrabenen und auch nicht
eingegrabenen Schwimmbecken benutzt, die einer sorgfältigen und professionellen Reinigung
bedürfen.
2. ANWENDUNGSBEREICH
Der Filter mit Pumpe muss mindestens 3.5 m vom Beckenrand entfernt positioniert werden.
Wassertemperatur nicht über 35 ° und nicht unter 4°.
Vor jedem Eingriff den Stecker ziehen.
3. MONTAGE DES FILTERS MIT PUMPE
Der Filter mit Pumpe besteht aus folgenden Teilen ( Abb. 2)
1 - Pumpe
2 - Ventil
3 - Dichtung
4 - Verschlussflansch
5 - Kessel
6 - Rohr mit Kollektor
7 - Kleine Sandfilter
8 - Auslassventil
9 - Zentrierer
10 - Stützgestell
Vor Montage von Filter und Pumpe, den Standort festlegen, es wäre nämlich anstrengend, den gefüllten
Filter zu verstellen.
Montage der Filterteile
Das Rohr samt Kollektor in den Kessel (Abb. 3) einführen und die kleinen Sandfilter mit dem Kollektor
durch Anschrauben verbinden (Abb.4). Den kompletten Kollektor auf dem Kesselboden abstellen und
zur Stabilisierung etwas Wasser hinzufügen.
Nun den Zentrierer auf die Kesselöffnung setzen, dabei das Kollektorrohr zentrieren. Mit Sand, bis eine
Spanne unter dem Kesselhals, auffüllen (Abb.5).
Den Zentrierer abnehmen, die Filteröffnung sorgfältig säubern und dann das 4-Wege-Ventil (Abb.6)
anbringen, sich dabei vergewissern, dass kein Sand vorhanden ist. Den Flansch anbringen und die
Schrauben fest anziehen (Abb. 7).
Der Filter ist nun einsatzbereit.
4. ANSCHLÜSSE WAND-SKIMMER/PUMPE
Die Pumpe am Grundgestell in den dafür vorgesehenen Sitz bringen und mit den mitgelieferten Schrauben
fixieren (1 Abb. 8)
1) Den Druckanschluss OUT der Pumpe mit dem Anschluss PUMP des Ventils verbinden, dazu die
mitgelieferten Anschlussmuffen und Klemmen benutzen (1-2 Abb.9).
2) Den Skimmeranschluss mit dem Sauganschluss IN der Pumpe verbinden.

9
DEUTSCH
3) Den Wassereinlaufstutzen mit dem Anschluss RETURN des 4-Wege-Ventils verbinden.
4) Am Anschluss WASTE anschließen, wenn man eine Rückspülung(backwash) erwünscht, dabei
einen geeigneten Schlauch benutzen, um das schmutzige Wasser an gewünschter Stelle abzuleiten.
Alle Schlauchanschlüsse mit geeigneten Schlauchklemmen fixieren.
Nun können Sie damit beginnen das Schwimmbad mit Wasser zu füllen. Das Wasser muss bis zur Mitte
der Ansaugöffnung des Wand-Skimmers reichen. Ihr Filtersystem kann jetzt in Betrieb genommen
werden. Die folgenden Anleitungen genauestens beachten.
5. INBETRIEBNAHME VON FILTER UND PUMPE
1) Mit ausgestecktem Stecker den Handgriff auf BACKWASH stellen. Die Pumpe einschalten und für
einige Minuten eine Rückwaschung vornehmen, um eventuellen Sand, der sich beim Füllen
angesammelt hat, zu entfernen. Die Pumpe ausschalten.
2) Den Handgriff auf RINSE stellen, die Pumpe einschalten, und für 1 Minute eine Nachspülung
vornehmen. Die Pumpe ausschalten.
3) Den Handgriff auf FILTER stellen und die Pumpe einschalten. Der Filter ist jetzt im Normalbetrieb und
erfüllt auf optimaler Weise seine Funktion.
Die FILTER-Funktion sollte mindestens 2 Mal täglich für eine Zeitdauer von ¾ Stunden aktiv sein, es
sollten nach jeder Filter-Funktion Rückwaschungen für die Dauer von ca. 2 Minuten durchgeführt
werden.
6. REINIGUNG DES SCHWIMMBECKENBODENS
Beim Bodensaugen muss die Pumpe ausgeschaltet sein, dazu muss am Skimmer der entsprechende
Bodensaugerschlauch (Vakuum) angeschlossen werden, dabei beachten, dass die ganze Luft
rausgelassen wird.
Den Handgriff auf FILTER stellen und die Pumpe einschalten. Mit der Bodensaugerbürste Boden und
Wände reinigen, dabei achten, dass keine Luft einströmt, die Pumpe könnte nämlich dadurch ausschalten
oder auch beschädigt werden.
Nach der Reinigung die Pumpe ausschalten, den Handgriff auf BACKWASH stellen. Die Pumpe wieder
einschalten und eine Spülung vornehmen (1 Minute), um den Schmutz abzuleiten. Die Pumpe ausschalten,
den Handgriff auf RINSE stellen, die Pumpe für eine halbe Minute einschalten, wodurch eine leichte
Spülung erfolgt. Der Reinigungszyklus ist somit beendet.
7. EINWINTERUNG
Am Ende der Schwimmbadsaison, die Schläuche abnehmen und den Filter durch Öffnen des
Auslassventils entleeren.
Auch die Pumpe entleeren, dann kann sie an einem trockenen, frostsicheren Platz abgestellt werden.
Der Sand kann im Filter bleiben und für die zukünftige Saison wieder gebraucht werden.
8. SICHERHEITSHINWEISE
Pumpen-Netzanschluss mit Fehlerstromschutzschalter 30 mA.
Vor allen Arbeiten an Filter und Pumpe Netzstecker ziehen.

10
FPS 300/4 - 400/6 - 500/8 - 500/10 - 500/12 - 600/17
Istruzioni per il montaggio e l’impiego
1. Il PRODOTTO
I filtri con pompa della serie FPS (fig. 1) trovano impiego nel filtraggio delle piscine fuori terra e interrate,
laddove si richiede una pulizia dell’acqua accurata e professionale.
2. CAMPO DI UTILIZZO
Il filtro /pompa va posizionato almeno a 3,5 mt dal bordo della piscina. La temperatura dell’acqua non
deve eccedere i 35 ° ne’ essere meno di 4°.
Ogni intervento va effettuato a spina disinserita.
3. MONTAGGIO DEL FILTRO/POMPA
Il filtro /pompa è composto dalle seguenti parti (fig. 2):
1 - Pompa
2 - Valvola
3 - Guarnizione
4 - Flangia di chiusura
5 - Contenitore
6 - Tubo con collettore
7 - Filtrini parasabbia
8 - Rubinetto di scarico
9 - Centraggio
10 - Base di supporto
Prima di cominciare a montare il gruppo filtro pompa è bene individuarne la posizione di installazione,
perchè una volta riempito di sabbia, il filtro è difficile da spostare per il suo peso.
Montaggio delle parti del Filtro
Inserire il tubo con collettore dentro al contenitore (fig.3) e avvitare i filtrini parasabbia al collettore
stesso (fig.4). Appoggiare il collettore completo sul fondo e mettere una spanna d’acqua per rendere
stabile il tutto.
Prendere il centraggio porlo sulla bocca del contenitore, avendo modo di centrare il tubo del collettore.
Riempire di sabbia fino a una spanna dal collo del contenitore (fig.5).
Togliere il centraggio, pulire per bene la bocca del filtro e inserire la valvola a 4 vie (fig.6), facendo
attenzione che non vi sia sabbia. Inserire la flangia e chiudere le viti di serraggio (fig.7).
Il filtro è pronto.
4. COLLEGAMENTO DELLA POMPA E DELLO SKIMMER DI PARETE
La pompa va posizionata sulla apposita sede ricavata sulla base di supporto e fissata alla base tramite
le viti in dotazione (fig. 8 part. 1)
1) Collegare la mandata OUT della pompa con il raccordo PUMP della valvola usando il manicotto e le
fascette in dotazione (fig. 9 part. 1-2).
2) Collegare il raccordo dello Skimmer con l’aspirazione IN della pompa.
ITALIANO

11
ITALIANO
3) Collegare il raccordo della bocchetta di entrata acqua in piscina col raccordo RETURN della valvola
a 4 vie.
4) Collegare alla bocchetta WASTE, quando si vuole la funzione controlavaggio (backwash), una
tubazione adeguata per scaricare l’acqua sporca nel luogo desiderato.
Tutte le tubazioni vanno assicurate con fascette di sicurezza.
Provvedere al riempimento della piscina, avendo cura che il livello dell’acqua copra circa meta’ della
bocca di aspirazione dello skimmer di parete.
Ora si può avviare il sistema. Attenersi alle istruzioni che seguono.
5. AVVIAMENTO DEL FILTRO/POMPA
1) A spina disinserita, mettere la leva sulla posizione BACKWASH . Accendere la pompa e eseguire un
controlavaggio di qualche minuto, per eliminare la sabbia eventualmente sfuggita in fase di riempi-
mento. Spegnere la pompa.
2) Mettere poi la leva su RINSE, accendere la pompa ed eseguire un risciacquo di un minuto. Spegnere
la pompa.
3) Mettere la leva su FILTER. Accendere la pompa . Il filtro ora lavora in maniera normale e svolge la
sua funzione in maniera ottimale.
Si raccomanda di utilizzare la funzione Filtro almeno due volte al giorno per 3/4 ore e di eseguire dei
Backwash di un paio di minuti dopo ciascun ciclo.
6. PULIZIA DEL FONDO DELLA PISCINA
A pompa spenta, inserire nello skimmer l’apposito tubo porta spazzola (vacuum), facendo attenzione
che ne esca tutta l’aria.
Mettere la leva in posizione FILTER. Accendere la pompa e passare la spazzola sul fondo e sulle pareti,
facendo attenzione a non fare entrare aria , che potrebbe disinnescare la pompa o creare danni alla
stessa facendola funzionare a secco.
Eseguita la pulizia, fermare la pompa , girare la leva su BACKWASH , accendere la pompa ed eseguire
un lavaggio di un minuto per eliminare lo sporco. Spegnere la pompa , mettere la leva in RINSE , accedere
la pompa per mezzo minuto per un leggero risciacquo. L’operazione di pulizia è terminata.
7. STOCCAGGIO INVERNALE
Alla fine della stagione estiva, scollegare le tubazioni, togliere l’acqua dal filtro aprendo il rubinetto.
Anche la pompa va svuotata dell’acqua e riposta in un luogo asciutto, al riparo dal gelo.
La sabbia può essere lasciata e riutilizzata la stagione successiva.
8. NORME DI SICUREZZA
La pompa va collegata alla rete elettrica tramite un interruttore differenziale da 30 mA.
Scollegare sempre la pompa dalla rete elettrica ,prima di qualunque intervento sul filtro o sulla pompa.

12
FPS 300/4 - 400/6 - 500/8 - 500/10 - 500/12 - 600/17
Navodila za montiranje in uporabo
1. PROIZVOD
Filtri s èrpalkami serije FPS (slika 1) se uporabljajo za filtriranje bazenov izven zemlje in obsutih z
zemljo, tam kjer se zahteva skrbno in profesionalno èièenje vode.
2. PODROÈJE UPORABE
Filter / èrpalka se polagajo najmanj ,5 metrov od roba bazena. Temperatura vode ne sme presegati
5° in ne sme biti pod 4°.
Vsak poseg se mora izvriti z izkljuèeno vtiènico.
3. MONTIRANJE FILTRA / ÈRPALKE
Filter / èrpalka so sestavljeni iz sledeèih delov (slika 2):
1 - Èrpalka
2 - Ventil
- Tesnilo
4 - Prirobnica za zapiranje
5 - Posoda
6 - Cev z zbiralnikom
7 - Filtri v zaèito pred peskom
8 - Odvodna pipa
9 - Naprava za centriranje
10 - Osnova leièa
Prej preden zaènete montirati skupino filtra in èrpalke je prav, da najprej doloèite poloaj za namestitev,
ker, ko se filter napolni s peskom ga je teko premakniti zaradi svoje tee.
Montiranje delov filtra
Vstavite cev z zbiralnikom znotraj posode (slika ) in pritrdite filtre proti pesku na zbiralnik (slika 4).
Poloite kompleten zbiralnik na dno in vlijte pedenj vode, da bi vse postalo bolj stabilno
Vzemite napravo za centriranje, jo postavite v usta zbiralnika tako, da centrirate cev zbiralnika. Preko
vrata zbiralnika napolnite s peskom za en pedenj (slika 5).
Oddaljite napravo za centriranje, dobro oèistite vhod v filter, nato pa vstavite ventil s 4 izhodi (slika 6).
Pazite da ne bo v bliini peska. Vstavite prirobnico in zavijte vijake za zapiranje (slika 7).
Filter je sedaj pripravljen.
4. POVEZOVANJE ÈRPALKE Z NAPRAVO ZA ÈIÈENJE PENE IZ STEN
Èrpalka se mora poloiti na doloèeno mesto, ki se nahaja na osnovi leièa in jo pritrditi na osnovo z
vijaki v dotaciji (1 slika 8)
1) Poveite odvodno cev OUT èrpalke s prikljuèkom PUMP ventila, pri tem pa uporabite spojnico in
steznike v dotaciji (1-2 slika 9).
2) Poveite prikljuèek za èièenje pene z napravo za vsesavanje IN èrpalke.
3) Poveite prikljuèek odprtinice za dovod vode v bazen s prikljuèkom ventila za ODVOD vode s 4
izhodi.
SLOVENSKO

13
SLOVENSKO
4) Poveite odprtinico WASTE, èe elite imeti funkcijo pranja (backwash), to je, prikladno cev za
odvod zamazane vode v doloèen prostor.
Vse cevi se morajo zavarovati z varnostnimi stezniki.
Poskrbite, da se bo bazen napolnil, pri tem pa pazite, da bo nivo vode pokril priblino polovico odprtine
za vsesavanje pene na steni.
Sedaj lahko poenete v pogon sistem. Spotujte sledeèa navodila.
5. POSTAVLJANJE V POGON FILTER / ÈRPALKO
1) Z izkljuèeno vtiènico postavite roèico v poloaj BACKWASH. Poenite èrpalko in umivajte nekaj
minut, da bi eliminirali pesek, ki bi lahko vstopil mimogrede za èasa polnjenja. Ugasnite èrpalko .
2) Nato postavite roèico na RINSE, prigite èrpalko in eno minuto izpirajte.
Ugasnite èrpalko.
3) Postavite roèico na FILTER. Prigite èrpalko. Filter sedaj normalno deluje in izvaja svojo
funkcijo na optimalen naèin.
Priporoèamo, da uporabljate funkcijo Filter vsaj dvakrat na dan po /4 ure in da izvrite Backwash nekaj
minut po vsakem ciklusu.
6. ÈIÈENJA DNA BAZENA
Z ugasnjeno èrpalko vstavite v napravo za èièenje pene doloèeno cev, ki ima èetko (vakuum), pri tem
pa pazite, da ne bo izel ves zrak.
Postavite roèico v poloaj FILTER. Prigite èrpalko in oèistite dno in stene s èetko, pri tem pa pazite, da
ne bo vstopil zrak, ki bi lahko izkljuèil èrpalko ali bi se le-ta pokodovala zaradi delovanja na suho.
Po konèanem èièenju zaustavite èrpalko, obrnite roèico na BACKWASH, prigite èrpalko in umivajte
eno minuto, da bi odstranili nesnago. Ugasnite èrpalko, postavite roèico na RINSE, prigite èrpalko za
pol minute, da bi izplaknili. Operacija èièenja je konèana.
7. SKLADIÈENJE ZA ZIMO
Na koncu leta izkljuèite cevi, oddaljite vodo iz filtrov tako, da odprete pipo.
Tudi iz èrpalke morate izprazniti vodo. Shranite jo v suhem in pred mrazom zaèitenem prostoru.
Pesek lahko pustite in ga uporabite sledeèe leto.
8. VARNOSTNI PREDPISI
Èrpalka se mora prikljuèiti na elektrièno mreo preko diferencialnega stikala od 0 mA.
Èe izvajate kateri koli poseg na filtru ali èrpalki, morate vedno izkljuèiti èrpalko iz elektriène mree.

14
MAGYAR
FPS 300/4 - 400/6 - 500/8 - 500/10 - 500/12 - 600/17
Összeállítási és felhasználási útmutatások
1. A GYÁRTMÁNY
A FPS széria szivattyú szûrõit (1. ábra) a föld szint feletti és a földbe tett uszodákhoz használják, ott
ahol a víz tökéletes és hivatásszerû tisztitását várják el.
2. FELHASZNÁLÁSI HELYEK
A szûrõt/szivattyút az uszoda szélétõl legalább ,5 méterre kell elhelyezni. A víz hõmérsékleté ne
legyen több mint 5° és 4°-nál kevesebb.
Minden beavatkozást kihúzott villanydugóval kell csinálni.
3. A SZÛRÕ/SZIVATTYÚ ÖSSZESZERELÉSE
A szûrõ/szivattyú a következõ részekbõl áll (2. ábra):
1 - Szivattyú
2 - Szelep
- Tömítés
4 - Záró karima
5 - Tartály
6 - Gyûjtõcsõ
7 - Homofogó szûrõcskék
8 - Lefolyó csap
9 - Centírozó
10 - Tartó alap
A szûrõ szivattyú csoport beszerelése elõtt, meg kell találni a megfelelõ elhelyezési pontot, mert miután
homokkal lesz feltöltve, a szûrõt nehezen lehet a súllya miatt elmozdítani.
A Szûrõ részeinek az összeszerelése
A gyûtõcsõt be kell helyezni a tartályba ( . ábra) és belecsavarni a homokfogó szûrõcskéket egyenesen
a gyûjtõtartályba (4. ábra).
A komplett gyûjtõtartályt be kell helyezni alulra és egy arasznyi vízet ráengedni, hogy stabilabb legyen minden.
A centirozót a tartály szájára helyezni, vigyázva, hogy a tartálycsõvet telibe találja. Telitölteni homokkal
a tartály nyaka alatt egy arasznyiig (5. ábra).
Kivenni a centírozót, jól letisztítani a szûrõ nyakát és behelyezni a 4 utas szelepet (6. ábra), vigyázva
arra, hogy ne legyen homokos. Behelyezni a karimát és becsavarni a befogó csavarjait (7. ábra).
A szûrõ kész.
4. A SZIVATTYÚ ÉS A FALI SKIMMER ÖSSZEKÖTÉSE
A szivattyút a tartó alapon direkt elõkészített helyre kell elhelyezni és a készletben levõ csavarokkal
odaerõsíteni az alaphoz. (1, 8. ábra)
1) Összekapcsolni az OUT szivattyú vízszállítót a szelep PUMP csatlakozójával, a készletben levõ
karmantyúval és gyûrûkkel. (1-2, 9. ábra)
2) Összekapcsolni a Skimmer csatlakozóját a szivattyú IN beszívójával

15
MAGYAR
3) Összekapcsolni az uszoda vízbemenõ csõkötéseinek csatlakozóját a 4 utas szelep RETURN
csatlakozóval.
4) Összekapcsolni a WASTE csõnyilással ha ellenmosást kivánnak csinálni.(backwash), megfelelõ
csõberendezés kell a piszkos víz elvezetéséhez a kivánt helyre.
A felszerelt csõveket biztosító gyûrûvel kell ellátni.
Feltölteni az uszodát vízzel, vigyázva arra, hogy a víz szintje eltakarja legalább a feléig a fali skimmer
beszívó nyílását.
Ezek után a rendszert be lehet indítani. Kövessék figyelemmel a következõ felvilágosításokat.
5. A SZÛRÕ/SZIVATTYÚ BEINDÍTÁSA
1) Kikapcsolt elektromos berendezéssel a kapcsolót BACKWASH pozicióba helyezni. Bekapcsolni a
szivattyút és néhány percig ellenmosást csinálni, hogy a feltöltés alatt esetleg bekerült homokot
eltávolitsuk. Lezárni a szivattyút.
2) A kapcsolót RINSE-re tenni, bekapcsolni a szivattyút és egy perces átmosást csinálni. Elzárni a
szivattyút.
3) A kapcsolót a FILTER-re helyezni. Bekapcsolni a szivattyút. A szûrõ most normál módon dolgozik és
optimálisan müködik.
Ajánljuk, hogy a Filtro (szûrõ) mükõdést legalább naponta kétszer ¾ órára beindítani és utána mindig egy
pár perces Backwash-t csinálni.
6. AZ USZODA ALJÁNAK A TISZTÍTÁSA
Lezárt szivattyúval a skimmerbe beletenni az odavaló kefe-tartó csõvet (vákum), vigyázva, hogy az
összes levegõ kimenjen.
A kapcsolót FILTER pozicióba helyezni. Bekapcsolni a szivattyút és átkefélni az alját és a falakat,
vigyázva, hogy ne menjen bele levegõ, mert az hatástalaníthatja a szivattyút vagy pedig szárazon
mûkõdve megkárosodhat.
A tisztítás után a szivattyút leállítani, átkapcsolni BACKWASH-ra, bekapcsolni a szivattyút és egy
percig mûkõdtetni,átmosással a piszokot eltávolitsa. Elzárni a szivattyút átkapcsolni RINSE-re,
bekapcsolni a szivattyút fél percre egy könnyebb öblitésre. A tisztítási mûvelet igy kész.
7. A TÉLI TÁROLÁS
A nyári szezon végén lekapcsolni a csõveket, a csapot kinyitva a szûrõbõl kiengedni a vízet
A szivattúból is ki kell engedni a vízet és száraz helyre kell elhelyezni, ahol fagymentesen lehet tárolni.
A homokot el lehet tenni a következõ évadra.
8. BIZTONSÁGI NORMÁK
A szivattyút az elektromos áramhoz 0 mA-es differenciális kapcsolóval kell összekötni. Bármilyen
beavatkozáskor a szûrõn vagy szivattyún ki kell kapcsolni az áramból.

16
Fig. - Abb. - slika - àbra 3 Fig. - Abb. - slika - àbra 4
Fig. - Abb. - slika - àbra 5 Fig. - Abb. - slika - àbra 6
Fig. - Abb. - slika - àbra 2
2
3
4
4
9
8
56
7
1
Fig. -
Abb. - slika - àbra 1 10
1
10

17
CERTIFICADO DE GARANTÍA
1. La garantía tiene valor por dos años 2 (dos), se calculan a partir del momento que ha sido
entregada al comprador.
2. Las eventuales partes que pueden ser sustituidas , no alargan el período de garantía de todo el
producto.
3. Para que la garantía tenga valor, el comprador debe presentar un recibo que compruebe la fecha
de compra del producto.
4. La garantía no tiene valor cuando el producto:
- ha sido forzado o manipulado por personal no autorizado.
- ha sido reparado con partes o repuestos no oridinales.
5. La garantía no comprende las partes que tienen un deterioro natural debido al uso normal del
producto.
CERTIFICAT DE GARANTIE
1. La garantie a une durée de 2 ans (deux), à compter de la date de livraison du produit à l’acheteur.
2. Les parties éventuellement remplacées ne prorogent pas la durée de garantie de tout le produit.
3. Pour que la garantie soit valable, l’acheteur doit présenter un document prouvant la date d’achat du produit.
4. La garantie n’est pas valable :
- si le produit a été endommagé ou manipulé par du personnel non autorisé.
- si le produit a été réparé avec des pièces non originales.
5. Les parties usurées, suite à une utilisation normale du produit, ne sont pas couvertes par la garantie.
CERTIFICATE OF GUARANTEE
1. The guarantee period is 2 (two) years long, starting from the date of delivery of the equipment to
the buyer.
2. Any parts that are replaced do not extend the guarantee period of the whole product.
3. For valid guarantee assistance the buyer must exhibit the sales receipt to prove the date of
purchase.
4. The guarantee is not valid when the product:
- has been tampered with or manipulated by unauthorized personnel.
- has been repaired with non original parts.
5. Parts that wear out naturally due to normal use of the product are not included in the guarantee.
GB
E
F
Fig. - Abb. - slika - àbra 7 Fig. - Abb. - slika - àbra 8 Fig. - Abb. - slika - àbra 9
2
2
1
1

18
CERTIFICATO DI GARANZIA
1. Il periodo di garanzia è di anni 2 (due), calcolato dal momento della consegna dello stesso all’acqui-
rente.
2. Le parti eventualmente sostituite non allungano il periodo di garanzia di tutto il prodotto.
3. Per la validità della garanzia , l’acquirente deve esibire una ricevuta che comprovi data di acquisto.
4. La garanzia non è valida quando il prodotto:
- è stato manomesso o manipolato da personale non autorizzato.
- è stato riparato con parti non originali.
5. Non sono comprese nella garanzia le parti che hanno un naturale logorio dovuto all’uso normale del
prodotto.
I
GARANCIJA
1. Garancija velja za 2 (dve) leti in se raèuna od trenutka predaje kupcu.
2. Èe so bili zamenjani nekateri deli le-ti ne bodo podaljali dobo garancije celotnega proizvoda.
. Da bi garancija bila veljavna mora kupec pokazati prejemnico, ki dokazuje datum nabave.
4. Garancija ne velja èe je proizvod bil:
- ponarejen ali manipuliran s strani nepooblaèenih oseb.
- popravljen z neoriginalnimi rezervnimi deli.
5. V garancijo ne spadajo deli, ki se po naravi izrabijo za èasa normalne uporabe proizvoda.
SLO
JÓTÁLLÁSI IGAZOLÁS
1. A garancia ideje 2(két) év, az átadás pillanatától véve.
2. Az esetleg átcserélt darabok nem hosszabbítják meg az árú garanciájának periódusát.
. A garancia érvényesítéséhez a vevõnek szükséges bemutatni a vételi bizonyitványt.
4. A garancia nem érvényes, amikor az áru:
- megrongálódott vagy nem felhatalmazott által lett javitva
-nem erediti alkatrészekkel lett megjavítva
5. A garancia nemfedi azokat az alkatrészeket, melyek az árú normál használatával természetesen
kopnak el.
H
GARANTIEBESCHEINIGUNG
1. 2(zwei)Jahre Garantie ab Übergabe an den Kunden.
2. Eventuell ersetzte Bestandteile verlängern nicht die Garantiezeit des ursprünglichen Produktes.
3. Zur Gewährleistung der Garantie muss der Käufer den Kassenbon mit dem Verkaufsdatum
vorweisen können.
4. Die Garantie entfällt:
- wenn das Gerät durch nicht autorisiertes Personal repariert oder umgeändert wurde;
- wenn das Gerät nicht mit originalen Ersatzteilen repariert wurde;
5. Die Gewährleistung erstreckt sich nicht auf Teile, die durch normalen Gebrauch einer natürlichen
Abnützung ausgesetzt sind.
D

19

20
Ed. 02-2008
Ogni riproduzione anche parziale del presente libretto è vietata salvo autorizzazione scritta.
Reproduction of this document, including partial, is forbidden without the written permission.
FPS
This manual suits for next models
5
Table of contents
Languages:
Other FPS Water Pump manuals