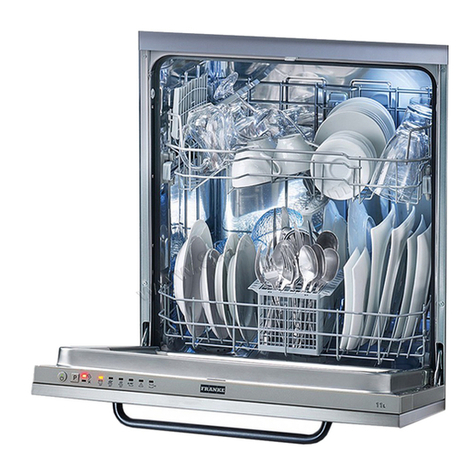
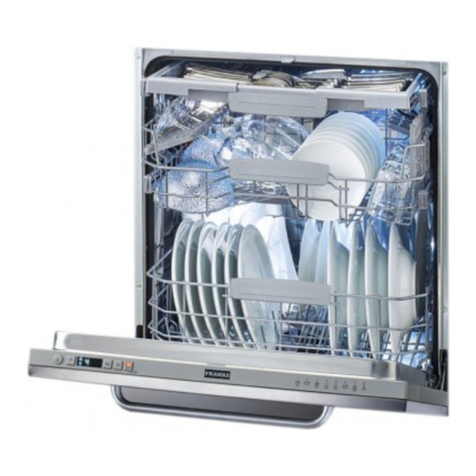
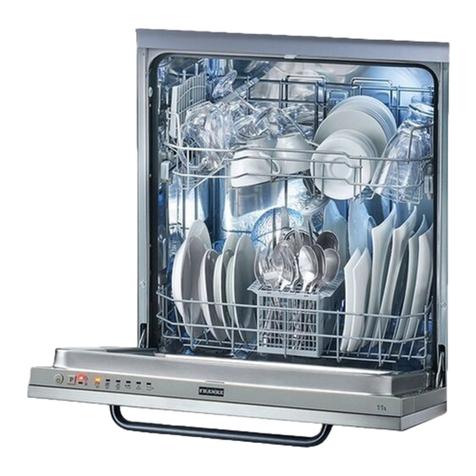
Franke FDWS 614 D8P DOS E User manual

FDWS 614 D8P DOS E
EN User manual
EL Εγχειρίδιο χρήστη
TR Kullanım kılavuzu
Dishwasher
Πλυντήριο πιάτων
Bulaşık makinesi

2
LANGUAGES
EN USER MANUAL ........................................................................................................................................................................ 3
EL ΕΓΧΕΙΡΊΔΙΟ ΧΡΉΣΤΗ............................................................................................................................................................ 14
TR KULLANIM KILAVUZU ......................................................................................................................................................... 25

3
EN
TABLE OF CONTENTS
OVERVIEW................................................................................................................................................................................................4
FIRST TIME USE.......................................................................................................................................................................................5
PROGRAMS TABLE.................................................................................................................................................................................6
OPTIONS AND FUNCTIONS................................................................................................................................................................7
LOADING THE RACKS ...........................................................................................................................................................................8
DAILY USE.................................................................................................................................................................................................9
ADVICE AND TIPS...................................................................................................................................................................................9
CARE AND MAINTENANCE.............................................................................................................................................................. 10
INSTALLATION...................................................................................................................................................................................... 11
TROUBLESHOOTING.......................................................................................................................................................................... 12
SUPPORT................................................................................................................................................................................................ 13

4
Before using the appliance carefully read Safety Instructions guide.
USER GUIDE
CONTROL PANEL
1. Upper rack
2. Foldable aps
3. Upper rack height adjuster
4. Upper spray arm
5. Lower rack
6. Cutlery basket
7. Lower spray arm
8. Filter Assembly
9. Salt reservoir
10. Detergent and Rinse Aid dispensers
11. Rating plate
12. Control panel
1. On-O/Reset button with indicator light
2. Program selection button with indicator light
3. Multizone button with indicator light / Keylock
4. Eco program indicator light
5. Key lock indicator light
6. Display
7. Program number and remaining time indicator
8. Tablet (Tab) indicator light
9. Closed water tap indicator light
10. Rinse Aid rell indicator light
11. Salt rell indicator light
12. Sani Rinse button with indicator light / Tablet (Tab)
13. Delay button with indicator light
14. Start/Pause button with indicator light / Drain out
OVERVIEW
0000 000 00000
Service:
1
2
3
4
5
6
10
12
7
11
9
8
3
1
2
8
13
1454 6 7 10 11 129

5
EN
The use of salt prevents the formation of LIMESCALE on the dishes
and on the machine’s functional components.
• It is mandatory that THE SALT RESERVOIR NEVER BE EMPTY.
• It is important to set the water hardness.
The salt reservoir is located in the lower part of the dishwasher
(see PRODUCT DESCRIPTION) and must be lled when the SALT REFILL
indicator light in the control panel is lit.
1. Remove the lower rack and unscrew the
reservoir cap (anticlockwise).
2. Only the rst time you do this: ll the salt
reservoir with water.
3. Position the funnel (see gure) and ll the salt
reservoir right up to its edge (approximately
1 kg); it is not unusual for a little water to leak
out.
4. Remove the funnel and wipe any salt
residue away from the opening.
Make sure the cap is screwed on tightly, so that no detergent can
get into the container during the wash program (this could damage
the water softener beyond repair).
Whenever you need to add salt, it is mandatory to complete
the
procedure before the beginning of the washing cycle to avoid
corrosion.
. . . . . . . . . . . . . . . . . . . . . . . . . . . . . . . . . . . . . . . . . . . . . . . . . . . . . . . . . . . . . . . . . . . . . . . . .
SETTING THE WATER HARDNESS
To allow the water softener to work in a perfect way, it is essential that
the water hardness setting is based on the actual water hardness in your
house. This information can be obtained from your local water supplier.
The factory sets the default value for the water hardness
FIRST TIME USE SALT, RINSE AID AND DETERGENT
FILLING THE SALT RESERVOIR
Rinse aid makes dish DRYING easier. The rinse aid dispenser Ashould
be lled when the RINSE AID REFILL indicator light in the control
panel is lit.
1. Open the dispenser Bby pressing and pulling up the tab on the lid.
2. Pour in the rinse aid (max.110 ml), making sure it does not overow
from the dispenser. If this happens, clean the spill immediately with
a dry cloth.
3. Press the lid down until you hear a click to close it.
NEVER pour the rinse aid directly into the appliance tub.
• Switch on the appliance by pressing the ON/OFF button.
• Switch o the appliance by pressing the ON/OFF button.
• Hold down button START/Pause for 5 seconds, until you hear a beep.
• Switch on the appliance by pressing the ON/OFF button.
• The current selection level number and the salt indicator light both ash.
• Press button P to select the desired hardness level (see WATER
HARDNESS TABLE).
Water Hardness Table
Level °dH
German degrees
°fH
French degrees
°Clark
English degrees
1 Soft 0 - 6 0 - 10 0 - 7
2 Medium 7 - 11 11 - 20 8 - 14
3 Average 12 - 16 21 - 29 15 - 20
4 Hard 17 - 34 30 - 60 21 - 42
5 Very hard 35 - 50 61 - 90 43 - 62
• Switch o the appliance by pressing the ON/OFF button.
Setting is complete!
As soon as this procedure is complete, run a program without loading.
Only use salt that has been specically designed for dishwashers.
After the salt has been poured into the machine, the SALT REFILL
indicator light switches o.
If the salt container is not lled, the water softener and the heating
element may be damaged as a result of limescale accumulation.
Using of Salt is recommended with any type of dishwasher detergent.
FILLING THE RINSE AID DISPENSER
A
B
Usage of detergent not designed for dishwashers may cause
malfunction or damage to the appliance.
To open the detergent dispenser
use the opening device C.
Introduce the detergent into
the dry dispenser D only. Place
the amount of detergent for pre-
washing directly inside the tub.
ADJUSTING THE DOSAGE OF RINSE AID
I
f you are not completely satised with the drying results, you can adjus
t
the quantity of rinse aid used.
• Switch the dishwasher on using the ON/OFF button.
• Switch it o using the ON/OFF button.
• Press button START/Pause three times - a beep will be heard.
• Switch it on using the ON/OFF button.
• The current selection level number and rinse aid indicator light ash.
• Press button P to select the level of rinse aid quantity to be supplied.
• Switch it o using the ON/OFF button
Setting is complete!
If the rinse aid level is set to 1 (ECO), no rinse aid will be supplied.The LOW
RINSE AID indicator light will not be lit if you run out of rinse aid.
A maximum of 5 levels can be set according to the dishwasher model.
The factory setting is specic to the model, please follow instruction
above to check this for your machine.
• If you see bluish streaks on the dishes, set a low number (1-2).
• If there are drops of water or limescale marks on the dishes, set a mid-
range number (3-4).
FILLING THE DETERGENT DISPENSER
C
D
1. When measuring out the detergent refer to the mentioned earlier
information to add the proper quantity. Inside the dispenser Dthere are
indications to help the detergent dosing.
2. Remove detergent residues from the edges of the dispenser
and close the cover until it clicks.
3. Close the lid of the detergent dispenser by pulling it up until
the closing device is secured in place.
The detergent dispenser automatically opens up at the right time
according to the program.
If all-in-one detergents are used, we recommend using the TABLET
button, because it adjusts the program so that the best washing
and drying results are always achieved.
After installation, remove the stoppers from the racks and the retaining elastic elements from the upper rack.

6
ECO program data is measured under laboratory conditions according to European Standard EN 60436:2020.
Pre-treatment of the dishes is not needed before any of the programs.
*) Not all options can be used simultaneously.
**) Values given for programs other than the program Eco are indicative only. The actual time may vary depending on many factors such as tem-
perature and pressure of the incoming water, room temperature, amount of detergent, quantity and type of load, load balancing, additional
selected options and sensor calibration. The sensor calibration can increase program duration up to 20 min.
PROGRAMS TABLE
PROGRAMS DESCRIPTION
Program
Drying
phase
CoolDry
Available
options *)
Duration of wash
program
(h:min) **)
Water
consumption
(litres/cycle)
Energy
consumption
(kWh/cycle)
1. Eco 50° 3:10 9.5 0.95
2. Auto
50-60°
1:25 - 3:00 7.0 - 14.0 0.90 - 1.40
3. Intensive 65° 2:50 14.0 1.50
4. Fast
Wash&Dry 50° 1:25 11.5 1.10
5. Crystals
45°
1:40 11.5 1.20
6. Rapid 30’ 50° --0:30 9.0 0.50
7. Silent 50° 3:30 15.0 1.15
8. Prewash - - -0:12 4.5 0.01
Instructions on wash cycle selection.
1 ECO
Eco programme is suitable to clean normally soiled tableware, that
for this use, it is the most ecient programme in terms of its combined
energy and water consumption, and that it is used to assess compliance
with the EU Ecodesign legislation.
2 AUTO
For normally soiled dishes with dried food residues. Senses the level
of soiling on the dishes and adjusts the program accordingly.
3 INTENSIVE
Program recommended for heavily soiled crockery, especially suitable
for pans and saucepans (not to be used for delicate items).
4 FASTWASH&DRY
Normally soiled crockery. Everyday cycle, that ensures optimal cleaning
and drying performance in shorter time.
5 CRYSTALS
Program for delicate items, which are more sensitive to high
temperatures, for example glasses and cups.
6 RAPID 30’
Program to be used for half load of lightly-soiled dishes with no dried
food residues. Does not include drying phase.
7 SILENT
Suitable for night-time operation of the appliance. Ensures optimal
cleaning and drying performance with the lowest noise emission.
8 PREWASH
Use to refresh crockery planned to be washed later. No detergent
to be used with this program.
Notes:
Please note that cycle Rapid 30’ is dedicated for lightly soiled dishes.

7
EN
OPTIONS AND FUNCTIONS
OPTIONS can be selected directly by pressing the corresponding button (see CONTROL PANEL). If an option is not compatible with the selected
program see PROGRAMS TABLE, the corresponding LED ashes rapidly 3 times and beeps will sound. The option will not be enabled.
MULTIZONE
If there are not many dishes to be washed, a half loading may
be used in order to save water, electricity and detergent.
Select the program and then press the MULTIZONE button: the indicator
over the button lights up and the symbol of the chosen rack will appear
on the display. By default the appliance washes dishes in all racks.
To wash only the specic rack, press this button repeatedly:
shown on the display (only lower rack)
shown on the display (only upper rack)
shown on the display (option is OFF and the appliance will wash
dishes in all racks).
Remember to load the upper or lower rack only, and to reduce
the amount of detergent accordingly.
If upper rack is removed, please apply detergent directly to tub
instead of detergent dispenser.
.........................................................................
DELAY
The start of the program may be delayed for a period of time
between 0:30 and 24 hours.
1. Select the program and any desired options. Press the DELAY
button (repeatedly) to delay the start of the program. Adjustable
from 0:30 to 24 hours. With each press of the button, the delay start
increases
by: 0:30 if selection below 4 hours, 1:00 if selection is below
12 hours,
4 hours if selection is above 12 hours. If 24 hours reached,
and the button is pressed, the delayed start is deactivated.
2. Press the START/PAUSE button: the timer will begin counting down;
3. Once this time has elapsed, the indicator light switches o
and the program begins automatically.
If at the time of the countdown the START/PAUSE button is pressed
again the DELAY option is cancelled and the selected program starts
automatically.
The DELAY function cannot be set once a program has been started.
TAB
This setting allows you to optimize the performance of the program
according to the type of detergent used.
Press the SANI RINSE button for 3 seconds (the corresponding symbol
will light up) if you use combined detergents in tablet form (rinse aid,
salt and detergent in 1 dose).
If you use powder or liquid detergent, this option should be o.
. . . . . . . . . . . . . . . . . . . . . . . . . . . . . . . . . . . . . . . . . . . . . . . . . . . . . . . . . . . . . . . . . . . . . . . . .
SANI RINSE
This option can be used to sanitize washed dishes.
It will increase nal rinse temperature and add antibacterial wash
to the selected program.
Select the washing program, press the SANI RINSE button; the indicator
light will light up. To deselect the option, press the same button again.
Ideal to clean crockery and feeding bottles. The dishwasher door must
be kept shut for the entire duration of the program in order to guarantee
reduction of germs. If the door is opened the indicator lamp starts
ashing.
WARNING: the crockery and plates could be extremely hot at the end
of the cycle.
.........................................................................
CoolDry
CoolDry is a convection drying system which automatically opens
the door during/after drying phase to ensure exceptional drying
performance every day. Door opens at the temperature that is safe
to your kitchen furniture, thus door will not be opened when the option
of SANI RINSE is on.
As additional steam protection, special designed protection foil is added
together with the dishwasher (depending on the model type - can
be the need to buy it). To see how to mount protection foil please refer
to (INSTALLATION GUIDE).
CoolDry functionality could be disabled by the user as follows:
• To DISABLE: Switch On, then switch O the machine. Keep the P
button pressed for 5 sec., at the end of 5 sec the dishwasher plays
a short beep. Switch On the machine, the display shows„oOF”.
• To ENABLE: Switch On, then switch O the machine. Keep the P
button pressed for 5 sec., at the end of 5 sec the dishwasher plays
a short beep. Switch On the machine, the display shows„oOn”.
. . . . . . . . . . . . . . . . . . . . . . . . . . . . . . . . . . . . . . . . . . . . . . . . . . . . . . . . . . . . . . . . . . . . . . . . .
KEYLOCK
A long press (for 3 seconds) of MULTIZONE button, will activate
the KEYLOCK function.The KEYLOCK function will block the control panel
except the ON/OFF button.To deactivate the KEYLOCK, long press again.
. . . . . . . . . . . . . . . . . . . . . . . . . . . . . . . . . . . . . . . . . . . . . . . . . . . . . . . . . . . . . . . . . . . . . . . . .
WATER TAP CLOSED – Alarm
Flashes when there is no inlet water or water tap is closed.
.........................................................................
DRAIN OUT
To stop and cancel the active cycle, the DRAIN OUT function can
be used. A long press of START/PAUSE button, will activate the DRAIN
OUT function. The active program will be stopped and the water
in the dishwasher will be drained out.

8
For pots, lids, plates, salad bowls, cutlery etc... Large plates and lids
should ideally be placed at the sides to avoid interferences with
the spray arm.
The lower rack has tip-up supports which can be used in a vertical
position when arranging plates or in a horizontal position (lower)
to load pans and salad bowls easily.
(loading example for the lower rack)
Load delicate and light dishes:
glasses, cups, saucers, low salad
bowls.
(loading example for the upper rack)
. . . . . . . . . . . . . . . . . . . . . . . . . . . . . . . . . . . . . . . . . . . . . . . . . . . . . . . . . . . . . . . . . .
ADJUSTING THE HEIGHT OF THE UPPER RACK
The height of the upper basket can be adjusted: high position to place
bulky crockery in the lower basket and low position to make the most
of the tip-up compartments by creating more space upwards.
The upper rack is equipped with a Upper Rack
height adjuster (see gure), without pressing
the levers, lift it up by simply holding the rack
sides, as soon as the rack is stable in its upper
position. To restore to the lower position, press
the levers (A) at the sides of the rack and move
the basket downwards.
We strongly recommend that you do not
adjust the height of the rack when it is
loaded.
NEVER raise or lower the basket on one side only.
LOADING THE RACKS
FOLDABLE FLAPS WITH ADJUSTABLE POSITION
The side foldable aps can be fold or unfold to optimize
the arrangement of crockery inside the rack.
Wine glasses can be placed safely
in the foldable aps by inserting
the stem of each glass into
the corresponding slots.
Depending on the model:
– to unfold the aps there is
needed to slide it up and rotate
or release it from the snaps
and pull it down.
– to fold the aps there is needed
to rotate it and slide aps down
or pull it up and attach aps
to the snaps.
LOWER RACK
CUTLERY BASKET
The basket is equipped with top grilles
for improved cutlery arrangement.
The cutlery basket should
be positioned only at the front
of the lower rack.
Knives and other utensils with
sharp edges must be placed
in the cutlery basket with the points
facing downwards or they must
be positioned horizontally
in the tip-up compartments
on the upper rack.
UPPER RACK

9
EN
DAILY USE
1. CHECK WATER CONNECTION
Check that the dishwasher is connected to the water supply
and that the tap is open.
2. SWITCH ON THE DISHWASHER
Open the door and press the ON/OFF button.
3. LOAD THE RACKS (see LOADING THE RACKS)
4. FILLING THE DETERGENT DISPENSER
5. CHOOSE THE PROGRAM AND CUSTOMISE THE CYCLE
Select the most appropriate program in accordance with the type
of crockery and its soiling level (see PROGRAMS DESCRIPTION) by pressing
the P button. Select the desired options (see OPTIONS AND FUNCTIONS).
6. START
Start the wash cycle by pressing the START/Pause button.
When the program starts you hear a beep.
.
7. END OF WASH CYCLE
The end of the wash cycle is indicated by beeps and the display shows
End. Open the door and switch o the appliance by pressing the ON/
OFF button. Wait for a few minutes before removing the crockery -
to avoid burns. Unload the racks, beginning with the lower one.
The machine will switch o automatically during certain extended
periods of inactivity, in order to minimise electricity consumption.
If the crockery is only lightly soiled or if it has been rinsed with
water before being placed in the dishwasher, reduce the amount
of detergent used accordingly.
MODIFYING A RUNNING PROGRAM
If a wrong program was selected, it is possible to change it, provided that
it has only just begun: press and hold the ON/OFF button, the machine
will switch o. Switch the machine back on using the ON/OFF button
and select the new wash cycle and any desired options; start the cycle
by pressing the START/PAUSE button.
.........................................................................
ADDING EXTRA CROCKERY
Without switching o the machine, open the door (be ware of HOT
steam!) and place the crockery inside the dishwasher. Close the door
and press the START/Pause button the cycle will begin from the point
at which it was interrupted.
. . . . . . . . . . . . . . . . . . . . . . . . . . . . . . . . . . . . . . . . . . . . . . . . . . . . . . . . . . . . . . . . . . . . . . . . . .
ACCIDENTAL INTERRUPTIONS
If the door is opened during the wash cycle, or if there is a power cut,
the cycle stops. Once the door has been closed or the electricity supply
is restored, to start again the cycle from where it was interrupted, press
the START/Pause button.
. . . . . . . . . . . . . . . . . . . . . . . . . . . . . . . . . . . . . . . . . . . . . . . . . . . . . . . . . . . . . . . . . . . . . . . . . .
To disable the DEMO MODE the following actions must be carried out
in sequence, without breaks. Switch the machine ON and then switch
it OFF again. Press the DELAY button until the buzzer is heard. Switch
the machine on again. The “dOF” indicator ashes and then turns OFF.
ADVICE AND TIPS
TIPS
Before loading the baskets, remove all food residues from the crockery
and empty the glasses. You do not need to rinse beforehand under
running water.
Arrange the crockery so that it is held in place rmly and does not tip
over; and arrange the containers with the openings facing downwards
and the concave/convex parts placed obliquely, thus allowing the water
to reach every surface and ow freely.
Warning: lids, handles, trays and frying pans do not prevent the sprayer
arms from rotating.
Place any small items in the cutlery basket.
Very soiled dishes and pans should be placed in the lower basket
because in this sector the water sprays are stronger and allow a higher
washing performance.
After loading the appliance, make sure that the sprayer arms can rotate freely.
. . . . . . . . . . . . . . . . . . . . . . . . . . . . . . . . . . . . . . . . . . . . . . . . . . . . . . . . . . . . . . . . . . . . . . . . .
TIPS ON ENERGY SAVING
• When the household dishwasher is used according
to the manufacturer’s instructions, washing tableware
in a dishwasher usually consumes less energy and water than
hand dishwashing.
• In order to maximize dishwasher eciency it is recommended
to initiate the wash cycle once dishwasher is fully loaded.
Loading the household dishwasher up to the capacity indicated
by the manufacturer will contribute to energy and water savings.
Information on correct loading of tableware can be found in Loading
chapter.
In case of partial loading it is recommended to use dedicated wash
options if available (Half load/ Zone Wash, Multizone), illing up only
selected racks. Incorrect loading or overloading the dishwasher may
increase resources usage (such as water, energy and time, as well
as increase noise level), reducing cleaning and drying performance.
• Manual pre-rinsing of tableware items leads to increased water
and energy consumption and is not recommended.
HYGIENE
To avoid odour and sediment which can be accumulated
in the dishwasher please run a high temperature program at least
one a month. Use a tea spoon of detergent and run it without
the loading to clean your appliance.
.........................................................................
UNSUITABLE CROCKERY
Items which are not dishwasher-safe:
• Wooden dishes, pots or pans: these may be damaged by the high
washing temperatures.
• Handcrafted items: these are rarely suitable for washing
in a dishwasher. The relatively high water temperatures
and the detergents used may damage them.
• Plastic dishes: these are not heat resistant and may lose their shape.
Heat resistant plastic dishes must be washed in the upper basket.
• Dishes and objects in copper, tin, zinc or brass: these tend to stain.
• Aluminium dishes: items made from anodised aluminium may lose
their colour.
• Silverware: silver items may stain.
• Glass and crystal: in general, glass and crystal objects can be washed
in the dishwasher. However, certain types of glass and crystal may become
dull and lose their clearness after many washings. Therefore, for these
items we recommend using the least aggressive program available.
• Decorated items: the decorated objects available on the market are
generally able to withstand washing in the dishwasher, although
the colours may fade after a great many washes. If in doubt
as to the fastness of the colours, it is advisable to wash just a few
items at a time for approximately one month.
.........................................................................
DAMAGE TO GLASS AND CROCKERY
• Only use glasses and porcelain guaranteed by the manufacturer
as dishwasher safe.
• Use a delicate detergent suitable for crockery
• Collect glasses and cutlery from the dishwasher as soon as the wash
cycle is over.
10
CLEANING AND MAINTENANCE
Always unplug the appliance when cleaning it and when performing maintenance work. Do not use ammable liquids to clean the machine.
CLEANING THE DISHWASHER
Any marks on the inside of the appliance may be removed
using a cloth dampened with water and a little vinegar.
The external surfaces of the machine and the control
panel can be cleaned using a non-abrasive cloth which
has been dampened with water. Do not use solvents
or abrasive products.
. . . . . . . . . . . . . . . . . . . . . . . . . . . . . . . . . . . . . . . . . . . . . . . . . . . . . . . . . . . . . . . . . . . . . . . . .
PREVENTING UNPLEASANT ODOURS
Always keep the door of the appliance ajar in order to avoid moisture
from forming and being trapped inside the machine.
Clean the seals around the door and detergent dispensers regularly using
a damp sponge. This will avoid food becoming trapped in the seals, which
is the main cause behind the formation of unpleasant odours.
. . . . . . . . . . . . . . . . . . . . . . . . . . . . . . . . . . . . . . . . . . . . . . . . . . . . . . . . . . . . . . . . . . . . . . . . .
CLEANING THE WATER INLET HOSE
If the water hoses are new or have not been used for an extended
period of time, let the water run to make sure it is clear and free
of impurities before performing the necessary connections. If this
precaution is not taken, the water inlet could become blocked
and damage the dishwasher.
CHEKING THE WATER SUPPLY HOSE
Check the inlet hose regularly for brittleness and cracks. If damaged,
replace it by a new hose available through our After-Sales Service
or your specialist dealer. Depending on the hose type:
If the inlet hose has a transparent coating, periodically check
if the colour intensies locally. If yes, the hose may have a leak
and should be replaced.
For water stop hoses: check the small safety valve inspection
window (see arrow). If it is red, the water stop function was triggered,
and the hose must be replaced by a new one.
For unscrewing this hose, press the release button while unscrewing
the hose.
After cleaning the lters, replace the lter assembly and x it in position
correctly; this is essential for maintaining the ecient operation
of the dishwasher.
Regularly clean the lter assembly so that the lters do not clog and that
the waste water ows away correctly.
Using dishwasher with clogged lters or foreign objects inside ltration
system or sprayarms may cause unit malfunction resulting in lose
of performance, noisy work or higher resources usage.
The lter assembly consists of three lters which remove food residues
from the washing water and then recirculate the water.
The dishwasher must not be used without lters or if the lter is
loose.
At least once per month or after each 30 cycles, check the lter assembly
and if necessary clean it thoroughly under running water, using a non-
metallic brush and following the instructions below:
1. Turn the cylindrical lter Ain an anti-clockwise direction and pull
it out (Fig 1).
2. Remove the cup lter Bby exerting a slight pressure on the side
aps (Fig 2).
3. Slide out the stainless-steel plate lter C (Fig 3).
4. In case you nd foreign objects (such as broken glass, porcelain,
bones, fruit seeds etc.) please remove them carefully.
5. Inspect the trap and remove any food residues. NEVER REMOVE
the wash-cycle pump protection (black detail) (Fig 4).
On occasions, food residue may
become encrusted onto the spray
arms and block the holes used
to spray the water. It is therefore
recommended that you check
the arms from time to time and clean
them with a small non-metallic brush.
To remove the upper spray arm, turn
the plastic locking ring in an anti-
clockwise direction. The upper spray arm should be replaced so that
the side with the greater number of holes is facing upwards.
21
43
A
C
A
B
CLEANING THE SPRAY ARMS
The lower spray arm may be removed
by pulling it upwards.
CLEANING THE FILTER ASSEMBLY

11
EN
CONNECTING THE WATER SUPPLY
Adaptation of the water supply for installation should only be perfor-
med by a qualied technician.
The water inlet and outlet hoses may be positioned towards the right
or the left in order to achieve the best possible installation.
Make sure the dishwasher does not bend or squash the hoses.
. . . . . . . . . . . . . . . . . . . . . . . . . . . . . . . . . . . . . . . . . . . . . . . . . . . . . . . . . . . . . . . . . . . . . . . . .
CONNECTING THE WATER INLET HOSE
• Run the water until it is perfectly clear.
• Screw the inlet hose tightly into position and turn on the tap.
If the inlet hose is not long enough, contact a specialist store or an
authorised technician.
The water pressure must be within the values indicated in the Techni-
cal Data table - otherwise the dishwasher may be function properly.
Make sure the hose is not bent or compressed.
SPECIFICATIONS FOR THE CONNECTION OF THE WATER SUPPLY HOSE:
WATER SUPPLY cold or hot (max. 60°C)
WATER INTAKE 3/4”
POWER OF WATER PRESSURE 0,05 ÷ 1 MPa (0.5 ÷ 10 bar)
7,25 – 145 psi
. . . . . . . . . . . . . . . . . . . . . . . . . . . . . . . . . . . . . . . . . . . . . . . . . . . . . . . . . . . . . . . . . . . . . . . . .
CONNECTING THE WATER OUTLET HOSE
Connect the outlet hose to a drain duct with a minimum diameter of 2
cm A.
The outlet hose connection must be at a height ranging from 40 to 80 cm
from the oor or surface where the dishwasher rests.
Before connecting the water outlet hose to the sink drain, remove
the plastic plug B.
. . . . . . . . . . . . . . . . . . . . . . . . . . . . . . . . . . . . . . . . . . . . . . . . . . . . . . . . . . . . . . . . . . . . . . . . .
ANTI-FLOODING PROTECTION
Anti-ooding protection. To ensure oods do not occur, the dishwasher:
- is provided with a special system which blocks the water supply
in the event of anomalies or leaks from inside the appliance.
Some models are also equipped with the supplementary safety device
New Aqua Stop, which guarantees anti-ooding protection even
in the event of a supply hose rupture.
Under no circumstances should the water inlet hose be cut as it contains
live electrical parts.
ELECTRICAL CONNECTION
WARNING: Under no circumstances should the water inlet hose
be cut as it contains live electrical parts.
Before inserting the plug into the electrical socket, make sure that:
• The socket is earth and complies with current regulations;
• The socket can withstand the maximum load of the appliance
as shown on the data plate located on the inside of the door (see
PRODUCT DESCRIPTION).
• The power supply voltage falls within the values indicated
on the data plate on the inside of the door.
• The socket is compatible with the plug of the appliance.
If this is not the case, ask an authorised technician to replace the plug
(see AFTER-SALES SERVICE). Do not use extension cables or multiple
sockets. Once the appliance has been installed, the power supply cable
and the electrical socket should be easily accessible.
The cable should not be bent or compressed.
If the power supply cable is damaged, have it replaced by the manufac-
turer or its authorised Technical Assistance Service in order to prevent all
potential hazards.
The Company shall not be held responsible for any incidents, if these
regulations are not observed.
.........................................................................
POSITIONING AND LEVELLING
1. Position the dishwasher on a level sturdy oor. If the oor is uneven,
the front feet of the appliance may be adjusted until it reaches
a horizontal position. If the appliance is levelled correctly, it will
be more stable and much less likely to move or cause vibrations
and noise while it is operating.
2. Before recessing the dishwasher, stick the adhesive transparent strip
under the wooden shelf in order to protect it from any condensation
which may form.
3. Place the dishwasher so that its sides or back panel are in contact
with the adjacent cabinets or the wall. This appliance can also be re-
cessed under a single worktop.
4. To adjust the height of the rear foot, turn the red hexagonal bushing
on the lower central part at the front of the dishwasher using a he-
xagonal spanner with an opening of 8 mm. Turn the spanner in
a clockwise direction to increase the height and in an anticlockwise
direction to decrease it.
.........................................................................
DIMENSIONS AND CAPACITY:
WIDTH 598 mm
HEIGHT 820 mm
DEPTH 555 mm
CAPACITY 14 standard place-settings
MIN 40 cm
MAX 80 cm
If the appliance must be moved at any time, keep it in an upright position; if absolutely necessary, it may be tilted onto its back.
Water softener automatically reduces water hardness, consequently
preventing scale buildup on heater, contributing also to better cleaning
eciency.
This system regenerates itself with salt, therefore it is required
to rell salt container when empty.
Frequency of regeneration depends on water hardness level setting
- regeneration takes place once per 6Eco cycles with water hardness
level set to 3.
WATER SOFTENING SYSTEM
Regeneration process starts in nal rinse and nishes in drying phase,
before cycle ends.
• Single regeneration consumes: ~3.5L of water;
• Takes up to 5 additional minutes for the cycle;
• Consumes below 0.005kWh of energy.
INSTALLATION

12
In case your dishwasher doesn’t work properly, check if the problem can be solved by going through the following list.
For other errors or issues please contact authorized After-sales Service which contact details can be found in the warranty booklet.
The manufacturer ensures the availability of spare parts for at least 10 years after production date of this appliance.
TROUBLESHOOTING
PROBLEMS POSSIBLE CAUSES SOLUTIONS
Salt indicator
is lit
Salt reservoir is empty (after rell the salt indica-
tor may remain lit for several wash cycles).
Rell reservoir with salt (for more information - see page 2).
Adjust water hardness (see table, page 2).
Rinse aidindi-
cator is lit
Rinse aid dispenser is empty (after rell
the rinse aid indicator may remain lit for seve-
ral wash cycles).
Rell dispenser with rinse aid (for more information - see page 2).
The dishwa-
sher won’t start
or does not
respond to com-
mands.
The appliance has not been plugged
in properly. Insert the plug into the socket.
Power outage. For safety reasons, dishwasher will not restart automatically when power
returns. Press the START/Pause button to resume the cycle.
The dishwasher door is not closed.
CoolDry pin is not pulled in. Vigorously push the door until you hear the “click”.
Cycle is interupted by door opening for > 4 sec.
Close the door and press START/Pause.
It does not respond to commands.
Display shows: F9 or F12 and both On/O
and START/Pause LEDs are blinking rapidly.
Switch o the appliance by pressing the ON/OFF button, switch it back
on after approximately one minute and restart the program. If problem
persists, unplug the appliance for 1 minute, then plug it back in.
The dishwasher
won’t drain.
Display shows: F3
and both On/O
and START/Pause
LEDs are blinking
rapidly.
The wash cycle has not nished yet. Wait until the wash cycle nishes.
The drain hose is bent. Check that the drain hose is not bent (see INSTALATION INSTRUCTION).
The sink drain pipe is blocked. Clean the sink drain pipe.
The lter is clogged up with food residues. Clean the lter (see CLEANING THE FILTER ASSEMBLY).
The dishwasher
makes
excessive noise.
The dishes are rattling against each other. Position the crockery correctly (see LOADING THE RACKS).
An excessive amount of foam has been pro-
duced.
The detergent has not been measured out correctly or it is not suitable
for use in dishwashers (see FILLING THE DETERGENT DISPENSER). Restart
dishwasher by pressing the DRAIN button (see OPTIONS AND FUNCTIONS)
and run new program without detergent.
The dishes are not
clean. The crockery has not been arranged properly. Arrange the crockery correctly (see LOADING THE RACKS).
The spray arms cannot rotate freely, being
hindered by the dishes. Arrange the crockery correctly (see LOADING THE RACKS).
The wash cycle is too gentle. Select an appropriate wash cycle (see PROGRAMS TABLE).
An excessive amount of foam has been pro-
duced.
The detergent has not been measured out correctly or it is not suitable
for use in dishwashers (see FILLING THE DETERGENT DISPENSER).
The cap on the rinse aid compartment has
not been shut correctly. Make sure the cap of the rinse aid dispenser is closed.
The lter is soiled or clogged. Clean the lter assembly (see CARE AND MAINTENANCE).
There is no salt. Fill the salt reservoir (see FILLING THE SALT RESERVOIR).
The dishwasher
does not ll the
water. Display
shows:
and F6, both On/
O and START/
Pause LEDs are
blinking rapidly.
No water in the water supply or the tap is
closed. Make sure there is water in the water supply or the tap running.
The inlet hose is bent. Make sure the inlet hose is not bent (see INSTALLATION) reprogram
the dishwasher and reboot.
The sieve in the water inlet hose is clogged;
it is necessary to clean it.
After having carried out the verication and cleaning, turn o and turn
on the dishwasher and restart a new program.
Dishwasher
nishes thecycle
prematurely.
Display shows:
F15 and both On/
O and START/
Pause LEDs are
blinking rapidly.
Drain hose positioned too low or siphoning
into home sewage system.
Check if end of drain hose is placed at correct height (see INSTALLATION).
Check for siphoning into home sewage system, install air admittance valve
if necessary.
Air in water supply. Check water supply for leaks or other issues letting air inside.

13
EN
SUPPORT
In the event of any operation problems, contact a Franke Technical Service Centre.
Never use the services of unauthorized technicians.
Specify:
– the type of fault
– the appliance model (art./Code)
– the serial number (S.N.) on the rating plate.
When you contact the After-Sales Service, you must provide the codes shown on the rating plate attached t
o the left or right side inside the door of the dishwasher.
FDW XXX XXX XXX
XXXXXXXXXXXX
Built-in dishwasher /
XXXXXXXXXXXX
S/N
xxxxxxxxxxxx
FXXXXXX RMMDDXXXX
FDW XXX XXX X XX
XXXXXXXXXXXX
XXX.XXXX.XXX
TYPE: DWX-DEAXXX-X
Max.XXXXW XXXXW
XXX-XXXV ~XX Hz X,XX
÷
X MPa
XXA
I.C.
xxxxxxxxxxxx
[BAR -CODE AR EA]
[CERTIFICATIONAREA]
Made inPoland /
Energyefficiencyclass forRF A
SafetyclassI
The model information can be retrieved using the QR-Code reported in the energy label.
The label also includes the model identier that can be used to consult the portal of the registry at https://eprel.ec.europa.eu (available only
on certain models).
001

14
ΙΝΑΚΑΣ ΕΡΙΕΧΟΜΕΝΩΝ
ΠΙΣΚΌΠΗΣΗ ....................................................................................................................................................................................... 15
ΠΡΩΤΗ ΧΡΗΣΗ ..................................................................................................................................................................................... 16
ΠΙΝΑΚΑΣ ΠΡΟΓΡΑΜΜΑΤΩΝ ........................................................................................................................................................... 17
ΠΙΛΟΓ Σ ΚΑΙ Λ ΙΤΟΥΡΓΙ Σ ............................................................................................................................................................ 18
Γ ΜΙΣΜΑ ΚΑΛΑΘΙΩΝ ........................................................................................................................................................................ 19
ΚΑΘΗΜ ΡΙΝΗ ΧΡΗΣΗ ....................................................................................................................................................................... 20
ΠΛΗΡΟΦΟΡΙ Σ ΚΑΙ ΣΥΜΒΟΥΛ Σ.................................................................................................................................................. 20
ΚΑΘΑΡΙΣΜΟΣ ΚΑΙ ΣΥΝΤΗΡΗΣΗ .................................................................................................................................................... 21
ΓΚΑΤΆΣΤΑΣΗ ...................................................................................................................................................................................... 22
ΑΝΤΙΜ ΤΩΠΙΣΗ ΠΡΟΒΛΗΜΑΤΩΝ ................................................................................................................................................. 23
ΥΠΟΣΤΗΡΙΞΗ ........................................................................................................................................................................................ 24

15
EL
Διαβάστε τις οδηγίες προσεκτικά πριν χρησιμοποιήσετε τη συσκευή.
Ε ΙΣΚΌ ΗΣΗ
ΙΝΑΚΑΣ ΕΛΕΓΧΟΥ
ΟΔΗΓΟΣ ΧΡΗΣΤΗ
1. πάνω καλάθι
2. Αναδιπλούμενα πτερύγια
3. Ρυθμιστής ύψους άνω καλαθιού
4. Πάνω εκτοξευτήρας
5. Κάτω καλάθι
6. Καλάθι για μαχαιροπίρουνα
7. Κάτω εκτοξευτήρας
8. Σύστημα φίλτρου
9. Δοχείο αλατιού
10. Δοχεία απορρυπαντικού και λαμπρυντικού
11. Πινακίδα τεχνικών στοιχείων
12. Πίνακας ελέγχου
1. Κουμπί On/O με ενδεικτική λυχνία
2. Κουμπί επιλογής προγράμματος με ενδεικτική λυχνία
3. Κουμπί Πολυζωνική λειτουργία με ενδεικτική
λυχνία / Κλείδωμα πληκτρολογίου
4. νδεικτική λυχνία οικονομικού προγράμματος
5. νδεικτική λυχνία κλείδωμα πληκτρολογίου
6. Οθόνη
7. Αριθμός προγράμματος και ένδειξη υπολειπόμενου
χρόνου
8. νδεικτική λυχνία ταμπλέτας (Tab)
9. νδεικτική λυχνία κλειστής παροχής νερού
10. νδεικτική λυχνία επαναπλήρωσης λαμπρυντικού
11. νδεικτική λυχνία επαναπλήρωσης αλατιού
12. Κουμπί „ Ξεπλυμα Sani” με ενδεικτική λυχνία /
ταμπλέτας (Tab)
13. Κουμπί καθυστέρησης με ενδεικτική λυχνία
14. Κουμπί Έναρξη/Παύση με ενδεικτική λυχνία /
κροής νερού
0000 000 00000
Service:
1
2
3
4
5
6
10
12
7
11
9
8
3
1
2
8
13
1454 6 7 10 11 129

16
Η χρήση αλατιού αποτρέπει το σχηματισμό ΑΛΑΤΩΝ στα πιάτα και στα
λειτουργικά μέρη της συσκευής.
• It is mandatory that THE SALT RESERVOIR NEVER BE EMPTY.
• ίναι σημαντικό να ρυθμιστεί η σκληρότητα του νερού.
Το δοχείο αλατιού βρίσκεται στην κάτω πλευρά του πλυντηρίου πιάτων
( λ. ΣΦΑΙΡΙΚΗ ΕΙΚΟΝΑ) και πρέπει να γεμίζεται όταν ανάβει η ενδεικτική
λυχνία ΑΝΑ ΛΗΡΩΣΗΣ ΑΛΑΤΙΟΥ στον πίνακα ελέγχου..
1. Αφαιρέστε το κάτω καλάθι και ξεβιδώστε το
πώμα του δοχείου (αριστερόστροφα).
2. Μόνο την πρώτη φορά που το κάνετε αυτό:
γεμίστε το δοχείο αλατιού με νερό.
3. Τοποθετήστε το χωνί (βλ. εικόνα) και γεμίστε
το δοχείο αλατιού μέχρι το άνω χείλος (περί-
που 1 kg). Δεν είναι ασυνήθιστο φαινόμενο να
διαρρεύσει λίγο νερό.
4. Αφαιρέστε το χωνί και καθαρίστε τυχόν
υπολείμματα αλατιού από το άνοιγμα.
Βεβαιωθείτε ότι το πώμα είναι καλά βιδωμένο, ώστε να μην εισέρχεται
απορρυπαντικό στο δοχείο κατά τη διάρκεια του προγράμματος πλύ-
σης (αυτό μπορεί να προκαλέσει ζημιά στον αποσκληρυντή και να φτά-
σει έως την ανάγκη επισκευής).
Κάθε φορά που χρειάζεται να προσθέσετε αλάτι, είναι υποχρεω-
τικό η διαδικασία να ολοκληρώνεται πριν από την έναρξη του κύ-
κλου πλύσης για να αποφευχθεί η διάβρωση.
. . . . . . . . . . . . . . . . . . . . . . . . . . . . . . . . . . . . . . . . . . . . . . . . . . . . . . . . .
ΡΥΘΜΙΣΗ ΣΚΛΗΡΟΤΗΤΑΣ ΝΕΡΟΥ
Για να μπορέσει να λειτουργήσει τέλεια ο αποσκληρυντής νερού, είναι
σημαντικό η ρύθμιση της σκληρότητας νερού να γίνεται στην πραγμα-
τική σκληρότητα νερού του σπιτιού σας. Μπορείτε να έχετε αυτήν την
πληροφορία από τον τοπικό πάροχο νερού. Από το εργοστάσιο ρυθμί-
ζεται η προεπιλεγμένη τιμή για τη σκληρότητα του νερού.
ΛΗΡΩΣΗ ΤΟΥ ΔΟΧΕΙΟΥ ΑΛΑΤΙΟΥ
Το λαμπρυντικό διευκολύνει το ΣΤ ΓΝΩΜΑ. Η θήκη λαμπρυντικού
A πρέπει να γεμίζει όταν στον πίνακα ελέγχου ανάβει η ενδεικτική
λυχνία ΑΝΑ ΛΗΡΩΣΗΣ ΛΑΜ ΡΥΝΤΙΚΟΥ .
1. Ανοίξτε τη θήκη B πιέζοντας και τραβώντας προς τα επάνω το γλωσσίδι
στο καπάκι.
2. ισαγάγετε προσεκτικά το λαμπρυντικό έως τη μέγιστη ενδεικτική εγκοπή
(110 ml) του χώρου πλήρωσης - αποφύγετε τη διαρροή. Αν διαρρεύσει, κα-
θαρίστε αμέσως το υγρό που διέρρευσε με ένα στεγνό πανί.
3. Πιέστε κάτω το καπάκι έως ότου ακούσετε το χαρακτηριστικό κλικ κλει-
σίματος.
ΟΤΕ μην ρίχνετε λαμπρυντικό απευθείας στον κάδο.
A
B
• νεργοποιήστε τη συσκευή πιέζοντας το κουμπί ON/OFF.
• Απενεργοποιήστε τη συσκευή πιέζοντας το κουμπί ON/OFF.
• Κρατήστε πατημένο το κουμπί ΈΝΑΡΞΗ/ΠΑΎΣΗ για 5 δευτερόλεπτα
έως ότου ακούσετε ένα μπιπ.
• νεργοποιήστε τη συσκευή πιέζοντας το κουμπί ON/OFF.
• Ο αριθμός επιπέδου της τρέχουσας επιλογής και η ενδεικτική λυχνία
αλατιού αναβοσβήνουν.
• Πιέστε το κουμπί P για να επιλέξετε το επιθυμητό επίπεδο σκληρότη-
τας (ΒΛ. ΠΙΝΑΚΑΣ ΣΚΛΗΡΟΤΗΤΑΣ ΝΕΡΟΥ).
• Απενεργοποιήστε τη συσκευή πιέζοντας το κουμπί ON/OFF.
Η ρύθμιση ολοκληρώθηκε!
Μόλις ολοκληρωθεί αυτή η διαδικασία, θέστε σε λειτουργία το πρόγραμ-
μα χωρίς φορτίο.
Χρησιμοποιείτε μόνο αλάτι που προορίζεται ειδικά για πλυντήρια πιάτων.
Μετά την τοποθέτηση του αλατιού στη συσκευή, η ενδεικτική λυχνία
ΠΑΝΑΠΛΗΡΩΣΗ ΑΛΑΤΙΟΥ σβήνει.
Αν το δοχείο αλατιού δεν είναι γεμάτο, μπορεί να προκληθεί ζημιά
στον αποσκληρυντή και στο στοιχείο θέρμανσης εξαιτίας των αλά-
των. Η χρήση αλατιού συνιστάται με οποιονδήποτε τύπο απορρυπα-
ντικού πλυντηρίου πιάτων.
ίνακας σκληρότητας νερού
Επίπεδο °dH
Γερμανικούς
βαθμούς
°fH
Γαλλικούς
βαθμούς
°Clark
Αγγλικούς
βαθμούς
1 Μελάτα 0 - 6 0 - 10 0 - 7
2 Mεσαία 7 - 11 11 - 20 8 - 14
3 Μέσος όρος 12 - 16 21 - 29 15 - 20
4 Σφιχτά 17 - 34 30 - 60 21 - 42
5 Πολύ σκληρό 35 - 50 61 - 90 43 - 62
ΛΗΡΩΣΗ ΘΗΚΗΣ ΛΑΜ ΡΥΝΤΙΚΟΥ
Η χρήση απορρυπαντικού που δεν προορίζεται για πλυντήρια πιάτων
μπορεί να προκαλέσει δυσλειτουργία ή ζημιά στη συσκευή.
Για να ανοίξετε το δοχείο απορ-
ρυπαντικού χρησιμοποιήστε τη
διάταξη ανοίγματος C. ροσθέστε
το απορρυπαντικό μόνο στο στεγνό
δοχείο D . Τοποθετήστε την ποσό-
τητα απορρυπαντικού για πρόπλυ-
ση απευθείας μέσα στον κάδο.
C
D
ΡΥΘΜΙΣΗ ΔΟΣΟΛΟΓΙΑΣ ΛΑΜ ΡΥΝΤΙΚΟΥ
Αν δεν είστε πλήρως ικανοποιημένοι από τα αποτελέσματα στεγνώμα-
τος, μπορείτε να ρυθμίσετε την ποσότητα λαμπρυντικού που χρησιμο-
ποιείται.
• νεργοποιήστε το πλυντήριο πιάτων με το κουμπί ON/OFF.
• Απενεργοποιήστε το με το κουμπί ON/OFF .
• Πιέστε το κουμπί ΈΝΑΡΞΗ/ΠΑΎΣΗ τρεις φορές - θα ακούσετε ένα μπιπ.
• νεργοποιήστε το με το κουμπί ON/OFF .
• Ο αριθμός επιπέδου της τρέχουσας επιλογής και η ενδεικτική λυχνία
λαμπρυντικού αναβοσβήνουν.
• Πιέστε το κουμπί P για να επιλέξετε το επίπεδο ποσότητας λαμπρυντι-
κού που πρέπει να παρασχεθεί.
• Απενεργοποιήστε το με το κουμπί ON/OFF
Η ρύθμιση ολοκληρώθηκε!
Αν το επίπεδο λαμπρυντικού έχει ρυθμιστεί στο ΜΗΔ Ν (ECO), δεν θα πα-
ρασχεθεί καθόλου λαμπρυντικό. Η ενδεικτική λυχνία ΜΙΚΡΗ ΠΟΣΟΤΗΤΑ
ΛΑΜΠΡΥΝΤΙΚΟΥ δεν θα ανάψει αν εξαντληθεί το λαμπρυντικό.
Μπορούν να ρυθμιστούν έως και 5 επίπεδα ανάλογα με το μοντέλο πλυ-
ντηρίου πιάτων. Η εργοστασιακή ρύθμιση είναι ειδική για το μοντέλο, ακο-
λουθήστε τις παραπάνω οδηγίες για να το ελέγξετε για τη συσκευή σας.
• Αν δείτε μπλε γραμμές στα πιάτα, ρυθμίστε χαμηλότερο αριθμό (1-2).
• Αν υπάρχουν σταγόνες νερού ή σημάδια αλάτων στα πιάτα, ρυθμίστε
σε μεγαλύτερο αριθμό (3-4).
ΛΗΡΩΣΗ ΤΟΥ ΔΟΧΕΙΟΥ Α ΟΡΡΥ ΑΝΤΙΚΟΥ
1. Όταν μετράτε το απορρυπαντικό ανατρέξτε στις προηγούμενες πληροφο-
ρίες για να προσθέσετε την κατάλληλη ποσότητα. μέσα στη θήκη D υπάρ-
χουν ενδείξεις ως βοήθημα για τη δοσομέτρηση του απορρυπαντικού.
2. Αφαιρέστε τα υπολείμματα απορρυπαντικού από τις άκρες των δοχείων
πριν κλείσετε το καπάκι, έως ότου ακουστεί το κλικ.
3. Κλείστε το καπάκι του δοχείου απορρυπαντικού τραβώντας το επάνω
έως ότου η διάταξη κλεισίματος ασφαλίσει στη θέση της.
Το δοχείο απορρυπαντικού αυτόματα ανοίγει τη σωστή στιγμή σύμφω-
να με το πρόγραμμα. Αν χρησιμοποιούνται απορρυπαντικά όλα σε ένα,
συνιστούμε να χρησιμοποιείτε το κουμπί ΤΑΜ ΛΕΤΑ, γιατί ρυθμίζει το
πρόγραμμα με τέτοιο τρόπο ώστε να επιτυγχάνονται τα καλύτερα απο-
τελέσματος πλυσίματος και στεγνώματος.
Μετά την εγκατάσταση, αφαιρέστε τα στοπ από τα καλάθια και τα ελαστικά στοιχεία συγκράτησης από το επάνω καλάθι.
ΡΩΤΗ ΧΡΗΣΗ ΑΛΑΤΙ, ΛΑΜΠΡΥΝΤΙΚΟ ΚΑΙ ΑΠΟΡΡΥΠΑΝΤΙΚΟ

17
EL
Οδηγίες για την επιλογή κύκλου πλυσίματος.
1 ECO
Το οικονομικό πρόγραμμα Eco είναι κατάλληλο για τον καθαρισμό
κανονικά λερωμένων σκευών, το οποίο είναι για το σκοπό αυτό το πιο
αποτελεσματικό πρόγραμμα ως προς τη συνδυασμένη κατανάλωση
ενέργειας και νερού και χρησιμοποιείται για την αξιολόγηση της
συμμόρφωσης με τη νομοθεσία της για τον οικολογικό σχεδιασμό.
2 ΑΥΤΟΜΑΤΟ
Για κανονικά λερωμένα πιάτα με ξεραμένα υπολείμματα τροφών. Ανιχνεύει
πόσο λερωμένα είναι τα πιάτα και ρυθμίζει το πρόγραμμα αναλόγως.
3 ΕΝΤΟΝΟ
Συνιστώμενο πρόγραμμα για πολύ λερωμένα οικιακά σκεύη, ιδιαίτερα
κατάλληλο για τηγάνια και κατσαρόλες (δεν πρέπει να χρησιμοποιείται
για ευαίσθητα σκεύη).
4 ΤΑΧΥ ΛΥΣΙΜΟ ΚΑΙ ΣΤΕΓΝΩΜΑ
Κανονικά λερωμένα σκεύη. Καθημερινός κύκλος που εξασφαλίζει βέλτιστη
απόδοση καθαρισμού και στέγνωσης σε μικρότερο χρονικό διάστημα.
5 ΚΡΥΣΤΑΛΛΑ
Πρόγραμμα για ευαίσθητα σκεύη, τα οποία είναι περισσότερο ευαίσθητα
στις υψηλές θερμοκρασίες, όπως ποτήρια και φλυτζάνια.
6 ΓΡΗΓΟΡΟ 30’
Πρόγραμμα που χρησιμοποιείται για ελαφρώς λερωμένα πιάτα χωρίς
ξεραμένα υπολείμματα τροφών. Δεν έχει φάση στέγνωσης.
7 ΑΘΟΡΥΒΟ
Κατάλληλο για νυχτερινή λειτουργία της συσκευής. ξασφαλίζει
βέλτιστο καθαρισμό και στέγνωση με χαμηλότερη εκπομπή θορύβου.
8 ΡΟ ΛΥΣΗ
Σκεύη που πρόκειται να πλυθούν αργότερα. Δεν χρησιμοποιείται
απορρυπαντικό με αυτό το πρόγραμμα.
Σημειώσεις:
Πρόγραμμα Γρήγορο 30’ που χρησιμοποιείται για ελαφρώς λερωμένα
πιάτα χωρίς ξεραμένα υπολείμματα τροφών.
ΕΡΙΓΡΑΦΗ ΡΟΓΡΑΜΜΑΤΩΝ
ΙΝΑΚΑΣ ΡΟΓΡΑΜΜΑΤΩΝ
Τα δεδομένα του προγράμματος ECO μετρώνται υπό εργαστηριακές συνθήκες σύμφωνα με το υρωπαϊκό Πρότυπο EN 60436:2020.
Δεν απαιτείται προεπεξεργασία των σκευών για κανένα πρόγραμμα.
*) Δεν μπορούν να χρησιμοποιηθούν όλες οι επιλογές ταυτόχρονα.
**) Οι τιμές που παρέχονται για τα προγράμματα, εκτός του προγράμματος Eco, είναι ενδεικτικές. Ο πραγματικός χρόνος μπορεί να διαφέρει
σε συνάρτηση με πολλούς παράγοντες όπως η θερμοκρασία και η πίεση του εισερχόμενου νερού, η θερμοκρασία του χώρου, η ποσότητα
απορρυπαντικού, η ποσότητα και ο τύπος φορτίου, η ισορροπία του φορτίου, οι πρόσθετες επιλογές και η βαθμονόμηση του αισθητήρα.
Η βαθμονόμηση του αισθητήρα μπορεί να αυξήσει τη διάρκεια του προγράμματος έως και 20 λεπτά.
ρόγραμμα
Φάση
στεγνώματος
CoolDry
Διαθέσιμες
επιλογές *)
Διάρκεια
προγράμματος
πλυσίματος
(h:min)**)
Κατανάλωση
νερού
(λίτρα/κύκλο)
Κατανάλωση
ρεύματος
(kWh/κύκλο)
1. Eco 50° 3:10 9,5 0,95
2. Αυτόματο
50-60°
1:25 - 3:00 7,0 - 14,0 0,90 - 1,40
3. Έντονο 65° 2:50 14,0 1,50
4. Ταχύ πλύσιμο και
στέγνωμα 50° 1:25 11,5 1,10
5. Κρύσταλλα
45°
1:40 11,5 1,20
6. Γρήγορο 30’ 50° -- 0:30 9,0 0,50
7. Αθόρυβο 50° 3:30 15,0 1,15
8. ρόπλυση - - - 0:12 4,5 0,01

18
Οι ΠΙΛΟΓ Σ μπορούν να γίνουν πιέζοντας απευθείας το αντίστοιχο κουμπί στον ( λ. ΠΙΝΑΚΑΣ ΕΛΕΓΧΟΥ). Αν μια επιλογή δεν είναι συμβατή με το επιλεγμέ-
νο πρόγραμμα λ. ΠΙΝΑΚΑΣ ΠΡΟΓΡΑΜΜΑΤΩΝ, το αντίστοιχο LED αναβοσβήνει γρήγορα 3 φορές και ακούγονται ήχοι μπιπ. Η επιλογή δεν θα ενεργοποιηθεί.
Ε ΙΛΟΓΕΣ ΚΑΙ ΛΕΙΤΟΥΡΓΙΕΣ
ΚΑΘΥΣΤΕΡΗΣΗ
Η έναρξη του προγράμματος μπορεί να καθυστερήσει για μια
χρονική περίοδο ανάμεσα σε 0:30 και 24 ώρες.
1. πιλέξτε το πρόγραμμα και οποιαδήποτε επιλογή θέλετε. Πατήστε
το κουμπί ΚΑΘΥΣΤ ΡΗΣΗ (επανειλημμένα) για να καθυστερήσετε
την έναρξη του προγράμματος. Μπορεί να ρυθμιστεί από 0:30 έως
24 ώρες. Με κάθε πίεση του κουμπιού, η έναρξη καθυστέρησης
αυξάνει κατά: 0:30 αν η επιλογή είναι λιγότερο από 4 ώρες, 1:00 αν
η επιλογή είναι λιγότερο από 12 ώρες, 4 ώρες αν η επιλογή είναι
περισσότερο από 12 ώρες. Αν επιτευχθούν οι 24 ώρες, και το κουμπί
είναι πατημένο, η έναρξη καθυστέρησης απενεργοποιείται.
2. Πιέστε το κουμπί ΝΑΡΞΗ/ΠΑΥΣΗ: ο χρονοδιακόπτης ξεκινάει την
αντίστροφη μέτρηση.
3. Μόλις περάσει αυτό το χρονικό διάστημα, η ενδεικτική λυχνία σβήνει
και το πρόγραμμα ξεκινάει αυτόματα.
Αν κατά τη διάρκεια αντίστροφης μέτρησης πιεστεί ξανά το κουμπί
ΝΑΡΞΗ/ΠΑΥΣΗ η επιλογή ΚΑΘΥΣΤ ΡΗΣΗΣ ακυρώνεται και το
επιλεγμένο πρόγραμμα ξεκινάει αυτόματα.
Η λειτουργία ΚΑΘΥΣΤΕΡΗΣΗΣ δεν μπορεί να ρυθμιστεί όταν το
πρόγραμμα έχει ξεκινήσει.
ΟΛΥΖΩΝΙΚΗ ΛΕΙΤΟΥΡΓΙΑ
Αν δεν είναι αρκετά τα πιάτα που πρέπει να πλυθούν, μπορεί να
χρησιμοποιηθεί το «μισό φορτίο» για να εξοικονομηθεί νερό, ηλεκτρικό
ρεύμα και απορρυπαντικό.
πιλέξτε το πρόγραμμα και στη συνέχεια πιέστε το κουμπί ΠΟΛΥΖΩΝΙΚΗ
Λ ΙΤΟΥΡΓΙΑ: η ένδειξη πάνω στο κουμπί ανάβει. Ως προεπιλογή, η
συσκευή πλένει τα πιάτα σε όλα τα καλάθια.
Για να πλύνετε μόνο σε ένα συγκεκριμένο καλάθι, πιέστε το κουμπί
επανειλημμένα:
Το εμφανίζεται στην οθόνη (μόνο το κάτω καλάθι)
Το εμφανίζεται στην οθόνη (μόνο το επάνω καλάθι)
Το εμφανίζεται στην οθόνη (η επιλογή είναι OFF και το πλύσιμο
στη συσκευή θα γίνει σε όλα τα καλάθια).
Θυμηθείτε να φορτώσετε το επάνω ή το κάτω καλάθι μόνο και να
μειώσετε ανάλογα την ποσότητα απορρυπαντικού.
Αν αφαιρεθεί το επάνω καλάθι, ρίξτε απορρυπαντικό απευθείας
στον σωλήνα και όχι στη θήκη απορρυπαντικού.
.........................................................................
CoolDry
CoolDry είναι ένα σύστημα στεγνώματος με αέρα το οποίο ανοίγει
αυτόματα την πόρτα κατά τη διάρκεια/μετά τη φάση στεγνώματος
προκειμένου να διασφαλίζεται εξαιρετική απόδοση στεγνώματος κάθε
ημέρα. Η πόρτα ανοίγει σε θερμοκρασία που είναι ασφαλής για τα έπιπλα
της κουζίνας, έτσι η πόρτα δεν θα ανοίξει όταν είναι ενεργοποιημένη η
επιλογή Ξ ΠΛΥΜΑ SANI.
Ως επιπλέον προστασία από τον ατμό, προστίθεται ένα ειδικά
σχεδιασμένο φύλλο προστασίας στο πλυντήριο πιάτων (ανάλογα με
τον τύπο μοντέλου - μπορεί να χρειάζεται να το αγοράσετε). Για την
τοποθέτηση του φύλλου προστασίας από τον ατμό, ανατρέξτε στον
(ΟΔΗΓΟΣ ΓΚΑΤΑΣΤΑΣΗΣ).
Η λειτουργία CoolDry μπορεί να απενεργοποιηθεί από τον χρήστη ως εξής:
• Για ΑΠ Ν ΡΓΟΠΟΙΗΣΗ: νεργοποιήστε και στη συνεχεία
απενεργοποιήστε τη συσκευή. Κρατήστε πατημένο το κουμπί Ρ για 5
δευτ., μετά από τα 5 δευτ. το πλυντήριο πιάτων εκπέμπει έναν σύντομο
ήχο μπιπ. νεργοποιήστε τη συσκευή, στην οθόνη εμφανίζεται η
ένδειξη „oOF”.
• Για Ν ΡΓΟΠΟΙΗΣΗ: νεργοποιήστε και στη συνεχεία απενεργοποιήστε
τη συσκευή. Κρατήστε πατημένο το κουμπί Ρ για 5 δευτ., μετά από
τα 5 δευτ. το πλυντήριο πιάτων εκπέμπει έναν σύντομο ήχο μπιπ.
νεργοποιήστε τη συσκευή, στην οθόνη εμφανίζεται η ένδειξη „oOn”.
. . . . . . . . . . . . . . . . . . . . . . . . . . . . . . . . . . . . . . . . . . . . . . . . . . . . . . . . . . . . . . . . . . . . . . . . .
ΚΛΕΙΔΩΜΑ ΛΗΚΤΡΩΝ
Μια παρατεταμένη πίεση (για 3 δευτερόλεπτα) του κουμπιού
ΠΟΛΥΖΩΝΙΚΗ Λ ΙΤΟΥΡΓΙΑ, ενεργοποιεί τη λειτουργία ΚΛ ΙΔΩΜΑΤΟΣ
ΠΛΗΚΤΡΟΛΟΓΙΟΥ. Η λειτουργία ΚΛ ΙΔΩΜΑ ΠΛΗΚΤΡΩΝ μπλοκάρει τον
πίνακα ελέγχου εκτός από το κουμπί ON/OFF. Για απενεργοποίηση του
ΚΛ ΙΔΩΜΑΤΟΣ ΠΛΗΚΤΡΩΝ, πατήστε ξανά παρατεταμένα.
. . . . . . . . . . . . . . . . . . . . . . . . . . . . . . . . . . . . . . . . . . . . . . . . . . . . . . . . . . . . . . . . . . . . . . . . .
ΑΡΟΧΗ ΝΕΡΟΥ ΚΛΕΙΣΤΗ – Συναγερμός
Αναβοσβήνει όταν δεν εισέρχεται νερό ή όταν η παροχή νερού
είναι κλειστή.
. . . . . . . . . . . . . . . . . . . . . . . . . . . . . . . . . . . . . . . . . . . . . . . . . . . . . . . . . . . . . . . . . . . . . . . . .
ΞΕ ΛΥΜΑ SANI
Η επιλογή αυτή μπορεί να χρησιμοποιηθεί για την
απολύμανση πλυμένων πιάτων.
Αυξάνει την τελική θερμοκρασία ξεπλύματος και προσθέτει την
αντιβακτηριδιακή πλύση στο επιλεγμένο πρόγραμμα.
πιλέξτε το πρόγραμμα πλυσίματος, πιέστε το κουμπί Ξ ΠΛΥΜΑ
SANI, ανάβει η ενδεικτική λυχνία. Πατήστε το ίδιο κουμπί ξανά
για να ακυρώσετε την επιλογή. Ιδανικό για καθαρισμό οικιακών
σκευών και μπιμπερό. Η πόρτα του πλυντηρίου πιάτων πρέπει
να παραμείνει κλειστή σε όλη τη διάρκεια του προγράμματος
προκειμένου να διασφαλιστεί η μείωση των βακτηρίων. άν ανοίξει
η πόρτα, αρχίζει να αναβοσβήνει η ένδειξη.
ΡΟΕΙΔΟ ΟΙΗΣΗ: τα οικιακά σκεύη και τα πιάτα μπορεί να είναι
εξαιρετικά ζεστά στο τέλος του κύκλου.
. . . . . . . . . . . . . . . . . . . . . . . . . . . . . . . . . . . . . . . . . . . . . . . . . . . . . . . . . . . . . . . . . . . . . . . . .
ΤΑΜ ΛΕΤΑ (Tab)
Η ρύθμιση αυτή παρέχει τη δυνατότητα βελτιστοποίησης της
απόδοσης των προγραμμάτων ανάλογα με τον τύπο απορρυπαντικού
που χρησιμοποιείται.
Πιέστε το κουμπί Ξ ΠΛΥΜΑ SANI (η ενδεικτική λυχνία ανάβει / το
αντίστοιχο σύμβολο ανάβει) αν χρησιμοποιείτε απορρυπαντικά
συνδυασμένης δράσης σε μορφή ταμπλέτας (λαμπρυντικό, αλάτι και
απορρυπαντικό σε 1 δόση).
Αν χρησιμοποιείτε σκόνη ή υγρό απορρυπαντικό, η επιλογή αυτή
πρέπει να είναι απενεργοποιημένη.
.........................................................................
ΕΚΡΟΉΣ ΝΕΡΟΎ
Για να σταματήσετε και να ακυρώσετε τον τρέχοντα κύκλο,
μπορείτε να χρησιμοποιήσετε τη λειτουργία «Απάντληση».
Μια παρατεταμένη πίεση του κουμπιού ΝΑΡΞΗ/ΠΑΥΣΗ ενεργοποιεί
τη λειτουργία ΚΡΟΉΣ Ν ΡΟΎ. Το ενεργό πρόγραμμα διακόπτεται και
γίνεται απάντληση του νερού στο πλυντήριο πιάτων.

19
EL
ΓΕΜΙΣΜΑ ΚΑΛΑΘΙΩΝ
Τοποθετήστε ευαίσθητα και
ελαφριά σκεύη: ποτήρια, φλυτζάνια,
πιατάκια, μικρά μπολ σαλάτας.
(παράδειγμα γεμίσματος επάνω καλαθιού)
. . . . . . . . . . . . . . . . . . . . . . . . . . . . . . . . . . . . . . . . . . . . . . . . . . . . . . . . . . . . . . . . . . . . . . . . .
ΑΝΑΔΙ ΛΟΥΜΕΝΑ ΤΕΡΥΓΙΑ ΜΕ ΡΥΘΜΙΖΟΜΕΝΗ ΘΕΣΗ
Αυτά τα πλευρικά αναδιπλούμενα
περύγια μπορούν να διπλωθούν και να
ξεδιπλωθούν προκειμένου να βελτιώσουν
την τακτοποίηση των σκευών στο ράφι.
Ποτήρια κρασιού μπορούν να
τοποθετηθούν με ασφάλεια στα
αναδιπλούμενα πτερύγια εισάγοντας
το στέλεχος κάθε ποτηριού στις
αντίστοιχες υποδοχές.
Ανάλογα με το μοντέλο:
– για να ξεδιπλώσετε τα πτερύγια
πρέπει να τα σύρετε επάνω και να τα
περιστρέψετε ή να τα ελευθερώσετε από τι κλιπ και να τραβήξετε
προς τα κάτω.
– για να διπλώσετε τα πτερύγια πρέπει να τα περιστρέψετε και να τα
σύρετε προς τα κάτω ή να τα τραβήξτε επάνω και να συνδέσετε τα
πτερύγια στα κλιπ.
ΡΥΘΜΙΣΗ ΥΨΟΥΣ ΤΟΥ Ε ΑΝΩ ΚΑΛΑΘΙΟΥ
Μπορείτε να ρυθμίσετε το ύψος του επάνω καλαθιού: επάνω θέση
για την τοποθέτηση σκευών μεγάλου όγκου στο κάτω καλάθι και
χαμηλή θέση για την πλήρη αξιοποίηση των ανακλινόμενων ραφιών
δημιουργώντας περισσότερο χώρο προς τα
επάνω και αποφυγή σύγκρουσης με τα σκεύη
που έχουν τοποθετηθεί στο κάτω καλάθι.
Το επάνω καλάθι εξοπλίζεται με ένα ρυθμιστή
ύψους επάνω καλαθιού (βλ. εικόνα), χωρίς να
πιέσετε τις λαβές, σηκώστε τον επάνω απλά
κρατώντας τα πλαϊνά του καλαθιού, μόλις το
καλάθι σταθεροποιηθεί στην επάνω θέση.
Για να το επαναφέρετε σε κάτω θέση, πιέστε
τα λεβιεδάκια A στα πλαϊνά του καλαθιού και
μετακινήστε το καλάθι προς τα κάτω.
Συνιστάται να μην ρυθμίζετε το ύψος του καλαθιού όταν αυτό είναι
γεμάτο.
ΟΤΕ μην ανυψώνετε ή κατεβάζετε το καλάθι μόνο από τη μία
πλευρά.
ΚΑΤΩ ΚΑΛΑΘΙ
Για κατσαρόλες, καπάκια, πιάτα, πιατέλες σαλάτας, μαχαιροπίρουνα, κ.τ.λ.
Η ιδανική θέση για τα μεγάλα πιάτα και τα καπάκια είναι τα πλαϊνά όπου
δεν θα παρεμβάλλονται με τον εκτοξευτήρα.
Το κάτω καλάθι διαθέτει ανακλινόμενα ράφια που μπορούν να
χρησιμοποιηθούν σε κάθετη θέση όταν τακτοποιείτε πιατάκια ή σε
οριζόντια θέση (χαμηλότερη) για την εύκολη τοποθέτηση τηγανιών
και σαλατιέρων.
(παράδειγμα γεμίσματος του κάτω καλαθιού))
ΚΑΛΑΘΙ ΓΙΑ ΜΑΧΑΙΡΟ ΙΡΟΥΝΑ
Το ρυθμιζόμενο καλάθι εξοπλίζεται με
γρίλιες επάνω για να τακτοποιούνται
καλύτερα τα μαχαιροπίρουνα. Το
καλάθι για μαχαιροπίρουνα πρέπει
να τοποθετείται μόνο στη μπροστινή
πλευρά του κάτω καλαθιού.
Τα μαχαίρια και άλλα εργαλεία
κουζίνας με μυτερά άκρα πρέπει
να τοποθετούνται στο καλάθι για
μαχαιροπίρουνα με το μυτερό
άκρο προς τα κάτω ή πρέπει να
τοποθετούνται οριζόντια στα αναδιπλούμενα ράφια του επάνω
καλαθιού.
Ε ΑΝΩ ΚΑΛΑΘΙ

20
ΣΚΕΥΗ
Πριν γεμίσετε τα καλάθια, καθαρίστε όλα τα υπολείμματα τροφών από
τα οικιακά σκεύη και αδειάστε τα ποτήρια. Δεν είναι απαραίτητο να τα
ξεπλύνετε με τρεχούμενο νερό.
Τακτοποιήστε τα σκεύη με τρόπο ώστε να διατηρηθούν σταθερά στη θέση
τους και δεν θα αναποδογυρίσουν, τακτοποιήστε τα δοχεία με το άνοιγμα
προς τα κάτω και τα κυρτά/κοίλα μέρη τοποθετημένα πλάγια, επιτρέποντας
έτσι στο νερό να φτάσει σε κάθε επιφάνεια και να ρέει ελεύθερα.
ροειδοποίηση: καπάκια, χειρολαβές, δίσκοι και τηγάνια δεν πρέπει να
εμποδίζουν την περιστροφή των εκτοξευτήρων.
Τοποθετήστε τα μικρά σκεύη στο καλάθι για μαχαιροπίρουνα. Τα πολύ
λερωμένα σκεύη και τηγάνια πρέπει να τοποθετούνται στο κάτω καλάθι
γιατί σε αυτό το τμήμα η εκτόξευση του νερού είναι πιο δυνατή και με
μεγαλύτερη απόδοση στο πλύσιμο. μετά το γέμισμα της συσκευής,
βεβαιωθείτε ότι οι εκτοξευτήρες μπορούν να περιστρέφονται ελεύθερα.
. . . . . . . . . . . . . . . . . . . . . . . . . . . . . . . . . . . . . . . . . . . . . . . . . . . . . . . . .
ΑΚΑΤΑΛΛΗΛΑ ΣΚΕΥΗ
Τα στοιχεία που δεν πλένονται στο πλυντήριο πιάτων:
• Ξύλινα πιάτα, δοχεία ή τηγάνια: μπορεί να καταστραφεί από την
υψηλή θερμοκρασίες πλύσης.
• Χειροποίητα στοιχεία: σπάνια είναι κατάλληλα για πλύσιμο σε ένα
πλυντήριο πιάτων. Οι σχετικά υψηλές θερμοκρασίες νερού και το
απορρυπαντικά μπορεί να τα βλάψουν.
• Πλαστικά πιάτα: αυτά δεν είναι ανθεκτικό στη θερμότητα και μπορεί
να χάσουν το σχήμα τους. ανθεκτικό στη θερμότητα πλαστικά πιάτα
πρέπει να πλυθούν στο επάνω καλάθι.
• Πιάτα και αντικείμενα από χαλκό, κασσίτερο, ψευδάργυρο ή ορεί-
χαλκο: τείνουν να λεκιάζουν.
• Πιάτα αλουμινίου: τα στοιχεία από αλουμίνιο μπορεί να χάσουν το
χρώμα τους.
• Ασημικά: τα ασημένια στοιχεία μπορεί να λεκιάσουν.
• Γυαλί και κρύσταλλα: γενικά, γυάλινα και κρυστάλλινα αντικείμενα μπο-
ρούν να πλένονται στο πλυντήριο πιάτων. Ωστόσο, ορισμένα είδη από
γυαλί και κρυστάλλων μπορεί να θαμπώσουν και να χάσουν την καθαρό-
τητά τους μετά από πολλές πλυσίματα. Ως εκ τούτου, για αυτά τα στοιχεία
συστήνουμε τη χρήση του τουλάχιστον επιθετικό πρόγραμμα διαθέσιμο.
• Διακοσμητικά: τα διακοσμητικά αντικείμενα που διατίθενται στην αγορά
είναι γενικά σε θέση να αντέχουν σε πλύσιμο στο πλυντήριο πιάτων, αν
και τα χρώματα μπορούν να εξασθενίσουν μετά από πολλά πλυσίματα.
Αν το αμφιβολία ως προς τη σταθερότητα των χρωμάτων, είναι σκόπιμο
να πλένετε μόνο ένα λίγα τεμάχια τη φορά και για περίπου έναν μήνα.
ΥΓΙΕΙΝΗ
Για να αποφύγετε τις οσμές και τις επικαθίσεις που μπορεί να συσσωρεύονται στο
πλυντήριο πιάτων, ενεργοποιήστε ένα πρόγραμμα υψηλής θερμοκρασίας
τουλάχιστον μία φορά το μήνα.
Χρησιμοποιήστε ένα κουταλάκι απορρυπαντικού και λειτουργήστε το χωρίς
να γεμίσετε ώστε να καθαρίσει η συσκευή.
. . . . . . . . . . . . . . . . . . . . . . . . . . . . . . . . . . . . . . . . . . . . . . . . . . . . . . . . .
ΣΥΜΒΟΥΛΕΣ ΓΙΑ ΤΗΝ ΕΞΟΙΚΟΝΟΜΗΣΗ ΕΝΕΡΓΕΙΑΣ
• Όταν το οικιακό πλυντήριο πιάτων χρησιμοποιείται σύμφωνα με τις
οδηγίες του κατασκευαστή, η κατανάλωση ΕΝΕΡΓΕΙΑΣ και νερού
κατά το πλύσιμο των επιτραπέζιων σκευών σε ένα πλυντήριο
πιάτων είναι συνήθως μικρότερη από το πλύσιμο στο χέρι.
• Προκειμένου να μεγιστοποιηθεί η αποτελεσματικότητα του
πλυντηρίου πιάτων, συνιστάται η έναρξη του κύκλου πλύσης
όταν το πλυντήριο πιάτων είναι εντελώς γεμάτο. Η φόρτωση
του οικιακού πλυντηρίου πιάτων μέχρι την προβλεπόμενη από
τον κατασκευαστή χωρητικότητα θα συμβάλει στην εξοικονόμηση
ενέργειας και νερού. Πληροφορίες σχετικά με τη σωστή φόρτωση
των επιτραπέζιων σκευών μπορείτε να βρείτε στο κεφάλαιο
ΦΟΡΤΩΣΗ ΚΑΛΑΘΙΩΝ.Σε περίπτωση μερικής φόρτωσης, συνιστάται
η χρήση ειδικών επιλογών πλύσης, εφόσον υπάρχουν (Multizone),
για την πλήρωση μόνο επιλεγμένων καλαθιών. Η λανθασμένη
φόρτωση ή η υπερφόρτωση του πλυντηρίου πιάτων μπορεί να
αυξήσει τη χρήση πόρων (όπως το νερό, την ενέργεια και το χρόνο,
καθώς και να αυξήσει τον θόρυβο), μειώνοντας την απόδοση
καθαρισμού και στεγνώματος.
• Το ξέπλυμα στο χέρι των επιτραπέζιων ειδών πριν από την
τοποθέτηση στο πλυντήριο πιάτων οδηγεί σε αυξημένη
κατανάλωση νερού και ενέργειας και δεν συνιστάται.
. . . . . . . . . . . . . . . . . . . . . . . . . . . . . . . . . . . . . . . . . . . . . . . . . . . . . . . . .
ΖΗΜΙΑ ΣΤΑ ΓΥΑΛΙΝΑ ΚΑΙ ΤΑ ΣΚΕΥΗ
• Χρησιμοποιείτε μόνο γυάλινα αντικείμενα και πορσελάνη που
διασφαλίζεται από τον κατασκευαστή ότι είναι κατάλληλα για
πλύσιμο σε πλυντήριο πιάτων.
• Χρησιμοποιείτε ήπιο απορρυπαντικό κατάλληλο για οικιακά σκεύη
• Αφαιρέστε τα γυάλινα αντικείμενα και τα σκεύη από το πλυντήριο
πιάτων αμέσως μόλις ολοκληρωθεί ο κύκλος πλύσης.
ΑΛΛΑΓΗ ΤΡΕΧΟΝΤΟΣ ΡΟΓΡΑΜΜΑΤΟΣ
Αν έχετε επιλέξει λάθος πρόγραμμα, μπορείτε να το αλλάξετε εφόσον
έχει μόλις αρχίσει: κρατήστε πατημένο το κουμπί ON/OFF, η συσκευή
απενεργοποιείται. νεργοποιήστε ξανά τη συσκευή με το κουμπί
ON/OFF και επιλέξτε το νέο κύκλο πλύσης και τις λειτουργίες που
επιθυμείτε. Ξεκινήστε τον κύκλο. Πιέζοντας το κουμπί ΝΑΡΞΗ/ΠΑΥΣΗ.
. . . . . . . . . . . . . . . . . . . . . . . . . . . . . . . . . . . . . . . . . . . . . . . . . . . . . . . . .
ΡΟΣΘΗΚΗ Ε Ι ΛΕΟΝ ΣΚΕΥΩΝ
Χωρίς να απενεργοποιήσετε τη συσκευή, ανοίξτε την πόρτα (προσέξτε
τον ΚΑΥΤΟ ΑΤΜΟ!) και τοποθετήστε τα οικιακά σκεύη στο πλυντήριο
πιάτων. Κλείστε την πόρτα και πατήστε το κουμπί ΝΑΡΞΗ/ΠΑΥΣΗ,
ο κύκλος
θα ξεκινήσει από το σημείο στο οποίο τον διακόψατε.
. . . . . . . . . . . . . . . . . . . . . . . . . . . . . . . . . . . . . . . . . . . . . . . . . . . . . . . . .
ΤΥΧΑΙΑ ΔΙΑΚΟ Η
Αν ανοίξει η πόρτα κατά τη διάρκεια του κύκλου πλύσης ή αν γίνει
διακοπή ρεύματος, ο κύκλος διακόπτεται. Μόλις κλείσει ξανά η πόρτα
ή επανέλθει το ηλεκτρικό ρεύμα, για να ξεκινήσει πάλι ο κύκλος από το
σημείο που διακόπηκε, πατήστε το κουμπί ΝΑΡΞΗ/ΠΑΥΣΗ.
. . . . . . . . . . . . . . . . . . . . . . . . . . . . . . . . . . . . . . . . . . . . . . . . . . . . . . . . .
Για να απενεργοποιήσετε τη ΛΕΙΤΟΥΡΓΊΑ Ε ΊΔΕΙΞΗΣ πρέπει
να κάνετε τις ακόλουθες ενέργειες με τη σειρά, χωρίς διακοπές.
Ανάψτε (ΟΝ) και σβήστε (OFF) πάλι τη συσκευή. Πατήστε το κουμπί
ΚΑΘΥΣΤ ΡΗΣΗ έως ότου ακούσετε τον βομβητή. νεργοποιήστε πάλι
τη συσκευή. Η ένδειξη “dOF” αναβοσβήνει και μετά σβήνει (OFF).
ΛΗΡΟΦΟΡΙΕΣ ΚΑΙ ΣΥΜΒΟΥΛΕΣ
1. ΕΛΕΓΞΤΕ ΤΗ ΣΥΝΔΕΣΗ ΝΕΡΟΥ
Βεβαιωθείτε ότι η συσκευή συνδέεται στο δίκτυο ύδρευσης και ότι
η βάνα παροχής νερού είναι ανοιχτή.
2. ΕΝΕΡΓΟ ΟΙΗΣΤΕ ΤΟ ΛΥΝΤΗΡΙΟ ΙΑΤΩΝ
Ανοίξτε την πόρτα και πιέστε το κουμπί ON/OFF.
3. ΓΕΜΙΣΤΕ ΤΑ ΚΑΛΑΘΙΑ ( λ. ΓΕΜΙΣΜΑ ΚΑΛΑΘΙΩΝ)
4. ΛΗΡΩΣΗ ΤΟΥ ΔΟΧΕΙΟΥ Α ΟΡΡΥ ΑΝΤΙΚΟΥ
5. Ε ΙΛΕΞΤΕ ΡΟΓΡΑΜΜΑ ΚΑΙ ΡΟΣΑΡΜΟΣΤΕ ΤΟΝ ΚΥΚΛΟ
πιλέξτε το καταλληλότερο πρόγραμμα ανάλογα με τον τύπο
οικιακών σκευών και το επίπεδο στο οποίο είναι λερωμένα (βλ.
Π ΡΙΓΡΑΦΗ ΠΡΟΓΡΑΜΜΑΤΩΝ) πιέζοντας το κουμπί P. Κάντε τις
επιθυμητές επιλογές (βλ. ΠΙΛΟΓ Σ ΚΑΙ Λ ΙΤΟΥΡΓΙ Σ).
6. ΕΝΑΡΞΗ
κκινήστε τον κύκλο πλύσης πατώντας το κουμπί ΈΝΑΡΞΗ/ΠΑΎΣΗ.
Όταν ξεκινήσει το πρόγραμμα θα ακούσετε ένα μπιπ.
7. ΤΕΛΟΣ ΚΥΚΛΟΥ ΛΥΣΗΣ
Το τέλος του κύκλου πλύσης επισημαίνεται με ήχους μπιπ και
στην οθόνη εμφανίζεται η ένδειξη END. Ανοίξτε την πόρτα και
απενεργοποιήστε τη συσκευή πιέζοντας το κουμπί ON/OFF.
Περιμένετε μερικά λεπτά πριν αφαιρέσετε τα σκεύη για να
αποφύγετε εγκαύματα. Βγάλτε τα καλάθια, ξεκινώντας από το κάτω.
Η συσκευή απενεργοποιείται αυτόματα κατά τη διάρκεια περιόδων
αδράνειας, προκειμένου να μειώσει την κατανάλωση ρεύματος.
Αν τα οικιακά σκεύη είναι μόνο ελαφρώς λερωμένα ή τα έχετε
ξεπλύνει με νερό πριν τα βάλετε στο πλυντήριο πιάτων, μειώστε
ανάλογα την ποσότητα απορρυπαντικού.
ΚΑΘΗΜΕΡΙΝΗ ΧΡΗΣΗ
Table of contents
Languages:
Other Franke Dishwasher manuals

Franke
Franke FDW 614 D7P A++ Setup guide

Franke
Franke FCDW60FS Manual

Franke
Franke FDW 614 D6P DOS E User manual

Franke
Franke FDW 614 D7P DOS A++ User manual

Franke
Franke FRDW60FS User manual

Franke
Franke FDW 614 D7P DOS A++ User manual

Franke
Franke FDW 613 E5P F User manual

Franke
Franke FDW 614 D10P User manual

Franke
Franke URBAN FCDW60SI Manual

Franke
Franke FDW 4510 E8P E Firmware update