manuals.online logo
Brands
  1. Home
  2. •
  3. Brands
  4. •
  5. Franke
  6. •
  7. Oven
  8. •
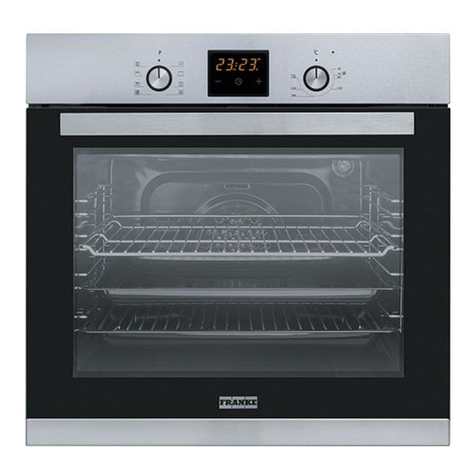
  9. Franke DM 97 M Operation manual

Franke DM 97 M Operation manual

This manual suits for next models

3

Other Franke Oven manuals

Franke FMY 98 P User manual

Franke

Franke FMY 98 P User manual

Franke GN 86 M H XS User manual

Franke

Franke GN 86 M H XS User manual

Franke AX 97 M Operation manual

Franke

Franke AX 97 M Operation manual

Franke CM 981 M User manual

Franke

Franke CM 981 M User manual

Franke CM 981 M User manual

Franke

Franke CM 981 M User manual

Franke SMART HYDRO FSM 86 H BK Original instructions

Franke

Franke SMART HYDRO FSM 86 H BK Original instructions

Franke FRE90M10B Quick start guide

Franke

Franke FRE90M10B Quick start guide

Franke HPP-960 User manual

Franke

Franke HPP-960 User manual

Franke DESIGN CHEF DC72MXS User manual

Franke

Franke DESIGN CHEF DC72MXS User manual

Franke FSL 86 C User manual

Franke

Franke FSL 86 C User manual

Franke FMXO 86 M Operation manual

Franke

Franke FMXO 86 M Operation manual

Franke FSM 82 HE XS User manual

Franke

Franke FSM 82 HE XS User manual

Franke FSL 52 H User manual

Franke

Franke FSL 52 H User manual

Franke FMW 250 G XS User manual

Franke

Franke FMW 250 G XS User manual

Franke MARIS FREE User manual

Franke

Franke MARIS FREE User manual

Franke FRE60M5B User manual

Franke

Franke FRE60M5B User manual

Franke CL 85 M User manual

Franke

Franke CL 85 M User manual

Franke Frames FS 913 P BK DC TFT AUS User manual

Franke

Franke Frames FS 913 P BK DC TFT AUS User manual

Franke TL 62 M User manual

Franke

Franke TL 62 M User manual

Franke FSO 45 FS User manual

Franke

Franke FSO 45 FS User manual

Franke FMY 99 P User manual

Franke

Franke FMY 99 P User manual

Franke FMW 45 FS User manual

Franke

Franke FMW 45 FS User manual

Franke FMY 45 MW XS Original instructions

Franke

Franke FMY 45 MW XS Original instructions

Franke FMO 46 CS 9T1 XS User manual

Franke

Franke FMO 46 CS 9T1 XS User manual

Popular Oven manuals by other brands

Brandt FC 222 user manual

Brandt

Brandt FC 222 user manual

aumate TOA20M04N-1E instruction manual

aumate

aumate TOA20M04N-1E instruction manual

Maytag CWE4100AC - 24" Single Electric Wall Oven Dimension Guide

Maytag

Maytag CWE4100AC - 24" Single Electric Wall Oven Dimension Guide

Kernau KBO 1076 S PT B instruction manual

Kernau

Kernau KBO 1076 S PT B instruction manual

Bosch HB 37 N Series User manual and installation instructions

Bosch

Bosch HB 37 N Series User manual and installation instructions

Electrolux EOD5420AA user manual

Electrolux

Electrolux EOD5420AA user manual

Mx Onda MX-HC2183 instruction manual

Mx Onda

Mx Onda MX-HC2183 instruction manual

Daewoo F6EV19SM2 Service manual

Daewoo

Daewoo F6EV19SM2 Service manual

Blodgett MT3870 Specifications

Blodgett

Blodgett MT3870 Specifications

GE ZET2F owner's manual

GE

GE ZET2F owner's manual

GE JK3000DF3WW owner's manual

GE

GE JK3000DF3WW owner's manual

eka EKF 523 NT Operating and instruction manual

eka

eka EKF 523 NT Operating and instruction manual

AEG Electrolux E3191-5 user manual

AEG Electrolux

AEG Electrolux E3191-5 user manual

Pratica Rocket Express quick start guide

Pratica

Pratica Rocket Express quick start guide

Viking Professional VGSO260T user guide

Viking

Viking Professional VGSO260T user guide

FM RX203 instruction manual

FM

FM RX203 instruction manual

Bosch HBN331 9B Series instruction manual

Bosch

Bosch HBN331 9B Series instruction manual

NEFF B95M42N0MK Instructions for use

NEFF

NEFF B95M42N0MK Instructions for use

manuals.online logo
manuals.online logoBrands
  • About & Mission
  • Contact us
  • Privacy Policy
  • Terms and Conditions

Copyright 2025 Manuals.Online. All Rights Reserved.

Istruzioni per luso e linstallazione
Forno da incasso multifunzione con 9 programmi 1
Instructions for use and installation
Built-in multi-function oven with 9 cooking modes 15
Mode d'emploi et installation
Four à encastrer multifonction 9 programmes 29
Instructies voor het gebruik en installeren
Inbouwoven met 9 programma's 43
Instrucciones para el uso y la instalación
Horno empotrable multifunción con 9 programas 57
Instruções para o uso e a instalação
Forno de encaixar multifuncional com 9 programas 71
Οδηγίες χρήσης και εγκατάστασης
Πολυλειτουργικός εντοιχιζόµενος φούρνος µε 9 προγράµµατα 85
Kullanýmvemontajtalimatlarý
9programlýçokfonksiyonluankastrefýrýn
99
AX 97 M
DC 97 M
DG 96 M
DM 97 M
15
Table of contents
Introduction ..................................................................................................................................... 15
First use ........................................................................................................................................... 15
Advice ............................................................................................................................................. 15
Close-up view .................................................................................................................................. 16
How to use your appliance ................................................................................................................ 17
Suggested cooking ta le .................................................................................................................. 23
Cleaning and oven care .................................................................................................................... 24
After-Sales Service ........................................................................................................................... 25
Safety precautions ........................................................................................................................... 26
Installation ...................................................................................................................................... 27
Technical Data ................................................................................................................................. 28
Introduction
Congratulations on choosing a Franke appliance.
Before using your new appliance, we recommend you read the instructions and advice provided in this
manual. This should help your understanding of how to use the appliance and also extend its life.
Always keep this owners manual close to hand, as you may need to refer to it in future.
First use
Before cooking for the first time, you must set the temperature control kno to the highest setting and
leave the oven on for at least 40 minutes with the oven door open and the room properly ventilated.
The smell that is often detected during this procedure is due to the evaporation of products used to
protect the oven during storage and until it is installed. Once this initial step has een taken, the oven
is ready for use.
Advice
A good ha it to get into immediately is to pre-heat the oven to the desired temperature efore placing your
dishes inside it.
During cooking, never place pans or cookware directly onto the ottom of your oven. These should e placed
on the grids or oven trays provided, inserted at one of the 5 rack heights availa le; failure to o serve this
particular piece of advice could damage the enamel coating on the oven interior.
Never line the oven interior with tin foil, especially the oven ottom.
All repairs should e carried out y specialised authorised staff.
Contact your nearest after-sales service centre and request the use of original spare parts only.
Your Franke oven is coated with a special enamel layer, which is easy to clean. Another good ha it to get into
is to clean the oven often and to avoid reheating caked on grease spots and food residue from previous
uses.
All self-cleaning panels (if the oven is fitted with them) should e cleaned with soapy water (see cleaning
instructions).
N.B.: - efore you turn your oven on, read the instructions on using the timer (see page 18).
- if the oven is fitted with an automatic cooking programmer or end cooking timer, you will have to select the
manual option identified y the sym ol to use the oven manually.
16
Close-up view
DM97M
DG96M
DC97M AX97M
Control Panel
Selector knob
Use this kno to select the oven operating
mode depending on the type of cooking
required. Set the kno onto any of the
cooking modes and the light inside the oven
will turn on to indicate that the appliance is
on.
Timer/Programmer (see page 18)
The Franke range of ovens includes various
different cooking time control and manage-
ment systems; page 18 provides detailed
instructions for each one; just identify the
type of control fitted on your oven and read
the relevant section for the correct use of this
feature
Thermostat indicator light
Indicated y the sym ol , it informs you
that the oven heating elements are in
operation. The light turns off when the tem-
perature set has een reached, and is turned
ack on every time the oven is in a heating
phase. It is a useful aid to check that the
correct temperature has een reached efore
you place a dish in the oven.
Temperature control knob
(Thermostat)
This kno allows you to select the right tem-
perature for the dish you wish to cook,
keeping it constant during the entire cooking
process. To select the desired temperature,
turn the kno clockwise until the reference
mark coincides with the corresponding
num er. The maximum temperature is
approximately 260°C.
O en rack guides
These are designed to help in the correct
positioning of the grids and oven trays in the
5 rack heights availa le (from 1 to 5 from
the ottom up); the suggested cooking ta le
(on page 23) provides a suggestion for the
ideal position of these accessories
depending on the dish and cooking mode.
O en tray
It is usually used to catch any fat and/or
grease dripping from food placed directly on
the grid or to cook food directly; when not in
use, the oven tray should e removed from
the oven for cooking. The oven tray is made
of type AA enamelled steel for use with
food products.
Grids
These are used as a support for your cake
tins, terrine dishes and any cookware other
than the oven tray provided, or when cooking
in the grill or ventilated grill modes to grill
meat and fish or to toast read and the like.
17
How to use your appliance
This oven com ines the advantages of traditional convection ovens with those of the more modern fan
assisted models. It is a highly versatile appliance that allows you to choose easily and safely etween 9
different cooking modes. Use kno s (B) and (E) on the control panel to pick one of the cooking modes
availa le and to set the desired temperature. We recommend you consult the suggested cooking ta le on
page 23 for the est use of your new oven.
Cooling fan
In order to cool down the door, control panel and sides of the appliance, this Franke oven is fitted with a
cooling fan which turns on automatically when the oven is hot. When the fan is on, a normal flow of air can e
heard exiting etween the oven door and the control panel. Special attention has een paid to ensure the
speed of the air flow does not distur you while cooking and to make sure it is as silent as possi le.
To protect the surrounding furniture cabinets, when cooking is complete, the fan stays on until the o en has
cooled down sufficiently.
The oven light
This sym ol is turned on when the light inside the oven is turned on, which has no effect whatsoever on the
oven heating.
It is especially useful for cleaning the oven when the same is turned off as it illuminates the appliance
interior to aid you in the cleaning task.
Cooking modes
Defrosting
Set the kno to the sym ol ( ) to ena le the defrosting mode.
In this mode, the air circulated y the motor action throughout the interior of the oven affects the food and
speeds up the natural thawing process.
Convection mode
The thermostat knob (E) should be set to between 50°C and Max (260°C).
The oven is heated oth from a ove (top heating element) and from elow ( ottom heating element). This is
the traditional cooking mode that allows food to e cooked evenly, using one rack height only.
Fan assisted mode
The thermostat knob (E) should be set to between 50°C and Max (260°C).
The top and ottom heating elements are turned on, as well as the fan inside the oven. Compared with the
previous cooking mode (convection), an even more even distri ution of heat is o tained thanks to the fan,
and 2 different rack heights can e used at the same time.
Ventilated mode
The thermostat knob (E) should be set to between 50°C and Max (260°C).
The circular heating element and the fan are turned on. The constant even heat cooks and rowns food
uniformly over its entire surface. With this mode, you can also cook various dishes at the same time, as long
as their respective cooking temperatures are the same. This is the most delicate of the ventilated modes
available in this Franke oven, and is ideal for baking cakes and pastries in general, as it allows you to
cook on three different rack heights simultaneously.
Multi power ventilated mode
The thermostat knob (E) should be set to between 50°C and Max (260°C).
The circular heating element is turned on, accompanied y the partial action of the top and ottom heating
elements and the fan. Compared with the previous cooking mode, it is more powerful and quicker to reach
the desired temperature; this, together with the uniform distri ution of the heat, makes it ideal for cooking
meat roasts and fish as well as pasta akes, using up to 3 different rack heights.
18
Quick cooking pizza mode
The thermostat knob (E) should be set to between 50°C and Max (260°C).
The circular heating element, along with the top and ottom heating elements and the fan are turned on.
This is the most powerful cooking mode availa le in your Franke oven, and the heat distri ution was especially
designed to perform a prevalent action towards the ottom; this makes it ideal for the preparation of pizzas
and for cooking frozen food quickly. It can e used to reach the desired temperature quickly, and then select
any of the other cooking modes availa le.
Oven ceiling fan cooking
The thermostat knob (E) should be set to between 50°C and max (260°C).
The top heating element (ceiling) and the fan will start up. The low power and the fan action ena le a delica-
te and even cooking process,which is ideal for aking cakes and for some types of aked pasta.
Grill mode
The thermostat knob (E) should normally be set to the Max setting (260°C), howe er you can choose
a lower setting, in which cased the grilling would be slower.
The grill heating element situated at the top of the oven is tuned on. In this case, the quick rowning of the
surface via infrared rays keeps the inside of the meat soft and tender; the grill mode can also e used to
toast up to 9 slices of read very quickly. Your Franke oven is perfectly safe, and has een designed for
grilling food with the oven door completely shut. However, during cooking, the oven door can e kept either
fully open or ajar, using the half-open position.
Warning: the grill heating element ecomes extremely hot during operation; try to avoid touching it
inadvertently when handling the food to e grilled; however, Franke has designed a special shape of the
oven front to protect the users hands as much as possi le.
Ventilated grill mode
The thermostat knob (E) should normally be set to the Max setting (260°C), howe er you can choose
a lower setting, in which cased the grilling would be slower.
The grill heating element situated at the top of the oven is tuned on, along with the fan. This com ination of
features increases the effectiveness of the unidirectional thermal radiation of the heating elements through
forced circulation of the air throughout the oven. This helps prevent food from urning on the surface, allowing
the heat to penetrate right into it. Excellent results are achieved with ke a s made with meat and vegeta les,
sausages, ri s, lam chops, spicy chicken, quails, pork chops, etc.
End Cooking Timer Knob
The end cooking timer is a practical device that turns the oven off
automatically at a set time, ranging from one to 120 minutes.
To use the end cooking timer, the ringer must e wound up y turning
kno (C) almost one full turn clockwise; then turn it ack to the desired
time so that the num er of minutes on the kno matches the reference
mark on the panel.
When the set amount of time is up, in addition to the timer ringing, the
oven is automatically turned off.
N.B. Straight after it is turned off, and for a prolonged period of time,
the interior of the oven maintains a temperature close to that set for
cooking; so, to avoid overcooking or urning food, we recommend you
remove it from the oven as soon as cooking is complete.
Warning: to use the o en in manual mode, i.e. without using the end cooking timer, you should align the
symbol on the control panel with the reference mark on the control panel. When the o en is turned off,
the end cooking timer can be used just like a normal minute minder.
19
The electronic cooking programmer
This feature allows you to program the oven or the grill as follows:
 delayed start for a specific length of time;
 immediate start for a specific length of time;
 minute minder.
Button Functions:
: minute minder with hours and minutes
: cooking time
: end cooking time
: switch to manual mode
: set cooking time - ackward;
: set cooking time - forward.
How to set the digital clock
After the appliance has een connected to the power supply, or when the power has gone out, the clock
display will automatically reset to 0:00 and egin to link. .
 Press the utton and then set the correct time (within four seconds) using the and uttons.
Button sets the time forward.
Button sets the time ackward.
Whenever the time needs to e reset, follow this same procedure:
Manual operation of the o en
Once the correct time has een set, the programmer automatically switches to manual mode.
Note: To reset the manual mode after each "Automatic" cooking, press the and uttons.
Delayed start with set cooking time
The cooking time as well as the time at which the cooking ends must e set. Let us suppose that the display
indicates 10:00 a.m. and that we wish to cook something for 30 minutes and we want cooking to end at
13:00.
1. Turn the oven control kno to the desired cooking mode and temperature (for example: convection mode
at 200°C).
2. Press the utton and then set the desired cooking time (within four seconds) using the and
uttons. Let us suppose that we set the cooking time to 30 minutes. The display will read as follows:
Release the utton and after 4 seconds the correct time will reappear along with the sym ol and the
word AUTO.
3. Press the utton and then use the and uttons to desired end cooking time . Let us suppose
this time to e 13:00.
4. After the utton has een released, the current time will e displayed after approximately 4 seconds:
The word AUTO will light up reminding you that the cooking time and end cooking time have een
programmed in automatic mode. At this point, the oven will turn on automatically at 12:30 and then turn off
after 30 minutes. When the oven is turned on, the sym ol of a hot pan will e displayed for the entire
cooking time. At any time during the cooking process, the length of the cooking time can e displayed y
pressing utton , and the end cooking time y pressing utton .
The timer rings when cooking is complete; to turn it off, simply press any of the buttons except the
and buttons.
20
Immediate start with set cooking time
By programming the cooking time only (points 1 and 2 of the Delayed start with set cooking time section),
cooking will start up immediately.
To cancel a scheduled cooking process
Press the utton.
Minute minder function
The minute minder allows you to set a given amount of time from which the countdown egins. This feature
does not turn the oven on or off; it merely sounds when the time has elapsed.
When the utton has een pressed, the display will read as follows:
Then set the desired time using the and uttons
After the utton has een released, the countdown egins and the current time is displayed.
When the time is up, a uzzer sounds, which can e turned off y pressing any of the uttons (except the
and uttons) at this point the sym ol will also come off.
Modifying and cancelling data
 The data entered can e changed at any time y pressing the corresponding utton and the or
uttons.
 When the data for the cooking time is cancelled, the data for the end cooking time is also cancelled
automatically, and vice versa.
 If the oven has een programmed, it will not accept end cooking times which come efore the start of the
cooking process.
N.B. Straight after it is turned off, and for a prolonged period of time, the interior of the oven maintains a
temperature close to that set for cooking; so, to avoid overcooking or urning food, we recommend you
remove it from the oven as soon as cooking is complete.
Electronic oven temperature control
This feature allows you to program the oven or the grill as follows:
 delayed start for a specific length of time;
 immediate start for a specific length of time;
 minute minder.
Button Functions:
: minute minder with hours and minutes
: cooking time
: end cooking time
: switch to manual mode
: set cooking time - ackward;
: set cooking time - forward.
How to set the digital clock
After the appliance has een connected to the power supply, or when the power has gone out, the clock
display will automatically reset to 0:00 and egin to link. .
 Press the utton and then set the correct time (within four seconds) using the and uttons.
Button sets the time forward.
Button sets the time ackward.
Whenever the time needs to e reset, follow this same procedure:
Manual operation of the o en
Once the correct time has een set, the programmer automatically switches to manual mode.
Note: To reset the manual mode after each "Automatic" cooking, press the and uttons.
21
Manual operation of the o en
When a cooking mode is selected, the oven immediately starts the heating process, shown y the sym ol
of a hot pan on the display. For each cooking mode, the display suggests a recommended cooking
temperature (SEE: Suggested cooking ta le); this temperature may e changed y the user using the
kno : turn it anti-clockwise to decrease the temperature and clockwise to increase it.
The sym ol of a hot pan flashing on the display indicates that the oven is in the pre-heating stage, which
means it has not reached the desired temperature yet. When the oven reaches the desired temperature, a
" eep" will sound for two seconds and the sym ol of the hot pan will stay on permanently, to indicate the
cooking stage has egun.
Immediate start with set cooking time
Let us suppose you want to cook at 200°C for 30 minutes.
1. Turn the selector kno , the display will suggest the recommended cooking temperature; use the tempe-
rature control kno to change it if necessary.
2. Press the hot pan key and then press the and keys to set the desired cooking time, in this case
30 minutes.
Release the key, the hot pan signal will start flashing after 4 seconds to indicate the oven is pre-heating. The
countdown, however, will only start once the desired temperature has een reached (except when the grill
modes are on, in which case the countdown starts immediately, see B).
The information displayed is as follows:
A - pre-heating stage
(you can check the time set using the hot pan key and the temperature set using the and keys).
When the oven reaches the desired temperature, a " eep" will sound for two seconds and the sym ol of
the hot pan will stay on permanently, to indicate the cooking stage has egun.
B - cooking stage
/
(remaining cooking time / temperature set - alternating)
C - end of cooking
You will e informed that cooking has ended y an intermittent eeping (**) lasting one minute, which can
e silenced y pressing the key (or even the hot pan and stop keys), and the display will indicate.
The oven suspends heating automatically, the fans will stay on to avoid any heat accumulation and the oven
light will stay on so you can check cooking. However, the temperature inside the oven will remain high for
several minutes. Should you wish to continue cooking manually, press the utton to re-start the heating
process. The word AUTO will disappear and the hot pan sym ol will reappear. If on the other hand you
wish to stop altogether, set the selector kno ack to 0. The display will indicate the following for 3 seconds.
After which the display will go ack to indicating the time of day (if you want to turn off the display when the
oven is off, press the timer and hot pan keys simultaneously and the display will indicate:
then use the and keys to set this parameter to:
the display will e turned off and will only come ack on when the oven is on).
(**): the intensity of the eeping can e modified while it is emitted and for future eeping y pressing the key.
22
Delayed start with set cooking time
The cooking time as well as the time at which the cooking ends must e set. Let us suppose that it is 8:00
a.m. and that you wish to cook something for 30 minutes that will end at 1 p.m..
1. Turn the selector kno , the display will suggest the recommended cooking temperature; use the tempe-
rature control kno to change it if necessary.
2. Press the hot pan key and then press the and keys to set the desired cooking time, in this case
30 minutes.
3. Press the "stop" key and within 4 seconds use the and keys to select the time you want
cooking to end, in this case 13:00.
The display indicates:
The oven is set, and on stand- y.
If you want to check the cooking time set, press the hot pan key ; use the and keys to change it.
To check the temperature set, press the or key, turn kno to change it.
Cooking stage:
when it is time for cooking to start, the oven will operate as from point B in the paragraph a ove,
except for the cooking time countdown, which starts immediately and not when the desired temperature
has een reached. This is ecause logically speaking you would have placed the dish in the oven when you
set it. The pre-heating time is included in the cooking time.
The end cooking time clock
The figure illustrates the programmer controls; kno s 1 (L/H) and 2 (R/
H) allow for all the necessary adjustments to e made.
Knob 1
Use this kno to set the correct time. To do this, pull and turn the kno
clockwise until the correct time is displayed.
Knob 2
Use this kno to set the cooking time or to programme the oven for
manual use. To do this, turn the kno clockwise.
Manual operation of the o en
The oven can also e used manually, i.e. without any programming. In
this case, turn kno 2 of the programmer clockwise until the sym ol
corresponds with the marker on the control kno .
Semi-automatic operation of the o en
Normal cooking start with programmed cooking end:
prepare your dish; turn kno 2 clockwise and set the expected minutes for the end cooking time on the dial
(Q); turn the selector kno to the chosen setting and the thermostat kno to the desired temperature. The
oven starts immediately. When the set amount of time is up, in addition to the timer ringing, the oven is
automatically turned off. To silence the uzzer, turn the clock ack to   or manual mode y turning kno 2.
N.B.Straight after it is turned off, and for a prolonged period of time, the interior of the oven maintains a
temperature close to that set for cooking; so, to avoid overcooking or urning food, we recommend you
remove it from the oven as soon as cooking is complete.
Minute minder
The clock may e used as a minute minder only if the oven is not in operation.
To operate the minute minder, turn kno 2 clockwise until the desired time is displayed on the dial (Q). The
maximum amount of time that can e set is 180 minutes. To silence the uzzer, turn kno 2 clockwise until
the sym ol In this case, turn kno 2   corresponds with the marker on the control kno .
Important
To use the oven in manual mode, (i.e. without any programming), the following steps are necessary:
 Turn kno 2 of the programmer clockwise until the sym ol corresponds with the marker on the
control kno .
23
Suggested cooking table
4FMFDUPSLOPC
TFUUJOH 5ZQFPGGPPE 8FJHIU
JOLH 3BDLIFJHIU 1SFIFBUJOHUJNF
NJO 5IFSNPTUBU
LOPCTFUUJOH $PPLJOH
UJNF NJO
$POWFDUJPONPEF 0ORKÍROASTS
/MELETTES
#OD3EAÍBREAM4URBOT
0LAINÍ"READ
0IES
&RESHWATERÍFISH
'ARNISHEDÍ0OLENTA
2ICOTTAÍ0IE











ÍSIMULT





















 

 

 
 
 
'BOBTTJTUFE
NPEF
3ADDLEÍOFÍ0ORK
/VENBAKEDÍRABBIT
/VENBAKEDÍCRAYFISH
#OD3EAÍBREAM4URBOT
0LAINÍ"READ
&RUITÍ#AKES
3AVOURYÍ0IES










ÍSIMULT
ÍSIMULT

 ÍSIMULT










 






 
 


FOUJMBUFENPEF 0UMPKINÍ0IE
7HOLEMEALÍ"READ
&LAKYÍ 0ASTRY
#RACKERS
6EGETABLEÍ0IES
$RYÍ#AKES
#HEESEÍ3OUFFL¤S
4ROUTÍ0ARCELS








ÍORÍÍORÍ
ÍSIMULT
ÍSIMULT
 ÍSIMULT

ÍORÍ


















 


 

 
 
 
.VMUJQPXFS
WFOUJMBUFENPEF
/VENBAKEDÍRABBITÍ
-EATÍ0IESÍ
3AVOURYÍ0IES



 ÍSIMULT
 ÍSIMULT
 ÍSIMULT    

 
#HICKEN
0ORKÍROAST
#RACKERS
&RUITÍ#AKES
2OASTÍ0OTATOES

























2VJDLDPPLJOH
QJ[[BNPEF
&OCACCIA
0LAINÍ"READ
"ROWNÍ"READ
0IZZA
2OASTÍ"EEF
3HIN
4URKEY








ÍSIMULT

 ÍSIMULT










-AX


-AX





 

 

  
0WFODFJMJOHGBO
DPPLJOH
4ORTELLINIÍAUÍGRATIN
0OTATOÍDUMPLINGS
3WORDFISH
-USSELS
3CALLOPS
2OASTÍ0OTATOES
#ANNELLONI













5SEÍTHEÍ1UICK
#OOKINGÍFUNCTIONÍTO
CUTÍDOWNÍO
ÍPREHEATINGÍTIMES
-AX
-AX

-AX


-AX
 
 




 
(SJMM.PEF #HICKENÍ7INGS
#HOPS
3CALLOPS
2OASTÍ0OTATOES
&RESHWATERÍFISH
4OMATOESÍAUÍGRATIN
/VENBAKEDÍ%EL
4URKEYÍ KEBABS








ÍORÍ

ÍORÍ

ÍORÍ
ÍORÍ










-AX
-AX
-AX
-AX
-AX
-AX
-AX
-AX
 


 
 

 
 
FOUJMBUFE(SJMM
NPEF
#HICKENÍ4HIGHS
3PAREÍ2IBS
'UINEAFOWL
3EABREAMÍPARCELS
#HICKEN
1UAILS
3AUSAGES
6EGETABLES








ÍORÍ






ÍORÍ









-AX
-AX

-AX
-AX
-AX
-AX




 



."ÍTHEÍSUGGESTIONSÍINÍTHEÍTABLEÍAREÍTHEÍRESULTÍOFÍRECIPEÍTRIALSÍCARRIEDÍOUTÍBYÍAÍTEAMÍOFÍPROFESSIONALÍCHEFSÍ)NÍANYÍCASEÍTHE
COOKINGÍTIMESÍAREÍAPPROXIMATEÍANDÍMAYÍVARYÍACCORDINGÍTOÍPERSONALÍTASTE