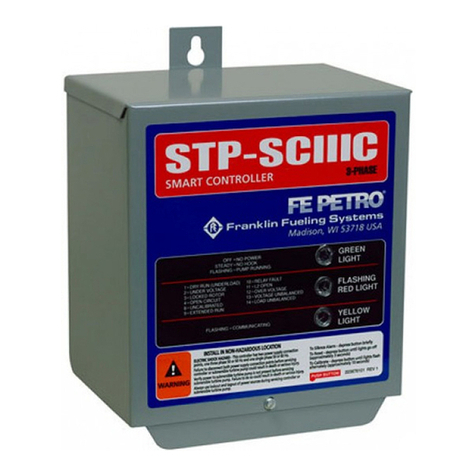
Franklin Fueling Systems TS-SCM User manual

TS-SCM
SECONDARY CONTAINMENT MONITORING
INSTALLATION GUIDE

The information in this publication is provided for reference only. While every effort has been made to ensure the reliability and accuracy of the
information contained in this manual at the time of printing, we recommend that you refer to “franklinfueling.com” for the most current version of this
manual. All product specications, as well as the information contained in this publication, are subject to change without notice. Franklin Fueling
Systems does not assume responsibility and expressly disclaims liability for loss, damage, or expense arising out of, or in any way connected with,
installation, operation, use, or maintenance by using this manual. Franklin Fueling Systems assumes no responsibility for any infringement of patents
or other rights of third parties that may result from use of this manual or the products. We make no warranty of any kind with regard to this material,
including, but not limited to, the implied warranties of merchantability and tness for a particular purpose.
Copyright © 2021 Franklin Fueling Systems, LLC, Madison, WI 53718. All world rights reserved. No part of this publication may be stored in a retrieval
system, transmitted, or reproduced in any way, including, but not limited to, photocopy, photograph, magnetic, or other record, without the prior written
permission of Franklin Fueling Systems.
For technical assistance, please contact:
franklinfueling.com
3760 Marsh Rd. • Madison, WI 53718 • USA
Tel: USA & Canada +1 800 225 9787 • Fax: +1 608 838 6433
Tel: UK +44 (0) 1473 243300 • Tel: Mex 001 800 738 7610
Tel: DE +49 6571 105 380 • Tel: CH +86 10 8565 4566
EVO is a trademark and AUTO-LEARN is a registered trademark of Franklin Electric Company, Inc.
000-0528 r7
CONVENTIONS USED IN THIS MANUAL
This manual includes safety precautions and other important information presented in the following format:
NOTE: This provides helpful supplementary information.
IMPORTANT: This provides instructions to avoid damaging hardware or a potential hazard to the environment, for example: fuel leakage from
equipment that could harm the environment.
CAUTION: This indicates a potentially hazardous situation that could result in minor or moderate injury if not avoided. This may also be used to alert
against unsafe practices.
WARNING: This indicates a potentially hazardous situation that could result in severe injury or death if not avoided.
DANGER: This indicates an imminently hazardous situation that will result in death if not avoided.
OPERATING PRECAUTIONS
Franklin Fueling Systems (FFS) equipment is designed to be installed in areas where volatile liquids such as gasoline and diesel fuel are present.
Working in such a hazardous environment presents a risk of severe injury or death if you do not follow standard industry practices and the instructions
in this manual. Before you work with or install the equipment covered in this manual, or any related equipment, read this entire manual, particularly the
following precautions:
IMPORTANT: To help prevent spillage from an underground storage tank, make sure the delivery equipment is well-maintained, that there is a proper
connection, and that the ll adaptor is tight. Delivery personnel should inspect delivery elbows and hoses for damage and missing parts.
CAUTION: Use only original FFS parts. Substituting non-FFS parts could cause the device to fail, which could create a hazardous condition and/or
harm the environment.
WARNING: Follow all codes that govern how you install and service this product and the entire system. Always lock out and tag electrical circuit
breakers while installing or servicing this equipment and related equipment. A potentially lethal electrical shock hazard and the possibility of an
explosion or re from a spark can result if the electrical circuit breakers are accidentally turned on while you are installing or servicing this product.
Refer to this manual (and documentation for related equipment) for complete installation and safety information.
WARNING: Before you enter a containment sump, check for the presence of hydrocarbon vapors. Inhaling these vapors can make you dizzy or
unconscious, and if ignited, they can explode and cause serious injury or death. Containment sumps are designed to trap hazardous liquid spills
and prevent environmental contamination, so they can accumulate dangerous amounts of hydrocarbon vapors. Check the atmosphere in the sump
regularly while you are working in it. If vapors reach unsafe levels, exit the sump and ventilate it with fresh air before you resume working. Always have
another person standing by for assistance.
WARNING: Follow all federal, state, and local laws governing the installation of this product and its associated systems. When no other regulations
apply, follow NFPA codes 30, 30A, and 70 from the National Fire Protection Association. Failure to follow these codes could result in severe injury,
death, serious property damage, and/or environmental contamination.
WARNING: Always secure the work area from moving vehicles. The equipment in this manual is usually mounted underground, so reduced visibility
puts service personnel working on it in danger from moving vehicles that enter the work area. To help prevent this safety hazard, secure the area by
using a service truck (or some other vehicle) to block access to the work area.
DANGER: Make sure you check the installation location for potential ignition sources such as ames, sparks, radio waves, ionizing radiation, and
ultrasound sonic waves. If you identify any potential ignition sources, you must make sure safety measure are implemented.

CONTENTS
INTRODUCTION.................................................................................................................................1
SAFETY............................................................................................................................................1
ADDITIONAL DOCUMENTATION ....................................................................................................1
APPLICATIONS ................................................................................................................................2
SITE REQUIREMENTS .....................................................................................................................2
SCM DIMENSIONS..........................................................................................................................3
INSTALLATION ...................................................................................................................................4
PROGRAMMING................................................................................................................................8
EVO™ 600 AND EVO™ 6000 PROGRAMMING ..............................................................................8
EVO™ 550 AND EVO™ 5000 PROGRAMMING ..............................................................................10
AC INPUT MODULE.....................................................................................................................10
4-20MA INPUT MODULE ............................................................................................................11
RELAY MODULE...........................................................................................................................11
STP MAPPING.................................................................................................................................13
TURBINE PUMP INTERFACE (TPI) APPLICATIONS (ALTERNATE STP CONTROL).............................14
TS-SCM APPLICATION ....................................................................................................................15
TS-SCM STATUS AND CONTROL SCREENS ........................................................................................16
TS-SCM STATUS SUMMARY SCREEN EVO™ 550 AND EVO™ 5000................................................16
STATUS AND ALARM INDICATORS...............................................................................................16
TS-SCM CONTROL SCREEN EVO™ 550 AND EVO™ 5000 ..............................................................17
STATUS INDICATOR TABLE...........................................................................................................17
CONTROL INDICATOR TABLE.......................................................................................................17
LEARN INDICATOR TABLE ............................................................................................................17
TS-SCM STATUS AND CONTROL SUMMARY SCREEN EVO™600 AND EVO™ 6000 .......................18
STATUS AND ALARM INDICATORS...............................................................................................18
CONTROL INDICATOR TABLE.......................................................................................................18
REQUIRED EQUIPMENT .................................................................................................................19
CONTAINMENT TIGHTNESS AND CONTINUITY TEST.....................................................................19
STP SIPHON FLOW RATE TEST........................................................................................................21
ESECONDARY CONTAINMENT MONITORING APPLICATION .........................................................22
LEARN PROCESS ................................................................................................................................23
WHEN TO LEARN/RE-LEARN..........................................................................................................23
PROCEDURE ...................................................................................................................................23
LEARN MESSAGES ..........................................................................................................................25
SCM REPORTS ...................................................................................................................................26
SCM ALARM REPORTS ...................................................................................................................26
APPLICATION EVENT REPORTS ......................................................................................................26
SCM REPORTS ................................................................................................................................26
SCM ALARM REPORTS ................................................................................................................26
APPLICATION EVENT REPORTS ......................................................................................................27
ALARMS.............................................................................................................................................27
SCM ALARMS AND WARNINGS .....................................................................................................27
CLEARING ALARMS ........................................................................................................................28

ENABLING/DISABLING TS-SCM......................................................................................................29
ENABLING TS-SCM CHANNELS ...................................................................................................29
DISABLING TS-SCM CHANNELS...................................................................................................29
SCM ANNUAL FUNCTIONAL TESTING...............................................................................................29
CONTROL DRAWING 1 ......................................................................................................................30
CONTROL DRAWING 2 ......................................................................................................................32

1
INTRODUCTION
This manual applies to the following Franklin Fueling Systems (FFS) consoles:
• TS-5 Series
• TS-550evo™ and TS-5000evo™
• EVO™ 550 and EVO™ 5000
• EVO™ 600 and EVO™ 6000
The TS-SCM (Secondary Containment Monitoring) system is a continuous secondary containment
monitoring system that monitors the interstitial spaces of double walled tanks and sumps, secondarily
contained product, and vapor return piping. You can order this product as an option with the FFS consoles
listed above.
The system is comprised of an application running on an FFS console and all necessary input and output
modules with installation kits. The system consists of a vacuum sensor, solenoid valve, mechanical
bypass valve, and vacuum manifold. The system uses the STP siphon port vacuum to evacuate the
containment space and AUTO-LEARN®technology to determine the characteristics of each secondary
containment area that is monitored.
SAFETY
WARNING: All wiring must enter the console’s enclosure through the designated knockouts. An
explosion hazard may result if other openings are used.
WARNING: All wiring from probes or sensors to the Tank Sentinel console must be run in conduit
separate from all other wiring. Failure to do so will create an explosion hazard.
WARNING: Substituting components could impair intrinsic safety. EVO™ Series consoles are
intrinsically safe for sensors installed in: Class I, Division 1, Group D hazardous locations. Substitution
of components could make the energy limiting circuitry in the system ineffective and could cause an
explosion hazard. Repairs to a EVO™ Series console or attached components should only be performed
by a qualied, factory-trained technician.
WARNING: The TS-SCM contains aluminum, care must be taken to avoid ignition due to impact.
WARNING: The TS-SCM operates at a standard 2 to 6" Hg and should be used only to monitor
containments that are designed to withstand these vacuum levels. Refer to the containment manufacturer
for further information.
ADDITIONAL DOCUMENTATION
You may need to refer to the following documentation:
• TS-5 Series Programming Guide, part number 000-2142.
• TS-550evo™ and TS-5000evo™ Programming Guide, part number 000-2173.
• EVO™ 600 and EVO™ 6000 Programming Guide, part number 228180061.

2
APPLICATIONS
The following diagram illustrates a typical installation in an STP sump.
Tank
Containment
Install Kit
Vacuum Sensor
Integral Solenoid
Product Pipe
Double Wall
APT
Test
Boot
APT
Syphon
Check Valve
TS-LSU500
Pump
Submersible
FE Petro
TS-SCCM/2
High Voltage Conduit
Intrinsically
Safe Conduit
To Bottom
of Tank
SITE REQUIREMENTS
Total Containment Volume* Minimum - 0.25 gallons (1 L)
Maximum - 500 gallons (1879 L)
Normal Operating Vacuum 2" – 6" Hg (1 – 3 PSIG)
Pre-Programmed Maximum Shutdown
(Alarm Condition) 9" Hg (4.5 PSIG)
Mechanical Relief Valve Vacuum** 10" Hg (5 PSIG)
Jumper Tubing Use only supplied vacuum tubing
Vacuum Sensor Wiring Belden No. 87761(0.12" OD) to 400 ft.
Belden No. 89182(0.31" OD) to 500 ft. (maximum distance)
Solenoid Wiring 600 V, 18 AWG minimum, UL approved.
Refer to ANSI/NFPA70 or CEC electrical codes
*Refer to manufacturers’ documentation to calculate containment area volumes.
**All containment areas MUST be compatible with the vacuum levels listed.
IMPORTANT: The system should be tested annually after installation.
The term “containment” (as in “secondary containment”) refers to the interstitial spaces of double walled
piping, sumps, and tanks that serve as a secondary restraining space if the primary containment is
damaged.

3
Individual containment sections of a given product pipeline may be jumpered together via a vacuum line
to form one larger single containment. An example of ‘jumpered’ containment spaces is the secondary
containment layer of product piping from the turbine containment to the rst dispenser, and then jumpered
to the secondary containment layer of the same product piping on the other side leading to a second
dispenser containment area.
Several containment areas may be grouped together and used with a single TS-SCM. No more than four
(4) TS-SCM groups should be used per pump siphon. The combination of any containment group may not
exceed the volume limits listed for the TS-SCM.
NOTES:
• DO NOT jumper tank interstitials with other tank interstitials or other containments.
• DO NOT jumper containment areas of unlike product pipelines together.
• If grouping multiple containment areas together, the installer will need to purchase and use the
vacuum hose, ttings, and clamps to secure the connection as specied by FFS.
• Both intrinsically safe and explosion proof conduits need to be available inside of the turbine
containment for the TS-SCM.
• Refer to the FFS product catalog for the current TS-SCM congurations offered.
SCM DIMENSIONS
TS-SCM/1 TS-SCM/2 TS-SCM Side View
5.0"
6.0"
5.25" 5.25"
5.7"
6.5"
2.00" 4.00"
4.00"
NOTE: The TS-SCM 1 can monitor one containment group, and the TS-SCM 2 can monitor two
containment groups.

4
INSTALLATION
Before starting installation, conduct a site survey to identify potential containment groups. Based on that
survey, plan out which STP sump the equipment will be installed in and how containment areas will be
grouped together.
NOTE: For additional vacuum sensor safety information, refer to the manufacturers' documentation
included with the product.
WARNING: Lockout and tag circuit breakers, and disconnect console power wiring before installing or
servicing any system wiring.
WARNING: DO NOT make solenoid and/or sensor wiring connections with live power connected to the
console or any module.
WARNING: Do not run intrinsically safe (IS) wiring and non-intrinsically safe (non-IS) wiring in the
same conduit.
NOTE: TS-SCM must be installed in accordance with the national electrical code, ANSI/NFPA 70, CEC or
other applicable national or local codes.
NOTE: Maximum torque on supplied hose clamps is 10.5 inch-lbs.
1. Pull all wiring through the conduits that will be used for the TS-SCM vacuum sensor and solenoid
valve. The intrinsically safe (IS) sensor wiring must be run in an IS conduit. The non-IS solenoid
wiring must be run in an approved explosion proof rigid metal conduit.
2. Mount the TS-SCM inside of the turbine containment area, supported by rigid, explosion proof
conduit. Then orientate the units to allow enough clearance to make the vacuum line connections
without stretching, kinking, or creating sharp bends in vacuum hoses. The TS-SCM cover is installed
with the label upwards.
TS-SCM/1 TS-SCM/2

5
3. Connect the solenoid wiring to the eld wiring using wire nuts to secure the connections. Replace
the explosion proof junction box cover.
4. Connect the vacuum sensor wiring to the IS eld wiring using epoxy wire seals to secure the
connections. Replace the IS junction box cover.
5. Install the supplied Siphon Check Valve with the inscribed Flow Arrow pointing to the STP. Apply
a non-hardening, thread sealing compound to the threads, then thread the valve body into the
submersible turbine’s siphon port. If necessary, use a FFS Secondary Syphon Assembly to connect
the TS-SCM to the syphon port of the STP.
Secondary Syphon
Assembly
STPSTP
Connect to TS-
SCM
Connect to TS-
SCM
6. Plumb the siphon hose from the VAC port of the TS-SCM to the siphon check valve. Secure the
hose to the ttings using one of the supplied hose clamps at each end.
7. Plumb the containment vacuum hose from the in-line air lter barb to the containment area to be
monitored. Secure the hose to the air lter using one of the supplied hose clamps per air lter. Install
Tee-ttings and clamps where necessary to connect the hoses if more than one containment area
will be monitored as a group.
NOTE: The containment vacuum hose must be placed in the lowest point of the containment space.
For double walled tanks, this means ensuring that the vacuum line rests at the bottom most part
of the tanks interstitial space. Use the same industry procedures used to install any sensor at the
bottom of a double walled tank.
NOTE: Installation kits include connections for both Schrader valve and push t connections. The
push t stub must be secured to the tubing with a band clamp.

6
8. Secure all containment boots, lids and caps. Clean pipe surfaces to clear debris or foreign objects
prior to tightening secondary test boots on secondary containment product or vapor return piping.
Make all jumper connections inside of dispenser sumps by using supplied hardware.
9. Inside the console, the TS-SCM solenoid wiring must enter the console from the explosion proof
rigid conduit through a designated knockout on the non-IS side of the barrier inside. Connect the
line to a single unused channel on the Relay Module (RLY). The solenoid should be wired to the
Normally Open (NO) contacts of the channel selected. Source voltage (110 VAC) will need to be
provided to the dry contact relay.
Earth Ground
Black
Locally sourced wire
To source Voltage
NOTE: TS and VS are different source voltages. For additional information, refer to the manufacturers'
documentation included with the product.
WARNING: If you use console power wires to provide power to a dry contact relay channel, ensure that
the console is positively shut down during installation and service. Failure to remove power may result in
damage to equipment, personal injury or even death.
10. The TS-SCM sensor wiring must enter the console in IS conduit through a knockout on the IS side
of the barrier. Secure each pair of sensor wires to a single channel on the 4-20mA Analog Input
Module. Always use the next available channel when wiring; for example, if Channels 1–3 are being
used, Channel 4 must be used next. Pay close attention to the polarity (+/-) of the wires.

7
4-20mA Input
Module
RUN
ERR
–
+
–
+
–
+
–
+
–
+
–
+
–
+
–
+
Black
or
Blue
Red
or
Brown
NOTE: If vacuum sensor wires are black and red, connect the black wire to the negative (-) terminal and
the red wire to the positive (+) terminal. If vacuum sensor wires are blue and brown, connect the blue wire
to the negative (-) terminal and the brown wire to the positive (+) terminal.

8
PROGRAMMING
The following instructions cover TS-SCM programming only. Administrator privileges are necessary
to program the TS-SCM application. (For console programming instructions or information about
obtaining Administrator access level, see the list of programming manuals in the “ADDITIONAL
DOCUMENTATION” section.)
Access the console, and open the Setup Menu. Go to each of the following sections, and adjust the
TS-SCM parameters accordingly. You will be prompted to enter the Administrator access level when it is
required.
NOTE: Sites setups vary depending on products used and other equipment installed. Setup information in
the sections of this chapter depict a typical site and are meant as examples only.
EVO™ 600 AND EVO™ 6000 PROGRAMMING
When you program a containment you want to monitor, obtain the following information:
• The pump that is providing the vacuum.
• The 4-20 mA channel the vacuum sensor transducer is connected to.
• The relay that is controlling the solenoid.
From Fuel Management>Secondary Containment Monitoring +:
1. Select the pump the TS-SCM Module is paired with. Pumps are dened in the Pump section.
Where the pumps are dened:

9
2. Next select which channel of the 4-20mA Module the TS-SCM transducer is connect to:
3. Next select the Relay where the TS-SCM solenoid is connected to:
Relays are dened in the Relay section:

10
EVO™ 550 AND EVO™ 5000 PROGRAMMING
AC INPUT MODULE
The AC Input Module can accept incoming dispenser hook control signals. Hook signals are used to
activate the STP via the relay channel connected to the pump controllers. Control signals from the
dispenser tell the console which product is requested by the dispenser, then control signals activate the
appropriate STP. To perform tests accordingly, the TS-SCM needs to know when pumps / dispensers are
being used by other applications.
Parameter Parameter Value
Number Gasoline
Hooks per
Dispenser
The number of product hook signal inputs to the console from the dispensers.
Channels Only select the total number of inputs intended for use.
Name Should be a specic device from which the signal is originated.
Enabled If yes, will allow the channel to be mapped to another module. Other modules
may use this signal to trigger an event.
Active State
If set to High, a high signal level will activate the channel and a low signal will
deactivate the channel. If set to Low, then the channel is inverted and will only
become active when a signal is absent and inactive when a signal is present.
Action
None (no response)
Alarm (to activate an Alarm)
Event (To trigger an event, i.e. record the event to the application)
Example: AC Input Module TS-SCM Setup
Group Name Parameter Name Parameter Value
AC Input Modules Number Gasoline Hooks per
Dispenser 2
Module 1 Channels ‘#’
Channel 1
Name Disp 1 Unleaded Hook Signal
Enabled Yes
Active State High
Action None
Channel 2
Name Disp 2 Unleaded Hook Signal
Enabled Yes
Active State High
Action None
Channel 3
Name Disp 3 Unleaded Hook Signal
Enabled Yes
Active State High
Action None

11
4-20MA INPUT MODULE
SCM Vacuum Sensors use a single 4-20mA channel per sensor to accept an incoming signal that allows
the console to monitor secondary containment vacuum levels.
Parameter Parameter Value
Channels The total number of channels used for TS-SCM, LLD, or other analog devices
connected to the module.
Name Should be a specic device or location where the TS-SCM Vacuum Sensor is located.
Service Type Indicates the type of device sending the input to the console. Choose Secondary
Containment Monitor to indicate that the device is a TS-SCM 4-20mA Vacuum Sensor.
Example: 4-20mA Input Module TS-SCM Setup
Group Name Parameter Name Parameter Value
4-20mA Input Modules
Module 1 Channels 3
Channel 1 Name Unleaded SCM Vacuum Sensor
Service Type Secondary Containment Monitor
Channel 2 Name Premium SCM Vacuum Sensor
Service Type Secondary Containment Monitor
Channel 3 Name Diesel SCM Vacuum Sensor
Service Type Secondary Containment Monitor
RELAY MODULE
The Relay Module contains eight separate relays (called Relay Channels). A channel is used to open and
close an individual TS-SCM solenoid. For the TS-SCM, the solenoid relay channel is controlled by an
input from the 4-20mA Input Module (the TS-SCM Vacuum Sensor channel).
Parameter Parameter Value
Channels The total number of channels used for any equipment connected to the module.
Enabled Set to Yes.
Input Channel Select the 4-20mA Input Module channel connected to the TS-SCM vacuum sensor on the
same TS-SCM as the solenoid being programmed.
Input Type Select the 4-20mA Input Module that contains the TS-SCM vacuum sensor on the same
TS-SCM as the solenoid being programmed.
Logic Set to OR logic.
Name Should be a specic device or location of the TS-SCM Solenoid connected to the relay.
Number of Inputs Set to 1.
Physically Wired As Select Normally Open to indicate which contacts the solenoid is wired to.
Polarity Set to Normal.
Type Select Solenoid for type identify the type of device connected to the relay is a TS-SCM
solenoid.

12
Example: Relay Module TS-SCM Setup
Group Name Parameter Name Parameter Value
Relay Modules
Module 1 Channels 3
Channel 1 Name Unleaded Solenoid Valve
Enabled Yes
Type Solenoid
Polarity Normal
Logic OR Logic
Physically Wired As Normally Open
Number of inputs 1
Input 1 Type 4-20mA Input Module
Channel Unleaded SCM Vacuum Sensor
Channel 2 Name Premium Solenoid Valve
Enabled Yes
Type Solenoid
Polarity Normal
Logic OR Logic
Physically Wired As Normally Open
Number of inputs 1
Input 1 Type 4-20mA Input Module
Channel Premium SCM Vacuum Sensor
Channel 3 Name Diesel Solenoid Valve
Enabled Yes
Type Solenoid
Polarity Normal
Logic OR Logic
Physically Wired As Normally Open
Number of inputs 1
Input 1 Type 4-20mA Input Module
Channel Diesel SCM Vacuum Sensor

13
STP MAPPING
Example: STP Mapping
Group Name Parameter Name Parameter Value
Relay Modules
Module 1 Channels 3
Channel 2 Name Unleaded STP controller
Enabled Yes
Type Submersible
Polarity Normal
Logic OR Logic
Physically Wired As Normally Open
Number of inputs 2
Input 1 Type 4-20mA Input Module
Channel Unleaded SCM Vacuum Sensor
Input 2 Type AC Input Module
Channel Unleaded Hook Signal
Channel 2 Name Premium STP controller
Enabled Yes
Type Submersible
Polarity Normal
Logic OR Logic
Physically Wired As Normally Open
Number of inputs 2
Input 1 Type 4-20mA Input Module
Channel Premium SCM Vacuum Sensor
Input 2 Type AC Input Module
Channel Premium Hook Signal
Channel 3 Name Diesel STP controller
Enabled Yes
Type Submersible
Polarity Normal
Logic OR Logic
Physically Wired As Normally Open
Number of inputs 2
Input 1 Type 4-20mA Input Module
Channel Diesel SCM Vacuum Sensor
Input 2 Type AC Input Module
Channel Diesel Hook Signal

14
TURBINE PUMP INTERFACE (TPI) APPLICATIONS (ALTERNATE STP CONTROL)
TPI is an alternative to using the Relay Module to actuate an STP on demand (from a dispenser request
or TS-SCM). Just as with using a relay channel, this method will provide positive pump shutdown on
alarm (if that option is chosen in the setup). When using the standard TPI feature of the console to control
a STP, be sure to map the TS-SCM vacuum sensor as an Input for the STP it is connected to (as shown
below). This allows the TS-SCM application to actuate the STP when it is necessary to regulate the
vacuum levels in the containment. (For further information, see the “ADDITIONAL DOCUMENTATION”
section.)
Example: TPI Setup
Group Name Parameter Name Parameter Value
Power Supply
RS-485 Enable Interface Yes
TS-TPI Enable Interface Yes
Controllers ANumber of Controllers 3
Controller 1
Name Unleaded Controller
Enabled Yes
Type Mag/Eco
Address 1
Group 0
Tank 1
Height 5.00 in
Number of inputs 2
Input 1 Type AC Input Module
Channel Unleaded Hook Signal
Input 2 Type 4-20mA Input Module
Channel Unleaded SCM Vacuum Sensor
Controller 2
Name Premium Controller
Enabled Yes
Type Smart I
Address 2
Group 0
Tank 2
Height 5.00 in
Number of inputs 2
Input 1 Type AC Input Module
Channel Premium Hook Signal
Input 2 Type 4-20mA Input Module
Channel Premium SCM Vacuum Sensor
Controller 3
Name Diesel Controller
Enabled Yes
Type Smart III
Address 3
Group 0
Tank 3
Height 5.00 in
Number of inputs 2
Input 1 Type AC Input Module
Channel Diesel Hook Signal
Input 2 Type 4-20mA Input Module
Channel Diesel SCM Vacuum Sensor

15
TS-SCM APPLICATION
Programming the TS-SCM application sets the parameters for the TS-SCM and enables it to monitor a set
number of channels. Each containment area or group must be programmed separately on the console.
Parameter Parameter Value
Enabled Set to Yes.
Name Should be a specic location or product type of the containment area.
Number of Containments The number of TS-SCMs connected to the console.
Pump Shutdown on Alarm If set to Yes, provides positive pump shutdown when the containment
area is in alarm.
Submersible Pump Channel Maps the containment area to the specic pump control output channel.
Submersible Pump Module Maps the containment area to a specic pump to provide pump on/off.
Transducer Maps the containment area to the TS-SCM Vacuum Sensor as specied
by the 4-20mA Input Module channel assignments.
Example: TS-SCM Application Setup
Group Name Parameter Name Parameter Value
Secondary Containment Monitor Number of Containments 3
Containment 1
Name Unleaded Line Containment
Enabled Yes
Pump Shutdown on Alarm Yes
Submersible Pump Module Relay Module (or Power Supply for
TPI)
Submersible Pump Channel Unleaded STP Controller
Transducer Unleaded SCM Vacuum Sensor
Containment 2
Name Premium Line Containment
Enabled Yes
Pump Shutdown on Alarm Yes
Submersible Pump Module Relay Module (or Power Supply for
TPI)
Submersible Pump Channel Premium Pump Controller
Transducer Premium SCM Vacuum Sensor
Containment 3
Name Diesel Line Containment
Enabled Yes
Pump Shutdown on Alarm Yes
Submersible Pump Module Relay Module (or Power Supply for
TPI)
Submersible Pump Channel Diesel Pump Controller
Transducer Diesel SCM Vacuum Sensor

16
TS-SCM STATUS AND CONTROL SCREENS
The status of each containment channel can be viewed at any time by navigating to the TS-SCM Status
or Control screens. To get to the TS-SCM Status or Control screens, go to TS-SCM>Status (Summary) or
TS-SCM> Control (Containment).
TS-SCM STATUS SUMMARY SCREEN EVO™ 550 AND EVO™ 5000
When viewing the TS-SCM Status Summary screen, remember to enable Auto Refresh. The Auto
Refresh button will allow the on-screen results to be automatically updated. When the results will update
is dependent on the user-dened parameter Refresh Rate found on the Conguration page.
STATUS AND ALARM INDICATORS
Indicator Description
Fail to Hold Vacuum The containment will not maintain the learned level of vacuum within the learned amount
of time.
Fail to Reach Vacuum The containment has not reached the learned level of vacuum within the learned amount
of time.
High Vacuum The vacuum level of the containment has exceeded 9" Hg.
Low Vacuum The vacuum level of the containment has dropped below 1.25" Hg.
Not Learned The containment has not been learned.
Program Error SCM has encountered an error.
Pump Request SCM is attempting to cycle the pump on.
Pump Request Ignored The pump is being used by another application.
Sensor Malfunction SCM has detected a failure of the TS-SCM vacuum sensor.
Solenoid Status Indicates whether the normally closed TS-SCM solenoid is open or closed.
Status Indicates the condition of the containment.
Vacuum Level A direct reading from the TS-SCM vacuum sensor.
Vacuum Unstable The level of vacuum in the containment is not statistically sound.
For more information on alarms and troubleshooting, refer to the "Alarms" chapter in this manual.
Table of contents
Other Franklin Fueling Systems Controllers manuals
Popular Controllers manuals by other brands

Texas Instruments
Texas Instruments TPS2151 user guide

Siemens
Siemens SIMATIC S7 Functional safety manual

Anemostat
Anemostat CSC-3016 installation guide

Emerson
Emerson E2 Quick setup guide

Controlli
Controlli MVT5 Series Mounting instructions

Evergreen
Evergreen Homely CEF9H7TC3FE Series installation manual

Balcrank
Balcrank PGE-55 Operation, installation, maintenance and repair guide

YATO
YATO YT-83082 Original instructions

Johnson Controls
Johnson Controls M9102-AGA-2S installation instructions

AIR SYSTEMS
AIR SYSTEMS POA-1 operating manual

Watlow
Watlow PM LEGACY Series user guide

Vector
Vector MZ3-FU-V11 manual