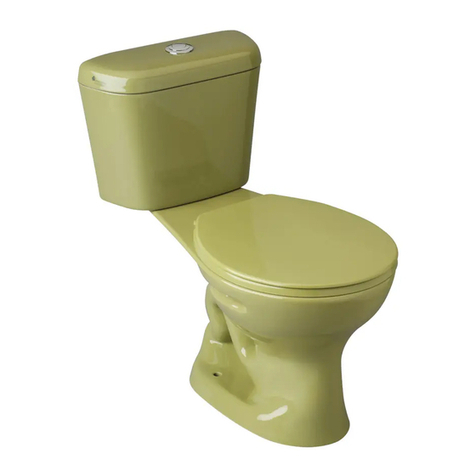
FRANZ VIEGENER E151 User manual

MEDIDAS / MEASURES:
A
segúrese que la persona que vaya a instalar el producto
sea
un
profesional en la materia, para prevenir errores que
afecten
las instalaciones o el correcto funcionamiento del producto.
Realice los ajuste del sanitario UTILIZANDO una herramienta
adecuada para que la superficie y el acabado del producto no
se raye o lastime.
Recuerde
que todos los productos tienen un mecanismo de
c
ontrol que debe ser revisado y cambiado de ser necesario, ya
que este puede deteriorarse debido a la frecuencia de uso.
To prevent any error that may affect the facilities or the correct
f
unctioning of the product, make sure that the person who is
going
to install the product is a professional. Install the
product
u
sing suitable tools, so that it is not scratched.
Remember
that all products have a control mechanism that
must
be reviewed and changed if necessary, since it
can
deteriorate due to the frequency of use.
RECOMENDACIONES:
RECOMMENDA
TIONS:
Dimensiones en milímetros / Dimensions in milimeters
Dimensiones en pulgadas / Dimensions in inches
E151
INODORO QUANTUM
ESTANDAR elongado
para uxómetro
30.5 cm
63 cm - 65 cm
12 cm
acople para
grifería
(SPUD)
acople para
grifería
(SPUD)
Agujeros
para fijación
Fixation holes
E151.1 BL E101.09 BL HP.02.02
395
15” 9/16
9” 27/32
57
pared acabada
piso acabado
desagüe desagüe
piso acabado
250
conexión extensible
130 (máximo)
106 (mínimo)
305
120
12”
4” 23/32
250
n25,4
70
cámara
de aire
600
360
14” 5/32
700
27” 9/16
630 mínimo - 650 máximo
24” 23/32 mínimo - 25” 19/32 máximo
630 mínimo - 650 máximo
24” 23/32 mínimo - 25” 19/32 máximo
1. Ubicar el inodoro en la posición que irá, verificar la alineación del inodoro
respecto a la pared y posicionar de acuerdo a las dimensiones (ver gráfico).
Verify the alignment of toilet regarding the wall and place it according to the
dimensions (see graphic).
3. Perforar y colocar los tacos de fijación #10 (no incluidos) (ver gráfico).
Drill and place the fixation bolts #10 (not included) (view graphic).
30.5 cm
63 cm - 65 cm
12 cm
acople para
grifería
(SPUD)
acople para
grifería
(SPUD)
Agujeros
para fijación
Fixation holes
30.5 cm
63 cm - 65 cm
12 cm
acople para
grifería
(SPUD)
acople para
grifería
(SPUD)
Agujeros
para fijación
Fixation holes
30.5 cm
63 cm - 65 cm
12 cm
acople para
grifería
(SPUD)
acople para
grifería
(SPUD)
Agujeros
para fijación
Fixation holes
30.5 cm
63 cm - 65 cm
12 cm
acople para
grifería
(SPUD)
acople para
grifería
(SPUD)
Agujeros
para fijación
Fixation holes
4- Voltear hacia abajo el inodoro y colocar el anillo de cera alrededor del desa-
güe (ver gráfico).
Turn the toilet down and insert the wax ring on the toilet drain (Graph. # 4).
2. Marcar (ver gráfico).
Mark (view graphic).
INSTRUCCIONES DE INSTALACIÓN / INSTALLATION INSTRUCTIONS:
Nota: si el fluxómetro supera
la altura de la acometida de
agua, puede cortar el tubo del
fluxómetro hasta la altura
necesaria.
Los sanitarios FV - Franz Viegener están fabricados pensando en el cuidado del ambiente y en evitar el desperdicio. Nuestros inodoros disponen de descarga simple y doble que permiten al usuario seleccionar la evacuación de líquidos y sólidos.
• Blanco / White: BL
Colores Disponibles/Available Colors:

F.V. - ÁREA ANDINA S.A. se reserva el derecho de modificar,
cambiar, mejorar y/o anular materiales, productos y/o diseños
sin previo aviso.
Visítenos en: www.franzviegener.com
Fecha: 2014-11-20
ECUADOR 1-800 FV FV FV (1-800 38 38 38)
Bogotá: 672 02 32 / 018000 11 36 00
(51-1) 717 87 44 / (51-1) 717 87 99
fvresponde@fvecuador.com
COLOMBIA
PERÚ
FV Responde
Centro de atención al usuario
Fecha: 2014-11-20
5. Fijar el inodoro al piso con pernos (ver gráfico).
Fix the toilet to the floor with bolts (see graphic).
6. Nivelar el inodoro y fijar al piso con un cordon de silicona (ver gráfico).
Level the toilet and fix it to the floor with a silicone cord (see graphic).
7. Instalar el SPUD (incluido). Es el acople para la grifería (ver gráfico).
Install the SPUD (not included).
8. Siga las instrucciones incluidas en el fluxometro para su instalación.
Follow the instructions of the flush valve for installation.
Nota: No es recomendable usar cemento en la base del inodoro y antes de insta-
lar el fluxómetro verifique que la acometida de agua este limpia y libre de
impurezas y residuos de construcción.
Note: It is not advisable to use cement in the base of the toilet to fix it. Before
installing the flush valve, verify that the feeding pipe is clean and free of and
construction residuals.
30.5 cm
63 cm - 65 cm
12 cm
acople para
grifería
(SPUD)
acople para
grifería
(SPUD)
Agujeros
para fijación
Fixation holes
30.5 cm
63 cm - 65 cm
12 cm
acople para
grifería
(SPUD)
acople para
grifería
(SPUD)
Agujeros
para fijación
Fixation holes
30.5 cm
63 cm - 65 cm
12 cm
acople para
grifería
(SPUD)
acople para
grifería
(SPUD)
Agujeros
para fijación
Fixation holes
30.5 cm
63 cm - 65 cm
12 cm
acople para
grifería
(SPUD)
acople para
grifería
(SPUD)
Agujeros
para fijación
Fixation holes
Código: HT- 1049F
CONSEJOS DE MANTENIMIENTO
Los sanitarios F.V. - Franz Viegener son fabricados con porcelana sanitaria vitri-
cada, cumpliendo normas internacionales, garantizando así su larga vida útil. Por
las características propias de los materiales utilizados y la tecnología empleada en
su desarrollo, se limpian fácilmente evitando el desarrollo de gérmenes y hongos.
Realice la limpieza utilizando productos limpiadores y desinfectantes para baños
de marcas reconocidas. Ayúdese de una esponja o un paño húmedo. En lo posible
evite productos de limpieza fuertemente abrasivos. La porcelana sanitaria vitrica-
da no permite adherencias y las grasas se eliminan con facilidad.
La porcelana sanitaria mantiene el brillo propio de su esmalte sin necesidad de
pulimentos.
MAINTENANCE
F.V. - Franz Viegener products are made of vitreous sanitary ware, complying
international standards and ensuring durability. The characteristics of the materials
and the technology used to make the products, help by preventing the develop-
ment of germs and fungi.
Clean the product using cleaning agents and bathroom antiseptics. Use a sponge
or damp cloth. If possible avoid highly abrasive cleaning products. Sanitary ware
doesn´t allow adhesions and it can be easily washed.
There is no need to polish sanitary ware because it will always maintain its shine.
Other FRANZ VIEGENER Toilet manuals
Popular Toilet manuals by other brands

Bar-Industries
Bar-Industries SK1000U Read this first

Rejuvenation
Rejuvenation Lirico owner's manual

Satellite PolyPortables
Satellite PolyPortables TUFWAY Assembly instructions

Raritan
Raritan Marine Elegance 241E Installation and maintenance instructions

Gustavsberg
Gustavsberg NORDIC 3 installation instructions

AER
AER HU 03 M Installation instruction