Fraser Hill Farm FHFFIRETRK071L Installation guide

Holiday Décor Installation, Use & Care Instructions
The model number of your holiday inatable is printed on the side of your carton.
Always use this number to identify your product.
Thank you for your purchase of this quality holiday inatable. With proper use and care, this
product will provide you with years of enjoyment. Please follow the instructions on how to
assemble and disassemble your item. If you should have any problems with your product, DO
NOT return it to the place of purchase. Please call our toll free number: 1-855-591-7451 or email
us at [email protected] and a customer service representative will assist you. Enjoy
your Holiday!
WARNING: Choking hazard – This product may contain small parts. Not for use with children. This is not a toy. Do
not leave children unattended with the inatable.
WARNING: Changes to or modications of this product can cause serious injury or property damage and will void
the warranty.
WARNING: Risk of Electric Shock. When used outdoors, connect only to a covered, Class A GFCI-protected
receptacle that is closed and weatherproof when the product plug is connected to the receptacle. If one is not
available, you must contact a qualied electrician for proper installation of a Class A GFCI-protected receptacle. Do
not use this product without the proper receptacle.
Please read and follow all instructions that are on the product or provided with the product.
Please read the product setup instructions carefully.
• Do not use this product for other than its intended purpose.
• Before each use, inspect the product carefully, including any electrical components. Do not use any products
that have frayed, damaged, loose, cracked or cut wires, lamps or enclosures, or exposed copper wire.
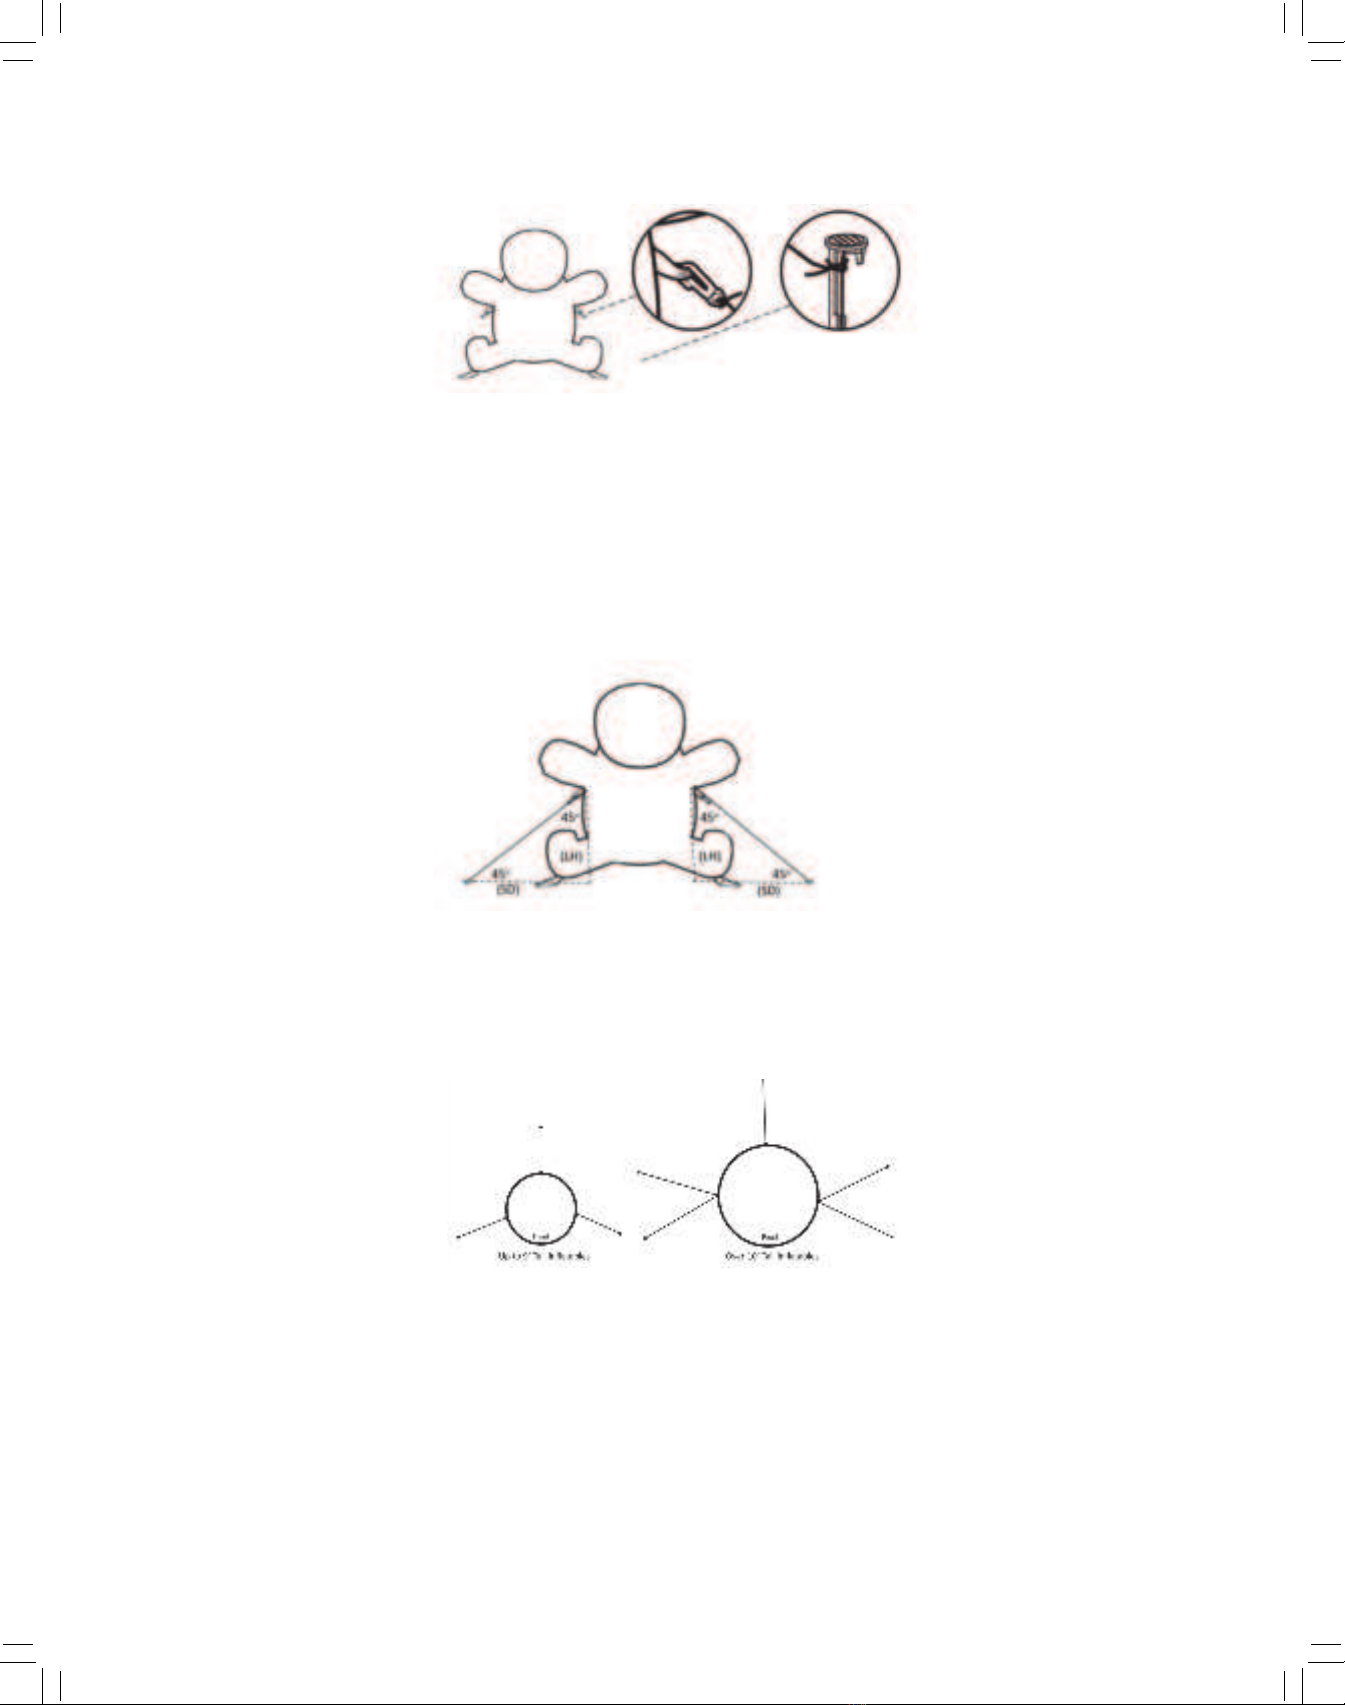
• Do not place your inatable near bushes, trees or building structures as they can puncture the inatable.
Do not install or use within 30 feet of a pool or building structure.
• Do not place your inatable near utility poles or wires. Reference the National Electrical Code (ANSI/N FPA
70) specically for the installation of wiring and clearances from power and lighting conductors.
• Do not mount or place near gas or electric heaters, replaces, candles, or other similar sources of heat.
• To reduce the risk of electrical shock, protect the electric fan, power cord and other electrical components
from direct exposure to water.
• Turn o or adjust the schedule of your sprinklers while you have your inatable set up.
• Note that the fan may stop operating at temperatures below 14° F (-10° C).
• Do not secure the product cord with staples or nails or place on sharp hooks or nails.
• Unplug the product when not in use.
• Do not hang ornaments or other objects from cord, wire, light string or any part of the product.
• Do not close doors or windows on or otherwise pinch or compress the product cord as this may damage the
wire insulation.
• Do not inate your inatable during unusually strong winds. If it becomes too windy for safe operation,
simply unplug your inatable and allow it to deate. Wait for better conditions before re-inating.
• Always store product in a cool, dry location protected from sunlight. Avoid storing near any sharp edges to
avoid catching or tearing the material or fabric.
• Whenever handling the product (during storage, retrieval or setup), use caution to avoid any undue strain or
stress on any of the product components, including blowers, plugs, connections and wires.
• Keep the area around the inatable clear of leaves, dirt and debris. If the inatable is dirty or wet, be sure to
clean the inatable and let dry completely before storing.

INSTALLATION AND SETUP
Please read the product setup instructions carefully. Do not operate this product in windy
conditions.
Find a at area of either grass or gravel for your product. Do not set up your inatable on a
slope. Doing so may prevent the inatable from inating properly or standing correctly. It
may also present a safety hazard. Be sure that the area is clear of leaves, loose dirt and/or
standing water as any of these can stain the product or damage the fan.
Carefully remove the inatable and included items from the box. Set the stakes, ropes and
clips aside. You will need those after fully inating your inatable for the rst time.
Lay your inatable out on the ground. The fan will be on the back side of the inatable.
Ensure that the deation zipper on the back of the inatable is closed. Plug the fan into a
Class A GFCI-protected receptacle to start inating your inatable.
For your rst ination, you will need to help your inatable inate properly. Ensure that
all of the extremities are positioned correctly, untwisting anything that may have become
tangled during unpacking and setup. For taller inatables, you will want to connect the tie
downs to the upper fabric (or metal) loops before you fully inate. Otherwise, the loops
may be too high to reach.
When fully inated, locate all of the tie-down points around the base. Place a stake through
the loop and press the stake about 2/3 of the way into the ground (you will insert these
fully later). These stakes help hold the inatable upright and prevent the wind from moving
your inatable.
Note: If your inatable is taller than 10 feet, you will need assistance to safely
position and secure your inatable.

For inatables under 9-feet tall, install at least three upper tie downs. For inatables
over 10-feet tall, you will need to install four or more upper tie downs, depending on the
inatable.
Attach each rope to a clip and attach the clip onto the upper fabric or metal loops. (If clips
are not included, tie each rope to directly to the loop.) Tie the ropes to
the additional ground stakes and secure the stakes about 2/3 of the way into the ground
(you will insert these fully later).
The angle of the rope to the ground should be 45 degrees (see diagram above). To achieve
a 45-degree angle, the stake distance (SD) from the inatable should be roughly equal to
the loop height (LH) on the inatable.
To properly secure your inatable, install the upper tie downs according to the above
graphic. Note that two of the side tie downs must angle forward by at least 30 degrees.
Adjust stakes as needed to assure that the inatable is fully upright and positioned
correctly. When the inatable is correctly positioned and all stakes have been placed, push
all of the stakes fully into the ground.
To achieve a proper 45º Angle,
Stake Distance (SD) = Loop
Height (LH)
For example, if the Loop Height
(LH) is 6’,
the stake should be placed 6’
away from the inatable

1-YEAR LIMITED WARRANTY
“Limited” Warranty Program
For a period of one (1) year after purchase, Fraser Hill Farm (“Manufacturer”) will either repair or replace defective components in
accordance with this Limited Warranty.
Sales and use taxes, plus shipping and handling charges are the responsibility of the consumer.
This warranty is between Manufacturer and the original purchaser and is valid only when accompanied by the original purchaser’
s sales receipt showing original date of purchase and location of purchase. Replacements under this warranty revert back to the
date of original purchase for future warranty.
Manufacturer or its authorized dealer can accept or reject warranty claims based on its ndings. This warranty applies in normal
residential use only, where an issue with the product is due to a defect in material or workmanship. Manufacturer can make
substitutions as required of mater ials , components, and sub-components of comparable value and utility. This warranty is
limited to product repair or replacement (to be determined solely by Manufacturer). Warranty return is limited to only the single
aected component .
This warranty covers only manufacturing defects and does not cover normal wear and tear , abuse or misuse, including: water
damage , chemical damage, exposure to extreme heat or cold, abrasion or excessive weight. This product is intended to be used
with standard ornaments only. This warranty is invalid if the product is not used for intended purpose. Manufacturer disclaims
liability for any aspect of installation and any inconvenience caused by a defective part or component.
Certain items are not covered by this warranty. These include, but are not limited to the following:
1. Components subjected to abuse, including abuse intended to simulate failure.
2. Damages caused by retailer , shipper or installation crew (such as scratches , dents , tears, etc.).
3. Any part which merely exhibits normal wear yet functions essentially as new, including stretching of materials
and stitching.
4. Tears, punctures, scratches or any damage caused by improper installation or use.
5. Items sold “as is” or oor models.
To make a claim, send a copy of the original sales receipt along with a brief description of the problem to the email address
below. Please include your email address and daytime telephone or cell phone #. All items may be charged actual freight and
handling costs. Repairs or replacement will be made at the Manufacturer’s option.
THIS IS THE ENTIRE EXCLUSIVE EXPRESS LIMITED LIABILITY. THE MANUFACTURER NEITHER MAKES NOR IS RESPONSIBLE
FOR ANY OTHER WARRANTIES, EITHER EXPRESS OR I MPLIED, I NCLUDING THOSE OF RETAILING DEALERS. THIS EXCLUSIVE
REMEDY IS LIMITED TO RECEIPT OF A CREDIT IN CONNECTION WITH THE REPAIR OR REPLACEMENT OF ANY PRODUCT OR
COMPONENT DEEMED TO BE DEFECTIVE UNDER THE TERMS AND CONDITIONS AS STATED IN THIS WARRANTY. NEITHER
FRASER HILL FARM, THE PRODUCT MANUFACTURER NOR ITS AGENTS SHALL BE LIABLE IN ANY CASE FOR INCIDENTAL,
INDIRECT, SPECIAL OR CONSEQUENTIAL DAMAGES RESULTING FROM THE USE OF THIS PRODUCT OR ARISING OUT OF
ANY BREACH OF THIS WARRANTY OR NEGLIGENCE EVEN IF IT HAS BEEN ADVISED OF THE POSSIBILITY OF SUCH
DAMAGES. EXCEPT AS OTHERWISE MAY BE REQUIRED BY LAW, THERE ARE NO OTHER EXPRESS OR IMPLIED WARRANTIES
OTHER THAN THE WARRANTY DESCRIBED HEREIN, AND ALL OTHER WARRANTIES, INCLUDING ANY IMPLIED WARRANTY OF
MERCHANTABILITY OR FITNESS FOR A PARTICULAR PURPOSE ARE EXPRESSLY DISCLAIMED.
Holiday@FraserHillFarm.com
1-855-591-7451
www.FraserHillFarm.com
Table of contents