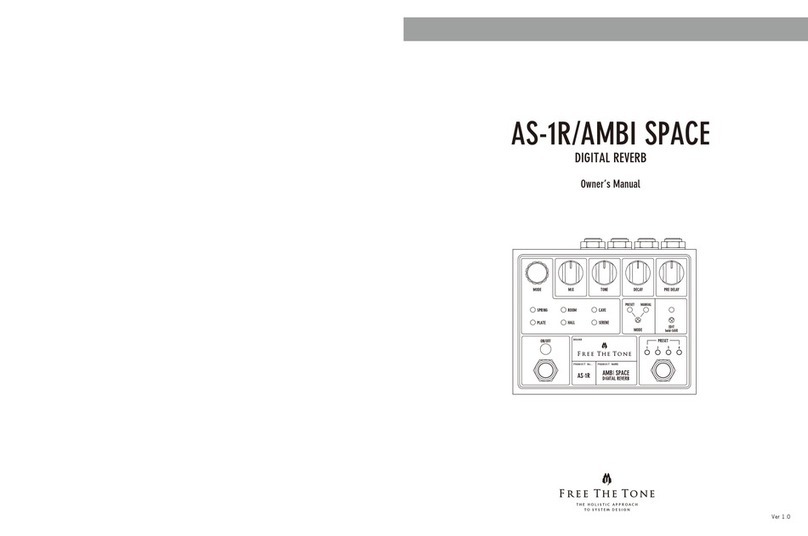
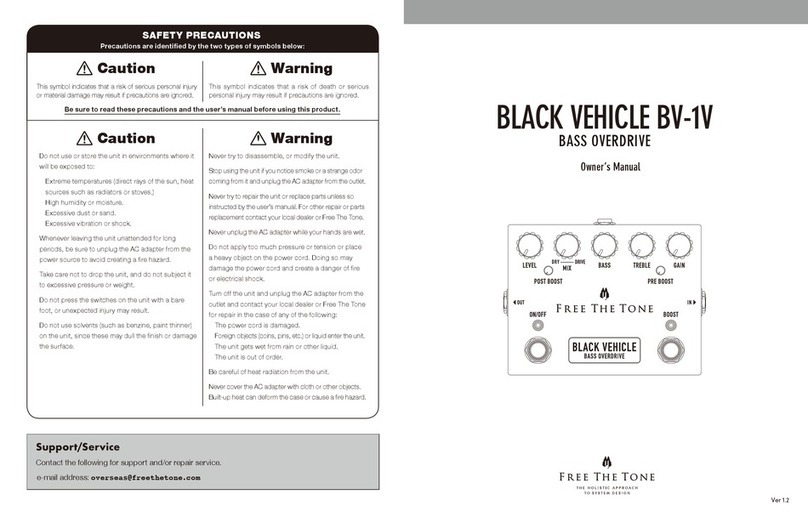
Free The Tone TA-1H User manual

TA-1H/TRI AVATAR
MULTI-DIMENSIONAL CHORUS
OWNER’S MANUAL
Ver 1.0

•Three independent pitch-modulation
signal paths and one dry signal path for
mixing in the analog domain.
•A widening effect characteristic of
three-phase choruses is attained by 120˚
shifting of the phase in each signal
modulation path.
•Supports both stereo and monaural
operation. In monaural operation, all of
signals from the three modulation paths
are mixed, enabling diverse sound
creation.
•Next generation chorus sound with
minimum noise has been attained by
adopting 24-bit AD/DA converters and
with Free The Tone’s original signal
processing and algorithms.
•Up to four sets of knob settings can be
stored as presets.
•Four presets can be recalled by sending
MIDI program change numbers.
•RATE or HI-CUT parameters can be
controlled in real-time from an expression
pedal plugged into the EXP terminal.
Main Features of TRI AVATAR
1 Controls and Indicators: Front Panel 4
2 Controls and Indicators: Rear Panel 5
3 Three Operating Modes 5
3-1 Manual Mode 6
3-2 Preset Mode 6
3-3 Edit Mode 6
4 Factory Presets 7
5 EXP Terminal Settings 8
6 MIDI Channel Settings 8
7 How to Perform Initialization 9
8 About MIDI 10
9 Specifications & Ratings 11
Table of Contents
Thank you for choosing a Free The Tone product. In order to take full advantage of
the features and performance it provides, please read this owner’s manual
thoroughly, and keep it in a safe place for future reference.
● Never connect or disconnect plugs to/from the input/output terminals on the
TA-1H when the external device that drives speaker is powered. Doing so can
cause noise and damage the speakers.
• Avoid applying excessive force to the footswitches, tact switches, rotary controls,
phone jacks, and DIN connector on the TA-1A.
• If the unit malfunctions or behaves erratically, cease operation at once and
contact your local dealer or Free The Tone directly.
Handling Precautions
Contact the following for support and/or repair service.
e-mail address:
Support/Service
SAFETY PRECAUTIONS
Precautions are identified by the two types of symbols below:
Be sure to read these precautions and the user’s manual before using this product.
Never try to disassemble, or modify the unit.
Stop using the unit if you notice smoke or a
strange odor coming from it and unplug the
AC adapter from the outlet.
Never try to repair the unit or replace parts
unless so instructed by the user’s manual.
For other repair or parts replacement contact
your local dealer or Free The Tone.
Never unplug the AC adapter while your
hands are wet.
Do not apply too much pressure or tension
or place a heavy object on the power cord.
Doing so may damage the power cord and
create a danger of fire or electrical shock.
Turn off the unit and unplug the AC adapter
from the outlet and contact your local dealer
or Free The Tone for repair in the case of any
of the following:
The power cord is damaged.
Foreign objects (coins, pins, etc.) or liquid
enter the unit.
The unit gets wet from rain or other liquid.
The unit is out of order.
Be careful of heat radiation from the unit.
Never cover the AC adapter with cloth or
other objects. Built-up heat can deform the
case or cause a fire hazard.
This symbol indicates that a risk of serious
personal injury or material damage may result
if precautions are ignored.
This symbol indicates that a risk of death or
serious personal injury may result if
precautions are ignored.
Do not use or store the unit in environments
where it will be exposed to:
Extreme temperatures (direct rays of the
sun, heat sources such as radiators or stoves.)
High humidity or moisture.
Excessive dust or sand.
Excessive vibration or shock.
Whenever leaving the unit unattended for long
periods, be sure to unplug the AC adapter
from the power source to avoid creating a fire
hazard.
Take care not to drop the unit, and do not
subject it to excessive pressure or weight.
Do not press the switches on the unit with a
bare foot, or unexpected injury may result.
Do not use solvents (such as benzine, paint
thinner) on the unit, since these may dull the
finish or damage the surface.
WarningCaution
WarningCaution
2 3
The TRI AVATAR is a next generation chorus pedal with four signal paths for three
chorus sounds (three phases) and one dry signal. In stereo operation the first
phase of chorus sound is assigned to the L side, the second phase to the L+R
sides, and the third phase to the R side. In monaural operation all of the three
phases are mixed together. By mixing three independent chorus sounds the TRI
AVATAR adds more width and depth to its output and the result exceeds that which
can be achieved by conventional stereo chorus pedals.

4 5
1
CONTROLS AND INDICATORS: FRONT PANEL
2
CONTROLS AND INDICATORS: REAR PANEL
⑫ ⑬ ⑭ ⑮ ⑯ ⑰
⑤
⑪
⑩
⑥ ⑦ ⑧ ⑨
④
③
① ②
①
Effect ON/OFF Footswitch
Turns on/off the chorus effect. When on,
the LED above the switch illuminates.
②
Select Footswitch
•In Preset Mode:
Switches presets 1–4 cyclically, i.e.,
Preset 1 →Preset 2 →Preset 3 →Preset 4
•In Edit Mode (EDIT LED illuminating):
Selects the preset number to save the
current chorus sound settings. The LED
for the selected preset number flashes.
•In Manual Mode: Selects the preset to
be recalled when the unit is switched to
Preset mode.
③
MODE Switch
Switches between Manual and Preset
modes.
④
EDIT Switch
Puts the unit in Edit mode.
•In Preset Mode: Used to modify the
contents of the preset currently recalled.
Press the EDIT switch. Then the LED
above it illuminates and the current preset
number’s LED flashes. Now you can
modify the current settings. When
completed, select the target preset
number and hold the EDIT switch for
about 1.5 seconds. Your modified settings
are stored in the selected preset memory.
•In Manual Mode: Used to save the
current knob settings to a preset. Press
the EDIT switch. Then the LED above it
illuminates and the current preset
number’s LED flashes. Select the target
preset number and hold the EDIT switch
for about 1.5 seconds. The current
settings are stored in the selected preset
memory.
⑤DEPTH LEFT Knob
Adjusts the pitch vibration depth of the
LEFT signal. The signal appears at the
OUT-L (MONO) terminal.
⑥DEPTH CENTER Knob
Adjusts the pitch vibration depth of the
CENTER signal. This signal appears at
both the L and R outputs. In monaural
operation, the signal appears at the
OUT-L (MONO) terminal.
⑦DEPTH RIGHT Knob
Adjusts the pitch vibration depth of the
RIGHT signal. The signal appears at the
OUT-R terminal. In monaural operation,
the signal appears at the OUT-L (MONO)
terminal.
⑧HI-CUT Knob
Adjusts the effect sound’s timber. Turning
the knob counterclockwise cuts the high
frequencies.
⑨RATE Knob
Adjusts the speed of pitch vibration.
Turning the knob clockwise increases the
vibration speed.
⑩LEVEL Knob
Adjusts the volume when the effect is
turned on.
⑪DRY MIX Knob
Adjusts the mix balance between the
effect and direct (dry) sounds when the
effect is turned on. When the knob is
turned fully counterclockwise, the output
is the effect sound only. By turning the
knob clockwise, the direct (dry) sound is
mixed to the effect sound.
⑫IN Terminal
Input terminal of the TRI AVATAR.
Connect your guitar or effects unit, etc. to
this jack.
⑬OUT-L (MONO) Terminal
•When in stereo operation: Outputs the
signal set by the DEPTH LEFT and
DEPTH CENTER knobs.
•When in monaural operation: Outputs
the signal set by the DEPTH LEFT,
DEPTH CENTER, and DEPTH RIGHT
knobs.
⑭OUT-R Terminal
Outputs the signal set by the DEPTH
RIGHT and DEPTH CENTER knobs.
⑮EXP Terminal
RATE (modulation speed) or HI-CUT
can be controlled in real-time from an
expression pedal connected to this
jack. Use an expression pedal with
variable resistance 10kΩ–50kΩ (our
recommendation: BOSS FL-500L,
EV-5).
⑯MIDI IN Terminal
Receives MIDI signals from an external
MIDI device.
⑰POWER DC9V IN Terminal
Connect the supplied AC adapter to this
terminal. Any AC adapter that has
regulated 9 VDC output, center minus
polarity, and more than 140 mA power
supply capability can be used. A standard
5.5 x ø2.1 mm plug is acceptable.

6 7
The TRI AVATAR has three operating modes: Manual, Preset, and Edit. Manual
and Preset modes are toggled by pressing the MODE switch. Edit mode is
activated by the EDIT switch. In Edit mode you can modify preset contents and
save them in a preset memory.
The TRI AVATAR has four chorus sounds as factory presets. These settings will be
lost by overwriting user presets but can be restored by initializing the TRI AVATAR.
3-1. Manual Mode
The MANUAL LED above the MODE switch illuminates when the unit is operating
in Manual mode. In Manual mode, chorus sound is set by the position of each
knob. When an expression pedal is connected to the EXP terminal, the setting
defined by the RATE or HI-CUT knob’s position is disabled and the parameter is
controlled from the expression pedal.
3-2. Preset Mode
The PRESET LED above the MODE switch illuminates when the unit is operating
in Preset mode. In this mode the chorus sound stored in the preset selected by
the Select footswitch is recalled. (Each of the four presets contains a sample
setting when shipped from our factory.)
When an expression pedal is connected to the EXP terminal, the RATE or HI-CUT
settings stored in the presets are disabled and you can modify these parameters
from the expression pedal. In Preset mode turning each knob does not modify the
chorus sound. This can avoid an unnecessary change of chorus sound due to an
unintentional change to the knob angle. Preset contents can be modified in Edit
mode explained below.
3-3. Edit Mode
The EDIT LED above the EDIT switch illuminates when the unit is operating in Edit
mode. This mode, activated by pressing the EDIT switch, is for modifying and
writing preset contents.
• If the unit enters Edit mode from Preset mode
You can change only the desired parameters from the current preset sound and
save them to the original or another preset.
1.Press the EDIT switch to enter Edit mode.
2. Adjust the desired parameter’s knob.
3. Press the Select footswitch to select the target preset number. If you want to
overwrite the current preset, do not press the Select footswitch.
The target preset number’s LED is flashing for your confirmation.
4. Press and hold the EDIT switch for about 1.5 seconds. The EDIT LED starts
flashing and the preset is saved in the memory. When saving completes,
the unit automatically switches from Edit to Preset mode and recalls the stored
preset.
If the EDIT switch is pressed again after turning the knobs to modify the
parameters in Edit mode, then your changes are canceled and the unit
returns to the status in which the original preset is recalled.
• If the unit enters Edit mode from Manual mode
The current Manual mode settings are saved in the preset memory.
3
THREE OPERATING MODES
4
FAC TORY PRESETS
PREST-1 Spacious three-phase
chorus sound without uncomfortable
pitch feeling. Dry sound is zero and
WET is 100%.
PREST-2 Warm and fat chorus sound
created by mixing dry (original) sound
with three-phase chorus sound.
PREST-3 Wide and round chorus
sound with lesser chorus effect.
PREST-4 Sound with vibrato effect.
Vibration speed can be controlled in
real-time from an expression pedal
connected to the EXP terminal.
1. Press the EDIT switch to enter Edit mode.
2. Press the Select footswitch to select the target preset number. The selected
preset number’s LED is flashing for your confirmation.
3. Press and hold the EDIT switch for about 1.5 seconds. The EDIT LED starts
flashing. When saving completes, the unit automatically switches from Edit to
Preset mode and recalls the stored preset.
Pressing the EDIT switch again when in Edit mode returns the unit to Manual
mode without executing a save operation.

8 9
5
EXP TERMINAL SETTINGS
6
MIDI CHANNEL SETTINGS
MIDI signal receiving channels are set by following the procedures below.
<Setup Procedures>
•Turn on the power to the unit while holding down the Select footswitch.
•Hold the footswitch down until both the PRESET and MANUAL LEDs illuminate.
Release the Select footswitch when both the LEDs illuminate and then set MIDI
function as follows.
<Step 1>
■The ON/OFF LED shows the on/off status of Omni mode and the off status of
MIDI function as explained below. Press the ON/OFF footswitch to toggle the
status.
●ON/OFF LED illuminates = Omni mode is turned on.
All of the MIDI channels will be received.
Press the MODE switch to complete the setting procedure.
●ON/OFF LED flashes = Omni mode is turned off.
Proceed to “Step 2” and set the receiving channel by using the Select
footswitch.
● ON/OFF LED extinguishes = MIDI receiving function is turned off.
Press the MODE switch to complete the setting procedure.
<Step 2>
■MIDI receiving channels when Omni mode is turned off are shown by the
combination of the four PRESET LEDs (1–4) above the Select footswitch.
Press the Select footswitch to select the receiving channel. For the relationship
between the LEDs and receiving channels, refer to the table on the next page.
When the PRESET LEDs indicate the desired MIDI channel, press the MODE
switch to complete the setting procedure.
7
HOW TO PERFORM INITIALIZATION
All of the presets can be cleared and reset to the factory settings.
1. Turn on the power to the unit while holding down the MODE switch and
Select footswitch.
2. Keep the two switches held down until all of the four PRESET LEDs (1–4)
above the Select footswitch illuminate.
3. Then release the switches.
Now all of the presets are reset to the factory settings and the unit is ready for
usual operation.
PRSET-1LED PRSET-2LED PRSET-3LED PRSET-4LED 設定MIDIChannel
× × × × MIDIChannel1
○ × × × MIDIChannel2
× ○ × × MIDIChannel3
○ ○ × × MIDIChannel4
× × ○ × MIDIChannel5
○ × ○ × MIDIChannel6
× ○ ○ × MIDIChannel7
○ ○ ○ × MIDIChannel8
× × × ○ MIDIChannel9
○ × × ○ MIDIChannel10
× ○ × ○ MIDIChannel11
○ ○ × ○ MIDIChannel12
× × ○ ○ MIDIChannel13
○ × ○ ○ MIDIChannel14
× ○ ○ ○ MIDIChannel15
○ ○ ○ ○ MIDIChannel16
○
:
LED ON ×:
LED OFF
NOTE: MIDI settings are automatically stored in the memory when they are set and
no save operation is required.
You can control RATE (modulation speed) or HI-CUT in real-time from an
expression pedal connected to the EXP terminal:
•To Control RATE: Turn the RATE knob clockwise or counterclockwise while
holding down the ON/OFF and Select footswitches. When the EDIT LED flashes
twice, then the settings is completed. The initial setting at factory before shipping
is to control RATE. You can control the RATE by just connecting an expression
pedal.
•To Control HI-CUT: Turn the HI-CUT knob clockwise or counterclockwise while
holding down the ON/OFF and Select footswitches. When the EDIT LED flashes
twice, then the setting is completed.

10 11
8
ABOUT MIDI 9
SPECIFICATIONS & RATINGS
The TRI AVATAR can switch presets or modify all of the parameters via external
MIDI signals. A MIDI signal is assigned to each function as shown in the table
below.
When the TRI AVATAR’s preset is recalled by a MIDI program change number, the
unit operates as follows:
• In Preset mode: The specified preset is recalled.
• In Manual mode: The specified preset is recalled and the unit enters Preset mode.
• In Edit mode: Exits Edit mode without executing a write operation, enters Preset
mode and the specified preset number is recalled.
NOTE: Parameter adjustment using MIDI signals is available in all of Manual,
Preset, and Edit modes. If an expression pedal is connected to the EXP terminal,
the expression pedal takes priority and MIDI control of RATE or HI-CUT parameters
is disabled.
PRESET Number Program Change Number
PRESET-1 001
PRESET-2 002
PRESET-3 003
PRESET-4 004
Controls MIDI CC Numbers Value Range
RATE 85 0-127
HI-CUT 86 0-127
DEPTH RIGHT 87 0-127
DEPTH CENTER 88 0-127
DEPTH LEFT 89 0-127
DRY MIX 90 0-127
LEVEL 91 0-127
EFFECT ON/OFF 64 off=0, on=127
MIDI SPECIFICATION
●Inputimpedance:min.500kΩ
●Outputloadimpedance:min.10kΩ
●Max.inputlevel:+7dBm
●Controls:RATE,HI-CUT,DEPTHL/C/R,DRYMIX,LEVEL
●Terminals:4xStandard1/4”phonejack(IN,OUT-L(MONO),OUT-R,EXP)
1xDIN5PINconnector(MIDIIN)
1xDC9Vinputjack(forconnectingACadapter)
●Powersupply:9VDCviadedicatedACadapter
●Currentconsumption:max.140mA
●Dimensions(WxDxH,incl.protuberancessuchasfootswitches,jacks):
120x102.3x74mm(4.72x4.03x2.91inches)
●Weight(excl.accessories):approx.380g(0.84lbs)
●Accessories:Warrantycard,Ownerʼsmanual,ACadapter,4xrubberfeet
Specificationsandappearancesubjecttochangewithoutnotice.
120 74
58.5
95
102.3
Other manuals for TA-1H
1
Table of contents
Other Free The Tone Music Pedal manuals

Free The Tone
Free The Tone MOTION LOOP User manual

Free The Tone
Free The Tone TA-1H Use and care manual

Free The Tone
Free The Tone COSMIC WAVE User manual

Free The Tone
Free The Tone MOTION LOOP User manual

Free The Tone
Free The Tone FT-2Y/FLIGHT TIME User manual

Free The Tone
Free The Tone AS-1R User manual

Free The Tone
Free The Tone BLACK VEHICLE BV-1V User manual

Free The Tone
Free The Tone FT-2Y/FLIGHT TIME User manual

Free The Tone
Free The Tone OVERDRIVELAND User manual