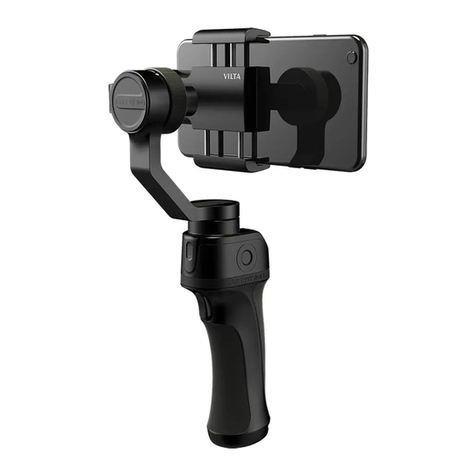
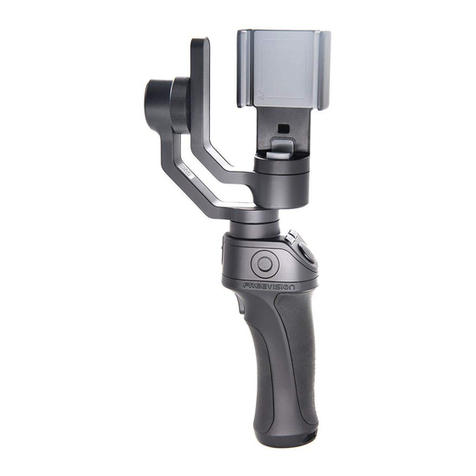
FreeVision Vilta User manual

VILTA
User Manual
www.freevisiontech.com
V 2.2

XFMDPNF
7*-5"DPOUBJOTUXPNPEFT%FOPJTJOHBOE1FSGPSNBODF
%FOPJTJOHJTEFGBVMUNPEFTVJUBCMFGPSBMMTDFOBSJPT#FTVSF
UPTFMFDU%FOPJTJOHNPEFXIFOZPVIBWFIJHISFRVJSFNFOU
POBVEJPRVBMJUZ
5IF1FSGPSNBODFJTTUSFOHUIFONPEFXIJDIXJMMHSFBUMZ
JNQSPWFUIFTUBCJMJUZPGHJNCBM5IFNPUPSSFTQPOTFJTSBEJDBM
UIBUXJMMCFBDDPNQBOJFEXJUITPNFOPJTF
5IF1FSGPSNBODF.PEFPOMZBQQMJFTUPTDFOFTUIBUSFRVJSF
FYUSFNFIJHITUBCJMJUZBDDVSBDZCVUOPUEFNBOEIJHIPODBNFSB
SFDPSEJOHRVBMJUZ4XJUDI%FOPTJOHBOE1FSGPSNBODFJO"QQ
5IF(P1SP"($"VUPNBUJD(BJO$POUSPMGVODUJPOXJMMHSFBUMZ
BNQMJGZUIFCBDLHSPVOETPVOE1MFBTFTFMFDU8JOE0OMZNPEF
PO(P1SPUPNJOJNJ[FUIFOPJTFUPUIFMPXFTU(P1SPBOE
(P1SPEPOPUIBWFUIJTQSPCMFN
*NQPSUBOU4UBUFNFOU
1MFBTFWJTJUPGGJDJBMXFCTJUFUPEPXOMPBEUIFMBUFTU6TFS.BOVBM

17 18
1
2
3
45
6
7
8
9
10
11
11
12
13
14
15
16
01. Tilt Axis
02. Roll Axis
03. Pan Axis
04. Power Switch
05. Shutter Button
06. Status Indicator
07. Joystick
08. Micro-USB Charging Port
09. Dismantle Button
10. Lanyard Hole
11. Camera Fixed Knob
12. Camera Frame
13. Pan Axis Lock
14.1/4 Screw Port
15. Function Button
16. HERO3/3+/4 Frame
17. Golden Finger Connector
18. 1/4 Screw Port
19. Accessory Mounting Port
20. Handle Battery Indicator
21. Micro-USB Charging Port
22. Handle Battery
23. Camera Charging Module
(Optional)
Product Overview
17
21
17
18
22
19
23
20

19 20
Installation
1
Unlock Gimbal
1
Install Camera
2
Handle Dismantle and Mantle
3
Install Accessory
4
Accessory Mounting Port
1/4 Screw Port
User Manual
1) Slide the Pan Axis Lock down
2) Twist the Tilt Aixs and Roll Axis to unlock
The Status Indicator will flash red if any axis is locked
1) Insert GoPro in the Camera Frame
2) Fasten the knob as indicated
1. Put Hero 3/3+/4 into frame before installing to the
Camera Frame
2. To avoid the camera falling, please ensure the
knob is fixed before power on
Dismantle: Press handle Dismantle Button and push as
stated to demount the handle
Mantle: Release Dismantle Button and align the mount,
slightly pushing forward the gimbal
2. Ensure you hear a click while mounting the grip
Fit for GoPro official
accessories
Fit for 1/4 screw camera kit
accessories
1. After dismantling handle, double tap on Power
Button of gimbal to switch Follow Mode

21 22
Control
2
Joystick
1
Connect and Shoot
3
VILTA as Remote Control
1
Joystick Virtual Joystick
Y:61 P:45 100%
4FUUJOH
2VJDL4FUUJOHT
0QFSBUJPO4UBUVT
+PZTUJDL
Tilt
Pan
Manual
2
Manual Mode can be turned on/ off in App
/RQJSUHVVWKH3RZHU6ZLWFKDQGFRQWURO9,/7$
through joystick
&RQQHFW9,/7$ZLWK$33DQGFRQWUROWKURXJKYLWXDOMR\VWLFN
GoPro5
GoPro 4
Power on the gimbal and camera, and operate camera
with the following steps
1) Long press the Shutter Button for 2 seconds to
shoot/stop shooting
2) Short press to take a picture
CONNECTIVITY Connect New Smart Remote
SETTING WI-FI RCPAIR
ON
When the Shutter Button lights off, connection is successful
Shutter Button
)RUPRUHGHWDLOHGIXQFWLRQFKHFNᱟ$GYDQFHGᱠᱟ6KXWWHU%XWWRQᱠ
NEWWI-FI RC
GoPro 3/3+
Directly adjust the shooting direction by hand

23 24
Connect APP
2
1)Via App,you can control the gimbal and camera
2)You can select the shooting mode in the Shooting
Function Menu in the APP
VIDEO
PHOTO
TIME LAPSE
Video Video+Photo Looping
Photo Night Burst
Time lapse photo Night lapse photo Time lapse video
Download and install APP
For iphone
For Andriod
Scan the QR code below to download and install
Please search FreeVision in APP Store to download
and install
The Shooting Function Menu in the APP
Charging4
VILTA Charging
1
Battery Indicator
2
GoPro Charging
3
Micro-USB
Charging Port
Charge gimbal and handle seperately through micro-USB
charging port
1) Take off the GoPro USB side door cover
(Caution: it may affect the water-proof function of GoPro)
2) Insert charging module into GoPro, the camera will be
charged by VILTA. Set GoPro charging mode in APP
GoPro charging module is an optional accessory
2) Short press on Function Button to check handle battery
level via Handle Battery Indicator.
1) Charge gimbal when the Power Switch glints.The Status
Indicator alternately glints in red,yellow and green lights
when charging. The Status Indicator turns green when
fully charged.

25 26
Mode
2
5
1
Function Button
Function Button Control
Power Switch Control
Power Switch
When the handle is released, double tap Power Switch
to shift mode
Red glint
Green glint
Warning
Busy/Auto Calibration
Status
Indicator
Yellow
Red
Green
Semi-follow Mode
Follow Mode
Lock Mode
Single tap
Press when recording Tag
Recording On/Off
Button Function
Connected
(Light off)
Picture
Double tap
Long press for 2s
Shutter
Button
Pairing ( Light on)
Long press for 6s
Selfie
Single tap
Long press for 2s
Double tap
On / Off
Sleep/Awake
Power
Switch
Button Function
(wearable gimbal only)
Long press for 7.5s Forced Shutdown
Mode Switch
Shutter Button
Power Switch
Status Indicator
Advanced
Button Function & Status Indicator Specification
Single
Tap
Double
Tap
Quadruple
Tap
Long
Hold Lock Mode
Tilt and Roll Axes are locked.
Pan Axis smoothly moves with handle
Follow
Mode
Lock
Mode
Semi-Follow
mode
(Default)
Roll Axis is locked. Pan and Tilt Axes
smoothly move with handle
Tilt, Roll, and Pan Axes are locked.
Camera always keeps the current
shooting direction
The camera returns to the front
Triple
Tap
Center the
camera
(Return to the previous mode when
Function Button released)
The Switching Sequence:
Semi-Follow (Default) Follow Lock

27 28
Parameter
6
Specification Parameter:
1
Other Specification
3
Technical Parameter:
2
Dimensions 94*41*258 mm(Folded)
Weight 430g(15.16 oz)
Supported Camera GoPro Hero3/3+/4/5
Pan Axis: 360° (Infinite Rotation)
7LOW$[LVᲄᲄ
Roll Axis: ±40°
Static Accuracy
Dynamic
Accuracy
Tilt: 0.001° Tilt: 0.01°
Pan: 0.002° Pan: 0.02°
Roll: 0.001° Roll: 0.01°
·Controllable Rotation Range
·Accuracy
Pan Axis: 360° (Infinite Rotation)
Tilt Axis: -90°to 135°
Roll Axis: -44°to 90°
·Mechanical Rotation Range
Voltage 7.6 V
Battery Type Intelligent Lithium Battery
Battery Capacity 350 mAh
Energy 2.66 Wh
·Gimbal Battery
·Gimbal
Voltage 7.6V
Working Current
Static 300mA , Dynamic 2.5A
Consumption 2.5W
WARNING
1. Do not expose to fire or high heat.
2. Drop and collision will break VILTA. Please caution.
3. Not water-proof. No water or liquid cleaning agent.
4. Do not disassemble, repair or modify VILTA.
5. Gimbal and handle need to be respectively charged.
Please use charger complying with public safety regulation.
6. Do not interfere VILTA operation when working.
7. Not suitable for children.
8. Not include GoPro.
Web: www.freevisiontech.com
86&XVWRPHU6XSSRUW888-898-6853
· 2SHUDWLQJ7HPSHUDWXUHᲇᲇ)
· Wearable Gimbal Working Time: 1.2h
· Handheld Gimbal Working Time: 7h
· Handle Charging Time: 2.5 h (5V,2A)
· Gimbal Charging Time: 1.5 h (5V, 1A)
· WIFI Working Frequency 2.412-2.462 GHz
1. VILTA handheld gimbal
2. Charging cable
3. Portable bag
4. Lanyard
5. User manual
6. Hero 3/3+/4 frame
Packing list
·Handle Battery
Voltage 7.4 V
Battery Type Intelligent Lithium Battery
Handle Battery Capacity 2000mAh
Energy 14.8Wh
·Maximum Control Speed:
$GDSWLYH5RWDWLRQ6SHHGᱡᲄV
° °

29 30
Only can use battery which compliance CE for charging
'RQRWXVHWKHSURGXFWLQHQYLURQPHQWEHORZᲇRU
DERYHᲇIRUFKDUJLQJ7KH5)GLVWDQFHEHWZHHQERG\
and product is 0cm
European standards:
(19(19
(19(19
(19(19
(1$&(1
(1
(1$$$$
CE WARNING
Caution:
Use the product in the environment with the temperature
EHWZHHQᲇDQGᲇ2WKHUZLVHLWPD\GDPDJH\RXU
product. It can be operating under 2000m
For the following equipment:
Product Name: VILTA
Model / Brand Name: VT01
Hangzhou Freevision Intelligent Technology Co., Ltd
hereby declares that this [Name: VILTA, Model: VT01]
is in compliance with the essential requirements and other
relevant provisions of Directive 1999/5/EC
The equipment was passed. The test was performed
according to the following
The SAR limit of USA (FCC) is 4.0W/kg averaged over one
gram of tissue. Device types VILTA / (FCC ID: 2ALQU-VT01)
has also been tested against this SAR limit. SAR information
RQWKLVDQGRWKHUSDGFDQEHYLHZHGRQ⇽OLQHDW
http://www.fcc.gov/oet/ea/fccid/.
Please use the device FCC ID number for search.
This device was tested for kept 0mm from the hand.
To maintain compliance with FCC RF exposure
requirements, use accessories that maintain a 0mm
separation distance between the user's hand. The use
of belt clips, holsters and similar accessories should not
contain metallic components in its assembly. The use of
accessories that do not satisfy these requirements may
not comply with FCC RF exposure requirements, and
should be avoided.
FCC WARNING
FCC RF Exposure Information and Statement
This device complies with Part 15 of the FCC Rules.
Operation is subject to the following two conditions:
(1) This device may not cause harmful interference, and
(2) this device must accept any interference received,
including interference that may cause undesired
operation
NOTE 1: This equipment has been tested and found to
comply with the limits for a Class B digital device,
pursuant to part 15 of the FCC Rules. These limits are
designed to provide reasonable protection against
harmful interference in a residential installation. This
equipment generates, uses and can radiate radio
frequency energy and, if not installed and used in
accordance with the instructions, may cause harmful
interference to radio communications. However, there

31 32
NOTE 2: Any changes or modifications to this unit not
expressly approved by the party responsible for
compliance could void the user's authority to operate
the equipment.
is no guarantee that interference will not occur in a
particular installation. If this equipment does cause
harmful interference to radio or television reception,
which can be determined by turning the equipment
off and on, the user is encouraged to try to correct the
interference by one or more of the following measures:
- Reorient or relocate the receiving antenna
- Increase the separation between the equipment and
receiver
- Connect the equipment into an outlet on a circuit
different from that to which the receiver is connected
- Consult the dealer or an experienced radio/TV
technician for help
Warranty Rules
Non Warranty Rules
Warranty Information
From the purchase date, you enjoy the free repair within
12 months with this card if it occurs any qualityproblems.
1) If within 7 days of purchase and it occurs manufacturing
defect, the customer can choose to have a full refund
(based on the invoice price) or exchange the product for
a new one.
2) With 1 year of purchase, you can enjoy free repair if it is
non man-made problem.
3) The product has not been refitted, dissembled or modified.
4) Valid purchase proof is provided.
$PDQPDGHSUREOHPDIIHFWLQJWKHTXDOLW\RISURGXFW
2) Damage caused by refitting, disassemble, or opening of
WKHVKHOO
3) An uncontrollable incident( earthquake, fire, flood, war)
UHVXOWLQJGDPDJH
4) Damage caused by not using as stated in the user manual
1) The customer is at first required to pay the product return
delivery fee. After Freevision after-sale service center
receives the product, it will undergo a test.
2) If the product does not conform to the conditions for free
repair, Freevision will assess the problem and cost of
repair, the customer has the right to repair or deliver it back.
3) When you receive the repair service, please provide valid
purhase proof and this warranty card. Please note: The
warranty card only becomes valid after sale. The card can
not be altered, or it will be deemed invalid.
4) Freevision reserves the right of final interpretation.
Warranty Rules
If your VILTA meets the following requirements, you can
enjoy the warranty policy:
If your VILTA falls under one of the following situations,
we will charge appropriate maintenance cost:

33
Warranty Card
$VTUPNFS*OGPSNBUJPO
/BNF@@@@@@@@@@@@@@@@@@@@@@@@
5&-@@@@@@@@@@@@@@@@@@@@@@@@@@
;JQ$PEF@@@@@@@@@@@@@@@@@@@@
&NBJM@@@@@@@@@@@@@@@@@@@@@@@@
"EESFTT@@@@@@@@@@@@@@@@@@@@@@
%FBMFS*OGPSNBUJPO
/BNF@@@@@@@@@@@@@@@@@@@@@@@@
5&-@@@@@@@@@@@@@@@@@@@@@@@@@@
;JQ$PEF@@@@@@@@@@@@@@@@@@@@@
&NBJM@@@@@@@@@@@@@@@@@@@@@@@@@
"EESFTT@@@@@@@@@@@@@@@@@@@@@@@
1SPEVDU*OGPSNBUJPO
*UFN/VNCFS@@@@@@@@@@@@@@@@@@@
1SPEVDU$PEF@@@@@@@@@@@@@@@@@@
1VSDIBTF%BUF@@@@@@@@@@@@@@@@@

Inspection Date Repair Date Cause Result Technician Signature
Other manuals for Vilta
5
Table of contents
Other FreeVision Camera Accessories manuals