Installing Frontier DSL Service
Efficient 674081-IC-0802
7
STEP 2: Install your Modem’s Software (Macintosh and Ethernet customers skip to Step 3, Number 7)
1. If you have not already done so, start up your computer.
2. Insert the SpeedStream Installation CD into your CD-ROM drive.
3. Click the “Start” button on the windows task bar.
4. Select “Run” from the Start menu.
5. Type “d:\setup.exe” where “d” represents your CD-ROM drive.
Note: Your drive letter may not be “d.”
6. Click the “OK” button.
7. The software installation program will start. Follow the on-screen directions to complete
the software installation. When prompted to attach the modem, please refer to the
instructions in STEP 3.
STEP 3: Connect your Modem’s Cables (Macintosh and Ethernet customers skip to Number 7)
In this step you will connect the modem’s power supply, telephone, and USB cables
IMPORTANT: Do not install a microfilter on this line!
1. If you have not completed STEP 2, please do so now.
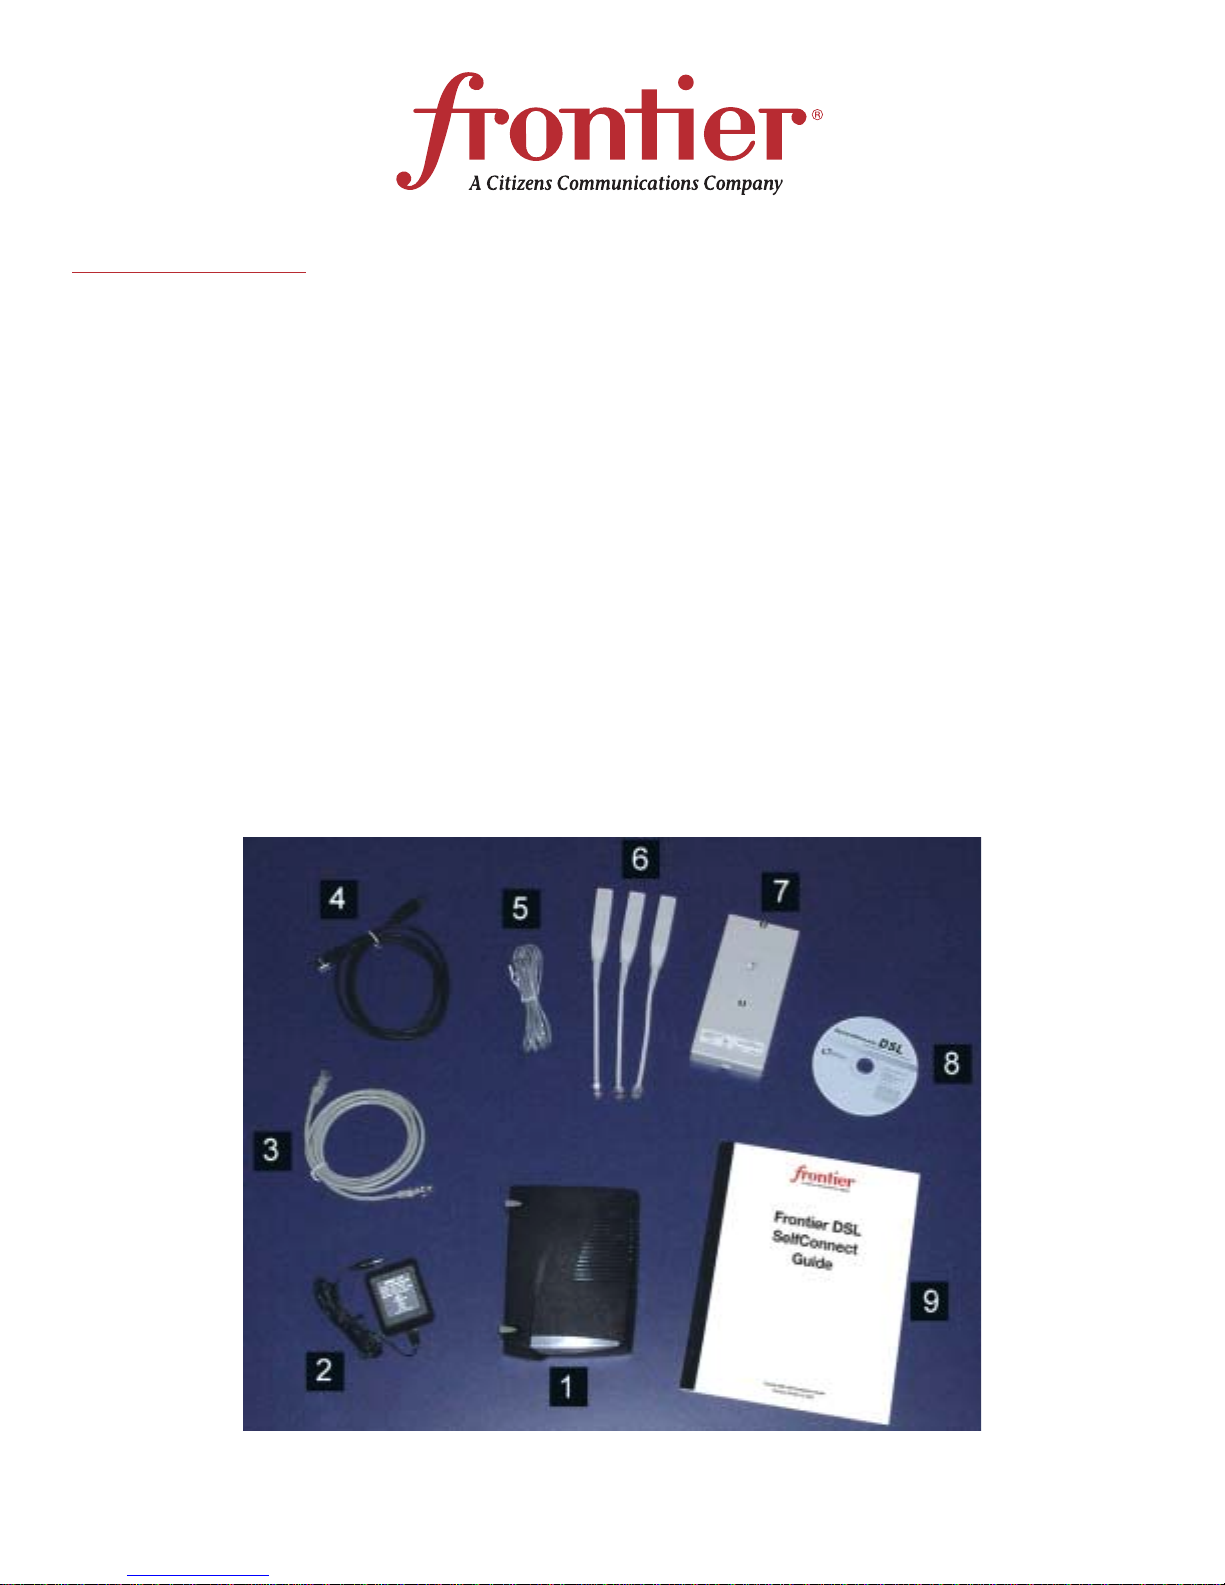
2. Plug the power adapter’s cord (Page 2 – Figure 1, Item 2) in to the PWR port (Page 8 – Figure 3)
on your modem. Plug the other end of the power cord in to a power outlet. Push the
power switch in, to the ON position.
3. If the POWER light stays dark, refer to Troubleshooting on page 12.
4. Plug one end of the telephone cable (gray) (Page 2 - Figure 1, Item 5) into the DSL port on
the modem (Page 8 - Figure 3). Plug the other end of the cable into the wall jack that is
providing your Frontier DSL connection.
5. Plug the square end of the USB cable (black) (Page 2 - Figure 1, Item 4) into the Modem’s
USB port (Page 8 - Figure 3). Plug the rectangle end of the cable into your computer’s
USB port.
6. A New Hardware Found message will appear on your computer and the drivers
will finish loading.