4
lippert.com 432-LIPPERT (432-547-7378) Rev: 11.11.22
Trekker™500W
Portable Power Station
Installation and Owner’s Manual
(For Aftermarket Applications)
CCD-0006493
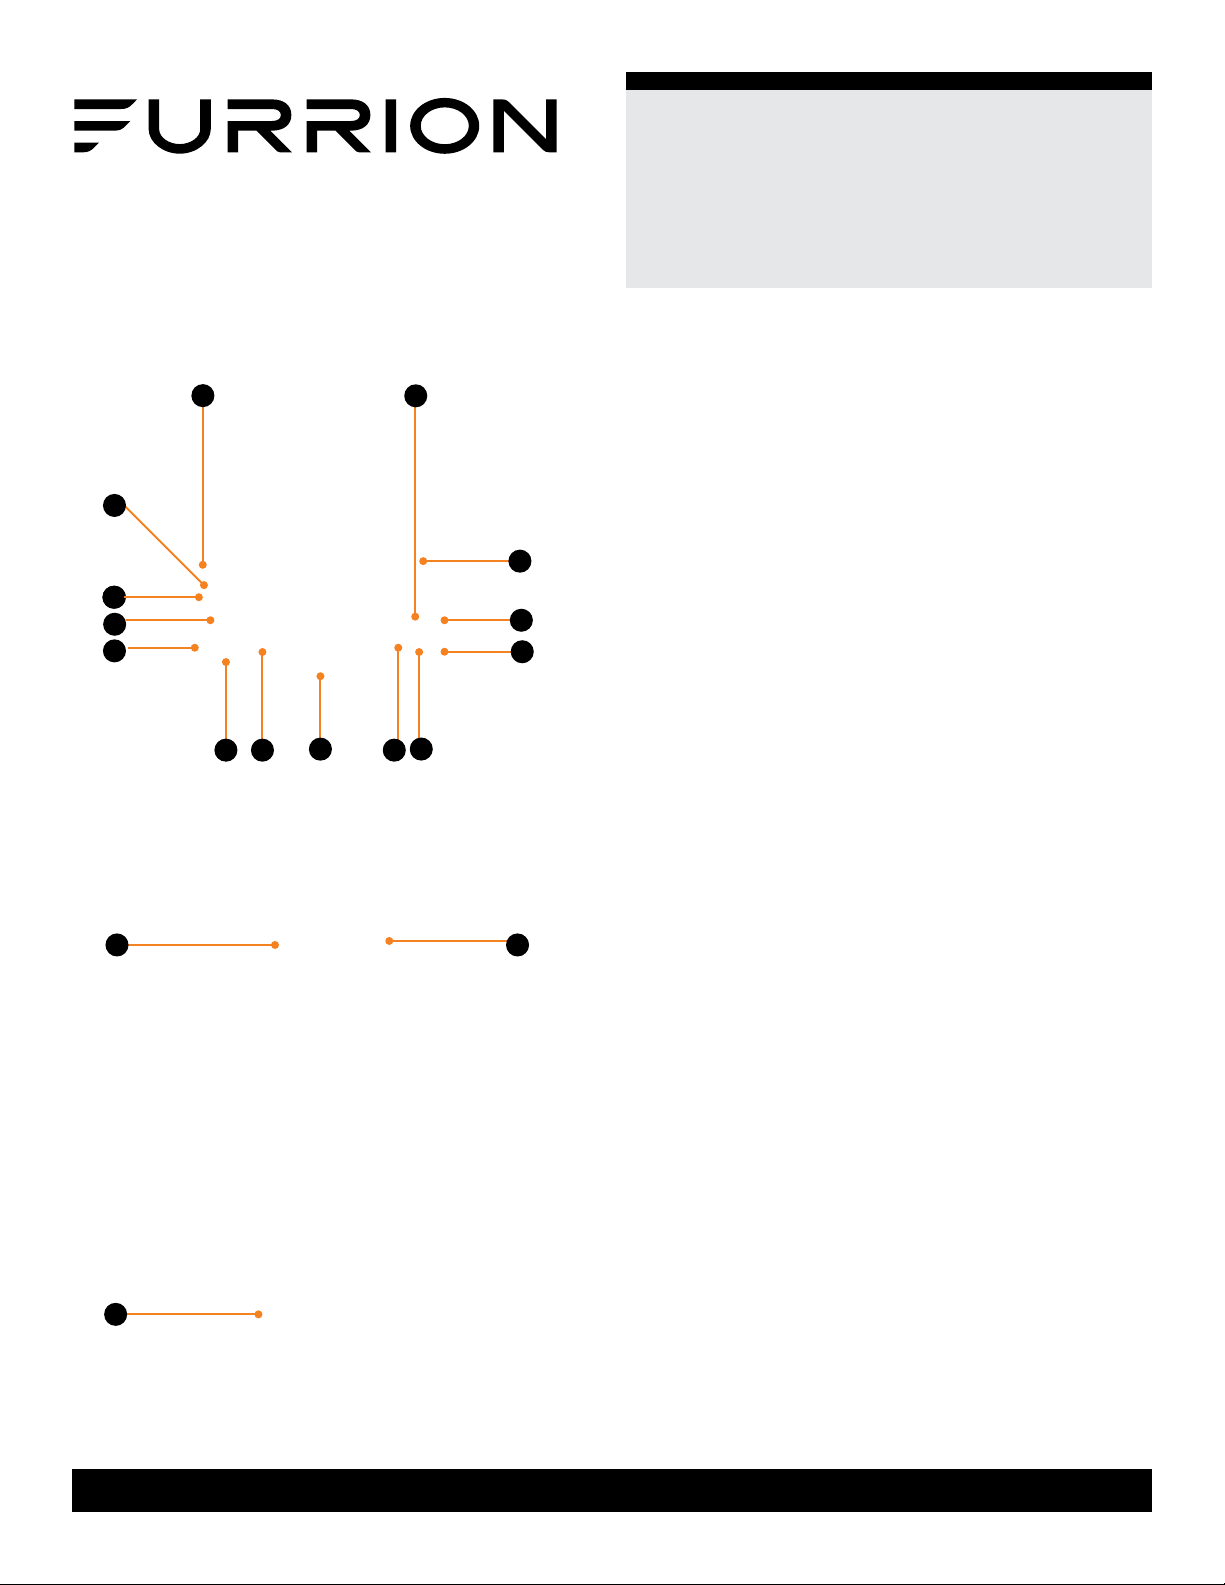
A
B C D E F
I
G H
LCD Display Screen
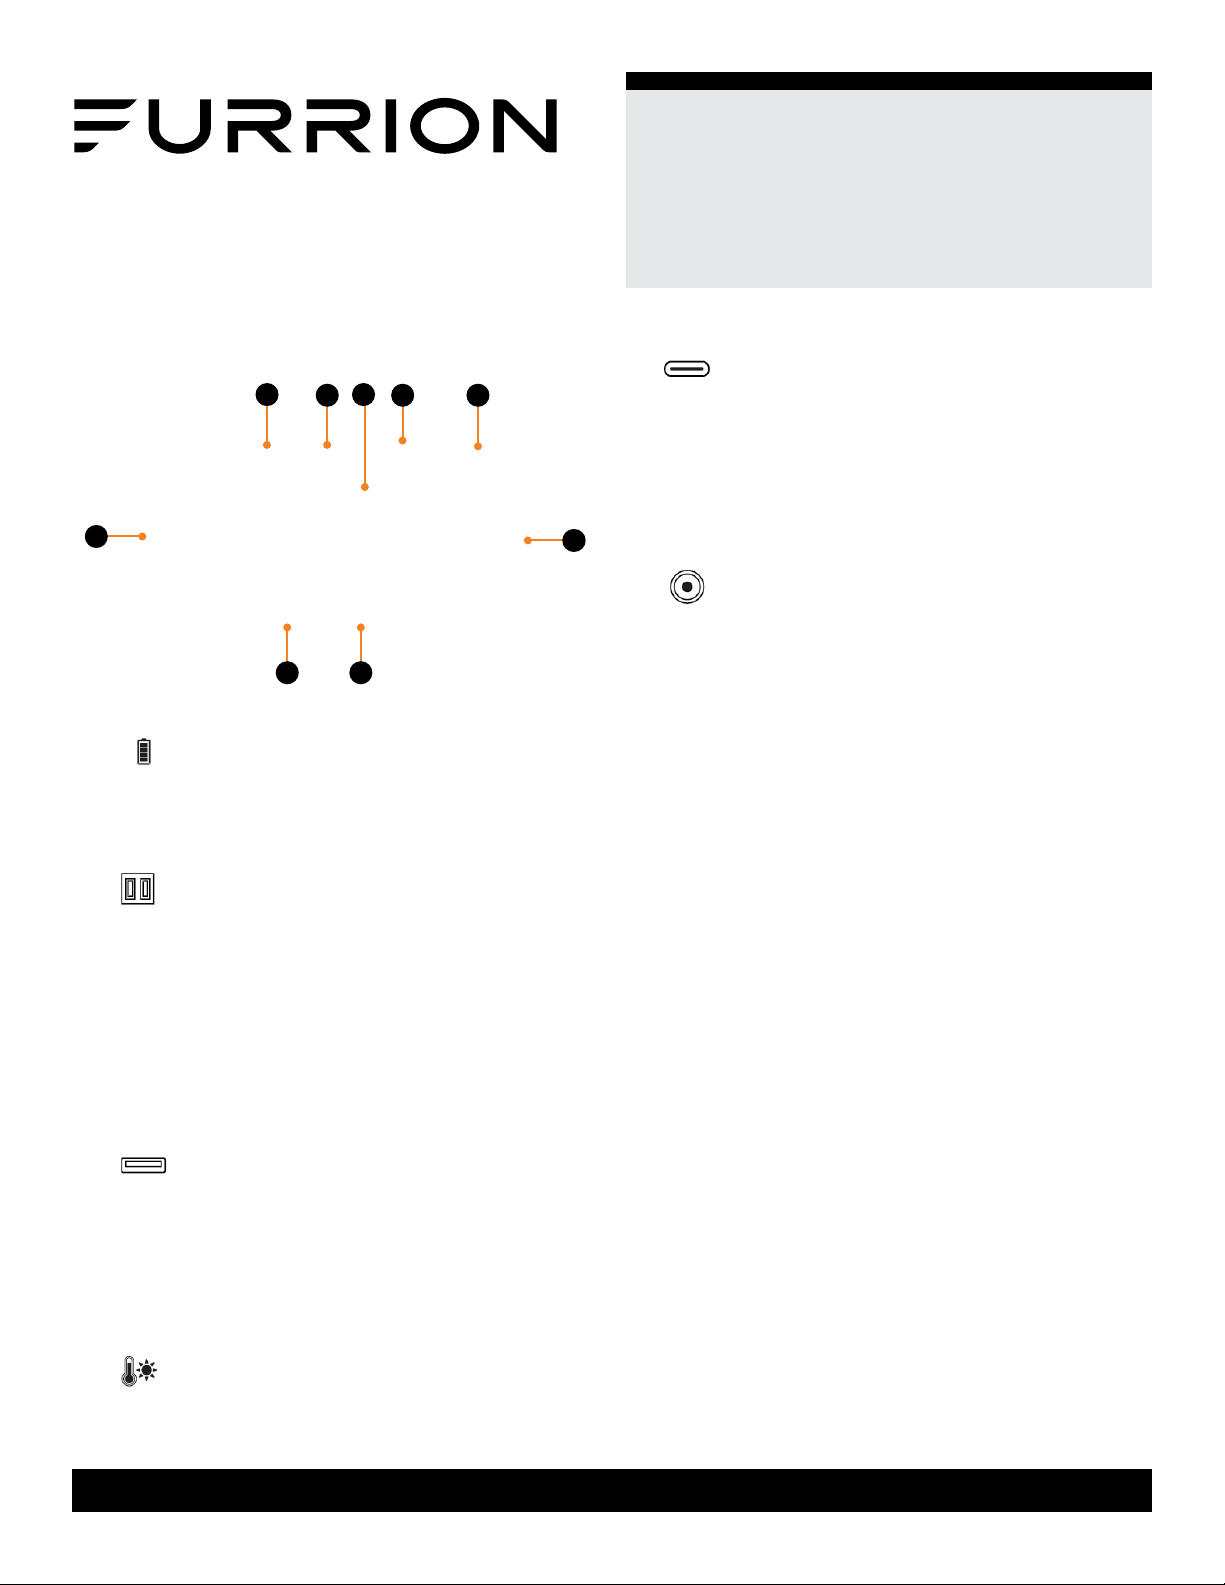
A. - Battery Life Symbol
The battery indicator when full will show four cells within,
with each cell representing 25%. When charging, the cells
will flash to represent the current state of the charging
process. Once complete the screen will display “FUL”.
B. - AC Output Symbol
Press the AC button for a long time to tum on the power.
The symbol will light up. At this time, the AC output socket
of the product can be used for output. If the AC socket
is not used, please long press the AC button in time
to power off. The AC symbol will disappear, which can
reduce unnecessary loss (When the AC output is on, the
product will always be in power on state and will not be
closed automatically).
Support charging and discharging at the same time.
C. - USB Output Symbol
Short-press the button located by the USB section of the
unit to activate the ports.
The display will show either the “USB” symbol or the “USB
TPYE-C” symbol dependent on the device plugged into the
respective port.
To turn off, short-press the button.
D. - High Temperature Alarm Symbol
This icon will be displayed if the operating temperature of
the unit is too high during use.
E. -Type-C Output Symbol
Short-press the button located by the USB section of the
unit to activate the ports. The display will show either the
“USB” symbol or the “USB TYPE-C” symbol dependent
on the device plugged into the respective port. To turn off,
short-press the button.
When charging the unit utilizing the PD 60W port the
display will show the “USB TYPE-C” symbol.
F. - DC Output Symbol
Short-press the button located by the DC outputs to
activate the ports. The “DC” symbol will be displayed when
device is plugged into either of the ports.
To turn off, short-press the button.
G. OVERLOAD - Overload Alarm Symbol
When the product is overloaded, the overload alarm
symbol will be on, the correspond ing port symbol will flash,
the automatic protection will be turned on and the output
will be closed; after the load is removed, the symbol will
be closed, AC will be automatically recovered, and other
buttons can be pressed for recovery.
H. - Real Time Power Display Symbol
Whether the unit is being charged or discharged (powering
devices), the display will represent the amount of power
being used or delivered at the current time. This number
will fluctuate in real time with the plugged in
devices demand.
I. - Real Time Use of Time Symbols
When the unit is being charged, this display will provide
the amount of time estimated until full charge is achieved.
When the unit is being used to power a device, the display
will show the amount of time estimated until charge
is required.