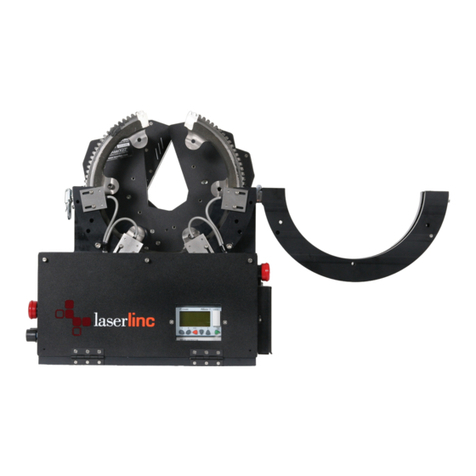
LaserLinc NetLinc TLAser400 User manual

Quick Start Guide 18 - RevA
Installing a NetLinc™ Processor
NetLinc Configuration
A NetLinc™ micrometer interface is a LaserLinc laser scanning micrometer connected via
Ethernet to a PC running TotalVu software. The NetLinc interface should not be confused with
the SmartLinc™ processor. The NetLinc interface requires a PC with TotalVu software while the
SmartLinc processor does not.
There are two types of NetLinc scanners: Internal and External. The external NetLinc adds
NetLinc capabilities to any LaserLinc scanner. This method enables prism-based micrometers to
be used as NetLinc scanners (prism-based micrometer bodies are too small to support internal
NetLinc circuitry). Note that competitor gauges are NOT supported by the External NetLinc and
can only be run using a TLAser400™ card. An Internal NetLinc is a LaserLinc micrometer with
network connectivity built in to the gauge head itself. It is not possible to use an Internal NetLinc
with a TLAser400™ card.
If your scanner connects to the computer using the TLAser400™ micrometer interface card, use
the quick start guide Adding a TLAser400™ Card Scanner, not this guide.
The benefit of a NetLinc interface over TLAser400 card connection is that a NetLinc interface
does not require proprietary cables. Standard Ethernet cabling allows the NetLinc interface to be
run on smaller computers and/or laptops that are incompatible with the TLAser400™ card. The
NetLinc interface also simplifies additional connections by allowing the use of standard Ethernet
switches for connecting multiple scanners to the same cable and/or computer.
Note: TotalVu software is currently limited to supporting a total of eight TLAser400 cards and
NetLinc scanners. Thus a system with two TLAser400 cards can only support 6 NetLincs.
TotalVu Setup
TotalVu version 5.14.2.3 or greater is required. Click here for a video showing how to configure
a standard gage. Configuring a NetLinc interface is similar. There is one new screen.
1 Start Total Vu software
1.1 Select the menu TotalVu>Full Configuration... or press Ctrl+C.
1.2 Double-click the Scanners icon to open the Scanners window. If this is the first scanner

to be added, the only icon will be for Add Scanner.
1.3 Add Scanner scree.
1.3.1 Double click the Add Scanner icon.
The Add Scanner wizard will open.
1.3.2 Complete the Add Scanner wizard as described in the following steps.
1.3.3 Enter the serial number of the scanner.
If the number is not accepted, you may need to update your linearization files.
1.3.4 Click Next or press Enter to move to the next screen.
1.4 Connection screen.
1.4.1 Check the box for Scanner is connected as a NetLinc device.
This indicates that the scanner uses a NetLinc interface for connection and will
not require the TLAser400™ card.
1.4.2 Click Next or press Enter to move to the next screen.
This is the new screen. It contains three fields: NetLinc Scanner IP Address, Host IP Address, and
NetLinc Serial Number.
NetLinc Scanner IP Address: The NetLinc is assigned this IP address each time the connection
from TotalVu is made. The IP address for the NetLinc is not saved. You do not need match this
IP address with the NetLinc, as this field is authoritative.
If the NetLinc is connected to the general network as rather than a crossover connection, you
must acquire the IP address from a network administrator. The address should come from an IP
range reserved for Static IPs in the DHCP configuration.
If the NetLinc is connected directly to the PC with a crossover cable, before finishing this step
you will need to establish the Host IP address. The Scanner IP address must match the PC’s
except for the last octet. In this case 10.10.10.x (where x = 2-n not to conflict with other devices)
is suggested. See General Network and Crossover Direct.
Host IP Address: Tells TotalVu which Ethernet interface of the computer to use by naming the
associated IP address. To fill out this field, you must find your IP address . If you are using a
crossover direct connection, you must first set a static IP Address for this network. You may use
10.10.10.1 as specified in Crossover Direct below. Ensure you do not confuse this Ethernet
network with a separate wireless network.
NetLinc Serial Number: This field is only used for an External NetLinc. The External NetLinc
serial number is attached to the side of the unit. It starts with an x followed by 5 digits. For an
Internal NetLinc this field is left blank as the serial number of the scanner from step 1 is
sufficient.
Complete the rest of the tabs as you would for a standard scanner. After connecting you will
need to calibrate the NetLinc using the standard method.

Network Setup
Here are two of the many methods for connecting a NetLinc to the TotalVu PC.
General Network
This method uses the facility network as the medium for connecting the NetLinc to the TotalVu
PC.
Using the facility network provides these benefits: (1) A NetLinc may be connected to any
network switch available within the plant as long as it is on the same subnet as the TotalVu PC.
(2) The TotalVu PC’s network card does not need to be configured with a static IP. The PC can
automatically get its IP address by DHCP. This IP address must be determined and copied into
the TotalVu configuration.
Drawbacks include: (1) Because the IP address must be reserved to prevent another device from
using it, you must acquire the address from a network administrator. (2) Using a larger network
provides more chances for configuration problems, IP address conflicts, and possible data
restrictions due to router or firewall configuration.
Setup
1. Connect the TotalVu PC to the network.
2. Connect the NetLinc to the network.
3. Ask the Network Admin for an IP address for the NetLinc.
Crossover Direct
This method physically connects the NetLinc to the PC by connecting one end of a network
cable to the NetLinc and the other end to the PC. If multiple NetLincs are desired, an Ethernet
switch (not a router) may be used to combine multiple scanners on one network cable connection
to the PC.
The crossover direct method provides these benefits: (1) Because the network is private from
scanner to PC, the IP address does not need to be reserved by a Network Administrator. (2)
Variations in plant networks have no effect on the configuration. (3) Because the connection is
point-to-point, fewer packets will be lost and the connection is more reliable. (4) The IP address
of the PC is known ahead of time, which allows the system to be preconfigured.
Drawbacks include: (1) A direct connection requires a dedicated Ethernet card on the PC, which
usually means multiple Ethernet interfaces. This can cause confusion among users, who may
switch the Ethernet cables for the plant network and NetLinc. (2) Long cables could be needed,
depending on distance to the NetLinc. (3) The TotalVu PC needs custom configuration on the
dedicated network card.

Setup
To use this method, a Static IP must be assigned to the PC’s network card.
1. Select Start->Run, type ncpa.cpl and click enter to bring up the Network Connections dialog.
2. Right click the network connection and select properties.
3. Find the entry Internet Protocol Version 4 (TCP/IPv4) or Internet Protocol (TCP/IP on XP) and
select Properties.
4. Select the option for Use the following IP address:.
5. Set the IP address to 10.10.10.1 or one of your own choosing. If you have a UG+ on a
different NIC make sure you don’t reuse the same subnet.
6. Set the Subnet mask to 255.255.255.0.
7. Selectk Ok and Ok to confirm these changes.
Scanner Setup
External NetLinc
1. Connect the NetLinc box to a standard power cord (provided).
2. Depending on the selected network setup, connect an Ethernet cable from the network port
on the NetLinc to either the PC or the plant network.
3. Using the supplied micrometer cable, connect the LaserLinc micrometer to your NetLinc.
Depending on your micrometer, the cable will be labeled with either a 3051 or 3075 prefix.
4. If the scanner has a separate power cable, use it to power the scanner. Except for the 203, all
prism scanners are powered by the data connection.
Internal NetLinc
The Internal NetLinc receives power from the scanner using the single standard power cord
officially known as a C13 C14 coupler
Depending on the selected network setup, connect an Ethernet cable from the network port on
the scanner to either the PC or the plant network.
Table of contents
Other LaserLinc Measuring Instrument manuals
Popular Measuring Instrument manuals by other brands

Emerson
Emerson MicroMotion HPC010 installation manual

Fonrich
Fonrich FR-DCMG Series user manual

Siemens
Siemens SENTRON PAC3200T product manual

Invicta
Invicta METRILOG Product guide

Tektronix
Tektronix 7L5 instruction manual

PCB Piezotronics
PCB Piezotronics IMI Sensors M603C00 Installation and operating manual