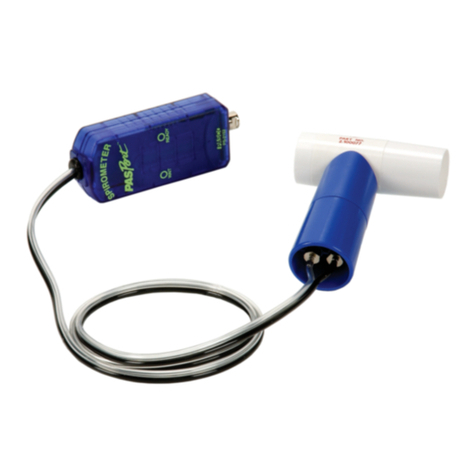
PASCO PS-3234 User manual

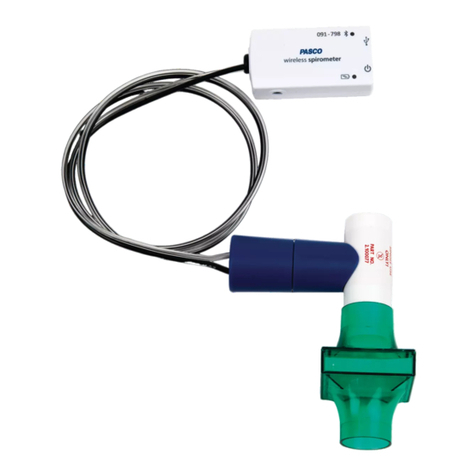
Wireless Spirometer (PS-3234)
Introduction
The Wireless Spirometer is designed for use with PASCO
Capstone or SPARKvue data collection software. The sensor
allows you to perform respiratory measurements, such as flow
rate, lung volume, and pressure.
NOTE:
•This is NOT a medical device. It is
designed for educational use only and
should not be used in life support, patient
diagnosis, or any other medical process. It
is also not intended for use in graduate
research or industry, including industrial
control or any type of industrial testing.
•Read all instructions before using the
product. Students should be supervised by
their instructors. When using the product,
follow the instructions in this manual and all
applicable local safety guidelines.
•Do not share mouthpieces or filters. The
mouthpieces and filters are intended for a
single occasion, which may include several
tests with the same individual.
CAUTION: In medical settings, pulmonary
function tests are performed under the
supervision of a medical professional. When
using a spirometer without medical supervision,
use extra caution. A person with a medical
condition that may be affected by a pulmonary
function test should NOT use the Wireless
Spirometer. Immediately end use if the subject
experiences breathing difficulty or discomfort.
Equipment
Included equipment:
•Wireless Spirometer
•3× mouthpieces
•3× mouthpiece filters
•USB cable
Features:
XXX-XXX
Device ID
Use to identify the sensor when connecting via Bluetooth.
Bluetooth Status LED
Indicates the status of the Bluetooth connection.
Bluetooth LED Status
Red blink Ready to pair
Green blink Connected
Yellow blink Logging data
For information on remote data logging, see the PASCO
Capstone or SPARKvue online help.
NOTE: The Bluetooth Status LED is disabled
when the sensor is connected to a computer via
the micro USB cable.
USB port
Use with the USB cable to connect the sensor to a USB
wall charger. The port can also be used to connect the
sensor to the software via the USB port of a computer or
mobile device. Note that this connection method is not
supported by iOS devices.
Power button
Press and briefly hold to turn the sensor on or off.
Battery Status LED
Indicates the battery level and current charging status.
Battery LED Status
Red blink Low power
Yellow ON Charging
Green ON Fully charged
Threaded hole
Accepts 1/4-20 screws. Use to mount the sensor to a
mounting rod or other similar apparatus.
Handle
Attach the mouthpiece here. Hold the handle upright and
steady while collecting data.
Product Guide | 012-16752B
1

Getting started
Initial step: Charge the battery
Charge the battery by connecting the micro USB port to any
standard USB charger. The Battery Status LED is solid yellow
while charging. When fully charged, the LED changes to solid
green.
Get the software
You can use the sensor with SPARKvue or PASCO Capstone
software. If you’re not sure which to use, visit
pasco.com/products/guides/software-comparison.
SPARKvue is available as a free app for Chromebook, iOS, and
Android devices. We offer a free trial of SPARKvue and
Capstone for Windows and Mac. To get the software, go to
pasco.com/downloads or search for SPARKvue in your device’s
app store.
If you have installed the software previously, check that you have
the latest update:
SPARKvue
Go to Main Menu > Check for Updates
PASCO Capstone
Go to Help > Check for Updates.
Check for a firmware update
SPARKvue
1. Press the power button until the LEDs turn on.
2. Open SPARKvue.
3. Select Sensor Data on the Welcome Screen.
4. From the list of available devices, select the sensor that
matches your sensor’s device ID. A notification appears if a
firmware update is available. Click Yes to update the
firmware.
5. Close SPARKvue once the update is complete.
PASCO Capstone
1. Press and hold the power button until the LEDs turn on.
2. Open PASCO Capstone.
3. Click Hardware Setup.
4. From the list of available devices, select the sensor that
matches your sensor’s device ID. A notification appears if a
firmware update is available. Click Yes to update the
firmware.
5. Close Capstone once the update is complete.
Set up the software
SPARKvue
Connecting the sensor to a tablet or computer via
Bluetooth:
1. Turn on the Wireless Spirometer. Check to make sure the
Bluetooth Status LED is blinking red.
2. Open SPARKvue, then click Sensor Data.
3. From the list of available wireless devices on the left, select
the device which matches the device ID printed on your
Wireless Spirometer.
Connecting the sensor to a computer via micro USB cable:
1. Open SPARKvue, then click Sensor Data.
2. Connect the provided micro USB cable from the micro USB
port on the sensor to a USB port or powered USB hub
connected to the computer. The sensor should
automatically connect to SPARKvue.
Collecting data using SPARKvue:
1. Select the measurements you intend to record from the
Select Measurements for Templates menu by clicking the
check box next to the relevant measurements' names.
2. Select an option in the Templates section to open the
Experiment Screen. The template will auto-populate with
the selected measurements.
3. Click Start to begin recording data.
PASCO Capstone
Connecting the sensor to a computer via Bluetooth:
1. Turn on the Wireless Spirometer. Check to make sure the
Bluetooth Status LED is blinking red.
2. Open Capstone, then click Hardware Setup in the
Tools palette.
3. From the list of Available Wireless Devices, click the
device which matches the device ID printed on your
Wireless Spirometer.
Connecting the sensor to a computer via micro USB cable:
1. Open Capstone. If desired, open Hardware Setup to
check the connection status of the sensor.
2. Connect the provided micro USB cable from the micro USB
port on the sensor to a USB port or powered USB hub
connected to the computer. The sensor should
automatically connect to Capstone.
Collecting data using Capstone:
1. Double-click an appropriate icon in the Displays palette to
create a new blank display of the corresponding type.
2. To assign measurements to the display, click each <Select
Measurement> box and select an appropriate
measurement from the list.
3. Click Record to begin collecting data.
Wireless Spirometer | PS-3234
2

Data collection
Using the sensor requires two people: one to serve as the test
subject, and one to perform data collection.
1. Connect the mouthpiece to the handle as shown below.
Make sure to align the pin on the mouthpiece with the notch
on the handle.
2. Connect the filter to the mouthpiece so that it creates a
snug fit.
3. Tell the subject to hold their breath, place their teeth and
lips on the filter, pinch their nose closed, stand still, and
relax. (See below.)
4. Begin data collection. The sensor will perform a calibration
procedure, as indicated by the Bluetooth Status LED
flashing red. Wait until the light flashes green, then move to
the next step.
5. Guide the test subject through each of the following data
collection steps. Do not show the data to the test subject as
it is collected.
a. Take four normal breaths.
b. Inhale as deeply as possible, then exhale deeply with
maximum effort.
c. Take two normal breaths.
6. Stop data collection.
NOTE: You may need to perform the test a few
times to ensure data is satisfactory. If the data
drifts or the calibration light does not turn green,
refer to Troubleshooting.
Interpreting the data
When performed correctly, a plot of lung volume versus time for
the experiment described in Data collection will yield data like
what is shown above. The following quantities can be obtained
from this plot:
•Tidal Volume (TV)
The volume of one breath, or the amount of air moved into
and out of the lungs during normal breathing.
•Functional Residual Capacity (FRC)
The amount of air left in the lungs after a normal expiration
(FRC = RV + ERV). The typical FRC value is about 2.5 L.
•Inspiratory Capacity (IC)
The maximum amount of air that can be inspired after a
normal expiration (IC = TV + IRV).
•Expiratory Reserve Volume (ERV)
The amount of air moved out of the lungs during a forced
expiration, beyond the level of tidal expiration.
•Inspiratory Reserve Volume (IRV)
The amount of air moved into the lungs during a forced
inspiration, beyond the level of tidal inspiration.
•Forced Expiratory Volume in One Second (FEV1.0)
The volume of air moved out of the lungs in the first second
of a forceful expiration after a maximal inspiration.
•Residual Volume (RV)
The amount of air remaining in the lungs at the end of a
forced expiration. The typical RV value is about 1.2 L.
•Vital Capacity (VC)
The maximum movable amount of air contained by the
lungs (VC = TV + IRV + ERV).
•Total Lung Capacity (TLC)
Maximum volume of air the lungs hold at peak inspiration.
Product Guide | 012-16752B
3

Troubleshooting
You may notice a slow drift or slight fluctuation in the baseline in
your graphs of Total Flow and Lung Volume. In most cases these
can be eliminated with the steps below. Note that slow baseline
changes usually do not significantly affect the measurements of
volumes and capacities that can be found from the graphs.
•Air pressure changes in the environment during the
measurement period can influence the sensor readings.
These pressure changes can be caused by doors opening
or closing, ventilation systems starting or stopping, and air
movement within the testing room, among other potential
sources. Try to reduce the presence of such changes while
collecting data. In most cases, natural environmental
pressure variation is tolerably low over the typical 30
second test period.
•If you observe significant drift across multiple runs, try
switching Steps 3 and 4 in the Data collection procedure,
allowing the sensor to calibrate while resting motionless on
a flat surface before being held to the subject’s mouth.
Software help
The SPARKvue and PASCO Capstone Help provide additional
information on how to use this product with the software. You
can access the help within the software or online.
SPARKvue
Software: Main Menu > Help
Online: help.pasco.com/sparkvue
PASCO Capstone
Software: Help > PASCO Capstone Help
Online: help.pasco.com/capstone
Specifications and accessories
Visit the product page at pasco.com/product/PS-3234 to view
the specifications and explore accessories. You can also
download experiment files and support documents from the
product page.
Experiment files
Download one of several student-ready activities from the
PASCO Experiment Library. Experiments include editable
student handouts and teacher notes. Visit
pasco.com/freelabs/PS-3234.
Technical support
Need more help? Our knowledgeable and friendly Technical
Support staff is ready to answer your questions or walk you
through any issues.
Chat pasco.com
Phone 1-800-772-8700 x1004 (USA)
+1 916 462 8384 (outside USA)
Email support@pasco.com
Regulatory information
Limited warranty
For a description of the product warranty, see the Warranty and Returns page at
www.pasco.com/legal.
Copyright
This document is copyrighted with all rights reserved. Permission is granted to non-
profit educational institutions for reproduction of any part of this manual, providing
the reproductions are used only in their laboratories and classrooms, and are not
sold for profit. Reproduction under any other circumstances, without the written
consent of PASCO scientific, is prohibited.
Trademarks
PASCO and PASCO scientific are trademarks or registered trademarks of PASCO
scientific, in the United States and in other countries. All other brands, products, or
service names are or may be trademarks or service marks of, and are used to
identify, products or services of, their respective owners. For more information visit
www.pasco.com/legal.
Product end-of-life disposal
This electronic product is subject to disposal and recycling regulations
that vary by country and region. It is your responsibility to recycle your
electronic equipment per your local environmental laws and regulations
to ensure that it will be recycled in a manner that protects human health
and the environment. To find out where you can drop off your waste
equipment for recycling, please contact your local waste recycle or disposal
service, or the place where you purchased the product. The European Union
WEEE (Waste Electronic and Electrical Equipment) symbol on the product or its
packaging indicates that this product must not be disposed of in a standard waste
container.
CE statement
This device has been tested and found to comply with the essential requirements
and other relevant provisions of the applicable EU Directives.
FCC statement
This device complies with part 15 of the FCC Rules.
Operation is subject to the following two conditions:
(1) This device may not cause harmful interference, and (2) this device must accept
any interference received, including interference that may cause undesired
operation.
Battery disposal
Batteries contain chemicals that, if released, may affect the environment
and human health. Batteries should be collected separately for recycling
and recycled at a local hazardous material disposal location adhering to
your country and local government regulations. To find out where you
can drop off your waste battery for recycling, please contact your local waste
disposal service, or the product representative. The battery used in this product is
marked with the European Union symbol for waste batteries to indicate the need
for the separate collection and recycling of batteries.
Wireless Spirometer | PS-3234
4
Other PASCO Measuring Instrument manuals

PASCO
PASCO Pasport PS-2132 User manual

PASCO
PASCO PS-2600 User manual

PASCO
PASCO Pasport PS-2600 User manual

PASCO
PASCO OS-9171 User manual

PASCO
PASCO PASPORT PS-2152 User manual

PASCO
PASCO PASPORT PS-2230 User manual

PASCO
PASCO SF-9568A User manual

PASCO
PASCO PS-3215 Use and care manual

PASCO
PASCO PS-3222 User manual

PASCO
PASCO ES-9078 User manual

PASCO
PASCO ME-9495A User manual

PASCO
PASCO ES-9042A User manual

PASCO
PASCO EM-3556 User manual

PASCO
PASCO Pasport PS-2152 User manual

PASCO
PASCO WA-7428 User manual

PASCO
PASCO OS-8527A User manual

PASCO
PASCO Xplorer GLX Programming manual

PASCO
PASCO PS-3320 User manual

PASCO
PASCO PS-3321 User manual

PASCO
PASCO ME-8598 User manual