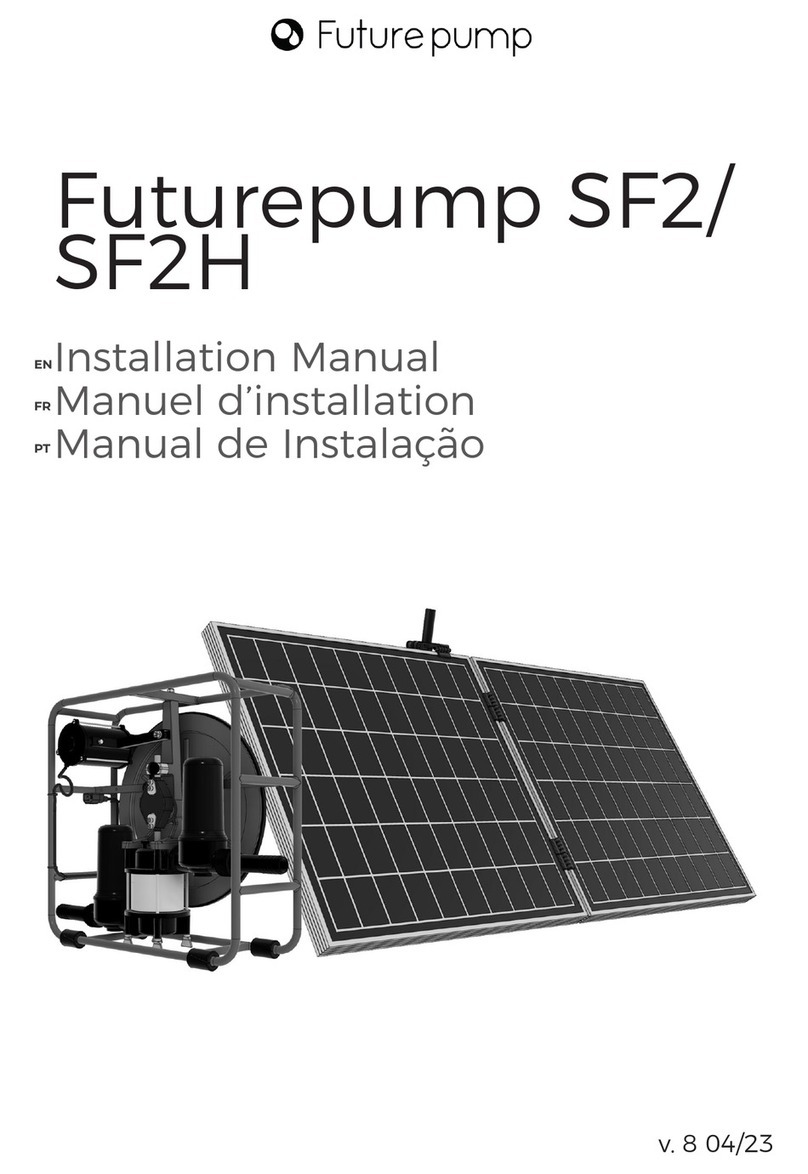
Futurepump SE1 User manual

1
Futurepump SE1
Installation Manual
Manuel d’installation
Manual de instalación
EN
ES
FR
v. 1 01/20

2
Contents:
Contenu:
Contenido:
ES
FR
EN
•• 4 x flywheel belts4 x flywheel belts
•• 4 x PU yoke pads4 x PU yoke pads
•• 5 x bellows5 x bellows
• 3 x piston seals
• 2 x suction/discharge valves
• 2 x adjustable hose clips
• 4 x courroies de volant
• 4 x pieces d’usure de bielle PU
• 5 x membranes
• 3 x joints de piston
• 2 x soupapes d’aspiration/refoulement
• 2 x colliers de serrage
• 4 x correas de volante
• 4 x cojinetes de biela PU
• 5 x fuelles
• 3 x juntas de pistón de repuesto
• 2 x válvulas de succión-descarga
• 2 x abrazaderas de manguera
ajustables
• 2 x 1” (25mm) pipe couplers
• 1 x Complete set of spare o-ring seals
• 1 x manual pumping handle
• Motor pulley, knob and tapered set
• 1 x tapered hose nipple
• 3 sizes of spanner, a double ended
screwdriver and an Allen key
• 2 x raccords de 1” (25mm)
• 1 x jeu complet de joints toriques
• 1 x poignet de pompe manuelle
• Poulie moteur, bouton et ensemble
conique
• 1 x mamelon conique pour tuyau
• 3 clés de différente taille, un tournevis à
double tête et une clé Allen
• 2 x Acopladores de tubo de 1“ (25mm)
pulgadas
• 1 x juego completo de juntas tóricas
de repuesto
• 1 x Palanca de bombeo manual
• Juego polea motor, pomo y cónico
• 1 x boquilla cónica para manguera
• 3 tamaños de llave, destornillador de
doble punta, llave Allen
1 x Pompe Futurepump SE1
1 x Panneau 60W, pieds et support du panneau
1 x Tuyau d’aspiration (6m) - 1” (25mm)
1 x Caisse de pièces détachées et d’outils:
1 x Futurepump SE1 pump
1 x 60 W panel, panel shoes and stand
1 x Suction hose (6m) - 1” (25mm)
1 x Box of spare parts and tools:
1 x Bomba Futurepump SE1
1 x Panel 60 W, patas y soporte del panel
1 x manguera de succión (6m) de 1“ (25mm)
1 x caja de repuestos y herramientas:

3
Quick start guide
Guide de démarrage rapide
EN
FR
ES
ES
ES
ES
ES
FR
ES
FR
ES
FR
FR
EN
FR
EN
FR
EN
EN
EN
EN
Brancher le panneau au moteurBrancher le panneau au moteur
Enchufar el panel en el motor
Guía de inicio rápido
1. Place the panel in a suitable location............................................6
Placer le panneau dans un lieu approprié
Coloque el panel en una ubicación adecuada
2. Connect inlet hose.......................................................................................14
Connecter le tuyaux d’aspiration
Conecte la manguera de succión
3. Prime.......................................................................................................................15
Amorcer la pompe
Cebar la bomba
4. Connect outlet hose....................................................................................16
Connecter le tuyaux de refoulement
Conecte la manguera de descarga
5. Connect panel to motor.Connect panel to motor...............................................................17
6. Switch on the pump!..................................................................................18
Mettre en marche la pompe!
¡Encienda la bomba!
7. Make sure you have registered your 10 year warranty.......20
Assurez-vous d’avoir rempli votre garantie de 10 ans
Asegúrese de haber registrado su garantía de 10 años
warranty.futurepump.com

4
d
e
f
h
i
j
g
c
k
a) Solar panel
b) Panel support
c) Piston rod & yoke
d) Pump chamber
e) Inlet
f) Outlet
g) Flywheel
h) Motor
i) Motor Mount
j) Pump frame
k) Switch Box
a
b
a
b
d
hn

5
Identifying the parts
Identifier les composants Identificar los componentes
Solar panel / Panneau solaire / Panel solar
Panel support / Support du panneau / Soporte del panel
Piston rod & yoke / Tige du piston & bielle
/ Vástago de pistón y yugo
Pump chamber / Corps de la pompe / Cámara de bombeo
Inlet / Aspiration / Succión
Outlet / Refoulement / Descarga
Flywheel / Volant / Volante
Motor / Moteur / Motor
Motor Mount / Support du moteur / Soporte del motor
Pump frame / Cadre de la pompe / Marco de la bomba
a -
b -
c -
d -
e -
f -
g -
h -
i -
j -

6
Identify installation
location
Identifier l’emplacement de l’installation
Identificar lugar para la instalación
EN
FR
ES
EN
FR
ES
EN
FR
ES
1
Install as near as possible to irrigated plot
Installer le plus proche possible de la parcelle à irriguer
Instalar, cuando le sea posible, lo más cerca al área de descarga
Install near water source
Installer à proximité d’une source
d’eau
Instalar cerca del suministro
de agua
Install panel in full sunlight
Installer le panneau en
plein soleil
Colocar el panel orientado
al sol

7
Calculate total head
Calcular altura total
Calculez la hauteur monométrique totale que la pompe voit
lorsqu’elle soulève l’eau.
Hauteur monométrique totale = hauteur d’aspiration +
hauteur d’décharge + pression du tuyau/restrictions/gicleurs
Calcule la altura total que ve la bomba cuando levanta agua.
Altura total = Elevación de succión + elevación de descarga +
presión de la manguera/restricciones/rociadores
FR
ES
EN
2
Suction lift
Hauteur d’aspiration
Elevación de succión
Max 7m (22ft)
Total head
Hauteur
manométrique
totale
Altura total
Max 15m
(50ft)
Discharge lift
Ascenseur de décharge
Elevación de descarga
Max 8m (26ft)
Discharge lift
Hauteur de décharge
Elevación de descarga
Calculer la hauteur monométrique totale
Calculate the total head that the pump see when it lifts the
water.
Total head = suction lift + discharge lift + pressure from hose
pipe/restrictions/sprinklers

8
Unpack Pump
Déballez la pompe Desempaque la bomba
3
EN
FR
ES
EN
FR
ES
Remove the black
flywheel locks by
unscrewing the bolts.
Retirar las ataduras
negras del volante
destornillando los pernos.
Retirer les fixations noires
du volant en dévissant les
vis.
Lift the motor out of the
securing clip and place it on
the flywheel.
Levantar el motor de la
atadura y colocarlo sobre el
volante.
Dégager le moteur de la
fixation en le soulevant et le
placer sur le volant.

9
Initial checks
Vérifications initiales Controles iniciales
EN
FR
ES
4
Rotate the flywheel clockwise by hand.
Check that the pulley is touching the flywheel and is straight
and that the wheel can move freely.
Tournez le volant dans le sens des aiguilles d’une montre à la
main.
Vérifiez que le poulie touche le volant, qu’il est droit et que le
volant peut tourner librement.
Gire el volante a la derecha con la mano.
Verifique que el tambor esté tocando el volante y que esté
recto y que el volante pueda moverse libremente.

10
Stand up panel
Installez le panneau Instalar el panel
EN
5
Panel Clamp
included in box
Take the panel out of the box.
With the panel upside down, screw on the two shoes to the
holes at each end of the panel and fasten using a nut.
Insert the screw to the panel bracket and attach to the top of
the panel, closest to the right-hand-side securing with a nut.
Insert the green panel stand into the panel clamp.
Adjust the panel angle to the sun and tighten with the star
knob.

11
Stand up panel
Installez le panneau Instalar el panel
FR
ES
Continued...
5
Saque el panel de la caja.
Con el panel boca abajo, atornille las dos patas en los orificios
en cada lado del panel y ajústelas con una tuerca.
Inserte el tornillo en la abrazadera del panel y fíjela en la
parte superior del panel, el más cercano a la fijación del lado
derecho con una tuerca.
Inserte el soporte del panel verde en la abrazadera del panel.
Ajuste el ángulo del panel al sol y apriételo con la perilla de
estrella.
Retirez le panneau de l’emballage.
Avec le panneau à l’envers, placez les deux pieds dans les
trous situés de chaque côté du panneau et fixez-les à l’aide
des écrous.
Insérez la vis dans la bride du panneau et fixez-la au haut du
panneau, le plus près de du côté droit à l’aide d’un écrou.
Insérez le support du panneau vert dans la bride du panneau.
Ajuster l’angle du panneau par rapport au soleil et serrez avec
le boulon étoile.

12
Connect inlet hose
Connectez le tuyau d’arrivée
Conecte la manguera de succión
EN
FR
ES
6
Connect the inlet hose to the inlet side on the pump (the
lower hose nipple).
The recommended hose size for this pump is 1” (25mm)
Connectez le tuyau d’aspiration à la prise d’entrée de la
pompe (embout de tuyau inférieur).
Le diamètre de tuyau recommandé pour cette pompe est de
25 mm (1”)
Conectar la manguera de succión a la entrada de la bomba
(la boquilla de manguera inferior).
El diámetro de manguera recomendado para esta bomba es
de 1” (25mm).

13
Using the tapered
hose nipple
Embout conique du tuyau
Boquilla cónica de la manguera
EN
FR
ES
Note
Connectez le tuyau à la pompe en le poussant dans la
vaisseau d’air et en le tournant dans un sens jusqu’à ce qu’il
soit bien fixé.
Pour le retirer, tourner l’embout du tuyau dans le sens opposé
à l’insertion puis tirer.
Conectar la manguera a la bomba empujándola dentro de la
cámara de aire y girándola en una dirección hasta que esté
bien fijada.
Para quitarla, girar la boquilla de la manguera en la dirección
opuesta a la inserción y luego tirar.
Attach the hose to the pump by pushing it into the air vessel
and turning it one way until it is secure.
To remove, twist the hose nipple in the opposite direction to
insertion then pull.

14
Prime pump
Amorcer la pompe Cebar la bomba
EN
FR
ES
7
Remplissez le corps de la pompe avec de l’eau.
Llene la cámara de bombeo con agua.
Fill the pump chamber with water.

15
Connect outlet hose
Connectez le tuyau refoulement
Conecte la manguera de salida
EN
FR
ES
8
Connectez le tuyau refoulement à l’embout conique du tuyau.
Ensuite, fixer le tuyau sur le côté refoulement de la pompe
(embout de tuyau supérieur).
Le diamètre de tuyau recommandé pour cette pompe est de
25 mm (1”).
Connect the outlet hose to the tapered hose nipple. Then
attach the hose to the outlet side of the pump (the upper
hose nipple).
The recommended hose size for this pump is 1” (25mm).
Conectar la manguera de salida a la boquilla cónica de
manguera . A continuación, conectar la manguera al lado de
salida de la bomba (la boquilla de manguera superior).
El diámetro de manguera recomendado para esta bomba es
de 1” (25mm).

16
Plug in panel
Enchufar el panel
Branchez le panneau
EN
FR
ES
9
Plug the panel into the motor, ensuring plug grooves align.
Brancher le panneau au moteur, en veillant à ce que les
rainures des prises soient alignées.
Conectar el panel al motor, asegurándose de que las ranuras
de los enchufes estén alineadas.

17
Start the pump
Démarrez la pompe Poner en marcha la bomba
EN
FR
ES
10
Flip the switch on the solar panel to the “ON” position.
Congratulations, you now have a fully operational SE1 pump!
Placer l’interrupteur du panneau solaire sur la position “ON”.
Félicitations, maintenant vous avez une pompe SE1 totalement
opérationnelle!
Poner el interruptor del panel solar en la posición “ON”.
¡Felicidades, ahora tiene una bomba SE1 completamente
operativa!

18
Optimum hose sizes
Diamètres optimaux des tuyaux
Diámetros óptimos de manguera
Note
Total head (m)
Hauteur totale (m)
Elevación total (m) 0 - 5 5 - 15
Maximum output (l/hr)
Debit maximale (l/hr)
Salida máxima (l/hr)
1600 - 1100 1100 - 700
Pipe size/
Diamètre du tuyau/
Diámetro de manguera
Total head
Hauteur totale
Elevación total (m)
0 to 5 5 to 15
Length of pipe/
Longueur de tuyau/
Largo de manguera
(m)
10 ⁄” (19mm) ⁄” (19mm)
20 1” (25mm) ⁄” (19mm)
30 1” (25mm) ⁄” (19mm)
40 1” (25mm) ⁄” (19mm)
60 1” ⁄ (32mm) 1” (25mm)
80 1” ⁄ (32mm) 1” (25mm)
100 1” ⁄ (32mm) 1” (25mm)
200 1” ⁄ (32mm) 1” ⁄ (32mm)
300 1” ⁄ (32mm) 1” ⁄ (32mm)
400 1” ⁄ (38mm) 1” ⁄ (32mm)
600 1” ⁄ (38mm) 1” ⁄ (38mm)
800 1” ⁄ (38mm) 1” ⁄ (38mm)

19
Registering your warranty
Enregistrement de votre garantie Registro de su garantía
EN
FR
ES
To register your warranty is easy:
1. Log on to warranty.futurepump.com
2. Enter your pump serial number and your details
3. Click register
You will now receive 10 years warranty on all spare parts and
labour. If you have a problem with your pump, please contact
your distributor or visit support.futurepump.com
Pour remplir votre garantie, c’est facile:
1. Connectez-vous à warranty.futurepump.com
2. Entrez le numéro de série et vos coor données
3. Cliquez sur enregistré
Vous recevrez maintenant une garantie de 10 ans sur toutes
les pièces de rechange et la main d’œuvre. Si vous avez un
problème avec votre pompe contactez votre distributeur ou
visiter support.futurepump.com
Registrar su garantía es fáci:
1. Inicie sesión en warranty.futurepump.com
2. Introduzca el número de serie de la bomba y sus datos
3. Haga clic en registrarse
Ahora recibirá 10 años de garantía para todos los repuestos y
mano de obra. Si tiene un problema con su bomba, póngase
en contacto con su distribuidor ou visite
support.futurepump.com

20
What will void the warranty?
Qu’est-ce qui annule la garantie? ¿Qué anulará la garantía?
EN
FR
ES
Normal rates for repairs will be charged when the warranty is voided due to
unauthorised modifications to the pump, or use of the solar panel for
applications other than with the supplied water pump.
Exclusions - This limited warranty does not cover:
1. Materials, supplies or accessories not manufactured or supplied by Futurepump Ltd;
2. Futurepump equipment that has been modified without prior approval;
3. Repairs performed by personnel not authorized by Futurepump Ltd;
4. Damage resulting from use of equipment not supplied by Futurepump Ltd;
5. Acts of God;
6. Incidental or consequential damages, such as breaking the solar panel or pump through
impact
Les frais normaux de réparation seront facturés lorsque la garantie est
annulée en raison de modifications non autorisées de la pompe ou de
l’utilisation du panneau solaire pour des applications autres que celles
fournies par la pompe.
Exclusions - Cette garantie limitée ne couvre pas:
1. Matériaux, fournitures, ou accessoires non fabriqués ou fournis par Futurepump Ltd;
2. Equipement Futurepump modifié sans approbation préalable;
3. Réparations effectuées par du personnel non autorisé par FuturepumpLtd;
4. Les dommages résultant de l’utilisation d’équipements non fournis par Futurepump Ltd;
5. Evènements de force majeure;
6. Dommages indirects ou consécutifs, tels que la rupture du panneau solaire ou de la
pompe en raison d’un impact
Las tarifas normales para reparaciones se cobrarán cuando la garantía se
anule debido a modificaciones no autorizadas en la bomba, o al uso del
panel solar para aplicaciones que no sean con la bomba de agua
suministrada.
Exclusiones - Esta garantía limitada no cubre:
1. Materiales, suministros o accesorios no fabricados o suministrados por Futurepump Ltd;
2. Equipos de Futurepump que han sido modificados sin aprobación previa;
3. Reparaciones realizadas por personal no autorizado por Futurepump.
4. Daños causados por el uso de equipos que no se proveen por Futurepump;
5. Casos de fuerza mayor;
6. Daños incidentales o consecuentes, como romper el panel solar o la bomba a través del
impacto
Other manuals for SE1
1
Table of contents
Other Futurepump Water Pump manuals
Popular Water Pump manuals by other brands

Dover
Dover Blackmer TLGLF3C Installation, operation and maintenance instructions

salmson
salmson CXL Installation and starting instructions

PFT
PFT N2FU User manual and spare parts list

Summit
Summit VV40H Installation, operation & maintenance manual

GÜDE
GÜDE GS 1101 PI Translation of original operating instructions

BREWFERM
BREWFERM Pump'in 018.600.15 user guide