17. Mains Power Block
Upper Drip Tray
Lower Drip Tray
18. Mains Power Cable
(UK & EU Plugs)
Drawer
10. Bin Handle
11. ‘Bin Full’ Light
12. Bin Lid
3. LED Button
2. Interactive LED
Light Display Cone
4. Drawer
5. Dispensing Lights
6. Dispensing Area
8. Upper Drip Tray
9. Base (Swivel or Fixed)
7. Lower Drip Tray
16. ON/OFF Switch
13. Serial Number
14. Bin Tray
15.Power Cable
1. Dome Cover
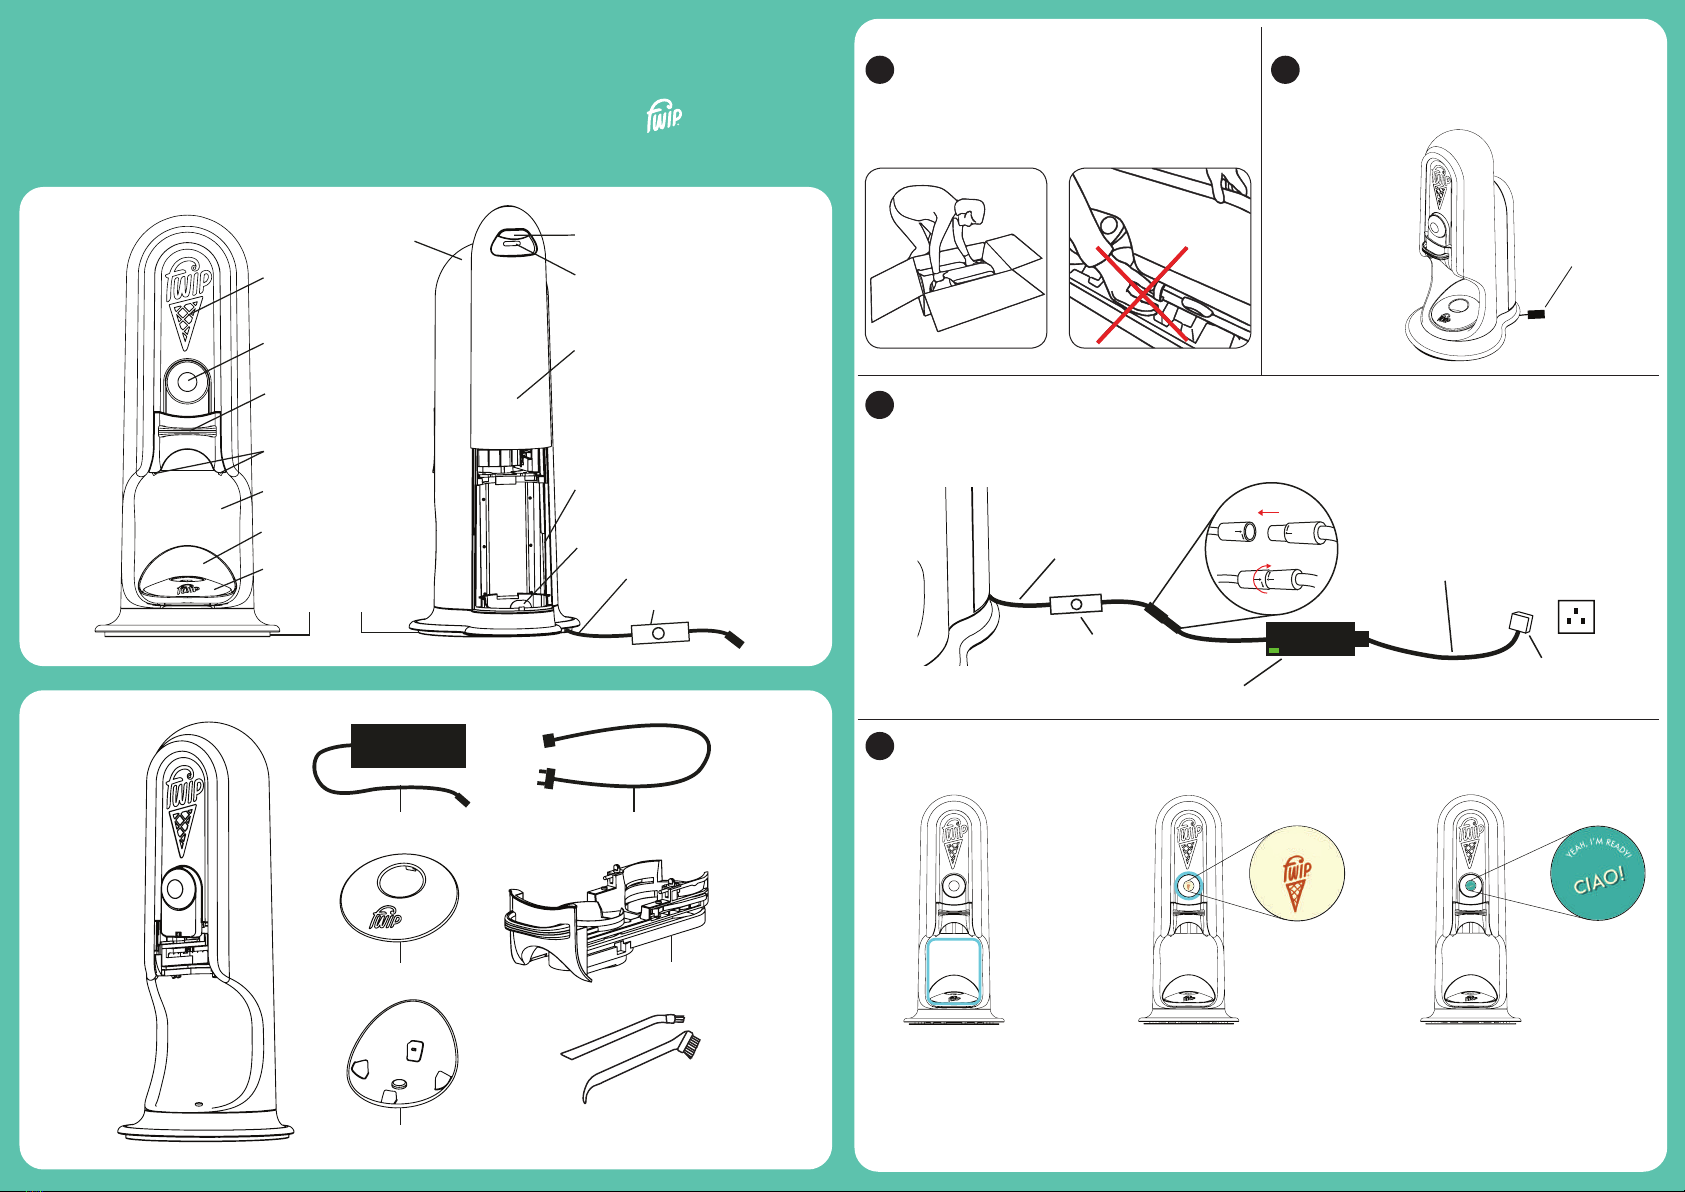
1Carefully lift me out of my case like a baby,
holding my side, supporting my back and
don’t grab my handle - I could fly out!
2Place me where I can shine when I serve.
Please make sure that the ON/OFF switch (16)
is not trapped underneath me.
16. ON/OFF Switch
3Connect the ON/OFF switch (16) to the mains power block (17) with a ‘twist & lock’ motion. Plug
the mains power cable (18) into the mains power block (17) and insert the plug directly into the wall
socket. Press the ON/OFF switch (16) to turn me on and check for the green light on the power
block (17).
17. Mains Power Block
18. Mains Power Cable
16. ON/OFF Switch
15.Power Cable Twist & Lock
A
B
Plug
4Wait for up to 30 seconds while I calibrate, please don’t play with my button, my lights will come
on in this order:
I’ll light up my
dispensing area (6)
Then my button (3) will
shine for you to show that
I’m ready to be used!
The ring light around
my button (3) will shine
dark blue
Note: The machine cannot calibrate if there is a capsule in the machine, the drawer is open or if the
bin lid is removed. Please fix any issues and press my button (3) to restart calibrating.
Plug & Play
2 x Cleaning Brushes
Your quick & easy guide to getting started with thefwipPortobello -
welcome to the world of freshly fwipped ice cream.
C
A
L
I
B
R
A
T
I
N
G
.
.
.


