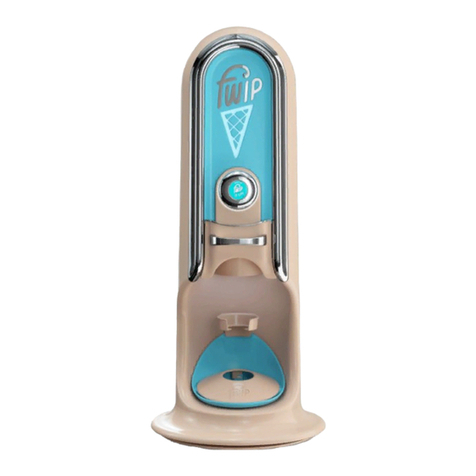
FWIP Portobello User manual


Content
Welcome to fwip club 4
All my parts 4
Plug & Play 5
Step by step - How to make magic! 6
Front-Loading vs Auto-Pod Disposal 8
My daily clean 8
Troubleshooting 10
Contact Information 12

4
Welcome to Club
Please read this manual first. You should find setting up and
using your fwip Portobello machine far more enjoyable if you
do. Your award-winning fwip is only a few steps away.
You now have in your hands, the ice cream machine of the future!
Every Portobello machine is unique. And while they all belong to
the same “Portobello” family, they still deserve a first name. And
that part is all up to you! Feel free to be as creative as you like by
showing some love to your newest and coolest (literally) piece of
commercial kit:
“I hereby promise to take care of, clean and polish
__________________ Portobello [insert name] so that he/ she
mayhavealong,healthyandprosperouslife,sellinggreat products
and putting big smiles on the faces of customers young and old.”
Note:“Dave”Portobello,“007”Portobelloand“Chastity”Portobello
have all been taken.
17. Mains Power Block
Upper Drip Tray
Lower Drip Tray
18. Mains Power Cable
(UK & EU Plugs)
Drawer
10. Bin Handle
11. ‘Bin Full’ Light
12. Bin Lid
3. LED Button
2. Interactive LED
Light Display Cone
4. Drawer
5. Dispensing Lights
6. Dispensing Area
8. Upper Drip Tray
9. Base (Swivel or Fixed)
7. Lower Drip Tray
16. ON/OFF Switch
13. Serial Number
14. Bin Tray
15.Power Cable
1. Dome Cover
2 x Cleaning Brushes
All my parts

3 - Connect me to the wall socket directly. The main power block
uses a ‘twist & lock’ mechanism to connect me securely.
Press the on/o switch (16) to turn me on and check for the green
light on the power block (17). Then, wait up to 60 seconds.
Plug & Play
Your Portobello machine has been hand built and crafted as a
timeless and iconic piece of commercial equipment, inspired by
Italian design, engineering, fashion, food and flair. It is best placed
in view of the customer front of counter, to engage on impulse.
With its specially designed swivel feature, any Fwipista (modern
for ice cream barista), can simply swivel, serve and swivel back,
creating a fresh product right in front of the customer. This has
increased sales at sites by up to 230%.
1 - Carefully lift me out of my case like a baby from my side and
supporting my back (you’ve brought me to life by giving me a
name, after all!). And don’t grab me by the handle - I could fly
out!
2 - Place me where I can shine during my serve. Please make
sure that the cable is not trapped underneath me.
17. Mains Power Block
18. Mains Power Cable
16. ON/OFF Switch
15.Power Cable Twist & Lock
A
B
Plug
5

Plug & Play
4 - Just relax, you’ve worked hard enough. Now it’s my turn. Give
me some time to “wake up” and this is what I’ll do after about 60
seconds:
Please don’t play with my buttons. Just wait up to 60 seconds for
my lights to come on.
- I’ll light up my dispensing area (6)
- The ring light around my LED button (3) will shine dark
blue
- Then my LED button (3) will shine for you to show that
I’m ready to be used!
Do not try to open the door while I am “calibrating” (fancy word
for ‘starting up’). I have a routine to get going and just like LeBron
James, you don’t want to throw me o my game!
Note: The machine cannot calibrate if the tray is open, the bin
chute is removed, or there is a capsule in the machine. This is all
for your safety. If this is the case, please fix and try again.
Step by step - How to make magic!
1 - Choose a fwip capsule from the freezer, and make sure
the freezer is set to -14°C... because that’s my magic number.
Please only use my fwip freezer (my partner in crime). We cannot
guarantee the success of other products that may not meet the
same high-quality standards.
DO NOT use capsules that come
from a deep freezer or have just
been delivered to you. They might
be at -18°C or colder and will need
up to 8 hours to get to the right
serving temperature. That’s why
it’s best to load up your freezer the
night before. Like milk & cookies
for Santa.
2 - Open my drawer (4) and insert the fwip capsule into my capsule
holder. Like with LEGO, I only fit in one way.
C
A
L
I
B
R
A
T
I
N
G
.
.
.
6
PLEASE WAIT PLEASE WAIT READY

Step by step - How to make magic!
3 - If you have an optional ‘cup or cone holder’ (sold separately),
choose your cup/cone and place it in my holder. If you don’t
have a holder, simply hold your cup in my dispensing area (6).
4 - Push my button! (3) (Make sure the tray is closed all the way).
5 - The machine will only dispense when it recognises a cup
or hand in the dispensing area. Like in Austin Powers, these are
activated by “lasers”.
6 - I will gradually light up my Interactive LED Light Display Cone
(2) while I work my magic.
7 - When the ice cream is ready I will say ENJOY and my dispensing
area (6) will turn o.
8 - Take the ice cream away and enjoy it!
9 - Before you do! Open & close the tray one more time (like a
Britney Spears song) to recycle the capsule in my bin.
7

Front-Loading vs Auto-Pod Disposal
Your Portobello came either as a front-loading machine, (meaning
you empty the capsule from the front by opening the drawer and
disposing of the capsule each time) OR, by collecting the capsules
in the back of the bin until full.
When my bin is full, an icon will pop up and ask you to empty me.
Squeeze the bin handle at the back and pull out the bin up and
o. Wash and rinse the drip tray, clean inside and close. Please
make sure to line up the side rails correctly until the bin chute
‘clicks’ in all the way. The “close bin” icon will disappear. If the
“close bin” icon does not disappear, please try to realign the bin
chute properly, making sure both sides line up.
My daily clean
You should take 5 minutes to clean your Portobello machine
every day. Whether you made 1 ice cream or 100 (wow, look at
you), daily maintenance will keep it in beautiful working order.
When you clean me, please do not use excessive amounts of
water.
If I’m dirty, clean me with a mild cleaning solution and hot water.*
Step 1 - Bin
Please make sure there are no dirty capsules left in my bin at the
end of the day:
- Open and close my drawer to remove any capsules that
may be left.
- Remove all capsules from my capsule bin at the end of
each day.
- Dispose of all capsules for recycling.
- Take the bin cover & blue bin tray to the sink for
cleaning.
- Wipe down the base of the bin floor at the back of
the machine.
*Warning: To reduce the risk of electric shock, switch me o and unplug me before cleaning
and servicing. Follow the above requirements as a General Cleaning Instruction Guide to be
carried out at least once per day. Your business and/or local legislation may require you to do
more. Please refer to your local authority and company procedures for further guidance on
best cleaning practice.
8

My daily clean
Step 2 - Drawer
Push down on the two pins with
your index fingers to pull out
my drawer (see red circles in the
picture).
Wash the drawer in the sink with
warm soapy water. If you have a
cup holder attached, wash this
also.
Step 3 - Drip Trays
Twist & Shout. Just kidding.
Twist and unclip the two base drip trays.
Wash and rinse both. Reattach when dry. Now you can yell
”Hooray!”. If you want.
Upper & Lower Drip Tray Removal
Step 4 - Inside Machine
Using either a cloth or brush, wipe and clean the inside of the
machine; the rails, sensors, lifting arms and dispensing unit.
FWIP TIP: While the parts are dishwasher safe, it will take you only
a few minutes to clean by hand. You’ll be doing wonders for the
environment with all the electricity and water you’ll be saving.
9
Twist the Upper Drip Tray
counter-clockwise to
remove.
Twist the Lower Drip Tray
clockwise to remove.
When reattaching the Lower
Drip Tray after cleaning, make
sure to line up with the drip
tray nipple before twisting
counter-clockwise back
into place.

Troubleshooting
Machine Doesn’t Turn On (no lights at all)
Anything worse than a false start is no start. Or, if you’re a 100m
sprinter, a failed drug test. So, please make sure that you:
1 - Check to see if the Mains Power Block (17) is plugged in and
the Mains Power Cable (18) is plugged into the wall socket. Check
that the Power Block (17) has a green indicator light on, showing
that the power is working. Make sure the wall socket switch is
turned ON. If the Mains Power Block does not have a green light
on, check the fuse (applies to the UK only).
2 - Unplug the fwip Portobello machine from the wall power
socket. Please check if the power socket in the wall works by
plugging in another appliance.
3 - Please switch o the machine. Wait for 30 seconds and then
switch it on again. Remember to make sure that the Drawer (4)
is inserted and closed all the way and that the Bin Lid (12) is fully
closed and that there is no capsule left in the machine. Wait for at
least 30 seconds before a blue halo light shows around the LED
Button (3).
If the problem persists, please contact the fwip team on 0207
247 0777.
Capsule Jam
In the unlikely event that the fwip capsule jams in the fwip
Portobello machine, the capsule will need to be removed. Allow
for the machine to finish its cycle, return to its original position,
and come to a full stop.
WARNING: DO NOT try to force the drawer open
Capsule is stuck in capsule holder, located in drawer (4)?
1 - Open the drawer (4) and remove the pod. Close the drawer. 2
- Open the Bin Lid (12) and pass your hand through the sensors at
the back to remove the “Pod Jam!” message. You’ll know you’re
waving like the Queen when the blue light flashes. Job well done.
And you didn’t even need a fancy glove.
10

Troubleshooting
The drawer (4) is stuck?
1 - To open the front of the
drawer (4), slide the tab in the
centre underside of the front
of the drawer (4) and lift the
handle upwards.
2 - Look inside the machine,
and move the capsule so you
can remove the drawer (4)
and the capsule.
3 - Open the drawer (4) and
remove capsule. Close the
drawer.
Unknown Capsule
Note: Using non-fwip capsules in our machine will not work,
please remove the capsule and use an original fwip capsule.
If it is an original fwip capsule and this message is displayed you
may need to:
1 - Wipe the capsule of any frost/condensation.
2 - Swivel the capsule around.
If the message persists, contact fwip support on 0207 247 077.
Mamma Mia
This message will appear when the machine has had to pause
in its cycle because the machine has encountered an unusual
amount of resistance. It could be due to:
A foreign object caught in the machine:
1 - Check and remove the object
2 - Make sure the capsule is not deformed or excessively frozen
- if so, use another.
3 - Restart the machine
If the message persists, contact fwip support on 0207 247 0777.
I’m Too Cold
1 - Check the freezer is at -14°C (if you have a Tefcold freezer,
please set it to 4 on the settings ‘dial’)
2 - Is the capsule at -14°C? Did you just receive a delivery? Or
move the stock from another freezer? It will take up to 8hours
for product to adjust to temperature.
If the message persists, contact fwip support on 0207 247 0777.
Drawer Won’t Open / Plunger Stuck Down
If the plunger stays down after dispensing:
1 - Press the OLED button on the front of the machine again and
wait for it to go back up.
If this does not help, contact fwip support on 0207 247 0777.
11

Contact Information
Our team of dedicated wizards are here to help.
Service & Support Contact Phone:
+44 (0) 20 7247 0777
Service & Support Email:
Other manuals for Portobello
2
Table of contents
Other FWIP Ice Cream Maker manuals