manuals.online logo
Brands
  1. Home
  2. •
  3. Brands
  4. •
  5. Gaggenau
  6. •
  7. Oven
  8. •
  9. Gaggenau ED 220 Product guide

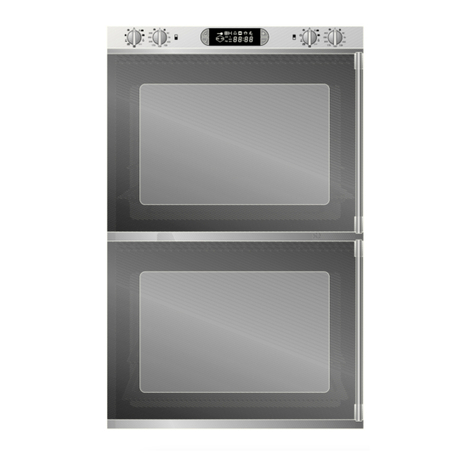
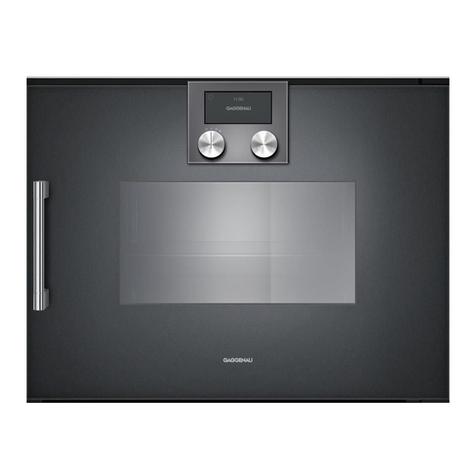
Gaggenau ED 220 Product guide

Operating and assembly instru tions
ED 220/221
Built-in steam oven
ED 220/221
1
Preface
1. Important notes Page 3-4
1.1 For your safety Page 3
1.2 About use Page 4
2. Appliance and accessories Page 5-6
2.1 Applian e des ription Page 5
2.2 Display Page 5
2.3 A essories / spe ial a essories Page 6
3. Operating for the first time Page 7-10
3.1 Important notes Page 7
3.2 Calibration Page 7-8
3.3 What to do, when ... Page 8
3.4 Determining water hardness Page 9
3.5 Entering the water hardness Page 10
4. Operation Page 11-17
4.1 Swit hing on and off Page 11
4.2 Control knobs Page 11
4.3 Operating modes Page 12
4.4 Operating the timer Page 13-17
5. Special functions Page 18-23
5.1 Child lo k Page 18
5.2 Options menu Page 19
5.3 Core temperature sensor Page 20-21
5.4 Steaming Page 22
5.5 Condensing Page 22
5.6 Display of the urrent ooking ompartment
temperature Page 23
5.7 Power failure prote tion Page 23
5.8 Holiday prote tion Page 23
5.9 Cleaning aid Page 23
6. Further uses Page 24-25
. Cooking table, Baking table Page 26-30
8. Tips and tricks Page 31
9. Cleaning and care Page 32-35
9.1 Manual leaning Page 32
9.2 Cleaning the side plate Page 33
9.3 Cleaning aid Page 34-35
10. Maintenance Page 36-39
10.1 General Page 36
10.2 Lamp repla ement Page 36
10.3 Des aling Page 37
10.4 Dismantling the front window Page 38
10.5 Remedying small malfun tions yourself Page 39
2
Prefa e
With your steam oven you can experience
modern professional cooking technology in
your own household.
The steam oven offers the following advantages:
– Cooking with steam allows gentle preparation.
The valuable substan es ontained in the
foodstuffs you prepare are retained almost
ompletely.
– Diverse meals an be prepared without any
transfer of taste.
– Thanks to a spe ial ombined steaming
method, foodstuffs are neither dried out nor
drained of their goodness.
– Gently re-heating up food is possible, and
prepared meals retain their natural
appearan e.
To ensure that you will be able to use this
applian e in all its diversity, read through
the operating and assembly instru tions
ons ientiously before operating it for the first
time. The instru tions ontain important notes on
use, installation and maintenan e of
the applian e.
On the following pages you will find important
notes on safety and operation. These notes will
serve to ensure your personal safety and the
lasting value of your applian e.
The hapters entitled “Structure and operating
principle” and “Operation” tell you all about
what your applian e an do and how you operate
it.
The hapter entitled “Cleaning and care” will
make sure that your applian e will stay operable
and beautiful for a long time.
We have also ompiled some “Tips and tricks”
for your.
And now we wish you lots of fun with your
steam oven.
Fig. 1
3
1. Important notes
1.1 For your safety
You must not operate the applian e if it is damaged.
The applian e must only be onne ted by an
authorised specialist, paying attention to
the relevant regulations of the power supply
ompanies and the regional onstru tion
regulations.
Observe the assembly instructions!
Caution: Fire risk! Do not store any ombustible
obje ts in your applian e. When operating the
applian e, only ever leave the inner parts inside the
ooking ompartment that you a tually need.
As the user, you yourself are responsible for
maintenan e and proper use in the household.
Only ever operate the applian e under supervision.
Dis onne t the unit from the water mains when it is
not in operation.
Caution! The applian e gets hot during operation.
Keep hildren away!
Caution! There is a risk of injuries if the door is not
losed properly. You ould jam and rush your
fingers and hands.
Caution! Steam may billow out when you open the
door. If there is steam in the oven, do not rea h in
with your hands! Risk of burns!
Caution! When removing the ooking insert hot
water may drip from the oven top. Risk of
scalding! Be areful when removing the ooking
insert as hot liquid might spill. Use heat resistant
oven gloves.
Leads of other ele tri al applian es that are used
in the proximity of the ooker must not be jammed
in by the hot oven door.
Do not lean the applian e with a steam leaning
apparatus or with water pressure – risk of short-
ir uits!
Dis onne t the applian e from the water and
ele tri ity mains. Swit h off the orresponding fuse
and turn off the tap.
Caution! For te hni al reasons the lamp over
annot be removed. Lamp must only be repla ed
by Gaggenau after-sales servi e.
Repairs may only be arried out by authorised
ele tri ians.
Note: The applian e must not be onne ted to the
hot water supply.
No warranty claims an be lodged for any
damage resulting from failure to observe these
instru tions.
Technical modifications reserved.
4
1.2 About use
The applian e is intended solely for use in the
household and must not be put to any other uses.
Use the applian e to prepare meals only. It must not
be used to heat up the room in whi h it is installed.
Only ever use the included cooking inserts or
order the spe ial a essories.
Do not pla e any items in the oven ompartment
that might rust. Rusty a essories will lead to further
rusting in the oven ompartment!
Do not use any silver tableware in the ooking
ompartment.
The ooking ompartment may be ome
dis oloured during prolonged operation. This does
not have a detrimental influen e on operability of
the applian e.
Operation is only possible when the door is losed,
otherwise there is a risk that water will spray out of
the applian e or that hot steam will ome out.
The steam oven uses unpressurized steam,
therefore the door an be opened at any time
during ooking. To prevent extreme steam from
es aping when you open the door, you an
ondense beforehand. Water may drip when
opening the door.
Steam may es ape during operation and when
opening the door.
The (Heating) symbol in the ontrol panel goes
off as soon as the required temperature has been
rea hed.
Turn the “Temperature” ontrol knob (right ontrol
knob) to the 0 position after use.
In the event of malfunctions, first of all he k
the household fuses. If the problem has nothing to
do with the power or water supply, please onta t
your spe ialist dealer or your lo al Gaggenau after-
sales servi e.
The door window may fog up at all moisture levels
(above all at the 100 % moisture level).
Operating noise may o ur in all operating modes.
Opening and losing of the air flap auses li king
noise.
The applian e rinses automati ally when swit hed
on if it has not been in operation for a prolonged
period of time or after a prolonged power failure
(several hours). This removes water that is left over
in the pipes.
The food being ooked must not ome into onta t
with the sides or the grease filter.
At set temperatures below 65°C, the light is
swit hed off after a few se onds to ensure that the
halogen lamp will not additionally heat
up the oven ompartment. This ensures more
pre ise temperature oordination. The light in the
oven ompartment is swit hed on again for a few
se onds if you turn one of the two ontrol knobs or
if you press a key.
Calibration
(automatic boiling point-adjustment):
The boiling point of water depends on the baro-
metri pressure. The barometri pressure hanges
with the altitude of the pla e where the applian e is
installed. During self-adjustment, the applian e
adapts itself to the pressure onditions prevailing at
the applian e’s lo ation.
The appliance cannot be operated if it has not
been calibrated!
The applian e features a descaling display.
When it flashes, this is an indi ation that the
applian e must be des aled. Before ommen ing
operation, you must enter the water hardness in
your household on the applian e.
2.1 Appliance description
2.2 Display
1Grease filter
2Air flap
3Slide-in grills
4“Temperature” ontrol knob
5“Moisture level” ontrol knob
6Core temperature sensor
Base strainer with siphon trap
8Side plate
9Display
10 Timer key
11 Core temperature sensor key
12 Plus key
13 Minus key
14 Temperature / Moisture level display
15 Time display
16 Steaming / ondensing key
1 Confirmation key
18 “Child lo k" symbol (symbol flashes)
“Show room mode" symbol (symbol lights onstantly)
19 “Duration, end" symbol
20 “Short timer" symbol
21 “Cooking time" symbol
22 “Core temperature sensor" symbol
23 “Water onne tion" symbol
24 “Heating" symbol
25 “Steaming / ondensing" symbol
26 “Des aling" symbol
2 “Door lo k" symbol
28 “Start alibration" symbol
29 “Steaming" symbol
30 “Hot air" symbol
31 “Cleaning aid" symbol
5
2. Applian e and a essories
Fig. 2 98 6 54
12 3
Fig. 3
10 11 12
1 16 15 14 13
Fig. 4
18 19 20 21 22 23 24 25 26 2
29 30 31
28
2.3 Accessories / special accessories
As standard, the applian e omes with the
following a essories:
– Stainless steel ooking insert GN 2/3,
unperforated, 40 mm deep (Fig. 5)
– Stainless steel ooking insert GN 2/3,
perforated, 40 mm deep (Fig. 6)
– Wire grill (Fig. 7)
– Water onne tion pipe (3 m)
– Waste water pipe (3 m)
You an order the following special accessories:
– DR 220-010: Pressure redu er, onne tion
a essory for water pressure
6-10 bar
– GZ 010-011: Extension pipes for water
onne tions
– WF 040-020: Brita des aling system (filter head
and filter artridge). If the hardness
of the water ex eeds 9° (English
water hardness), you must install a
des aling system before the
applian e.
– WF 040-021: Set of 3 filter artridges
– KB 220-114: Stainless steel ooking insert
GN 1/3, unperforated, 40 mm deep
– KB 220-124: Stainless steel ooking insert
GN 1/3, perforated, 40 mm deep
6
Fig. 5
Fig. 6
Fig. 7
3.1 Important notes
Before operating the applian e for the first time,
please pay attention to the following notes:
Read through these instru tions attentively before
operating the applian e for the first time.
Remove the pa kaging from the applian e and
dispose of it properly.
Pay attention to the fa t that there are a essories
in the base of the pa kaging.
Keep pa kaging elements away from hildren.
Thoroughly lean the applian e and a essories
before using them for the first time. This will
eliminate any “newness” smells and soiling (see
Chapter 9).
3.2 Calibration
The boiling point of water depends on the
barometri pressure at mean sea level.
During alibration, the applian e is adjusted to the
pressure onditions prevailing at the altitude where
the applian e is installed.
Re alibrate the applian e manually if you should
move home to a different altitude (see hapter
entitled “Options menu” on Page 19).
Every applian e is subje ted to a thorough he k
before it arrives in your home. It is therefore
possible that there is still water in the applian e.
Before operating the applian e for the first time,
make sure that the water onne tion is properly
se ured.
When you operate the applian e for the first time,
the suggested time 8:00 appears on the display.
You an now hoose the required time of day by
pressing the +and –keys. Press the
(Confirmation) key to onfirm the entered value.
3. Operating for the first time
7
Important:
The alibration pro ess annot be interrupted.
Should the alibration pro ess be interrupted by
opening the door or swit hing off the applian e,
the steam oven will not fun tion. The applian e
will automati ally start alibration until the
operation has been ompleted.
Re alibration is not ne essary after a power
failure.
3.3 What to do, when ...
Proceed as follows:
– Install the applian e at the required lo ation (see
assembly instru tions).
– Remove all loose parts from the oven
ompartment (baking tray et .).
– Close the applian e door.
– Open the water tap.
– Self-adjustment starts automati ally as soon as
you turn the “Temperature” ontrol knob to any
temperature. This takes around 15 minutes. The
elapsing time appears in the display. The “CAL”
symbol for alibration appears in the display.
– An audible signal sounds after ompletion of
alibration. The applian e is now ready for
operation. “--:--” appears on the display. The
(Duration) and (Cooking time) symbols flash
on the display.
– Turn the “Temperature” ontrol knob ba k to the
0 position. The applian e is now ready for
operation.
8
Fig. 8
Fig. 9
The display repeatedly flashes the The applian e re eives no water. Turn the water onne tion on. Che k
symbol (water onne tion). that the pipe is orre tly onne ted and free from bends. Turn the
“Temperature” ontrol knob to 0 and then to the required temperature.
The Rsymbol appears on the display. The applian e has not been alibrated. Swit h the applian e on,
the alibration pro ess starts automati ally.
The symbol appears on the display. The applian e is in show room mode without heating fun tion.
The applian e does not alibrate or Dis onne t the applian e from power supply for a few se onds
heat up, although the heating symbol (by swit hing off the fuse), then within 3 minutes press +key
appears on the display. and keep pressed and turn “Temperature” ontrol knob to any
temperature (not light!).
The symbol flashes on the display. The hild lo k is operating (see page 18).
The CAL and 40 °C symbol flash The temperature in the oven is above 40 °C. Therefore the alibration
alternating on the display. annot take pla e. The a tual temperature appears on the left of
the display. The applian e automati ally ools the oven below
40 °C and re-starts the alibration.
F 61 or F 62 lights on the display. Che k the power and water supply. If these are fun tioning
orre tly all the Gaggenau after-sales servi e.
3.4 Determining water hardness
Water hardness range 4 has been pre-entered on
the applian e. If the hardness of the water in your
household should deviate from this value, the
orre t water hardness range (between 1
and 4) must be entered before commencing
operation of the appliance. You an find out
the hardness of the water in your household either
by onsulting your waterworks or by using the
in luded test strip.
– Run water from the tap for about 20 se onds to
drain off stale water.
– Fill a glass with tap water and briefly (no more
than 1 se ond) dip the test strip into the water,
making sure that all test points are wetted.
– Remove the strip from the water and shake off any
surplus water drops.
– You an read off the result after one minute.
– If your water ontains lime, one or more of the test
areas is/are of a reddish olour and the others
stay light or greenish. The number of light (green)
areas defines the right water hardness range
setting on the applian e.
The test set must be used even if a water des aling
system is already installed in your household
be ause, depending on the des aling method, not
all s ale-forming ions are removed.
Please also note that different designations are
used outside Germany to des ribe the hardness of
water.
Water hardness range
12 3 4
Ameri an hardness 1-7° 7-14° 14-21° >21°
Fren h hardness 1-12° 12-25° 25-37° >37°
British hardness 1-9° 9-18° 18-26° >26°
Russian hardness 1-50° 50-100° 100-150° >150°
9
Number of light Water hardness Water
(green) areas on (German hardness) hardness
the test strip range
3 or more 1-7° 1
2 7-14° 2
1 14-21° 3
None >21° 4
3.5 Entering the water hardness
If the hardness of the water in your household
deviates from the value that is set at the works
(water hardness range 4), you must enter the
right water hardness in the options menu for
ommen ing operation of the applian e.
Proceed as follows:
– Turn the two ontrol knobs to the topmost
position.
– Press the (Confirmation) key and keep it
pressed.
– Turn the “Moisture level” knob to the right.
– Release the (Confirmation) key.
– The various options appear on the display. Turn
the “Moisture level” ontrol knob to the right to
the des aling position.
– With the + and – keys, set the water hardness
(between 1 and 4) (Fig. 11).
– Press the (Confirmation) key.
– To quit the options menu, turn the “Moisture”
ontrol knob ba k up or turn the “Temperature”
ontrol knob.
10
Fig. 11
End
Options menu
Time display
24h / 12h
(AM/PM)
Descaling
Sta t
Calib ation
Tempe atu e
display in
°C / °F
Time display
ON/OFF
(only if appliance is switched off)
0
Fig. 10
11
4.1 Switching on and off
Switching on
Switching off
4.2 Control knobs
Switching on
– Turn the “Temperature” ontrol knob by one
lat hing position to the right (Fig. 12).
The lighting goes on:
– Turn the “Moisture level” ontrol knob to the
moisture level you require.
– Turn the “Temperature” knob to the temperature
you require.
When you turn the “Temperature” knob one lat hing
position to the left, the suggested temperature for
the hosen moisture level appears on the display.
100 % – 100 °C
80 % – 120 °C
60 % – 120 °C
30 % – 165 °C
0 % – 165 °C
When the “Moisture” ontrol knob is turned, the
moisture is displayed for a few se onds.
Switching off:
To swit h off, turn the “Temperature” knob to the
0 position (Fig. 13).
The steam oven lighting goes off.
“Temperature” control knob:
The temperature an be set between 30 and
230 °C.
“Moisture” control knob:
You an sele t the following moisture levels:
100 %, 80 %, 60 %, 30 % und 0 %
4. Operation
Off
Cleaning assistance Suggested
tempe atu e
Moistu e
cont ol knob Tempe atu e
cont ol knob
Fig. 12
Fig. 13
Fig. 14
The applian e rinses automati ally when swit hed
on, if it has not been in operation for some days.
This removes water that is left over in the pipes
and will take no longer than 1 minute.
12
4.3 Operating modes
Moisture Temperature Display Particularly Principle Remarks
suitable for...
100% 150 - 230°C Bread Steam baking:
poultry, The high moisture prevents the food from drying out.
puff pastry Thanks to the high temperature, the surfa e be ome
rispy brown all-round.
100% 100°C Vegetables, Steaming: You an use several
side dishes, The food is ompletely surrounded by steam. ooking inserts at
blan hing, Steaming is a very gently method with whi h the food the same time.
sterilising, is not deprived of its goodness and retains its natural
jui e extra tion olour.
100% 120°C Potatoes, Fast steaming:
pulses and beans The higher temperature a elerates steaming.
Not suitable for sensitive foodstuffs.
100% 80 - 90°C Fish Low-temperature steaming:
The air in the ooking ompartment is saturated with
steam. The heat is transferred without any drying out
whatever. Protein leaking is avoided by the lower
temperature.
80% 30 - 45°C Yeast dough, Fermenting, rising: Light goes off after
60% sour dough mixture, Thanks to the moisture, the heat is distributed a few se onds.
Yoghurt parti ularly evenly. The surfa es of doughs do not
dry out so mu h.
80% 150 - 230°C Casserole dishes, Combined steaming:
60% gratin, the middle way between steam baking and hot air
roast operation makes it possible to a hieve the optimum
ooking limate for every food.
60% 120°C Plated dishes Reheating: Meals an be heated
160°C ooked food an be reheated gently. Thanks to the dire tly on the plate.
supply of steam, the food is not dried out.
Reheat food served on plates at 120 °C and baked
items at 160°C.
30% 150 - 230°C Yeast pastry In this mode of operation, the ooking ompartment
is sealed hermeti ally. The remaining moisture
prevents the drying effe t of onventional hot air.
30% 70 - 80°C Roast beef, Low-temperature cooking:
leg of lamb briefly seared meat an mature slowly and gently
over a long ooking time.
0% 150 - 230°C Fruit ake Hot air:
the ooking ompartment is ventilated and vented
through an opening so that the moisture produ ed
an be dissipated. This is parti ularly advantageous
for baked items that have to give off moisture during
the baking pro ess.
100% 60°C Cleaning aid
The leaning aid makes it possible to loosen
soiling with steam.
4.4 Operating the timer
The required moisture level and temperature an
be set before and after time programming by
turning the “Temperature” or “moisture level” knob.
As long as one or several symbol(s) in the display
flash(es), no input is possible and no value is pro-
grammed or an invalid value has been programmed.
All time values are entered by means of the
(timer), +, – and ( onfirmation) keys. Every
input triggers an audible and a visible signal.
If you sele t a program (e.g. end), but you do not
enter a value, the urrent time will appear on the
display after 20 se onds.
An entered value (e.g. duration programming) must
be onfirmed within 20 se onds (Confirm) key.
Entered values are not stored if they are not
onfirmed.
Press the (Confirm) key if you wish to onfirm
a value during programming.
If you press any other key instead, the entered
value will not be stored and will disappear.
You an query set values by pressing the
(timer) key. The value appears on the display for
around 10 se onds. During this time, you an
modify the value by pressing the + or – key and you
an onfirm it by pressing the (Confirm) key.
Press the + and – keys at the same time if you wish
to lear a value.
If you have already programmed a time value on e
(e.g. a duration) on the applian e, this previously
programmed value will be proposed to you when
programming a value again.
The longer you press the + or – key when
programming a time, the faster the time elapses on
the display.
After ompletion of time programming, the
orresponding symbol flashes on the display. For
example, if you have programmed an end time, the
(end time) symbol will flash. An audible signal is
also sounded. Heating is dea tivated and the oven
lighting goes off. You an restart the previously
sele ted mode by pressing any key on the display.
You end the baking pro ess by turning the
“Temperature" knob to 0.
During a time programming it is possible at any
time to turn the “Temperature” ontrol knob ba k
to 0. The steam oven will then no longer heat. The
previously programmed value is retained. An
audible signal sounds after the entered time has
elapsed.
Every alarm goes off after 3 minutes.
Note: all time programming fun tions an be
programmed simultaneously.
Note: If the time is not displayed exa tly on the
timer, this may not be due to a te hni al defe t. The
mains frequen y of the publi power supply is the
time base for the timers. In Europe, this is a
standard frequen y of 50 Hz (Hertz). As far as this
point is on erned, power supply networks that are
fed from power stations in eastern Europe flu tuate.
This is why an in orre t time may be displayed.
This dis repan y has no influen e on the fun tions
and program sequen es of the applian e.
13
14
Setting the time of day
Proceed as follows:
– Press the (Timer) key 3 times. The (Time
unit) symbol flashes on the display.
The time display shows the urrently set time
of day (Fig. 15).
– You an sele t the required time by pressing
the +or –key.
– Press the (Confirmation) key to onfirm the
entered value. An audible signal is sounded.
Fig. 15
After first installation or a power failure lasting
several hours, 08:00 and the time unit symbol will
flash in the display. You an set the urrent time by
pressing the +and –keys. 08:00 will be stored as
the time of day if you turn one of the ontrol knobs.
Short time
You an program a period of time with the short
time fun tion without automati a tivation or
dea tivation. You an use this mode of operation
even when the applian e is swit hed off as an egg
timer, for example. The range that an be set is
between ten se onds (00:10) and 23.59 hours
(23:59)
Proceed as follows:
– Press the +key. The short time symbol flashes
(Fig. 16).
– The entered value appears on the display, whi h
you an modify by pressing the +or –key. The
time unit symbol lights up.
– Press the (Confirm) key to onfirm the entered
value.
– The elapsing time is displayed.
Note: if nothing is entered for 5 se onds, the short
time starts even if the key (Confirm) is not
pressed.
On e the short time has elapsed, an audible signal
sounds and the (Short time) symbol flashes on
the display. The signal goes off when you press any
key. The short time reminder an be swit hed off at
any time by pressing the +and –minus keys at the
same time.
Elapsing timer
Proceed as follows:
– Press the –key (Fig. 17).
– The time, beginning at 00:00, is displayed
(maximum display: value 12 hours).
Thus, you an ontinuously display the elapsed
ooking time without programming automati
dea tivation.
When you press the –key again, the time is
swit hed off.
15
The last programmed value is proposed to you
every other time you program a short time.
Fig. 16
Fig. 17
16
Programming a duration
The applian e is operated for a spe ifi period of
time. The range that an be set is between one
minute (00:01) and 23 hours and 59 minutes (23:59).
Proceed as follows:
– Press the (Timer) key on e. The (Duration)
symbol and the (Cooking time) symbol flash on
the display. Dashes appear on the display (i.e. no
value programmed).
– Press the +or the –key to set the required
duration.
– Press the (Confirm) key to onfirm the set
value. An audible signal is sounded. The
(Cooking time) symbol lights up on the display.
– A signal is sounded after the programmed
duration has elapsed. At the same time, the steam
oven swit hes off automati ally.
– By pressing any key, you an swit h off the signal
and heating will start again. Turn the temperature
sele tor swit h to 0 to end the operation.
Clearing incorrectly programmed values:
– Press the (Timer) key on e.
– Press the +and – keys at the same time.
An audible signal is sounded.
The end time is displayed automati ally if you
press the (Timer) key twi e.
Every other time you program a duration, the value
programmed last is proposed to you when you
press the +key.
Fig. 18
17
Programming a switch-off time
The applian e swit hes off automati ally at a time
that you have hosen. The starting point is the time
of day set on the applian e.
Proceed as follows:
– Press the (Timer) key twi e. The (End) and
(Cooking time) symbols flash.
– Press the +or –key to set the required time. You
an hoose any swit h-off time within a period of
24 hours.
– Press the (Confirm) key to onfirm the entered
value. An audible signal is sounded. The
(Cooking time) symbol lights up on the display.
After the set time has elapsed, the (Cooking
time) symbol flashes and an audible signal is
sounded.
By pressing any key, you an swit h off the signal
and heating will start again. Turn the temperature
sele tor swit h to 0 to end the operation.
Programming a duration and an off time
This mode enables you to start and end baking and
ooking in your absen e.
Proceed as follows:
– Enter a required duration (see page 16).
– Press the (Confirmation) key.
– Enter the required swit h-off time (see above).
– Press the (Confirmation) key.
The automati mode be omes a tive as soon as
the swit h-off time is programmed and you have
pressed the (Confirm) key.
Fig. 19
Note: the time of day that is set on the applian e
is the starting point for programming the swit h-off
time.
You an query the entered value by pressing the
(Timer) key twi e.
5. Spe ial fun tions
18
5.1 Child lock
The hild lo k prevents inadvertent a tivation of the
steam oven.
Proceed as follows:
Switching on:
– Turn the “Temperature” ontrol knob to the right
to any temperature position (not light).
– Press the (Confirm) key and keep it pressed.
– Turn the “Temperature” ontrol knob to the 0
position (Fig. 20).
The (Child lo k) symbol on the display flashes.
Switching off:
– Press the (Confirm) key and keep it pressed.
– Turn the “Temperature” ontrol knob to the right
to any temperature position (not light).
– Release the (Confirmation) key.
– Turn the “Temperature” ontrol knob to the 0
position (Fig. 21).
The (Child lo k) symbol on the display goes off.
Fig. 20
Fig. 21
19
5.2 Options menu
With the aid of the Options menu, you an
– hoose between °C and °F on the temperature
display.
– hoose between 12h and 24h on the time display.
– turn the timer on and off.
– start alibration.
– reset the des aling display.
Proceed as follows:
– Turn the two ontrol knobs to the topmost
position.
– Press the (Confirm) key and keep it pressed.
– Turn the “Moisture level” knob to the right.
– Release the (Confirmation) key.
– By turning the “Moisture level” ontrol knob, you
an now hoose the various fun tions (Fig. 22):
Position 1: temperature display either in °C or °F.
Position 2: time display in 24 hours or 12 hours
(am and pm)
Position 3: optional dea tivation of the time
display when the applian e is off
Position 4: alibration – you an now start the
alibration pro ess when you turn the
“Temperature” ontrol knob to any
position ex ept light.
Position 5: des aling, enter water hardness
– Set the required option by pressing the +or –key.
– Press the (Confirmation) key
– To quit the options menu, turn the “Moisture”
ontrol knob ba k up or turn the “Temperature”
ontrol knob.
End
Options menu
Time display
24h / 12h
(AM/PM)
Descaling
Sta t
Calib ation
Tempe atu e
display in
°C / °F
Time display
ON/OFF
(only if appliance is switched off)
Fig. 22

This manual suits for next models

1

Other Gaggenau Oven manuals

Gaggenau BSP 221 User manual

Gaggenau

Gaggenau BSP 221 User manual

Gaggenau EB 295-6 Operating and Specification sheet

Gaggenau

Gaggenau EB 295-6 Operating and Specification sheet

Gaggenau ED 220-100 Setup guide

Gaggenau

Gaggenau ED 220-100 Setup guide

Gaggenau BX 480 User manual

Gaggenau

Gaggenau BX 480 User manual

Gaggenau EB 333 610 User manual

Gaggenau

Gaggenau EB 333 610 User manual

Gaggenau BO 270/271 User manual

Gaggenau

Gaggenau BO 270/271 User manual

Gaggenau BO 420 2 Series User manual

Gaggenau

Gaggenau BO 420 2 Series User manual

Gaggenau GF 111 70 User manual

Gaggenau

Gaggenau GF 111 70 User manual

Gaggenau BO 21 Series User manual

Gaggenau

Gaggenau BO 21 Series User manual

Gaggenau EB 385 User manual

Gaggenau

Gaggenau EB 385 User manual

Gaggenau BO 421 2 Series User manual

Gaggenau

Gaggenau BO 421 2 Series User manual

Gaggenau EB 270/271 User manual

Gaggenau

Gaggenau EB 270/271 User manual

Gaggenau BO 451 6 Series User manual

Gaggenau

Gaggenau BO 451 6 Series User manual

Gaggenau BO 450 610 User manual

Gaggenau

Gaggenau BO 450 610 User manual

Gaggenau BOP 250 611 User manual

Gaggenau

Gaggenau BOP 250 611 User manual

Gaggenau BOP2201.2 User manual

Gaggenau

Gaggenau BOP2201.2 User manual

Gaggenau BO 471 2 Series User manual

Gaggenau

Gaggenau BO 471 2 Series User manual

Gaggenau BOP 210 930 User manual

Gaggenau

Gaggenau BOP 210 930 User manual

Gaggenau BX 481 612 User manual

Gaggenau

Gaggenau BX 481 612 User manual

Gaggenau EB 333 User manual

Gaggenau

Gaggenau EB 333 User manual

Gaggenau BO 450 610 User manual

Gaggenau

Gaggenau BO 450 610 User manual

Gaggenau BS 280/281 1.1 User manual

Gaggenau

Gaggenau BS 280/281 1.1 User manual

Gaggenau BSP 251 610 User manual

Gaggenau

Gaggenau BSP 251 610 User manual

Gaggenau BO 450 611 User manual

Gaggenau

Gaggenau BO 450 611 User manual

Popular Oven manuals by other brands

Hanseatic 65M90E0-E11A99G user manual

Hanseatic

Hanseatic 65M90E0-E11A99G user manual

Electrolux OPEB2650B user manual

Electrolux

Electrolux OPEB2650B user manual

CONSTRUCTA CF332250 instruction manual

CONSTRUCTA

CONSTRUCTA CF332250 instruction manual

Beko BDVC 665 MK user manual

Beko

Beko BDVC 665 MK user manual

Rowenta OC3738 manual

Rowenta

Rowenta OC3738 manual

Doyon DP14 user guide

Doyon

Doyon DP14 user guide

AEG BHP6200B1 user manual

AEG

AEG BHP6200B1 user manual

Omega OBO654GG Operating and installation instructions

Omega

Omega OBO654GG Operating and installation instructions

Teka HX-725 E Simplified instructions for use

Teka

Teka HX-725 E Simplified instructions for use

ACP AXP5201 Service training manual

ACP

ACP AXP5201 Service training manual

Logik LCPCKX11 Instruction & installation manual

Logik

Logik LCPCKX11 Instruction & installation manual

NEFF U15M52.3GB instruction manual

NEFF

NEFF U15M52.3GB instruction manual

AYA AFE70XBL Instructions for use

AYA

AYA AFE70XBL Instructions for use

Brigade D3 installation guide

Brigade

Brigade D3 installation guide

GE Profile Advantium PSA9120SFSS Dimension Guide

GE

GE Profile Advantium PSA9120SFSS Dimension Guide

Wood Stone BISTRO 4343 WS-BL-4343-W Installation and operation manual

Wood Stone

Wood Stone BISTRO 4343 WS-BL-4343-W Installation and operation manual

Stone Bake Mezzo 76 Kit Assembly and operation manual

Stone Bake

Stone Bake Mezzo 76 Kit Assembly and operation manual

Wood Stone BISTRO 3030 Installation and operation manual

Wood Stone

Wood Stone BISTRO 3030 Installation and operation manual

manuals.online logo
manuals.online logoBrands
  • About & Mission
  • Contact us
  • Privacy Policy
  • Terms and Conditions

Copyright 2025 Manuals.Online. All Rights Reserved.