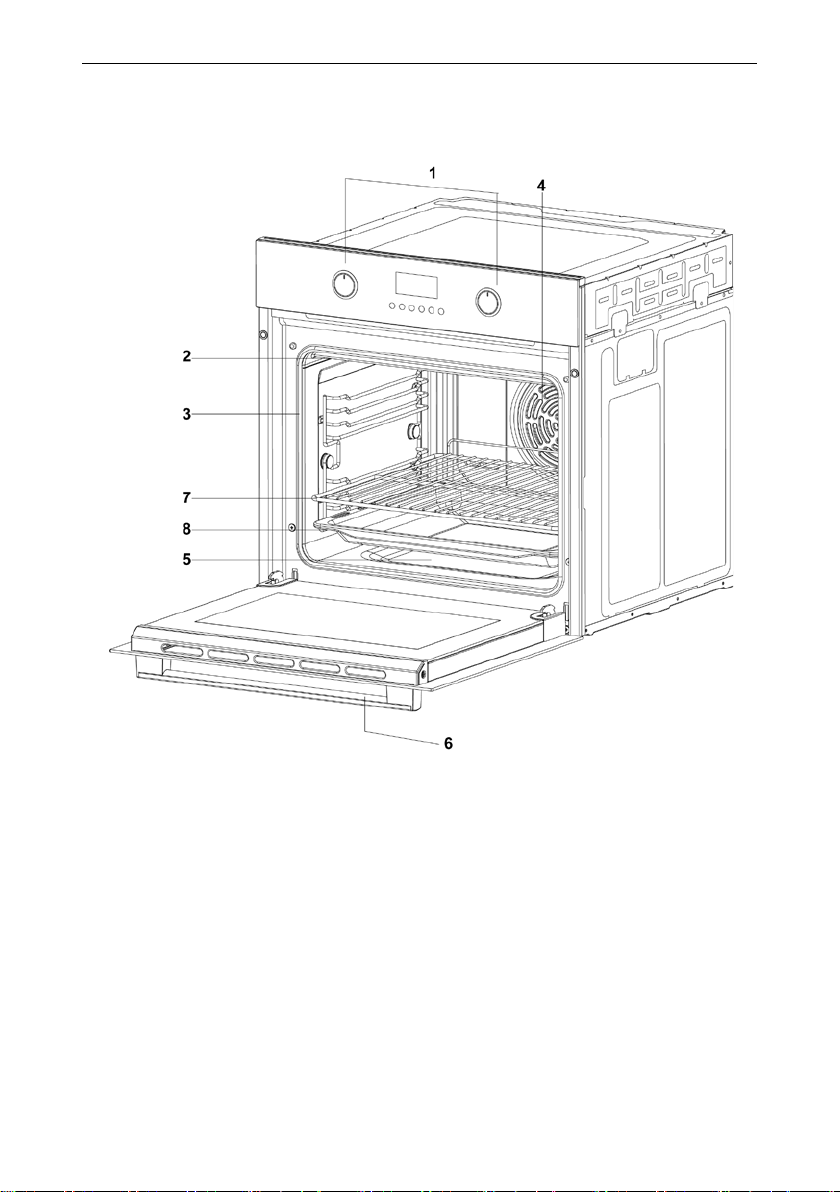
Galanz BIOUK003B Operator's manual

BIOUK003B
Please carefully read these instructions before installing and operating the oven.
User Instruction Manual
Built-in Electric Oven
Model: BIOUK003B

BIOUK003B
2

BIOUK003B
3
CONTENTS
IMPORTANT SAFETY INSTRUCTIONS..............................................4
SPECIFICATIONS ............................................................................7
INSTALLATION...............................................................................7
PARTS NAMES............................................................................. 10
CONTROL PANEL ......................................................................... 10
OPERATING INSTRUCTIONS......................................................... 11
SETTING THE CLOCK ........................................................................ 12
PRESET FUNCTION .......................................................................... 12
OVEN LAMP.................................................................................... 13
CHILD LOCK .................................................................................... 13
MULTI-FUNCTION SETTING.............................................................. 14
STEAM CLEANING ........................................................................... 15
CLEANING AND CARE.................................................................. 17
HOW TO USE ACCESSORIES ......................................................... 22
TROUBLESHOOTING TIPS ............................................................ 24

BIOUK003B
4
IMPORTANT SAFETY INSTRUCTIONS
General Warnings
1. When unpacking the oven, ensure you keep packing materials
such as plastic bags, polystyrene or nails out of the reach of
children.
2. To avoid the possibility of fire and explosion, do not put
combustible items into, near or onto the oven.
3. Do not attempt to modify this oven in any way as any changes
will void the warranty and may present safety risks.
4. Ensure other appliance cables cannot touch the hot surface of
the oven or become caught in the door.
5. To avoid danger, do not store items in the oven when not in use
as the oven may be switched on accidentally.
6. Take care when removing food from the oven at the end of the
cooking cycle due to the high temperatures emitted.
7. Do not allow children to go near the oven when it is hot,
especially when the grill programme is running.
8. Never remove the plug from the socket by pulling on the oven
handle.
9. Do not touch the oven with wet or damp hands or feet. Always
wear appropriate footwear.
10. Do not use external adapters or extension cables with the
appliance.
11. If the oven breaks down or develops a fault, switch it off at the
mains and do not touch it.
12. If the cable is damaged in any way, it must be replaced promptly
by a properly qualified technician and:
a) The cable must comply with the appropriate electrical
current required by the oven.
b) The earthling cable (yellow-green) must be 10 mm longer
than the power cable.
13. During operation, the door or the outer surface may get hot and

BIOUK003B
5
the temperature of accessible surfaces may be high. Care should
be taken to avoid touching the outer surface and heating
elements inside the oven.
14. The appliance is not intended to be operated by means of an
external timer or separate remote-control system.
15. Young children should be kept away from the oven during use to
avoid risk of harm.
16. The appliance can be used by children aged from 8 years and
above and persons with reduced physical, sensory or mental
capabilities or lack of experience and knowledge if they have
been given adequate supervision or instruction concerning use
of the appliance in a safe way and understand the hazards
involved.
17. Cleaning and user maintenance shall not be made by children
without supervision.
18. Children less than 8 years of age shall be kept away unless
continuously supervised.
19. If the supply cord is damaged, it must be replaced by the
manufacturer, its service agent or similarly qualified person in
order to avoid a hazard.
20. The oven is for domestic purposes only and should be used by
adults for its intended purpose only of cooking food. Any other
use, such as any form of heating, is improper and
dangerous.Children should be supervised at all times to ensure
that they do not play with the appliance.
21. Disconnection must be incorporated in the fixed wiring in
accordance with the wiring rules.
22. When you unpack the oven, ensure it has not been damaged in
any way. If in doubt do not use it - contact a professionally
qualified person.
23. The manufacturer cannot be held responsible for any damage
caused by improper, incorrect or unreasonable use. When using
any electrical appliance you must follow these basic rules.

BIOUK003B
6
Hints for Cooking
1. When the oven is first switched on, it may emit acrid smelling
fumes from the bonding agent used for insulating the panels
around the oven. This is completely normal; if it does occur,
wait for the fumes to clear before putting food into oven.
2. Hot fat can burn easily – take care when cooking with oil.
3. To avoid danger of spillage, do not use unstable or out-of-shape
containers when cooking.
4. Rotary grilling accessories are very sharp – take care when
using.
5. When cooking meat, use the Oil Collector supplied.
6. Add some water into the Oil Collector to reduce the smell of
burnt food.
7. Use appropriate oven gloves when putting food into or
removing food from the oven, taking care not to touch the hot
elements.
8. Do not place plates, dishes or aluminium foil on the bottom of
the oven as this will affect the heat distribution and damage the
enamel layer.
9. Take care not to damage the enamel surface inside the oven
when inserting the Oil Collector and Grill Rack. To keep the oven
clean, a piece of aluminium foil can be placed between foods
and the Grill Rack. Note: In order to ensure correct hot air
circulation, do not cover the entire surface of the Grill Rack with
the aluminium foil.
10. Before cooking, prick poultry meat or sausages with a fork to
prevent bloating and bursting during cooking.
11. Cover greasy meat or food to avoid oil splashes during cooking.

BIOUK003B
7
SPECIFICATIONS
Power Supply: 220-240V~ 50Hz
Rated power output: 3000W
Outside Dimensions:
595mm(H)×595mm(W)×570mm(D)
Oven Cavity Dimensions:
340mm(H)×470mm(W)×410mm(D)
Oven Capacity:
65Litres
Gross Weight: Approx.41.5 kg
Net Weight: Approx.36.5 kg
INSTALLATION
Installation and electrical connection must be carried out by
qualified professional technical personnel.
After removing the appliance from the packaging, ensure the oven
and power cord are not damaged.If in doubt, do not use and contact
customer service.
Installation Method
1. Choose the designated location inside the kitchen (refer to
diagrams below).
2. Using screws, fix the oven onto the installation frame location
(figure 1).
3. To determine the position of the mounting hole, open the oven
door. To ensure correct ventilation, refer to figure 2 for
measurements.

BIOUK003B
8

BIOUK003B
9
a) For correct operation of the oven, the kitchen housing must be
suitable.
b) The panels of the kitchen unit that are next to the oven must be
made of a heat resistant material. Ensure that the glue of units
made of veneered wood can withstand 120 ℃temperatures.
Once the oven has been lodged inside the unit, the electrical
part must be completely insulated. This is a legal safety
requirement.
c) All guards must be firmly fixed into place so that it is impossible
to remove them without using special tools.
d) Remove the back of the kitchen unit to ensure an adequate
current of air circulates around the oven.
Connecting to the Power Supply
Connection must take account of the current supplied and must
comply with current legal requirements.
The yellow and green grounding line must not be controlled by a
switch. The socket or the ON/OFF switch used for connecting to the
power supply must be easily accessible when the oven has been
installed.
IMPORTANT:During installation, the power cable position must be
taken into account. Do not locate the power cable in an area where
the temperature exceeds 50℃. The oven complies with safety
standards set by the regulatory bodies and is safe to use only if it has
been adequately earthed in compliance with current legal
requirements on wiring safety. You must ensure the oven has been
adequately earthed.
The manufacturer cannot be held responsible for any harm or injury
to person, animal or belongings caused by failure to properly earth
the oven.
WARNING: The voltage and the supply frequency are shown on the
rating plate. The cabling and wiring system must be able to bear the
maximum electric power required by the oven as shown on the
specifications plate. If in doubt, contact a suitably qualified person.

BIOUK003B
10
PARTS NAMES
1. Control panel
2. Heater tubes
3. Cavity sealing ring
4. Convection fan
5. Oven cavity
6. Door handle
7. Grill rack
8. Oil collector

BIOUK003B
10
CONTROL PANEL
Button
Image Name Function
Temperature
Use this button to set the
temperature
Clock
Use this button to set the clock
and cooking time
Timer
Use this button to start the preset
function
Safety Lock
Use this button to set or release
the child-proof lock
Light
Use this button to switch on or off
the oven light
Confirm
Start/Stop
Use this button to start or stop the
cooking programme or to confirm
the setting of temperature,
cooking time and clock
Function Knob
1. Turn it to select different programmes;
2. Turn it to “●” and the system will go into
standby mode. Press the knob to hide it.

BIOUK003B
11
-/+ Knob
1. Turn to adjust time and select different
temperature.
2. Turn it to “●” and press the knob to hide it.
OPERATING INSTRUCTIONS
Attentions:
When the oven is switched on, the system will emit a sound, the
display shows the function of the corresponding function knob
settings (if the left knob corresponds to reset function "●", only
shows "12:00").
During cooking press pad once to suspend the programme,
the display shows "PAU", and then press it again to resume. In
any mode, turn the left function knob to “●”, then the oven will
return to standby mode.
At the end of the cooking process, END will display and the
system will emit a sound to remind user every 2 minutes until any
pad is pressed.
When cooking is finished, make sure all the knobs are in the "●"
position, and press the knob to hide it.
The oven door must be closed in any cooking process. The oven
has a special natural air circulation and hot air recycle system.
This system regulates the humidity and temperature inside the
oven ensuring food is cooked evenly and thoroughly. In addition,
you can shorten the cooking time reducing energy consumption.
NOTE: Hot steam may be produced during the cooking process,
this is normal.

BIOUK003B
12
Take care of escaping steam when opening the oven door during
cooking or at the end of the cooking cycle.
Save electricity mode:
After 1 minute of in-operation the display will show the
power-saving mode and the oven will go into standby. Turn any
button or press any pad once to end.
The Knob position setting should always be returned to "●". The
knob can be pushed flush for protection by gently press down on
the knob. When you need to use, gently press the knob to engage
the pop up function.
The oven control panel is touch screen and only requires a light
touch to activate the corresponding operation. Do not press hard
or wear gloves.
When the oven is plugged in, turn either of the function knobs or
“-/+” knob and the indicator light corresponding to the knob will
be lit. After 1 minute of in-operation the knob indicator light
turns off.
SETTING THE CLOCK
This is a 24 hour clock. To set the clock, for example, to 9:30:
1. Turn left function knob to “●”.
2. Press “” once, the hour figures will flash.
3. Turn the “-/+” knob to enter “9” hours.
4. Press “ ” once, the minute figures will flash.
5. Turn“-/+” knob to enter “30” minutes.
6. Press “ ” to confirm.
PRESET FUNCTION
This function starts the oven and ends the programme automatically
at the specified time set in advance.
Example: Current time is 12:30, to set the “Back Convection”

BIOUK003B
13
programme to start at 15:30 with 2 hours cooking time:
Steps:
1. Place the food into oven, close the door.
2. Turn FUNCTION knob to select “Back Convection” function,
“”displays.
3. Press 【 】pad once, initial temperature will flash. Turn Knob “-/+”
input temperature and press pad once to confirm.
4. Press 【 】pad once, initial time will flash. Turn Knob “-/+” input
cook time “2:00” and press pad once to confirm.
5. Press pad once, at this time the display shows the current
clock and " ".
6. When the hour figures flash, turn “-/+” Knob input hour figures
“15” and then press pad once to confirm.
7. When minute figures flash, turn “-/+” Knob input minute figures
“30” and then press pad once to confirm.
8. The programme will automatically start at 15:30 with 2 hours
cooking time.
OVEN LAMP
The system defaults to turn on the lamp when the oven starts to
cook. After 1 minute, the lamp automatically turns off.In the 60
seconds before the end of cooking the lamp automatically turns on.
Once cooking has finished, the lamp will automatically turn off after
1 minute. The lamp can be turned off or on by pressing pad.
CHILD LOCK
Lock:press” ” for 3 seconds, “ ” indicator will display and
buttons are disabled.
Unlock:In the lock mode, press “ ” for 3 seconds, “ ”
indicator will deactivate and the lock is released.

BIOUK003B
14
MULTI-FUNCTION SETTING
This function allows you to set 11 different programmes. At the end of
cooking, the fan will work for approximately 3 minutes to cool the cavity.
Working methods, temperature range and setting steps are shown
below:
CODE MODES WORKING
METHODS
TEMPERATURE
RANGE
SUITABLE MENU
1
Top -outer Heater
+ Bottom Heater
30℃~250℃
Cookies (160℃)
Cake (160℃)
Egg tarts (190℃)
Barbecue (230
℃
)
2 Back Convection Kebabs (220℃)
Grilled steak (250
℃
)
3
Back Convection
+ Bottom Heater
Pizza (180℃)
Quiche (190℃)
Apple pie (190
℃
)
4 Bottom Heater 30℃~220℃Fried dumplings (200℃)
5
Top Two Heater +
Fan
30℃~250℃Toast (200℃)
6
Bottom Heater +
Fan 30℃~220℃
Sweet potatoes dry
(120℃)
Dried beef (120
℃
)
7
Top -inner Heater
+ Bottom Heater 30℃~250℃
Grilled fish (200℃)
Grilled corn (200℃)
Roast vegetables (180℃)
8
Keep Warm
(Bottom Heater)
60℃~80℃Baked foods
Fried foods
9 Defrost (Fan) 40℃~60℃Frozen food
10 Top Two Heater
30℃~250℃
Roast chicken (250℃)
Roast duck (250
℃
)
11
Top -outer Heater
+ Bottom
Heater+ Fan
Barbecue (230℃)
Chicken (250℃)
Roast leg of lamb(250℃)

BIOUK003B
15
The electric oven has 11 cooking programmes and a reset function.
Select the cooking programme by turning the left function knob. Press
【 】and【 】 pads to change the cooking temperature and cooking
time.
Press 【 】 once, the current temperature flashes for 10 seconds.Turn
the “-/+” Knob to enter the cooking temperature within 10 seconds
and then press pad once to confirm.
NOTE: Pressing and holding 【 】for 5 seconds can switch the
temperature unit from ℃to ℉. Thedefault unit is ℃.
Press 【 】 once, the current time flashes for 10 seconds.Turn the
“-/+” to enter the hourdigit for cooking time and then press pad
once, turn the “-/+” to enter minutes digit for cooking time, press
pad once to confirm. The longest cooking time you can enter is 23
hours and 59 minutes.
Once the time and temperatures are set, press pad once to start
cooking.
NOTE: If no cooking time is set, the time will increase automatically. If
the cooking time has been set, it will count down when the oven starts
cooking.
STEAM CLEANING
The oven has a cleaning function that uses steam to clean light
soiling in the oven.
1. Open the oven door and remove all the accessories.
2. Pour 400ml of water onto the bottom of the oven and close the
door.

BIOUK003B
16
3. Turn the FUNCTION knob to select “ ” programme.
4. Press【 】pad once, and then turn the “-/+” knob to enter 5
minutes.
5. Press pad once to confirm.
6. Once the programme is complete, do not open the oven door
for20 minutes.
7. Open the oven door and use a dry cloth to clean inside the oven.
NOTE:
If the oven is heavily soiled with grease, for example after
roasting or grilling, it is recommended to remove stubborn soil
manually using a cleaning agent before activating Steam cleaning.
Leave the oven door ajar when the cycle is complete. This is to
allow the interior enamel surface to dry thoroughly.
While the oven is hot inside, auto cleaning is not activated. Wait
until the oven cools down, and try again.
Gently pour water onto the bottom, otherwise, the water overflows
to the front.

BIOUK003B
17
CLEANING AND CARE
General Instructions
1. Ensure that the appliance is switched off and unplugged before
replacing the lamp or cleaning to avoid the possibility of electric
shock.
2. Wipe the oven using a soft, damp cloth or sponge and a little
washing-up liquid. Dry with a soft cloth.Do not spray the
appliance directly with water as this could cause electric shock.
3. Use a mild window-cleaning detergent on the glass door. Wipe
the area with a soft cloth using a horizontal action without
applying pressure.
4. Never use a steam or high pressure spray to clean the appliance.
5. Never use abrasive or caustic cleaners, wire wool or sharp
objects to clean the glass oven dooras this will damage the
surface,enamel layer and ruin the oven’s appearanceand may
even shatter the glass.
6. If any abrasive or caustic substances come into contact with the
frontage, clean immediately with a soft damp cloth or sponge.
7. Clean the stainless steel and enamelled surfaces with warm,
soapy water or with suitable brand products.
8. Important - clean the oven each time after it is used.
9. Melted fat is deposited on the sides of the oven during cooking.
The next time the oven is used this fat could cause
unpleasantodours and might even affect cooking
performance.Use hot water and detergent to clean and rinse
thoroughly.
10. Always remove any deposits of limescale,grease,corn flour and
egg white immediately. Corrosion can form under such deposits.
Use stainless steel care products and follow the manufacturer’s
instructions. Try the product out on a small inconspicuous area
first before using on the whole surface.
11. For cleaning, the appliance must be cooled down and
unplugged.

BIOUK003B
18
12. For safety reasons, do not clean the appliance with steam jet or
high-pressure cleaning equipment.
13. Do not use aggressive cleaning products, scratchy sponges or
rough cleaning cloths.
14. When the oven isscrapped, to avoid the possibility of injury,
destroy the lock device and cut off the outside cable.
15. Disposal must be carried out in accordance with local
environment regulations for waste disposal. For more detailed
information about treatment, recovery and recycling of this
product, please contact your local authorityoffice or
yourhousehold waste disposal service.
The Oven Outside Surface
Only use a damp soft cloth to wipe the appliance.Do not use
abrasive or coarse equipment. For stubborn marks, use a small
amount of detergent in the water and wipe with a soft, dry cloth.
Do not use corrosive and abrasive cleaners as they will damage the
surface and in case of accidental spillage, cleanimmediately with
water.
Cleanthe Oven Accessories
Carefully clean with soap and waterand wipe dry.
Inside the Oven
Once the oven has cooled completely, use a damp cloth to wipe the
inside of the oven.Note that there may be some fading of the
enamel layer and metal surfaces under high temperature and this is
normal and does not affect the performance of the oven.Donot use
abrasive cleaners or cloths to try to restore the fading that has
occurred.Only use warm water to clean the enamel surface. Do not
use steel wire, corrosive or abrasive cleaners or sharp objects such
as a knife or scraper as this will damage the enamel layer.

BIOUK003B
19
Cleaning the Oven Door and Glass Panel
Use a mild cleaning fluid and sponge or cloth to clean and dry the
oven door.Do not use steel wire or corrosive cleaners and scrapers
as this will damage the surface of the oven.The oven door can be
removed for cleaning (see below).Do not use corrosive or abrasive
cleaners or sharp objects to clean the glass panel as this will scratch
and damage the glass surface and may affect the glass panel
performance during cooking and lead to injury.After cleaning install
the glass panel on the oven door first and then install the oven door
taking care not to install the glass panel back to front.Do not use the
oven if the glass panel has been installed incorrectly.
A. Removing the oven door: (see Figure 1)
1. Pull the oven door to the horizontal position. (figure A)
2. Move the hinges on both sides to the fully open position (figure
B) and hold the door
3. Hold and remove the door from the oven at a 60 degree angle.
B. Removing the door glass
1. Remove the top (shutter)
by unscrewing the bolts on
both sides (see figure 2).
2. Unscrew the other 6 bolts
in the opposite top on both
sides of the door.
3. Pull out and remove the
Glass 1 (see figure 3)
4. Take out the four pads.
5. Draw out and remove Glass
Table of contents
Other Galanz Oven manuals

Galanz
Galanz GRH1209RDRM151 User manual

Galanz
Galanz GTS311S2EWAQ18 User manual

Galanz
Galanz GRH1209BERM151 User manual

Galanz
Galanz GLOMJB19S2SWZ-10 User manual

Galanz
Galanz GTH12A09S2EWAC18 User manual

Galanz
Galanz GRSK2A15RDMA18 User manual

Galanz
Galanz KWS2042LQ-H8UK User manual

Galanz
Galanz MOUK001B Operator's manual

Galanz
Galanz GTS311S2ETWAQ18 User manual

Galanz
Galanz BIOUK004BL Operator's manual