Galaxy Audio AS_TV10 User manual


Contents
Introduction.............................................................................................1
Before using theTV10, TV8, TV5i & TV5X.......................................................1
TV10 Front & Rear panel configuration.............................................................2
TV10 Master Control Panel............................................................................3
AS-TV8 Series Rear Panel Configuration.........................................................4
AS-TV8 & TV10 Series Description of Functions .....................................5-11
Power Supply/Charger..................................................................................5, 6
Power Switch.................................................................................................5, 6
AS-TV8 Master Control..................................................................................5, 6
Digital Echo System..............................................................................7
Audio Link Transmitter...................................................................................7, 8
Wireless Mic/Audio Link Receiver .....................................................................8
Bluetooth Receiver Module...............................................................................9
RM-CD CD/MP3/SD/USB Player...................................................................10
RM-CDV CD/DVD/MP3/SD/USB Player........................................................11
RM-DIGIMP Digital Player..............................................................................11
RM-CASSP Cassette Player...........................................................................11
TV5i & TV5X
TV5i Front & Rear Panel.................…..........………………………..........12, 13
TV5i Battery Replacement…..............................………………………..........12
TV5i Bluetooth Connection…..........……………...................…………..........13
TV5MP3 Optional Media Player…..........……………………............…......14, 15
Wireless Microphone Receiver Option TV5-REC for TV5i & TV5X.................15
TV5X Panel Configuration…..........……………...................…………..........16
WIRELESS HAND HELD & BODY PACK TRANSMITTERS
TVHH Microphone Description & Functions...............................................18-21
TVH2 Microphone Description & Functions................................................21-23
AS-TVBPT Body Pack Transmitter Description & Functions.......................23, 24
AS-TVBPR Body Pack Receiver Description & Functions..................25, 26
AS-TVMBP Body Pack Transmitter Description & Functions..................26-28
Maintenance..............................................................................................29
AS-TXRM Stationary Transmitter………………………………..........……. 30, 31
Setup and Operation of TXRM………………………………............…………...31
Specifications.................................................................................32-40
AS-TV10 Specifications...........................................................................32
AS-TV8 Specifications...................................................................................33
TV5i Specifications…………………………………………………….................34
TV5X Specifications……………………………………………………................35
AS-TVREC Wireless Receiver Module..........................………….36, 37
AS-TVTX & TXRM Audio Link Transmitter Module...........................................37
AS-TVEC Digital Echo Module........................................................................37
AS-TVHH Handheld Microphones............................................................37-38
AS-TVH2 Handheld Microphones...................................................................38
AS-TVMBP Body Pack Transmitter.................................................................39
AS-TVBPT Body Pack Transmitter............................................................39, 40
TV5MP3 Digital Media Player..........................................................................39
TRAVELER APPLICATION TABLE................................................................41

Operating Manual for AS-TV10/TV8/TV5i/TV5X Series
**Please visit for the latest updates**www.galaxyaudio.com
Introduction
1
Thank you for purchasing the TV10/TV8/TV5i/TV5X series wireless portable
sound systems. These units feature an “all in one” design that allows them to be
configured with a variety of different function modules to suit your specific needs.
With rich, full sound and plenty of power, the TV10/TV8 series is ideally suited to
cover large areas. The TV5's, with their compact size, is ideal for classrooms,
conference rooms, and guided tours. This manual covers the complete functions
and operations of the TV10/TV8, TV5i and TV5X including all optional function
modules. It also covers the TXRM Stationary Transmitter, the TVHH/TVHHC &
TVH2 Handheld Wireless Mics, the TVMBP Bodypack and AS-TVBPT Pendant
Transmitters. To use these systems to their fullest potential please read this
manual carefully.
1. The TV10, TV8 and TV5 use a universal AC switching power supply/charger
that will operate on voltages of 100~240V,50/60Hz. The TV10, TV8 power
supplies are internal, while the TV5's is external. Verify that the voltage to
which you are connecting is in this range and then connect the AC power
cord from the Traveler to the wall outlet.
2. Charge the battery for at least 8 hours with the Power Switch OFF prior
to first time use to maintain the quality of the battery and provide maximum
operation time. When charging, the charging indicator lights RED. When
charging is almost complete, the indicator will flash alternately RED and
GREEN. After the battery is fully charged, the indicator will light GREEN.
After the initial charge the Traveler may be operated on either AC or Battery
power. When operating on AC power the Traveler will simultaneously
recharge its internal batteries.
3. These units have auto protection circuitry that will protect the battery from
being overcharged or overused. When running on battery power and the
power switch LED blinks RED, the battery power is down to 30%. When the
battery is nearly exhausted, the system will turn off automatically to protect
the battery.
Before Using the TV10, TV8 or TV5i & TV5X
CHARGING FUNCTIONS:
1. Charge indicator will illuminate red when
charging and green when fully charged
2. Unit can be permanently left on charge.
3. For maximum battery life, recharge after
every use and at least once every 3 months.
4. When in use and battery capacity is < 20%
the power switch flashes red.
CHARGING FUNCTIONS:
● Charging- LEDs light in sequence.
● Fully charged-Only top Green LED will light.
USEFUL TIPS:
● Unit can be permanently left on charge.
● For maximum battery life, recharge after
every use and at least once every 3 months.

2
2
1
7
3
4
5
6
1
2
3
4
5
6
7
8
Front Side
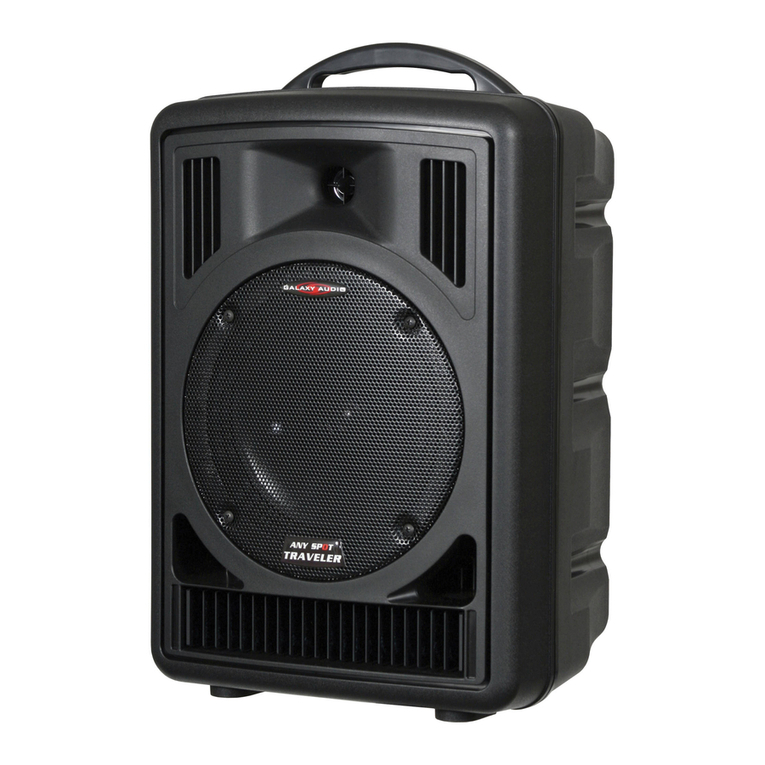
1. Retractable Handle
2. Handle
3. Horn Tweeter
4. Speaker Grille
5. Woofer
6. Port
7. Wheels
Rear Side
1. Retractable Handle
2. Optional Wireless Receivers
3. Optional CD/MP3 Player
4. Main Power Switch and Charging
Indicator (Optional Transmitter module)
5. Master Control Panel
6. AC Power Input
7. Battery Cover
8. Wheels
AS-TV10 Front & Rear Panel Configuration

3
7
8 9 10 11 12
1 2 3 4 5 6
1. TREBLE control with center detent
2. BASS control with center detent
3. LINE IN volume control
4. AUX IN volume control
5. MIC2 volume control
6. MIC1 volume control
7. MASTER control for overall system volume
8. VOICE PRIORITY button to activate or end the microphone priority function
5. 7. LED lights red meaning the voice priority function is active.
9. LINE-IN (RCA phone jack) to connect with external music sources including
CD/MP3/DVD/iPod players etc.
LINE OUT (RCA phone jack) to connect with external mixed-signal recorder or
active speaker system
10. AUX IN (1/8" jack) to connect with external music sources including CD/MP3
DVD/iPod players etc.
AUX OUT (1/8" jack) to connect with external mixed-signal recorder or active
speaker system
11. MIC IN 2 (1/4" jack) microphone connector
12. MIC IN 1 (XLR / 1/4" jack) combo microphone connector
TV10 Master Control Panel

4
5
1
2
3
6
7
8
4
AS-TV8 Series Rear Panel Configuration
AS-TV8CT2 (Part# for unit shown with options)
1. Optional Receiver Modules
2. Optional MEDIA Player
3. Audio Link Transmitter
4. Power Switch
5. Mixer
6. Speaker Out
7. In/Out Jacks
8. Power Supply/Charging Input

5
1
2
3
3
2
1
A. Power Supply/Charging Input
1. AC Power Cable connector
2. Batteries (behind cover)
3. Battery cover
Description of Functions for AS-TV8 & TV10
567 8
21 3 4
5. Line in RCA jacks
6. Line out RCA jacks
7. Mic in XLR/1/4" jack
8. Speaker level output jack.
Minimum 8 ohm external speaker
C. TV8 Master Control Panel
1. Master volume control
2. Treble control
3. Bass control
4. Mic volume control
(For wired Mic connected
to Mic In jack 7)
B. Power Switch and Charge Indicator for AS-TV8 & TV10
1. Power LED
2. Charging indicator
3. Power On/Off switch

6
Operation of TV8 & TV10 Portable Sound System
A. Power Supply/Charger (see page 5)
1. There is a universal AC switching power supply/charger built into the system
that will operate on voltages of 100~240V,50/60Hz. Verify that the voltage to
which you are connecting is in that range and then connect the AC power
cord from the AC IN (A1) to the wall outlet.
B. Power Switch and Charge Indicator (see page 5)
1. Power LED lights constant red under normal operation when power switch is
on. Blinking Power LED indicates 30% of battery power remaining.
2. When charging is almost complete, the indicator will flash RED and GREEN.
After the battery is fully charged, the indicator lights GREEN. The Universal
Power Supply/Battery Charger allows the Traveler to be used anywhere in
the world. The Traveler will operate for an unlimited time on AC power and
for about 6 hours on just battery power. A full recharge of the batteries takes
about 4 hours. The Traveler may be operated while recharging the batteries
without affecting the charge time. If a power failure occurs when operating
on AC, the Traveler will seamlessly switch over to battery power.
C. TV8 Master Control Panel (see the page 5)
1. Master Volume Control.
2. Turn the Treble control (C2) counterclockwise to decrease the treble,
and turn clockwise to increase the treble. The center position (straight up)
produces a flat response.
3. Turn the Bass control (C3) counterclockwise to decrease the bass, and
turn clockwise to increase the bass. The center position (straight up) produces
a flat response.
4. Mic Volume (C3) for wired Mic In jack (C7).
5. The system contains Line In, Line Out, and Mic in jacks for connecting
external audio devices.
6. Line In (C5): RCA jacks to connect external audio sources, such as CD/
MP3 players or iPods. The volume of the Line In is controlled solely by the
Master (C5) on the TV8 individual on the TV10.
7. Line Out (C6): RCA jacks for sending the entire mix signal to other audio
devices, such as recorders, mixers, or power amps.
8. Mic In (C7): XLR or 1/4" (6.3mm) phone jack for wired microphones. Volume
of this input is controlled by Mic In (C4) and the Master (C1).
9. Speaker Out: (C8) Used to connect to an external unpowered speaker
(8Ω Min.) AS-TV8 Only

7
D. Digital Echo System (AS-TVEC) (for AS-TV8)
1 2 3 4 5 6 7
5. Wired mic 2 volume control
6. Wired mic 1-1/4" input jack
7. Wired mic 2-1/4" input jack
1. Master echo volume control
2. Delay repeat control
3. Delay time control
4. Wired mic 1 volume control
1 2 3 4 5 6 7
E. Audio Link Transmitter (AS-TVTX) (for AS-TV8/TV10)
5. Enter Setting
6. Channel selector
7. Power switch and volume control
1. LCD display
2. TX indicator
3. Low audio level indicator
4. High audio level indicator
1. Turn the Echo Control (D-1) clockwise to turn on the echo system. Then
use this control to adjust the level of echo in the mix. Echo will be applied to all
3 mic inputs.
2. Adjust the repeat button (D-2) to select the number of repeats desired.
Adjust the delay button to select the delay time.
3. Mic input jacks (D-6 and D-7) are provided for connecting wired Mics. Mic
volume is controlled by D-4 and D-5 plus the Master ( ).C-1, Pg.5
1. Turn the power switch (E-7) clockwise to turn on the transmitter.
2. The LCD display (E-1) will show “On” and the channel in use when the unit
was last turned off.
3. To select a different channel, press the set button (E-5) and the channel will
flash in the LCD display. Press the up or down button (E-6) to select the
transmit channel, and then press the set button again to enter the setting. The
LCD will then automatically display the selected channel. To display the
frequency of the selected channel press and hold either the up or down button.
4. Turn the volume control (E-7) to adjust the audio transmit level. Use this
control in conjunction with the volume controls on the receiving Traveler.
This module transmits the entire audio mix from one Traveler to another
Traveler that is equiped with a wireless Mic/Audio Link Receiver.

8
5. When transmitting signal, the TX indicator (E-2) will light Green to
show the transmitting condition. The AF Level indicator lights Yellow (E-3) to
show a low audio level and lights Red (E-4) to show high audio level.
6. Set up the receiving Traveler according to the procedure outlined in: section ( ) F
page 12. Wireless Mic/Audio Link Receiver Select the same channel chosen on
the transmitting Traveler.
F. Wireless Microphone/Audio Link Receiver
(AS-TVREC for TV8/TV10) &
(TV5REC for TV5i/TVX)
1. LCD display
2. A/B diversity indicator
3. RF indicator
4. AF level indicator
5. Channel Set
6. Channel selector
7. Power switch & mic. volume 21 3 4 5 6 7
Optional Modules for TRAVELERS
F. Wireless Mic/Audio Link Receiver (AS-TVREC)
This system may include one or two receivers with selectable PLL 96 channel
operation. These modules receive signals from wireless Mics or from another
Traveler equiped with an Audio Link Transmitter.
1. Turn the power switch clockwise to turn on the receiver.
2. The LCD display will show “On” and the channel that was last in use when the
unit was turned off.
3. To select a different channel, press the set button. The channel number will
flash in the in LCD display. Press the up or down button to select a channel to
use, and then press the set button. After a channel has been set, press either
the up or down button to display the frequency of the selected channel.
4. Adjust the volume control to the desired level.
5. When receiving signal, the A/B diversity indicator will light RED or Green to
show the normal condition. The RF indicator will light to show RF received
and the AF indicator will show audio received.
TV5-REC Wireless Mic/Audio Receiver on Page 15.

9
1. Turn the knob clockwise to switch on the Bluetooth module. Set a mid-range
volume level to begin.
2. You will hear a tone and the PWR indicator (LED) will light blue. The LINK
indicator will also flash blue to indicate that the module is ready to pair with
another Bluetooth device.
3. When in pairing mode, activate a Bluetooth connection scan on your device
that will serve as a source of audio. When the search is complete, select a
device named “Galaxy Traveler” from the pairing list. Your device will attempt
to
connect with the Bluetooth module.
4. When the devices have successfully paired, the module will sound a prompt
tone again. The LINK indicator will light steady blue.
5. You are now ready to stream audio via the Bluetooth connection from your
device. You can adjust the audio volume on your device or using the volume
knob on the Bluetooth receiver module.
6. The AF indicator will light when an audio signal is streamed from your
playback device and received by the Bluetooth module.
7. If a phone call is incoming during playback, the audio stream will be
interrupted for the user to take the call. When the call is finished, the
Bluetooth module will be automatically re-link and audio files will continue
playback from where they were interrupted.
8. When a user moves out of range for the Bluetooth connection, the audio
stream will be severed until the user returns to a location within range of the
module. The range is approximately 30 feet. However, it depends on the
operating system that’s installed on the device. Occasionally it’s necessary to
manually reconnect to the Bluetooth following the steps above.
G. Bluetooth Receiver
Module
1. PWR - Power indicator
2. LINK - Bluetooth connectivity
indicator
3. AF - Audio Frequency indicator
4. On/Off/Volume control knob
21 3 4
(TV-RECBT for TV8/TV10)
(TV5-RECBT for TV5i & TV5X)

10
1. Push the power switch (2) to turn on the player. Put a CD in the CD slot (G10)
or push the Stop/Eject button (5) to take a CD out of the slot.
2. Press the Play/Pause button (8) to start or pause CD/MP3 play .Turn the
volume control (9) to adjust to the proper volume. Push the Stop/Eject button
to stop or change the CD or MP3 disc.
3. Press the Forward (7) or Reverse (6) button to skip forward to the next rack or
reverse to the previous track. Holding down the Forward or Reverse button
will continuously forward or reverse the tracks.
Tip: MP3 files on a USB or Flash card should be loaded on the media in the
order of desired playback. Do not have files in individual folders.
4. Repeat/Shuffle (4) has three modes:
1. Repeat one song
2. Repeat all songs
3. Shuffle for random play.
5. Create Program Playlist:
Step 1: Press Prog button (1) to begin setting up the program playlist
Step 2: Select a song (see step 3 and 6)
Step 3: Press Repeat (4) to enter the song. Repeat steps 2 and 3 to enter
additional songs.
Step 4: Press Play (4) to play the programmed songs in memory
Note: that the program will reset once the Program button is pressed again.
6. To select a folder from an MP3, press Folder button (11). Use Forward or
Reverse buttons to select a song.
1 2 3 4 5 6
78 9 10 11 12 13 14 15 16 17
Optional Modules for TV10/TV8
9. Shuffle and execute button
10. Repeat: Repeat play mode
11. Previous Folder
12. Next Folder
13. Reverse
14. Fast Forward
15. Play/Pause
16. Stop/Eject
17. Volume Control
1. USB Connector
2. Power Switch
3. LCD display
4. Mute
5. Program Button
6. SD Card Slot: Accepts SD and
SDHC Cards containing MP3 files
7. IR Window
8. CD / USB / SD: Press this key to
select USB, SD, or CD mode.

11

12
TV5i Front and Rear Panel Configuration
TV5iM1K9 (Part# for unit shown with options)
5. Controls, Battery Meter, Mic in
6. Power Switch
7. DC Input
8. Battery Door
1. Tweeter (1")
2. Neodymium Driver (5")
3. Optional UHF Receiver
4. Optional Digital Media Player
Battery replacement Lead-Acid battery
Remove battery door
screws
Pull battery out Remove connectors and
replace new battery in
reverse order
RED = Positive;
BLACK = Negative
6
7
1
2
3
4
8
5

I. Rear Panel of TV5i
13
1. DC Power Input
2. Power Switch
3. Power LED
4. Master
5. Treble
6. Bass
7. Battery meter
8. Voice priority:
when activated,
Priority LED (6) will light.
9. Voice priority indicator
10. Bluetooth Button (if equipped)
11. Aux in control
12. Aux in, 1/8" Jack
13. Aux out, 1/8" Jack
14. Mic (wired) in control
15. Mic in, 1/4"/ XLR Combo jack
16. Battery Cover Plate 2
1
3
4 5 67
8 9 12
10
11 13
16
1514
Turn On and Off:
Press and hold Bluetooth button for
approximately 2 seconds to activate
the Bluetooth function. Press and hold Bluetooth button for approximately 2
seconds again, to turn the Bluetooth function off.
Bluetooth pairing:
1. When Bluetooth function is activated successfully, it will emit with a prompt
tone.
2. The button will flash Blue as a sign that the device is in pairing mode.
3. Activate the Bluetooth connection on your smartphone or any Bluetooth
device you are using.
4. Find the device name “Galaxy Traveler” on the pairing list to connect your
device.
5. When the pairing is successful, it emit out with a prompt tone again and the
blue indicator light will be illuminated.
6. You are ready to stream audio from your device.
Caution:
1. During Bluetooth connection, audio playback will stop when a call is made to
your smartphone or tablet. When the call is finished, Bluetooth will be relinked
automatically and audio files will be played.
2. The Bluetooth connection can be lost when the device gets out of range of
the TV5i. When this happens it may automatically re-link when back in range, or
it may have to be manually reset. This is dependant on the device and it's
operating system.
Guide for TV5i
Bluetooth connection

14
1. LCD display
2. Previous track / volume
down (works during playback)
3. Next track / volume up
(works during playback)
4. Stop
5. Play / Pause
6. SD/MMC port
7. USB port
1. Press and hold (9) for 1 second to turn TV5MP3 player on. Press and
hold (9) for 1 second to turn off.
2. Press (2) to play previous audio track; press (3) to play next audio track.
Press (4) to stop any playback.
3. Press (5) to Play or to Pause any audio track.
4. When both SD card and USB are installed, USB has higher priority to be
readout.
5. Do not pull SD card out directly or it may be damaged. Push in and SD
card will eject.
6. Repeat / Folder Select:
a. There are 3 modes for repeat during audio playback.
:To repeat a track.
:To repeat all tracks in all album.
:To repeat all tracks in a single album.
b. When not in playback, press (8) to select a desired folder/album with
NEXT, PREV buttons. Finally press PLAY to end the setting.
7. During playback, press VOL+ to increase volume; press VOL- to decrease volume.
21 345
678 9
J. Optional Media Player for TV5i & TV5X TV5MP3
12
10 11
13
remote control
8. Repeat / Folder select
9. Power
10. Volume down
(MUTE when in minimum level)
11. Volume up
12. Mute
13. Folder select

Turn receiver power on/off control (K7) clockwise until a click occurs. A
text of “ SYNC ” will appear on LCD window for about 2 seconds followed
by a channel number. To turn it off, turn the control counterclockwise until a
click occurs. A text of “ OFF ” will appear on LCD window and will disappear
after 2 to 3 seconds.
How SYNC works:
“ SYNC ” function can find a clean channel and assign it to transmitter in
the range, about 3 m. Turn on your microphone or transmitter first and
press SYNC button, in a few seconds the receiver will have found a clear
channel and Synced the transmitter to it. During synchronization, the RF
indicator will blink.
Change channel manually:
Press and hold UP or DOWN button for 1 second until channel number is
blinking. Select a desired number using the UP or DOWN button. The
selected channel number will be confirmed in 1 second if no other
adjustment is made.
When you have more than 1 receiver complete the channel setup in one
*
receiver first and then set up the second receiver.
Be sure to use a different channel number for each receiver.
*
1. LCD window
2. Antenna A and B indicator
3. RF signal indicator
4. AF signal indicator
5. Synchronization button
6. Channel up/down adjustment
7. Receiver power on/off control
and volume adjustment
Operation:
K. Wireless Microphone Receiver Option (TV5-REC)
For TV5i and TV5X
15

16
TV5X Panel Configuration
1. Controls, Battery Life, Mic in
2. Digital Media Player
3. Wireless Receiver
4. Battery Door
5. LED indicator
6. Drop in Hand Held Charger
7. Strap Attachment Point
21 345
66
7
7
K. Control Panel for TV5X 1 2 345
6
7
8
9 10 11 12 13
1. Power
2. Voice priority indicator
3. Voice priority:
when activated,
Priority LED (2) will light.
4. Master
5. Tone
6. Battery meter
7. DC IN
8. 5V charger
9. Aux out, 1/8" Jack
10. Aux in, 1/8" Jack
11. Aux in control
12. Mic (wired) in control
13. Wired mic input
Battery replacement TV5X Lead-Acid battery
Remove battery door
screws
Pull battery out Remove connectors and replace
new battery in reverse order
RED = Positive;
BLACK = Negative
TV5 (Part# for unit shown with options)XM1FK9
J. Optional Media Player for TV5i & TV5X (see pages 14-15)TV5MP3
K. For a Description and Operation of the Optional Wireless Microphone
Receiver (TV5-REC) (see pages 15).

17

Description of Functions for Hand held Microphone
AS-TVHH/TVHHC
Wind Screen: Protects
cartridge with Pop Filter.
Front Panel
Main Body: Contains
Wireless Transmitter PCB.
SET button for
channel settings
LCD panel:
Channel and
frequency display.
UP and DOWN
buttons: For Channel
select and Frequency
display.
LED: Power status
Power Switch:
Charging Input:
Remove lower
18
Volume Control: Three
level settings, including
mute, LOW and HI.
Pushing point: Slide the
battery cover down by
pressing here.
Battery Cover
Lower Housing: Remove
to slide battery cover off
or to connect charger
Rear Panel
MUTE
HI LOW
HI
LOW
This manual suits for next models
6
Table of contents
Other Galaxy Audio Speakers manuals

Galaxy Audio
Galaxy Audio LA4 User manual

Galaxy Audio
Galaxy Audio LA4D User manual

Galaxy Audio
Galaxy Audio HS4 User manual

Galaxy Audio
Galaxy Audio HS7 User manual

Galaxy Audio
Galaxy Audio PA6BT User manual

Galaxy Audio
Galaxy Audio HOT SPOT User manual

Galaxy Audio
Galaxy Audio TQ6 User manual

Galaxy Audio
Galaxy Audio HOT SPOT User manual

Galaxy Audio
Galaxy Audio HS7 User manual

Galaxy Audio
Galaxy Audio TV10 User manual