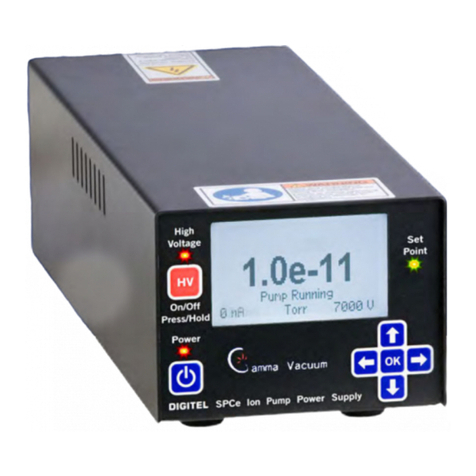
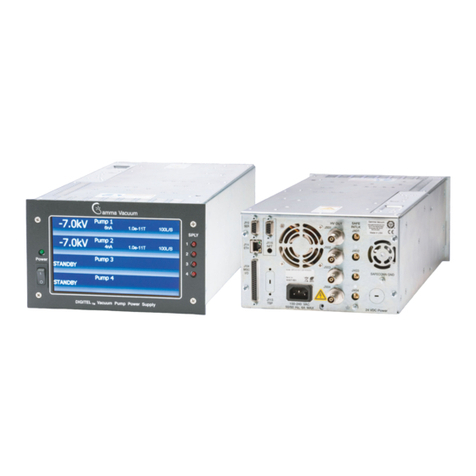
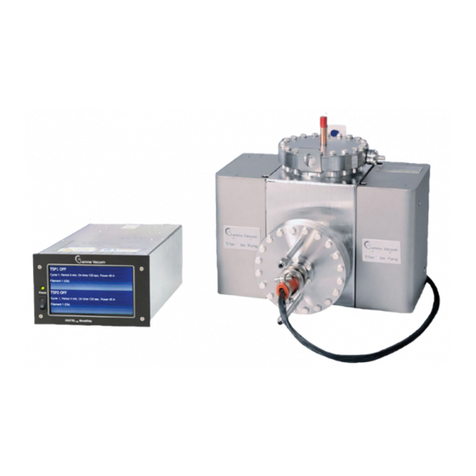
Gamma Vacuum SPCe User manual

SMALL PUMP CONTROLLER
(SPCe) USERS MANUAL
PN 900026, Rev E
ISO 9001:2015 Certied

2
GENERAL INFORMATION
The DIGITEL SPCe is an intelligent, programmable ion pump power
supply, which features a LCD display and soft-keys for navigation.
It requires an external 24V DC power supply—an external mains
adapter is available to permit operation from 85 to 260V AC, 50 or
60Hz. It is ¼ rack and 2u high with an optional half rack or full rack
mount kit.
The SPCe can be controlled two ways: directly from the front panel
or remotely through serial or Ethernet ports. The serial port supports
RS-232/422/485 protocols.
Individual model specification information is located on our website
at: www.gammavacuum.com
WARNING: Do not use unauthorized parts.
Such parts may compromise safety. Contact
Gamma Vacuum with any questions.
Read this entire manual and follow installation
instructions. Failure to do so may cause injury and/or
may void warranty.
APPROVALS
Gamma Vacuum Small Pump Controllers (SPCe) are shown to meet
the EEC Low-Voltage Directive and Electromagnetic Compatibility
approvals:
• EN 61326-1
• EN 616326-2-1
• Low Voltage Directive 73/23/EEC
WARNINGS
WARNING:
SHOCK HAZARD. CAN
CAUSE INJURY OR DEATH.
REMOVE POWER BEFORE
SERVICING.
ALERTE:
RISQUE DE CHOC. PEUT
CAUSER DES BLESSURES
OU LA MORT. RETIRER LA
SOURCE D’ALIMENTATION
AVANT LE SERVICE.
警 告:
点 検・修 理 の 際 は
必ず全ての 電 源を
お 切 りくださ い 。
使用者 が感電した
り 、死 亡 、ま た は
重傷を負う危険が
あります。
安全 警告:
触电危险。触 电可
能导致受伤或死亡。
请于维修前去掉电
源。
ADVERTENCIA:
PELIGRO POR DESCARGA. PUEDE
CAUSAR LESIÓN O INCLUSO LA
MUERTE. RETIRE Y DESCONECTE
LA FUENTE DE ALIMENTACION
ELECTRICA, ANTES DE PROCEDER
AL SERVICIO DE REPARACIÓN,
MANTENIMIENTO O REVISION
INTERNA.
ACHTUNG:
GEFAHR ELEKTRISCHER
SCHLÄGE. VERLETZUNGS- ODER
LEBENSGEFAHR. TRENNEN
SIE ALLE ELEKTRISCHEN
ANSCHLÜSSE VON DER
SPANNUNGSVERSORGUNG
BEVOR SIE ARBEITEN AN DEM
GERÄT AUSFÜHREN.
WARNING:
HEAVY OBJECT. TO AVOID
MUSCLE STRAIN OR BACK
INJURY, USE LIFTING AIDS
AND PROPER LIFTING
TECHNIQUES WHEN
REMOVING OR REPLACING.
ALERTE:
OBJET LOURD. POUR
EVITER UNE TENSION
MUSCULAIRE OU UN MAL
DE DOS, UTILISER DES
AIDES ET DES TECHNIQUES
DE LEVAGE APPROPRIEES
POUR L’ENLEVEMENT OU LE
DEPLACEMENT.
警告:
大 変 重 い 装 置 で す。
筋挫傷、背部損
傷等を防ぐ為、移
動や移設の際は適
切な技術や補助機
器 等 を 使 用してく
ださい。
安全 警告:
重物。为避免肌肉
拉伤或背部受伤,
当移动或归位时请
使用起重设备以及
适当的起重技术。
ADVERTENCIA:
OBJETO PESADO. PARA EVITAR
UN SOBRE-ESFUERZO MUSCULAR
O DAÑO FÍSICO, UTILIZE LA
AYUDA DE ELEVADORES Y
TÉCNICAS APROPIADAS PARA EL
MANEJO DE OBJETOS PESADOS,
CUANDO LO TRANSPORTE,
DESPLAZE O CONSIDERE
REEMPLAZARLO.
ACHTUNG:
SCHWERES OBJEKT.
ZUR VERMEIDUNG VON
MUSKELZERRUNGEN ODER
RÜCKENSCHÄDEN BEIM
TRANSPORT GEEIGNETE
HUBVOR-RICHTUNGEN UND
HEBETECHNIKEN VERWENDEN.
WARNING:
READ AND UNDERSTAND
OPERATOR’S MANUAL
BEFORE USING THIS
MACHINE. FAILURE TO
FOLLOW OPERATING
INSTRUCTIONS COULD
RESULT IN INJURY OR
DAMAGE TO EQUIPMENT.
ALERTE:
LIRE ET COMPRENDRE LE
MANUEL D’OPERATION
AVANT D’UTILISER CETTE
MACHINE . NE PAS SUIVRE
LES INSTRUCTIONS
D’OPERATION PEUT CAUSER
DES BLESSURES OU DES
DEGATS A L’EQUIPEMENT.
警 告:
この 装 置を 使 用さ
れる前に必ず取扱
説明書を熟読し理
解した上でご使用
く だ さ い 。取 扱 説
明書の 通り操作を
しなかった場合、
装 置 が 損 傷 、破 損
することがありま
す。
安全 警告:
在使用这台机器前,
请务必阅读并理解
“操作员手册
( 指 南 )”。如 果
未能遵循操作步骤
说明 ,将 可 能 导致
设备的损坏。
ADVERTENCIA:
LEA, ESTUDIE, Y ENTIENDA BIEN
EL MANUAL DE OPERACION,
ANTES DE USAR ESTA
MAQUINARIA. UNA FALLA POR
NO SEGUIR LAS INSTRUCCIONES
OPERATIVAS, PUDIERA RESULTAR
EN DAÑO O PERJUICO DEL
EQUIPO.
ACHTUNG:
LESEN UND VERSTEHEN SIE
DIE BEDIENUNGSANLEITUNG
BEVOR SIE DAS GERÄT IN BETRIEB
NEHMEN. FEHLBEDIENUNGEN
KÖNNEN ZU VERLETZUNGEN
FÜHREN ODER DIE AUSRÜSTUNG
BESCHÄDIGEN.

3
UNPACKING THE CONTROLLER
Inspect for any obvious damage
If the SPCe is damaged in any way, a claim should be filed with the
carrier immediately and notification given to Gamma Vacuum.
If equipment must be retuned for inspection or repair, obtain
authorization from Gamma Vacuum prior to shipping. Contact
Gamma Vacuum for authorization and return instructions.
Check the equipment received
Ensure that all items shipped have been received. If any items are
missing, notify the carrier and Gamma Vacuum. Save all packaging
material for inspection.
SAFETY NOTICES
1. To avoid personal injury, do no perform any installation or service
unless qualified to do so. Installation should be performed by
qualified, authorized personnel who have experience working with
voltages greater than 50 volts.
2. Do not open the SPCe case under any circumstances. There are
no serviceable parts inside the SPCe, and voltages over 5000V
are present. In the event that the SPCe requires attention, return it
to Gamma Vacuum.
3.Do not disconnect the high-voltage cable with the power on.
After turning off the SPCe, allow at least one minute before
disconnecting electrical equipment.
4. Do not operate the SPCe without a proper electrical ground or
near water. The SPCe may be damaged and its safety reduced, if
it is operated outside specifications.
5.In the event that this unit is not used in accordance with its
intended purpose of controlling an ion pump, safety and
protection requirements are subjected to change and not specified
by the manufacturer.
INSTALLATION
NOTES:
• The SPCe can be mounted in a standard 19 in. (48.3 cm) rack or
used as a free-standing unit.
Optional 19-in. Rack Adapter Kit (part 310057) and
Half-Rack Adapter Kit (part 360242) are available.
• When installing, make sure the rear power cord is accessible.
• Maintain a 2.52 in. (64 mm) clearance behind controllers for
cable bend radius and proper airflow.
• Maintain a .125 in. (3 mm) gap between vertically mounted
controllers. This gap is designed in the rack mount kit, and they
can be mounted directly above or below each other.
• Position the control so that the power plug can be reached to
disconnect power.
CAUTION: This equipment uses a high voltage,
detachable power supply cord. Do not
replace with inadequately rated supply
cords.
CAUTION: Remove all metal jewelry prior to working
with any potential electrical hazards.
Required Items
You will need the following items to install the controller:
1. A 3-wire, detachable, universal input power cable (included).
2. A high voltage (HV) cable for each pump (ordered separately).
3.A safety ground cable for each pump.
Installation Procedure
1. Place the controller in its location and secure as necessary.
2. Connect the safety ground cable to the pump and the safety
ground stud at the SPCe rear panel.
3.Connect the high voltage cable to the ion pump and the high
voltage connector on the SPCe rear panel (J501).
4. If you have the optional SAFECONN feature, an additional
connector is part of the HV cable. Connect it to the SAFECONN
connector (J401).
5.Verify input voltage requirements, and then connect the
detachable universal input power adapter cable to the input
power receptacle on the SPCe rear panel.
6.Connect the power adapter mains cable to A/C power source.

4
OPERATION
Front Panel
LED Indicators and LCD Display
LEDs indicate the status of the main power, high voltage, and the set
point. The LCD displays operation parameters, messages, and menu
options.
During ion pump operation, the screen displays voltage, current,
and pressure. One of these three values is displayed larger than the
other two; this can be changed by pressing the left and right arrow
keys.
Soft Keys
• Main Power: Turns on and off the controller.
• High Voltage: Enables high voltage when pressed and held for
1-2 seconds.
• OK and arrow keys: Open and navigate the configuration menus,
and commit changes.
NOTE: Some keys may be disabled by a serial command when the
controller is connected to a computer or terminal.
High Voltage Operation (Quick Start)
Prior to starting the ion pump, confirm the following:
• The controller and connected ion pumps are grounded with a
redundant grounding wire.
• The high voltage cable is attached to the controller and the ion
pump.
• The controller’s high voltage output has the correct output polarity
for the ion pump (positive voltage for diode pump and negative
voltage for triode pump).
Evacuate the Vacuum System
1. Rough pump down to 1x10⁻⁴ Torr or less (the lower the better). See
Rough Pump manual for details.
2. Ensure contaminants do not exist in the system.
3.If an ion pump is used or has been exposed to atmospheric
pressure, it may be necessary to bake the pump into the roughing
pump to achieve the best pressure. See the Operation section in
the Pump manual for details.
Starting the Ion Pump
1. If the ion pump size has not been entered into the System Menu,
enter the ion pump size. The SPCe will not start until the ion pump
size has been entered.
2. Press and hold High Voltage on the front panel for
1-2 seconds.
Stopping the Ion Pump
Press High Voltage on the front panel to disable high voltage.

5
DISPLAY MENU
Operation parameters, messages, and menu options are shown on
the LCD display.
Display During Ion Pump Operation
When the ion pump is in operation, the SPCe displays voltage,
current, and pressure.
Accessing Main Menu Settings
The Main menu categories are: System, Output, Supply,
Communications, Serial, Ethernet, Configuration, Diagnostics, and
SPC.
To access and navigate the Main menu:
• Press OK to access the Main menu.
• Press the left and right arrow keys to navigate through the Main
menu.
• Press the up and down arrow keys to navigate through the drop-
down menus.
• Press OK to select the highlighted menu item.
System Information Menu (Sys)
Size
The Size parameter must be set prior to high voltage operation.
Setting the correct pump size allows the controller to properly
monitor power delivered to the ion pump and calculate pressure.
Pressure is calculated using the following current-to-pressure
calculation:
• Amps = Current reading in Amps
• volts = Voltage reading in volts (SPCe is variable)
• Units = Conversion factor (Torr = 1, mbar = 1.33, Pascal = 133)
• Cal Factor = MPCe/LPCe programmed calibration factor
(typically set to 1)
• Pump Size = The size of the ion pump is liters per second (l/s)
Units
The Units parameter changes the displayed unit of measurement for
pressure. It can be changed to display in Torr, mBar, or Pascal. (Torr
is the default.)
Pressure =
(0.066 x Amps x (5600/volts) x Units x Cal Factor)
Pump Size

6
Setpoint
• On Point: The Setpoint relay will activate when the pressure is
equal to or above this pressure.
• Off Point: The Setpoint will deactivate when the pressure is equal
to or below this pressure.
• The Off Point pressure must be equal to or greater than the On
Point.
• When the Off Point value is set to 0.1e-10, the Off Point value
will be ignored, and once the Setpoint is active, the Setpoint will
remain active independent of the pressure thereafter.
• Error: The Setpoint will turn on when the SPCe has an error
condition.
Factor
The calibration factor is a variable used in the current-to-pressure
calculation. The default value is one. Changing this value will have
a linear relationship with respect to pressure. This setting can be
changed, for example, when calibrating the SPCe pressure to a
known gague pressure.
Pressure is calculated using the following current-to-pressure
calculation:
• Amps = Current reading in Amps
• volts = Voltage reading in volts (SPCe is variable)
• Units = Conversion factor (Torr = 1, mbar = 1.33, Pascal = 133)
• Cal Factor = MPCe/LPCe programmed calibration factor
(typically set to 1)
• Pump Size = The size of the ion pump is liters per second (l/s)
High Voltage Output Menu (Output)
NOTE: If an asterisk (*) is present, a pump size has not been
entered into the controller.
Voltage
The Voltage parameter sets the output voltage. It can be set in the
range of 3000 to 7000 VDC. For ion pumps at 5 l/s or less, the
default voltage is 5000 VDC. For ion pumps larger than 5 l/s, the
default voltage is 7000 VDC.
NOTE: The default voltage for ion pumps at 5 l/s or less but with
5 KV feedthrough is 7000 VDC.
Current
The Current parameter sets the output current. The maximum current
output is limited based on the size of the ion pump programmed into
the controller. The default is 2 mA per l/s.
Pressure =
(0.066 x Amps x (5600/volts) x Units x Cal Factor)
Pump Size

7
Foldback Voltage Feature
With the Foldback feature enabled, the SPCe will reduce the voltage
once a specified pressure is reached. The specified pressure can be
set in the range of 1x10⁻⁵ to 1x10-12 Torr. The default is 9x10⁻⁹ Torr.
The Foldback voltage can be programmed in the range of 3000V to
6900V, done in 100V increments. The default voltage is 3500V.
Pressure or Current Output Setting (Monitor)
The SPCe can be monitored via the miscellaneous I/O port (J1).
This parameter determines the pressure or current output. Selectable
values are:
• Pressure: Logarithmic
• Current: Logarithmic
• Current: 1VDC per 1nA
• Current: 1VDC per 10nA
• Current: 1VDC per 100nA
• Current: 1VDC per 1uA
• Current: 1VDC per 10uA
• Current: 1VDC per 100uA
• Current: 1VDC per 1mA
• Current: 1VDC per 10mA
• MidiVac Emulation
The logarithmic output calculates the log base 10 of the selected
measurement (current or pressure) and adds an offset in order to
make the voltage output positive. (The Log base 10 of a number less
than 1 is negative.) When logarithmic output is selected, an offset
must also be specified. The higher the offset value, the higher the
output.
Supply Menu (Supply)
Arc Detection (Arc)
Arc detection provides protection for the ion pump by lowering high
voltage during arcing. The default setting is off.
Power Loss Recover (Auto HV)
The software contains a power loss recovery feature to restart the
system if the system was turned off due to a power failure.
• Disabled (default option): If input power is disrupted, the controller
will not power up when input power is restored.
• Enabled: If HV is on and input power is disrupted, the controller
will power up and will turn on HV when input power is restored.
If HV is off and input power is disrupted, the controller will power
up, but it will not turn on HV when input power is restored.
• Power: If the input power is disrupted, the controller will power up,
but will not turn on the HV when input power is restored. This is
independent on the HV on/off state.
Normally, when DC power is applied to the SPCe, the SPCe does
not start until the Power button is pressed. In the case where power
loss recovery criteria are satisfied (see above), the SPCe will turn on
when DC power is applied and start high voltage.
High Voltage Enable (HVE)
This parameter controls the high voltage on/off via the HVE interlock
signal. When enabled, the SPCe is controlled by a signal on the
miscellaneous I/O port (J1) connector. If the signal is High, high
voltage will enable.
• Disabled (default option): Pin 8 on the J1 misc. I/O connector on
the rear panel does not have a function.
• Intrlock: Pin 8 serves as the interlock function. Logic high
(+3.3VDC to +12VDC) on this pin enables HV to be turned on
by the user, but does not turn on HV automatically. Logic low
disables HV operation—user cannot turn on HV.
• On/Off: Pin 8 serves as the on/off switch function. Logic high
turns on HV. Logic low turns off HV.

8
Battery Mode (Battery)
Disables or enables battery mode.
• Disabled (default option): The input power voltage must be in the
+22 to +26VDC range in order to run HV.
• Enabled: The input power voltage can be outside this range.
Communications Mode (Comm)
RS Protocol
This parameter allows protocol selection for remote
communications. The available options are listed below.
Mode
There are three user input modes to the SPCe. They are changed
by selecting Mode on the Comm menu. Select the type of
communication for the controller.
• Local: The controller only accepts change commands made
via the keypad. The controller will accept read only commands
via serial/Ethernet. It will not, however, accept write/change
commands via serial/Ethernet.
• Remote: The controller will accept all serial and Ethernet
commands. When remote mode is activated, the keypad is
locked. To unlock the keypad, press and hold down arrow key.
Note, when keypad is unlocked, the communication mode is set
to full. To lock the keypad, press and hold down arrow key or set
communication mode to remote. Message “Keypad locked” is
shown on the screen.
• Full: The controller will accept all commands from the keypad and
serial/Ethernet.
Address
This parameter is used to set the SPCe serial address. The default
value is 5.
Handshaking
This parameter is used to set serial handshaking. The default value is
set to disabled.
Serial Parameters Menu (Serial)
SW Protocol
This parameter chooses the command set used for remote
commands.

9
Baud Rate (Baud)
This parameter is used to set the serial baud rate of the SPCe. The
default value is 115200.
Parity
This parameter is used to set the parity party check of the SPCe. The
default value is None.
Data Bits
This parameter is used to set the serial data bits of the SPCe. The
default value is 8.
Data and Stop Bits
This parameter is used to set the stop bits of the SPCe. The default
value is 1.
Ethernet Parameters Menu (Ethnt)
DHCP & IP Address (Addr)
The SPCe is capable of acting as a DHCP (Dynamic Host
Configuration Protocol) client. When enabled as a DHCP client, the
SPCe will obtain needed network information from a DHCP server.
When DHCP is disabled, the user may change the SPCe Ethernet
address. Currently IPv4 is the only supported format.
Subnet Mask(Mask)
When DHCP is disabled, the user may change the Ethernet subnet
mask.
Gateway (Gatewy)
When DHCP is disabled, the user may change the SPCe Ethernet
gateway address.
MAC Address (MAC)
This screen shows the controller’s MAC address.

10
Configuration Menu (Config)
Contrast
This function is used to adjust the contrast of the display. Use the
arrow keys to adjust the screen contrast.
Pump Name
This parameter allows the pump name to be changed. Use the up
and down arrows to cycle through letters, numbers, and symbols.
Use the left and right arrow keys to move the selector.
LCD Timeout
The SPCe’s LCD back light can be dimmed to extend the life of the
display. By enabling this parameter, the back light is dimmed after
a specified amount of time has passed since the last key press. This
feature is off by default.
Diagnostics Menu (Diag)
Zero Offset Calibrate Supply (Calibrate)
Prior to operating an ion pump, the controller should be calibrated
to account for electrical noise in the system. This provides a more
accurate current measurement given all site-specific parameters
that may be different than those observed during production. When
initiated, the controller goes through the calibration steps on screen
for reference. Click OK when calibration process is completed.
Fowler-Nordheim Field Emission Analysis (FEA)
Analyzing the emission current of an ion pump allows for more
accurate pressure readings. This analysis is done using the Fowler-
Nordheim method. Based on this calculation, the SPCe will
recommend that a hi-pot be conducted on the ion pump.
High Pot (Hi Pot)
This feature operates the ion pump in a high-pot mode where
the pump voltage can perform in the range of 10.5kV for hi-pot
cleaning of an ion pump. The ion pump will attempt to reach a
preset voltage up to 10.5kV.

11
Supply Jump Start (Jump Mode)
Enabling Jump Start causes the SPCe to increase the voltage to
the set value when initially starting the ion pump. This causes the
ion pump to potentially arc from cathode to anode, which creates
electrons within the ion pump. These electrons start the initial
electron charge within the pump. This feature is useful when starting
smaller pumps that are very low in pressure when the pump is turned
on (for example after a long turbo bake).
SPC
Technician Features (Tech)
This is the technician screen for the SPCe.
• High Resolution Mode: This mode can be enabled or disabled.
Disabled is the default. When enabled, the pressure value
coefficient, also called significant, has additional digit, i.e. 1.57e-
10 vs. 1.5e-10.
• Fan Mode: This mode can be set to on or auto. When set to on,
the fan is always on when HV is on. When set to auto, the fan is
on when in pump starting mode and not in pump running mode.
Events
During operation, the SPCe records various vacuum events that
occur (short circuit, excessive arcing, etc). These event are recorded
and viewable. The event description, time, voltage, current, and
pressure are recorded.
Update Firmware (Update)
The SPCe firmware can be updated via serial cable or ethernet. The
latest version of SPCe software is downloadable from
www.gammavacuum.com. Reference Service Bulletin 00.056.092 in
that download for full details.
About
This screen displays manufacturer, contact, and revision information.

12
DISPLAY MESSAGES
During operation, the SPCe may detect and report a number of possible operating conditions. For example, the SAFECONN connector may
become disconnected, the vacuum may fail, or the ion-pump may have a problem. These conditions are reported by the following messages
on the display:
Display Message Display Meaning
01: Cooldown Cycles > 3 Too many cooldown cycles occurred during pump starting.
02: Vacuum Loss The voltage dropped below 1200V while pump was running.
03: Short Circuit Short circuit condition has been detected during pump starting.
04: Excess Pressure Excessive pressure condition detected. Pressure greater than 1.0e-04 Torr detected.
(Obsolete starting with version 1.15.03)
05: Pump Overload Too much power delivered to the pump for the given pump size.
06: Supply Power > 50W Supply output power detected greater than 50W.
07: Start Under Voltage The voltage did not reach 2000V within the maximum pump starting time of 5 minutes.
10: Pump is Arcing Arcing detected.
12: Thermal Runaway Significant drop in voltage detected during pump starting.
19: Unknown Error (Used internally for troubleshooting.)
20: SAFE_CONN Intrlock Safety interlock connection is not detected. Check safe-conn connection.
21: HVE Interlock HVE interlock function is active on pin 8 on J1 misc i/o connector.
To turn on HV, user must satisfy interlock (3.3VDC to 12VDC on pin 8 on J1 misc i/o connector).
or 21: HVE Signal Off HVE on/off function is active on pin 8 on J1 misc i/o connector.
Logic high (3.3VDC to 12VDC on pin 8 on J1 misc i/o connector) turns on HV. Logic low turns of HV.
22: Set Pump Size Pump size is not set.
23: Calibration Needed Supply calibration has not been performed. Required for accurate current/pressure readings.
24: Reset Required Supply calibration parameters are outside normal ranges. System reset will clear all parameters to
factory defaults.
25: Temperature Warning Supply internal temperature is past the threshold.
26: Supply Over Heat Supply internal temperature too high. HV operation is disabled.
27: Current Limited Supply current is limited. The limit is set by programming the pump size or manually by the user.
30: Internal Bus Error Internal data bus error detected.
31: HV Control Error Supply HV control mechanism malfunctioning. On/Off state is malfunctioning.
32: Current Control Err Supply current control mechanism malfunctioning.
33: Current Measure Err Supply current measuring mechanism malfunctioning.
34: Voltage Control Err Supply HV control mechanism malfunctioning. Voltage output level is malfunctioning.
35: Voltage Measure Err Supply voltage measuring mechanism malfunctioning.
37: HV Not Installed Internal boards polarity mismatch.
37: Input Voltage Error HV module missing.
38: Input Voltage Error Input power voltage outside 22-26VDC range. HV operation disabled.
When running in battery mode, this restriction is off.

13
BACK PANEL OPERATION
Remote Hardware Option (J1)
The SPCe can be controlled by using the miscellaneous I/O 15-pin
sub-d connector.
Pin
#
Function Pin
#
Function
1Setpoint relay common 9Setpoint relay NO
2Setpoint relay NC 10 +14V
3GND 11 Setpoint logic output
4GND 12 Output current monitor
5-14V 13 HV enable monitor
6+14V 14 Output voltage monitor
7+5V 15 +14V
8Remote HV Enable
(3.3–12V)
Setpoint Relay (Pins 1,2,9, and 11)
The setpoint relay is driven while either of the following two sets of
conditions are true:
1. The SPCe unit is powered up.
2. The HV is enabled.
3.The output voltage is high enough for a valid pressure to be read.
By default, this is greater than 2kV.
4. The calculated pressure is lower than the user-selected setpoint
pressure.
- OR -
1. The SPCe unit is powered up.
2. The SPCe unit is in error mode.
NOTE: There is a delay after turning on the HV until the SPCe
considers the calculated pressure reading to be valid. This
reading can take up to one minute. The setpoint relay will
not be driven during this period.
Pin 1 is the relay common, pin 2 is the normally closed, and pin 9 is
the normally open contact.
Pin 11 is a TTL logic level output (with a 1K resistor in series for
protection), which mimics the setpoint relay state. It is high whenever
the set point relay is driven.
Output Current or Pressure (Pin 12)
Pin 12 is a buffered voltage output that is proportional to the HV
output current and can be used to monitor the HV current. The
scaling factor defaults to 1V per 1mA out. This factor is scaleable
from the front panel of the SPCe.
Logarithmic Current (i) Examples:
Example 1
Offset = 8
Current = 2X10⁻⁸ (20nA)
Step 1: Calculate the log of the current (Log (2X10⁻⁸) = -7.7)
Step 2: Add the offset value (-7.7 + 8 = 0.3 Volts = Vpin12)
Example 2
Offset = 8
Current = 5X10⁻⁶ (5uA)
Step 1: Calculate the log of the current (Log (5X10⁻⁶) = -5.3)
Step 2: Add the offset value (-5.3 + 8 = 2.7 Volts = Vpin12)
Example 3
Offset = 7
Current = 2X10⁻⁸ (20nA)
Step 1: Calculate the log of the current (Log (2X10⁻⁸) = -7.7)
Step 2: Add the offset value (-7.7 + 7 = -0.7 Volts,
Vpin12 therefore = 0 and is at the bottom of its range)
Logarithmic Pressure (p) Examples
Example 1
Offset = 10
Pressure = 1X10⁻⁹ Torr/mbar/pascal
Step 1: Calculate the log of the pressure (Log (1X10⁻⁹) = -9)
Step 2: Add the offset value (-9 + 10 = 1 Volt = Vpin12)

14
Example 2
Offset = 11
Pressure = 6X10⁻⁸ Torr/mbar/pascal
Step 1: Calculate the log of the pressure (Log (6X10⁻⁸) = -7.2)
Step 2: Add the offset value (-7.2 + 11 = 3.8 Volts = Vpin12)
High Voltage Monitoring (Pin 13)
Pin 13 can be used to determine if the HV is enabled. It is designed
to drive a relay or logic signals as required. When the HV is enabled,
pin 13 is pulled down to 0V and can sink 100mA. When the HV is
disabled, pin 13 is pulled up to +14V through a 4K7 resistor.
V+
R1
Pin 13
Output Voltage Monitoring (Pin 14)
Pin 14 is a buffered voltage output that is proportional to the HV
output voltage and can be used to monitor the HV. The scaling
factor is 1V per 1KV out.
Power Supplies
The following power supply pins are available on the misc. I/O
connector. These power supplies are not protected and should be
used with care. Do not attempt to power the SPCe by connecting
external power supplies to these pins.
• Pin 5 is connected to (approximately) –12V.
• Pin 10, pin 6, and pin 15 are connected to (approximately) +12V.
• Pin 7 is connected to (approximately) +5V.
• Pin 3 and pin 4 are grounded.
• The +14V and –14V supplies are regulated but not calibrated—in
practice they may vary over the range 12V to 15V or so. Do not
draw more than 50mA from any of these supplies, and do not
inject significant levels of noise onto them.
• The +5V supply may range from +4.9V to +5.1V. Do not draw
more than 100mA from this supply.
SERIAL (J3) AND ETHERNET (J2) OPERATION
Ethernet Connector
A Telnet session may be established to port TCP 23, allowing remote
control of the SPCe in the same way as serial communications link.
Once the Telnet session is established, commands may be issued in
the format:
spc <two-digit command code> <optional parameters>
For example, to set the pump size to 1200 using the command
CMD_HV_SET_PUMPSIZE, issue the following command in the
Telnet session:
spc 12 1200
Unlike the serial command protocol, no opening tilde, no address
field, and no checksum are required.
It is important that the command code be two digits. For example,
command code 1 must be issued as 01.
Serial Connector
J3 is a 9-pin, female DE-9 connector used to route serial interface
signals. The default setting is RS-232. Alternate configurations
are RS-485 (full or half duplex) and RS-422. Specific OEM
configurations may also be available upon request.
RS-232 RS-422
RXD 2+RX 3
TXD 3-RX 7
GND 5GND 5
RS-485
Full Duplex
Operation
RS-485
Half Duplex
Operation
+T X 2+TX/+RX 2
-TX 8-TX/-RX 8
GND 5GND 5
+RX 3
-RX 7
NOTE: RS 422 is not bidirectional.

15
Standard
Devices cannot send data until they have been addressed by the
controlling computer. A typical command exchange for a device
would be:
1. The computer sends a command.
2. Devices read the address.
3.When a device recognizes its address, it decodes the message
and returns an acknowledgement to the computer, along with any
data that was requested.
The serial communications port settings such as number of
data/start/stop bits, parity, etc. are defined subsequently. Every
communications exchange between the controlling computer and a
Gamma Vacuum controller using the standard interface consists of a
command packet (sent by the controlling computer), and a response
packet (returned by the remote controller). All characters in these
packets are ASCII. All fields are separated by a space (not required
between the checksum and terminator). Hexadecimal numbers can
be represented in either upper or lower case.
Cabling
The SPCe functions as a DTE (Data Terminal Equipment) device.
When the controller is connected to another DTE device (such as
a personal computer), a null modem serial cable is required to
connect the devices. The null modem cable swaps the signal and
control lines so that receive and transmit are properly connected.
The controller is equipped with a nine-pin female (DCE) D-sub
connector protruding from the chassis rear.

16
Command Packet Structure
The command packet is made up of at least five fields and contains
information needed for a remote controller to perform a command.
The minimum command packet (single command with no data) is 11
bytes long and consists of the following fields:
<START CHAR> <space> <ADDRESS> <space> <COMMAND> <space> <CHECKSUM> <TERMINATOR>
1 byte 1 byte 2 bytes 1 byte 2 bytes 1 byte 2 bytes 1 byte
Field Size Comment
1. START Character 1 character (byte) ASCII character is ‘~’ (TILDA)
Start is the first byte in the command packet and tells remote controllers to start decoding a message. It should be implemented as a
#define, so it can be changed if necessary. As a #define, the character is rarely changed because it is hard coded into the SPCe.
<SPACE>
2. ADDRESS 2 hex characters Range 00 through FF
This field should be filled in with the hexadecimal representation of the integer address of the controller. The range provides 255 unique
addresses. Only 32 devices may reside on the same serial port due to hardware loading limitations.
<SPACE>
3. COMMAND CODE 2 hex characters Range 00 through FF
This field is one of 255 possible hexadecimal numbers, which is typically an index into a table of functions on the remote controller.
Commands should be implemented as #defines with integers between 0 and 255. The integer value must be converted into ASCII hex
before placement into the command packet character array. The command code must be two hex digits, even if the first is a zero.
<SPACE>
4. DATA field(s) (optional) As needed ACSII printable characters only
Data field(s) are for any commands that have a data value. For instance, a command to set a beam voltage in some unit would probably
consist of a command to set the beam voltage, along with a value of beam voltage. If the command had more than one data value
associated with it, such as setting an X and a Y value in a unit, the command field could be followed by two data fields (X and Y) separated
by a space between them. All data must be sent in ASCII printable format (no binary or “control” characters). There is no limit on the
number or size of data fields. It is up to the remote unit designer to keep practicality in mind when determining these fields. A data field is
not required for all commands.
<SPACE>
5. CHECKSUM 2 hex characters Computed checksum of packet
The calculated checksum must have its value in ASCII hexadecimal notation. It is calculated by adding the decimal value of all characters in
the packet (excluding start, checksum, and terminator), and then dividing the result by 256. The integer remainder converted to two ASCII
hex digits is the checksum. When a remote device receives a packet, the passed checksum is compared with a computed checksum, and if
they do not match, the device discards the packet.
6. Terminator character 2 hex characters ASCII carriage return
This field is an ASCII carriage return placed at the end of a command packet. This character is not the newline character “\n”, but can be
used in string assign statements as “\r”. There is not a space between the checksum and terminator field.
Command Packet Example
Command to be sent is “0x01” - GET CONTROLLER MODEL
Serial address of the controller is 5.
Command packet
“~ 05 01 00<CR>” where “<CR>” is return carriage character.
Command packet in ASCII hexadecimal
“7e 20 30 35 20 30 31 20 30 30 0D”
Response to “0x01” - GET CONTROLLER MODEL
“05 OK 00 DIGITEL SPCe 46<CR>” Where “<CR>” is the return
carriage character.
NOTE: Command checksum is set to “00” to bypass the checksum
field verification by the controller.

17
Decoding the Command Packet
An SPCe operates in one of three modes: monitor, receive, and
respond. Receipt of data is interrupt driven or otherwise multiplexed,
so other tasks are performed by the unit’s microprocessor. When the
controller receives a command packet, it continues monitoring for
new commands while the current one is carried out.
1. MONITOR: The controller monitors serial data traffic. When
a “start” character is detected, the controller changes to the
RECEIVE MODE.
2. RECEIVE: After receiving start, the controller tests subsequent
characters for a valid command packet. This mode must have a
count down timer associated with it, which is a predetermined time
for a valid command packet SPCe to be received. Furthermore,
if another start character is received while in this mode, (i.e. the
first start character was actually part of a command packet for
a different device) the controller responds by going back to the
beginning of the RECEIVE mode with a fresh timer setting. If a
command packet is not received within the allowed time frame or
if the checksum does not match, the timer is disabled, the packet
is discarded, and the mode is reset back to MONITOR. Once a
command packet is received, the mode changes to RESPOND.
The only way the controller can get to a RESPOND is by receiving:
• a valid start character followed by a space,
• a 2-byte hex value matching the controller’s address followed
by a space,
• at least one 2-character hex value command followed by a
space,
• a 2-byte hex checksum matching the command packet’s actual
checksum,
• and a carriage return terminator.
3.RESPOND: The controlling computer is in count-down timer
mode waiting for a response from the SPCe. All controllers
must respond within 500 milliseconds once a valid command
has been received. A valid response could be an error code
indicating that the controller is BUSY with a previous command
or an acknowledging response packet. After returning a response
packet, the unit returns to MONITOR and executes the command.
If the controlling computer needs to verify that the last command
was successful, it sends a command to the unit requesting status
feedback.

18
Response Packet
The response packet is made up of at least five fields and contains information to let the controlling computer know the command requested
was either recognized and accepted (STATUS = “OK”), or an error condition occurred (STATUS = “ER”). The minimum packet also contains
a RESPONSE CODE that is used either to pass an error code (if STATUS = “ER”), or is available for each unit to use as needed for a STATUS
return of “OK”. The minimum response packet (simple acknowledgment with no data) would consist of the following fields, and would be 12
bytes long.
<ADDRESS> <space> <STATUS> <space> <RESPONSE CODE> <space> <CHECKSUM> <TERMINATOR>
2 byteS 1 byte 2 bytes 1 byte 2 bytes 1 byte 2 bytes 1 byte
NOTE: When a device responds to the controlling computer, that response has been requested and is expected by the computer. For this
reason, a specific “start” character is not required in the response packet. The address of the responding unit is included in the
packet, so the controlling computer can verify it to make the data exchange easier to view on an ASCII terminal.
Field Size Comment
1. ADDRESS of unit 2 hex characters Range 00 through FF
This field is filled in with the hexadecimal representation of the integer address of the unit. The range provides 255 unique addresses. The
controlling computer will use this field to determine that the correct remote unit is responding.
<SPACE>
2. STATUS MNEMONIC 2 ASCII characters Either OK or ER
This field is made up of two ASCII characters and is either OK or ER. OK indicates success in recognizing the command. ER indicates an
error condition, which can mean that the command is invalid, or the remote unit received the command but is still busy with a previous
command. Specific information about ER is reported in the RESPONSE CODE field.
<SPACE>
3. RESPONSE CODE 2 hex characters Range 00 through FF
For an error condition with an incoming command, this field returns an error number to the controlling computer. For non-error conditions,
this field returns a status byte/word to the controlling computer, which is defined in the SPCE and can vary with the needs of individual
commands within a unit, as well as varying from unit to unit. Data must be in ASCII printable format.
<SPACE>
4. DATA field(s) (optional) As needed ACSII printable characters only
Data field(s) are used to respond to commands requesting data. For example, a command requesting the current voltage setting in a unit
would have the reading placed in a data field. Data must be in ASCII printable format. There is no limit on the number or size of data fields.
Data is not required for all responses.
<SPACE>
5. CHECKSUM 2 hex characters Computed checksum of packet
Checksum contains a simple computed checksum of the command packet. The value must be in ASCII hexadecimal notation. The checksum
is calculated by adding the decimal value of all characters in this packet (including the space before the checksum field) and then dividing
the result by 256 (base 10). The integer remainder converted to two ASCII hex digits is the packet checksum. When the controlling computer
receives a response packet, the passed checksum is converted from the hex value to a binary integer and compared with a computed
checksum. If they are not the same, considers it an error, and repeats the last command. When qualified technicians are testing the remote
unit using a dumb terminal this returned checksum value can be ignored.
6. Terminator character 2 hex characters ASCII carriage return
This field is an ASCII carriage return placed at the end of a packet. This character is not the newline character “\n” which is actually an
ASCII linefeed, but can be assigned using the “\r” designation in a string. There is not a space between the checksum and terminator field.

19
RS 232/422/485 General Commands
Hex
Command
Description Data
Field
Response Data/Response
Description
01 MODEL NUMBER
A description of the controller.
DIGITEL SPCe
02 VERSION
Firmware revision level.
DIGITEL
FIRMWARE: X.XX
X.XX is the numerical revision level for
major changes
07 MASTER RESET
Executes a complete software reset.
No response due to initialization of
controller
FF MASTER RESET (legacy)
Executes a complete software reset
(legacy MPC support command).
No response due to initialization of
controller
91 SET ARC DETECT
Enables/disables arc detection.
“YES” or
“NO”
92 GET ARC DETECT
Reads the current arc detection setting.
“YES” or “NO”
0A READ CURRENT
Reads pump current.
None or “1” X.XE-XX AMPS 0.1E-09 = HV OFF STATUS
0B READ PRESSURE
Reads pump pressure.
None or “1” X.XE-XX UUU UUU is pressure units (Torr, MBR, or PA)
0.1E-10 = HV OFF STATUS
0C READ VOLTAGE
Reads pump voltage.
None or “1” XXXX XXXX indicates the voltage In volts
0D GET SUPPLY STATUS
Reads various conditional messages
displayed on the front panel.
None or “1” Various See Display Messages section of this
manual
0E SET PRESS UNITS
Specifies the default pressure units.
U U is pressure units
U = T (Torr), M (Mbar), P (Pascal)
11 GET PUMP SIZE
Reads pump size in liters per second.
None or “1” ssss L/S ssss is pump size
12 SET PUMP SIZE
Sets pump size in liters per second.
ssss ssss is pump size
1D GET CAL FACTOR
Reads the calibration factor that
modifies pressure.
n.nn n.nn range is 0.00 – 9.99
1E SET CAL FACTOR
Sets the calibration factor that modifies
pressure.
n.nn n.nn range is 0.00 – 9.99
33 SET AUTO-RESTART
Sets supply to automatically restart on
power up.
“YES” or
“NO”
34 GET AUTO RESTART
Reads auto restart status of supplies.
“YES” or “NO”
37 START PUMP
Enables high voltage.
None or “1”
38 STOP PUMP
Disables high voltage.
None or “1”
3C GET SETPOINT
Reads configuration of the set point.
None or “1” N, E, X.XE-XX,
Y.YE-YY, O
N = Setpoint Number
E = Enabled (1 = yes, 0 = no)
X.XE-XX = On Pressure
Y.YE-YY = Off Pressure
O = Setpoint On (1 = yes, 0 = no)
3D SET SETPOINT
Configures a specified set point.
N, S,
X.XE-XX,
Y.YE-YY
N = Setpoint Number
S = Supply (0 = Inactive, 1 = Supply 1)
X.XE-XX = On Pressure
Y.YE-YY = Off Pressure

20
Hex
Command
Description Data
Field
Response Data/Response
Description
44 LOCK KEYPAD
Established Remote Mode and locks the
front panel except HV off and power
keys.
45 UNLOCK KEYPAD
Unlocks all front panel keys.
50 GET ANALOG MODE
Reads the current/pressure analog
output mode.
0-10
(7 is MPC only)
0 = Logarithmic pressure
1 = Logarithmic current
2 = Volts per 1.0uA
3 = Volts per 10.0uA
4 = Volts per 100.0uA
5 = Volts per 1.0mA
6 = Volts per 10.0mA
8 = Volts per 1.0 nA
9 = Volts per 10.0 nA
10 = Volts per 100.0 nA
51 SET ANALOG MODE
Sets the current/pressure analog output
mode.
n n = 0-10, 7 is MPC only
0 = Logarithmic pressure
1 = Logarithmic current
2 = Volts per 1.0uA
3 = Volts per 10.0uA
4 = Volts per 100.0uA
5 = Volts per 1.0mA
6 = Volts per 10.0mA
8 = Volts per 1.0 nA
9 = Volts per 10.0 nA
10 = Volts per 100.0 nA
61 IS HIGH VOLTAGE ON
Indicates if the high voltage enabled
None or “1” “YES” or “NO”
62 SET SERIAL ADDRESS
Sets the controllers serial address.
nnn nnn = new serial address (000-255)
68 SET HV AUTORECOVERY
Sets the power auto recovery mode. For
Auto HV restart, if HV is on and power
interrupted, unit will power up and start
HV. For auto power, if HV was on and
power interrupted, unit will power up
only (does not start HV).
n n = 0-2
0 = disabled
1 = enable auto HV restart
2 = enable auto power recovery
69 GET HV AUTORECOVERY
Displays the mode of Auto Recovery.
n n = 0-2
0 = disabled
1 = enable auto HV restart
2 = enable auto power recovery
8F SET_FIRMWARE_UPDATE
Sets the SPCe to flash load mode for
firmware updates.
D3 SET COMM MODE
Sets the communication mode to local,
full, or remote.
N N is the mode
0 = Local
1 = Remote
2 = Full
D4 GET COMM MODE
Returns the current communication
mode.
N N is the mode
0 = Local
1 = Remote
2 = Full
Other manuals for SPCe
1
Table of contents
Other Gamma Vacuum Controllers manuals