manuals.online logo
Brands
  1. Home
  2. •
  3. Brands
  4. •
  5. Ganz
  6. •
  7. IP Camera
  8. •
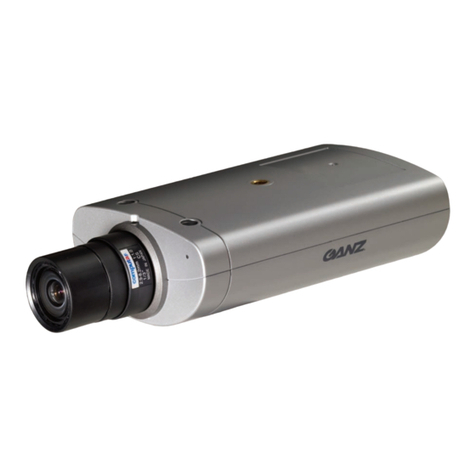
  9. Ganz YCX-05 SERIES User manual

Ganz YCX-05 SERIES User manual

Color Day/Night Camera
Wide Dynamic Range
WITH
(*
Thank you for your purchase of this product.
Before operating this product, please read this instruction manual carefully.

After you have read this manual, store it in a safe place for future reference.
CONTENTS
PRODUCT FEATURES / SAFETY PRECAUTIONS-------------------------------------------------------------------- EG-2
PART NAMES AND FUNCTIONS ------------------------------------------------------------------------------------------- EG-4
CAMERA MOUNTING / EXTERNAL DIMENSIONS / MODEL DESCRIPTION --------------------------------- EG-6
SPECIFICATIONS --------------------------------------------------------------------------------------------------------------- EG-7
PRODUCT FEATURES
• High-resolution surveillance camera with a new built-in 1/3-type CCD. It delivers clear images at a
horizontal resolution of 700 TVL by using a new high-resolution CCD and image processing technol-
ogy.
• 12 V DC/24 V AC auto switching power supply.
• The new 12,600 times Wide Dynamic Range (WDR) processing allows sharp images even if the
pictures are shot in mixed indoor/outdoor scenes with backlight.
• New Easy Focus function helps adjust the lens focus by edge enhancement focus level bar, and
screen view zoom-up / down.
• The Color Bar Output function enables the checking and adjustment of cable signal levels and moni-
toring of the image quality.
• The Defog function provides high-quality images with automatically enhanced contrast in an environ-
ment with poor visibility, such as fog, mist, rain, and snow.
• The 3D-Digital Noise Reduction (3D-DNR) function realizes low noise and high sensitivity.
• The OSD settings can be dynamically switched using the Profile Switching function. With these func-
tions, two preset profiles can be switched with each other when a Mode Selection terminal has been
controlled or Day/Night switching has been made. A combination of profiles can be selected according
to surveillance conditions.
• Day/Night function provides a high-sensitivity black and white image in low light conditions (e.g., night
time) by automatically switching the camera to black and white mode. The camera is automatically
switched to color mode in brighter light conditions (e.g., day time).
• This product offers additional functions such as Stabilizer, Privacy Mask, and Motion Detection func-
tions.
SAFETY PRECAUTIONS
The installation should be made by a qualified service person and should conform to all local
codes.
For this device provided no power switch, the installation shall be carried out in accordance
with the rules of the country or the region in which the equipment is to be installed.
This symbol indicates that there is a possibility of death or damage to operator or others.
(1) Use only 24V AC power supply marked class 2 or +12V DC regulated power supply marked class 2.
(2) To prevent fire or electrical shock, UL listed class 2 wiring should be used for the 12V DC or 24V AC input
terminal.
(3) Be sure to connect each lead to the appropriate terminal. Wrong connection may cause malfunction and/or
damage to the video camera.
(4) Never attempt to disassemble or modify the camera.
(5) If an abnormality should occur, immediately turn off the power and consult your dealer.
(6) To prevent fire or electric shock, do not expose this product to rain or moisture.
(7) Never remove the cover. This may cause fire or electric shock.
(*
This symbol indicates that there is a possibility of injury or damage to equipment.
(1) Do not attempt to aim the camera at the sun or other extremely bright objects that cause smear to appear
irrespective of whether the camera is operating or not. This can damage the CCD (Charge Coupled De-
vice).
(2) Do not place the camera in the following locations.
Locations subject to extremely high or low temperatures.
(Operating temperature range: -10°C to +50°C {14°F to 122°F})
(Storage temperature range: -20°C to +60°C {-4°F to 140°F})
Locations subject to high levels of humidity and dust.
(Operating humidity range: max 85% {No condensation})
(Storage humidity range: max 95% {No condensation})
Locations where there are large amounts of water vapor and steam.
(3) Ensure the location selected is sufficiently strong enough to support the weight of the camera and is free
from vibration.
(4) When this camera is installed near equipment that emits a strong electromagnetic field, some irregularity
such as noise on the monitor screen may happen.
(5) Do not allow the camera to be subjected to strong impacts or shocks. The camera could be damaged by
improper handling or storage.
This device complies with Part 15 of the FCC Rules. Operation is subject to following two
conditions:
(1) This device may not cause harmful interference.
(2) This device must accept any interference received, including interference that may cause
undesired operation.
Industry Canada’s Compliance Statement
This Class A digital apparatus complies with Canadian ICES-003.
Cet appareil numérique de la classe A est conforme à la norme NMB-003 du Canada.
(*
PART NAMES AND FUNCTIONS
/2&.
,5,6
83
/()7 5,*+7
'2:1
0(18
56 '& 9,'(2
,5,6
7(50
02'(6(/
%:),;
*1'
9,'(2
*1'9'&
$&9
21 2)) $ $ % %
56
02'(6(/
%:),;
*1'
$ $ % %
56
02'(6(/
%:),;
*1'
$ % %




 


(1
Flange back adjustment wheel
If the focus needs to be adjusted after the
lens has been mounted, loosen the flange
back locking screw () and rotate the adjust-
ment wheel to adjust.
Flange back lock screw
Loosen this screw for flange back adjust-
ment. Be sure to retighten the screw after
adjustment.
Auto-Iris mode switch
For switching the output from the auto-iris
connector ().
:
When connecting the auto-iris lens, turn off
the camera power. Also, if the Auto-Iris mode
switch is set to a mode other than “DC” or
“VIDEO” that is set for the connecting lens,
the lens may be damaged.
DC : To be set when using a non-amp
auto-iris lens.
VIDEO : To be set when using an auto-iris
lens a built-in amp.
Menu Operation Switch
To adjust settings in the OSD menu, press
and hold down the Menu Operation Switch.
The OSD menu appears, and here you can
adjust various settings using this switch.
83
/()7 5,*+7
'2:1
0(18
Menu Operation Switch
• Pressing the switch in the UP/DOWN/
LEFT/RIGHT direction moves the cursor
and allows you to select an item.
• Press the Menu Operation Switch to con-
firm the item you have selected.
* For details, please see the separate “OSD
Operation Manual.”
Video iris lens adjustment
While using a video iris lens, make sure to
make this adjustment. Activate the adjust-
ment screen of the video iris lens by selecting
“Setup” l“Lens” in the OSD menu. To adjust
the brightness, turn the “LEVEL” volume
control to “L” or “H” until “LEVEL VR Position:
OK” appears on the OSD screen. When the
adjustment is completed, close the OSD
menu.
* For details, please see “Video-Iris LEVEL
VR Setup” of the separate “OSD Operation
Manual.”
:
• Make sure to set the ALC adjustment vol-
ume of the lens to the Average (AV) end.
• Make sure to adjust the lens in a bright
light environment.
(*
Easy focus adjustment
Make sure to adjust focus in a bright light envi-
ronment. With the OSD screen not displayed,
activate the focus adjustment screen by press-
ing and holding down the Menu Operation
Switch in the UP direction (Jump function).
You can also activate the focus adjustment
screen by selecting “Setup” l“EZ Focus” in
the OSD menu. The lens iris is forcibly kept
open while this screen is being displayed. The
focus can be easily adjusted by using focus
adjustment assisting functions such as edge
enhancement, focus level bar indication, and
screen view zoom-up/down enabled by press-
ing the Menu Operation Switch in the left/right
direction. When the adjustment is completed,
close the OSD menu.
* For details, please see “EZ Focus Menu”
of the separate “OSD Operation Manual.”
Video output connector
Connected to the TV monitor with a coaxial
cable.
Power input terminal
(when using 12 V DC/24 V AC)
This model can use 24 V AC and 12 V DC.
:
Use only with a 24 V AC power supply
marked class 2 or +12 V DC power supply.
12V DC connection
24V AC connection
When connecting to a terminal
When connecting a cable to a power cable
terminal (AWG16-24), peel off the cable by
11 mm from the end.
11 mm
Auto-iris output connector
For connecting the cable of an auto-iris lens,
the pin assignment is as shown below. (While
using the auto-iris lens, set the Auto-iris
Mode switch () to “DC” or “VIDEO”
depending on the type of lens used.)
No. DC VIDEO
1 CONTROL- +9.4V (max. 50 mA)
2 CONTROL+ N. C.
3 DRIVE+ VIDEO
4 DRIVE- GND

B/W Fix terminal/Mode Selection terminal
This terminal can be used as a B/W Fix ter-
minal and also as a Mode Selection terminal
that enables the dynamic switching of OSD
settings. The mode selection setting needs
to be adjusted beforehand on the OSD set-
ting screen. The picture mode can be fixed
at B/W by shorting the two contacts on the
B/W Fix terminal. (See the back side of the
camera on page 3.) Fixing the picture mode
at B/W can prevent the picture from having
a phenomenon in which continuous switch-
ing occurs between the color mode and B/W
mode under infrared illumination. The Mode
Selection terminal allows switching between
Profile 1/Profile 2 selected on the OSD
screen.
When using infrared illumination, make sure
to adjust the focal point of the lens in color
mode.
If excessive infrared illumination causes the
phenomenon above, set the picture mode at
B/W using the BW Fix terminal.
RS485 communication terminal
(with communication function)
The RS485 communication function enables
remote operation of the OSD function.
* For initial settings of the camera for RS485
communication, please see “RS485 Menu”
of the separate “OSD Operation Manual.”
When connecting to a terminal
While connecting a shielded twisted pair cable
to a terminal [B/W Fix terminal, Communica-
tion terminal (AWG22-26)], peel off the cable
by 9 mm from the end.
9 mm
(1 Termination resistance switch
(with communication function)
7(50
$&9
21 2)) $
Termination resis-
tance switch
During the RS485 communication connec-
tion, turn on the termination resistance switch
of the camera connected at the end of the
cable, and turn off all other switches. Adjust
the characteristic impedance of the cable
used to the same level as that of the termina-
tion resistance (120 :).
(*
CAMERA MOUNTING
The camera can be attached to a
tripod, fixer or other mounting de-
vice from either the top or bottom
side by using the mounting screw
holes (1/4-inch, 20 UNC) of the
tripod set base plate. The tripod
set base plate can be moved by
first removing the two screws and
then attaching the base plate to
the top or bottom.
:
Use of longer screws can damage the camera and use of shorter screws can result in falling.
EXTERNAL DIMENSIONS
/2&.
,5,6
56 '& 9,'(2
,5,6
7(50
02'(6(/
%:),;
*1'
9,'(2
*1'9'&
$&9
21 2)) $ $ % %
/2&.
,5,6
83
/()7 5,*+7
'2:1
0(18



 
DC12V/AC24V
/Model with communication
function
True Day & Night model
Digital Day & Night model
MODEL DESCRIPTION
556&RPPXQLFDWLRQ0DQXIDFWXUHU¶V2SWLRQ
17UXH'D\1LJKWRU1RQH'LJLWDO'D\1LJKW
::'5:LGH'\QDPLF5DQJHRU1RQH('5([WHQGHG'\QDPLF5DQJH
<&;('5'LJLWDO'D\1LJKW
<&;::'5'LJLWDO'D\1LJKW
<&;1('57UXH'D\1LJKW
<&;:15
Top attachmentBottom attachmentMoving the tripod set
base plate
(*
SPECIFICATIONS
EDR Type
Digital Day/Night model True Day/Night model
Model No. YCX-05 YCX-05N
TV system NTSC
Scanning system 2:1 Interlace
Image sensor 1/3-type Interline transfer CCD
Effective pixels 976 (H) x 494 (V)
Scanning frequency 15.734kHz (H) / 59.94Hz (V)
Video output 1.0V (p-p) / 75:
Horizontal resolution 700 TVL
Min. Illuminance
F1.2
Night mode
AGC Extreme
50IRE SENS UP: OFF
0.3 lx (Color) / 0.03 lx (B/W) 0.07 lx (Color) / 0.007 lx (B/W)
SENS UP: ON (x512)
0.0006 lx (Color) / 0.00006 lx (B/W) 0.00014 lx (Color) / 0.000015 lx (B/W)
30IRE SENS UP: OFF
0.15 lx (Color) / 0.015 lx (B/W) 0.035 lx (Color) / 0.0035 lx (B/W)
SENS UP: ON (x512)
0.0003 lx (Color) / 0.00003 lx (B/W) 0.00007 lx (Color) / 0.000007 lx (B/W)
S/N ratio More than 50dB (At minimum AGC gain)
Gamma characteristic 0.45
Sync. System Internal synchronization (INT.) / Line Lock (L.L.) : For 60Hz regions only
Electronic shutter Electronic shutter ON: 1/60 s to 1/100,000 s.
* The shutter speed ranging from 1/1,000 s to 1/5,000 s can be set by 1/500 s
1/60 sec. fixed (Flickerless: OFF), 1/100 sec. fixed (Flickerless: ON)
Iris control DC IRIS DC-drive auto-iris lens
AES Fixed iris lens (1/60-1/100,000 sec. automatic electronic shutter)
VIDEO IRIS Video-drive auto-iris lens
Vcc=DC 9.4V, 50mA max, video signal: 0.7V (p-p) (high impedance)
Extended Dynamic Range (EDR) ON / OFF
Backlight Compensation (BLC) ON / OFF
White balance ATW (Normal / Wide) / AWB / Manual
SENS UP ON: Auto (x2 to x512) / OFF
Day/Night setting Auto / Color Fix / B / W Fix
Noise Reduction (2D/3D-DNR) Extreme / High / Middle / Low
Electronic zoom ON (16 times max.) / OFF
Defog Image correction ON / OFF
Profile setting Standard / high sensitivity / casino / sodium vapor lamp / profile
AGC ON (Extreme / High / Middle / Low) / OFF
ALC -20 to +20
HLC Detection level: 1-3 steps
Easy focus Enabled
Privacy Mask ON (16 spots max., 10 colors, mosaic) / OFF
Motion detection Detects all areas. 6 (horizontal) × 4 (vertical),
24 pixels in total (minimum block), sensitivity (1–10)
Stabilizer ON / OFF
Monitor output mode CRT / LCD
Communication function RS485 communication, half duplex (models with communication function only)
Power source 24 V AC ± 10% (50/60 Hz ± 1 Hz) or 12 V DC ± 10%
Power consumption DC12V 260mA
AC24V 220mA, 3.1W
Operating temperature/humidity -10°C to +50°C, 85% or lower humidity (no condensing)
Storage temperature/humidity -20°C to +60°C, 95% or lower humidity (no condensing)
External dimensions 60 (W) x 54 (H) x 119.4 (D) mm
Weight 320g
Input/Output
terminals
Video output BNC
Auto-iris terminal 4P connector
Power supply terminal 2P screwless terminal block AWG16-24
B/W Mode-Fix terminal 2P screwless terminal block AWG22-26
RS485 communication terminal 4P screwless terminal block AWG22-26 (models with communication function only)
Adjustment switch OSD switch Push-button switch with 5 contact points (in 4 directions and at a central point)
Iris mode switching switch Slide switch
Termination resistance switch Slide switch (models with communication function only)
Accessories OSD Operation Manual, Instruction manual (this document)
* The specifications and/or appearance of the product may change without a prior notice.
(*
WDR type
Digital Day/Night model True Day/Night model
Model No. YCX-05W YCX-05WN
TV system NTSC
Scanning system 2:1 Interlace
Image sensor 1/3-type Interline transfer CCD
Effective pixels 976 (H) x 494 (V)
Scanning frequency 15.734kHz (H)/59.94Hz (V)
Video output 1.0V (p-p)/75:
Horizontal resolution 700 TVL
Min. Illuminance
F1.2
Night mode
AGC Extreme
50IRE SENS UP: OFF
0.3 lx (Color) / 0.03 lx (B/W) 0.07 lx (Color) / 0.007 lx (B/W)
SENS UP: ON (x512)
0.0006 lx (Color) / 0.00006 lx (B/W) 0.00014 lx (Color) / 0.000015 lx (B/W)
30IRE SENS UP: OFF
0.15 lx (Color) / 0.015 lx (B/W) 0.035 lx (Color) / 0.0035 lx (B/W)
SENS UP: ON (x512)
0.0003 lx (Color) / 0.00003 lx (B/W) 0.00007 lx (Color) / 0.000007 lx (B/W)
S/N ratio More than 50dB (At minimum AGC gain)
Gamma characteristic 0.45
Sync. System Internal synchronization (INT.) / Line Lock (L.L.) : For 60Hz regions only
Electronic shutter Electronic shutter ON: 1/60 s to 1/100,000 s.
* The shutter speed ranging from 1/1,000 s to 1/5,000 s can be set by 1/500 s
1/60 sec. fixed (Flickerless: OFF), 1/100 sec. fixed (Flickerless: ON)
Iris control DC IRIS DC-drive auto-iris lens
AES Fixed iris lens (1/60-1/100,000 sec. automatic electronic shutter)
VIDEO IRIS Video-drive auto-iris lens
Vcc=DC 9.4V, 50mA max, video signal: 0.7V (p-p) (high impedance)
Wide Dynamic Rang (WDR) Max 82dB
Backlight Compensation (BLC) ON / OFF
White balance ATW (Normal / Wide) / AWC / Manual
SENS UP ON: Auto (x2 to x512) / OFF
Day/Night setting Auto / Color Fix / B / W Fix
Noise Reduction (2D/3D-DNR) Extreme / High / Middle / Low
Electronic zoom ON (16 times max.) / OFF
Defog Image correction ON / OFF
Profile setting Standard / high sensitivity / casino / sodium vapor lamp / profile
AGC ON (Extreme / High / Middle / Low) OFF
ALC -20 to +20
HLC Detection level: 1-3 steps
Easy focus Enabled
Privacy Mask ON (16 spots max., 10 colors, mosaic) / OFF
Motion detection Detects all areas. 6 (horizontal) × 4 (vertical),
24 pixels in total (minimum block), sensitivity (1–10)
Stabilizer ON / OFF
Monitor output mode CRT / LCD
Communication function RS485 communication, half duplex (models with communication function only)
Power source 24 V AC ± 10% (50/60 Hz ± 1 Hz) or 12 V DC ± 10%
Power consumption DC12V 310mA
AC24V 250mA, 3.7W
Operating temperature/humidity -10°C to +50°C, 85% or lower humidity (no condensing)
Storage temperature/humidity -20°C to +60°C, 95% or lower humidity (no condensing)
External dimensions 60 (W) x 54 (H) x 119.4 (D) mm
Weight 320g
Input/Output
terminals
Video output BNC
Auto-iris terminal 4P connector
Power supply terminal 2P screwless terminal block AWG16-24
B/W Mode-Fix terminal 2P screwless terminal block AWG22-26
RS485 communication terminal 4P screwless terminal block AWG22-26 (models with communication function only)
Adjustment switch OSD switch Push-button switch with 5 contact points (in 4 directions and at a central point)
Iris mode switching switch Slide switch
Termination resistance switch Slide switch (models with communication function only)
Accessories OSD Operation Manual, Instruction manual (this document)
* The specifications and/or appearance of the product may change without a prior notice.
171-1.0

Other manuals for YCX-05 SERIES

2

Other Ganz IP Camera manuals

Ganz Ganz PixelPro HWB-1 User manual

Ganz

Ganz Ganz PixelPro HWB-1 User manual

Ganz ZC-BNX4312NHA User manual

Ganz

Ganz ZC-BNX4312NHA User manual

Ganz PixelPro ZN-DT2MTP User manual

Ganz

Ganz PixelPro ZN-DT2MTP User manual

Ganz ZN8 Series User manual

Ganz

Ganz ZN8 Series User manual

Ganz PixelIPro Series ZN-B2MAP User manual

Ganz

Ganz PixelIPro Series ZN-B2MAP User manual

Ganz ZN-NH11VPE User manual

Ganz

Ganz ZN-NH11VPE User manual

Ganz ZN8 Series User manual

Ganz

Ganz ZN8 Series User manual

Ganz YCH-03Am User manual

Ganz

Ganz YCH-03Am User manual

Ganz ZN-PT304L User manual

Ganz

Ganz ZN-PT304L User manual

Ganz PixelPro GXi Series ZN1-D4NMZ43L User manual

Ganz

Ganz PixelPro GXi Series ZN1-D4NMZ43L User manual

Ganz ZN-YH305 User manual

Ganz

Ganz ZN-YH305 User manual

Ganz ZN-D2024 User manual

Ganz

Ganz ZN-D2024 User manual

Ganz ZC-PT series User manual

Ganz

Ganz ZC-PT series User manual

Ganz BCH-IR312NA User manual

Ganz

Ganz BCH-IR312NA User manual

Ganz ZN-DNT352XE-MIR Instruction manual

Ganz

Ganz ZN-DNT352XE-MIR Instruction manual

Ganz MDCH-IR312NA User manual

Ganz

Ganz MDCH-IR312NA User manual

Ganz Thermal Series User manual

Ganz

Ganz Thermal Series User manual

Ganz ZN-DNT352XE SERIES User manual

Ganz

Ganz ZN-DNT352XE SERIES User manual

Ganz ZN-DNT350VPE User manual

Ganz

Ganz ZN-DNT350VPE User manual

Ganz ZN8 Series User manual

Ganz

Ganz ZN8 Series User manual

Ganz IP Camera User manual

Ganz

Ganz IP Camera User manual

Popular IP Camera manuals by other brands

GeoVision GV-Fisheye SERIES quick start guide

GeoVision

GeoVision GV-Fisheye SERIES quick start guide

Dahua IPC-HFW5100C user manual

Dahua

Dahua IPC-HFW5100C user manual

Ganz Thermal ZNT1-H Series quick start guide

Ganz Thermal

Ganz Thermal ZNT1-H Series quick start guide

D-Link DCS-6620G - Network Camera install guide

D-Link

D-Link DCS-6620G - Network Camera install guide

Bticino TC BOX IP MEGA user manual

Bticino

Bticino TC BOX IP MEGA user manual

Samsung SCB-9060 Series user manual

Samsung

Samsung SCB-9060 Series user manual

GE Security TruVision Bullet IR TVC-BIR-SR Pocket guide

GE Security

GE Security TruVision Bullet IR TVC-BIR-SR Pocket guide

Avigilon 1.0MP-HD-H264-DC1 installation guide

Avigilon

Avigilon 1.0MP-HD-H264-DC1 installation guide

Live LW2401AC2 SERIES quick start guide

Live

Live LW2401AC2 SERIES quick start guide

Speco VLDT4W user manual

Speco

Speco VLDT4W user manual

Chinavision CVLM-I70 user manual

Chinavision

Chinavision CVLM-I70 user manual

PNI 631W user manual

PNI

PNI 631W user manual

ELRO AS80CA11A installation instructions

ELRO

ELRO AS80CA11A installation instructions

Allnet ALL2272 Firmware user manual

Allnet

Allnet ALL2272 Firmware user manual

Clever Home Wiser 5200/IP633 Installation notes

Clever Home

Clever Home Wiser 5200/IP633 Installation notes

Honic HN-IRDNS200 quick start guide

Honic

Honic HN-IRDNS200 quick start guide

Allnet ALL2205 Quick installation guide

Allnet

Allnet ALL2205 Quick installation guide

optris Xi 80 Operator's manual

optris

optris Xi 80 Operator's manual

manuals.online logo
manuals.online logoBrands
  • About & Mission
  • Contact us
  • Privacy Policy
  • Terms and Conditions

Copyright 2025 Manuals.Online. All Rights Reserved.