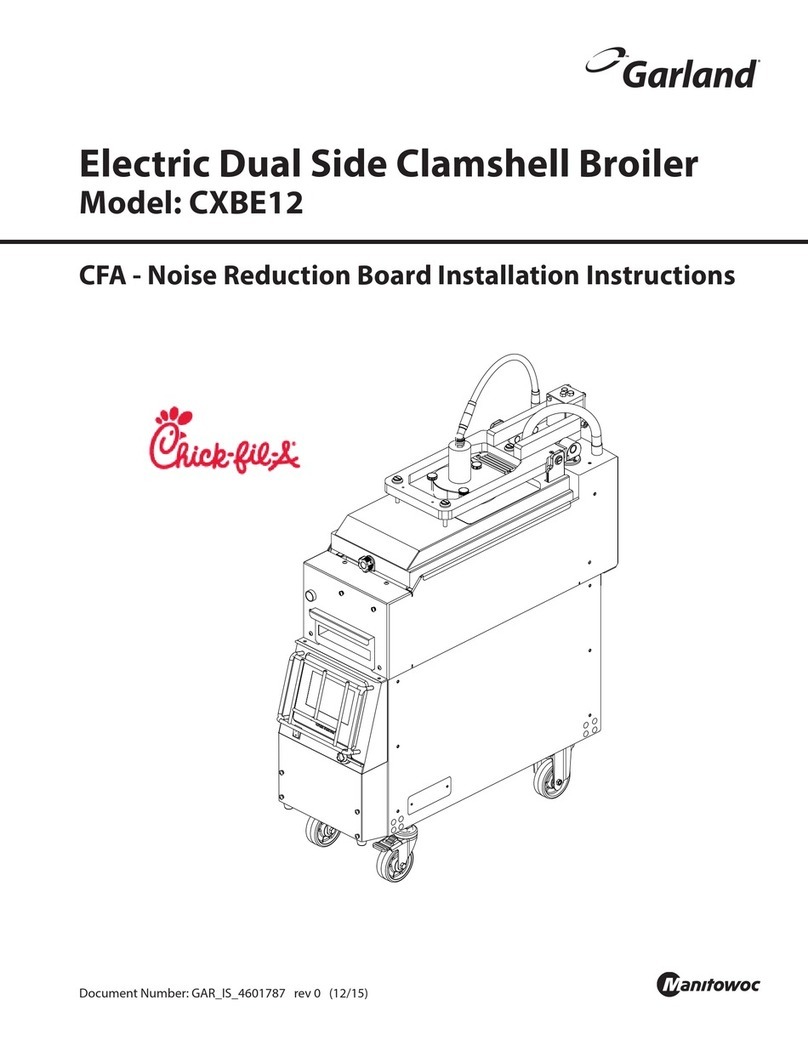
Garland CXBE12 User manual

Part #4532096 Rev 1 (26 June 2013)
PRODUCT MANUAL
INSTALLATION AND OPERATION
PARTS AND SERVICE
PRE-PRODUCTION VERSION
ELECTRIC DUAL SIDE
CLAMSHELL BROILER
MODEL: CXBE12
THIS EQUIPMENT MUST BE INSTALLED AND COMMISSIONED BY A PROFESSIONAL, FACTORY-TRAINED
TECHNICIAN.
THIS EQUIPMENT MUST BE OPERATED UNDER AN APPROVED HOOD SYSTEM ONLY.
PLEASE READ ALL SECTIONS OF THIS MANUAL AND
RETAIN FOR FUTURE REFERENCE.
THIS PRODUCT HAS BEEN CERTIFIED AS
COMMERCIAL COOKING EQUIPMENT AND MUST
BE INSTALLED BY PROFESSIONAL PERSONNEL AS
SPECIFIED.
INSTALLATION AND ELECTRICAL CONNECTION MUST
COMPLY WITH CURRENT CODES:
IN CANADA - THE CANADIAN ELECTRICAL CODE
PART 1 AND / OR LOCAL CODES.
IN USA – THE NATIONAL ELECTRICAL CODE ANSI /
NFPA – CURRENT EDITION.
ENSURE ELECTRICAL SUPPLY CONFORMS WITH
ELECTRICAL CHARACTERISTICS SHOWN ON THE
RATING PLATE.
For Your Safety:
Post in a prominent location, instructions to be
followed in the event the user smells gas. This
information shall be obtained by consulting your
local gas supplier
FOR YOUR SAFETY:
DO NOT STORE OR USE GASOLINE OR
OTHER FLAMMABLE VAPORS OR LIQUIDS
IN THE VICINITY OF THIS OR ANY OTHER
APPLIANCE
WARNING:
IMPROPER INSTALLATION, ADJUSTMENT,
ALTERATION, SERVICE OR MAINTENANCE
CAN CAUSE PROPERTY DAMAGE, INJURY,
OR DEATH. READ THE INSTALLATION,
OPERATING AND MAINTENANCE
INSTRUCTIONS THOROUGHLY
BEFORE INSTALLING OR
SERVICING THIS EQUIPMENT
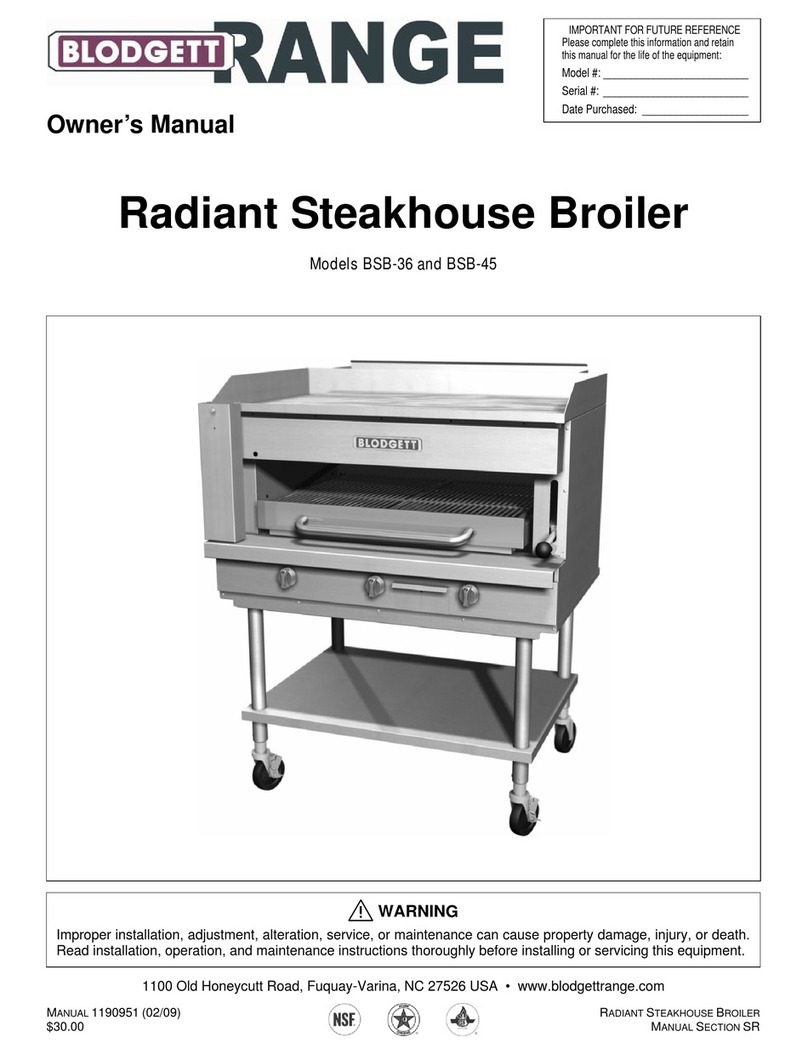
MANUFACTURED EXCLUSIVELY FOR CHICK-FIL-A BY:
GARLAND COMMERCIAL RANGES
http://www.garland-group.com/

SERVICE MANUAL GARLAND ELECTIC CLAMSHELL BROILER, CXBE12 MODEL
Part #4532096 Rev 1 (26 June 2013)
Page 2
IMPORTANT INFORMATION
WARNING:
THIS PRODUCT CONTAINS CHEMICALS KNOWN TO THE STATE OF CALIFORNIA TO CAUSE CANCER AND/OR BIRTH
DEFECTS OR OTHER REPRODUCTIVE HARM. INSTALLATION AND SERVICING OF THIS PRODUCT COULD EXPOSE
YOU TO AIRBORNE PARTICLES OF GLASS WOOL/CERAMIC FIBERS. INHALATION OF AIRBORNE PARTICLES OF
GLASS WOOL/CERAMIC FIBERS IS KNOWN TO THE STATE OF CALIFORNIA TO CAUSE CANCER. OPERATION OF
THIS PRODUCT COULD EXPOSE YOU TO CARBON MONOXIDE IF NOT ADJUSTED PROPERLY. INHALATION OF CAR-
BON MONOXIDE IS KNOWN TO THE STATE OF CALIFORNIA TO CAUSE BIRTH DEFECTS OR OTHER REPRODUCTIVE
HARM.
KEEP APPLIANCE AREA FREE AND CLEAR OF COMBUSTIBLES.

GARLAND ELECTIC CLAMSHELL BROILER GRILL, CXBE12 MODEL SERVICE MANUAL
Part #4532096 Rev 1 (26 June 2013) Page 3
CONTENTS
WARRANTY . . . . . . . . . . . . . . . . . . . . . . . . . . . . . . . . . . . . . . . . . . . .4
SHIPPING DAMAGE CLAIM PROCEDURE . . . . . . . . . . . . . . . . .4
SAFETY . . . . . . . . . . . . . . . . . . . . . . . . . . . . . . . . . . . . . . . . . . . . . . . .5
DIMENSION SPECIFICATION. . . . . . . . . . . . . . . . . . . . . . . . . . . . .6
Dimensions: Broiler . . . . . . . . . . . . . . . . . . . . . . . . . . . . . . . . . . . . . . . . . 6
CLAMSHELL BROILER SPECIFICATION . . . . . . . . . . . . . . . . . . .7
Shipping Dimensions and Weight. . . . . . . . . . . . . . . . . . . . . . . . . . . . 7
Electrical Input Specications. . . . . . . . . . . . . . . . . . . . . . . . . . . . . . . . 7
INTRODUCTION . . . . . . . . . . . . . . . . . . . . . . . . . . . . . . . . . . . . . . . . 8
Packing . . . . . . . . . . . . . . . . . . . . . . . . . . . . . . . . . . . . . . . . . . . . . . . . . . . . . 8
Unpacking . . . . . . . . . . . . . . . . . . . . . . . . . . . . . . . . . . . . . . . . . . . . . . . . . . 8
Temporary Storage. . . . . . . . . . . . . . . . . . . . . . . . . . . . . . . . . . . . . . . . . . 8
Safety. . . . . . . . . . . . . . . . . . . . . . . . . . . . . . . . . . . . . . . . . . . . . . . . . . . . . . . 8
INSTALLATION. . . . . . . . . . . . . . . . . . . . . . . . . . . . . . . . . . . . . . . . . . 9
General . . . . . . . . . . . . . . . . . . . . . . . . . . . . . . . . . . . . . . . . . . . . . . . . . . . . . 9
Rating Plate . . . . . . . . . . . . . . . . . . . . . . . . . . . . . . . . . . . . . . . . . . . . . . . . . 9
Positioning and Setup . . . . . . . . . . . . . . . . . . . . . . . . . . . . . . . . . . . . . . . 9
Appliances Equipped with Casters . . . . . . . . . . . . . . . . . . . . . . . . . . . 9
STEPS TO REMOVE CLAMSHELL BROILER FROM WOOD
CRATE . . . . . . . . . . . . . . . . . . . . . . . . . . . . . . . . . . . . . . . . . . . .10
Air Supply and Ventilation . . . . . . . . . . . . . . . . . . . . . . . . . . . . . . . . . . 11
ELECTRICAL CONNECTION. . . . . . . . . . . . . . . . . . . . . . . . . . . . .12
Electrical Grounding Instructions . . . . . . . . . . . . . . . . . . . . . . . . . . . 12
Important Electrical Precautions . . . . . . . . . . . . . . . . . . . . . . . . . . . . 12
CLAMSHELL BROILER START UP . . . . . . . . . . . . . . . . . . . . . . . .13
Temperature Verication . . . . . . . . . . . . . . . . . . . . . . . . . . . . . . . . . . . 13
LOWER THERMOCOUPLE LOCATIONS . . . . . . . . . . . . . . . . . .14
UPPER THERMOCOUPLE LOCATIONS . . . . . . . . . . . . . . . . . . .14
Startup Form Procedure . . . . . . . . . . . . . . . . . . . . . . . . . . . . . . . . . . . . 15
CLAMSHELL BROILER ACCESORIES . . . . . . . . . . . . . . . . . . . . .17
USE AND CARE . . . . . . . . . . . . . . . . . . . . . . . . . . . . . . . . . . . . . . . .18
Operation. . . . . . . . . . . . . . . . . . . . . . . . . . . . . . . . . . . . . . . . . . . . . . . . . . 18
Shutdown . . . . . . . . . . . . . . . . . . . . . . . . . . . . . . . . . . . . . . . . . . . . . . . . . 18
Warnings . . . . . . . . . . . . . . . . . . . . . . . . . . . . . . . . . . . . . . . . . . . . . . . . . . 18
Service Maintenance . . . . . . . . . . . . . . . . . . . . . . . . . . . . . . . . . . . . . . . 19
Service and Parts . . . . . . . . . . . . . . . . . . . . . . . . . . . . . . . . . . . . . . . . . . . 19
CLEANING AND MAINTENANCE . . . . . . . . . . . . . . . . . . . . . . . .20
Daily Cleaning . . . . . . . . . . . . . . . . . . . . . . . . . . . . . . . . . . . . . . . . . . . . . 20
Weekly Cleaning . . . . . . . . . . . . . . . . . . . . . . . . . . . . . . . . . . . . . . . . . . . 22
CHICKEN / NUGGETS PRODUCT PLACEMENT . . . . . . . . . . .24
CHICKEN BACON / SAUSAGE PRODUCT PLACEMENT. . . .26
DESCRIPTION OF CLAMSHELL BROILER CONTROL . . . . . .28
easyToUCH OVERVIEW. . . . . . . . . . . . . . . . . . . . . . . . . . . . . . . . .29
Clamshell Broiler Operating Modes:. . . . . . . . . . . . . . . . . . . . . . . . . 29
OTHER easyToUCH SCREENS . . . . . . . . . . . . . . . . . . . . . . . . . . .29
Cook Cycle Changes: . . . . . . . . . . . . . . . . . . . . . . . . . . . . . . . . . . . . . . . 29
Temperatures:. . . . . . . . . . . . . . . . . . . . . . . . . . . . . . . . . . . . . . . . . . . . . . 30
Warnings and Alerts: . . . . . . . . . . . . . . . . . . . . . . . . . . . . . . . . . . . . . . . 30
Grates Open: . . . . . . . . . . . . . . . . . . . . . . . . . . . . . . . . . . . . . . . . . . . . . . . 30
Shutdown: . . . . . . . . . . . . . . . . . . . . . . . . . . . . . . . . . . . . . . . . . . . . . . . . . 30
Cleaning Reminders: . . . . . . . . . . . . . . . . . . . . . . . . . . . . . . . . . . . . . . . 30
START UP COOKING:. . . . . . . . . . . . . . . . . . . . . . . . . . . . . . . . . . . . . . . . 31
COOKING A RECIPE: . . . . . . . . . . . . . . . . . . . . . . . . . . . . . . . . . . . . . . . . 32
CHANGES TO A RECIPE COOK CYCLE:. . . . . . . . . . . . . . . . . . . . . . . . 33
SLEEP MODE:. . . . . . . . . . . . . . . . . . . . . . . . . . . . . . . . . . . . . . . . . . . . . . . 33
MENU MODE: . . . . . . . . . . . . . . . . . . . . . . . . . . . . . . . . . . . . . . . . . . . . . . 34
SETTINGS MODE:. . . . . . . . . . . . . . . . . . . . . . . . . . . . . . . . . . . . . . . . . . . 35
LOGIC MENU TREE . . . . . . . . . . . . . . . . . . . . . . . . . . . . . . . . . . . . .37
PLATEN CALIBRATION . . . . . . . . . . . . . . . . . . . . . . . . . . . . . . . . .38
TROUBLESHOOTING STEPS . . . . . . . . . . . . . . . . . . . . . . . . . . . .39
Elements Problems. . . . . . . . . . . . . . . . . . . . . . . . . . . . . . . . . . . . . . . . . 39
UI issues . . . . . . . . . . . . . . . . . . . . . . . . . . . . . . . . . . . . . . . . . . . . . . . . . . . 39
Lift System . . . . . . . . . . . . . . . . . . . . . . . . . . . . . . . . . . . . . . . . . . . . . . . . . 40
Cooking Issues . . . . . . . . . . . . . . . . . . . . . . . . . . . . . . . . . . . . . . . . . . . . . 40
BROILER ACCESSORIES, PART LIST . . . . . . . . . . . . . . . . . . . . . .41
BROILER EXTERIOR, PART LIST. . . . . . . . . . . . . . . . . . . . . . . . . .43
BROILER PLATEN EXHAUST ASSEMBLY, PART LIST . . . . . . .45
BROILER PLATEN EXHAUST ASSEMBLY, PART LIST . . . . . . .47
WIRING DIAGRAM . . . . . . . . . . . . . . . . . . . . . . . . . . . . . . . . . . . . .49

SERVICE MANUAL GARLAND ELECTIC CLAMSHELL BROILER, CXBE12 MODEL
Part #4532096 Rev 1 (26 June 2013)
Page 4
WARRANTY
This warranty covers defects in material and workmanship under normal use providing that:
1. the equipment has not been accidentally or intentionally damaged, altered or misused.
2. the equipment is properly installed, adjusted, operated and maintained in accordance with national and
local codes and in accordance with the installation instructions provided with this product.
3. the warranty serial number axed to the appliance by us has not been defaced, obliterated or removed.
4. an acceptable report for any claim under this warranty is supplied to us.
The equipment warranty coverage remains in force for a period of one (1) year (parts and labor) from the date
the product is rst put into operation.
The Garland Group agrees to repair or replace, at it’s option, any part that proves to be defective in material or
workmanship at no charge for the part or normal labor.
We assume no responsibility for installation, adjustments, diagnosis, or normal maintenance such as: lubrication
of springs or valves.
We assume no responsibility for travel costs beyond two (2) hours and 100 miles/150Kms round trip, travel other
than overland, and overtime costs of repair.
We exclude broken glass, paint and porcelain nish, surface rust, gasket material, ceramic material, light bulbs
and fuses from normal coverage.
We exclude damage or dysfunction caused by re, ood, and like “Acts of God” that are beyond the control of
The Garland Group.
We exclude failures caused by erratic voltage or gas supplies.
The Garland Group will only cover the cost of the parts replacement and/or service.
This warranty is limited and is in lieu of all other warranties, expressed or implied. The Garland Group, our
employees, or our agents shall not be held liable for any claims of personal injury or consequential damage or
loss.
This warranty gives you specic legal rights, and you may have other rights which vary from state to state.
Do not use abrasive materials on the chrome surface, such abrasive scouring pads. Using abrasive materials
will void your warranty
Do not use this unit outdoors, operating unit outdoors will void your warranty.
Do not remove any permanently axed labels, warnings or data plates from the appliance as this may invalidate
the Garland warranty.
Please note that the Garland equipment was carefully inspected and packed by skilled personnel before leaving
the factory. The transportation company assumes full responsibility for safe delivery upon acceptance of the
equipment. What to do if the equipment arrives damaged:
1. File a claim immediately regardless of the extent of damage.
2. Be sure to note, “visible loss or damage,”on the freight bill or express receipt and have the person making
the delivery sign it.
3. Concealed loss or damage: if damage is unnoticed until the equipment is unpacked, notify the freight
company immediately, (within 15 days), and le a concealed damage claim.
SHIPPING DAMAGE CLAIM PROCEDURE

GARLAND ELECTIC CLAMSHELL BROILER GRILL, CXBE12 MODEL SERVICE MANUAL
Part #4532096 Rev 1 (26 June 2013) Page 5
This appliance is for professional use and shall be used only by qualied personnel.
Warning: Accessible parts may become hot during use. Young children should be kept away. This appliance is not
intended for use by persons (including children) with reduced physical, sensory or mental capabilities, or lack of
experience and knowledge, unless they have been given supervision or instruction concerning use of the appliance
by a person responsible for their safety.”
CAUTION: THIS EQUIPMENT MUST ONLY BE OPERATED UNDER AN APPROVED HOOD SYSTEM IN ACCORDANCE
WITH LOCAL REGULATIONS IN FORCE. THIS UNIT IS INTENDED FOR INDOOR USE ONLY.
THIS PRODUCT IS NOT AUTHORIZED FOR HOME OR RESIDENTIAL USE. GARLAND WILL NOT PROVIDE SERVICE,
WARRANTY, MAINTENANCE, OR SUPPORT OF ANY KIND OTHER THAN IN COMMERCIAL APPLICATIONS.
Do not operate the broiler unless it has been commisioned (Start-Up) by a Factory Authorized Service Center.
Do not operate the broiler without reading this operation manual.
Do not operate the broiler unless it has been properly installed and grounded.
Do not operate the broiler unless all service and access panels are in place and fastened properly.
Do not use an extension cord to connect this appliance to a power supply.
Do not use this appliance if the power cord is damaged. Do not attempt to repair a damaged power cord.
Caution! Use care when moving this unit. This unit cannot be dropped as it will impact the performance of the
electronics.
Take care not to expose the power cord to heat (i.e. near the ue, etc.) and be careful not to damage the cord by
pinching or rubbing on sharp edges.
Do not clean the broiler with a power washer. This appliance is not approved for power washing.
The appliance generates signicant amounts of heat and the operator should take care when touching accessible
surfaces that are likely to get hot. Surfaces close to the cooking surface including side panels may get hot enough
to burn skin.
Do not attempt to service this appliance unless you are a qualied service technician.
This appliance is intended for commercial use only and should only be operated by fully trained and qualied personnel.
The electrical power supply must be disconnected prior to cleaning or any maintenance or service work being done
on the appliance.
Do not sit or stand on the appliance under any circumstances. Serious injury and damage to the appliance and/or
property could result.
Warning: The broiler rack will get extremely hot. Even close up it will not appear to be hot but will burn you if you
touch it.
SAFETY
• DISCONNECT ELECTRICAL SUPPLIES BEFORE OPENING PANELS FOR SERVICING.
• KEEP THE APPLIANCE AREA FREE AND CLEAR FROM COMBUSTIBLES.
• DO NOT OBSTRUCT THE FLOW OF COMBUSTION AND VENTILATION AIR (if applicable).

SERVICE MANUAL GARLAND ELECTIC CLAMSHELL BROILER, CXBE12 MODEL
Part #4532096 Rev 1 (26 June 2013)
Page 6
DIMENSION SPECIFICATION
Dimensions: Broiler
MODEL HEIGHT WIDTH DEPTH
inches mm inches mm inches mm
CXBE 31.5 800 11.8 299 37.8 960
* Height not including casters
257
10.1
24
1.0
800
31.5
840
33.1
COOK HEIGHT
715
28.1
MAX OPEN 50.0°
MAX OPEN
591
23.3
197
7.8
152
6.0
802
31.6
±0.5"(12.7mm)
FOR LEVEL
ADJUSTMENT
299
11.8
607
23.9
91
3.6
210
8.3
960
37.8

GARLAND ELECTIC CLAMSHELL BROILER GRILL, CXBE12 MODEL SERVICE MANUAL
Part #4532096 Rev 1 (26 June 2013) Page 7
CLAMSHELL BROILER SPECIFICATION
Shipping Dimensions and Weight
MODEL
SHIPPING DIMENSIONS
inches (mm) SHIPPING WEIGHT
lbs/kg
Length Width Height
CXBE12 43 1/2”
(1105mm)
27 3/8”
(695mm)
49 5/8”
(1260mm) 500/ 226.8
Electrical Input Specications
MODEL
ELECTRICAL REQUIREMENTS**
Voltage (V) Total kW Frequency
(Hz)
Unbalance 3 phase Amps
per line
L1 L2 L3
CXBE12 208 / 3phase 16.04 60 43.3 43.3 47.0
A 5-feet (1524mm) power supply cord with an integral (NEMA 15-50) plug is provided with each model.
Note: Wiring diagram is supplied with each unit.

SERVICE MANUAL GARLAND ELECTIC CLAMSHELL BROILER, CXBE12 MODEL
Part #4532096 Rev 1 (26 June 2013)
Page 8
INTRODUCTION
IT IS STRONGLY RECOMMENDED THAT INSTALLATION, MAINTENANCE AND REPAIRS BE DONE BY AN
AUTHORIZED SERVICE AGENCY, OR THE WARRANTY WILL BE DEEMED NULL AND VOID. FOR A LIST OF
AUTHORIZED SERVICE AGENTS, REFER TO THE GARLAND WEB SITE AT http://www.garland-group.com.
This appliance should be given regular care and maintenance to operate at peak perfomance and
maximum energy eciency. It is recommended that the unit be inspected every 6 months by a
certied service technician for proper operation and performance. Whenever possible avoid over-
heating the unit when idle as this is a major cause of increased service cost. Remember“Regular
maintenance ensures peak performance.”
Every broiler is inspected and tested at the factory prior to shipment.
Packing
The product is shipped in a substantial crate
with the broiler in vertical position. Casters are
factory installed on the broiler. Garland places
unit/accesories in crate in a neat and organized
manner and in such a way as to eliminate
damage from movement, rubbing etc.
Check crate for any visible damage sustained
during transit.
It is recommended to remove crate when the
clamshell broiler is inside the kitchen.
Unpacking
CAUTION
Heavy load
Use of lifting aids
and proper lifting
technique required
Carefully remove unit from crate and thoroughly
inspect it for any visible or concealed damage.
Report any damage immediately to your carrier
to le the appropriate freight claims. For more
information, see page 4. Push or Pull broiler must
be taken care to see that the broiler does not tip
over.
Do not remove any permanently axed labels,
warnings or data plates from the appliance as
this may invalidate the Garland warranty.
Temporary Storage
Garland provides adequate protection under
normal conditions. The broiler may need
additional protection if it is stored near salt water,
a tropical area, or other unfavorable conditions.
You must contact Garland immediately if these
conditions occur.
Safety
It is essential that the instructions in this manual
be strictly followed for the safe and economical
operation of the equipment. Should it be
known or suspected that a fault exists with the
appliance, then it must not be used until the fault
is rectied by a authorized or certied service
person.

GARLAND ELECTIC CLAMSHELL BROILER GRILL, CXBE12 MODEL SERVICE MANUAL
Part #4532096 Rev 1 (26 June 2013) Page 9
INSTALLATION
THIS PRODUCT IS NOT AUTHORIZED FOR HOME OR RESIDENTIAL USE. GARLAND WILL NOT PROVIDE
SERVICE, WARRANTY, MAINTENANCE, OR SUPPORT OF ANY KIND OTHER THAN IN COMMERCIAL
APPLICATIONS.
General
In the United States the installation must comply
with the latest edition of the National Electrical
Code ANSI/NFPA 70 – latest edition and/or local
Codes to assure safe and ecient operation.
In Canada, the installation must comply with
local codes and CSA B149.1 and handling Code
–latest edition and the Canadian Electrical Code
C22.1 – latest edition.
In other countries installation must be carried
out by a competent person in accordance with
the relevant regulations, codes of practice
and the related publications of the country of
destination.
Adequate clearance must be provided for
servicing and proper operation.
If you have any questions regarding the
installation of this unit, contact the Garland
Service Department at (855)-586-1542 or
Regional Service Managers.
Rating Plate
Two (2) rating plate will be intalled in each unit,
and they can be found;
a. Inside front panel under the electronic touch
control.
b. Outside the right side panel,
lower left side.
If service or replacement parts
are needed, refer to the model
number (including prex & sux
letters/numbers) and serial
number on the rating plate
when in contact with the factory
or authorized service agency. These numbers
ensure proper unit identication and aid in
providing faster and more accurate service.
Positioning and Setup
CAUTION
Heavy load
Use of lifting aids
and proper lifting
technique required
The unit is very heavy (500Lbs) so some form of
mechanical assistance may be required to lift and
position the broiler.
The unit is designed to base on a smooth and
level oor built to withstand the weight of
the fully laden appliance. To comply with NSF
Sanitation Standards the unit must stand on
casters for easy of mobility during cleaning
procedures.
Appliances Equipped with Casters
All broilers are shipped with casters intalled
in place, however some adjustment may be
required to level the unit. The front casters are
adjustable, swivel casters with brakes. The rear
casters are xed. Garland recommends installing
restraining chains/cables from the oor/wall to
the rear of the unit. These restraints limit the
mobility of the appliance.
FRONT CASTER WITH BRAKE REAR CASTER WITHOUT BRAKE

SERVICE MANUAL GARLAND ELECTIC CLAMSHELL BROILER, CXBE12 MODEL
Part #4532096 Rev 1 (26 June 2013)
Page 10
STEPS TO REMOVE CLAMSHELL BROILER FROM WOOD CRATE
CAUTION
Heavy load
Use of lifting aids
and proper lifting
technique required
The unit is very heavy (500Lbs) so some form of
mechanical assistance may be required to lift and
position the broiler.
STOP! - FOLLOW THE INSTRUCTIONS BELOW TO SAFELY AND EASILY REMOVE UNIT FROM PACKAGING SKID
2. REMOVE AND DISCARD TWO (2) #10-24 X 2 1/2”
LONG TRUSS HEAD PHILLIPS DRIVE MACHINE
SCREWS AND FLAT WASHERS FROM THE LOWER
SUPPORT BRACE (“ITEM B”) ON EACH SIDE OF
UNIT.
3. PUSH UNIT FORWARD OFF OF THE SKID. THE
LOWER SIDE SUPPORT BRACES WILL SERVE AS
GUIDES AND ENSURE THAT THE UNIT ROLLS
STRAIGHT AS IT IS BEING MOVED.
4. REPLACE THE FASTENERS REMOVED FROM EACH
SIDE OF THE UNIT IN STEP 2 WITH TWO (2) #10-24
X ½”LONG PAN HEAD PHILLIPS DRIVE MACHINE
SCREWS INCLUDED WITH UNIT ACCESSORIES.
Tools required.
1. REMOVE AND DISCARD FRONT STOP BOARD
(ITEM“A”) NAILED TO FRONT OF SKID.

GARLAND ELECTIC CLAMSHELL BROILER GRILL, CXBE12 MODEL SERVICE MANUAL
Part #4532096 Rev 1 (26 June 2013) Page 11
Air Supply and Ventilation
VENTILATION REQUIREMENTS MAY BE SUBJECT TO LOCAL BUILDING AND FIRE CODES. CONSULT
LOCAL AUTHORITIES HAVING JURISDICTION.
Your new broiler appliance must be vented
properly to operate correctly and safely. Due
to the extremely high temperature a re safety
system should be installed. In addition, frequent
cleaning of the vent hood and the appliance
greatly reduces any re risk.
For any commercial cooking appliance, means
must be provided to exhaust combustion
waste products, steam, etc. to the outside of
the building. Proper ventilation is essential for
optimum performance.
Air movement should be checked during
installation. There must be adequate air
intake into the building to compensate for
the amount of air removed by the ventilation
system. Without a proper balance, abnormal
atmospheric pressure will occur, aecting burner
and appliance performance. If air movement is a
concern, adjustments should be made to correct
the problem by a qualied technician.
HAVING DIFFICULTY OPENING DOORS THAT
EXIT THE BUILDING IS AN INDICATION THAT THE
BUILDING HAS A PROBLEM WITH AIR MOVEMENT.
Do not use fans to blow air directly at the
appliance. This can create air cross-currents
and/or excessive drafts that interfere with the
operation of the unit.

SERVICE MANUAL GARLAND ELECTIC CLAMSHELL BROILER, CXBE12 MODEL
Part #4532096 Rev 1 (26 June 2013)
Page 12
ELECTRICAL CONNECTION
DISCONNECT THE POWER SUPPLY BEFORE SERVICING.
HIGH
VOLTAGE
IMPORTANT: The appliance must be electrically
grounded in accordance with local codes, or in
the absence of local codes, with the National
Electrical Code ANSI/NFPA70, or the Canadian
Electrical Code CSA C22.2, as applicable.
Electrical Grounding Instructions
The appliance is equipped with a standard
Nema 15-50 three prong (grounding) plug with
appropriate strain relief for your protection
against shock hazard and should be plugged
directly into a properly grounded three prong
receptacle. Do not cut or remove the grounding
prong from this plug.
Important Electrical Precautions
Never touch anything that runs on electricity
when your hands are wet.
It is recommended to allow enough slack on the
electrical cord to allow the appliance to be pulled
out for proper cleaning and maintenance.
DO NOT USE AN EXTENSION CORD TO CONNECT
THIS UNIT TO A POWER SUPPLY.
DO NOT USE THIS APPLIANCE IF THE POWER
CORD IS DAMAGED.
DO NOT ATEMPT TO REPAIR A DAMAGED POWER
CORD. DO NOT EXPOSE THE POWER CORD TO
HEAT OR SHARP EDGES.
DO NOT OPERATE BROILER IF THE CORD HAS
BEEN PINCHED OR HAS BEEN DAMEGED AS A
RESULT OF RUBBING ON SHARP EDGES.

GARLAND ELECTIC CLAMSHELL BROILER GRILL, CXBE12 MODEL SERVICE MANUAL
Part #4532096 Rev 1 (26 June 2013) Page 13
CLAMSHELL BROILER START UP
IMPORTANT NOTE:
Prior to intallation, check the electrical supply to ensure input voltage and phase match the
equipment - voltage rating and phase. Many local codes exist and it is the responsibility of the
owner/installer to comply with these codes.
Certied
Installer
Ensure power supply is connected to the
appliance.
Remove all factory applied protective material
by washing with hot water, mild detergent, or a
soap solution.
NOTE: Each clamshell broiler has been factory
tested and adjusted prior to shipment. It may
be necessary to further adjust the unit as part
of a proper installation. Such adjustments are
the responsibility of the installer. Adjustments
are not considered to be defects in material and
workmanship and are not covered under the
original equipment warranty.
Temperature Verication
HOT SURFACE
Grill Temperatures
Will Cause Severe
Burns
Embedded heating elements and thermocouples
in ductile cast iron grates allow a maximun
temperature of 5000F/260°C.
Infrared heating elements allow for a maximum
temperature of 600˚F /316°C.
Must clean upper and lower clamshell broiler
cooking surface.
1. The upper and lower clamshell broiler should
be at operating temperatures to perform
this calibration procedure. (approximately 30
minutes)
2. Place temp. probe over the thermocouples
as per gure #1. Allow 5 to 10 seconds for
the pyrometer to respond and stabilize
temperature.
3. Temperature delta between pyrometer and
controller must be +/- (200F). If temperature
delta between pyrometer and controller is
greater than +/- (200F), call service at 855-586-
1542.

SERVICE MANUAL GARLAND ELECTIC CLAMSHELL BROILER, CXBE12 MODEL
Part #4532096 Rev 1 (26 June 2013)
Page 14
LOWER THERMOCOUPLE LOCATIONS
UPPER THERMOCOUPLE LOCATIONS

GARLAND ELECTIC CLAMSHELL BROILER GRILL, CXBE12 MODEL SERVICE MANUAL
Part #4532096 Rev 1 (26 June 2013) Page 15
THERMOCOUPLE LOCATION
COOKING AREA
-TOP-
2.35”
2.35
14.73”
7.23
”
RL
COOKING AREA
-BOTTOM-
RL
2.72”
2.72”
14.92”
7.68”
GRILL FRONT
HOT SURFACE
Grill Temperatures
Will Cause Severe
Burns
A
A = Bottom Left Rear
B = Bottom Right Front
C = Top Right Rear
D = Top Left Front
B
C
D
Figure #1
Startup Form Procedure
A factory startup is a comprehensive clamshell broiler check in which a factory certied technician
will document all nal settings programmed in the controller once various other performance checks
are complete. The estimated time to complete a startup is approximately 1.5 – 2 hours. Please keep in
mind this estimated time when scheduling the startup. After hours or overtime is not covered under
warranty and will be billed at a charge which is the dierence between the Garland Reimbursement
rate and the Factory Authorized Service Centers overtime charges. A factory startup is necessary to
start the warranty period. The Authorized Service Center is required to complete the paperwork during
the startup process, and send it to Garland Commercial Ranges for reimbursement. At the time of
receipt, Garland will start the warranty as mentioned in the Warranty section.

SERVICE MANUAL GARLAND ELECTIC CLAMSHELL BROILER, CXBE12 MODEL
Part #4532096 Rev 1 (26 June 2013)
Page 16
STARTUPCHECKLIST
Part#4532160
Serial#: Date:
CFAStore#: Phone#:
Address:
City: State: ZipCode:
ELECTRIC/3PHASEINPUTSPECIFICATION:208V MEASUREVOLTAGEFROMOUTLET: L1ͲL2 L2ͲL3 L3ͲL1
1ConfirmiftheoutletinthestoreisNEMA15Ͳ50Rbycheckingtheboxontheside.IftheoutletisotherthanNEMA15Ͳ50R,DONOTINSTALLthe
clamshellbroileruntilthisissueisresolved.CallGarlandServiceat1Ͳ855Ͳ586Ͳ1542.
OK
2Removeunitfrompackage.Inspectforanyobviousshippingdamage.Shippingmaterialundertheplatenwillberemovedatalaterstep.
3Removesidepanelandensurelinecordissecuredtothecontactor.Checkallwiringattheterminalblockfortightness.Checkallpinconnectors
toensuretheyaresecure.
4RemoveexistingunitandplacenewChickͲfilͲAClamshellBroilerinplaceunderthehoodandpluginwiththeavailableoutlet.
5Ensureclamshellbroilerisleveledsidetoside,fronttobackanddiagonallyinlocationunderthehood.Providedetailsifunabletolevel:
………………………………………………………………………………………………………………….………Checkboxtoconfirmbestpossiblelevelwasachieved.
6Turnonpowerswitch.EnsurecontrolinitiatesandactivatestheHOMEscreen.
7PresstheDIAGNOSTICSicon.EntertheSERVICEPASSWORDprovidedbyGarland.GointotheCONFIGUREMOTIONmenu.PresstheUPARROW
toraiseplatentheplatenhighenoughtobeabletoremoveallpackagingmaterialunderneaththeplaten.
8SprayKayReleaseAgentprovidedbylocationtoboththeupperandlowergrates.
9
PressthePRESS&GOicon.Ensuretheclamshellbroilergoesthroughitshomingsequenceandpreheat.
RECORDAMPSPER
LINEL1: L2: L3:
RECORDVOLTAGE
FROMCONTACTORL1ͲL2: L2ͲL3: L1ͲL3:
10EnsuretheclamshellbroilerpreͲheats,reachessetpoints,soaksandthatplatenraisesandgoestoreadystate.
11
Fillinthefollowingtable:
ZONESetPointMaxActualZONESetPointMaxActual
TRR(TopRightRear) BRF(BottomRightFront)
TLF(TopLeftFront) BLR(BottomLeftRight)
TIR(TopInfrared) BIR(BottomInfrared)
12Flipeachofthebottomgratesindividuallytoensurethateachwillproperlycutoffthesupplyofthehighvoltagewhenopened.Verifythat
switchmountsaretight.Adjustmicroswitchbracketifnecessary.Checktheboxtoconfirmthattheswitcheswerebothproperlyset.
13LevelandCalibratetheplaten.Ensurethatthejamnutsaretightenedandthatallcapsareinplace.RecordthesavedHomeSwitchReference
Location:……………………….andconfirmthattheclamshellbroilerwasleveledandcalibrated.Powercyclethebroileraftercalibration.
14GoBacktoCONFIGUREMOTION.UsethemotioncontrolcommandstosettheVIRTUALUPPERSWITCHlocationensuringproperclearanceto
thehoodwhileallowingforcomfortableloadingoffoodproduct.RecordfinalUpperSP…………………………..
15
VerificationofthefactoryTEMPBIAS:Probethebroiler’sthermocouplesimmediatelyafterasimulatedcookcycleandcomparethemtothe
controloutputs.Recordtheoffsetsusedbelowandensureallarewithin+/Ͳ200F.Ifnot,callserviceat855Ͳ586Ͳ1542.
ZONEOFFSET(0F)ZONEOFFSET(0F)
TRR(TopRightRear) BRF(BottomRightFront)
TLF(TopLeftFront) BLR(BottomLeftRight)
TIR(TopInfrared) BIR(BottomInfrared)
16
Runtheclamshellbroilerwithoutproductonthegratesandconfirmnormalfunctioningofthefollowing:
Properfunctioningofthetouchscreentostartanddiscardcycles.
AbilitytoputtheclamshellbroilerintoSLEEPMODE.
Properfunctioningofgreenbuttontostart,stopandacknowledge.
ProperandnoisefreeoperationoftheExhaustFan.
Properfunctioningofthespeaker.Confirmvolumelevelwithstoreoperatorandadjustasrequired.
Properscreenbrightness.Confirmbrightnesslevelwithstoreoperatorandadjustasrequired.
ProperfunctioningoftheUSBport.(Onlyifyouhavebeentrainedtodoso.Ifnot,pleaseignorethischeck)
17Ensureallpanelsaretightlysecuredandattachanytoolstoragebinsprovided.
18
Ifpossible,assistorobtainassistancefromstorepersonaltoperformproductintegritytestingonchickenensuringtheyfallwithintheaccepted
parameters.Recordtemperaturebelow;
RIGHTSIDE(0F)13579
LEFTSIDE(0F)246810
Verifysatisfactoryexhaustfansmokecapturethrucompletecookcycle.Adjusttheexhaustshutterasnecessaryandcheckboxtoacknowledge
adequatesmokecapture.
19Notethefirmwareversion,Firmware#......................................................
20Problems/SpecialCircumstances/Damage:
SUBMITTEDBY:ACCEPTEDBY:
Name: Name:
Signature/PrintnameSignature/Printname
SERVICEAGENCY:Ihavebeenadequatelyinformedontheoperationofthe
clamshellbroiler,itsuseandgeneraloperation?YN
SUBͲAGENT(ifapplicable):Ihavebeenadequatelyinformedonthemaintenanceof
theclamshellbroiler?YN
Haveyoutrainedthestoreontheoperationofthe
clamshellbroiler?(30minutes)YN COMMENTS:
Areyouafactorycertifiedtechnician?YN
Dateofcertification:
Note:SeeInstallationOperationManualfordetailedinstructionsontheclamshellbroilerandcontrolfunctionality.
ThisformistobefaxedtotheRISECallCenter(
727Ͳ569Ͳ1247
)orbyemailvia
immediatelyuponcompletionfromtheChickͲfilͲAsite.
REFERENCE ONLY
Y
ront)
Y
LY
t
Right
LY
LY
m
Infrared)
NLY
LY
off
the
supply
ox
confirm
ONL
and
t
all
cap
as
leveled
a
O
mands
et
the
oduct.
Record
CE
er’s
thermocou
d
ensure
l
are
ENC
ET
(
0
F)
RE
ER
FER
EFE
hout
product
o
REF
chscree
RE
R

GARLAND ELECTIC CLAMSHELL BROILER GRILL, CXBE12 MODEL SERVICE MANUAL
Part #4532096 Rev 1 (26 June 2013) Page 17
CLAMSHELL BROILER ACCESORIES
Front Tray
Side Splash Guard
Disposable Front Tray

SERVICE MANUAL GARLAND ELECTIC CLAMSHELL BROILER, CXBE12 MODEL
Part #4532096 Rev 1 (26 June 2013)
Page 18
USE AND CARE
Operation
IF FOR ANY REASON THE ELECTRICAL POWER IS INTERRUPTED OR THE CIRCUIT BREAKER IS TURNED
OFF, TURN THE POWER OFF TO THE APPLIANCE BY SWITCHING THE MAIN POWER SWITCH OFF.
CONTACT AN AUTHORIZED SERVICE AGENT FOR SERVICE BEFORE ATTEMPTING TO RESTORE THE
POWER. FOR A LIST OF AUTHORIZED SERVICE AGENTS, REFER TO THE GARLAND WEBSITE AT http://
www.garland-group.om
Shutdown
Turn main switch to the“OFF”, “0”position
For extended shut down periods, turn main
switch“OFF” “0” position, and unplug the
electrical power cord.
NOTE: Do not abuse the appliance by leaving
thermostats at a high temperature setting when
not required. During idle periods/sleep mode,
set thermostats to a low temperature setting to
keep it warm. Set thermostats as required, to a
higher setting, for periods of heavy load.
Warnings
Do not use an extension cord to connect this
appliance to a power supply.
Do not use this appliance if the power cord is
damaged. Do not attempt to repair a damaged
power cord.
Take care not to expose the power cord to heat
(i.e. near the ue, etc.) and be careful not to
damage the cord by pinching or rubbing on
sharp edges.
This appliance is not approved for power
washing. Do not clean the unit with a power
washer.
The appliance generates signicant amounts of
heat and the operator should take care when
touching accessible surfaces that are likely to
get hot. Surfaces close to the cooking surface
including side panels may get hot enough to
burn skin.
Do not attempt to service this appliance unless
you are a qualied service technician.
This appliance is intended for commercial use
only and should only be operated by fully trained
and qualied personnel.
The electrical power supply must be
disconnected prior to cleaning or prior to
maintenance or service.
Do not sit or stand on the appliance under any
circumstances. Serious injury and damage to the
operator, appliance and/or property could result.
Do not operate the appliance unless all panels
and covers are installed.
Ensure that the clamshell broiler does not
contain food debris or is obstructed in any
way. A broiler surface is imperative for proper
operation.
Use only stainless steel, wood or plastic tools
to scrape o heavy deposits or oil. Do not use
ordinary steel scrapers or knives, as iron particles
may become embedded and rust. NEVER USE
STEEL WOOL.
The Grease Box should be emptied as required.
Do not allow it to overll.

GARLAND ELECTIC CLAMSHELL BROILER GRILL, CXBE12 MODEL SERVICE MANUAL
Part #4532096 Rev 1 (26 June 2013) Page 19
Do not cool o a hot broiler with ice. The use of
ice may damage the castings, crack the welds, or
warp the broiler grate castings and will void the
warranty.
Once the unit has cooled external stainless steel
panels should be cleaned using a mild detergent
and/or a food-safe liquid cleaner designed to
clean stainless steel, a soft cloth and hot water. If
it is necessary to use a non-metallic scouring pad,
always rub in the direction of the grain in the
metal to prevent scratching. Wash a small area
at a time and rinse the washed area with a clean
sponge dipped into a disinfectant and wipe dry
with a soft clean cloth before it can dry.
USE AND CARE, continuation
Use only stainless steel, wood or plastic tools
to scrape o heavy deposits or oil. Do not use
ordinary steel scrapers or knives, as iron particles
may become embedded and rust. NEVER USE
STEEL WOOL.
The Grease Box should be emptied as required.
Do not allow it to overll.
Rinse with clean water and wipe away residue
with a clean, dry cloth.
Scrape the grease trough and chute, directing
any grease/debris into the grease drawer. Once
cool enough to handle, empty grease drawer,
scraping out stubborn grease/debris and wash
drawer in a hot soapy solution.
Service Maintenance
Any maintenance involving the disassembly of components should be performed by a qualied
service technician as part of a regular kitchen maintenance program. Regular (at least 6 month
intervals) inspections should be done to verify performance and make any necessary adjustments
to the appliance. In addition, cleaning behind the front panel should also be done by the service
technician during regular maintenance.
Service and Parts
If for any reason this appliance requires service, contact Garland Service Department at 1-855-586-
1542. All repairs must be performed by a qualied technician, using genuine Garland replacement
parts or there will be a risk of voiding the warranty.
Refer to the rating plate found on right exterior side of the unit, when calling for service. The plate
contains the model and serial numbers for your appliance. Properly identifying the appliance will help
the factory, or your local service agent provide faster and more accurate service.

SERVICE MANUAL GARLAND ELECTIC CLAMSHELL BROILER, CXBE12 MODEL
Part #4532096 Rev 1 (26 June 2013)
Page 20
CLEANING AND MAINTENANCE
IMPORTANT NOTE:
THIS APPLIANCE WILL WORK AT MAXIMUM PERFORMANCE AND LAST LONGER IF IT IS PROPERLY MAINTAINED.
FOLLOWING A CLEANING SCHEDULE AND HAVING THE UNIT CHECKED AT LEAST ANNUALLY BY AN
AUTHORIZED SERVICE AGENT ARE STRONGLY RECOMMENDED. FOR A LIST OF AUTHORIZED SERVICE AGENTS,
REFER TO THE GARLAND WEBSITE AT http://www.garland-group.com
CAUTION
Cleaning
in
Process
IT IS THE USER’S RESPONSIBILITY TO PREVENT THE HAZARDS OF GREASE ACCUMULATION BY
CLEANING AND MAINTAINING THEIR APPLIANCE ON A REGULAR BASIS. GARLAND WILL NOT BE
RESPONSIBLE FOR DIMINISHED PERFORMANCE AND/OR DAMAGE, OR FIRES RESULTING FROM
MISUSE AND/OR POOR CLEANING AND MAINTENANCE PROCEDURES.
Daily Cleaning
ELECTRICAL
HAZARD
Warning: Always disconnect
electrical power before cleaning
accessible panels.
HOT BROILER
Broiler temperature extremely
high, be very careful.
1. Press the GREEN
to raise upper platen;
allow clamshell
broiler to cool for
approximately 20
minutes
2. Turn clamshell broiler
Main Power Switch
OFF. (Green Main
Power switches are set
at the ON:”I”and OFF:
“0”position)
ON
OFF
Protect you Hands
Wear Glove
3. Brush broier grates
with broiler brush.
Upper grate rst. Brush
from front to back, to
push debris towards
the back of broiler.
4. Brush the lower broiler
grates with broiler
brush. Brush from
front to back with a
slight back and forth
movement.
(Always check with Chick-ll-A store Manager for latest cleaning information)
Other manuals for CXBE12
2
Table of contents
Other Garland Broiler manuals

Garland
Garland ED-15B Manual

Garland
Garland G18-BRL User manual

Garland
Garland HEEG "CL" User manual

Garland
Garland Enodis HEEE-24Cl User manual

Garland
Garland MSR16 User manual

Garland
Garland IR36-280L Troubleshooting guide

Garland
Garland HEEGM XX CL User manual

Garland
Garland M60XR User manual

Garland
Garland CXBE12 User manual

Garland
Garland 60-40R User manual