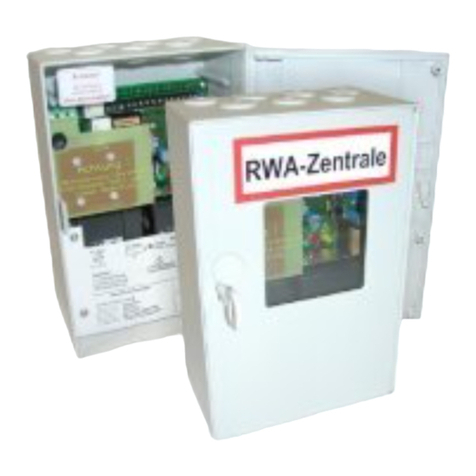
GAS Gasmaster User manual

1 to 4 channel gas detection control panel
Gasmaster
Installation, Operation and
Maintenance Manual

The equipment described in this manual may have mains voltages applied to it. Ensure correct safety procedures are adopted
before working on the equipment. The equipment described in this manual is designed for the detection of ammable and/
or toxic gases. Detectors may be sited in hazardous areas. Ensure local safety procedures are adopted before carrying out any
maintenance or calibration work. The equipment described in this manual may be connected to remote alarms and/ or shutdown
systems. Ensure that local operating procedures are adopted before carrying out any maintenance or calibration work.
This product has been tested and found to comply with the European Directive 2004/108/EC and the EMC requirements of
EN50270. It also complies with the Council Directive 2006/95/EC relating to electrical safety and the Low Voltage Directive. It
conforms to the CE Marking Directive 93/68/EEC.

Contents
1. Introduction. .............................................................................................................................1
1.1 About Gasmaster ....................................................................................................................1
1.2 About this manual ..................................................................................................................1
1.3 Instructions for use as part of an ATEX approved system.........................................2
2. Installation .................................................................................................................................3
Please read this rst................................................................................................................3
2.1 Before installation ...................................................................................................................4
2.1 General........................................................................................................................................4
2.3 Mounting....................................................................................................................................5
2.4 Cabling requirements............................................................................................................5
2.5 Installing gas and re detectors.........................................................................................6
2.6 Installing output devices......................................................................................................6
2.7 Connecting mains power..................................................................................................... 6
2.8 Connecting input devices....................................................................................................7
2.9 Connecting output devices.................................................................................................11
2.10 Applying power .......................................................................................................................13
2.11 Battery back-up times............................................................................................................13
2.12 Commissioning........................................................................................................................14
3. Operation...................................................................................................................................17
3.1 Gasmaster Operator Panel...................................................................................................17
3.2 Gasmaster start up sequence .............................................................................................19
3.3 How to adjust display contrast...........................................................................................19
3.4 How to display Instrument serial number and system identity .............................19
3.5 Using the menu system ........................................................................................................20
3.6 Inhibiting channels.................................................................................................................20
3.7 Using the Control Panel in Supervisor Mode................................................................21
3.8 In the event of an alarm........................................................................................................22
3.9 mV channels: Pellistor saver mode ...................................................................................22
3.10 In the event of a fault.............................................................................................................23
3.11 System Conguration ............................................................................................................23
4. Maintenance .............................................................................................................................35
4.1 Functional Testing...................................................................................................................35
4.2 System Inhibi ............................................................................................................................35
4.3 Detector Calibration...............................................................................................................36
4.4 Changing Batteries .................................................................................................................36
4.5 Module Replacement ............................................................................................................36
4.6 Event logging............................................................................................................................36
4.7 Service card ..............................................................................................................................36
4.8 Cleaning......................................................................................................................................36
5. Adding an input module......................................................................................................37
Appendix A: Specications..................................................................................................38
Appendix B: Spare Parts and Accessories.......................................................................39
Appendix C: Display characters..........................................................................................40
Warranty Statement ...............................................................................................................41

1
1.1 About Gasmaster
Gasmaster is a gas and re control panel, designed
to monitor remote gas and re detectors.
Gasmaster can also monitor ame detectors as
well as GAS’s ESU product. The status of each input
is displayed on a large, clear LCD display, and
alarms or faults are indicated by clear LEDs and an
integral sounder.
Relay outputs are provided for alarms and faults, as
well as dedicated outputs for audible visual alarms.
An RS-485 Modbus output is provided for two-wire
transfer of all data to industry-standard control
systems.
Gasmaster logs all alarm and fault events so that
they can be investigated at a later stage using
Gasmaster PC software.
There are two versions of Gasmaster:
• Gasmaster 1 - single channel unit for one gas
detector, re zone or ESU sampling device.
• Gasmaster 4 - four channel unit for one to
four gas detectors, re zones or ESU sampling
devices.
Gasmaster 1 is identiable from Gasmaster 4 by
having only a single channel display (see gure
3.2, page 18) and a de-populated terminal PCB. All
operating functions are identical to Gasmater 4.
Gasmaster is designed for simple operation, and all
day-to-day functions can be performed from the
front panel. Please refer to section 3 for details on
display operation.
1.2 About this manual
The manual is divided into sections which
detail procedures for installing, operating and
maintaining Gasmaster. Gasmaster is a safety
system and it is essential that all instructions are
correctly followed.
Details of the types of device that can be
connected to Gasmaster are shown in section 2,
along with typical connection diagrams. Section
3 provides instructions for day-to-day operation
of Gasmaster as well as detailed information on
system conguration.
Warning
Regular maintenance of any safety system is essential,
and failure to maintain the system according to these
instructions could result in failures which could lead to
harm to plant and/or personnel or even death. Details of
the requirements for Gasmaster systems are provided in
section 4.
There are separate appendices for systems
specication and spare parts identication.
1. Introduction

2
1. Introduction
1.3 Instructions for use as part of
an ATEX approved system
Gasmaster is approved according to the 94/9/EC
ATEX Directive when used as part of a system with
intrinsically safe gas detectors and I.S. barriers.
Gasmaster has been certied according to
EN60079- 25:2010 Explosive atmospheres -
Intrinsically safe electrical systems. Certicate
reference: Baseefa05Y0090/1 Gasmaster must
be installed in the safe area only, but is certied
for connection to Intrinsically Safe gas detectors
installed in Zone 0, 1 or 2 hazardous areas when
connected by a safety barrier. Installation must be
in accordance with the instructions shown below.

3
Please read this rst
Before commencing the installation and commisioning
of your Gasmaster system, please read through the
following information which will guide you through
the whole process.
The installation instructions contained in this section
are for a pre-congured Gasmaster. For instructions on
installing and commissioning gas and re detectors,
please follow the user manual instructions supplied
with the detectors. Alternatively contact Gas Alarm
Systems for advice.
To complete the installation of your Gasmaster system
you will need to use the Operator panel and Menu. Full
instructions can be found in section III. Operation, you
are advised to familiarise yourself with the operator
buttons on the front panel and the menu structure, see
page 25. Some conguration steps may require you to
enter Supervisor mode. Gas Alarm Systems advises that
personnel familiar with installing and commisioning
gas and re detection systems carry out this part.
If you have purchased a Gasmaster 1
Please follow the instructions in this section but ignore
the reference to additional channels.
If you have purchased a non-congured
Gasmaster 4
Please follow the installation instructions for a pre-
congured Gasmaster 4. Additional information
on setting-up your Gasmaster system can be found in
section III. Operation.
Step-by-step instructions
The installation and commissioning of your Gasmaster
system is presented in easy to follow instructions. A
summary table of contents detailing a typical sequence
of installation steps is shown below. Depending on
your conguration some or part of each step may be
omitted.
Warning:
Gasmaster is not certied for use in hazardous
areas, but may be connected to detectors
and/or alarm devices which are installed in a
hazardous area. Instructions for eld devices
must be closely observed when installing a
Gasmaster system.
2.1 Before installation
2.2 General
2.3 Mounting
2.4 Cabling requirements
2.5 Installing gas and re detectors
2.6 Installing output devices
2.7 Connecting mains power
2.8 Connecting input devices
2.8.1 Two wire 4-20mA devices
2.8.2 Three wire 4-20mA devices
2.8.3 mV bridge pellistor detectors.
2.8.4 Heat/smoke detectors
2.8.5 Environmental Sampling Unit
(ESU)
2.8.6 Flame detectors
2.8.7 Remote inhibit and accept/
reset inputs
2.9 Connecting output devices
2.9.1 Audible visual alarms
2.9.2 Common relay connections
2.9.3 Channel relay connections
2.9.4 Analogue outputs
2.9.5 RS485 communications
2.10 Applying power
2.11 Battery back-up time/power calculations
2.12 Commissioning
2.12.1 Commissioning mV pellistor
detectors
2.12.2 Zero adjustment and calibration
2.12.3 Testing re channels
2.12.4 Testing ESU channels
2. Installation

4
2.1 Before installation
Before carrying out any installation work, ensure that
local regulations and site procedures are followed.
Further advice is available from Gas Alarm Systems if
required.
Gasmaster is intended for use in non hazardous areas.
Gas and re detectors may be mounted in potentially
ammable atmospheres using appropriate barrier
devices where necessary. Check the equipment to be
installed is suitable for the area classication. Please
refer to instrument installation manuals for information
on location.
Gas Alarm Systems recommends the installation of
Gasmaster be carried out by people with experience of
installing electrical equipment in potentially hazardous
areas.
2.2 General
This section describes how to get started with a
Gasmaster 4 or Gasmaster 1 system that has been pre-
congured for the detectors supplied. Figures 2.1, 2.2
and 2.5 show the internal structure of Gasmaster.
See the Specication and Inspection Certicate
provided with your system for full details of its
conguration.
Figure 2.1 shows the internal arrangement of a
Gasmaster system. The front cover ➀is removed
by unscrewing the four screws ➁and carefully
disconnecting the two-pole sounder connector
from the display PCB ➂. The front cover can either
be supported by the case using one of the retaining
screws, or removed completely and placed in a safe
location. Two separate chassis support the display PCB
and batteries which supports the display PCB ➂and
batteries ➃. The terminal PCB ➆contains the input
modules, and all of the input and output terminals. The
display PCB ➂is connected to the terminal PCB ➆via
a 50-way ribbon connector, and is hinged on the left
side so that it can be moved to provide access to the
detector input terminals. Most terminals are accessible
once the display PCB is moved and the batteries are
removed. If necessary the two chassis can be removed
for easier terminal access.
In order to remove the display chassis, the display PCB
ribbon connector must rst be carefully unplugged.
Care should be taken when re-tting the display PCB so
as not to damage the connector or ribbon cable.
Six punched cable gland knock-outs are provided
on the top and bottom of the enclosure. The knock-
outs are suitable for M20, 1/2”NPT or PG13.5 cable
glands. To remove Knock-outs,tap around the edge
of the recessed ange using a small hammer and a
screwdriver. The knocks outs should then come away
from the enclosure
Knock-outs should be removed prior to mounting
Gasmaster and great care must be taken to avoid
damaging internal components.
Power supply
Gasmaster comes tted with an auto-ranging power
supply suitable for 100-240 V ac 50-60 Hz operation.
This provides a nominal 24 V dc supply with a
maximum power of 60 W. Alternatively Gasmaster
can be powered from an external 24 V dc supply, a
maximum 60 W supply is required. Gasmaster must
never be connected to ac and dc supplies at the same
time.
2. Installation

5
The Gasmaster power supply contains no user
replaceable fuses.
Short circuit protection
Each detector input is short-circuit protected. Self-
resetting‘polyfuses’ are tted to the 24 V power supply
which will cut power in the event of a cabling fault,
and automatically reset when the fault is corrected.
Detectors with a maximum consumption of 500 mA
may be connected.
Circuit breaker
If the equipment is permanently connected to a
mains supply then a dedicated circuit breaker must be
included in the installation, to comply with EN 61010-
1. The circuit breaker must be close to Gasmaster, in
easy reach of the operator. It must be marked as the
disconnecting device for the Gasmaster system, and
the ON and OFF positions must be clearly marked.
The circuit breaker must comply with the relevant
requirements of IEC60947-1 and IEC60947-3. The
protective earth must not be disconnected even when
the breaker is activated.
Figure 2.2 Gasmaster chassis plate with display PCB
board and batteries.
2.3 Mounting
All Gasmaster systems should be installed in a safe area.
Consider location, cabling and earthing requirements.
Figure 2.3 provides a dimensional view of Gasmaster.
To access the mounting points, rst remove the front
cover by unscrewing the xings labelled ➁in gure
2.1. Carefully remove the sounder connector from
the display PCB. The cover should be placed in a
secure location. It is recommended that Gasmaster is
positioned by hand in the desired location, and a pencil
used to mark the mounting hole positions. Gasmaster
should be removed before drilling the mounting
holes. Nylon bushes suitable for up to 5mm screws are
tted within the Gasmaster mounting points. Ensure
these bushes are present when mounting as they are
essential to maintain the ingress protection of the
enclosure.
Figure 2.3 Dimensional view of Gasmaster with
mounting holes shown
2.4 Cabling requirements
Cabling to Gasmaster and detectors must be in
accordance with the recognised standards of the
appropriate authority in the country concerned, and
must meet the electrical requirements of the detector.
• Explosion-proof (Exd) devices
Gas Alarm Systems recommends the use of steel wire
armoured (SWA) cable. Suitable explosionproof glands
must be used.
• Intrinsically Safe (I.S.) devices
Gas Alarm Systems recommends the use of twisted
pair cable with overall screen and sheath. Suitable
weatherproof glands must be used. I.S. devices must be
used with a suitable Zener Barrier or Galvanic Isolator
when used in a hazardous area.
2. Installation

6
• Fire detectors
Gas Alarm Systems recommends the use of twisted-pair
cable, screened with an overall protective sheath that
is reproof, for example, Pirelli FP200 or similar. A 1K8
end-of-line resistor must be tted to the last detector
on each conventional smoke or heat detector loop.
Alternative cabling techniques, such as steel conduit,
may be acceptable provided that appropriate
standards are met. The minimum acceptable supply
voltage measured at the detector and the maximum
current drawn by that detector is dierent for each
device. Please refer to the relevant Installation,
Operating and Maintenance Instructions provided
with each detector to calculate the maximum cable
distances allowed for dierent cable types.
The maximum cable distance allowed is dependent
upon the installation, for example, whether Zener
Barriers or Galvanic Isolators are required (for I.S.
devices) or not.
When calculating maximum cable distances for
detectors, assume a minimum supply of 19 V and
a sense resistance of 98 Ω (39 Ω for convential re
channels).
Table 1: Typical cable characteristics
c.s.a (mm2)* Resistance (Ω per km)
Cable Loop
0.5 (20) 39.0 78.0
1.0 (17) 18.1 36.2
1.5 (15) 12.1 24.2
2.5 (13) 8.0 16.0
*Approximate c.s.a. in awg given in brackets.
Cable lengths should be calculated according to the
equations dened in the detector instructions sheet
and the cable and Gasmaster characteristics specied
above.
There are a number of suitable ways of terminating
cables and glands to Gasmaster dependant on the
cable and gland type:
– Steel wire-armoured (SWA) cable and glands with
electrical termination of the armour to the enclosure
via the gland.
– Screened cable with the screen terminated inside the
enclosure via a metal tag attached to the gland.
– Screened cable using an EMC gland where the screen
is terminated to the enclosure via the gland.
– For detectors, 4-20 mA outputs and RS- 485
terminations: screened cable where the screen is
connected to the SCR terminal on the appropriate
terminal strip.
2.5 Installing gas and re detectors
Install gas and re detectors as per instrument
installation manuals, paying attention to location and
cabling requirements. For ESU devices please refer to
installation manual provided.
2.6 Installing output devices
Gasmaster can drive 12 V dc or 24 V dc audible visual
alarms directly via the Audible Visual drive terminals
on the terminal PCB. Relays are provided for switching
additional outputs, and 12 V dc or 24 V dc 200 mA
auxiliary supplies are available adjacent to each
block of relay terminals for switching low power
devices. Section 2.9 provides detailed information on
connections to output devices.
2.7 Connecting mains power
Connect the external power supply using the two part
screw terminals, refer to Figures 2.4 and 2.5.
Gasmaster must be earthed either at the power
connector earth terminal (see Figure 2.4) or using the
stud on top of the enclosure.
Figure 2.4 Mains connection terminals on terminal PCB
2. Installation

7
2.8 Connecting input devices
Gasmaster may be tted with between one and four
input modules (one only for Gasmaster 1) of the
following types:
• 4-20mA/Fire module for 4-20mA type detectors,
conventional smoke/heat detectors or ESU.
• mV Pellistor module for mV bridge type ammable
gas detectors.
Details of hardware congurations and link settings can
be found in section 2.8.1 to 2.8.6.
4-20 mA Inputs
Gasmaster provides analogue 4-20 mA inputs with a
sensor supply voltage of 19 to 28 V dc and measures the
signal across a 98 Ω sense resistor.
Inputs can be gas detectors or ame detectors in 4-20
mA 2-wire sink, or 3-wire sink or source congurations.
Gasmaster will track inputs from 3 to 21.5 mA at which
point an ‘over-range’ fault will be indicated. Connection
details are shown in section 2.8.1 and 2.8.2.
2. Installation

8
Conventional re detectors
A loop of up to 20 conventional smoke/heat detectors
(for example Apollo Series 65 or Orbis devices’) can
be connected to each Gasmaster input channel.
A re loop can also comprise switched devices such as
manual alarm call points or ame detectors, and devices
can be mixed on the same loop provided electrical
characteristics are compatible and re regulations allow.
Switched devices require a 470 Ω series resistor. Each re
loop must be terminated with a 1K8 end-of-line resistor,
which is monitored to provide indication of open circuit
or short circuit faults. Connection details are shown in
section 2.8.3.
Environmental Sampling Unit (ESU)
Each Gasmaster input can monitor a Gas Alarm Systems
Environmental Sampling Unit (ESU), which enables
detection of ammable or toxic gases over a wide area
using a sample draw technique. It is essential that the
sampling device on the ESU is operating correctly, and
Gasmaster provides this monitoring function to ensure
a sample is being drawn. Gasmaster provides a 2-wire 24
V dc supply to the sampling device. Separate Gasmaster
input channels are required to monitor the gas detector
or detectors tted to the ESU. Connection details are
shown in section 2.8.5.
mV bridge pellistor detectors
Some ammable gas detectors provide a mV bridge
type signal rather than a 4-20mA signal. Example Gas
Alarm Systems products are Xgard Type 3 and Xgard
Type 4. The procedure for setting-up these detectors is
dierent from 4-20mA devices: refer to section 2.12.1 for
detailed instructions on commissioning mV bridge type
detectors
Please contact Gas Alarm Systems for specic wiring
details for Gas Alarm Systems detectors
2.8.1. Two wire 4-20mA devices
Figure 2.6 shows a typical wiring conguration for a
2-wire current sink detector for safe area use only.
Figures 2.7 and 2.8 show typical wiring congurations
for I.S. detectors installed in hazardous areas using Zener
Barriers or Galvanic isolators. Refer also to section 1.3.
Set the link on the 4-20 mA/Fire input module to SINK
in all cases.
Figure 2.6 Connections for 2 wire detector 4-20mA/Fire
input module
Figures 2.7 and 2.8 show typical wiring congurations for
a 2 wire sink I.S.detector with Zener barrier or Galvanic
Isolator. Set the link for the appropriate channel as
shown in each diagram.
2.8.2. Three wire 4-20mA devices
Figure 2.9 shows a typical wiring conguration for a
3-wire detector. Set the link on the 4-20 mA/ Fire input
module to SOURCE for a current source detector, and
SINK for a detector congured as current sink.
Figure 2.9 Connections for 3 wire detector 4-20mA/Fire
input module
2.8.3. mV bridge pellistor detectors.
Detectors such as Gas Alarm Systems’s Xgard Type 3 or
4 should be connected as shown. Refer to section 2.12.1
for instructions on detector set-up.
Refer to Figure 5.1 on page 37 for wiring details.
Important: to avoid signal interference, it is essential
that detector cables do not lay over mV pellistor input
modules (hatched area on diagram).
2. Installation

9
2. Installation

10
2.8.4. Heat/smoke detectors
Conventional re detectors for safe area use should be
setup according to Figures 2.10 and 2.11. Conventional
re detectors for hazardous area use should be setup
according to Figure 2.12.
Figure 2.11 shows connections for manual alarm call
points.
2.8.5. Environmental Sampling Unit
(ESU)
Figure 2.13 shows the wiring conguration for
monitoring the ESU sampling device. Gas detectors
tted to the ESU should be cabled separately to the
appropriate input channels on the Gasmaster or other
control panel. For connections, details are shown on
the instructions provided with the ESU.
2.8.6. Flame detectors
Figure 2.14 shows a typical wiring conguration for a
4-20 mA 3 wire Flame detector. Set the detector type
link appropriate for the type of ame detector, refer to
Figure 2.5. Do not set link to FIRE.
2.8.7. Remote inhibit and accept/reset
inputs
Gasmaster has inputs for the connection of remote
switches to inhibit alarm outputs or accept and reset
alarms. Inputs are activated when pulled down to 0 V,
the open circuit voltage is 5 V dc.
2. Installation

11
Warning
Gas Alarm Systems strongly recommends that remote
inhibit switches be key operated only, and that
access to the key should be restricted to authorised
personnel. A Gasmaster system that has been inhibited
without other safety precautions being in place may
not provide the protection for which it was designed.
Steps should be taken to ensure that all appropriate
personnel are aware when a Gasmaster system is
inhibited.
Remote ACCEPT/RESET
Close the contact momentarily to accept alarms and
cancel audible alarms. Close the contact again when
the hazard is cleared to reset alarms.
Remote INHIBIT
Closing the contact will inhibit alarms on all input
channels. Channels will remain inhibited until the
contact is opened; the Gasmaster will then return
to its original state (any channels that have been
set to inhibit using the Supervisor menu will remain
inhibited). Figure 2.15 shows wiring congurations for
remote inputs.
Gas Alarm Systems recommends screened cables for
connecting remote switches. The screen should be
terminated at the appropriate‘SCR’ terminal.
2.9 Connecting output devices
WARNING: After accounting for internal power
consumption, the maximum power available for input
and output devices is 48 W
2.9.1. Audible visual alarms
Figure 2.16 shows a typical wiring diagram for audible
& visual (A/V) alarms, in this example a two-tone
sounder is depicted. The A/V drive from Gasmaster is
capable of providing up to 650mA, which equates to
two general purpose A/V alarm devices using xenon
type beacons. A greater number of LED-based beacons
may be powered; contact Gas Alarm Systems for
advice. Gasmaster is compatible with 12 V dc or 24 V dc
A/V alarms: refer to Figure 2.16 for link settings.
Gasmaster is compatible with A/V alarms which require
a common 0V supply (+VE switched), or a common
+VE DC supply (0V or ‘-VE’switched). Connect the A/V
device to the‘AV +VE SWITCHING’or ‘AV -VE SWITCHING’
terminals as appropriate.
Two separate sounder outputs are provided to activate
on level 1 and level 2 alarms respectively (terminal
AV2 becomes active on alarm level 1; AV3 becomes
active on alarm level 2). If a single tone sounder is
used, connections should be to terminal AV2 (and the
common terminal) only. T
erminal AV1 is intended to drive a visual alarm and
activates on a level 1 alarm.
2.9.2. Common relay connections
Double-Pole-Change-Over (DPCO) relays with contact
rating of 250 V ac 8 A (non-inductive), 5 A (inductive)
are provided for Alarm 1, Alarm 2 and Fault. Each relay
can be set in its non-active state as energised (Fail safe)
or de-energised. It is common practice to set the Fault
relay as Fail Safe so in the event of power loss, the fault
relay will change state. See Figure 2.5 for Common
Relay terminal location and Figure 2.17 for contact
denitions. Terminals are tted adjacent to all relay
blocks to provide 12 V or 24 V dc supplies for switching
low power devices. The dc auxiliary output terminals
may be set to either 12 V dc or 24 V dc by moving the ‘V
AV’ link. Refer to Figure 2.5 on page 7 for details.
2. Installation

12
Common Alarm and Fault relay congurations can be
set using the User Control Panel and Menu System. See
Section 3 “Operation” on page 17 for details.
2.9.3. Channel relay connections
Gasmaster 4 provides Double-Pole-Change-Over
(DPCO) relays for each channel. The relays provide
a contact rating of 250 V ac 8 A (non-inductive), 5 A
(inductive) for Alarm 1 and Alarm 2. Each relay can be
set in its non-active state as energised (Fail safe) or de-
energised. Refer to Figure 2.5 for location of Channel
Relay terminals and Figure 2.17 for contact denitions.
Terminals are tted adjacent to all relay blocks to
provide 12 V or 24 V dc supplies for switching low
power devices. The dc auxiliary output terminals may
be set to either 12 V dc or 24 V dc by moving the ‘V AV’
link. Refer to Figure 2.5 on page 7 for details Channel
Alarm thresholds and congurations can be set using
the User Control Panel and Menu System. See Section
“3. Operation” on page 17 for details.
Fire Channels
Conventional re channels will activate both Alarm
1 and Alarm 2 relays on the aected channel in the
event of an alarm. The Common Alarm 2 relay only
will activate. 4-20 mA ame detectors will activate two
levels of alarm as per a gas detector.
ESU Channels
If the ESU sampling device slows signicantly causing
reduced sample ow the Alarm 1 relay for that channel
will activate. If the sampling device stops the Alarm 2
relay will activate. The Common Alarm relays will not
activate if the sampling device slows or stops. If the
cable to the sampling device is open or short-circuited
the Common Fault relay will activate.
2.9.4. Analogue outputs
Gasmaster provides an analogue output for each
channel which can be set as either 4-20 mA or 1-5
V dc by tting a link (see Figure 2.18). These signals
can be used to drive PLC/DCS/SCADA systems or
remote displays. 4-20 mA outputs are current source
(resolution 0.1 mA) and can drive a maximum load of
700 Ω, 1-5 V outputs require a minimum load of 50 KΩ.
Analogue outputs will function in the following way:
4-20 mA gas detectors: the output will track the input
from 3 to 21.5 mA, the signal will drop to 0 mA if the
input rises above 21.5 mA to signal a fault. A sensor
signal that is greater than 110% of range is designated
by Gasmaster as a fault condition. The signal will be set
to 2 mA to indicate when a channel is inhibited, and 0
mA when a channel is in fault.
Fire channels: a signal of between 4 and 12 mA
indicates a‘no-re’ condition, 12-20 mA indicates a re,
0mA indicates a fault (open or short circuit). A 2 mA
signal indicates that a channel is inhibited.
ESU channels: a signal of between 4 and 12 mA
indicates the sampling device is operating correctly,
12-20 mA indicates a sampling device failure, 0 mA
indicates a fault (open or short circuit). A 2 mA signal
indicates that a channel is inhibited.
2. Installation

13
2.9.5. RS-485 communications
Gasmaster can provide alarm and system information
to PLC/DCS/SCADA systems via a two-wire link using
the Modbus RTU protocol (9600 baud, 8 data bits, no
parity, 1 or 2 stop bits). Up to 16 Gasmaster systems
can be ‘multi-dropped’ on a single two-wire link with a
maximum cable length of 1 Km, two-core twisted pair
cable is recommended. Single Gasmaster systems that
are to communicate via the RS-485 link should have the
RS485 TERM link made, which connects a terminating
resistor. For multi-dropped systems the RS485 TERM
link should be removed from all Gasmasters except the
last unit on the line.
A Modbus specication document is available from Gas
Alarm Systems on request.
The RS-485 terminals on Gasmaster systems ordered
with the optional local communications connector will
be used for terminating the connector leads. These
leads must be removed if a remote RS-485 serial link is
required.
2.10 Applying power
Before applying power ensure that any control
or shutdown systems to which the Gasmaster is
connected are inhibited. Once all eld cables have
been installed, the batteries can be connected as
per the diagram attached to the chassis plate. (Refer
to section 4.4.) Gasmaster will not power up until an
external power supply is applied.
Apply power to Gasmaster from either the AC or 24 V
dc external supplies. Outputs are inhibited for a preset
time after power-up, and the system will perform a
start up sequence testing alarm indicators and the
internal sounder. If after a settling period faults are
reported, check the sensor connections again or refer
to“Faults menu”on page 24.
When power is applied the green Power LED will
illuminate and ash every 5 seconds to indicate that
the system is operational.
If the external supply fails, Gasmaster will continue to
operate from its internal batteries and the Power LED
will ash every second. Depending on conguration,
Gasmaster will display either a Warning (Warning LED
lights and the sounder will beep every 5 seconds) or a
fault (the Fault LED and sounder will activate, and the
fault relay will change state).
Gasmaster should display all channels being
monitored. Allow sensors to settle before commencing
calibration, refer to sensor instructions supplied with
detectors for recommended settling times.
Note: your Gasmaster is supplied pre-congured, refer
to the Specication and Inspection Certicate provided
with your system. If no channels are congured,
Gasmaster will display the following screen:
To congure your system go to page 25.
2.11 Battery back-up times
Gasmaster is tted with 1.2 Ah batteries to provide
continued operation in the event of a power loss.
Examples of typical back-up times are provided
below for a system in a non-alarm state, relays set as
de-energised and with the 4-20mA outputs unused
(system current consumption without detectors is
approximately 50mA):
2. Installation

14
Gasmaster 1
with a toxic gas detector (2-wire): 21 hours
Gasmaster 1
with an oxygen detector (2-wire): 16 hours
Gasmaster 1
with a mV pellistor ammable gas detector:
12 hours
Gasmaster 4
with four toxic gas detectors (2-wire):
10 hours
Gasmaster 4
with four oxygen detectors (2-wire): 4 hours
Gasmaster 4
with four mV pellistor ammable gas
detectors: 3 hours
Gasmaster incorporates protection to prevent
the internal batteries being damaged by being
deeply discharged. When operating from internal
batteries, Gasmaster will display a “Warning -
battery low” fault message when the battery
voltage drops to 22 V. When the voltage drops
to approximately 20 V, the batteries will be
automatically disconnected. The batteries will only be
re-connected when the external power supply is
re-instated, and will take approximately 18 hours
to fully re-charge.
Note: The internal batteries may not be charged
eciently when Gasmaster is powered from an
external dc supply, and therefore the back-up
function may not work if the external supply fails
Please contact Gas Alarm Systems for further advice.
2.12 Commissioning
Note: it is strongly recommended that persons
intending to commission a Gasmaster system rst
read and understand the Operating instructions
provided in section III. Operation.
When all eld devices have been connected and
powered-up, commissioning can commence. Gas
detectors should be calibrated according to their
instructions, re detectors should be tested using
appropriate tools.
Alarms should be simulated and actions noted to
ensure that the system operates as intended. All
warning devices should be checked, and interfaces
with auxiliary equipment should also be veried. The
test and View menu’s are provided for this purpose (see
page 24 on page 27.
2.12.1. Commissioning mV pellistor
detectors
It is essential for these types of detectors that the
correct ‘head voltage’ and balance is set before
attempting to zero and calibrate the sensor.
To set the head voltage, measure the voltage across the
‘+’ and‘-‘ terminals at the detector and adjust the ‘HEAD
VOLTAGE’ potentiometer on the appropriate Gasmaster
input module. Check the detector instructions for
voltage settings: 2 V dc is typical for an Xgard Type 3 or
4 detector.
Allow the sensor to warm-up for 1 hour and then adjust
the amplier balance as follows: connect a meter set
in the dc mV range to test-points TP12 and TP13 on
the Gasmaster mV pellistor input module. Adjust the
‘BALANCE’ potentiometer until the meter reads‘300
m V ’.
The sensor is now ready for zeroing (having rst
checked no ammable gas is present) and calibration.
2.12.2. Zero adjustment and calibration
Calibration must be carried out separately on individual
gas detectors on Gasmaster. Follow calibration
instructions supplied with each detector. Ensure at all
times the local legislation and codes of practice are
complied with.
Allow detectors to stabilise for at least one hour before
commencing calibration. Refer to detector manual for
more information.
Gasmaster provides Zero and Calibration Wizards to
enable you to carry out calibration easily. These are
accessed through the Operator Display Panel and
Menu System. Section III. Operation provides detailed
information on the menu structure and operator
buttons.
Zero adjustment
1. From the normal operating display, press the
Continue button to enter the menu system.
2. Use the Up and Down buttons as necessary to
select Supervisor and press Continue .
2. Installation

15
3. You will be asked to enter a password, press
Continue .
The default password is ZZZ (uppercase), use the Up
and Down buttons to enter the rst character
of the password.
Note: Double click the Up or Down button to
move to the top or bottom of the alphabet list. To
enter numbers or lower case characters, continue
pressing the Up or Down button.
When you have selected the correct character,
press Continue , the cursor will move to the next
character position. Continue entering the rest of
the password. When you have nished press the
Continue button twice.
(See 3.7 in section III. Operation for details of
entering text strings).
4. The Zero Wizard oers temporary Inhibit but
you may wish to Inhibit all channels during the
calibration process.
How to set global inhibit:
From the Supervisor menu, scroll down to Inhibit
and press Continue . Select All and press Continue
. Use the Up and Down button to set inhibit
to INHIBIT=ON, press Continue to accept. Use
the Back button to return to the Supervisor
menu. The Inhibit icons will appear on the channel
display.
How to set channel inhibit:
Channel inhibit can be selected from the Inhibit
menu or within the Zero or Calibrate menu.
Follow the instructions provided above, selecting
the Channel #n (where n represents the channel
number) in place of All.
5. From the Supervisor menu, use the Up and Down
buttons to select Zero by pressing the Continue
button .
6. Select the channel to apply zero. Press the Continue
button to step through the Zero Wizard.
7. Press Continue when ‘…Only continue if in clean
air!…’is displayed, ensure the detector has been
correctly zeroed rst (i.e. 4 mA) Press Continue to
apply Zero now.
Gasmaster will display‘Pass’ when zero is successful
or ‘Fail’ if the detector zero is out of range.
8. Use the Continue button to Zero other channels
or Back button to the Supervisor menu to continue
calibration.
Calibration
1. Follow points 1 to 3 above in Zero adjustment to
enter Supervisor mode.
2. Before you commence calibration, ensure the
channels are inhibited prior to applying gas.
Channels can be inhibited globally or individually.
Follow the instructions given in step 4 in Zero
Adjustment.
3. From Supervisor menu, scroll down and select
Calibrate.
4. Select the channel to calibrate. Press the Continue
button to step through the Calibrate Wizard.
Ensure the channels are inhibited prior to applying
gas.
5. The next wizard screen displays the default
calibration gas concentration as 50% of range. If
necessary this calibration gure must be adjusted to
match the concentration of the calibration gas used.
Adjust the value using the Up or Downbuttons
as necessary and press Continue .
6. When“Apply Gas”is displayed, apply gas to the
detector and press Continue , allow readings to
settle.
7. Press Continue when the reading on the appropriate
channel is stable, and the detector has been
calibrated according to its instructions.
Gasmaster will display ‘Pass’ when successful or
‘Fail’ if the detector signal is out of range.
8. Calibration is complete when ‘Purge’ is displayed,
remove the gas from the detector.
Use the Continue button to calibrate another
channel or Back button to exit Supervisor mode
and return to the main display.
9. Ensure that all channel inhibits are removed after
calibration is complete.
2. Installation

16
2.12.3. Testing re channels
To test smoke detectors, inhibit the relevant FIRE
channel and use a smoke test aerosol to test each
detector on a loop in turn. The channel display will
indicate FirE when the detector activates.
Each detector on a loop should be reset before testing
the next to ensure that all detectors activate the alarm.
Heat detectors can be tested with a heat-gun using
the same method as described above.
Flame detectors can either provide a signal using
contacts, or a 4-20 mA signal.
A contact type detector will be connected as a
conventional re loop using 470 Ω series resistors
and a 1K8 end of line resistor and will only indicate
FIRE or FAULT. A 4-20 mA detector will be connected
directly as a 4-20 input, and may have various alarm
levels to indicate UV or IR activation (please refer to
the instructions supplied with the device for details).
Flame detectors require a UV or IR torch (depending on
detector type) to simulate alarms. Inhibit the relevant
channel, shine the torch at the detector and check that
FIRE is shown on the Gasmaster display. For 4-20 mA
detectors, also check that the appropriate alarm level is
displayed.
2.12.4. Testing ESU channels
To test a channel monitoring an ESU sampling device,
inhibit the channel and manually slow the device,
check that Alarm Level 1 is activated.
Manually stop the device and check that Alarm Level 2
is activated. If the alarms do not activate the thresholds
may need changing, refer to section 3.10 for details on
how to change alarm levels.
When commissioning is complete ensure that the
system is left fully functional with no faults present
and no channels inhibited.
2. Installation

17
Every Gasmaster system is pre-congured by Gas
Alarm Systems, please refer to the Specication and
Inspection Certicate provided with the product
for conguration details. This section describes the
operation of pre-congured units, and includes
procedures for altering settings.
3.1 Gasmaster Operator Panel
The Operator Panel allows you to communicate
with Gasmaster. Use it to monitor the status of all
attached eld devices, determine system settings and
conguration of eld devices. Figure 3.1 shows the
Operator Panel and typical display under normal, non-
alarm monitoring conditions.
Gasmaster Display
The User display provides continuous readings for up
to 4 eld devices plus a display area for user messages
and channel number summary. Gasmaster 1 provides
display for one eld device plus the message area.
Message display area
In normal, non-alarm condition, the message area
displays the channel numbers and detector types, e.g.
CH4 refers to methane detector, see following example.
The # symbol represents the channel number (i.e. #1 is
channel 1).
In the event of an alarm, this message area will display
the channels in alarm and their location. See section 3.8
for more information on alarm conditions.
In the case of a fault (or warning), brief details of
the fault will be displayed. See section 3.9 for more
information on fault conditions. Detailed fault and
warning messages can be found in section 3.10.
Note: User messages longer then sixteen characters are
displayed as scrolling text. If fault and alarm conditions
are present at the same time, alarm messages take
priority.
Channel display area
Gasmaster 4 has a large clear display which shows all
gas levels simultaneously. Gasmaster 1 has a display
for one gas level only, see gure 3.2. The image below
shows details of the channel display area and icons that
are used on Gasmaster.
3. Operation
This manual suits for next models
2
Table of contents
Popular Control Panel manuals by other brands

Bentel
Bentel Omnia installation manual
Controls
Controls XE-9501-AS product manual

Panasonic
Panasonic AK-HRP1005G Operation guide
Chamberlain
Chamberlain LiftMaster CB11 Instructions and electrical set up

Aprilaire
Aprilaire Zoned Comfort Control 6203 Safety & installation instructions

Honeywell
Honeywell THOR VM1 instruction manual
VESTEL
VESTEL NF COMBI 5661 ELECTRONIC IMD Customer support information
Danfoss
Danfoss TS715Si installation guide

QOLSYS
QOLSYS IQ PANEL installation manual

Soundoff Signal
Soundoff Signal ENGSCP7141 quick start guide
Panasonic
Panasonic AV-HS60C3G operating instructions

Helo
Helo WE-50 User and installation manual
