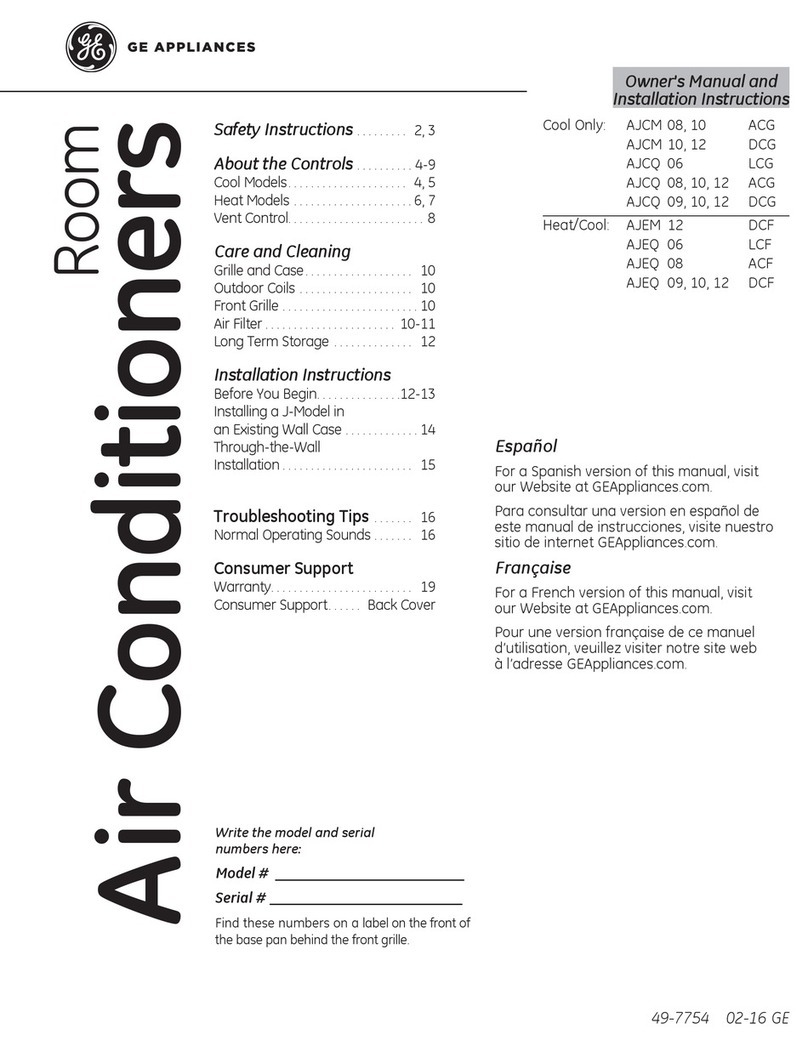
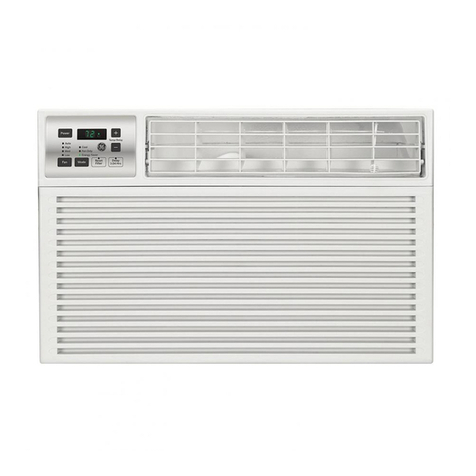
GE AEM10ASQ1 Operating instructions

GEAppliances.com
0_
-0
Safety Instructions ............. 2,3
Operating Instructions .......... 4-6
Care and Cleaning
Air Filter ............................. 6
Outdoor Coils ........................ 6
Installation Instructions ...... 7- to
Troubleshooting Tips ........... 11
Normal Operating Sounds ........... 11
Consumer Support
Consumer Support .......... Back Cover
Warranty ......................... 12
*ENERGYSTAR®labeled product
I
AEMIO*
AEM12*
Climutiseur
La section fran¢aise commence 8 la page 13
Acondicionador
de aire
Lo secci6n en espahol empieza en la pdgina 27
®
ENERGYSTAR
As an ENERGYSTAR®partner, GEhas
determined that this product meets
the ENERGYSTAR®guidelines for
energy efficiency.
Write the model and serial numbers here:
Model #
Serial #
Find these numbers on u label on the side of
the air conditioner.
49-7718 09-15 GE

IMPORTANT SAFETY INFORMATION.
READ ALL INSTRUCTIONS BEFORE USING.
AWARNING!
Foryour safety, the information in this manual must be followed to minimize the risk of fire, electric
shock or personal injury.
SAFETYPRECAUTIONS
Use this appliance only for its intended
purpose as described in this Owner's
Hanual.
This air conditioner must be properly
installed in accordance with the Installation
Instructions before it is used.
Never unplug your air conditioner by pulling
on the power cord. Always grip plug firmly
and pull straight out from the receptacle.
Replace immediately all electric service
cords that have become frayed or otherwise
damaged. A damaged power supply cord
must be replaced with a new power supply
cord obtained from the manufacturer and
not repaired. Do not use a cord that shows
cracks or abrasion damage along its length
or at either the plug or connector end.
Turn the unit OFFand unplug your air
conditioner before cleaning.
GEdoes not support any servicing of the
air conditioner. We strongly recommend
that you do not attempt to service the air
conditioner yourself.
For your safety...do not store or use
combustible materials, gasoline or other
flammable vapors or liquids in the vicinity
of this or any other appliance.
All air conditioners contain refrigerants,
which under federal law must be removed
prior to product disposal. If you are getting
rid of an old product with refrigerants, check
with the company handling disposal about
what to do.
If the receptacle does not match the plug,
the receptacle must be changed out by a
qualified electrician.
These R410A air conditioning systems
require contractors and technicians to
use tools, equipment and safety standards
approved for use with this refrigerant.
DO NOT use equipment certified for
R22 refrigerant only.
2
HOW TO CONNECT ELECTRICITY
Do not, under any circumstances, cut or remove
the third (ground) prong from the power cord.
For personal safety, this appliance must be
properly grounded.
DO NOT use an adapter plug with this
appliance.
The power cord of this appliance is equipped
with a 3-prong (grounding) plug which mates
with a standard 3-prong (grounding) wall outlet
to minimize the possibility of electric shock
hazard from this appliance.
Power cord includes a current interrupter device.
A test and reset button is provided on the plug
case. The device should be tested on a periodic
basis by first pressing the TESTbutton and
then the RESETbutton while plugged into the
outlet. If the TESTbutton does not trip or if the
RESETbutton will not stay engaged, discontinue
use of the air conditioner and contact a qualified
service technician.
Have the wall outlet and circuit checked by
a qualified electrician to make sure the outlet
is properly grounded.
Where a 2-prong wall outlet is encountered,
it isyour personal responsibility and obligation to
have it replaced with a properly grounded
3-prong wall outlet.
The air conditioner should always be plugged
into its own individual electrical outlet which has
a voltage rating that matches the rating plate.
This provides the best performance and also
prevents overloading house wiring circuits which
could cause a fire hazard from overheated wires.
See the Installation Instructions, Electrical
Requirements section for specific electrical
connection requirements.

AWARNING!
USEOF EXTENSION CORDS
RISK OF FIRE. Could cause serious injury or
death.
,, DO NOT use an extension cord with this
Window Air Conditioner.
,, DO NOT use surge protectors or multi-outlet
adaptors with this Window Air Conditioner.
GEAppliances.com
READANDFOLLOWTHISSAFETYINFORMATIONCAREFULLY.
SAVETHESEINSTRUCTIONS

About the controls on the air conditioner.
Features and appearance will vary.
Lights next to the touch pads on the air conditioner control panel indicate the selected settings.
Light indicates the unit is in the
temperature or delay time Set mode. Dght indicates the
delay timer Jsset.
I
[] Auto
[] High [] Cool
[] l'4ed [] Fan Only
[] Low [] Energy Saver
0 0
NOTE: The display always shows the room temperature except
when setting the Set temperature or the Delay timer.
Air Conditioner Controls
Delay 1-24hr
Delay timer _Delay
timer
Increase
Decrease W I
iVlodeseleet _---_j_ __ AutoFanon
Fan speed _ I /_ _ _x I_
Decrease _ I q_ __ IncreaseFanspeed
Temperature _ I ,,_---_ I _ Unit power
set Increase _ _ on/off
and Decrease
Remote Control
4
Controls
Power Pad
Turnsair conditioner on and off.When
turned on,the display will show the room
temperature.
Display
Shows the room temperature or time remaining
on the Delay timer. Showsthe Set temperature
while setting the temperature in Cool or Energy
Saver modes.TheSetlight will turn on while
setting.
Temp Increase A/Decrease T Pads
Useto set temperature when in Coolor
Energy Saver mode. TheSet lightwill turn on
while setting.
Delay Timer Increase A(+)/Decrease
T(-1Pads
Eachtouch of the Increase A/ Decrease T
pads on the unit or the Increase +/ Decrease
- pads on the remote control will set the delay
time when using the Delay 1-24hr timer.The
Setlight will turn on while setting.
Fan Speed Pads
Useto set the fan speedto Law, Meal,High
or Auto on the unit. NOTE:On the remote
control, usethe fan speed Increase +/
Decrease - padsto set the fan speedsto Low,
Med or High. Usethe Auto pad to turn Auto
fan on.
Mode Pad
Useto set the air conditioner to Cool Energy
Saver or Fan Only mode.
Delay Pads/Delay 1-24hr Pad
Delay ON--When the air conditioner isoff, it can
be set to automatically come on in i to 24 hours
at its previous mode and fan settings.
Delay OFF--When the air conditioner ison,
it can be setto automatically turn off in i to
24 hours.
How to set:
Pressthe Delay 1-24hr pad on the unit or the
Delaypad on the remote control. Eachtouch
of the Increase A/ DecreaseT pads on the
unit or the Increase +/ Decrease - pads on
the remote control will set the timer in 1-hour
intervals.TheSet light will turn on while setting.
Toreview the remaining time on the Delay
1-24hr timer, pressthe Delay 1-24hr pad on
the unit or the Delaypad on the remote control.
Usethe Increase A/ Decrease _' pads on the
unit or the Increase +/ Decrease - pads on the
remote control to set a new time if desired.
To cancel the timer, pressthe Delay 1-24hr pad
until the light on the Delay :L-24hrpad goesoff.
Reset Filter
LEDwill turn on when fan has accumulated 250
hours of run time as a reminder to clean filter.
PressResetFilter to turn off the LEDand reset
the accumulated run time.
Note: The default temperature reading on the display isdegree Fahrenheit (°F). Tochange the display to
degree Celcius (°C),press the Temp Increase A and Temp Decrease _' buttons together and hold for 3
seconds. Repeat the process to change back to degree Fahrenheit (°F)

GEAppliances.com
Do Not Operatein FreezingOutdoor Conditions
Thiscool-only air conditioner was not designed for
freezing outdoor conditions. It must not be usedin
freezing outdoor conditions.
Remote Control
, Toensure proper operation, aim the remote
control at the signal receiver on the air
conditioner.
, ivlakesure nothing isbetween the air conditioner
and the remote control that could block the
signal.
, Theremote control signal has u rangeof
up to 20 feet.
, Make sure batteries are fresh and installed
correctly us indicated on the remote control.
, Remotecontains u magnet allowing it to attach
to metal surfaces.
Cool Mode
Usethe Cool mode at Low, Meal,High or Auto Fan
Speedfor cooling. Usethe Temperature Increase A
/ Decrease • padsto set the desiredtemperature
between 64% and 86°F in I°F increments.
An electronicthermostat isusedto maintain the room
temperature. Thecompressorwill cycleon
and off to keepthe room at the set levelof comfort.
Setthe thermostat at u lower number and the indoor
air will become cooler.Setthe thermostat at u higher
number and the indoor air will become warmer.
NOTE:If theair conditioner isoff and is then turned on
while set to aCool setting or if turned from afan
setting to a Cool setting,it may take approximately
5 minutes for the compressor to start and coolingto
begin.
Cooling Descriptions
For Normal Cooling-Select the Cool mode and
High or Med fan with a middle set temperature.
For Maximum Cooling-Select the Cool mode
and High fan with a lower set temperature.
For Quieter and Nighttime Cooling-Select the
Cool mode and Low fun with a middle set
temperature.
Energy Saver Mode
This mode optimizes the cooling power of your air
conditioner, thereby saving you energy. Once the
set point temperature has been reached, the fan
will cycle off to save energy. Thefan will cycle back
on periodically to insure all cooling capacity in the
system isused.This mode isthe default mode for the
unit. Eachtime the unit ispowered off, it will restart
in Energy Saver mode ON.This includes Delay timer
mode. Thefirst time the unit isturned on,the settings
will be 70°and Low fan. You can adjust the fan
speed and temperature to your personal comfort.
Energy Saver ON--Helps minimize electricity use.
It is normal for the fan to cycle off and then back
on in this mode. This on/off cycle can repeat
multiple times. Because the fan will cycle off, you
may notice a variation in room temperature and
humidity.
Energy Saver OFF--Whenthis mode is not engaged,
the fan will run continuously, and in Cool mode the
compressor will cycle on and off to maintain room
temperature.
Fan Only Mode
Usethe FanOnly Modeat Low, Medor Highfan
speedto provide air circulation and filtering without
cooling. Sincefan-only settings do not provide
cooling, a Settemperature cannot be entered.The
room temperature will appear in the display.
NOTE:Auto FanSpeedcannot be usedwhen in the
Fan Only Mode.
Auto Fan Speed
Setto Auto fan speedfor the fan speedto
automatically set to the speedneeded to provide
optimum comfort settings with the set temperature.
If the room needsmore cooling, the fan speed
will automatically increase.If the room needs less
cooling, the fan speedwill automatically decrease.
NOTE:Auto FanSpeedcannot be usedwhen in the
Fan Only Mode.
Power Outage Recovery Feature
Inthe case of a power outage or interruption, the
unit will automatically restart in the settings last
used after the power isrestored. Ifthe Delay 1-24hr
feature was set,it will resume countdown. You may
need to set a new time if desired.
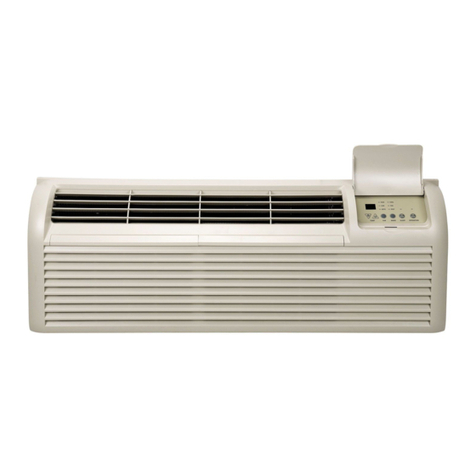
About the controls onthe air conditioner
Additional important information.
Air Direction
Usethe leverto adjust the air direction left and right
only.
Care and cleaning of the air conditioner.
Grille and Case
Turn the air conditioner off and remove the plug from Toclean, usewater and a mild detergent. Do not use
the wall outlet before cleaning, bleachor abrasives.
Air Filter
Theair filter behind the front grille should be checked
and cleaned at least every 30 days or
more often if necessary.
To remove:
Open the inlet grille by pulling downward on the tabs
at the top upper corners ofthe inlet grille until the
grille is in a 450position. Removethe filter.
Cleanthe filter with warm, soapy water. Rinseand let
the filter dry before replacing it. Donot cleanthe filter
in a dishwasher.
A CAUTION: DoNOroperatetheair
conditioner without a filter because dirt and lint will
clog it and reduce performance.
Tab Tab
Outdoor Coils
Thecoils on the outdoor sideof the air conditioner
should be checked regularly. Ifthey are clogged with
dirt or soot,they may be professionallycleaned.
6
How to Insert the Batteries in the Remote Control
-] emove the battery cover by sliding it according
to the arrow direction.
[2-2-] Insertnew batteries, making sure that the (+)
and (-) of battery are installed correctly.
[-3] Reuttuchthe cover by slidingit back
into position.
NOTES:
, Use2 "AAA"(1.5volt) alkaline batteries. Do not
use rechargeable batteries.
, Removethe batteriesfrom the remote control if
the system isnot going to be usedfor a long time.
, Donot mix old and new batteries. Donot mix
alkaline,standard (carbon-zinc)or rechargeable
(ni-cad,ni-mh, etc) batteries.

Installation
Instructions Air Conditioner
BEFORE YOU BEGIN
Read these instructions completely
and carefully.
. IMPORTANT - Savetheseinstructions
for local inspector's use.
. IMPORTANT - Observeallgoverning
codes and ordinances.
, Note to Installer- Be sure to leave these
instructions with the Consumer.
, Note to Consumer - Keep these instructions for
future reference.
• Skill level - Installation of this appliance requires
basic mechanical skills.
, Completion time - Approximately i hour
, We recommend that two people install
this product.
. Proper installation is the responsibility of the
installer.
Product failure due to improper installation is not
covered under the Warranty.
You MUST use all supplied parts and use proper
installation procedures as described in these
instructions when installing this air conditioner.
ELECTRICAL REQUIREMENTS
Some models require a 115/120-voltAC,
60-Hz grounded outlet protected with a
1g-amp time-delay fuse or circuit breaker.
The 3-prong grounding plug minimizes the possibility
of electric shock hazard. If the wall outlet you plan to
use is only a 2-prong outlet, it isyour responsibility to
have it replaced with a properly grounded 3-prong wall
outlet.
Some models require 230/208-volt AC,
protected with a time-delay fuse or circuit
breaker. These models should be installed on
their own single branch circuit for best
performance and to prevent overloading
house or apartment wiring circuits, which
could cause a possible fire hazard from
overheating wires.
ACAUTION:
Do not, under any circumstances, cut or remove
the third (ground) prong from the power cord.
Do not change the plug on the power cord
of this air conditioner.
Aluminum house wiring may present special
problems-consult o qualified electrician.
TOOLS YOU WILL NEED
Phillips-head screwdriver
Fiat-blade screwdriver
Pencil Ruler or tope measure
Level Scissors or knife
Power cord includes a current interrupter device. A
test and reset button is provided on the plug case. The
device should be tested on a periodic basis by first
pressing the TESTbutton and then the RESETbutton
while plugged into the outlet. If the TESTbutton does
not trip or if the RESETbutton will not stay engaged,
discontinue use of the air conditioner and contact a
qualified service technician.

Installation Instructions
PARTS INCLUDED
(Appearance may vary) Window
sash seal
_Pket
Left
accordion
panel _
I
Right
accordion
panel
Air
conditioner
\
Screw (6) Window locking
bracket (1) Frame locking
bracket (2)

Installation Instructions
l]] WINDOW REQUIREMENTS
. These instructions are for u standard double-hung
window. You will need to modify them for other types
of windows.
. The air conditioner con be installed without the
accordion panels if needed to fit in o narrow
window. See the window opening dimensions.
. All supporting ports must be secured
to firm wood, masonry or metal.
. The electrical outlet must be within reach of the
power cord.
[1_=4]
15 1W'min.
22" to 36"
(With accordion panels) 7
[Z] STORM WINDOW REQUIREMENTS
A storm window frame will not allow the air
conditioner to tilt toward the outside, and will keep it
from draining properly.
To adjust for this, attach o piece of wood to the sill.
WOOD PIECES
WIDTH: 2"
LENGTH:Long enough to fit inside the window
frame.
THICKNESS: To determine the thickness, place a
piece of wood on the sill to make it 1/2" higher than
the top of the storm window frame or the vinyl
frame.
Attach securely with nails or screws provided by the
installer.
1/2" higher
than storm
window
frame
Storm window
frame
1/2" higher
than vinylframe
_ _ (onsomewindows
_ Wood
"r_ Vinylframe I !
ITI PREPARE THE AIR CONDITIONER
[] Hold the accordion panel in one hand and
gently pull back to free the open end.
%Slide the free end of the accordion panel into
the side panel rails. Slide the panel down. Be
sure to leave enough space to slip the top
and bottom of the frame into the rails on the
cabinet.
NOTE: There is a right and a left accordion
panel. Be sure to use the proper panel for each
side.
[] Slide the left and right accordion panels into
the top and bottom mounting rails.
Topmounting rail Topright
Top
Bottom mounting rail

Installation Instructions
[a] PREPARE THE WINDOW
Cut the window sash seal to the proper length.
Peel off the backing and attach the seal to the
underside of the window sash.
[_] INSTALL THE AIR CONDITIONER IN
THE WINDOW
r_ Place the air conditioner on the sill with the
bottom mounting rail against its back edge.
Center it and close the window securely behind
the top mounting rail.
It should be level or slightly tilted to the outside.
Use a level; about a 1/3 bubble will be the correct
case slant to the outside.
3 Screws
2 Frame locking brackets
r_ Extend the left and right accordion panels to
the vertical window sashes and attach 3 screws
through the holes in the upper panels, as
appropriate.
r_ Install the frame locking brackets between the
bottom of the accordion panel and the window
sill. Attach with 2 screws. NOTE: To prevent the
window sill from splitting, drive the pilot holes
before driving the screws.
[6] INSTALL SUPPORT BRACKET AND
FOAM TOP WINDOW GASKET
%
@
@
ACAUTION:
To prevent broken glass or
damage to windows, on
vinyl or other similarly
constructed windows,
attach the window locking
bracket to the window
side jamb with one screw.
V
Wood
Cut the foam top window gasket to the window
width.
Stuff the foam
between the glass
and the window
to prevent air and
insects from getting
into the room.
NOTE: If the gasket supplied does not fit your
window, obtain appropriate material locally to
provide a proper installation seal.
10

Troubleshooting Tips. GEAppliances.com
Passible Causes What To Do
Air conditioner The air conditioner . Hake surethe air conditioner plug ispushed
does not start is unplugged, completely into the outlet.
Thefuse is blown/circuit • Checkthe house fuse/circuit breaker box and replace
breaker istripped, the fuse or reset the breaker.
Power failure. .The unit will automatically re-start in the settings lost
used offer the power isrestored.
.There is o protective time delay (approximately
3 minutes) to prevent tripping of the compressor
overload. For this reason, the unit may not start
normal cooling for 3 minutes offer it is turned
back on.
The current interrupter . Pressthe RESETbutton located on the power cord plug.
device is tripped. . If the RESETbutton will not stay engaged, discontinue
use of the air conditioner and contact o qualified
service technician.
Air conditioner does Airflow is restricted. . Hake surethere ore no curtains, blindsor furniture
not cool as it should blocking the front of the air conditioner.
Thetamp control may . On models with touch pods: Inthe Cool mode, pressthe
not be set correctly. Decrease T pod.
. On models with control knobs,turn the temperature
knob to o higher number.
The air filter is dirty. • Cleonthe filter at leastevery 30 days.
Seethe Cureand Cleaningsection.
The room may have been hot. . When the air conditioner isfirst turned on,you need
to allow time for the room to cool down.
Cold air isescaping. • Checkfor open furnace registersand cold air returns.
Cooling coils have iced up. , See "Air conditioner freezing up" below.
Air conditioner
freezing up Ice blocks the air flow
and stops the air conditioner
from cooling the room.
. On models with control knobs,set the mode control at
High Fan or High Coolwith the Tamp at 1 or 2.
. On models with touch pods, set the controls at High Fan
or High Coo/and set the thermostat to o higher
temperature.
Theremote control The batteries are inserted . Checkthe position of the batteries.They should be
is not working incorrectly, inserted inthe opposite (+)and (-)direction.
The batteries may be dead. . Replacethe batteries.
Water drips outside Hot, humid weather. . Thisisnormal.
Water drips indoors The air conditioner is not . For proper water disposal,make sure the air conditioner
tilted to the outside, slants slightlyfrom the case front to the rear.
Water collects in Moisture removed from air . Thisisnormal for o short period in areaswith little
basepan and drains into base pan. humidity; normal for o longer period in very humid areas.
Normal Operating Sounds
You may hear o pinging noisecaused by
water being picked up and thrown against the
condenser on rainy days or when the humidity
is high.This designfeature helpsremove
moisture and improve efficiency.
You may hear the thermostat click when the
compressor cycles on and off.
Water will collect in the bose pan during
high humidity or on rainy days.Thewater
may overflow and drip from the outdoor side
of the unit.
Thefan may run even when the compressor
does not.
11

GE Air Conditioner--One-Year Limited Warranty.
All warranty service provided by our Factory Service Centers,
or an authorized Customer Care®technician. To schedule service,
visit us on-line at ge.com, or call 800.GE.CARES (800.432.2737).
Have serial number and model number available when calling
for service.
Stapleyour receipt here.
Proof of the original purchase
date is needed to obtain service
under the warranty.
One Year
From the dote Ofthe
Origino!
GE Will Replace:
Any part of the air conditioner which fails due to Gdefect in materials or workmanship.
Duringthis limited one-year warranty, GEwill Glsoprovide, free of charge, GIIIGborGndrelGted
serviceto replGcethe defective part.
, Service trips to your home to teach you how to
use the product.
, Improper installation, delivery or maintenance. If you
have an installation problem, or if the air conditioner
is of improper cooling capacity for the intended use,
contact your dealer or installer. Youare responsible
for providing adequate electrical connecting facilities.
, Failure of the product resulting from modifications to
the product or due to unreasonable use including failure
to provide reasonable and necessary maintenance.
, In commercial locations, labor necessary to move the
unit to a location where it is accessible for service
by an individual technician.
, Replacement of housefuses or resetting of circuit
breakers.
, Failure due to corrosion on models not corrosion-
protected.
, Damage to the product caused by improper power
supply voltage, accident, fire, floods or acts of God.
, Incidental or consequential damage caused by possible
defects with this air conditioner.
, Damage caused after delivery.
EXCLUSION OF IMPLIED WARRANTIES--Your sole and exclusive remedy is product repair as provided in
this Limited Warranty. Any implied warranties, including the implied warranties of merchantability or
fitness for a particular purpose, are limited to one year or the shortest period allowed by law.
This warranty is extended to the original purchaser and any succeeding owner for products purchased for
home use within the USA. If the product is located in an area where service by a GE Authorized Servicer is
not available, you may be responsible for a trip charge or you may be required to bring the product to an
Authorized GE Service location for service. In Alaska, the warranty excludes the cost of shipping or service calls
to your home.
Some states do not allow the exclusion or limitation of incidental or consequential damages. This warranty
gives you specific legal rights, and you may also have other rights which vary from state to state. To know
what your legal rights are, consult your local or state consumer affairs office or your state's Attorney General.
Warrantor: General Electric Company. Louisville, KY 40225
12

Consignes de s6curit6 ............. 14-15
Consignesd'utifisation .............. 16-18
Entretien et nettoyage
Filtre (_air ................................ 18
Serpentins ext#rieurs ..................... 18
instructions de montage .......... 19-22
Conseils de d_pannage .............. 23
Bruits normaux de fonctionnement ........ 25
Assistance _la clientele
Assistance 5 la clientele ................... 26
Garantie .................................. 25
*Produits homologu_s ENERGYSTAR®
ENERGYSTAR
En runt que purtenuire d'ENERGY STAR®,GE
u d_termin_ que ce produit _tuit conforme
uux exigences d'efficucit_ _nerg_tique
d'ENERGY STAR®.
Inscrivez ici les num6ros de module et de s6rie :
Num6ro de module :
Num6ro de S6rie :
Vous trouverez ces num_ros sur I'#tiquette
appos#e sur le c6t# du climatiseur.
13

J J
Ih,'IPORTANTESCONSIGNES DE SECURITE.
VEUILLEZ LIRE TOUTES LES CONSIGNES AVANT UTILISATION.
14
AAVERTISSEMENT!
Pour votre s6curit6, les informations contenues dans ce manuel doivent _tre suivies afin de minimiser
les risques d'incendie, de chocs 61ectriques ou de blessures corporelles.
CONSIGNES DE 5ECURITE
N'utilisez cet appareil qu'aux fins pr6vues
d6crites dans le manuel d'utilisation.
Ce climatiseur doit _tre correctement
install6 conform6ment aux Instructions
d'lnstallation avant route utilisation.
Ne d6branchezjamais votre climatiseur en
tirant sur le cordon d'alimentation. Prenez
toujours fermement la fiche en main et tirez
pour la sortir de la prise.
Remplacez imm6diatement tout cordon
61ectrique us6 ou endommag& Un
cordon d'alimentation endommag6 doit
_tre remplac6 par un nouveau cordon
d'alimentation obtenu du fabricant. Ne
r6parez pas le cordon endommag& N'utilisez
pas un cordon fissur6 ou pr6sentant des
dommages dus aux frottements soit sur
sa Iongueur ou aux extr6mit6s du c6t6
de la fiche ou du raccord.
Eteignez votre climatiseur et d6branchez-le
avant de le nettoyer.
GE n'offre pas de service d'entretien pour les
climatiseurs. Nous vous recommandons de
ne pas essayer d'effectuer I'entretien
de votre climatiseur vous-m_me.
Pour votre s6curit6, ne stockez pas et
n'utilisez pas de mat6riaux combustibles,
d'essence ou d'autres vapeurs et liquides
inflammables dans les parages de cet
appareil ou de tout autre appareil.
Tousles climatiseurs contiennent des
fluides frigorig_nes qui, conform6ment, 5 la
16gislation f6d6rale doivent _tre retir6s avant
la mise au rebut de I'appareil. Si vous mettez
au rebus un ancien appareil contenant des
fluides frigorig_nes, v6rifiez la proc6dure 6
suivre aupr_s de la compagnie responsable
de 1'61imination.
Sila prise de courant est d'un format
diff6rent de la fiche, cette prise doit _tre
chang6e par un 61ectricien qualifi&
Ces syst_mes de climatisation R410A
n6cessitent que les entrepreneurs et
techniciens adoptent des outils, du mat6riel
et des normes de s6curit6 approuv6s pour
utilisation avec ce r6frig6rant. N'utilisez pas
de mat6riel certifi6 pour le r6frig6rant R22
uniquement.
BRANCHEHENTS dLLECTRIUES
Ne coupez pas ou n'enlevez pas, sous aucun
pr6texte, la troisi_me broche de mise 6 la terre
du cordon d'alimentation. Pour des raisons
de s6curit6, cet appareil doit _tre correctement
mis 6 la terre.
N'utilisez PASd'uduptuteur uvec cet uppureiL
Le cordon d'alimentation de cet appareil
est 6quip6 d'une fiche 6 trois broches (pour une
mise 6 la terre) qui s'adapte 6 la prise
de courant standard 6 3 broches (pour une mise
6 la terre) pour minimiser les risques
de chocs 61ectriques par cet appareil.
Le cordon d'alimentation est 6quip6 d'un
dispositif d'interruption du courant. Un bouton
d'essai et de r6enclenchement est fourni
sur le bdtier de la prise. Vous devez tester le
m6canisme r6guli_rement en appuyant d'abord
sur le bouton TEST(essuil puis sur le bouton
RESET(r_enclenchemeng Iorsque I'appareil est
branch& Si le bouton TEST(essui) ne bascule
pas ou si le bouton RESET(r#enclenchemeng
ne reste pas enclench@, cessez d'utiliser votre
climatiseur et appelez un technicien de service
qualifi&
Faites v@rifier la prise murale et le circuit
6lectrique par un @lectricien qualifi6 pour
s'assurer que le syst6me est correctement
mis 6 la terre.
Dons le cas d'une prise biphas6e,
I'installateur ala responsabilit6 et I'obligation
de la remplacer par une prise triphas_e
correctement mise 6 la terre.
Le climatiseur doit toujours @trebranch6
6 sa propre prise 61ectrique d'une tension
nominale correspondant 6 celle indiqu6e
sur sa plaque signal6tique.
Ceci permet d'obtenir un meilleur rendement
du climatiseur et _vite de surcharger les circuits
_lectriques du domicile qui risque d'occasionner
un incendie en surchauffant.
Consultez les Consignes d'lnstallations, dons
la section Exigences Electriques pour les
exigences de branchements 61ectriques
particuliers.

www. GEAppliance s.cam
AA VERTISSEMENT !
UTILISATION DE RALLONGES
RISQUED'INCENDIE. Peut occasionner des
blessures graves ou la mort.
, NE PASutiliser de rallonge avec ce climatiseur.
, NE PASutiliser de parasurtenseur ou
d'adaptateur _ prises multiples avec ce
climatiseur.
LISEZETSUIVEZSOIGNEUSEMENTCESCONSIGNESDESECURITE.
CONSERVEZ CESINSTRUCTIONS
15

A propos des commandes du climatiseur.
LesfonctionsetI'aspectpeuventvarlet.
Lest_moinslumineux8c6tddestouches8effleurementsurletableaudecommandesdu dimotiseurindiquentlesr_glagess@ctionnds.
O [] Auto
[] High
[] Heal
[] Low
O l
Le t_moin indique que I'opporeil
est en mode Progrommotion de
/otemperature ou du d_loi. |Le t_moin lumineux indique qua
Io minuterie est progromm@.
[] Cool
[] Fan Only I
H
[] Energy Saver E
NOTE : L'dcron offiche toujours la temperature de la ps_cesouf lorsque vous progrommez
Jotemperature ou Jominutene.
Commandes du Climatiseur
Augmentation
du dalai
tarehe
automatiquedu
ventilateur
Augmentationde la
wrassedu ventilateur
Nise en marche
de I'appareilON/OFF
(marche/arr_t)
T 16commande
Commandes
Touche d'alimentation
Het leclimatiseuren positionde marche
ou d'arr_t.L'_cranaffichela temp@ature
de la pieceIorsqueI'appareilestmis en marche.
Affichage
Affichela temperaturede la pieceou le temps
restantavant la miseen marche ou I'arr@tde
I'appareil.Affichelatemp@aturede r_glageIors
de la programmationde la temperaturepour les
modesCool(refroidissemengou EnergySaver
(economied'energie).Let6moin lumineuxSet
(programm6)s'allumeIorsdu r6glage.
Touches Temp Increase (Augmentation
temperature) A/Decrease (R6duction
de la temp6raturelT Sontutilis@espour
programmerlatemp@aturedanslesmodesCool
ou EnergySaver.Let@moinlumineuxSets'allume
Iorsdu r@glage.
Touches Delay Timer Increase (Augmentation du
d6lailA (+l/ Decrease (Diminution du d6lail T(d
Chaque foisque vous effleurez les touches
Increase A/ Decrease_r surI'appareilou
lestouchesIncrease+/ Decrease- de la
t616commande,vous programmezladur6e
du d6laiIorsde I'utilisationde la minuterieDelay
1-24hr(d6laide 1-2/4h).Let6moin lumineuxSet
s'allumeIorsdu glage.
Touches de vitesse du ventilateur
Sontutilis@spour r_glerlavitessedu ventilateur
de I'appareilsur Low(faible),Ned(moyenne),
High (elev_e)ouAuto (automatique).RENARQUE:
Surlat_l_commande,utilisezlestouchesIncrease
+/Decrease - pour r6glerlavitessedu ventilateur
surLow,Ned, ou High. Utilisezla toucheAuto
pour allumerleventilateuren modeAuto.
Touche Node
Estutilis@pour programmer leclimatiseursur
lesmodesCool, EnergySaverou FanOnly
(ventilateuruniquement).
Touches de O_lai/ O_laide I _24heures
Delay ON(d6laide raiseen marche)-Lorsque
leclimatiseurest _teint,il peut_tre programm6
pour d@marrerautomatiquementdansun d@lai
de 1 @2/4heures_ sesr6glagespr6c@dents(mode,
vitessedu ventilateur).
Delay OFF(d_laid'arr_t)-Lorsque leclimatiseur
est enfonctionnement,il peut_treprogramm6
pour s'arr6terautomatiquementdansun d61aide
1_ 2/4heures.
Comment leprogrammer:
AppuyezsurlatoucheDelay1-24hr(D6laide 1
2/4heures)de I'appareilou Delaypad (Touchesde
D@lai)delat_l_commande.Chaqueloisquevous
effleurezlestouchesIncrease•/Decrease Tsur
I'appareilou lestouchesIncrease+/Decrease
- de lat@l@commande,vousprogrammezla
dur@edu d@laipar intervallede i heure.Let@moin
lumineuxSets'allumeIorsdu r_glage.
Pourconna_treletempsrestantsurla minuterie
Delay1-24hr,appuyezsurlatoucheDelay 1-24hr
deI'appareilouDeleypad (Touchesde D@lai)de
lat_l_commande.UtilisezlestouchesIncreaseA
/Decrease_ sur I'appareilou lestouches
Increase+/ Decrease- de lat616commandepour
programmer un nouveaud6lai sin6cessaire.
Pourannular la minuterie, appuyezsurlatouche
Delay1-24hrjusqu'@cequa levoyant lumineux
surla toucheDelay 1-24hr s'6teigne.
R_initialisation du Filtre
Let6moin lumineu×s'allumemau bout d'uncumul
de 250 heuresde fonctionnementdu ventilateur
pour mppelerla n6cessit6de nettoyerlefiltre.
AppuyezsurResetFilter pour 6teindrelet6moin
et remettre5 z6roletempsdefonctionnement
cumul&
16
Remarque :La lecture de temp6rature par d6faut s'affiche en degr6 Fahrenheit (°F).Pour modifier
I'affichage en degr6 Celcius (°C),appuyez simultan6ment sur les boutons d'augmentation _ou
d'abaissement Tde la temp6rature et maintenez-les enfonc6s pendant 3 secondes. R6p6tezla m6thode
pour effectuer un retour 5 I'affichage des degr6s Fahrenheit (°F).

www. GEAppliance s.com
Ne faites pas fonctionner votre appareil Ce climatiseur froid seul n'est pas con_u pour fonctionner
Iorsque les temperatures ext_rieures sont avec des temp@atures ext@ieures en dessous de 0 °C
en dessous de 0 °C (32 °F). (s2 °F).IIne doit pas OtreutilisOIorsque lestemp6ratures
ext6rieures sont en dessous de O°C(32°F).
T616commande
Pourvous assurer d'un fonctionnement correct, pointez
lat616commande vers le r6cepteur de signal
du climatiseur.
Assurez-vousqu'aucunobstaclepouvantbloquer
lesignalnesetrouveentreleclimatiseuret la
t616commande.
Mode Cool (refroidissementl
utilisez lemode Cool(refroidissement) avecla vitesse
du ventilateursur Low(faible),Med(moyennel,
High (elev#elou Auto(automatique)pour refroidir.
AppuyezsurlestouchesTemperatureIncrease
(augmentation de la temperature) A/Decrease
(diminution de la temp#ruture)T pour programmer la
temp@ature souhait@ entre 18 °Cet ]0 °C(64
et 86 °F)par increments de 0,5 °C(1 °F).
Unthermostat _lectronique permet de maintenir la
temp@ature de la piece. Lecompresseur se met en
marche et s'arr_te 6 intervalles r_gulierspour maintenir
latemp@ature de la piece 6 un niveau de confort choisi.
R_glezlethermostat 6 une valeur plus basse et I'air
ambiant se refroidira.R_glezlethermostat 6 une valeur
plus _lev@ et I'airambiant se r_chauffera.
Lerayon d'action de la t616commande s'6tendjusqu'6
6,4 m (20pieds).
Assurez-vous que les pilessont r6centes et
correctement install6esdons la t616commande.
Lat616commande renferme un aimant permettant de
lafixer sur des surfaces m6talliques.
REHARQUE:Sileclimatiseur6teintest allum6alorsqu'il
est programm6surun r6glageCoolou sivous passez
d'un modeVentilation6 un modede Refroidissement,il
faudra environ3 minutespour que lecompresseurse
remetteen marche etrecommence6 refroidir.
Descriptions du Refroidissement
Pour un RefroidissementNormal - S61ectionnez
le modeCod avecla vitessedu ventilateursurP/ed
ou High etun r6glage6 unetemp6raturemoyenne.
Pour un RefroidissementHaximal - S61ectionnez
le modeCool avecla vitessedu ventilateursurHigh
et un r_glage 6 une temp@ature plus basse.
Pour un Refroidissementplus SilencieuxouDurant
la Nuit - S61ectionnezlemodeCoolavecla vitessedu
ventilateursur Lowet un r_glage6 unetemp@ature
moyenne.
Mode Energy Saver (economie d'#nergie)
Ce mode optimise la puissance de refroidissement
de votre climatiseur, vous faisant du m_me coup
6conomiser de 1'6nergie.Une lois la temp@ature
du point de r_glage atteinte, le ventilateur
s'@eindra par intervalles pour 6conomiser
1'6nergie.IIs'allumera aussi p@iodiquement
pour faire en sorte que la pleine capacit6 de
refroidissement du syst_me soit utilis_e. IIs'agit
du mode par d6faut de I'appareil. A chaque fois
qu'il est mis hors tension, I'appareil red_marrera
en mode Economie d'_nergie. Cela inclut aussi
le mode Delay (Ddloi de mise en morche). A
la premi@e mise sous tension de I'appareil,
les r_glages de temp@ature et du ventilateur
indiqueront respectivement 70° et Low (Foible).
Vous pouvez r_gler la vitesse du ventilateur et la
temp@ature selon vos crit_res de confort.
Energy Saver ON (dconomie d'dnergie octivde) :
Le mode d'_conomie d'_nergie contribue h r_duire
la consommation d'_lectricit& Dans ce mode,
il est normal que le ventilateur s'_teigne puis se
rallume en alternance. Ce cycle de red_marrage
peut se r_p@er plusieurs lois. En raison des arr_ts
p@iodiques du ventilateur, vous remarquerez
peut-_tre une variation de la temp@ature et de
I'humidit_ ambiantes.
Energy Saver OFF(dconomie d'dnergie ddsoctivde) :
Lorsque ce mode est d_sactiv_, le ventilateur
fonctionne continuellement, et dans le mode
Cool (refroidissement), le compresseur s'allume
et s'@eint en alternance pour maintenir la
temp@ature ambiante.
Mode Fan Only (ventilateur uniquemeng
Utilisezlemode Fan Onlyavec une vitesse de ventilateur
r_gl@ surLow,Hedou Highpour fairecirculerI'airet
lefiltrer sansle refroidir.Etantdonn_ quale modeFan
Onlyne permet pasde refroidissement,le r_glagede la
temp@aturen'affiche pas.Latemp@aturede la piece
s'affiche6 I'_cran.
REMARQUE:Lavitessede ventilateurauto nepeut_tre
utilis@ Iorsqueleclimatiseurestsurle modeFunOnly.
Auto Fan Speed (vitesse du ventilateur autol
R_glezlavitessedu ventilateursurauto pour que
la vitessedu ventilateurseregleautomatiquement 6 la
vitessen_cessaire6 I'obtentiondesr_glagesapportant
un niveaudeconfort optimal 6 la temp@ature
programm_e.
Sila piecedemandeun refroidissementsuppl_mentaire,
la vitessedu ventilateuraugmente automatiquement.Si
la piecedemandemains de refroidissement,la vitesse
du ventilateurdiminueautomatiquement.
REI'4ARQUE:Lavitessede ventilateurauto nepeut_tre
utilis@ Iorsqueleclimatiseurestsurle modeFunOnly.
Fonction de conservation des r#glages apr#s une coupure de courant
En cas de panne ou d'interruption de courant, I'appareil 6 2/4heures) @ait utilis@,I'appareil reprend son compte
red_marreautomatiquementap@sr@ablissement 6 rebours.Vousaurezpeut-_trebesoindeprogrammer
de I'alimentation_lectriqueet conservelesderniers une nouvelleheure.
r_glagesutilis_s.Silafonction Delay1-24hr(D_laide 1 17

A propos des commandes du dimatiseur.
Information suppldmentaire importante.
Direction de PAir
Utilisezle levier pour r6gler la direction de I'airvers la
gauche ou vers la droite seulement.
Entretien et nettoyage du climatiseur.
Grille et BaTtier
Eteignezet d@branchezleclimatiseuravant tout Pourle nettoyer,utilisezde I'eauet un d@ergentdoux.
nettoyage. N'utilisezpasd'eaude Javelou de nettoyantsabrasifs.
Filtre _Air
Lefiltre 6 air derri@e la grille frontale doit
@rev@ifi6et nettoy_ au bout de 30jours de
fonctionnement ou plussouvent sin6cessaire.
Pour retirer :
Ouvrez la grille d'entr_e en tirant vers le bassur les
languettes descoins sup@ieursde la grille d'entr_e
jusqu'6 ce que la grille soit dans une position 6/45
degr6s. Retirezlefiltre.
Nettoyezle filtre avec de I'eausavonneuse tilde.
Rincezle filtre et laissez-les6cher avant de le remettre
dans le climatiseur. Nenettoyez pas
votre filtre au lave-vaisselle.
MISE EN GARDE: NEfaitesPAS
fonctionner leclimatiseur sans le filtre sous peine de
le boucher avec de la poussi_reet de la charpie et de
r6duire sonefficacit6
Languette
Serpentins Ext_rieurs
Lesserpentinssitu6s du c8t6 ext@ieur du climatiseur
doivent @rer6guli@ement v@ifi6s.S'ilssont obstru_s
par des poussi@esou de la suie, il est possiblede les
faire nettoyer par desprofessionnels.
18
Comment InsUrer les Piles dans la T_l_commande
D3Retirezlecouvercle du Iogement despiles
en lefaisant glisser dans lesens indiqu6 par
lafl_che.
Ins@ezlesnouvelles pilesen vous assurant
que lespSles(+)et (-) de la pile sont orient6s
dans la bonne direction.
Remettezlecouvercle en lefaisant glisser.
REMARQUES :
Utilisez2 pilesalcalines AAAd'!,5 Volt. N'utilisez
pasde pilesrechargeables.
Retirezlespilesde lat616commandesivous
pr_voyezde ne pas utiliservotre climatiseur
pendant un certain temps.
Nem61angezpasdes pilesneuves avec des
pilesus_es.Nem61angezpas ensemble lespiles
alcalines,standard (carbone-zinc)ou rechargeables
(ni-cad,ni-mh, etc).

Istr cti s
de nta e Cli tise r
[r-?1 Questions? Composez le 800.GE.CARES1800.432.2737} ou visitez notre site web a °www.GEAppliances.com I
AVANT DE COMMENCER
Lisez ces instructions enti_rement et attentivement.
• IMPORTANT -Conservezcesinstructions
pour I'inspecteur 61ectrique local.
• IMPORTANT - Respectez tousles codes et
r6glements en vigueur.
• Remarque pour I'installateur - Assurez-vous de
remettre ces instructions au client.
o
o
Remorque pour le client - Conservez ces
instructions pour toute r6f6rence future.
Niveou de comp6tence - L'installation de cet
mecanJque.
D@Ioid'e×6cution - Environ 1 heure
Nous recommandons que I'installation dece
produit soit effectu6e par deux personnes.
• L'installateur est responsablede I'installation
correcte de I'appareil.
• La panne de I'appareil due _ une mauvaise
installation n'est pascouverte par la garantie.
Vous DEVEZutiliser toutes les pi@cesfournies et
suivre la proc@dured installation du climatiseur
d6crite dans cette notice.
E×IGENCES I_LECTRIQUES
Certains mod@lesn6cessitent une prise mise _ la
terre de 115/120 Volts AC,60 Hz,prot6g6e par
un fusible a action diff6r6e ou par un disjoncteur.
Lafiche triphas6e avec terre r6duit le risque de choc
61ectrique.Si la prise murale que vous envisagez d'utiliser
est biphas6e, vous avez la responsabilit@et I'obligation de
la remplacer par une prise triphas6e correctement mise a
la terre.
Certains mod@lesn6cessitent une prise mise a la
terre de 230/208 Volts AC,prot6g@epar un
fusible @action diff6r6e ou par un disjoncteur.
Ces mod@lesdoivent @reinstall6s sur leur
propre circuit d6riv6 pour 6viter de surcharger
les circuits @lectriquesdu domicile qui peut
occasionner un risque d'incendie par surchauffe
des cables.
AMISE EN GARDE :
Ne coupez pus ou n'enlevez pus, sous aucun
pr_texte, la troisi_me broche de mise (_la terre
du cordon d'alimentation.
Ne changez pas la fiche du cordon d'alimentation
du climatiseur.
Un c_blage en aluminium du domicile peut
occasionner des probl_mes particuliers-
consultez un 61ectricien qualifi6.
OUTILLAGE NI_CESSAIRES
Tournevis cruciforme Phillips
Tournevis @t@teplate
Crayon R@gleou m@tre
Niveau Ciseaux ou couteau
Le cordon d'alimentation est @quip@d'un dispositif
d'interruption du courant. Un bouton d'essai et de
r6enclenchement est fourni sur le boTtierde la prise. Vous
devez tester le m6canisme r6guli@rement en appuyant
d'abord sur le bouton TEST(essai) puis sur le bouton
RESET(r6enclenchement)Iorsque I'appareil est branch&
Si le bouton TEST(essai} ne bascule pas ou si le bouton
RESET(r_enclenchement} ne reste pas enclench& cessez
d'utiliser votre climatiseur et appelez un technicien de
service qualifi&
19

Instructions de montage
PII_CES INCLUES
"-IL'aspect peut varier) Joint d'_tc]nch_it_ de la
fen_tre 5 guillotine
mousse de IG
fen_tre
Ponneou en
occord_on
gauche
I
Ponnec]u en
accordion
j droit
Climotiseur
Vis (6) Ferrure de verrouillc]ge de
la fen_tre (1)
Ferrure de
verrouillc]ge
de codre (2)
2O
This manual suits for next models
2
Table of contents
Languages:
Other GE Air Conditioner manuals

GE
GE Zoneline AZ85E09DAC Manual

GE
GE GE AIR Z09 IN EH Operating instructions

GE
GE Profile ENERGY STAR PHC06 Series User manual

GE
GE ASV06 User manual

GE
GE AEE12DK Assembly instructions

GE
GE ASW10 Original instructions

GE
GE AZ61H09EAB Manual

GE
GE AHH24 Series Operating instructions

GE
GE APS12DA Installation instructions

GE
GE AFQ08 Series Operating instructions