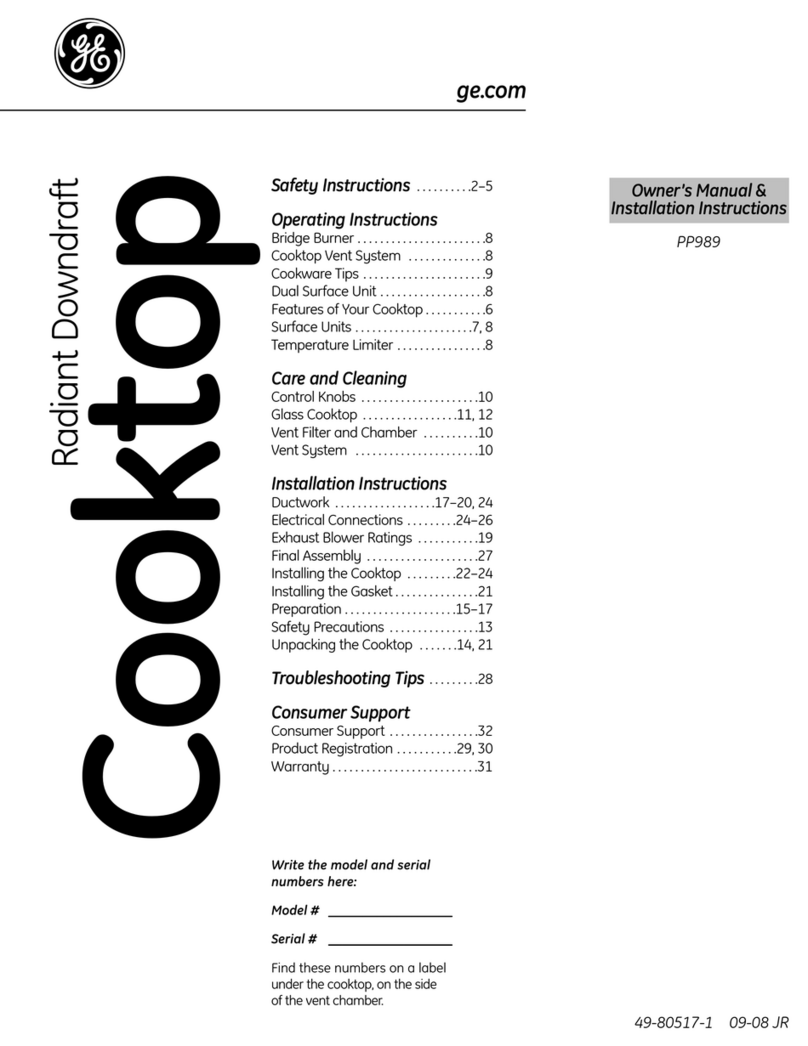
GE PP9830 Original instructions

49-80635-1 03-15 GE
GEAppliances.com
Safety Information ............2
Warranty........................4
Assistance /
Parts and Accessories .........5
Using The Cooktop
CooktopFeatures..................6
Surface Burners....................7
Cookware for Radiant
GlassCooktop....................9
ForBestResults....................9
Care and Cleaning
CleaningTheCooktop.............10
CleaningtheGlassCooktop........11
Installation Instructions......13
Troubleshooting Tips .........25
Cooktop
Radiant Downdraft
Write the model and serial
numbers here:
Model # ______________________
Serial # _______________________
Find these numbers on a label
under the cooktop, on the side
of the vent chamber.
For a Spanish version of this
manual, visit our Website at
GEAppliances.com.
Para consultar una version
en español de este manual
de instrucciones, visite
nuestro sitio de internet
GEAppliances.com.
Owner’s Manual &
Installation Instructions
PP9830

249-80635-1
SAVE THESE INSTRUCTIONS
Read all safety instructions before using the product. Failure to follow these
instructions may result in fire, electric shock, serious injury or death.
WARNING
IMPORTANT SAFETY INFORMATION.
READ ALL INSTRUCTIONS BEFORE USING.
SAFETY INFORMATION
Ŷ 8VHWKLVDSSOLDQFHIRULWVLQWHQGHGSXUSRVHDV
described in this Owner’s Manual.
Ŷ %HVXUH\RXUDSSOLDQFHLVSURSHUO\LQVWDOOHGDQG
grounded by a qualified installer in accordance
with the provided installation instructions.
Ŷ 'RQRWDWWHPSWWRUHSDLURUUHSODFHDQ\SDUWRI
your range unless it is specifically recommended
in this manual. All other servicing should be
referred to a qualified technician.
Ŷ %HIRUHSHUIRUPLQJDQ\VHUYLFHXQSOXJWKH
cooktop or disconnect the power supply at the
household distribution panel by removing the
fuse or switching off the circuit breaker.
Ŷ 'RQRWOHDYHFKLOGUHQDORQH²FKLOGUHQVKRXOG
not be left alone or unattended in an area where
an appliance is in use. They should never be
allowed to climb, sit or stand on any part of the
appliance.
Ŷ CAUTION:'RQRWVWRUHLWHPVRILQWHUHVW
WRFKLOGUHQDERYHDFRRNWRS²FKLOGUHQFOLPELQJ
on the cooktop to reach items could be seriously
injured.
Ŷ 8VHRQO\GU\SRWKROGHUV²PRLVWRUGDPSSRW
holders on hot surfaces may result in burns from
VWHDP'RQRWOHWSRWKROGHUVWRXFKKRWVXUIDFH
XQLWVRUKHDWLQJHOHPHQWV'RQRWXVHDWRZHORU
other bulky cloth in place of pot holders.
Ŷ 1HYHUXVH\RXUDSSOLDQFHIRUZDUPLQJRUKHDWLQJ
the room.
Ŷ 'RQRWWRXFKWKHVXUIDFHHOHPHQWV7KHVH
surfaces may be hot enough to burn even though
WKH\DUHGDUNLQFRORU'XULQJDQGDIWHUXVH
do not touch, or let clothing or other flammable
materials contact the surface units or areas
nearby the surface units; allow sufficient time for
cooling first. Other surfaces of the appliance may
become hot enough to cause burns. Potentially
hot surfaces include the cooktop and areas
facing the cooktop.
Ŷ 'RQRWKHDWXQRSHQHGIRRGFRQWDLQHUV3UHVVXUH
could build up and the container could burst,
causing an injury.
Ŷ &RRNPHDWDQGSRXOWU\WKRURXJKO\²PHDWWR
at least an internal temperature of 160°F and
poultry to at least an internal temperature of
)&RRNLQJWRWKHVHWHPSHUDWXUHVXVXDOO\
protects against foodborne illness.
Ŷ 6XIILFLHQWDLULVQHHGHGIRUSURSHUFRPEXVWLRQDQG
exhausting of gases through the flue (chimney) of
fuel burning equipment to prevent back drafting.
Follow the heating equipment manufacturer’s
guide lines and safety standards, such as
WKRVHSXEOLVKHGE\WKH1DWLRQDO)LUH3URWHFWLRQ
$VVRFLDWLRQ1)3$WKH$PHULFDQ6RFLHW\IRU
+HDWLQJ5HIULJHUDWLRQDQG$LU&RQGLWLRQLQJ
$6+5$(DQGWKHORFDOFRGHDXWKRULWLHVZKHQ
applicable, install any make up (replacement)
air system in accordance with local building
FRGHUHTXLUHPHQWV9LVLW*($SSOLDQFHVFRPIRU
available makeup air solutions
Ŷ 'RQRWVWRUHRUXVHIODPPDEOHPDWHULDOQHDUWKH
cooktop, including paper, plastic, pot holders,
linens, wall coverings, curtains, drapes and
gasoline or other flammable vapors and liquids.
Ŷ1HYHUZHDUORRVHILWWLQJRUKDQJLQJJDUPHQWVZKLOH
using the appliance. These garments may ignite if
they contact hot surfaces causing severe burns.
Ŷ'RQRWOHWFRRNLQJJUHDVHRURWKHUIODPPDEOH
materials accumulate on or near the cooktop.
Grease on the cooktop may ignite.
Ŷ&OHDQYHQWLODWLQJKRRGVIUHTXHQWO\*UHDVHVKRXOG
not be allowed to accumulate on the hood or filter.
GENERAL SAFETY INSTRUCTIONS
KEEP FLAMMABLE MATERIALS AWAY FROM
THE COOKTOP.
WARNING
WARNING
49-80635-1 3
SAVE THESE INSTRUCTIONS
SAFETY INFORMATION
Ŷ 1HYHUOHDYHWKHVXUIDFHXQLWVXQDWWHQGHGDWPHGLXP
RUKLJKKHDWVHWWLQJV%RLORYHUVFDXVHVPRNLQJDQG
greasy spillovers that may catch on fire.
Ŷ 1HYHUOHDYHRLOXQDWWHQGHGZKLOHIU\LQJ,IDOORZHG
to heat beyond its smoking point, oil may ignite
resulting in fire that may spread to surrounding
FDELQHWV8VHDGHHSIDWWKHUPRPHWHUZKHQHYHU
possible to monitor oil temperature.
Ŷ 7RDYRLGRLOVSLOORYHUDQGILUHXVHDPLQLPXP
DPRXQWRIRLOZKHQVKDOORZSDQIU\LQJDQGDYRLG
cooking frozen foods with excessive amounts of ice.
Ŷ 8VHSURSHUSDQVL]H²VHOHFWFRRNZDUHKDYLQJ
flat bottoms large enough to cover the surface
heating element. The use of undersized
cookware will expose a portion of the surface
unit to direct contact and may result in ignition
of clothing. Proper relationship of cookware to
surface unit will also improve efficiency.
Ŷ 2QO\FHUWDLQW\SHVRIJODVVJODVVFHUDPLF
earthenware or other glazed containers are
suitable for cooktop service; others may break
because of the sudden change in temperature.
Ŷ 7RPLQLPL]HWKHSRVVLELOLW\RIEXUQVLJQLWLRQRI
flammable materials and spillage, the handle of a
container should be turned toward the center of the
range without extending over nearby surface units.
Ŷ :KHQSUHSDULQJIODPLQJIRRGVXQGHUDKRRGWXUQ
the fan on.
Ŷ 8VHFDUHZKHQWRXFKLQJWKHFRRNWRS7KHJODVV
surface of the cooktop will retain heat after the
controls have been turned off.
Ŷ $YRLGVFUDWFKLQJRULPSDFWLQJWKHJODVVFRRNWRS
'RLQJVRPD\OHDGWREURNHQJODVV7KHFRRNWRS
can be scratched with items such as knives,
sharp instruments, rings or other jewelry, and
rivets on clothing.
Ŷ 'RQRWFRRNRQDEURNHQFRRNWRS,IJODVV
cooktop should break, cleaning solutions and
spillovers may penetrate the broken cooktop and
FUHDWHDULVNRIHOHFWULFVKRFN&RQWDFWDTXDOLILHG
technician immediately.
Ŷ 'RQRWSODFHRUVWRUHLWHPVWKDWFDQPHOWRUFDWFK
fire on the glass cooktop, even when it is not
EHLQJXVHG,IWKHFRRNWRSLVLQDGYHUWHQWO\WXUQHG
on, they may ignite. Heat from the cooktop after it
is turned off may cause them to ignite also.
Ŷ 8VH&(5$0$%5<7(®FHUDPLF&RRNWRS&OHDQHU
DQG&(5$0$%5<7(®&OHDQLQJ3DGWRFOHDQ
WKHFRRNWRS:DLWXQWLOWKHFRRNWRSFRROVDQG
the indicator light goes out before cleaning. A
wet sponge or cloth on a hot surface can cause
VWHDPEXUQV6RPHFOHDQHUVFDQSURGXFH
noxious fumes if applied to a hot surface.
127(6XJDUVSLOOVDUHDQH[FHSWLRQ7KH\
should be scraped off while still hot using an
RYHQPLWWDQGDVFUDSHU6HHWKH&OHDQLQJWKH
glass cooktop section for detailed instructions.
Ŷ 5HDGDQGIROORZDOOLQVWUXFWLRQVDQGZDUQLQJVRQ
the cleaning cream label.
Ŷ 'RQRWXVHZDWHURQJUHDVHILUHV1HYHUSLFNXS
DIODPLQJSDQ7XUQWKHFRQWUROVRII6PRWKHUD
flaming pan on a surface unit by covering the
SDQFRPSOHWHO\ZLWKDZHOOILWWLQJOLGFRRNLHVKHHW
RUIODWWUD\8VHDPXOWLSXUSRVHGU\FKHPLFDORU
IRDPW\SHILUHH[WLQJXLVKHU
RADIANT COOKTOP SAFETY INSTRUCTIONS
IN THE EVENT OF A FIRE, TAKE THE FOLLOWING
STEPS TO PREVENT THE FIRE FROM SPREADING:
WARNING
WARNING

449-80635-1
GE Radiant Cooktop Warranty
GEAppliances.com
$OOZDUUDQW\VHUYLFHLVSURYLGHGE\RXU)DFWRU\6HUYLFH&HQWHUVRUDQDXWKRUL]HG&XVWRPHU&DUH®technician.
7RVFKHGXOHVHUYLFHRQOLQHYLVLWXVDWZZZJHDSSOLDQFHVFRPVHUYLFHBDQGBVXSSRUWRUFDOO*(&$5(6
(800.432.2737). Please have serial number and model number available when calling for service.
6HUYLFLQJ\RXUDSSOLDQFHPD\UHTXLUHWKHXVHRIWKHRQERDUGGDWDSRUWIRUGLDJQRVWLFV7KLVJLYHVD*(IDFWRU\
VHUYLFHWHFKQLFLDQWKHDELOLW\WRTXLFNO\GLDJQRVHDQ\LVVXHVZLWK\RXUDSSOLDQFHDQGKHOSV*(LPSURYHLWVSURGXFWV
E\SURYLGLQJ*(ZLWKLQIRUPDWLRQRQ\RXUDSSOLDQFH,I\RXGRQRWZDQW\RXUDSSOLDQFHGDWDWREHVHQWWR*(SOHDVH
DGYLVH\RXUWHFKQLFLDQQRWWRVXEPLWWKHGDWDWR*(DWWKHWLPHRIVHUYLFH
)RUWKHSHULRGRIRQH\HDUIURPWKHGDWHRIWKHRULJLQDOSXUFKDVH*(ZLOOSURYLGHDQ\SDUWRIWKHFRRNWRSZKLFK
IDLOVGXHWRDGHIHFWLQPDWHULDOVRUZRUNPDQVKLS'XULQJWKLVOLPLWHGRQH\HDUZDUUDQW\*(ZLOODOVRSURYLGHIUHHRI
FKDUJHDOOODERUDQGLQKRPHVHUYLFHWRUHSODFHWKHGHIHFWLYHSDUW
What GE will not cover:
Ŷ 6HUYLFHWULSVWR\RXUKRPHWRWHDFK\RXKRZWRXVH
the product.
Ŷ ,PSURSHULQVWDOODWLRQGHOLYHU\RUPDLQWHQDQFH
Ŷ Failure of the product if it is abused, misused,
modified or used for other than the intended purpose
or used commercially.
Ŷ Replacement of house fuses or resetting of circuit
breakers.
Ŷ 'DPDJHWRWKHSURGXFWFDXVHGE\DFFLGHQWILUH
floods or acts of God.
Ŷ ,QFLGHQWDORUFRQVHTXHQWLDOGDPDJHFDXVHGE\
possible defects with this appliance.
Ŷ 'DPDJHFDXVHGDIWHUGHOLYHU\
Ŷ Product not accessible to provide required service.
Ŷ 6HUYLFHWRUHSDLURUUHSODFHOLJKWEXOEVH[FHSWIRU
/('ODPSV
Ŷ ,QVWDOODWLRQRUVHUYLFHIRUDPDNHXSUHSODFHPHQW
air system.
EXCLUSION OF IMPLIED WARRANTIES
<RXUVROHDQGH[FOXVLYHUHPHG\LVSURGXFWUHSDLUDVSURYLGHGLQWKLV/LPLWHG:DUUDQW\$Q\LPSOLHGZDUUDQWLHV
including the implied warranties of merchantability or fitness for a particular purpose, are limited to one year or the
shortest period allowed by law.
This warranty is extended to the original purchaser and any succeeding owner for products purchased for home use
ZLWKLQWKH86$,IWKHSURGXFWLVORFDWHGLQDQDUHDZKHUHVHUYLFHE\D*($XWKRUL]HG6HUYLFHULVQRWDYDLODEOH\RX
PD\EHUHVSRQVLEOHIRUDWULSFKDUJHRU\RXPD\EHUHTXLUHGWREULQJWKHSURGXFWWRDQ$XWKRUL]HG*(6HUYLFHORFDWLRQ
IRUVHUYLFH,Q$ODVNDWKHZDUUDQW\H[FOXGHVWKHFRVWRIVKLSSLQJRUVHUYLFHFDOOVWR\RXUKRPH
6RPHVWDWHVGRQRWDOORZWKHH[FOXVLRQRUOLPLWDWLRQRILQFLGHQWDORUFRQVHTXHQWLDOGDPDJHV7KLVZDUUDQW\JLYHV\RX
specific legal rights, and you may also have other rights which vary from state to state. To know what your legal rights
are, consult your local or state consumer affairs office or your state’s Attorney General.
Warrantor: General Electric Company. Louisville, KY 40225
Extended Warranties:3XUFKDVHD*(H[WHQGHGZDUUDQW\DQGOHDUQDERXWVSHFLDOGLVFRXQWVWKDWDUHDYDLODEOHZKLOH
\RXUZDUUDQW\LVVWLOOLQHIIHFW<RXFDQSXUFKDVHLWRQOLQHDQ\WLPH
ZZZJHDSSOLDQFHVFRPVHUYLFHBDQGBVXSSRUWVKRSIRUH[WHQGHGVHUYLFHSODQVKWP
RUFDOOGXULQJQRUPDOEXVLQHVVKRXUV*(&RQVXPHU+RPH6HUYLFHVZLOOVWLOOEHWKHUHDIWHU\RXU
warranty expires.
Register Your Appliance: 5HJLVWHU\RXUQHZDSSOLDQFHRQOLQHDW\RXUFRQYHQLHQFH
ZZZJHDSSOLDQFHVFRPVHUYLFHBDQGBVXSSRUWUHJLVWHU
Timely product registration will allow for enhanced communication and prompt service under the terms of your warranty,
VKRXOGWKHQHHGDULVH<RXPD\DOVRPDLOLQWKHSUHSULQWHGUHJLVWUDWLRQFDUGLQFOXGHGLQWKHSDFNLQJPDWHULDO
6WDSOH\RXUUHFHLSWKHUH3URRIRIWKHRULJLQDOSXUFKDVH
date is needed to obtain service under the warranty. WARRANTY
Thank You! ... for your purchase of a GE Brand appliance.

49-80635-1 5
Schedule Service: ([SHUW*(UHSDLUVHUYLFHLVRQO\RQH
VWHSDZD\IURP\RXUGRRU*HWRQOLQHDQGVFKHGXOH\RXU
VHUYLFHDWZZZJHDSSOLDQFHVFRPVHUYLFHBDQGBVXSSRUW
2UFDOO*(&$5(6GXULQJQRUPDO
business hours.
Parts and Accessories: ,QGLYLGXDOVTXDOLILHGWRVHUYLFH
their own appliances can have parts or accessories sent
GLUHFWO\WRWKHLUKRPHV9,6$0DVWHU&DUGDQG'LVFRYHU
FDUGVDUHDFFHSWHG2UGHURQOLQHWRGD\KRXUV
every day or by phone at 800.626.2002 during normal
business hours.
,QVWUXFWLRQVFRQWDLQHGLQWKLVPDQXDOFRYHUSURFHGXUHV
to be performed by any user. Other servicing generally
VKRXOGEHUHIHUUHGWRTXDOLILHGVHUYLFHSHUVRQQHO&DXWLRQ
must be exercised, since improper servicing may cause
unsafe operation.
Real Life Design Studio: *(VXSSRUWVWKH8QLYHUVDO
'HVLJQFRQFHSWRISURGXFWVVHUYLFHVDQGHQYLURQPHQWV
that can be used by people of all ages, sizes and
FDSDELOLWLHV:HUHFRJQL]HWKHQHHGWRGHVLJQIRUDZLGH
range of physical and mental abilities and impairments.
)RUGHWDLOVRI*(¶V8QLYHUVDO'HVLJQDSSOLFDWLRQV
including kitchen design ideas for people with disabilities,
FKHFNRXWRXU:HEVLWHWRGD\)RUWKHKHDULQJLPSDLUHG
SOHDVHFDOO7''*($&
Contact Us: ,I\RXDUHQRWVDWLVILHGZLWKWKHVHUYLFH\RX
UHFHLYHIURP*(FRQWDFWXVRQRXU:HEVLWHZLWKDOOWKH
GHWDLOVLQFOXGLQJ\RXUSKRQHQXPEHURUZULWHWR
General Manager, Customer Relations
GE Appliances, Appliance Park Louisville, KY 40225
7U\WKH*($SSOLDQFHV:HEVLWHwww.geappliances.com/service_and_support/) 24 hours a day, any day of the
\HDU)RUJUHDWHUFRQYHQLHQFHDQGIDVWHUVHUYLFH\RXFDQQRZGRZQORDG2ZQHU¶V0DQXDOVRUGHUSDUWVRUHYHQ
VFKHGXOHVHUYLFHRQOLQH
Parts and Accessories
7RSODFHDQRUGHUYLVLWXVRQOLQHDW
www.GEApplianceParts.com86RUwww.GEAppliances.ca&DQDGD
or call 800.626.200286800.661.1616&DQDGD
7KHIROORZLQJSDUWVDUHDYDLODEOH
How to Remove Protective Shipping Film and Packaging Tape
&DUHIXOO\JUDVSDFRUQHURIWKHSURWHFWLYHVKLSSLQJILOP
with your fingers and slowly peel it from the appliance
VXUIDFH'RQRWXVHDQ\VKDUSLWHPVWRUHPRYHWKHILOP
Remove all of the film before using the appliance for the
first time.
To assure no damage is done to the finish of the
product, the safest way to remove the adhesive from
packaging tape on new appliances is an application of
a household liquid dishwashing detergent. Apply with a
soft cloth and allow to soak.
NOTE: 7KHDGKHVLYHPXVWEHUHPRYHGIURPDOOSDUWV,W
cannot be removed if it is baked on.
Parts
9HQW)LOWHU :%;
9HQW*ULOOH:KLWH :%;
9HQW*ULOOH%ODFN :%;
/RFNDQG9HQW&RQWURO.QRE:KLWH :%;
/RFNDQG9HQW&RQWURO.QRE%ODFN :%;
/RFNDQG9HQW&RQWURO.QRE66 :%;
%XUQHU&RQWURO.QRE:KLWH :%;
%XUQHU&RQWURO.QRE%ODFN :%;
%XUQHU&RQWURO.QRE66 :%7
Cleaning Supplies
&LWUX6KLQH6WDLQOHVV6WHHO:LSHV :;;
&(5$0$%5<7(®6WDLQOHVV6WHHO$SSOLDQFH&OHDQHU 30;
&(5$0$%5<7(®&OHDQLQJ3DGVIRU&HUDPLF&RRNWRSV :;;
&(5$0$%5<7(®&HUDPLF&RRNWRS&OHDQHU :;;
&(5$0$%5<7(®&HUDPLF&RRNWRS6FUDSHU :;;
.LW.LWLQFOXGHVFUHDPDQGFRRNWRSVFUDSHU :%;
Have a question or need assistance with your appliance?
ASSISTANCE / PARTS AND ACCESSORIES

649-80635-1
1. Left Rear Surface Unit
2. Bridge Surface Unit
3. Left Front Surface Unit
4. Vent Grille
5. Vent Filter (below the vent grille)
6. Right Rear Surface Unit
7. Dual Surface Unit
8. Model and Serial Number Label (under the
cooktop, on the right side of the vent chamber)
9. Left Rear Surface Unit Control
10. Left Front Surface Unit Control
11. Left Side Hot Surface Indicator Lights
(one for each surface unit)
12. Vent Fan Speed Control
13. Control Lock Knob
14. Right Side Hot Surface Indicator Lights
(one for each surface unit)
15. Dual Surface Unit Control
16. Right Rear Surface Unit Control
17. Surface Unit On Indicator Light
Throughout this manual, features and appearance may vary from your model.
Cooktop Features
USING THE COOKTOP: Cooktop Features
Feature Index (Features and appearance may vary)
4516
378
2
9
13
17
12
11
10 15
16
14

49-80635-1 7
Surface Burners
USING THE COOKTOP: Surface Burners
Radiant Surface Units
The control for the radiant surface unit can be set
anywhere between LO and HI for an unlimited number
RIKHDWVHWWLQJV:LWKWKHLQILQLWHVZLWFKWKHFRLOF\FOHVRQ
and off to maintain your selected control setting.
To bring liquids to a boil faster, use a lid to cover the pan.
The control knob must be pushed down and turned
from the OFFSRVLWLRQ:KHQWKHFRQWURONQREVDUHLQ
any position other than off, they may be turned without
pushing down.
%HVXUH\RXWXUQWKHFRQWURONQRERIIZKHQ\RXILQLVK
FRRNLQJ<RXZLOOIHHODFOLFNDWWKHOFF position.
The surface unit ON indicator
light will glow when any
surface unit is on.
The HOT surface indicator
light will glow when the glass
surface is hot and will remain
on until the surface has cooled.
About the radiant surface units
The radiant cooktop features heating units beneath a
smooth glass surface.
NOTE: A slight odor is normal when a new cooktop is
XVHGIRUWKHILUVWWLPH,WLVFDXVHGE\WKHKHDWLQJRIQHZ
parts and insulating materials and will disappear in a
short time.
NOTE: On models with light colored glass cooktops, it is
normal for the cooking zones to change color when hot
or cooling down. This is temporary and will disappear as
the glass cools to room temperature.
The surface unit will cycle on and off to maintain your
selected control setting.
,WLVVDIHWRSODFHKRWFRRNZDUHIURPWKHRYHQRUVXUIDFH
on the glass surface when the surface is cool.
(YHQDIWHUWKHVXUIDFHXQLWVDUHWXUQHGRIIWKHJODVV
cooktop retains enough heat to continue cooking. To
DYRLGRYHUFRRNLQJUHPRYHSDQVIURPWKHVXUIDFHXQLWV
when the food is cooked. Avoid placing anything on the
surface unit until it has cooled completely.
Ŷ :DWHUVWDLQVPLQHUDOGHSRVLWVDUHUHPRYDEOHXVLQJ
the cleaning cream or full strength white vinegar.
Ŷ 8VHRIZLQGRZFOHDQHUPD\OHDYHDQLULGHVFHQWILOP
on the cooktop. The cleaning cream will remove this
discoloration.
Ŷ 'RQ¶WVWRUHKHDY\LWHPVDERYHWKHFRRNWRS,IWKH\
drop onto the cooktop, they can cause damage.
Ŷ 'RQRWXVHWKHVXUIDFHDVDFXWWLQJERDUG
Never cook directly on the glass.
Always use cookware.
Always place the pan in the center
of the surface unit you are cooking on.
Do not slide cookware across the
cooktop because it can scratch the
glass. The glass is scratch-resistant,
not scratchproof.
Be sure you turn the control knob
to OFF when you finish cooking.
SURFACE
COOKING
OFF CENTER
DRAGGING

849-80635-1
Surface Burners (Cont.)
USING THE COOKTOP: Surface Burners
Dual Surface Unit
The right front surface unit has 2 cooking sizes to select
from so you can match the size of the unit to the size of
the cookware you are using.
7RXVHWKHODUJHLQFKVXUIDFHXQLWWXUQWKHNQRE
clockwise to and select the desired setting. The unit
will heat the entire area contained by the larger circle.
7RXVHWKHVPDOOLQFK
surface unit, turn the knob
counterclockwise to and
select the desired setting. The
unit will only heat the area
inside the smaller circle.
Bridge Surface Unit
Make sure the pan rests flat on the glass cooktop and
LWLVQRWUHVWLQJRQWKHWULP,I\RXQRWLFHSRRUFRRNLQJ
performance, move the pan to make sure it is flat on
the cooktop.
To use the bridge burner, turn the burner knob to and
select the desired setting. The unit will heat the front
surface burner and the bridge.
&KRRVHSDQVWKDWPDWFKWKHFLUFOHEULGJHDUHDDVFORVHO\
as possible.
To use only the front surface
unit, turn the burner knob to
and select the desired setting.
The unit will only heat the front
surface burner.
<RXFDQFUHDWHDQREORQJ
heated area by using the left
rear unit in addition to the front
unit bridge combination.
Surface Elements Cycle On and Off
6XUIDFHHOHPHQWVZLOOF\FOHRQDQGRIIWRPDLQWDLQWKH
temperature you have selected.
All radiant surface elements have a temperature limiter
that protects the glass cooktop from getting too hot.
The temperature limiter may cycle the elements off
ZKLOHFRRNLQJLI
Ŷ 7KHSDQERLOVGU\
Ŷ 7KHSDQERWWRPLVQRWIODW
Ŷ 7KHSDQLVRIIFHQWHU
Ŷ 7KHUHLVQRSDQRQWKHHOHPHQW
Temperature Limiter
(YHU\UDGLDQWVXUIDFHXQLWKDVDWHPSHUDWXUHOLPLWHU
The temperature limiter protects the glass cooktop from
getting too hot.
The temperature limiter may cycle the units off for a
WLPHLI
Ŷ 7KHFRRNWRSLVRQZKLOHFRRNLQJ
Ŷ 7KHSDQERLOVGU\
Ŷ 7KHSDQERWWRPLVQRWIODW
Ŷ 7KHSDQLVRIIFHQWHU
Ŷ 7KHUHLVQRSDQRQWKHXQLW
Control Lock-Out for Surface Units
7RDFWLYDWHFRQWUROORFNRXWWXUQWKH&RQWURO/RFNNQRE
to LOCK. This will prevent surface units from heating.
An indicator light will glow to show that they are locked.
The downdraft fan will remain operable with control
lockout engaged.
,QWKHORFNHGSRVLWLRQWKHFRRNWRS
will produce an audible sound if any
surface unit control knob is engaged or
moved to a position other than OFF.
How to Operate the Vent System
7KHEXLOWLQYHQWV\VWHPKHOSVUHPRYHFRRNLQJYDSRUV
odors and smoke from foods prepared on the cooktop.
To operate the downdraft vent system, turn the vent fan
speed control knob to HI,MED or LO, as needed.
&RQWLQXRXVXVHRIWKHYHQWV\VWHPZKLOH
cooking helps keep the kitchen comfortable
and less humid, reducing cooking odors
and soiling moisture that normally creates a
frequent need for cleaning.
Small 6"
surface unit
setting
Large 9"
surface unit setting
Front
Burner and
Bridge
Front
Burner
only

49-80635-1 9
Cookware for Radiant Glass Cooktop
USING THE COOKTOP: Cookware for Radiant Glass Cooktop / For Best Results
For Best Results
NOTE: Follow all cookware manufacturer’s recommendations when using any type of cookware on the ceramic cooktop.
The following information will help you choose cookware which will give good performance on
glass cooktops.
Stainless Steel:
recommended
Aluminum:
heavy weight recommended
Good conductivity. Aluminum residues
sometimes appear as scratches on the
cooktop but can be removed if cleaned
LPPHGLDWHO\%HFDXVHRILWVORZPHOWLQJSRLQW
thin weight aluminum should not be used.
Copper Bottom:
recommended
&RSSHUPD\OHDYHUHVLGXHVZKLFKFDQ
appear as scratches. The residues can be
removed, as long as the cooktop is cleaned
immediately. However, do not let these pots
boil dry. Overheated metal can bond to glass
cooktops. An overheated copper bottom pot
will leave a residue that will permanently
stain the cooktop if not removed immediately.
Porcelain Enamel on Cast Iron:
recommended if bottom of pan is coated
Porcelain Enamel on Steel:
not recommended
Heating empty pans can cause permanent
damage to cooktop glass. The enamel can
melt and bond to the ceramic cooktop.
Glass-ceramic:
not recommended
3RRUSHUIRUPDQFH:LOOVFUDWFKWKHVXUIDFH
Stoneware:
not recommended
Poor performance. May scratch the surface.
Cast Iron:
QRWUHFRPPHQGHG²XQOHVVGHVLJQHG
specifically for glass cooktops
Poor conductivity and slow to absorb heat.
:LOOVFUDWFKWKHFRRNWRSVXUIDFH
Ŷ 3ODFHRQO\GU\SDQVRQWKHVXUIDFHHOHPHQWV'RQRW
place lids on the surface elements, particularly wet lids.
Ŷ 'RQRWXVHZRNVWKDWKDYHVXSSRUWULQJV7KLVW\SHRI
wok will not heat on glass surface elements.
Ŷ :HUHFRPPHQGWKDW\RXXVHRQO\DIODWERWWRPHG
wok. They are available at your local retail store. The
bottom of the wok should have the same diameter as
the surface element to ensure proper contact.
Ŷ 6RPHVSHFLDOFRRNLQJSURFHGXUHVUHTXLUHVSHFLILF
FRRNZDUHVXFKDVSUHVVXUHFRRNHUVGHHSIDWIU\HUV
etc. All cookware must have flat bottoms and be the
correct size.
Ŷ Avoid allowing foods to boil dry as some cookware
may stick to the cooking surface, causing permanent
damage to the cooktop.
Check pans for flat
bottoms by using a
straight edge.
Pans with rounded,
curved, ridged or
warped bottoms are
not recommended.
Do not place wet pans on the
glass cooktop.
Do not use woks with support
rings on the glass cooktop.
Use flat-bottomed woks on
the glass cooktop.

10 49-80635-1
Cleaning The Cooktop
CARE AND CLEANING: Cleaning The Cooktop
Vent Grille
%HIRUHFOHDQLQJWKHYHQWJULOOHEHVXUHWKHH[KDXVW
blower is turned off.
To clean the vent grille, remove it from the cooktop by
OLIWLQJLWXSDQGRII:LSHZLWKDGDPSFORWK,IQHFHVVDU\
the vent grille can be washed in the sink.
8VHGLVKZDVKLQJOLTXLGIRUFOHDQLQJ
'RQRWXVHDEUDVLYHFOHDQHUV
They will damage the vent
grille’s finish.
'RQRWFOHDQWKHYHQWJULOOHLQ
the dishwasher.
Vent Filter and Chamber
The filter is held in place at an angle with a hold bump.
Lift the filter up and out of the vent opening diagonally.
To clean the filter, swish it in hot, soapy water. Rinse
well and dry thoroughly.
Do not operate the vent without the filter in place.
To clean the vent chamber, use hot, soapy water. Rinse
ZLWKFOHDQZDWHUDQGGU\WKRURXJKO\'RQRWXVHDEUDVLYH
cleaners; they will damage the finish. Replace the filter
after it is cleaned and dry.
Remove and replace the filter diagonally
through the vent opening.
To order replacement filters, see the
Assistance / Parts and Accessories section.
Control Knobs
The control knobs may be removed for easier cleaning.
Make sure the knobs are in the Off positions and pull
them straight off the stems for cleaning.
To clean the knobs, place them in a dishwasher or wash
with soap and water. Rinse with clean water. Make sure
the insides of knobs are dry before replacing.
Replace the knobs in the Off position to ensure proper
placement.
Stainless Steel Surfaces (on some models)
'RQRWXVHDVWHHOZRROSDGLWZLOOVFUDWFKWKHVXUIDFH
To clean the stainless steel surface, use warm sudsy
water or a stainless steel cleaner or polish. Always wipe
the surface in the direction of the grain. Follow the cleaner
instructions for cleaning the stainless steel surface.
To inquire about purchasing cleaning products including
stainless steel appliance cleaner or polish read the
$VVLVWDQFH3DUWVDQG$FFHVVRULHVVHFWLRQVDWWKH
beginning of this manual.
Vent
Chamber
Vent Filter
When replacing the filter, make sure it
rests, at an angle, on the supports in
the vent opening.
Shaped area

49-80635-1 11
Use a CERAMA BRYTE®Cleaning
Pad for Ceramic Cooktops.
Normal Daily Use Cleaning
21/<XVH&(5$0$%5<7(®&HUDPLF&RRNWRS
&OHDQHURQWKHJODVVFRRNWRS2WKHUFUHDPVPD\QRW
be as effective.
To maintain and protect the surface of your glass
FRRNWRSIROORZWKHVHVWHSV
%HIRUHXVLQJWKHFRRNWRSIRUWKHILUVWWLPHFOHDQLW
ZLWK&(5$0$%5<7(®&HUDPLF&RRNWRS&OHDQHU
This helps protect the top and makes cleanup easier.
'DLO\XVHRI&(5$0$%5<7(®&HUDPLF&RRNWRS
&OHDQHUZLOOKHOSNHHSWKHFRRNWRSORRNLQJQHZ
3. Remove the burner grates, vent grille and vent grille
gasket.
6KDNHWKHFOHDQLQJFUHDPZHOO$SSO\DIHZGURSVRI
&(5$0$%5<7(®&HUDPLF&RRNWRS&OHDQHUGLUHFWO\
to the cooktop.
8VHDSDSHUWRZHORU
&(5$0$%5<7(®&OHDQLQJ
3DGIRU&HUDPLF&RRNWRSV
to clean the entire cooktop
surface.
8VHDGU\FORWKRUSDSHUWRZHO
to remove all cleaning residue.
1RQHHGWRULQVH
NOTE:,WLVYHU\LPSRUWDQWWKDW
\RX'2127KHDWWKHFRRNWRS
until it has been cleaned
thoroughly.
Burned-On Residue
NOTE:'$0$*(WR\RXUJODVVVXUIDFHPD\RFFXULI\RX
use scrub pads other than those recommended.
1. Allow the cooktop to cool.
2. Remove the burner grates, vent grille and vent grille
JDVNHW6SUHDGDIHZGURSVRI&(5$0$%5<7(®
&HUDPLF&RRNWRS&OHDQHUWRWKHHQWLUHEXUQHG
residue area.
8VLQJWKHLQFOXGHG&(5$0$%5<7(®&OHDQLQJ3DG
IRU&HUDPLF&RRNWRSVUXEWKHUHVLGXHDUHDDSSO\LQJ
pressure as needed.
,IDQ\UHVLGXHUHPDLQVUHSHDWWKHVWHSVOLVWHGDERYH
as needed.
)RUDGGLWLRQDOSURWHFWLRQDIWHUDOOUHVLGXHKDV
been removed, polish the entire surface with
&(5$0$%5<7(®&HUDPLF&RRNWRS&OHDQHU
and a paper towel.
Clean your cooktop after each
spill. Use CERAMA BRYTE®
Ceramic Cooktop Cleaner.
CARE AND CLEANING: Cleaning The Cooktop / Cleaning the Glass Cooktop
Cleaning the Glass Cooktop
Heavy, Burned-On Residue
1. Allow the cooktop to cool.
2. Remove the burner grates, vent grille and vent grille
gasket.
8VHDVLQJOHHGJHUD]RUEODGHVFUDSHUDWDSSUR[LPDWHO\
DDQJOHDJDLQVWWKHJODVVVXUIDFHDQGVFUDSHWKH
VRLO,WZLOOEHQHFHVVDU\WRDSSO\SUHVVXUHWRWKHUD]RU
scraper in order to remove the residue.
4. After scraping with the razor scraper, spread a few drops
RI&(5$0$%5<7(®&HUDPLF&RRNWRS&OHDQHURQWKH
HQWLUHEXUQHGUHVLGXHDUHD8VHWKH&(5$0$%5<7(®
&OHDQLQJ3DGWRUHPRYHDQ\UHPDLQLQJUHVLGXH
)RUDGGLWLRQDOSURWHFWLRQDIWHUDOOUHVLGXHKDVEHHQ
UHPRYHGSROLVKWKHHQWLUHVXUIDFHZLWK&(5$0$
%5<7(®&HUDPLF&RRNWRS&OHDQHUDQGDSDSHUWRZHO
The CERAMA BRYTE®Ceramic Cooktop Scraper and all recommended
supplies are available through our Parts Center. See Assistance / Parts
And Accessories section.
NOTE: Do not use a dull or nicked blade.

12 49-80635-1
CARE AND CLEANING: Cleaning the Glass Cooktop
Cleaning the Glass Cooktop
Metal Marks and Scratches
%HFDUHIXOQRWWRVOLGHSRWVDQGSDQVDFURVV\RXU
FRRNWRS,WZLOOOHDYHPHWDOPDUNLQJVRQWKHFRRNWRS
surface. These marks are removable using the
&(5$0$%5<7(®&HUDPLF&RRNWRS&OHDQHUZLWK
WKH&(5$0$%5<7(®&OHDQLQJ3DGIRU&HUDPLF
&RRNWRSV
,ISRWVZLWKDWKLQRYHUOD\RIDOXPLQXPRUFRSSHU
are allowed to boil dry, the overlay may leave black
discoloration on the cooktop. This should be removed
immediately before heating again or the discoloration
may be permanent.
WARNING: &DUHIXOO\FKHFNWKHERWWRPRI
pans for roughness that would scratch the cooktop.
Damage from Sugary Spills and Melted Plastic
6SHFLDOFDUHVKRXOGEHWDNHQZKHQUHPRYLQJKRWVXEVWDQFHVto avoid permanent damage of the glass surface.
6XJDU\VSLOORYHUVVXFKDVMHOOLHVIXGJHFDQG\V\UXSVRUPHOWHGSODVWLFVFDQFDXVHSLWWLQJRIWKHVXUIDFHRI\RXU
FRRNWRSQRWFRYHUHGE\WKHZDUUDQW\XQOHVVWKHVSLOOLVUHPRYHGZKLOHVWLOOKRW6SHFLDOFDUHVKRXOGEHWDNHQZKHQ
removing hot substances.
%HVXUHWRXVHDQHZVKDUSUD]RUVFUDSHU
'RQRWXVHDGXOORUQLFNHGEODGH
1. Turn off all surface burners and, with an oven mitt,
remove hot pans and grates.
:HDULQJDQRYHQPLWW
D8VHDVLQJOHHGJHUD]RUEODGHVFUDSHU
&(5$0$%5<7(®&HUDPLF&RRNWRS6FUDSHUWR
move the spill to a cool area on the cooktop.
b. Remove the spill with paper towels.
3. Any remaining spillover should be left until the surface
of the cooktop has cooled.
'RQ¶WXVHWKHVXUIDFHXQLWVDJDLQXQWLODOORIWKH
residue has been completely removed.
NOTE:,ISLWWLQJRULQGHQWDWLRQLQWKHJODVVVXUIDFHKDV
already occurred, the cooktop glass will have to be
UHSODFHG,QWKLVFDVHVHUYLFHZLOOEHQHFHVVDU\

49-80635-1 13
Installation
Radiant Downdraft Cooktop
Instructions PP9830
“If you have questions, call 800.GE.CARES or visit our website at: GEAppliances.com”
INSTALLATION INSTRUCTIONS
BEFORE YOU BEGIN
Read these instructions completely and carefully.
• IMPORTANT –Save these instructions for local
inspector’s use.
•IMPORTANT –Observe all governing codes
and ordinances.
• Note to Installer – Be sure to leave these instructions
with the Consumer.
• Note to Consumer – Keep these instructions for future
reference.
• Unless very knowledgeable in the installation of this
product, engage a professional installer.
• Proper installation is the responsibility of the installer.
• Product failure due to improper installation is not
covered under the Warranty.
WARNING –Before beginning the installation,
switch power off at the service panel and lock the service
disconnecting means to prevent power from being switched
on accidentally. When the service disconnecting means
cannot be locked, securely fasten a prominent warning
device, such as a tag, to the service panel. WARNING –TO REDUCE THE RISK OF FIRE,
USE ONLY METAL DUCTWORK.
IMPORTANT SAFETY INSTRUCTIONS
WARNING –TO REDUCE THE RISK
OF FIRE, ELECTRIC SHOCK OR INJURY TO PERSONS,
OBSERVE THE FOLLOWING:
A
Installation work and electrical wiring must be done
by qualified person(s) in accordance with all applicable
codes and standards, including fire-rated
construction.
B
Sufficient air is needed for proper combustion and
exhausting of gases through the flue (chimney) of fuel
burning equipment to prevent back drafting. Follow
the heating equipment manufacturer’s guidelines and
safety standards such as those published by
the National Fire Protection Association (NFPA), and
the American Society for Heating, Refrigeration and
Air Conditioning Engineers (ASHRAE), and the local
code authorities.
C
When cutting or drilling into wall or ceiling, do not
damage electrical wiring and other hidden utilities.
D
Ducted fans must always be vented to the outdoors.
• This unit must be properly grounded.
EXHAUST BLOWER RATINGS
EXHAUST BLOWER SAFETY WARNING
Sufficient air is needed for proper combustion and exhausting of gases through the flue (chimney) of fuel burning equipment to
prevent back drafting. Follow the heating equipment manufacturer’s guide lines and safety standards, such as those published by
the National Fire Protection Association (NFPA), the American Society for Heating, Refrigeration and Air Conditioning (ASHRAE) and
the local code authorities. when applicable, install any make up (replacement) air system in accordance with local building code
requirements. Visit GEAppliances.com for available makeup air solutions.

14 49-80635-1
INSTALLATION INSTRUCTIONS
Installation Instructions
UNPACKING YOUR COOKTOP
Vent Grille
Cleaning Cream Scrub Sponge
Sheet Metal
Screws (9)
(8-18 x 3/8") Foam Gasket Tape
Blower Assembly and (4) Mounting
Nuts (10-32 keps – nuts with lock
washers attached)
Blower
Plenum Vent
Filter
CAUTION:
DO NOT LIFT
FROM VENT
OPENING OR
BUMP GLASS
Check to be sure that all packing materials and
tape have been removed. This will include tape on
control knobs (if applicable), adhesive tape, wire ties,
cardboard and protective plastic. Failure to remove
these materials could result in damage to the
appliance once the appliance has been turned on and
surfaces have heated.
CAUTION: GLASS IS FRAGILE DO NOT BUMP
EDGE OF GLASS DURING INSTALLATION

49-80635-1 15
INSTALLATION INSTRUCTIONS
Installation Instructions
PREPARATION
30" COOKTOP (DIMENSIONS FOR REFERENCE ONLY)
Unit shown fully assembled.
Unit must be vented to the outside!
TOOLS AND MATERIALS YOU WILL NEED
• Cut resistant gloves
• Saw
• Flat-blade screwdriver
• Electrician’s pliers
• Duct tape
• Measuring tape or scale
• Carpenter’s square
• 7/16” wrench or socket set
• Drill and drill bit
• Sheet metal screws
• Junction box*
• 3/4” flexible conduit*
• Electrical wire per local code*
• Wire nuts*
• Ductwork
*NOTE: Electrical installation kit JXCK89 may be ordered
separately and includes all the parts necessary to connect
the cooktop to typical rough-in wiring.
ELECTRICAL REQUIREMENTS
This appliance must be supplied with the proper voltage and
frequency, as listed in these Installation Instructions, and
connected to an individual, properly grounded branch circuit,
protected by a 40-amp circuit breaker or time delay fuses.
All wire connections must be made in accordance with local
codes and properly insulated. Check with your local utility for
governing electrical codes and ordinances. In the absence
of local electrical codes, the National Electrical Code, ANSI/
NFPA No. 70 – Latest Edition, governing electric range
installations, must be followed.
A copy of the National Electrical Code can be obtained by
writing to:
National Fire Protection Association
Batterymarch Park
Quincy, MA 02260
Effective January 1, 1996, the National Electrical Code
requires that new, but not existing, construction utilize a
four-conductor connection to an electric range. When
installing an electric range in new construction, follow
the instructions in NEW CONSTRUCTION AND FOUR-
CONDUCTOR BRANCH CIRCUIT CONNECTION.
You must use a three-wire, single-phase AC 208Y/120 Volt
or 240/120 Volt, 60 Hertz electrical system with separate
ground. If you connect to aluminum wiring, properly
installed connectors approved for use with aluminum wiring
must be used.
CAUTION:FOR PERSONAL SAFETY, REMOVE
HOUSE FUSE OR OPEN CIRCUIT BREAKER BEFORE
PREPARING JUNCTION BOX.
201ø2”
22”
283ø4”
23ø16”
(21ø4”SS)
217ø8”
(2115ø16”SS)
2923ø32”
(2913ø16”SS)

16 49-80635-1
INSTALLATION INSTRUCTIONS
Installation Instructions
CABINET PREPARATION
1PREPARING FOR INSTALLATION
Positioning the cooktop
The cooktop is designed to look best when centered in a
cabinet at least 30” wide.
The exhaust vent beneath the cooktop must be located
between wall studs or floor joists so that the ductwork may
be installed properly.
At least 6” must be allowed between side edges of the
cooktop and adjacent walls.
Avoid placing cabinets above the cooktop unit, if possible,
in order to reduce the hazards caused by reaching over
heated surface units. If cabinets are placed over the
cooktop, the risks can be reduced by installing a range hood
that projects horizontally a minimum of 5 inches beyond the
bottom of the cabinets.
If cabinetry is used above the cooktop, allow a minimum 30”
clearance between the cooking surface and the bottom of
any unprotected cabinet.
If the clearance between the cooktop and the cabinetry is
less than 30”, the cabinet bottom must be protected with
flame retardant millboard at least 1/4” thick, covered with
28 gauge sheet steel or 0.020” thick copper. Clearance
between the cooktop and the protected cabinetry MUST
NEVER BE LESS THAN 24".
EXCEPTION: Installation of a listed microwave oven or
cooking appliance over the cooktop shall conform to the
installation instructions packed with that appliance.
A 15” minimum must be kept from the side edge of the
cooktop to the bottom of any cabinet not directly above the
cooktop. If the clearance is less than 15”, adjacent cabinets
should be at least 6” from the side edge of the cooktop.
3
ROUGH PREPARATION OF JUNCTION BOX
CAUTION: FOR PERSONAL SAFETY, REMOVE
HOUSE FUSE OR OPEN CIRCUIT BREAKER BEFORE
PREPARING JUNCTION BOX.
Install an approved junction box within shaded area shown
LQGLDJUDP-XQFWLRQER[PXVWEHDWOHDVWøµEHORZWRS
of cabinet.
Run conductors from residence wiring to junction box
according to local electrical codes.
2PREPARING THE BASE CABINET
This cooktop is designed to fit easily into a variety
of cabinets. However, some cabinets may require
modifications.
Preparing a cabinet that is against a wall
In some cabinets, the sides may need to be scooped or cut
down 53/4” as shown, and the corner braces removed in
order to accommodate the unit.
In 75 cm and 90 cm frameless European cabinets,
the back panel may need to be cut down 53/4” to
accommodate the unit.
Preparing a peninsula or island-type cabinet
In a peninsula or island-type cabinet, the sides may need to
be scooped or cut down, and the corner braces removed in
order to accommodate the unit.
13" max.
depth of
unprotected
overhead
cabinets
6" min. clearance
from cutout to
side walls
30" min. clearance
from countertop
to unprotected
overhead surface
15" min. height
from countertop to
nearest cabinet on
either side of the unit
53/4
”
Approx.
53/4
”
Approx.
for European
cabinets
16"
9" 4"
20”
101ø2”
C
L

49-80635-1 17
INSTALLATION INSTRUCTIONS
Installation Instructions
CABINET PREPARATION CUTOUTS
4
PREPARING THE COUNTERTOP
The countertop must have a deep flat surface to
accommodate the cooktop and the vent. Countertops
with a rolled front edge and backsplash may not provide
the flat surface area required.
Clearance between inside front of cabinet and rear of
countertop cutout must be 205ø8” in order to accommodate
cooktop depth.
A 1/2” wide flat area is required around the edge of opening
for support of the unit. The cooktop unit must be level and
sit squarely into countertop opening.
Carefully cut countertop opening according to the
dimensions shown in the illustration. Be sure that opening
is cut squarely, with sides parallel to each other and rear
exactly perpendicular to sides.
5
PREPARING FOR DUCTWORK
NOTE: Ductwork MUST be vented to outside. DO NOT vent
into a wall, ceiling, crawlspace, attic or any concealed space.
Cut hole in cabinet wall or floor as appropriate for your
installation. Make sure exhaust duct is located between wall
studs or floor joists.
NOTE: When cutting or drilling into wall or ceiling, do not
damage electrical wiring and other hidden utilities.
6
BLOWER TO DUCTWORK ALIGNMENT
In general, the use of flexible ducting is discouraged
because it can cause severely restricted airflow. However,
if the blower outlet and the floor or wall duct location do
NOT align well, then flexible METAL ducting can be used to
adapt to an offset. Good alignment without use of flexible
ducting is best.
NOTE:
• Do not exceed the maximum recommended offset of 6”.
• Do not allow the flexible ducting to kink or collapse.
• Do stretch the flexible ducting as much as possible to
eliminate as much of the corrugation as possible.
A 31ø4” x 10” rectangle to 6” round transition duct is available
at your local building supply store.
NOTE: Illustrations are for planning purposes only
.
25” min. flat surface area required
205ø8
”
17ø8
”
min.
23ø8
”
min.
205ø8
”
17ø8
”
min.
25
”
287ø8
”
91ø8
”
183ø4
”
101ø8
”
61ø8
”
Rear Wall Venting Downward Venting
Back Venting
(Requires 31ø4” x 10")
Bottom Venting
6” Max.
Centerline
to Centerline
Offset

18 49-80635-1
INSTALLATION INSTRUCTIONS
Installation Instructions
DESIGN INFORMATION
7
PREPARE FOR DUCTWORK
Determine the best route for ductwork; it can be routed in a
variety of ways depending on the kitchen layout.
IMPORTANT: The downdraft air discharge outlet for this unit is
øµ[µUHFWDQJXODU3ODQGXFWLQJDFFRUGLQJO\
Typical duct arrangement countertop series.
To maximize the ventilation performance of the vent system:
1. Minimize the duct run length and number of transitions
and elbows.
2. Maintain a constant duct size.
3. Seal all joints with duct tape to prevent any leaks.
4. Do not use any type of flexible ducting.
If needed, install any make up (replacement) air system in
accordance with local building code requirements. Visit
GEAppliances.com for available makeup air solutions.
• Install ductwork so the piece of duct nearest the downdraft
unit slots INTO the next piece of the duct. Secure the joints
with self-tapping screws and apply duct tape around the
joints to ensure an airtight seal.
Inside wall
cabinet
Up inside wall to roof or
overhang
Directly to outside
Between floor joists Through cabinet toe space
Peninsula or island
Peninsula
Outside wall
cabinet
NOTE: PVC sewer pipe type PSM 12454-B
Schedule 40 ASTM D1785.
Wall Cap Concrete
Slab
6″(15 cm)
Dia. PVC
Sewer Pipe
6″(15 cm)
Dia. Metal
Duct
Pack tightly with gravel
or sand completely
around pipe
3-1/4″x 10″Rectangular
to 6″Round Transition
6″(15 cm)
Dia. 90°
Metal Elbow
6″(15 cm) Dia.
Metal Duct
16″
(40.6 cm)
Max.
12″
(30 cm)
Min.
6″
(15 cm)
Dia. PVC
Coupling
6″(15 cm) Dia.
PVC Sewer Pipe
Elbow
6″(15 cm) Dia.
PVC Sewer Pipe
Elbow
6″(15 cm)
Dia. PVC
Sewer
Pipe
6″
(15 cm)
Dia.
PVC
Coupling
30′-0″(9.14 m) Max.
Optional duct arrangement under concrete slab.
PVC duct should be used if installing under a
poured concrete slab.
Duct Tape
Over Seam and Screw
Screw
Air
Flow

49-80635-1 19
Installation Instructions
UNPACKING THE COOKTOP/INSTALLING THE GASKET
8
INSTALLING THE FOAM GASKET
Do not install the cooktop into the countertop without
installing the foam gasket as shown. It protects the bottom
edge of the glass from the countertop and seals the cooktop
against spills.
Remove the cooktop along with its shipping pad from
the shipping box. Remove the shipping block from the
downdraft vent opening and place it under the shipping pad
to provide level support.
CAUTION: GLASS IS FRAGILE. DO NOT BUMP
EDGE OF GLASS DURING INSTALLATION.
Locate the reflective tape and foam gasket tape included
with your cooktop.
Peel off the white backing to install the foam gasket tape on
the bottom side of the cooktop glass as shown.
Foam Gasket Installation Notes:
•The foam gasket tape should be installed within 1/8” of
the edge of the glass. Do not stretch or twist the foam
gasket tape.
CAUTION: Failure to install foam gasket tape
greatly increases the potential of breaking the cooktop
glass when installing, especially in Corian®or granite
countertops.
•Use care not to stretch the foam gasket tape while it is
installed or it will not stay in place.
•Do not place foam gasket tape over the metal flanges.
•Butt the foam gasket tape ends together at each corner
without overlapping.
•Trim the foam gasket tape to length without stretching.
•Mitre cut outside corners of foam gasket tape slightly if
necessary for appearance.
•Do not scratch the glass while cutting the foam gasket tape.
Center vent shipping block –
place under the shipping pad to
provide level support
Underside
of Glass
Foam
Gasket
Tape
1ø8
”
max. to
Glass Edge
INSTALLATION INSTRUCTIONS

20 49-80635-1
INSTALLATION INSTRUCTIONS
Installation Instructions
INSTALLING THE COOKTOP
9
INSTALLING THE COOKTOP:
Lift the cooktop by the glass side edges as shown.
NOTE: Do not use the glass top vent opening to lift or move
the cooktop into position.
Lower the cooktop into the countertop opening, guiding it
LQWRSRVLWLRQ*ODVVLVIUDJLOH³GRQRWDOORZLWWRGURSRQWRWKH
countertop. Support from the underside and lower slowly.
Carefully remove your fingers one corner at a time to lower
the cooktop into position.
NOTE: Do not use Silicone RTV or caulk to bond cooktop
glass to countertop.
Once the unit is placed in countertop; visually inspect the
cooktop and counter, appearance or alignment concerns.
10
INSTALLING THE OPTIONAL
INSTALLATION BRACKETS
NOTE: Check for glass flatness in Step 9 before installing
optional installation brackets.
To order optional installation brackets/thumb screws, call the
National Parts Center at 800.626.2002.
Order two of each part: WB02X11331 Bracket
WB01X10353 Screw
To install optional installation brackets:
Remove 2 screws on both sides under cooktop.
Align optional installation bracket under cooktop and reinstall
screws through the slot in the bracket. Do this on both sides of
the cooktop.
Thread the thumb screw through the hole in the bracket and
tighten to secure the cooktop to the countertop. Repeat on the
other side.
IMPORTANT: Turn thumb screw until it touches the bottom of
the countertop. Do not overtighten.
CAUTION:
DO NOT LIFT FROM
VENT OPENING.
Optional installation
bracket and
thumbscrew (not
included)
Cooktop Countertop
Screws supplied
with cooktop Thumbscrew
Other manuals for PP9830
3
Table of contents
Languages:
Other GE Cooktop manuals

GE
GE JP355 User manual

GE
GE Monogram ZHU36RSM Manual

GE
GE PCP912 User manual

GE
GE Profile JGP656 Series Installation instructions

GE
GE Monogram ZGU48N4G User manual

GE
GE JP626 User manual

GE
GE JP676J Installation instructions

GE
GE Digital Radiant Cooktop User manual

GE
GE Profile PP962 Manual

GE
GE JP326 User manual