GE GLDT696DSS User manual

GEAppliances.com
GLDT690 Series
GLDT696 Series
Owner’s Manual
Dishwashers
49-55074-1 10-11 GE
Write the model and serial
numbers here:
Model # ___________________
Serial # ____________________
You can find them on a label on the
tub wall just inside the door.
Safety Instructions.........2-5
Operating Instructions
Control Panels and Settings .... 6,7
Loading the
Dishwasher Racks...............10
UsingtheDishwasher..........8,9
Care Instructions
Care and Cleaning ...........11,12
Troubleshooting Tips . . . 13–15
Consumer Support
Consumer Support ..............16
Warranty .......................15

2
IMPORTANT SAFETY INFORMATION.
5($'$//,16758&7,216%()25(86,1*³
SAVE THESE INSTRUCTIONS
WARNING!
For your safety, the information in this manual must be followed to minimize the risk of fire,
explosion, electric shock, and to prevent property damage, personal injury, or death.
WATER HEATER SAFETY
PROPER INSTALLATION AND MAINTENANCE
This dishwasher must be properly installed and located in accordance with the Installation
Instructions before it is used. If you did not receive an Installation Instructions sheet with
your dishwasher, you can receive one by visiting our website at GEAppliances.com.
Contents washed in Anti-bacterial mode, if
available, may be hot to the touch. Use care
before handling.
Using a detergent that is
not specifically designed
for dishwashers will cause
the dishwasher to fill with
suds.
If your dishwasher is connected to a
wall switch, ensure that the switch is
on prior to use.
On dishwashers with electronic
controls, if you choose to turn the wall
switch off between wash cycles, allow
5–10 seconds after turning the switch on
before touching ON/OFF to allow the control to
reboot.
Non-Dishware Items: Do not wash items such
as electronic air cleaner filters, furnace filters
and paint brushes in your dishwasher. Damage
to dishwasher and discoloration or staining of
dishwasher may result.
Close supervision is necessary if this appliance
is used by or near children.
Load light, plastic items so they will not become
dislodged and drop to the bottom
of the dishwasher³they might come into
contact with the heating element and be
damaged.
Connect the dishwasher/appliance to a grounded
metal, permanent wiring system; or run an
equipment-grounding conductor with the circuit
conductors and connect to the equipment-
grounding terminal or lead of the appliance.
Improper connection of the equipment-grounding
conductor can result in a risk of electric shock.
Check with a qualified electrician or service
representative if you are in doubt whether the
appliance is properly grounded.
Dispose of discarded appliances and shipping or
packing material properly.
Do not attempt to repair or replace any part
of your dishwasher unless it is specifically
recommended in this manual. All other servicing
should be referred to a qualified technician.
To minimize the possibility of electric shock,
disconnect this appliance from the power supply
before attempting any maintenance.
NOTE: Turning the dishwasher off does not
disconnect the appliance from the power supply.
We recommend having a qualified technician
service your appliance.
WARNING!
CAUTION: To prevent minor injury or property damage
Under certain conditions, hydrogen gas may be produced in a water heater that has not been used
for two or more weeks. HYDROGEN GAS IS EXPLOSIVE.
If the hot water has not been used for two or more weeks, prevent the possibility of damage or
injury by turning on all hot water faucets and allow them to run for several minutes. Do this before
using any electrical appliance connected to the hot water system. This simple procedure will allow
any built-up hydrogen gas to escape. Since the gas is flammable, do not smoke, use an open flame,
or use the appliance during this process.

3
INFORMACIN IMPORTANTE DE SEGURIDAD
/($72'$6/$6,16758&&,21(6$17(6'(86$5³
GUARDE ESTAS INSTRUCCIONES
¡ADVERTENCIA!
Para su seguridad, debe cumplirse con la información de este manual a fin de minimizar el
riesgo de incendio o explosión, descarga eléctrica o para prevenir daños a la propiedad, lesiones
personales o la muerte.
SEGURIDAD DEL CALENTADOR DE AGUA
Los elementos lavados en el modo anti-bacterial, si
se encuentra disponible, pueden quedar calientes al
tacto. Tenga cuidado antes de tocarlos.
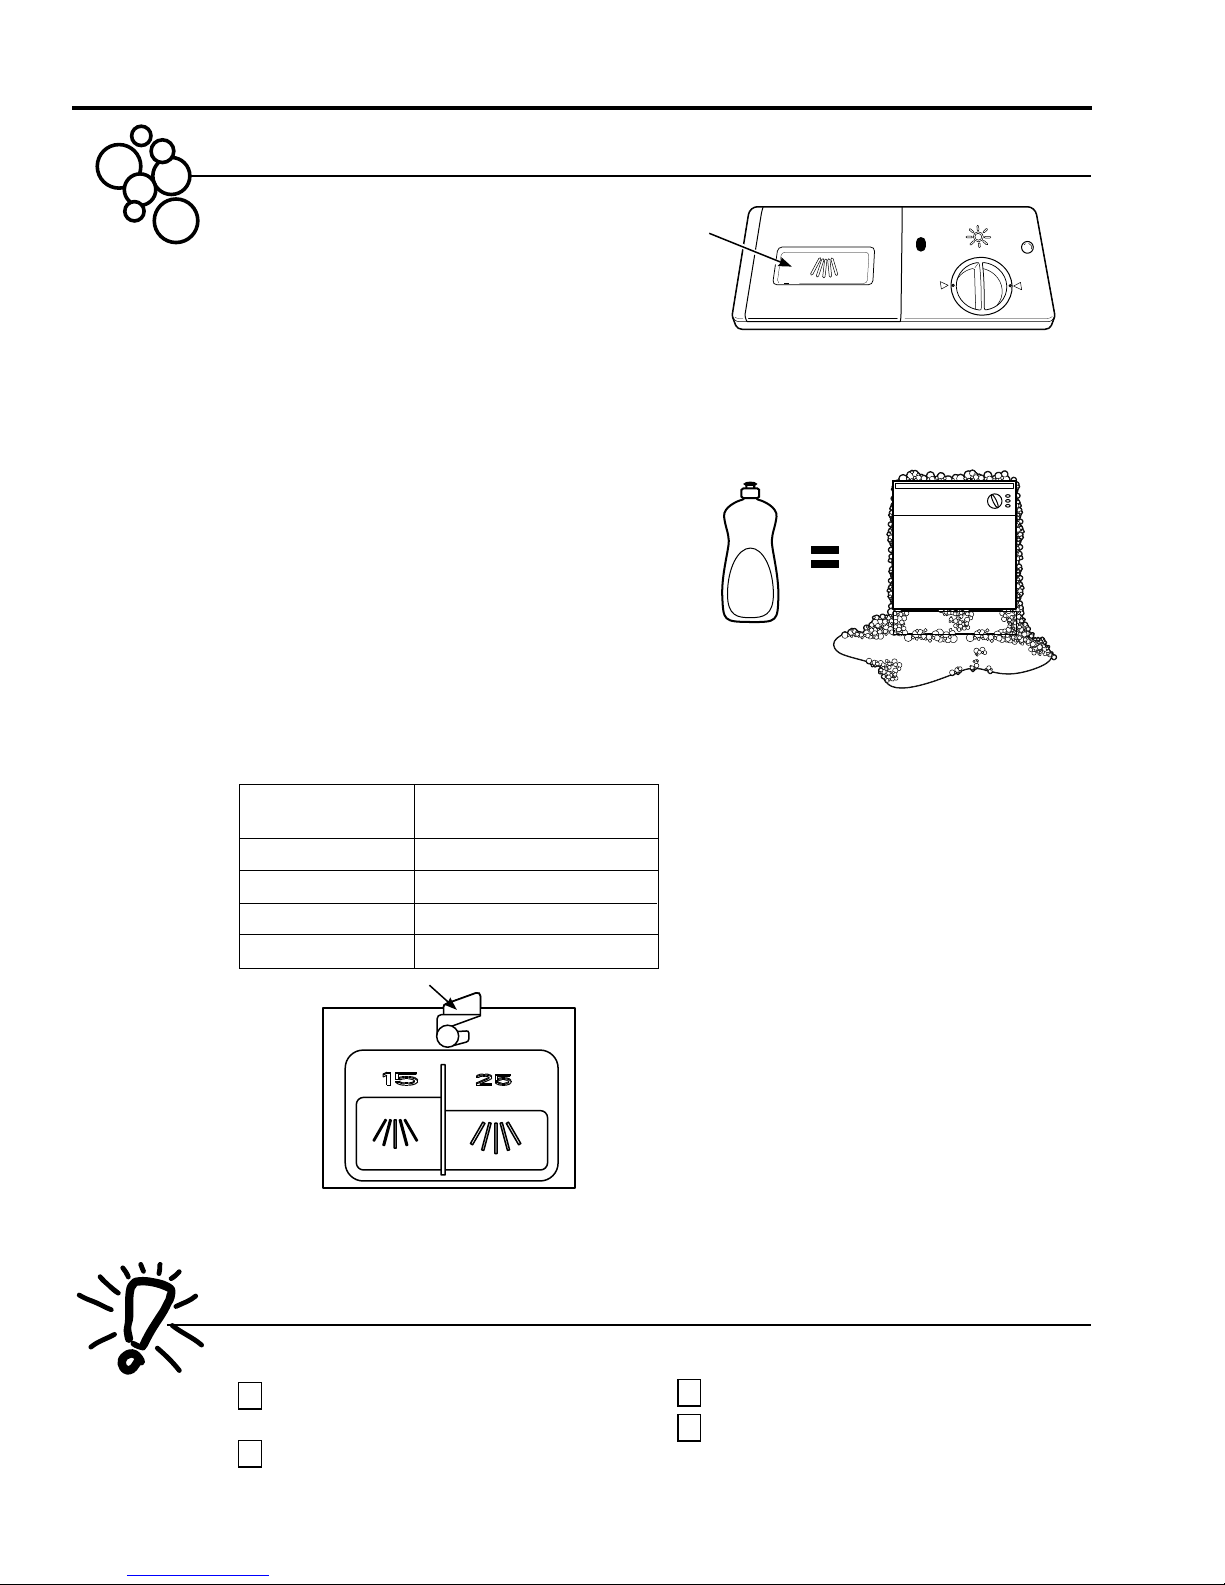
Utilizar un detergente no
diseñado específicamente
para lavaplatos provocará
que el aparato se llene de
espuma.
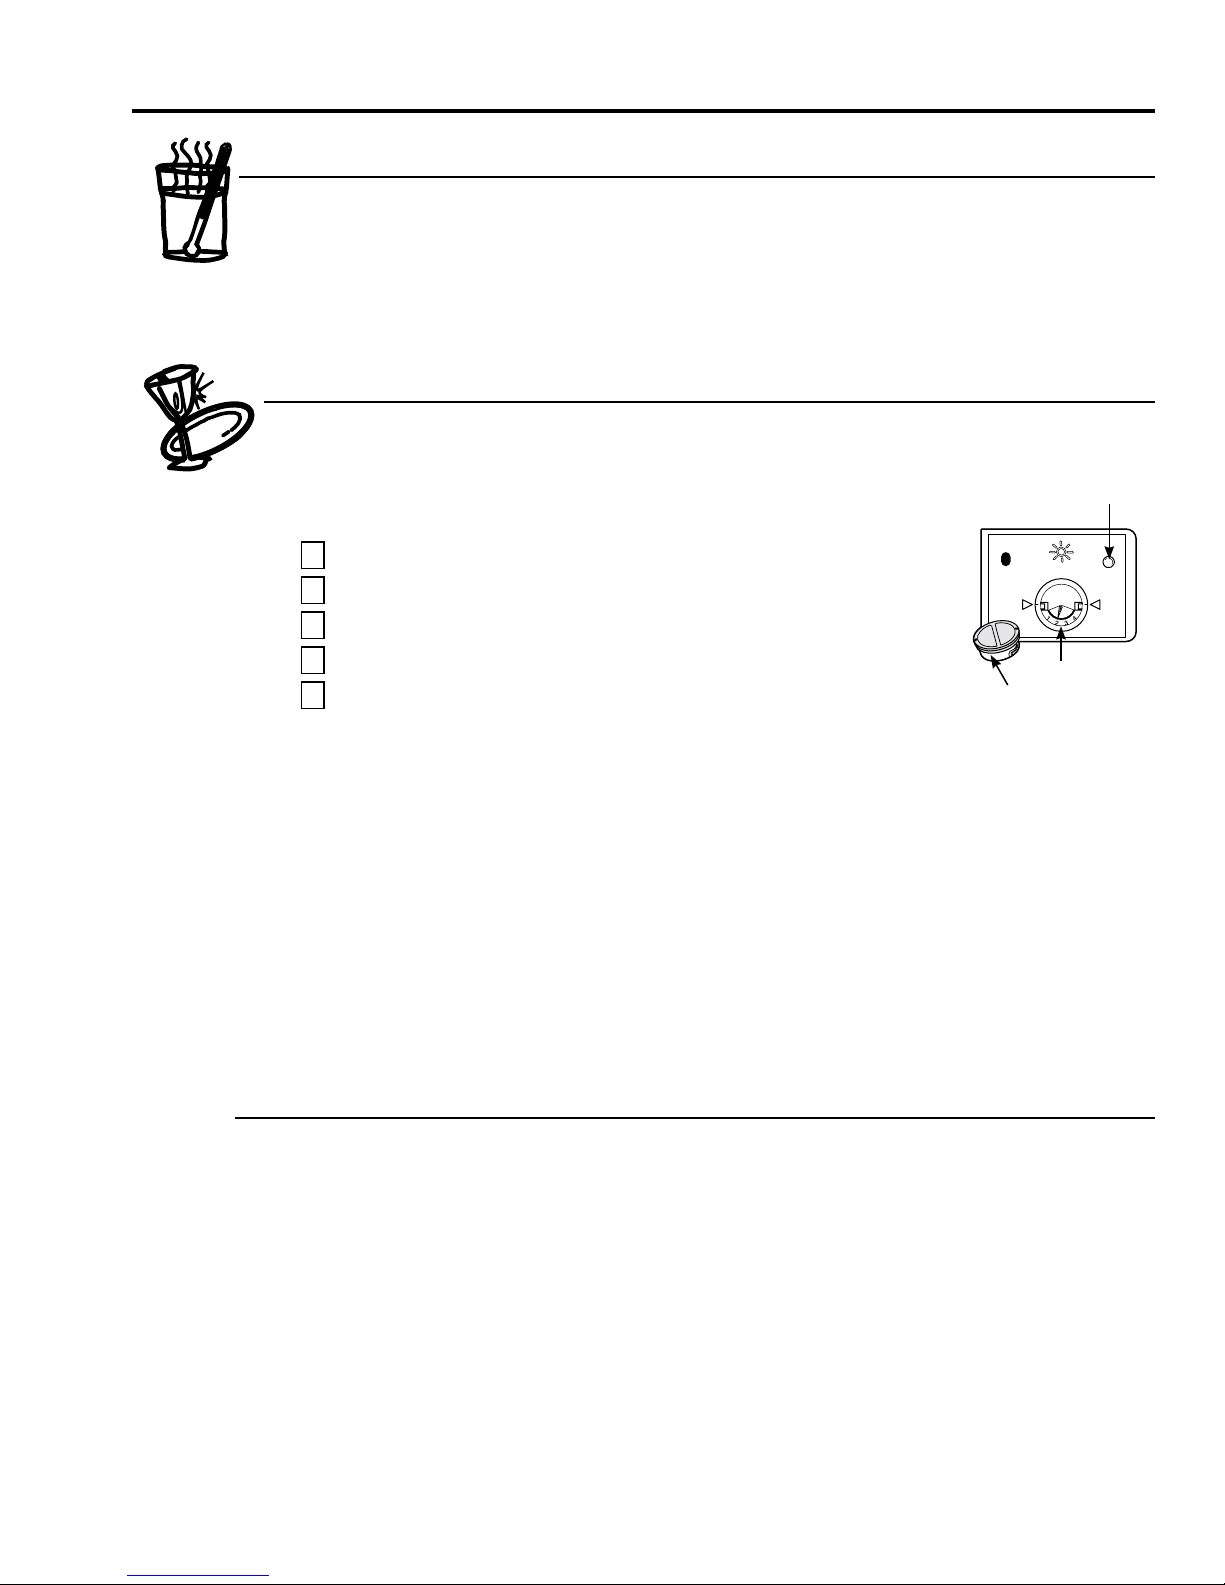
Si su lavaplatos se encuentra
conectado a un interruptor de
pared, verifique que el interruptor se
encuentre encendido antes del uso.
En lavaplatos con controles electrónicos,
si usted elije apagar el interruptor de
pared entre ciclos de lavado, deje pasar
5-10 segundos después de encender el interruptor
antes de presionar ON/OFF para permitir que el
control se inicie.
Elementos no aptos para lavaplatos: No lave
elementos como filtros de limpiadores de aire
electrónicos, filtros de hornos y pinceles de pintura
en su lavaplatos. Pueden producirse daños en el
lavaplatos y decoloración o manchas en el aparato.
Se requiere una supervisión estricta cuando cualquier
aparato es utilizado por niños o en su cercanÌa.
Cargue elementos livianos y plásticos de modo que
no se desplacen y caigan al fondo del lavaplatos,
ya que pueden entrar en contacto con el elemento
calentador y dañarse.
INSTALACIÓN Y MANTENIMIENTO ADECUADOS
Este lavaplatos debe instalarse de manera adecuada y ubicarse de acuerdo con las Instrucciones
de Instalación antes de comenzar el uso. Si usted no ha recibido una página de Instrucciones de
instalación con su lavaplatos, puede obtener una visitando nuestro sitio Web en GEAppliances.com.
Conecte el lavaplatos/aparato a un sistema de
cableado permanente con conexión a tierra o debe
utilizarse un conductor de conexión a tierra del
equipamiento con los conductores de circuito, y
debe conectarse a la terminal de conexión a tierra o
conductor del aparato.
Una conexión inadecuada del conductor de conexión
a tierra de equipo puede provocar un riesgo de
descarga eléctrica. Consulte a un electricista
calificado o representante de servicio técnico si tiene
dudas sobre la correcta conexión a tierra del aparato.
Elimine los aparatos que no va a utilizar más y el
material de empaque o envío como corresponde.
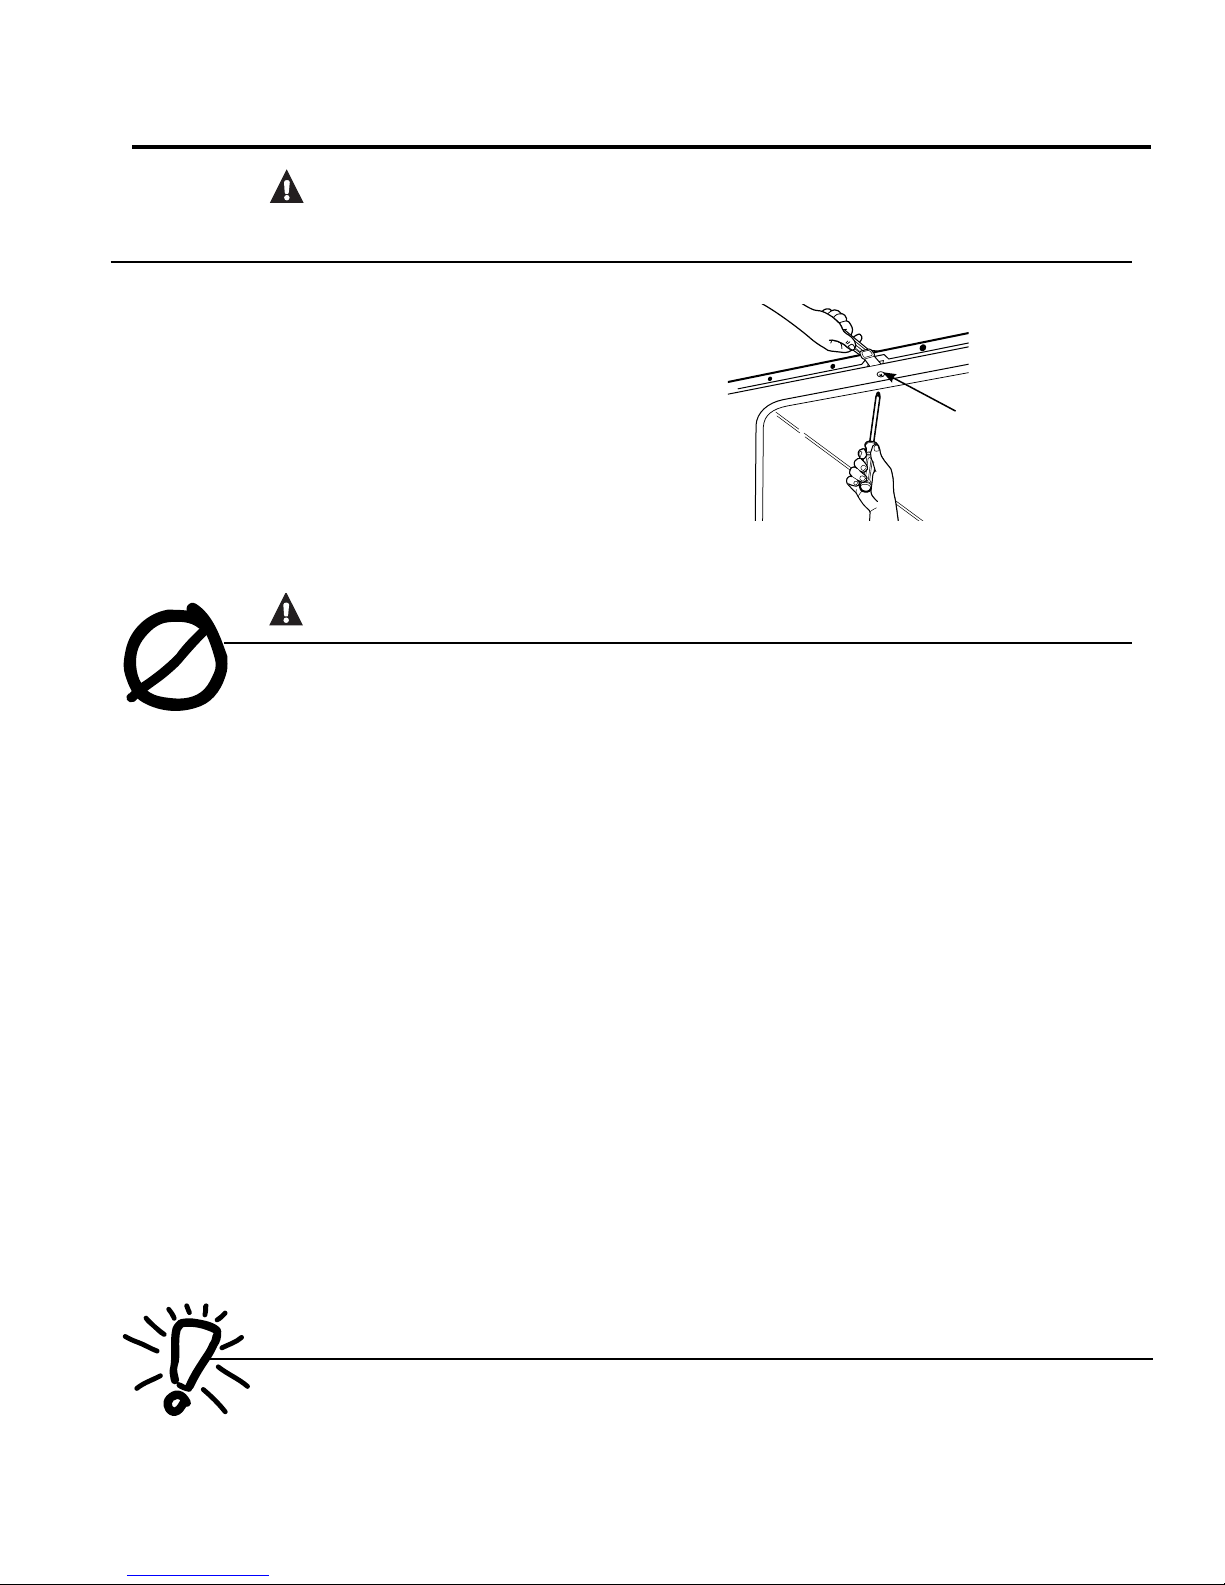
No intente reparar o cambiar ninguna pieza de
su lavaplatos a menos que esté específicamente
recomendado en este manual. Cualquier otro servicio
debe realizarlo un técnico calificado.
Para minimizar la posibilidad de una descarga
eléctrica, desconecte este aparato de la fuente
de energía antes de realizar cualquier clase de
mantenimiento.
NOTA: Apagar el lavaplatos no desconecta el aparato
del suministro de energía. Recomendamos que un
técnico calificado realice el servicio técnico de su
aparato.
¡ADVERTENCIA!
PRECAUCIÓN: Para evitar lesiones menores y daños a la propiedad
Bajo ciertas condiciones, puede producirse gas de hidrógeno en un calentador de agua que no se ha usado
durante dos semanas o más. EL GAS DE HIDRÓGENO ES EXPLOSIVO.
Si el agua caliente no se ha utilizado por dos semanas o más, evite la posibilidad de daños o lesiones
abriendo todos los grifos de agua caliente y dejándolas correr durante varios minutos. Haga esto antes de
utilizar cualquier aparato eléctrico que se encuentre conectado al sistema de agua caliente. Este simple
procedimiento permitirá que se libere cualquier clase de acumulación de gas de hidrógeno. Ya que el gas
es inflamable, no fume o utilice una llama abierta o un aparato durante este proceso.
GEAppliances.com

4
PROPER DISPOSAL OF THE DISHWASHER
Junked or abandoned dishwashers are
dangerous… even if they will sit for “just a
few days.” If you are getting rid of your old
dishwasher, please follow the instructions
below to help prevent accidents.
Before You Throw Away Your Old
Dishwasher:
Take off the door of the washing compartment
or remove the door latch keeper (as shown).
WARNING! RISK OF CHILD ENTRAPMENT
Door latch
keeper
Hold nut at top of dishwasher
while removing screw
Use this appliance only for its intended purpose
as described in this Owner’s Manual.
Use only powder, tabs, liquid detergents or rinse
agents recommended for use in a dishwasher and
keep them out of the reach of children. Cascade®,
Cascade®Complete Automatic Dishwashing
Detergents, and and Cascade Crystal Clear®
rinse agents) have been approved for use in all GE
dishwashers.
Locate sharp items so that they are not likely
to damage the door seal.
Load sharp knives with the handles up to reduce
the risk of cut-type injuries.
Do not wash plastic items unless marked
“Dishwasher Safe” or the equivalent. For plastic
items not so marked, check the manufacturer’s
recommendations.
Do not touch the heating element during or
immediately after use.
Do not operate your dishwasher unless all
enclosure panels are properly in place.
Do not tamper with controls.
Do not abuse, sit on or stand on the door or dish
rack of the dishwasher.
Do not allow children to play around dishwasher
when opening or closing door due to the possibility
of small fingers being pinched in door.
Do not discard a dishwasher without first removing
the door of the washing compartment or the door
latch.
Do not store or use combustible materials,
gasoline or other flammable vapors and liquids in
the vicinity of this or any other appliance.
Do not allow children to play with, on or inside this
appliance or any discarded appliance.
WARNING! When using your dishwasher, follow basic precautions,
including the following:
SAVE THESE INSTRUCTIONS
READ AND FOLLOW THIS SAFETY INFORMATION CAREFULLY.
IMPORTANT SAFETY INFORMATION.
5($'$//,16758&7,216%()25(86,1*³
SAVE THESE INSTRUCTIONS

5
ELIMINACIÓN CORRECTA DEL LAVAPLATOS
Un lavaplatos desechado o abandonado resulta
peligroso…aún si quedará en un lugar por “sólo
unos días”. Si va a desechar su viejo lavaplatos,
siga las siguientes instrucciones para prevenir
accidentes..
Antes de desechar su viejo lavaplatos:
Quite la puerta del compartimento de lavado
o saque la traba de la puerta (como puede
verse).
¡ADVERTENCIA! RIESGO DE ENCIERRO PARA NIÑOS
Traba de la puerta
Hold nut at top of dishwasher
while removing screw
Use este aparato sólo con el objetivo para el que
fue creado, como se describe en este Manual del
Propietario.
Utilice sólo detergentes en polvo, líquido o tabletas
o agentes de enjuague recomendados para uso
en lavaplatos y manténgalos alejados del alcance
de los niños. Los detergentes para lavaplatos
automáticos Cascade®, Cascade® Complete, y
los agentes de enjuague Cascade Crystal Clear®
han sido aprobados para el uso en todos los
lavaplatos GE..
Ubique los elementos filosos de modo que no
dañen el sellado de la puerta.
Cargue cuchillos filosos con los mangos hacia
arriba para reducir el riesgo de una lesión
personal.
No lave elementos plásticos a menos que
estén marcados como aptos para lavaplatos o
equivalente. En el caso de elementos plásticos
que no estén marcados así, verifique las
recomendaciones del fabricante.
No toque el elemento calentador durante el uso o
inmediatamente después de finalizar el uso.
No haga funcionar el lavaplatos a menos que
todos los paneles del recinto se encuentren en su
lugar.
No altere o modifique los controles.
No maltrate, ni se siente o se pare sobre la puerta
o bandejas de los platos del lavaplatos.
No permita que los niños jueguen alrededor del
lavaplatos cuando abra o cierre la puerta debido a
la posibilidad de pellizcar sus dedos con la puerta.
No deseche el lavaplatos sin antes quitar la puerta
del compartimento de lavado o la traba de la
puerta
No almacene o use materiales combustibles,
gasolina u otros vapores o líquidos inflamables
cerca de este o cualquier otro aparato.
No permita que los niños jueguen sobre, con
o dentro de este o cualquier otro aparato
desechado.
¡ADVERTENCIA! Cuando use su lavaplatos, siga precauciones básicas
de seguridad, incluyendo las siguientes:
SAVE THESE INSTRUCTIONS
READ AND FOLLOW THIS SAFETY INFORMATION CAREFULLY.
INFORMACIN IMPORTANTE DE SEGURIDAD
/($72'$6/$6,16758&&,21(6$17(6'(86$5³
GUARDE ESTAS INSTRUCCIONES GEAppliances.com

6
About the dishwasher control panel.
Control Settings
2
3
16
1ON/OFF
With door open, press ON/OFF button to turn the unit ON to begin operation and OFF at the end of a wash cycle.
The ON/OFF light is displayed when the dishwasher is ON.
2Wash Cycle Selections
Press SELECT button to choose wash cycle. The light under the cycle name will display to indicate which cycle has been selected.
NOTE: All
cycle times and water usage information contained in this section are approximate values. Actual results will depend
on several factors including, but not limited to, inlet water temperature and household water pressure.
SANITIZE 4.8 gallons, 130 minutes
This cycle is meant to sanitize dishes and glasses with added heat. If you select sanitize cycle, at the end
of this cycle, the sanitized indicator will turn on .
HEAVY 6.7 gallons, 125 minutes
T
his cycle is meant for heavily soiled dishes or cookware with dried-on or baked-on soils. This
cycle may not remove burned-on foods. Everyday dishes are safe to be used in this cycle.
NORMAL 3.8 gallons, 140 minutes
T
his cycle is meant for loads of everyday dishes, glasses and cookware with medium soils that have not been
pre-rinsed.
LIGHT 4.8 gallons, 78 minutes
T
his cycle is meant for loads of everyday dishes, glasses and cookware with light soils that have been pre-rinsed.
GLASSES 3.9 gallons, 76 minutes
T
his cycle is meant for lightly soiled glassware. This cycle has less heating during the wash and rinse to protect
your glassware. This cycle also has a lower temperature heated dry.
SPEED 5.8 gallons, 78 minutes
T
his cycle is meant for loads of everyday dishes, glasses and cookware with medium soils that have not been
pre-rinsed. This cycle features reduced wash times to allow for faster cycle completion. This cycle also has a
reduced time heated dry.
RINSE 1.9 gallons, 26 minutes
F
or rinsing partial loads that will be washed later. Do not use detergent with this cycle. This cycle does not include
heated dry.
4
6

7
3Delay Start Option
This option allows you to delay the start of a wash cycle for up to 24 hours.
With the door open, turn the dishwasher ON by pressing the ON/OFF button; then press the DELAY button to choose
the number of hours you want to delay the start of the wash cycle. The hours will show in the display window.
N
OTE: To cancel the DELAY HOURS option before the start of the cycle, repeatedly press the DELAY HOURS button
until the display is blank or reads “00.”
42 Digit Display
This display is used for DELAY START and cycle time countdown.
When a cycle is selected, this display is populated with the total number of minutes in the cycle (up to 99 minutes).
For cycle times above 99 minutes the display will read “99”.
5Starting a Cycle
After selecting the wash cycle (Step 2) and DELAY START (Step 3), if desired, close the door of the
dishwasher to start the cycle or begin the DELAY START countdown. When the door is closed, there will be a 5
second delay followed by a 60 second pump out before the water fill begins.
6Status Indicators
SANITIZED If the SANITIZE cycle is selected, the sanitized indicator light will be turned on at the end
of the cycle. If the NSF requirements for sanitization are not reached, the light will not
turn on.
CLEAN
The green light will display and a beep will sound to alert you that the wash cycle is complete.
If the door is NOT opened, the beep will sound 4 times.
GEAppliances.com

8
Using the dishwasher.
Use Cascade Crystal Clear®Rinse Agent
Cascade Crystal Clear®rinse agent removes spots and prevents new film buildup on your dishes, glasses,
flatware, cookware and plastic.
Filling the Dispenser
The rinse agent dispenser holds 3.5 oz. of rinse agent. Under normal conditions,
this will last approximately one month. Try to keep it full, but do not overfill.
1Make sure the dishwasher door is fully open.
2Turn the dispenser cap to the left and lift it out.
3Add rinse agent until the indicator window looks full.
4Clean up any spilled rinse agent with a damp cloth.
5Replace the dispenser cap.
Rinse Aid Setting
The amount of rinse agent released into the final wash can be adjusted.
The factory setting is at the midpoint. If there are rings of calcium
(hard water) spots on dishes, try a higher setting. If you observe foam
in the final rinse, try a lower setting.
To adjust the setting
Remove the dispenser cap; then turn the adjuster counterclockwise
to increase the amount of rinse agent or clockwise to reduce the amount
of rinse agent dispensed.
Check the Water Temperature
The entering water should be at least 120°F and
not more than 150°F for effective cleaning and
to prevent dish damage. Check the water
temperature with a candy or meat thermometer.
Turn on the hot water faucet nearest the
dishwasher, place the thermometer in a glass and
let the water run continuously into the glass until
the temperature stops rising.
M
i
n
M
a
x
Indicator
Dispenser cap
Adjustable setting
No prerinsing of normal food soil is required if using
Heavy, Normal or Speed wash cycles.
Scrape off hard soils, bones, toothpicks, skins and
seeds.
Remove large quantities of any remaining food.
Remove leafy vegetables, meat, trimmings and
excessive amounts of grease or oil.
Remove acidic food soils that can discolor stainless
steel.
Dish Preparation Prior to Loading

GEAppliances.com
Proper Use of Detergent
Use only detergent specifically made for use
in dishwashers. Cascade®Automatic
Dishwashing Detergent has been approved.
Keep your detergent fresh and dry. Don’t put
detergent into the dispenser until you’re ready to
wash dishes.
The amount of detergent to use depends on
whether your water is hard or soft. With hard
water, you need extra detergent. With soft water,
you need less detergent.
Protect your dishes and dishwasher by
contacting your water department and asking
how hard your water is. Twelve or more grains
is extremely hard water. A water softener is
recommended. Without it, lime can build up in
the water valve, which could stick while open
and cause flooding. Too much detergent with
soft water can cause a permanent cloudiness
of glassware, called etching.
Use the information in the table below as a
guideline to determine the amount of automatic
dishwasher detergent to place in the dispenser.
When using automatic dishwasher detergent
tablets, simply place one tablet in the dispenser
and close the cover.
To open the wash cover, press the button and the
cover will flip back.
For heavily-soiled loads, use the HEAVY wash cycle
and add a little extra detergent.
DO NOT USE HAND DISH DETERGENT
NOTE: Using a detergent that is not specifically
designed for dishwashers will cause the dishwasher
to fill with suds. During operation, these suds will spill
out of the dishwasher vents, covering the kitchen
floor and making the floor wet.
Because so many detergent containers look alike,
store the dishwasher detergent in a separate space
from all other cleaners. Show anyone who may use
the dishwasher the correct detergent and where it
is stored.
While there will be no lasting damage to the
dishwasher, your dishes will not get clean using a
dishwashing detergent that is not formulated to
work with dishwashers.
A forgotten dish can be added any time before
the main wash.
1Unlatch the door to interrupt the cycle. Pull
the door handle to release the door.
2Do not open the door until the water spray
action stops. Steam may rise out of the
dishwasher.
3Add forgotten dishes.
4Close the door and push it in to relatch.
Forget to Add a Dish?
Button
Open
cup
Detergent Cups to Fill
15 cup
25 cup
15 and 25 cups
15, 25 cups and the open cup
Number
of Grains
Less than 4
4 to 8
8 to 12
Greater than 12
9

10
Loading the dishwasher racks.
Silverware Basket
The silverware basket may be used without the topper for quick loading.
With the topper, flatware is better positioned for the dishwasher to
thoroughly wash and dry all pieces by preventing nesting.
Without the topper
Put the flatware in the removable basket with fork and knife handles up
to protect your hands. Place spoons in the basket with handles down.
Mix knives, forks and spoons so they don’t nest together. Distribute
evenly. Small plastic items, such as measuring spoons and lids from
small containers, should go in the bottom of the silverware basket with
silverware on top.
With the topper
Place small plastic items, such as measuring spoons and lids from small
containers, in the bottom of the basket and snap the topper in place.
Insert spoons and forks, handles first, through the holes in the topper.
Place knives, blades first, through the holes in the topper.
For best dishwashing results, follow these loading guidelines. Features and appearance of racks and silverware
baskets may vary from your model.
Upper Rack
The upper rack is for glasses, cups and saucers. This is also a secure
place for dishwasher-safe plastics. A cup shelf may be placed in the up
or down position to add flexibility. The upper rack is good for all kinds of
odd-shaped utensils. Saucepans, mixing bowls and other items should
be placed face down.
Secure larger dishwasher-safe plastics over two tines when possible.
Make sure small plastic items are secure so they can’t fall onto the heater.
Be sure that items do not protrude through the bottom of the rack and
block rotation of the middle spray arm. This could result in poor wash
performance for items in the upper rack.
Lower Rack
When loading the lower rack, do not load large platters or trays in the
front left corner. They may prevent detergent from circulating during the
wash cycle.
The lower rack is best used for plates, saucers and cookware. Large
items should go along the sides. Load platters, pots and bowls along the
sides, in corners or in the back. The soiled side of items should face the
center of the rack.
Be careful not to let a portion of any item such as a pot or dish handle
extend through the bottom rack. This could block the wash arm and
cause poor washing results.
Through bottom
To remove end baskets, grasp
the basket at opposite corners
and slide apart.
Three-piece basket

11
Caring for the dishwasher. GEAppliances.com
To clean the control panel, use a lightly dampened cloth, then dry thoroughly. To clean the exterior, use a good
appliance polish wax. Never use sharp objects, scouring pads or harsh cleaners on any part of the dishwasher.
Cleaning the Door Panel
Before cleaning the front panel, make
sure you know what type of panel you
have. Refer to the last two letters of your
model number. You can locate your model
number on the left-hand tub wall just
inside the door. If your model number ends
with BB or WW, then you have a Painted
Door panel. If your model number ends
with SS, then you have a Stainless Steel
Door panel.
Follow the instructions below for cleaning
the door panel for your specific model.
Painted Door Panel (model numbers
ending in BB–black or WW–white)
Use a clean, soft, lightly dampened cloth,
then dry thoroughly. You may also use a
good appliance wax or polish.
Stainless Steel Door Panel (model
numbers ending in SS)
The stainless steel panels can be cleaned
with Stainless Steel Magic or a similar
product using a clean, soft cloth. Do not
use appliance wax, polish, bleach or
products containing chlorine on Stainless
Steel doors.
You can order Stainless Steel Magic
#WX10X15 through GE Parts by calling
800.626.2002.
Do not wipe the dishwasher with a soiled
dish cloth or wet towel. These may leave
a residue. Do not use scouring pads or
powdered cleaners because these products
can scratch the finish.
Cleaning the Exterior
Cleaning the Control Panel
To clean the control panel, use a lightly
dampened cloth; then dry thoroughly. Do
not use sharp objects, scouring pads or
harsh cleaners on the control panel.
Stainless Steel Interior Tub and
Inner Door
The stainless steel used to make the
dishwasher tub and inner door provides
the highest reliability available in a GE
dishwasher. If the dishwasher tub or inner
door is ever scrached or dented during
during normal use, they will not rust or
corrode. These surface blemishes will not
affect their function or durability.
The dishwasher will flush away all normal food soils. However, objects (fruit pits, bones, etc.) may collect in
openings and should be removed occasionally to avoid clogging the drain system.
CAUTION
Personal injury hazard. Before cleaning the interior, wait at least 20 minutes after a cycle for the heating
element to cool down. Failure to do so could result in burn injuries.
Cleaning the Spray Arms
Because hard water chemicals will clog the
spray arm jets and bearings, it is necessary
to clean the spray arms regularly. Wash the
arms in soapy, warm water and use
a soft brush to clean the jets. Replace them
after rinsing thoroughly.
To remove the upper spray arm, unscrew the
nut clockwise.
To remove the lower spray arm, pull upward.
Cleaning the Spray Arms and the Filters
UNSCREW
PULL OUT
Upper
Arm
Lower
Arm

12
Cleaning the Filters
For best performance and results, the filter assembly must
be cleaned once a month. The filter efficiently removes food
particles from the wash water, allowing water to be recirculated
during the cycle. For this reason, it is a good idea to remove the
large food particles trapped in the filter frequently by rinsing the
main filter and cup under running water. To remove the filter
assembly, follow the 3 steps shown below. To clean the main
filter and fine filter, use a cleaning brush. The dishwasher must
never be used without the filters. Improper replacement of the
filter may reduce the performance level of the appliance and
may damage dishes and utensils.
Protect Against Freezing
If your dishwasher is left in an unheated
place during the winter, ask a service
technician to:
1Cut off electrical power to the dishwasher.
Remove fuses or trip circuit breaker.
2Turn off the water supply and
disconnect the water inlet line from
the water valve.
3Drain water from the water inlet line
and water valve. (Use a pan to catch
the water.)
4Reconnect the water inlet line to the
water valve.
Check the air gap any time your
dishwasher isn’t draining well.
Does Your Dishwasher Have
an Air Gap?
An air gap protects your dishwasher against
water backing up into it if a drain clogs.
The air gap is not a part of the dishwasher.
It is not covered by your warranty. Not all
plumbing codes require
air gaps, so you may not have one.
The air gap is easy to clean.
1Turn off the dishwasher and lift off the
chrome cover.
2Remove the plastic cap and clean with
a toothpick.
Two types of
air gaps
Caring for the dishwasher.
General Care Instructions
Cleaning the Spray Arms and the Filters (Continued)
STEP 1: Turn the filter counter-clockwise and lift up.
STEP 2: Lift the main filter up
STEP 3: Lift the fine filter up

13
Before you call for service…
Problem Possible Causes What To Do
Noise Some of the sounds you’ll Detergent cup opening.
hear are normal The motor starting during the drying period.
Water draining out of the tub immediately after you
start the dishwasher.
Utensils are not secure in the Make sure everything is secured in dishwasher.
rack or something small has
dropped into the rack
Motor hums Dishwasher has not been used on a regular basis. If you
do not use your dishwasher often, set it to fill and pump
out once every week. This will help keep the seal moist.
Dishwasher control was not advanced properly to the start
of the desired cycle. Advance the control to the start of
the desired cycle.
Detergent left in Dishes are blocking the Reposition the dishes.
dispenser cups detergent cups
Water standing in the Drain is clogged If you have an air gap, clean it.
bottom of the tub Check to see if your kitchen sink is draining well. If not,
you may need a plumber.
If the dishwasher drains into a disposer, run disposer clear.
This is normal A small amount of clean water around the outlet of the tub
bottom at the back of the tub keeps the water seal lubricated.
Suds in the tub Correct detergent wasn’t used Use only automatic dishwasher detergents to avoid sudsing.
Cascade®Dishwashing Detergent has been
approved for use in all GE dishwashers.
To remove suds from the tub, open the dishwasher and let
suds evaporate. Add 1 gallon of cold water to the tub. Close
and latch the dishwasher. Repeat if necessary.
Rinse agent was spilled Always wipe up rinse agent spills immediately.
Stained dishwasher parts Detergent with Some detergents contain colorant (pigment or dyes) that
colorant was used will discolor the tub interior with extended use. Check the
detergent cup for signs of any discoloration. If cup is
discolored, change to detergent without any colorant.
Cascade®Dishwashing Detergents has been
approved for use in all GE dishwashers.
Some tomato-based Use of the RINSE ONLY cycle after adding the dish to the
foods can stain load can decrease the level of staining.
Troubleshooting Tips - Save time and money! Review the charts on the following pages, or visit
GEAppliances.com. You may not need to call for service.
Dishwasher won’t run Fuse is blown, or the Replace fuse or reset circuit breaker. Remove any other appliances
circuit breaker tripped from the circuit.
Power is turned off In some installations, the power to the dishwasher is proved through a
wall switch, often located next to the disposer switch. Make sure it is on.
Reboot your control Turn off power to the dishwasher (at circuit breaker or wall switch) for
30 seconds, then turn back on.
Steam This is normal Steam comes through the vent during washing, drying and when
water is being pumped out.
Beeping at the end This is normal The dishwasher will beep 4 times (unless interupted) and the CLEAN light
of the cycle will display at the end of the wash cycle.

14
Control panel Door latch may not be Make sure the door is firmly closed.
responded to input properly seated
but dishwasher never
filled with water Water vale may be Make sure water valve (usually located under the sink) is turned on.
turned off
Dishwasher beeps This is normal Close the door after opening it mid-cycle.
once every 15 seconds
This is a reminder that the
Press ON/OFF to turn OFF the dishwasher.
door has been left open
during operation
Problem Possible Causes What To Do
Dishes and flatware Low inlet water temperature Make sure inlet water temperature is correct (see page 6).
not clean Water pressure is temporarily low Turn on a faucet. Is water coming out more slowly than usual"
If so, wait until pressure is normal before using your dishwasher.
Air gap is clogged Clean the air gap.
Improper rack loading Make sure large dishware does not block the detergent
dispenser or the wash arms.
No air gap or high drain loop 9erify that you have an air gap or a high drain loop. Refer to the
Installation Instructions.
Filter needs cleaning The filter assembly must be cleaned regularly to allow the filter to
efficiently remove food particles from the wash water. See Cleaning the
Filter section on page 1.
Spots and filming Extremely hard water Use Cascade Crystal Clear®rinse agent to remove spots and
on glasses and prevent new film buildup.
flatware Low inlet water temperature
Make sure water temperature is at least 120°F.
Overloading the dishwasher /
Load dishwasher as shown in the Loading the Dishwasher Racks
Improper loading
section.
Old or damp powder detergent
Make sure detergent is fresh.
Rinse agent dispenser empty
If water is extremely hard, a water softener may be required.
Too little detergent
Cloudiness on Combination of soft water and This is called etching and is permanent. To prevent this from happening,
glassware too much detergent use less detergent if you have soft water. Wash glassware in the shortest
cycle that will get them clean.
Water temperature entering Lower the water heater temperature.
the dishwasher exceeds 150°F
Black or gray Aluminum utensils have Remove marks with a mild, abrasive cleaner.
marks on dishes rubbed against dishes
Yellow or brown film Tea or coffee stains Remove the stain by hand, using a solution of 1/2 cup bleach and
on inside surfaces 3 cups warm water.
WARNING
Before cleaning interior wait at least 20 minutes after a cycle for the
heating element to cool down. Failure to do so can result in burns.
An overall yellow or brown film can A special filter in the water supply line is the only way to correct
be caused by iron deposits in water this problem. Contact a water softener company.
White film on inside Hard water minerals To clean the interior, apply dishwasher detergent to a damp sponge.
surfaces Wear rubber gloves. Do not use any type of cleanser other than
dishwasher detergent because it may cause foaming or sudsing. Cascade®
Automatic Dishwashing Detergent has been approved
for use in all GE dishwashers.
Dishes don’t dry Low inlet water temperature Make sure inlet water temperature is correct (see page 6).
Rinse agent dispenser is empty Check the rinse agent dispenser.
Before you call for service…

15
What GE Will Not Cover:
GE Dishwasher Warranty.
For The Period Of: GE Will Replace:
One Year Any part of the dishwasher which fails due to a defect in materials or workmanship. During this
From the date of the limited one-year warranty, GE will also provide, free of charge, all labor and in-home service to
original purchase replace the defective part.
Service trips to your home to teach you how to use
the product.
Improper installation, delivery or maintenance.
Failure of the product if it is abused, misused, or used for
other than the intended purpose or used commercially.
Replacement of house fuses or resetting of circuit
breakers.
Damage to the product caused by accident, fire, floods
or acts of God.
Incidental or consequential damage caused by possible
defects with this appliance.
Cleaning or servicing of the air gap device in the
drain line.
Damage caused after delivery.
Product not accessible to provide required service.
This warranty is extended to the original purchaser and any succeeding owner for products purchased for
home use within the USA. If the product is located in an area where service by a GE Authorized Servicer is
not available, you may be responsible for a trip charge or you may be required to bring the product to an
Authorized GE Service location for service. In Alaska, the warranty excludes the cost of shipping or service calls
to your home.
Some states do not allow the exclusion or limitation of incidental or consequential damages. This warranty
gives you specific legal rights, and you may also have other rights which vary from state to state. To know
what your legal rights are, consult your local or state consumer affairs office or your state’s Attorney General.
Warrantor: General Electric Company. Louisville, KY 40225
All warranty service provided by our Factory Service Centers,
or an authorized Customer Care®technician. To schedule service,
on-line, visit us at GEAppliances.com, or call 800.GE.CARES
(800.432.2737) in the United Sates. In Canada, call 1.800.561.3344.
Please have serial number and model number available when
calling for service.
Staple your receipt here.
Proof of the original purchase
date is needed to obtain service
under the warranty.
(;&/86,212),03/,(':$55$17,(6³<RXUVROHDQGH[FOXVLYHUHPHG\LVSURGXFWUHSDLUDVSURYLGHGLQ
this Limited Warranty. Any implied warranties, including the implied warranties of merchantability or
fitness for a particular purpose, are limited to one year or the shortest period allowed by law.
What Is Not Covered (for customers in Canada):
Service trips to your home to teach you how to use
the product.
Improper installation.
If you have an installation problem, contact your dealer or installer.
You are responsible for providing adequate electrical, exhausting
and other connecting failures.
Failure of the product if it is abused, misused, or used for
other than the intended purpose or used commercially.
Replacement of house fuses or resetting of circuit breakers.
Damage to the product caused by accident, fire, floods
or acts of God.
Damage caused after delivery.
(;&/86,212),03/,(':$55$17,(6³<RXUVROHDQGH[FOXVLYHUHPHG\LVSURGXFWUHSDLUDVSURYLGHGLQWKLV
Limited Warranty. Any implied warranties, including the implied warranties of merchantability or fitness for a
particular purpose, are limited to one year or the shortest period allowed by law.
This warranty is extended to the original purchaser and any succeeding owner for products purchased in Canada for home use within
Canada. In home warranty service will be provided in areas where it is available and deemed reasonable by Mabe to provide.
WARRANTOR IS NOT RESPONSIBLE FOR CONSEQUENTIAL DAMAGES.
Warrantor: MABE CANADA INC.

16
Consumer Support.
Purchase a GE extended warranty and learn about special discounts that are available while your warranty
is still in effect. You can purchase it on-line anytime, or call 800.626.2224 during normal business hours.
GE Consumer Home Services will still be there after your warranty expires. In Canada, please visit our Website
or contact your local extended warranty provider.
Parts and Accessories In the U.S. : GEAppliances.com
Individuals qualified to service their own appliances can have parts or accessories sent directly to their homes (9ISA,
MasterCard and Discover cards are accepted). Order on-line today, 24 hours every day or
by phone at 800.626.2002 during normal business hours.
Instructions contained in this manual cover procedures to be performed by any user. Other servicing generally
should be referred to qualified service personnel. Caution must be exercised, since improper servicing may cause
unsafe operation.
Customers in Canada should consult the yellow pages for the nearest Mabe service center, or call 1.800.661.1616.
Contact Us In the U.S. : GEAppliances.com
If you are not satisfied with the service you receive from GE, contact us on our Website with all the details
including your phone number, or write to: General Manager, Customer Relations
GE Appliances, Appliance Park
Louisville, KY 40225
In Canada: www.GEAppliances.ca, or write to: Director, Consumer Relations, Mabe Canada Inc
Suite 310, 1 Factory Lane
Moncton, N.B. E1C 9M3
GE Appliances Website In the U.S. : GEAppliances.com
Have a question or need assistance with your appliance"Try the GE Appliances Website 24 hours a day, any
day of the year! For greater convenience and faster service, you can now download Owner’s Manuals, order
parts or even schedule service on-line. In Canada: www.GEAppliances.ca
Schedule Service In the U.S. : GEAppliances.com
Expert GE repair service is only one step away from your door. Get on-line and schedule your service at
your convenience 24 hours any day of the year! Or call 800.GE.CARES (800.432.2737) during normal business
hours.
In Canada, call 1.800.561.3344
Real Life Design Studio In the U.S. : GEAppliances.com
GE supports the Universal Design concept³products, services and environments that can be used by
people of all ages, sizes and capabilities. We recognize the need to design for a wide range of physical and
mental abilities and impairments. For details of GE’s Universal Design applications, including kitchen design
ideas for people with disabilities, check out our Website today. For the hearing impaired, please call 800.TDD.
GEAC (800.833.4322).
In Canada, contact: Directeur, Relations avec les consommateurs, Mabe Canada Inc.
Bureau 310, 1 Factory Lane
Moncton, N.B. E1C 9M3
Extended Warranties In the U.S. : GEAppliances.com
Register Your Appliance In the U.S. : GEAppliances.com
Register your new appliance on-line³at your convenience! Timely product registration will allow for enhanced
communication and prompt service under the terms of your warranty, should the need arise.
You may also mail in the pre-printed registration card included in the packing material.
In Canada: www.GEAppliances.ca
Printed in China

www.electromenagersge.ca
GLDT690 Series
GLDT696 Series
Manuel
d‘utilisation
Lave-vaisselle
49-55074-1 10-11 GE
Inscrivez ci-dessous les numérosde
modèle et de série :
N° de modèle _______________
N° de série _________________
Ils se trouvent sur une étiquette apposée sur
la paroi de la cuve, à l‘intérieur de la porte.
Consignes de sécurité .... 2,3
Directives de fonctionnement
Tableau de commande et réglage des
commandes .................. 4,5
Chargement des paniers
du lave-vaisselle ................. 8
Utilisation du lave-vaisselle .....6,7
Directives d’entretien
Entretienetnettoyage.........9,10
Dépannage............... 11–13
Service à la clientèle
Service à la clientèle.... Back Cover
Garantie ........................15

2
CONSIGNES DE SÉCURITÉ IMPORTANTE
VEUILLEZ LIRE TOUTES LES CONSIGNES AVANT D‘UTILISER
L‘APPAREIL – CONSERVEZ CES DIRECTIVES
AVERTISSEMENT!
Pour votre sécurité, veuillez suivre les directives données dans le présent manuel afin de
réduire au minimum les risques d‘incendie, d‘explosion et de chocs électriques et prévenir
tout dommage et blessure grave ou mortelle.
SÉCURITÉ DU CHAUFFE-EAU
INSTALLATION ET ENTRETIEN APPROPRIÉS
Ce lave-vaisselle doit être correctement installé, en conformité avec les directives d‘installation
fournies, avant d‘être utilisé. Si vous n‘avez pas reçu les directives d‘installation avec
votre appareil, vous pouvez vous les procurer en visitant notre site Web à l‘adresse www.
electromenagersge.ca.
Les articles lavés au mode antibactérien, le
cas échéant, peuvent être chauds au toucher.
Manipulez-les avec prudence.
L‘utilisation d‘un détergent
non conçu pour les lave-
vaisselle peut provoquer la
formation de mousse.
Si votre lave-vaisselle
est branché sur un circuit relié à un
interrupteur mural, assurez-vous
d‘actionner celui-ci avant d‘utiliser
votre appareil.
Sur les lave-vaisselle dotés de
commandes électroniques, si vous
fermez l‘interrupteur mural entre les
cycles de lavage, attendez de 5 à 10 secondes
après avoir ramené l‘interrupteur à ON (Marche)
avant
d‘appuyer sur la touche ON/OFF (Marche/
réinitialisation) pour permettre aux commandes
de se réinitialiser.
Articles autres que la vaisselle : ne lavez pas
dans le lave-vaisselle des articles comme des
filtres de purificateur d‘air, des filtres de systèmes
de chauffage ou des pinceaux. Vous pourriez
endommager le lave-vaisselle et provoquer une
décoloration ou des taches dans l‘appareil..
Une surveillance attentive est nécessaire lorsque
cet appareil est utilisé par ou près des enfants..
Placez les articles légers en plastique de
manière qu‘ils ne se déplacent pas ou
ne tombent pas au fond de l‘appareil³ils
pourraient entrer en contact avec l‘élément
chauffant, ce qui pourrait les endommager
Cet appareil doit être relié à un système de
câblage électrique permanent en métal, mis
à la terre. Sinon, un fil de mise à la terre pour
appareillage doit être installé et raccordé à la
borne ou au fil de mise à la terre de l‘appareil..
Un raccordement incorrect du fil de mise à la
terre peut présenter un risque d‘électrocution.
Consultez un électricien ou un technicien qualifié
si vous n‘êtes pas certain que l‘appareil est
correctement mis à la terre.
Veuillez vous débarrasser de la façon appropriée
de vos vieux électroménagers et des matériaux
d‘emballage ou d‘expédition.
Ne tentez pas de réparer ou de remplacer une
pièce quelconque de votre lave-vaisselle, à moins
que cela ne soit spécifiquement recommandé
dans le présent manuel. Confiez toutes les autres
réparations à un technicien qualifié..
Pour réduire au minimum les risques
d‘électrocution, débranchez l‘appareil de sa
source d‘alimentation avant d‘en effectuer
l‘entretien.
Remarque : Le fait d‘arrêter le lave-vaisselle ne
coupe l‘alimentation électrique de l‘appareil. Nous
vous recommandons de confier la réparation de
votre électroménager à un technicien qualifié.
AVERTISSEMENT!
ATTENTION: Pour éviter les blessures mineures ou les dommages matériels
Dans certaines conditions, il peut se former de l‘hydrogène dans un chauffe-eau qui n‘a pas été
utilisé pendant deux semaines ou plus. L‘HYDROGÈNE EST UN GAZ EXPLOSIF.
Si vous n‘avez pas utilisé votre chauffe-eau pendant deux semaines ou plus, ouvrez tous les
robinets d‘eau chaude et laissez couler l‘eau pendant plusieurs minutes afin de réduire les risques
de dommages matériels ou de blessures. Prenez cette précaution avant même d‘utiliser un
électroménager raccordé au chauffe-eau pour éliminer l‘hydrogène qui pourrait s‘y être accumulé.
Puisqu‘il s‘agit d‘un gaz inflammable, ne fumez pas ou n‘utilisez pas une flamme nue ou un
électroménager au cours de ce processus.

3
ÉLIMINATION APPROPRIÉE DU LAVE-VAISSELLE
Les lave-vaisselle jetés ou abandonnés sont
dangereux…même si vous ne les laissez là «que
pour quelques jours». Si vous voulez jeter votre
vieux lave-vaisselle, veuillez suivre les directives
ci-dessous pour éviter les accidents.
Avant de jeter votre vieux lave-vaisselle
Enlevez la porte de l‘appareil ou enlevez
la gâche de la porte (comme indiqué dans
l‘illustration).
AVERTISSEMENT! RISQUE DE SUFFOCATION POUR
UN ENFANTÉCOINC À L‘INT RIEUR DE L‘APPAREIL
CONSERVEZ CES DIRECTIVES
Gâche de la
porte
Retenez l’écrou à la partie
supérieure du lave-vaisselle
pendant que vous enlevez la vis
N‘utilisez cet appareil que pour l‘usage pour lequel
il a été conçu, comme expliqué dans le présent
manuel.
N‘utilisez que des détergents en poudre, en
liquide ou en tablettes, ou des produits de
rinçage recommandés pour les lave-vaisselle et
gardez-les hors de portée des enfants. L‘utilisation
des détergents pour lave-vaisselle automatiques
Cascade®, Cascade® Complete, et les produits de
rinçage Cascade Crystal Clear® est approuvée
dans tous les lave-vaisselle GE.
Placez les articles coupants de manière à ce qu‘ils
n‘endommagent pas le joint d‘étanchéité de la
porte.
Placez dans le panier à couverts les couteaux
tranchants le manche vers le haut afin de réduire
les risques de coupures.
Ne lavez-pas les articles en plastique, à moins
qu‘ils portent la mention «Lavable au lave-
vaisselle» ou l‘équivalent. Dans le cas des articles
en plastique qui ne portent pas cette mention,
reportez-vous aux recommandations du fabricant.
Ne touchez pas à l‘élément chauffant pendant
ou immédiatement après le fonctionnement de
l‘appareil.
Ne faite pas fonctionner le lave-vaisselle si tous
les panneaux de la carrosserie n‘ont pas été
correctement réinstallés.
Ne modifiez pas le fonctionnement des
commandes.
N‘utilisez pas le lave-vaisselle de façon abusive,
et ne vous assoyez pas ou ne montez pas sur la
porte ou les paniers de l‘appareil.
Ne laissez pas les enfants jouer à proximité du
lave-vaisselle lorsque vous ouvrez ou fermez
la porte afin d‘éviter que leurs petits doigts se
coincent dans la porte.
Ne jetez pas un lave-vaisselle sans d‘abord enlever
la porte ou la gâche de la porte de l‘appareil.
N‘entreposez pas ou n‘utilisez pas de produits
combustibles, d‘essence ou autres vapeurs ou
liquides inflammables à proximité de votre lave-
vaisselle ou de tout autre électroménager.
Ne laissez pas les enfants jouer avec le lave-
vaisselle, ou à l‘intérieur de celui-ci ou de tout autre
électroménager mis aux rebuts.
AVERTISSEMENT! Lors du fonctionnement de votre lave-vaisselle, prenez
les précautions de base, notamment les suivantes:
VEUILLEZ LIRE ET SUIVRE À LA LETTRE CES CONSIGNES DE
SÉCURITÉ.
www.electromenagersge.ca

4
Tableau de commande du lave-vaisselle.
Réglage des commandes
1ON/OFF (Marche/Arrêt)
Pendant que la porte est ouverte, appuyez sur le bouton ON/OFF pour mettre l’appareil en MARCHE afin qu’il commence à fonctionner
et s’ARRÊTE à la fin d’un programme de lavage. Le voyant ON/OFF s’allume lorsque le lave-vaisselle est en MARCHE.
2Programmes de lavage
Appuyez sur le bouton SELECT (Choisir) pour choisir un programme de lavage. Le voyant sous le nom du programme s’allume pour
indiquer le programme que vous avez choisi.
REMARQUE : Les renseignements concernant la durée des programmes et leur consommation d’eau, fournis
dans la présente section, sont approximatifs. Les résultats réels dépendent de plusieurs facteurs, y compris
mais non de façon limitative la température et la pression de l’eau qui alimente le lave-vaisselle.
SANITIZE 18,2 litres (4,8 gallons), 130 minutes
(Hygiénique) Ce programme est conçu pour désinfecter la vaisselle et les verres au moyen d’une température plus
élevée. Si vous choisissez le programme hygiénique, le voyant SANITIZED s’allume à la fin du programme.
HEAVY 25,4 litres (6,7 gallons), 125 minutes
(Saleté importante) Ce programme est conçu pour la vaisselle ou les ustensiles de cuisson très sales, sur lesquels des
aliments sont séchés ou cuits. Il est possible que ce programme ne puisse pas déloger les aliments
brûlés. Vous pouvez laver en toute sécurité la vaisselle de tous les jours à ce programme.
NORMAL 14,4 litres (3,8 gallons), 140 minutes
(Saleté normale) Ce programme est conçu pour laver la vaisselle de tous les jours, les verres et les ustensiles de cuisson
moyennement sales qui n’ont pas été rincés au préalable.
LIGHT 18,2 litres (4,8 gallons), 78 minutes
(Saleté légère) Ce programme est conçu pour laver la vaisselle de tous les jours, les verres et les ustensiles de cuisson
peu sales qui ont été rincés au préalable.
GLASSES 14,8 litres (3,9 gallons), 76 minutes
(Verres) Ce programme est conçu pour les verres légèrement sales. La température de l’eau est moins élevée
pendant le lavage et le rinçage afin de protéger vos articles en verre. Ce programme comprend
également un séchage avec chaleur à température plus basse.
SPEED 22 litres (5,8 gallons), 78 minutes
(Lavage rapide) Ce programme est conçu pour la vaisselle de tous les jours, les verres et les ustensiles de cuisson
moyennement sales qui n’ont pas été rincés au préalable. La durée de lavage de ce programme est
plus courte pour un programme de lavage plus rapide. Ce programme comprend un séchage avec
chaleur d’une durée réduite.
RINSE 7,2 litres (1,9 gallons), 26 minutes
(Rinçage) Pour rincer les charges partielles que vous désirez laver plus tard. N’utilisez pas de détergent avec
ce programme. Ce programme ne comprend pas de séchage avec chaleur.
2
3
16
4
6
Other manuals for GLDT696DSS
1
This manual suits for next models
4
Table of contents
Languages:
Other GE Dishwasher manuals