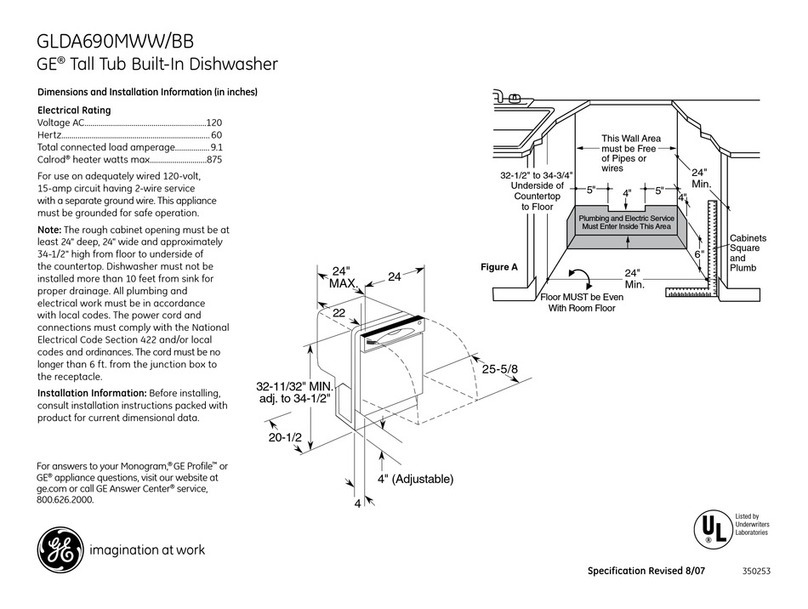
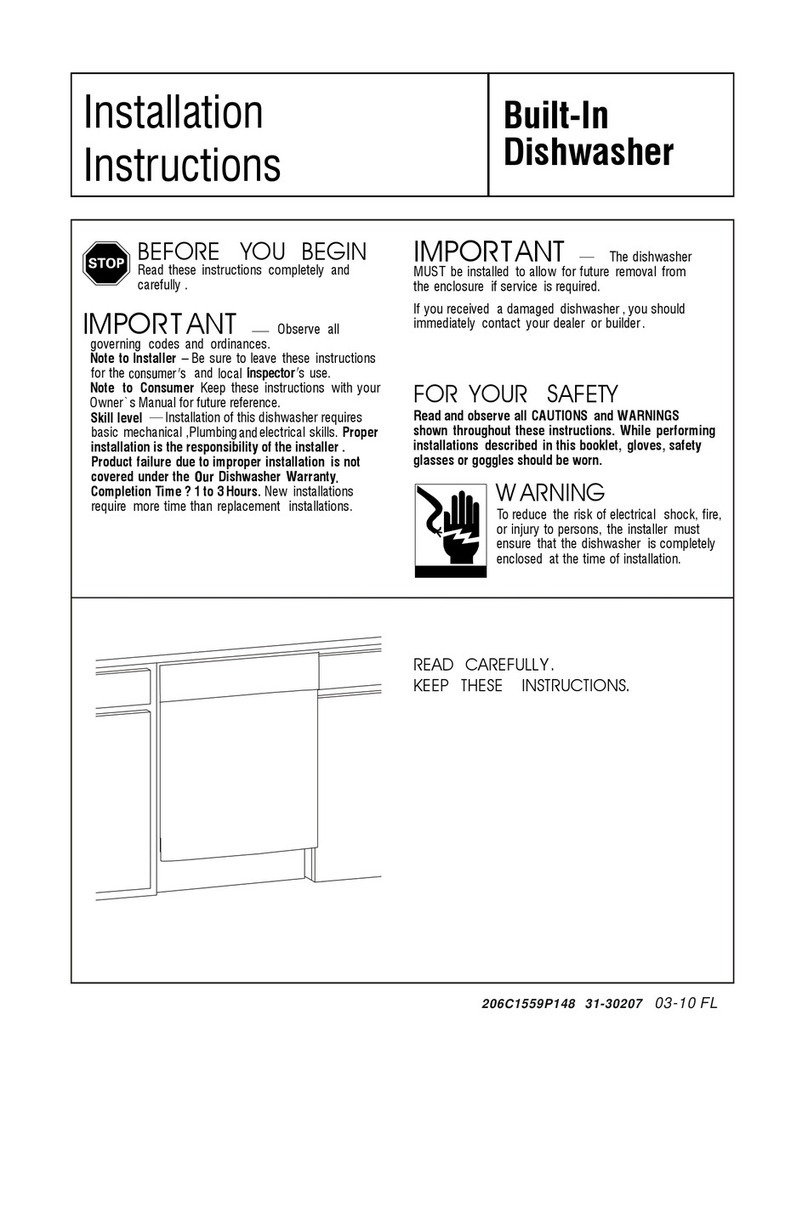
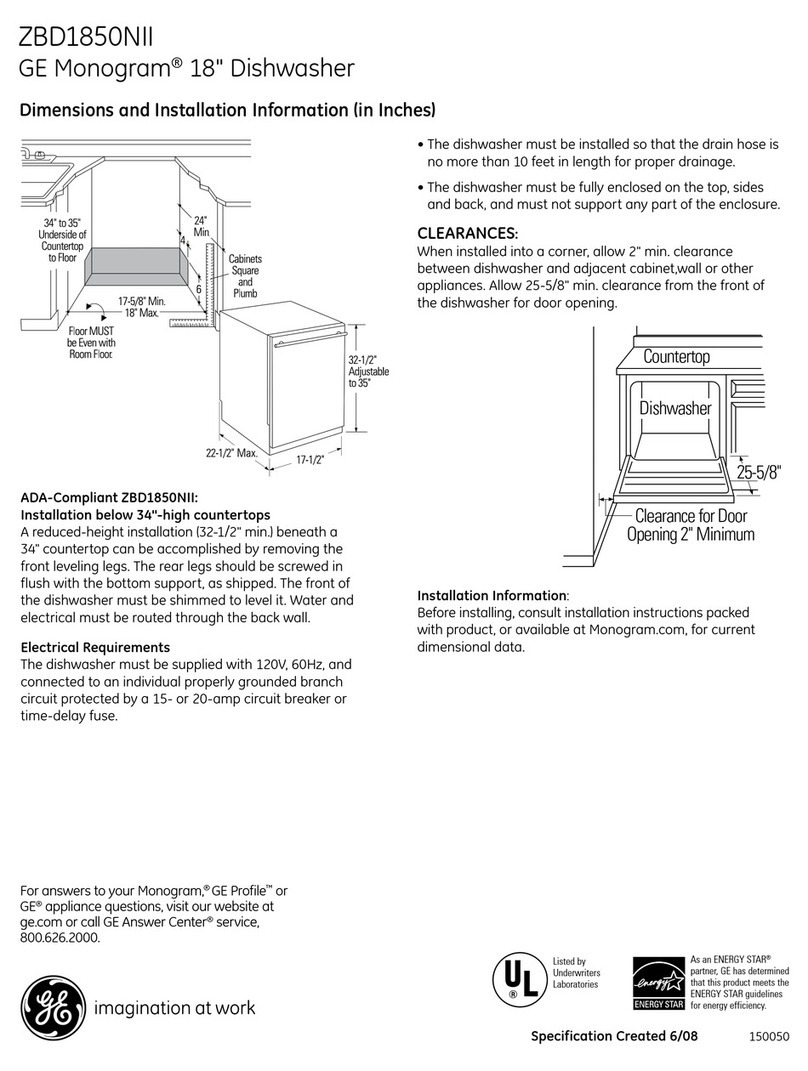
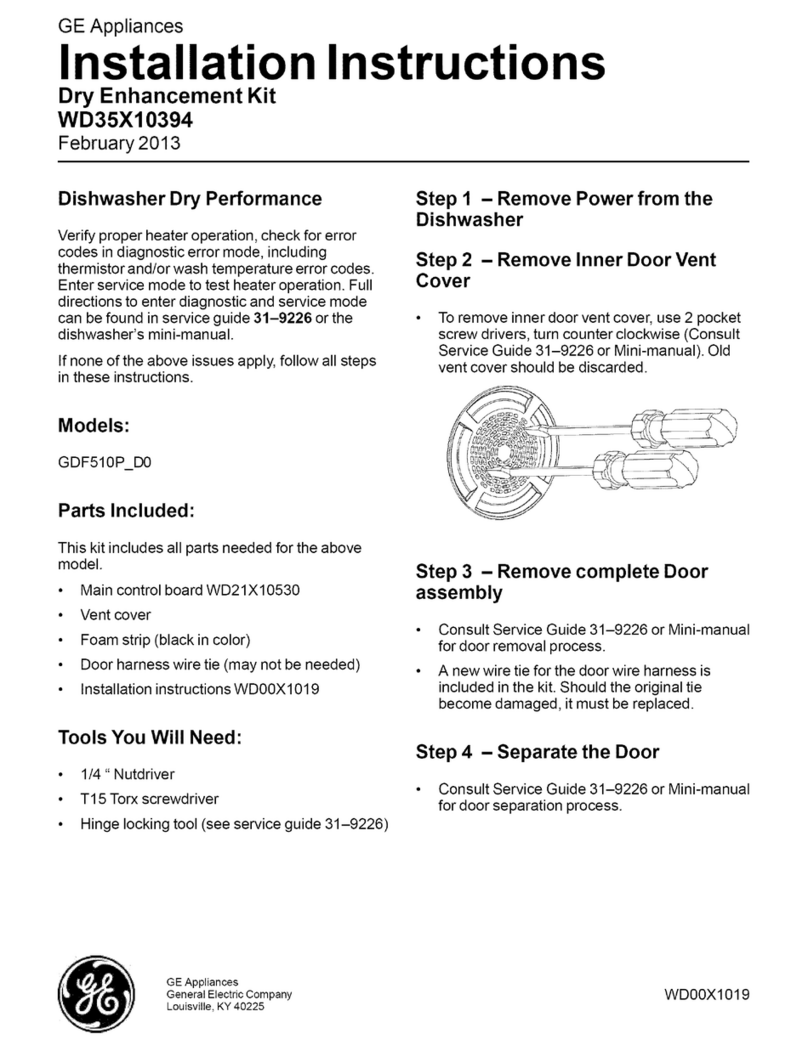
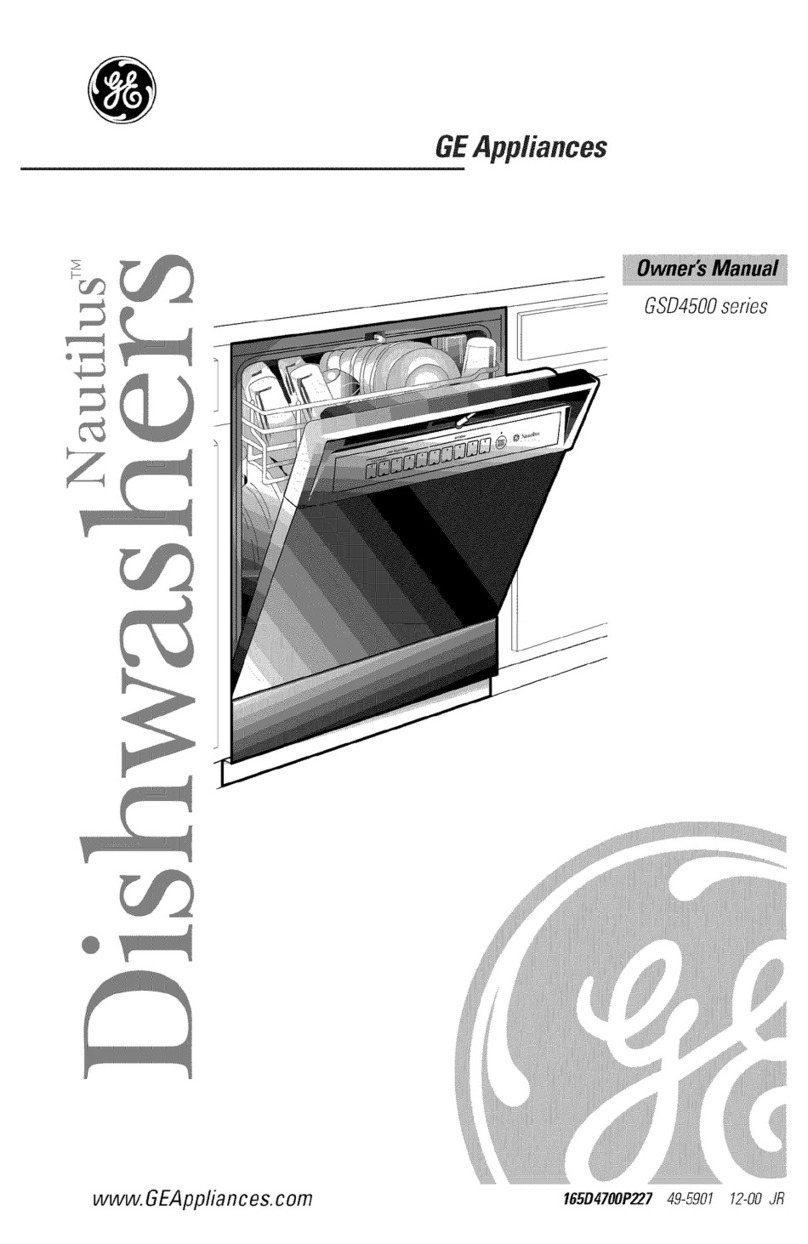
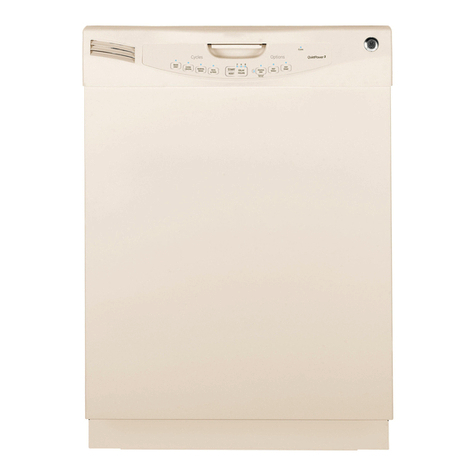
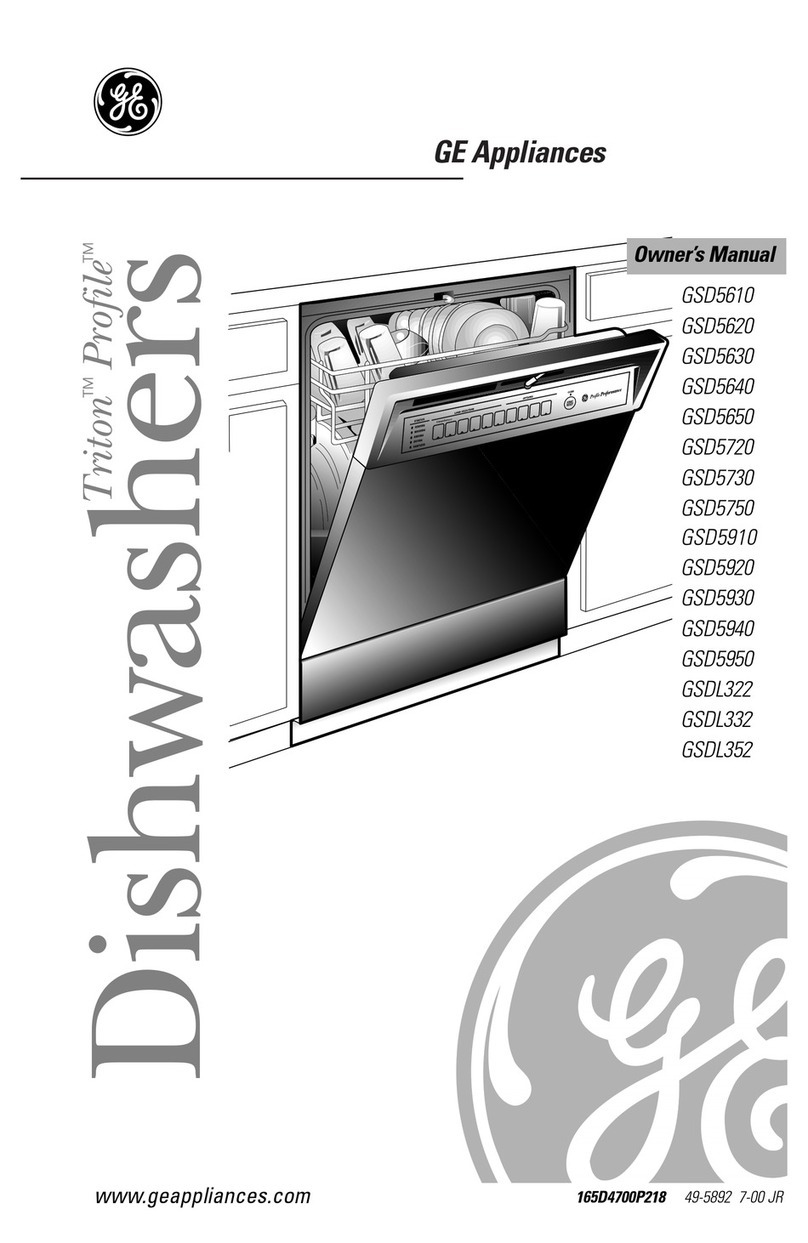
GE GSC870 User manual

D
contents
ApplianceRegistration 2SafetyInstructions 3
CareandCleaning 17 Unicouple 13
China,Crystal,Sterling 11 UserMaintenanceInstructions 1’7
ConsumerServices 19 warranty BackCover
CycleFeatures 5WaterTemperature
DelavStart 4WinterStorage 1!
Detergent,DetergentGuide 6,’7 WoodTop 1’7
DispenserCups 7
ElectricalRequirements 12
Energy-SavingTips 2
Features 4
FrontPanelColorChange 17
Loading 8-10
ModelandSerialNumbers 2
OperatingGuide 4,5
CycleSelection 5
SoilLevel 7
POTSCRUBBERCycle 4,5
ProblemSolver
RinseAgent 14-16 GEAnswerCentera
6/??/70.Jw..wfin
(hlVt?d3h3 Model GSC87’OM

Help W!3heipyou...
BeforeUsingyour
dishwasher,Rwdthis
bookcarefuIlye
It is intendedto helpyou
operateandmaintainyournew
dishwasherproperly.
Keep ithandy for answersto
your questions.
If you don’tunderstandsomething
or need more help, write(include
yourphone number):
ConsumerAffairs
GE Appliances
AppliancePark
Louisville,KY 40225
Writedownthemodeland
serialmmbers.
You’llfind them on alabel
fastened to the tub walljust inside
the dishwasherdoor.
These numbers are also on the
Consumer Product Ownership
Registration Card that came with
your dishwasher.Before sending
in this card, please write these
numbers here:
ModelNumber
Savetimeand money.
Beforeyou It%xpst
Ser-viah
Check the Problem Solver(pages
12through 16).It listscauses of
minoroperatingproblemsthat you
can correctyourself.
Toobtain aSpanish language
version of this book,call
GE Answer Center@
800>626.2000
consumerinformation service.
Para obtener la versi6ncm
espa?iolde este manual,
name a
GE Answer Center?
servicio de informacibn
para el consurnidor,
tel;fono 800.626.2000.
Energy-savingtips
The power consumption of your
dishwasher can be minimized if
you follow these suggestions:
sOperate dishwasher only when
it’s full. Let the dishes accumulate
in dishwasher. When you put in
only apartial load, use the RINSE
&HOLD cycle to rinse off heavy
soils. Be sure to latch the door
when waiting for afull load.
This helps keep soilsmoist, easier
to remove.
~If yoLldon’tneed your dishes
right away, use your ENERGY
SAVER no-heat drying feature
that turns the drying heater off
automatically. Dishes dry
naturally over alonger period
such as overnight.
IZIAlways select the cycle that
uses least amount of water that
win remove the soil ii-ml the
hxd. See pages 4and 5.
Serial Number
Use these numbers in any
correspondence or service calls
concerning your dishwasher.
Hyou received a
damageddishwasher...
Immediately contact the dealer
(or builder) that sold you
the dishwasher.
~Turn your water heater down to
120”Fand use the WASH HEAT
BOOST Option. Make sure the
entering water temperature is no
less than 120°F (see page 6).
2
M’youneedservice
Toobtain service,see the
ConsumerServicespage in the =
back of thisbook.
We’reproudof our serviceand e
want you to be pleased.If for some
reason you are nothappy with the
serviceyou receive,here arethree
stepsto followfor furtherhelp.
FIRST,contactthe peoplewho
servicedyour appliance.Explain
why you are not pleased.In most
cases, this will solvethe problem.
NEXT, if you are stiHnot pleased,
write allthe details—including
your phone number—to:
Manager, ConsumerRelations
GE Appliances
Appliance Park
Louisville,Kentucky40225
FINALLY,if your problem is still
not resolved, write:
Major ApplianceConsumer
Action Panel
20 Nollh WackerDrive
Chicago, Illinois60606

IMPORTANTSAFETYmSTRUCTIONS
Readall instructionsh#i-m?Usingthis appliance
WARNING—When using this
appliance,always exercisebasic
safety precautions,including
the following:
~Use this applianceonlyfor its
intendedpurpose,as you willfind
describedin this Use and Care
Book.
eThis dishwasher must be
properly inst$m!d and
10M4?43hmxmikmce with
the Instahtion. Instructions
before it is used. If you did
notreceive an Installation
Instructionssheet with your
dishwasher,you can obtainone
by contactin~the service
location nearest you.
—This appliancemust be
connected to agrounded metal,
permanent wiring sys~ern;or an
equipment-groundingconductor
must be run with the circuit
conductors and connected to the
equipment-grounding terrnimd
or lead of the appliance.
—Connect to aproperly rated,
protectedand sizedpower-supply
circuit to avoid electrical
overload.
*Use only powder or liquid
detergents or wetting agents
recommended for use in a
dishwasher.
~Do not washplasticitemsunless
marked “dishwashersafe” or the
equivalent.Forplasticitemsnotso
marked,check the manufacturer’s
recommendations.
~Load lightplasticitems so
they will not becomedislodged
and drop to the bottomof the
dishwasher—they might come
into contactwith theheating
unit and be damaged.
TOminimize the possiMity
d’ injury,
*When loadingitems to be
washed:
A. Locate sharp items so that
they are not likelyto damage
the door seal, and
B. Load sharp knives with the
handles tip to reduce the risk
of cut-type injuries.
~Do not touch the heating
element during or immediately
after use.
~Do not operateyourdishwasher
unless aHenclosure panels are
properly in place.
*Do not tamper with controls.
@Do not abuse, sit on, or stand
on the door or dish rack of the
dishwasher.
~Close supervision is necessary
if this appliance is used by or
near children. Do not allow
children to play inside, on or
with this appliance or any ‘
discarded appliance. Dispose
of discarded appliances and
shipping or packing material
properly. Before discarding a
dishwasher, remove the door
of the washing compartment,
oKeep all washing detergents
and wetting agents out of the
reach of children, preferably in
alocked cabinet. Observe all
warnings on container
avoid personal injury.
*To minimize he possibility
of electric shock,disconnect
this appliancefrom the power
supply More attemptingany
maintenance.
Note: Turning the control dial
to the (NWpositiondoes not
disconnect the appliance
from the power supply,We
recommend having aqualified
technicianserviceyour ap#iance.
WAmmG–WDROGENGAS
is produced by the chemical
action within your water heater.
It can accumulate in the water
heater and/or water pipes if hot
water has not been used for a
period of two weeks or longer.
HYDROGEN GAS IS
EXPLOSIVE. To prevent the
possibility of damage or injury,
if you have not used hot water
for two weeks or more, or
moved into aresidence in which
the hot water system may not
have been used for some time,
turn on all hot water faucets and
allow them to nm for several
minutes before using any
electrical appliance which is
connected to the hot water
system. This will allow any
hydrogen gas to escape. Also,
since the gas is flammable, do
not smoke or use an open flame
or appliance during this process.
SAVETHESE
INSTRUCTIONS

.—
How ‘tooperateyour dishwasher
—
POT. tdOliMAl UGH7 -’l
J:@
*#*.*r
suoJ8mR WASH WIUH &mH&i Wfll Hal yJEl QWWGHEA7 WASHING
mmm @
$4.”
s: 1-
ow mCo/ww7ib/r)
DnY!NGg
CN18S Opda.u Potscmbber 870 MRIMING
lAi$J’ ~J
*
STEP’1. Load your dishwasher
with dishes, silverware,pots,
pans, bowls, etc., accordingto
instructionson pages 8-10.
STEP 2. Add detergentto the
detergentdispenser.Make sure the
Cycle Indicator Dial is at OFF
position before addingdetergent.
(See pages 6and 7.)
Use rinse aid agent to help prevent
spotting.Occasionally check to
insure that rinse agent containeris
at least half full. (See page 6.)
STEP 3. Select drying option.
IDRYINGHEAT
ON OFF
IEEl
DRYING HEAT ON. Turns the
drying heater on for fast drying.
DRYIINGHEATOFF.Turnsthe
dryingheater offto saveenergy.
Disheswilldry naturallyovera
longerperiodsuchas overnight.
If you need your dishes sooner,
open the dishwasher door after the
cycle is complete to reduce the
natural drying time.
STEP 4. WASHHEAT’BOOST
Option.
WASHHEATBOOST
mOFF
an
When selected,the wash cycle will
be extendedfor 8minuteswhile
the dishwasherheatsthe water for
good washing and drying.The
entering water must be at least
120°F.
When this option is not selected
the entering water mustbe at least
140°F.To test water temperature,
see page 6.
STEP 5. Select the wash cycle and
start the dishwasher.(See Cycle
Selection Hints on next page.)
If your dishwasher drains into a
food waste disposer,operate the
disposer until it is empty before
starting the dishwasher.
~When NOT using DELAY
START (for all cycles):
a. Be sure door is tdatchd.
b. Push selected cycle button.
d. Latch the doorto start the
dishwasher.There is adelay
between start-upand water fill
so you will not hear any wash
actionright away.
“When using DELAYSTART
(for allcycles):
Note: STARTcan be delayed
automaticallyfor up to 6hours.
a. Be sure door is unlatched.
b. Push selected cycle button.
o
ORY
IwRINSING I
c.
d.
Slowly turn Cycle Indicator
Dial to desired delay time.
Latch door to start timer.
Dishwasherwillstartautomatically
at end of selected delay time.
c. Slowly turn Cycle Indicator
Dial to START.
4.
ii
.

—
Cycleselectionhints
It is importantto followtheloading
instructionsonpages8-10.
POTSCRLJBBER-For itemssuch
as pots, pans and casseroleswith
dried-onor baked-on soils.
Everydaydishes may beincluded,
NORMAL WASH—Forloadsof
everydaydishes, glassesand
cookware with mediumsoils.
Designed to yield high
performance on normalsoils.
LIGHT WASH—--Formostloads of
everyday dishes with lightsoilsor
soilsthat have not dried on. It
saves hot water over thehigher
performance cycles, savingenergy.
RINSE &HOLD—For rinsing
partial loadswhich will be washed
later.Do not use detergent.It is best
not to use the DELAY START
option with this cycle.
WhtRthappensineachcycle
~You’11hear occasional clicking
sounds:
—Soft food dis~oser shreddinz
Lu
action.
—Drain valve opening to pump
water out.
—Timer control as cycle
progresses.
—Detergent cup opening.
eDuring the dryingperiod:
—The motor stops.
—Water vapor comes through the
vent by the door latch during
drying and when water is being
pumped out.
WashCyck% lEi:!;lMrnl
CycleSequence
I I I
POTSCRIJBIIER 11.1 ““ EIEIEEIEIIEIEIEEI
NORMALWM51-I 11.1 ““ EIEEIEIEIEIE3EI
—— —— —
LIGHT VVASH 8.2 S,* b-JlN4!&_lHM
M%63E&130LII 2.9 1() mm
“Unextendedtimes.Thesecycletimeswillbeincreasedapproximately8minutesifWASH
HEATBOOSTOptionison.
Drying options:
m. -DRYINGHEATOhJ.Availableon allwashcyclesexceptRINSE&HOLD.Add30minutesto
~~$’ washcycletime.
DRYINGHEATOFF,Dryingheateristurnedoff.Dishesdrynaturally.
.4%.?..
k“- 3:,,:.::T=~j”—
....1
,.,,..,
.#q
—————.—-—.— ———

Gooddishwashing sm%$
withHOTwater
Togetdishescleananddryyouneed
hotwater.Tohelpyougetwaterof
thepropertemperature,your
dishwasherhasaWASHHEAT
BOOSTfeature.Whenselected(see
page4),thiswaterheatingfeature
allowsyouto turndownyour
householdwaterheaterandsave
energyif you’rewillingtoletthe
dishwasherrunalittlelongerwhileit
heatswater.Forgoodwashingand
drying,theenteringwatermustbe
between120”Fand 140”F.Toprevent
dishdamage,inletwatershouldnot
exceed150°F.
How to test water temperature:
Check the water temperatureinside
your dishwasher with acandy or
meat thermometer.
Let the dishwasher run through one
fill and pump out cycle, then let the
dishwasher fill with water the
second time, approximately 5
minutes after starting the machine.
When you hear the water stop
filling, unlatch the door and slowly
open it.
Measure the temperature of the
water in the bottom of the tub this
way: ..
Remove the silverware basket and
p]ace acandy or meat thermometer
in the water towards the middle of
the tub. If the temperature is less
than 120”F,you will not get good
washing results. Raise your water
heater temperature, wait 30 minutes
and test again. Higher water
temperature is needeclto dissolve
grease and activate powder
detergents. Mthe water temperature
is less than 140°F,usetheWASH
HEAT 1300ST Option (see page 4).
6
IIe@ful hints:If outside
temperaturesare unusuallylow,or
if yourwater travelsalong distance
from water heaterto dishwasher,
you may need to setyour water
heater’sthermostatup. If you have
notused hot waterfor sometime,
the waterin the pipes will becold.
Turn on the hot water faucet at the
sink and allow it to run untilthe
wateris hot. Then start the
dishwasher.If you’verecently done
laundry or run hotwater for
showers,give your water heater
time to recover before operatingthe
dishwasher.
Howtouse aRinseAgent
Arinse agentmakes water flow off
dishesquicker than usual. This
lessens water spottingand makes
drying faster, too.
For best dishwashingperformance,
use of arinse agent such as J13T-
DRY brand is recommended.
Rinse agents come in either liquid
or solid form. Yourdishwasher’s
dispenser uses the liquid form.
How to fill the rinse agent
dispenser. Unscrew the cap. Add
the liquid rinse agentuntil itjust
reaches the bottom of the lip inside
the dispenser opening. Replace the
cap. The dispenser automatically
releases the rinse agent into the
final rinse water.
If you accidentally spih Wipe up
the rinse agent with adamp cloth.
Don’t leave the spill in the
dishwasher. It can keep your
detergent from working.
If you can’t find any rinse agent,
write:
B13NCKISERCONSUMER
PRODUCTS, INC.
(“JET DRY”)
411 W. Putnam Ave.
Greenwich, CT 06830
Your dishwasher’s rinse agent
container holds 4X ounces. This
shou~dlast about 3months. Fill as
needed. Do not overfill.
Howtochine anduse
fik!terfy?nt ---
w:
First,me only powder or Iliquid —
detergentsspecificallymade for
use in dishwashers.Othertypes
will causeoversudsing.
Second,check the phosphate
content.Phosphattihelpsprevent
hard-watermaterialsfromforming
spotsor filmonyourdishes.If your
waterishard (7grainsor more),
yourdetergenthasto workharder.
Detergentswithahigherphosphate
levelwillprobablyworkbetter.If
thephosphatecontentislow (8.770
or less),you’llhaveto useextra
detergentwithhardwater,
Yourwater department can tell
you how hardyour water is. So
canyour countyextensionagent
or your area’swater softener
company.Just call and ask them
how many “grains of hardness”
there are in your water.
How much detergent should you
use? That depend~.Is your water
“hard” or “soft”? With hard water,
you need extra detergentto get
dishes clean. With soft water, you
need less detergent.
Toomuch detergentwith softwater
notonly wastesmoney,itcan be
harmful It can causeapermanent
cloudinessof glassware,called
“etching.” An outsidelayer of glass
is etched away!Of course,thistakes
sometime. Butwhy take achance
when it’seasy to find outthe
hardnessof yourwater.
Keep your detergent fresh and
dry. Under the sink isn’t agood
place to store detergent. Too much
moisture. Don’t put powder
detergent into the dispenser until
you’re ready to wash dishes, either.
(It won’t be fresh OR dry.)
If your powder detergent gets ok!
or hmpy9 throw it away.Rwon’t
wash well, Old detergentoften
won’t dissolve.
If you use aliquiddishwasher
detergent, theseprecautions are not ~~
(
necessary because liquiddetergents -‘“w
don’t %mp” as they age or come ~<z%
in contact with water. @$
v
——.——..— —— ————.———+.

—
You’llfind two detergent
dispenserson the insidedoor of
your dishwasher.TWO,because
somecycles use two washes.
r
OPEN
CUP
See “DetergentUsageGuide”
below.(Bejui-ethe CycleIndicator
Dial isat OFFpositionbefore
addingdetergent.Otherwise,the
detergentcup willnotcloseand
latchproperly)
Close the main cup.
NOTE: Detergent cup i-naybe
opened manually with no harm,
Turnhandle counterclockwise
until it releases.Asnapping sound
is normal when it opens.
Howto preparethedishes
forwashing
If thisisyourfwstdishwasher,or
ifyou’rereplacingamucholder
model,you may wonderhowmuch
preparationyourdishesneed,
Actuallyverylittle.Pre-rinsingof
normalfood soilsisnotnecessary.
Withcommonsenseandalittle
practiceyou’llsoonknowwhat
foodsto remove.Hereare some
guidelines:
1.Scrapeoffbones,seeds,skins,
toothpicksandotherhardsolids.It
is alsobestto removehardshelled
vegetables,meattrimmings,leafy
vegetablesand crusts.Remove
excessivequantitiesof oilorgrease.
20Removelargequantitiesof any
food.Yourdishwasherhas abuilt-in
softfood disposerthatpulverizes
softfood bitsand flushesthem
away.It can handlesmallamounts
of softfoods,but largeamountswill
be difficultto handle.
llt%tx~en~ US~~e GRMe (powder or liquid)
3.T1yto removefoodscrapsarid
placedishesindishwasherbefore
soilhasachanceto dly andbecome
hard.Disheswithdried-onsoilare
moredifficultto washandmay not
comecleanin theNORMAL
WASHcycle.Rememberto use
yourRINSE&HOLD cyclefor
small“holding”loads.
Note: Thefoodsmentionedabove
areforexamplesonly.Otherfoods
notmentionedmay alsoneedto be
removedfromyourdishes.Youmay
alsowant toconsiderremoving
foodssuchasmustard,mayonnaise,
vinegar,lemonjuice and otherfoods
thatcan causediscolorationof
stainlesssteelifallowedto remain
on dishesfor alongperiodof time.
When usingthePOTSCR~BER
cyde~lesspreparationisrequired
beforeloading.ThePOTSCRU13BER
cyclecanwashheavily-soileddishes.
Itemswithburned-onandbaked-on
soilsmaynotcomeclean.Andthe
dishwashercannotremoveburn
marksorrestorefadingcausedby
overheatingduringcoo~king.
ISOFT WATER MEDIUM WATER HARD WATER
(O-3grains hardness) (3-7 grains) (7-12 grains*)
CYCLES MainCup OpenCup MainCup OpenCup MainCup~ OpenCup*
POTSCRUBBER 1Tablespoon 1Tablespoon HalfFull HalfFull Completely Completely
and minimum minimum Full Full
NORMALWASH +-1- +
cycles III
LIGHTWASHcycle I1Tablespoon
minimum None IEIalfFull INone ICompletely INone
IIFull - -
I
RINSE&HOLDcycleIuse no detergent Iuse no detergent Iuse no detergent
IIIiE
‘K12 grainsandup isextremelyhardwater,Awatersoftenerisrecommended.Withoutit, lime WA
can buildup inthewatervalve.Thewatervalvemaystickwhileopenandcauseflooding. $$)
:[FilIedMainCupholds3tablespoons;FilledOpenCupholds2tablespoons. ~-p
xc
-
-.iLzCz:.

How toload your dishwasher
This is arandommixed load,the most common type
you willhave.
Make suredishes are properly loaded to insure that
water can reach the soiledsurfaces. The wash arm in
the bottomsprays water up. The tower that rises in the
center sendswater out over the dishes to wash the
items in theupper rack. Aspray arm in the top washes
down also.Make sure to place tall items to the outside
so the upperwash arm is not blocked.
How toloadtheTOPMCK
The top rack is best for glasses, cups and saucers. Two
rows of cups can be washed when using the folding
shelf. Load the bottom row first, then fold down the
shelf and load the top row. Cups and glasses fit best
along the sides. This is the place for dishwasher-safe
plastics, too. Make sure small plastic items are lodged
in tightly so they can’t fall onto Calrod[”heating unit.
Arrange stemware so that it canno~move easily. Don’t
let thtiglasses touch each other.
WATCHOUT FOR THIS.
The wash tower rises through the center of the bottom
rack during the wash and rinse portionsof the cycle.
Don’t block it or load tall things nextto it. Also, be
careful not to let aportion of an item such as apot or
dish handle extend through the bottom rack. This could
block the wash arm and cause poor washing results.
($J —. ——
Sauce pans, mixing bowls and other small items may
be placed—face down—in the top rack. The top rack is
handy for all kinds of odd shapes.

11
shelf up
Fold the folding shelfup for glasses and tall things.
Place tall items to the outsideso the upper wash arm is
not blocked.
How toload the BOTTOMmcK
How toload the TOPmcK
shelf Down
The folding shelfgives you extra spacefor cups and
long utensilson two levels. Load the lower level first,
then fold the shelfdown.
I.. ...
~.,
Fit plates and saucers between the pins. Load platters,
pots and bowls along the sides, in corners or in the
back.
As shown here, this plate is being placed with the
soiled side facing the center of the rack so water and
detergent from wash arm can reach soiled surfaces.
(cor~tinuednext page)

——.—
w’
Heavily soiledpots, pans and casserolesmustbe loaded
Pots, pans, casseroles, salad bowls,mixing bowls and
lidsmust be loaded in the bottomrack, facing down. in the bottom rack, facing down. Prop broiler pans and
racks along the edge. Shallow items may be angled
providedthe lower side does not shield the soiled
surfaceinsidefrom the water.
Put flatware in the removable basket with handles up to
protect your hands. Mix knives, forks and spoons so
they don’t nest together. Distribute evenly.
The security cell cover, hinged in the handle, can be
lowered to either side to secure light-weight items from
the effects of the vigorous wash action. When it is not
needed, this cover can remain upright.
Precaution!
Take out anything that may fall or extend through the
bottom of the basket.

what you camusuallywash safeIyinyour dishwasher.
. .
-. -,. .
Iusually
Material Safe IExceptions(notsafe) SpecialInstructions
Somedarkeningor spottingpossible.Removeby
scouringwith soap-filled steel woolpads,
If in doubt,check with the manufacturer,or test wash
one piece daily for at least amonth,Compare withthe
rest of the set.
Aluminum YES Somecolored anodized aluminumcan
fade,
China/Stoneware YES Antique, metal-trimmed, hand-painted
or over-the-glaze patterns fade. Gold
leaf will discolor.
Crystal
I
YES Antique, metal-trimmed or hand-
painted patterns fade. Gold leaf will
discolor.
Load securely to prevent movement.Check
manufacturer’s instructionsfor yourcrystal.
Do not wash in dishwasher.Damageto dishwasher and
discoloration or stainingof dishwashermay result.
Non-dishwasher
I
NO
items-such as
electronic air cleaner
filters, furnace filters, II
paintbrushes, etc. -
Glass
iron
IYES Milk glass may yellow.
NO Iron will rust.
Pewter
Plastics
NO Pewter tarnishes.
If it doesn’t say DISHWASHERSAFE,test one piece in
the top rack before dishwashing an entire set. Washin
top rack only.
Rinse if not washing immediately,Salty or acid foods
can stain if left on.
Rinse if not washing immediately.Salty or acid foods
can stain if left on. Dry detergent can cause difficult-to-
remove black spots. Place in back section of silverware
basket to avoid exposure to detergent from the detergent
cup.
YES
YESStainless steel
Sterling Silver
and Silver plate Don’t put in same silverware basket
with stainless steel. Contact between
metals can damage silver. Don’t wash
copper utensils in the same load. Silver
may get abrown film. Adhesive used
to attach some hollow-handle knives
can loosen.
YES
l== After washing, wipe the non-stick coating area with
vegetable oil to keep it from losing its non-stick quality.
Non-stick
coatings
‘h NO Tin can rust.
wood NO Woodcan warp, crack or lose its
finish with any type of washing.
Forgetadish? Here’s
‘whim!
J-w.l GM-l addit,
Add dishesanytime duringthe
RINSE&HOLD cycle.With
otherwash cycles,you can add
However, opening the door during 2. Wait afew secondsuntil the
any cycle lessens cleaning power water calms. Then open the door.
because the temperature inside the
dishwasher is lowered. So try to
load everything at the beginning.
3. Add dishes you’ve forgotten.
4. Close the door and push the
Here’s how to add aforgotten dish: latch to the far right. when the
dishesat any-time~EFORE themain door is locked, washing will
detergentwashpoi~ionof thecycle, 1.Push the door latch to the left.
/@%. continue.
Washing will stop.
..1..,.:.J
*:$
J

.
—.
How toconnect
eleettici~
Caution, for personal safety:
DOIWYI’USEAN EX’I’EI’’dSN3IN
CX3RD$X?AN ADAPTERPLUG
WITHTHISAPPLIANCE.
DO NOT, UNDER ANY
CX?CUW!YI’ANCES,cm OR
REMOVE THE ‘THIRD
GROUNDING PRONG FROM
THE POWER CORD.
Dishwashermust be ekctricdly
groundedin accmkum with
local codes and ordinances,or in
the absence of local codes,in
accordance with the NATK31NAL
ELECTRICALCODE,
AN$WNFPAl’Wk70-1987.
Ekctrkd requirement
0Thisappliancemust.besupplied
with 120V,60Hz,andconnectedto
an individual,properlygrounded e
bmnchcircuit,Protectedby a 15or
20ampcircuitbreakeror fime-delay
fuse.
-R (y+
;90 0
/I.0 +
INSUREPROPERGROUND
EXISTSBEFOREUSE
~If theelectricsupplyprovideddoes
notmeettheabovespecifications,it
isrecommendedthatalicensed
electricianinstallan approvedoutlet.
eYourdishwashercircuitshouldnot
be usedfor any otherappliance
whilethedishwasherisin operation
as thedishwasherrequiresthefull
capacityof tie circuit.
~Ethewallreceptacleyou piug
the dishwasher%powercordinto
iscontrolledby aswitch~turnon
the switch.
12

..
I
How tousethe unicoup~e
Beforeoperatingyour
dishwasher thefirsttime...
AttachtheAerator Faucet
Adapter. Thespecialaeratorfaucet
adaptersuppliedwithyour
dishwashermustbe assembledto
thesinkfaucetbeforeyoucan use
yourdishwasher.
The fwcet adapteris designedto
fit standardspoutshavinginternal
or externalthreads. Youwill find
theadapter and two washersin the
“~ardware for Installation” packet
inyour dishwasher.
Toinstallfaucet adapter,first
remove the old aerator or trimring
on your faucet spout.
Hfaucet has external threads:
--=s7
II
Insert the thinnerof the two
washers intc the faucet adapter and
attach it to the faucet spout.
If faucet has internal threads:
I
1-I
Insert both washers into the faucet
adapter and attach it to the faucet
spout.
If the faucet adapter threads do
not match your faucet spout~
you~local hardware or plumbing
sLlpplystore normally has
additional fittings to adapt your
faucet spout to the special aerator
faucet adapter.
jVOTE:AS1’llk.Vjl}”(lyaltm’hmcnt
hose can burst ~fit is i~ls[a[ld on
[Ile some sink }\’it/l yottr a’ish}~?mhec
JW Su<qcqcslflwt -volt discoiulwt tlw
.vijllc.s/3rayottachmc)lt(fjw{i- sink
/lokrO1lE’(1HLJplug the hole.
Howto connect the
Unieouple
1.PullUnicouplear]ditshoses
fromstoragecompartmentlocated
at rear ofdishwasherand attach it
to thefaucetadapter,
2. Attachthe Unicoupleconnector
to thefaucetadapterby depressing
collarat thetop of theconnector.
When Unicoupleis allthe way up
ontothe adapter,releasethecollar,
It willthen snapinto positionto
lockthe Unicoupleinplace.
The Unicouple’ssmallhose carries
water from the faucetto the
dishwasher.Its largehose carries
drain water to the sink.Be sure
drain hose is pointingtoward the
sinkbowl drain openingand the
sink drain is open for water that
willdrain from your dishwasher.If
your dishwasherdrainsinto a
disposer,operate the disposeruntil
it is completely empty before
sta~lingthe dishwasher.
How touse the
J?awet-molnozzk
The Faucet-Flo nozzle is part of the
Unicoupleconnector. Operate the
nozzle by depressing the pressure
release lever on the side of the
Unicouple connector. You will find
the Faucet-Flo nozzle useful for
several reasons. For example:
eIt allowsyou to flushcold water
out of thehot water line so that
yoLican betterregulateyour water
temperature.
~It allowsyou to test the
temperatureof the waterbefore
startingyour dishwasher.
Uyou need fresh water for
personalme:
IBDisconnectthe Unicouple.
eDraw yourfresh water directly
from your faucet.
eDo not disconnectthe Unicouple
while the dishwasheris operating.
How to disconnect the
Unicouple from faucet
adapter
LTurn off the hot water.
2. Release the water pressure by
depressing the pressure release
lever.This relieves water pressure
and protects you, and the room,
from severe splashing.
3. Shake excess water out of
Unicouple and return it and its
hoses to the dishwasher storage
compartment.
NOTE: When motorstops at the
end ofthe finalrinse, the Unicouple
can be disconnectedand returned to
storage.
.—. .-.=-.= -. .—=—.-—.. m.-m . . . . . . . .: -—...—.— .-.-.,.s ..-.

Questions?
——
--- useThisProblemsolver
PROBLEM
DISHWASHER
WON’T RUN
UNUSUAL NOISE
DISHESDON’T DRY
UNCLEAN DISHES
AND FLATWARE
BLACK OR GRAY
MARKS ON DISHES
DETERGENT LEFT Ih
DISPENSER CUPS
DETERGENT CUP
LID WON’T LATCH
AFTER ADDING
DETERGENT
YELLOW OR
B120WN FILM
14
-*
.—
IW$!NBLECAUSE AND REMEDY
Afuse in yourhome maybe blown,or the circuit breakertripped.Replacefuse or
reset circuitbreaker,Remove any otherappliancesfrom the cwcuit.
Utensilsmay riotbe secureon rack pins, or somethingsmallmay have droppedfrom
therack. Wateris causing utensilsto rattle. Make sureeverythingis securelyplaced in
dishwasher. .
Makesureinletwatertemperatureiscorrect. (See Page 6.)
Unload the bottomrack first. Waterfrom dishes in the top rack maybe spillinginto the
bottomrack.
Check for improper loading.Dishes shouldn’tnest together.Avoidoverloading.
Check the rinse agent dispenserto see that it’snot empty.
Checkinletwatertemperature.It shouldbe at least 120°F.(To test, see page 6.)
Waterpressure may betemporarily low.Turn on afaucet. Is water coming out slower
than usual? If so, wait untilpressureis normal before using your dishwasher.
Improper rack loading. (See pages 8-10.)
—
Aluminum utensilsofkenleave marks when they rub against dishes. Remove marks
with amild abrasive cleanser.
Water may not be reaching the detergentcups, Move dishes that maybe blocking
detergent cup.
The dispenser cover may not be opening or may be blocked by improperly Ioaded
items. If you used apowder detergent, open the cup and remove any caked-on
detergent. If the cup stilldoesn’t open automatically, call for service.
Detergentmay be old. If the powder detergent is hard or caked in the box, throw it
away.The detergent may not be working well. Try another brand.
CycleIndicator Dial must be in OFF position for cup lid to close ad latch properly. If
YOUunlatch the door and open it to dry your dishes, the Cycle Indictor Dial does not
idvance to OFF by itself.
~eaor coffee can stain cups. Remove the stains by hand, using asolution of 1/2 cup
]leach and 3cups warm water.
hoverall yellow or brown film on dishes or glassware can be caused by iron
ieposits in water. Aspecial filter in the water supply line is the only way to correct
his problem. Your water softener company can tell you about the filter.
fellow film on sterling silver results when you wash copper utensils in the same
oad. Silver polish will usually remove this stain.
o
-~.>:.~..
-%-~2%
;I~
n+-;:
.
.. .._rJ
,.+++)
-a:.-A.

..
.-
IROBLEM
WYrs AND
FILlkUNGON
GLASSES AND
FLATWARE
CLOUDINESS ON
GLASSWARE
P0SSI13LECAUSE AND REMEDY
Spottingcan be caused by all thesethings:
mExtremely hard water.(See page6+)
*Low inlet water temperature.(Totest, seepage 6.)
QOverloadingthe dishwasher.
*Improperloading. (See pages 8-10.)
~Old or damp powder detergent.
~Phosphatelevel in detergenttoo low. (See page 6.)
‘Rinse agent dispenserempty.(See page 6.)
“Toolittle detergent. (See page 7.)
Due to varying local water conditionsand personalpreferences, try severalbrands of
detergentsto find one that givesthe best results for you. Aliquid dishwasherdetergent
may help reduce filming.
To remove stubborn spots and film from ghsswmx
1. Remove all metal utensilsfrom the dishwasher.
2. Do not add detergent.
3. Select P0TSCRU13BER cycle.
4. Start the dishwasher and allow to run for 15”to 20 minutes. The dishwasherwill
now be in the main wash.
5. Then open the door and pour 2cups (500ml) of white vinegar into the bottomof
the dishwasher.
6. Close the door and allow to complete the cycle.
If vinegar rinse doesn’t work: Repeat as above, except use 1/4cup (60ml) of citric
acid crystals instead of vinegar.(Most drugstores carry citric acid crystals. If yours
doesn’t, call GE Factory Service.)
Using avinegar or citric acid crystal rinse more than twice amonth? Consider a
home water softener. -.
If vinegar or citric acid crystal rinse doesn’t work, the cloudiness is “etching.”
The film cannot be removed.
It can be prevented: Use less detergent if you have soft water. Wash glassware in
the shortest cycle that will get them clean.
Water temperature entering dishwasher exceeds 150”F.
(continued on next page

CHIPPING OF
CHINA
SMALL AMOUNT
OF WATER
STANDING IN
THE BOTTOM
OF THE TUB
WATERWON’T
PUMP OUT OF
THE TUB
SUDS IN THE TUB
DISHWASHER
LEAKS
POSSIBLE CAUSE AND RENIEDY
Rough handling can causechipping.Load with care. Make sureglasswareand china
are secure and can’tjar loose. (Seepage 8for correct way to load glassware.)Make
suretall glasses and stemwarewill clear the top of thetub when yOLIpushthe rack
into the dishwasher.
Always use the top rack for delicateitems.
Wateraround the outlet on thetub bottom at the back of the tub is normal.It is clean
water. It’sthere to keep the water seal lubricated.
If the entire bottom of the tub has water,you may have adrain problem.
Check the kitchen sink.Is it drainingwell? YOL1may need aplumber.
If dishwasher drains into disposer,run disposer to clear. Be sure disposeris not
clogged.
Sudsing detergents are not meant for dishwashers. USE ONLYAUTOMATIC
DISHWASHER DETERGENTS TO AVOID SUDMNG.
TOremove suds from the tub: Open the dishwasher. Let suds evaporate. Add 1
gallon of cold water to the tub. Close and latch the dishwasher.Pump out water by
slowly turning the control dial until adrain period is reached.
Repeat if necessary.
Suds can cause unit to overflow.That’s why it’s so important to use adetergent that’s –
designed for automatic dishwashers.
Spilling the rinse agent can cause foam during washing. This can lead to overflowing.
Wipe up accidental spill of rinse agent with adamp cloth.
H’you need more help...cd, toll free:
GE Answer Center@
800.626.2000
consumer information service
16

-m careand cleaning
USER MAINTENANCE
INSTRUCTIONS
(Hem the controlpaneIwith a
lightlydampenedcloth.Dry
thoroughly.Do not use abrasives
or sharpobjectson the panel.They
can damageit.
Clean the outside withagood
Removingthewoodtop How todmngecolorpanels
(m built-inmodelsonly)
Ifyou are redecorating,you can
changeyourdishwasher’sdoor
panelto matchor blend with your
new colors.
The panel is held in place by the
doortrim. Each side of the panel is
adifferentcolor.Or you can paint
the panel with the colorof your
own choice.
NOTE:Donotoperatethe
dishwasherwhilechangingpanels ~
Removethetwomountingscrewsas
shownandpullthetoptowardyou
toremoveit.fromthedishwasher.appliancepolishwax. T.h;outside
cabinetfin;sh is durable,but it can
scratch.So use no scouringpads,
or harsh or grittycleaners.
AppliancePolishWax &Cleaner
(Cat.No. WR97X0216)is
availablefrom GE Appliance
Parts Mart.
The inside usually takescare of
itself. If it shouldever need
cleaning,use amild cleansing
powder.Scouringpads and harsh
cleaners can mar the finish.
To remove the protectivecover,
use scissorsto cut the bag from the
under side.Then reinstallthe top
taking care to engagethe rear
brackets as shown.
or whenthe loweraccesspanelis
removed.
Howtochangethe!door
pad:
110 NOT’operate the dishwasher
without the wood top in place. 1. Takeout trim screws on either
side of the dishwasherdoor.
Remove the sidetrim.
careof thewoodtop 2. Slide the r)anelout.
Before using, wipe well with adry
cloth to remove surfacedust.
Saturate aclean cloth with mineral
oil and polish all exposed wood
surfaces until they gleam. Allow
wood top to stand overnightto
absorb the oil and repeat the
treatment the next day.Allow to
stand for 4to 6hours and wipe off
excess oil with asoft,dry cloth,
(Careful-e&ges maybe sharp.) g
3. Turn the panel around and put ~a
the color you want in front. s
Comw!rsionKit 4. Replace the panel, side trim and L
m
screws.
Aspecialkit (CatNo. WD35X0193)
forchangingaconvertible
dishwasherto apermanentbuilt-in How to changethe lowerpanel:
installationisavailablefromyour
dealeror serviceorganization. 1.Removepanelattachmentscrews.
Wood tops should not be used as a
place for thawing frozen foods,
even when protected by asheet of
aluminum foil. Never let water
stand on the wood top.
2. Removetheentirepanel.
Howtoprepare‘your
dishwasher f“rwinterstorage
(onbuilt-inmodelsonly)
Ifthedishwasheristo beleftunused
inan unheatedlocationduringthe
wintermonth,haveaservice
techniciantakethefollowingstepsto
preventthemachinefromfreezing:
~Remove fuses or trip circuit
breakers to remove electric power
from the dishwasher.
~Turn off water to dishwasher.
Disconnect the water inlet line
from the water valve and drain.
~Remove watervalve from the
dishwasherandblow on small
plasticoutletto remove water.
l?eplacewater valve and water line.
$Remove plug in bottom of rubber
boot and drain completely. Replace
the Ping.
3. Takeout screwsand removethe
toptrim.
4. Slidethe doorpanelout.
To remove water stains,rub with a
cloth saturated with non-toxic
mineral oil (available at most
drugstores).
5.Turn the panel around and put
the color you want in front.
6. Replacethe lowerpanel,top trim
and screws.
Shouldyourtop becometoostained,
dirtyor cut,sand with#000(150)or
WOOO(220)sandpaperand thenwipe
with aclothsaturatedwithnon-toxic
mineraloil.
‘7.Replacetheentirepaneland
attachmentscrews.
Awood paneltrimkitcontains
trimand instructionsfor addinga
decorativewooddoor paneland
loweraccesspanel to match kitchen
cabinets.The kit is availableat no
extracost. (SpecifyGPF 40,)
Order from:
GE Appliances
c/o IMi-ViewIVIanufacturing
4706 Allmond Ave.
Louisville, KY 40209
17
—.——.—..—-—.——

We’uBeThere
AGE ConsumerServiceprofessional
willprovideexpertrepair service,
scheduledat atime that’sconvenient
for you.ManyGEConsumerService
company-operatedlocationsofferyou
servicetodayor tomorrow,or at your
convenience(’ZOOa.m.to 700 p.m.
weekdays,9:00a.m.to 2:00p.m.Satur-
days).Our factory-trainedtechnicians
knowyourapplianceinsideand out—
somostrepairscan be handled injust
one visit,
Youcanhavethesecurefeelingthat
GEConsumerServicewillstillbe
thereafteryourwarrantyexpires,l?ur-
chaseaGEcontractwhileyourwar-
rantyisstillineffectandyou’llreceive
asubstantialdiscount.Withamultiple-
yearcontract,you’reassuredof fiture
serviceattoday’sprices.
WhateveryourquesticnaboutanyGE
majorappliance,GEAnswerCente@
informationserviceisavailableto
help.Yourcall-and yourquestion—
willbe answeredpromptlyand
courteously.Andyoucancallany
time.GEAnswerCente@serviceis
open24hoursaday7daysaweek.
P
elecommunicationDevicefortheDeaf
sg.N .ArJ
=..—-..-,,lJ, .!-. -. -.
.!.. —. ..- 0. --—-.. ~...
Idividwds qualifiedto seMce their
ownappliances can haveneeded
parts or accessoriessentdirectlyto
their home,free of shippingcharge!
The GEparts systemprovidesaccess
to over4’7,000parts..and allGE
Genuine RenewalPartsare fidly
warranted.VISA,MasterCardand
Discovercardsare accepted.
user maintenance imdm.ldions
Contied in.&is bookletcoverpmce-
dums intended to be perfomed by
av.yuser. Other servicinggmmdy
shouldbe .l&3medto qwdifkl Ser-
vice‘personnel.caution mustbe
emwcked9sinceiimpmpmseticing
mayU%wlseUmsafe‘qpemtbne
Upon request,GEwillprovideBrad]
c&trok Foravarietyo~GEappliarm
andabrochuretoassistin planning
barrier-fiwekitchenfor personswith
limitedmobility.Toobtaintheseiter
free of charge,call800,626.2000.
Consume~swithimpaired hearing
or speech who havea&essto aTI113-
or aconventionalteletypewritermay
call800-TTI13-GEAC(800-833-4322)
to recpest information or semice.
I!E

YOURGE DISHWASHERWITHPERMATuF@INTER1OR
WARRANTY I
Saveproof of originalpurchasedate suchas your sales slip or cancelleci checkto establishwarrantyperiod.
WHATIISCOVERED
FULLONE-YEARWARRANTY
Foroneyearfrom dateoforigins!
purchase,wewillprovide,freeof
charge,partsandservicelaborin
yourhometo repairor replaceany
part of thecijslwvaslwthat fails
becauseof amanufacturingdefect.
FULLTEN-YEARWARRANTY
Forten yearsfrom date oforiginal
purchase,wewill provide,free of
charge,partsandservicelaborin
yourhometo repairor replacethe
Pem7a71.@tubor doorlinerif it
failsto containwater becauseof
amanufacturingdefectsuchas
cracking,chipping,peeling
or rusting.
LJIVNTEDSECOND-YEAR
WARRANTY
Forthe secondyearfromdateof
originalpurchase,wewillprovide,
freeof charge,replacementpartsfor
anypart of the WaterDistribution
System(asillustratedbelow)that
failsbecauseof amanufacturing
defect.Associatedinletanddrain
plumbingpartsare notcoveredby
thiswarranty.Youpayforthe
servicetripto yourhomeand
servicelaborcharges.
PowerShower@arm ~~
3Piece Power TowerTMd-Hose
Wa
(Sp Hub
-connection
assembly
Bo Motor
w
Soft Food Disposer ‘
Water Distribution System
Thiswarrantyisextendedto
theoriginalpurchaserandany
succeedingownerfor products
purchasedfor ordinatyhomeusein
the48 mainlandstates,Hawaiiand
Washington,D.C.InAlaskathe
warrantyisthe sameexceptthat it is
LIMITEDbecauseyou mustpayto
shipthe productto theserviceshop
orforthe servicetechnician’stravel
coststo your home.
Allwarrantyservicewillbe
providedby our FactoryService
Centersor by ourauthorized
CustomerCare@servicersduring
normalworkinghours.
Lookinthe WhiteorYellowPages
of yourtelephonedirectoryfor
GENERALELECTRICCOMPANY,
GENERALELECTRICFACTORY
SERVICE,GENERALELECTRiC-
HOTPOINTFACTORYSERVICEor
GENERALELECTRICCUSTCWIER
CARE” SERVICE.
WHAT1SNOTCOVERED IXI
Servicetripsto your hometo teach adequateelectrical,plumbing,and
you howto usethe product. other connecting facilities. (
Readyour Use and Carematerial. ~Replacementof housefusesor
Ifyou then haveanyquestions resettingof circuitbreakers.
aboutoperatingthe product,please
contactyour dealeror our
ConsumerAffairsofficeat the
addressbelow,or call,toll free:
GE AnswerCenter@
800,626,2000
consumer informationservice
~Improper installation.
Ifyou havean installationproblem,
contactvour dealer or installer.You
~Cleaningor servicingof air gap
devicein drainline.
eFailureof the productif it is used
for otherthan its intendedpurpose
or usedcommercially.
@Damageto productcausedby
accident,fire, floodsor acts of God.
W/4RRANT0RIS/VOTRESKWSIBLE
FORCONSEQUENTIALDAMAGES.
II are responsiblefor providing
Ii
Some states do not allow the exclusion or limitation of incidental or consequential damages, so the above limitation or exclusion
may not apply to yoIJ.This warranty gives you specific legal rights, and you may also have other rights which vary from state to state
To know what your legal rights are in your state, consult your local or state consumer affairs office or your state’s Attorney General.
?J
II Warrantor: General Electric Cotipany
II
iif
further help is neededconcerning this warranty, write:
Manager—CQnSWmerAffairs, GE Appliances, Lmisvih, KY 40225
L.
Part No. 165D3080P200 ~~~gf$~i
\J
-----___
Printed in Cana a
‘lib. No.4g-5504
!- J
lz.913 cG
- -.—-.... ... . .——.- . ..
___
.——— .—. -.—.- ——
.——. ._,— ______ _
Table of contents
Other GE Dishwasher manuals