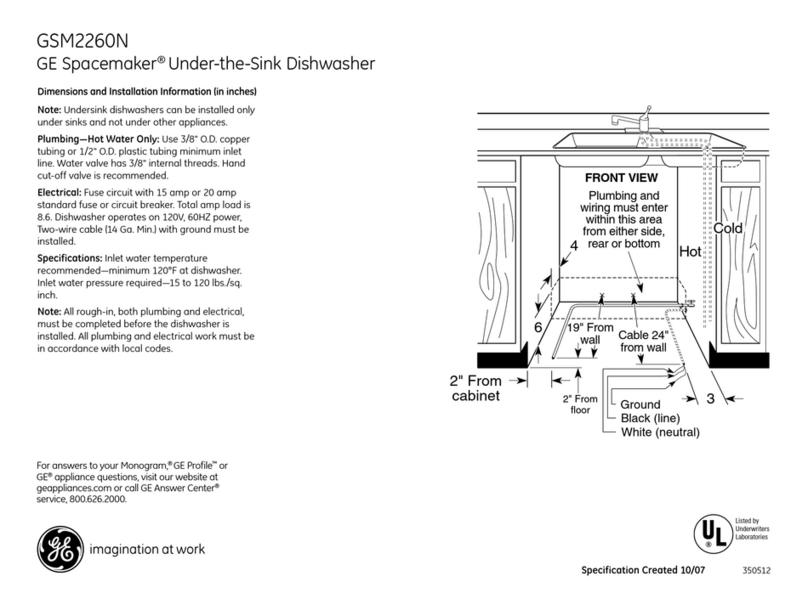
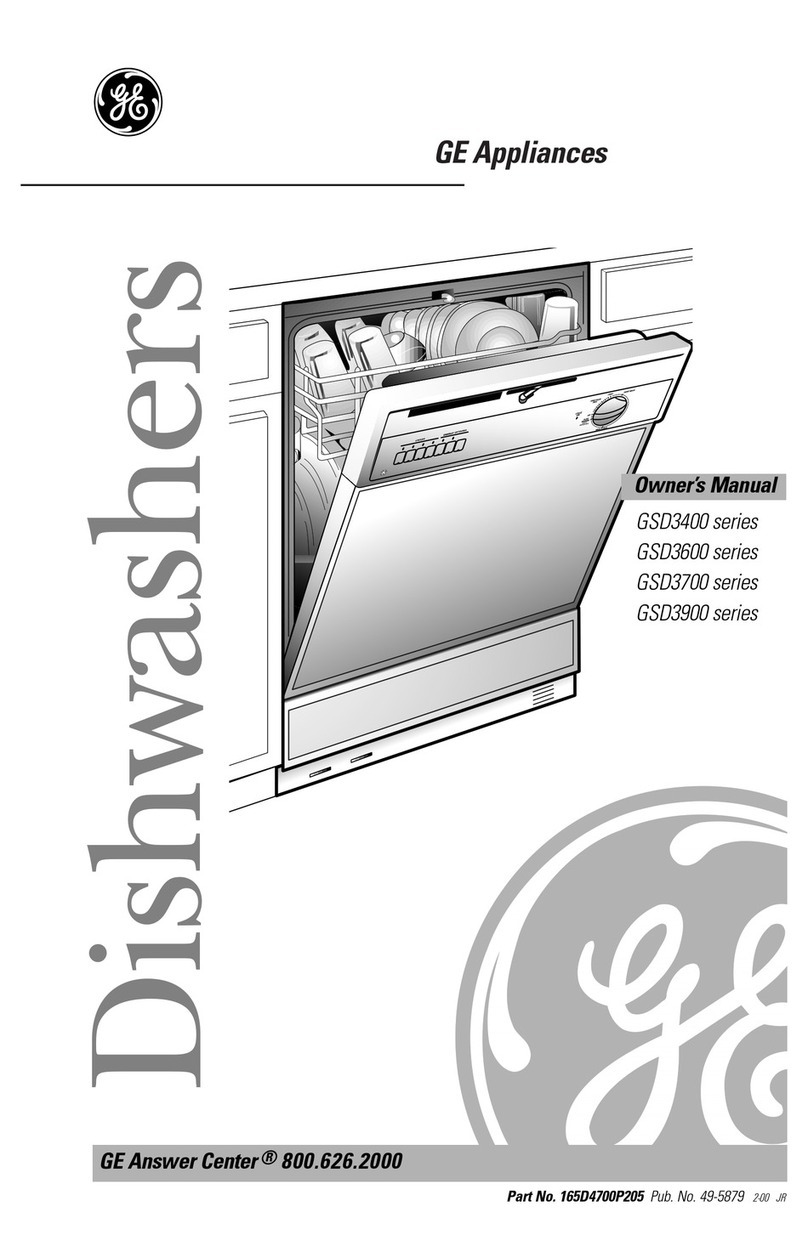
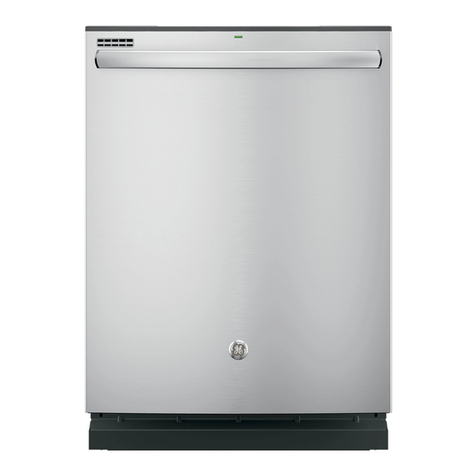
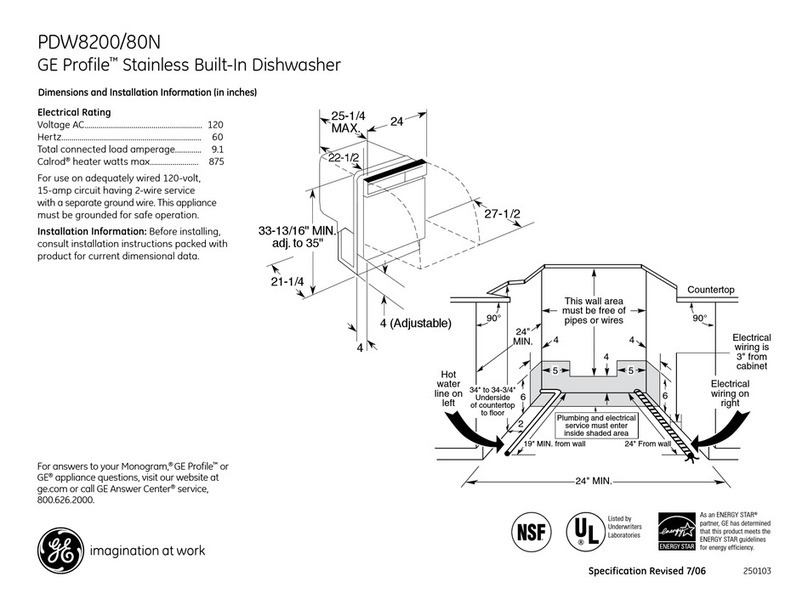
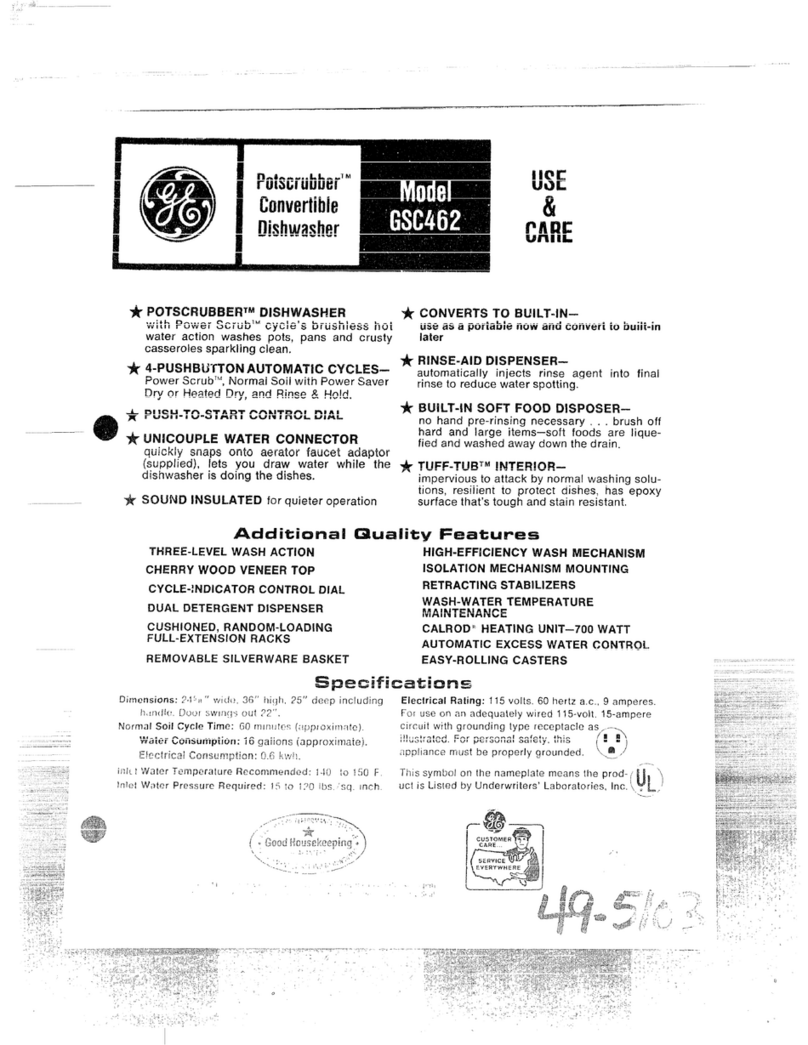
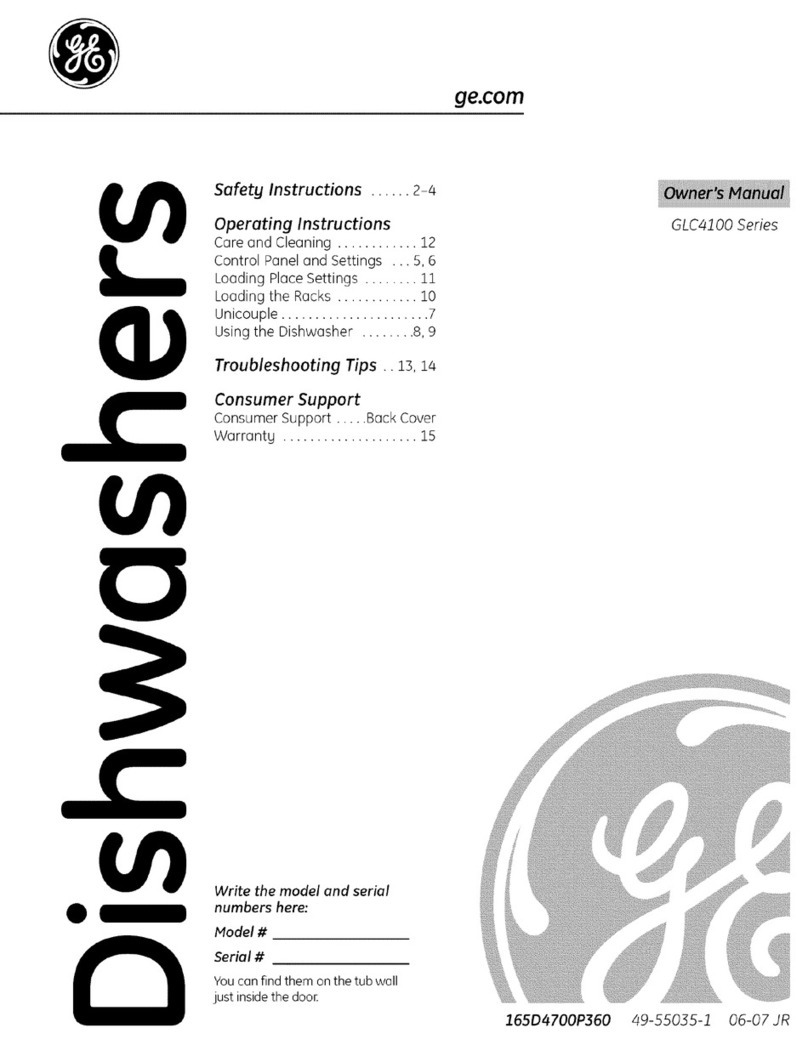
GE Spacemaker GSM2200N User manual

Owner’s Manual
Dishwashers
165D4700P368 49-55043 10-07 JR
Safety Instructions . . . . . . . . 2, 3
Operatin Instructions
Care and Cleaning . . . . . . . . . . . . . .12
Control Panels . . . . . . . . . . . . . . . . . . . .6
Control Settings . . . . . . . . . . . . . . . 4–5
Dial Cycles . . . . . . . . . . . . . . . . . . . . . . .7
Flashing Display ights . . . . . . . . . . .8
oading the
Dishwasher Racks . . . . . . . . . . . . . . .10
oading Place Settings . . . . . . . . . .11
Optional Accessories . . . . . . . . . . . .12
Using the Dishwasher . . . . . . . . . .8, 9
Troubleshootin Tips . . . 13, 14
Consumer Support
Consumer Support . . . . . . . . . . . . . 16
Warranty . . . . . . . . . . . . . . . . . . . . . . . 15
Write the model and serial
numbers here:
Model #____________________
Serial # ____________________
You can find them on a label on the
tub wall just inside the door.

2
Operatin Instructions Safety InstructionsConsumer Support Troubleshootin Tips
IMPORTANT SAFETY INFORMATION
READ ALL INSTRUCTIONS BEFORE USING —
SAVE THESE INSTRUCTIONS
WARNING!
For your safety, the information in this manual must be followed to minimize the risk of fire,
explosion, electric shock, and to prevent property dama e, personal injury, or death.
WATER HEATER SAFETY
PROPER INSTALLATION AND MAINTENANCE
This dish asher must be properly installed and located in accordance ith the Installation
Instructions before it is used. If you did not receive an Installation Instructions sheet ith
your dish asher, you can receive one by visiting our ebsite at www.geappliances.ca.
■Contents washed in Anti-bacterial mode, if
available, may be hot to the touch. Use care
before handling.
■Using a detergent that is
not specifically designed
for dishwashers will cause
the dishwasher to fill with
suds.
■If your dishwasher is connected to a
wall switch, ensure that the switch is
on prior to use.
■On dishwashers with electronic controls,
if you choose to turn the wall switch off
between wash cycles, allow 5-10
seconds after turning the switch on before
touching START/RESET to allow the control
to initialize.
■Non-Dishware Items: Do not wash items such
as electronic air cleaner filters, furnace filters and
paint brushes in your dishwasher. Damage to the
dishwasher and discoloration or staining of the
dishwasher may result.
■Close supervision is necessary if this appliance
is used by or near children.
■oad light, plastic items so they do not
become dislodged and drop to the bottom of
the dishwasher—they might come into contact
with the heating element and be damaged.
■Connect the dishwasher/appliance to a grounded
metal, permanent wiring system; or run an
equipment-grounding conductor with the circuit
conductors and connect to the equipment-
grounding terminal or lead of the appliance.
■Improper connection of the equipment-grounding
conductor can result in a risk of electric shock.
Check with a qualified electrician or service
representative if you are in doubt whether the
appliance is properly grounded.
■Dispose of discarded appliances and shipping
or packing material properly.
■Do not attempt to repair or replace any part
of your dishwasher unless it is specifically
recommended in this manual. All other servicing
should be referred to a qualified technician.
■To minimize the possibility of electric shock,
disconnect this appliance from the power supply
before attempting any maintenance.
NOTE: Turning the dish asher off does not
disconnect the appliance from the po er supply.
We recommend having a qualified technician
service your appliance.
WARNING!
CAUTION: To prevent minor injury and property dama e
Under certain conditions, hydrogen gas may be produced in a ater heater that has not been used
for t o or more eeks. HYDROGEN GAS IS EXPLOSIVE.
If the hot water has not been used for two or more weeks, prevent the possibility of damage or injury
by turning on all hot water faucets and allow them to run for several minutes. Do this before using any
electrical appliance connected to the hot water system. This simple procedure will allow any built-up
hydrogen gas to escape. Since the gas is flammable, do not smoke, use an open flame, or use the appliance
during this process.
eappliances.ca
Consumer SupportTroubleshootin TipsOperatin InstructionsSafety Instructions
3
PROPER DISPOSAL OF THE DISHWASHER
Junked or abandoned dishwashers are
dangerous…even if they will sit for “just a
few days.” If you are getting rid of your old
dishwasher, please follow the instructions
below to help prevent accidents.
Before You Throw Away Your Old
Dishwasher:
■Take off the door of the washing compartment
or remove the door latch keeper (as shown).
WARNING! RISK OF CHILD ENTRAPMENT
Door latch keeper
READ AND FOLLOW THIS SAFETY INFORMATION
CAREFULLY.
SAVE THESE INSTRUCTIONS
■Use this appliance only for its intended purpose
as described in this Owner's Manual.
■Use only powder, tabs, liquid detergents or rinse
agents recommended for use in a dishwasher and
keep them out of the reach of children. Cascade®,
Cascade®Complete and Electrasol®Automatic
Dishwashing Detergents, and Jet-Dry®and
Cascade Crystal Clear®rinse agents have
been approved for use in all GE dishwashers.
■ocate sharp items so that they are not likely
to damage the door seal.
■oad sharp knives with the handles up to reduce
the risk of cut-type injuries.
■Do not wash plastic items unless marked
dishwasher safe or the equivalent. For plastic
items not so marked, check the manufacturer's
recommendations.
■Do not touch the heating element during or
immediately after use.
■Do not operate your dishwasher unless all
enclosure panels are properly in place.
■Do not tamper with controls.
■Do not abuse, sit on or stand on the door or dish
rack of the dishwasher.
■Do not allow children to play around the
dishwasher when opening or closing the door due
to the possibility of small fingers being pinched in
the door.
■Do not discard a dishwasher without first removing
the door of the washing compartment or the latch
keeper.
■Do not store or use combustible materials, gasoline
or other flammable vapors and liquids in the
vicinity of this or any other appliance.
■Do not allow children to play with, on or inside this
or any discarded appliance.
WARNING! When usin your dishwasher, follow basic precautions,
includin the followin :

Operatin Instructions Safety Instructions
Consumer Support Troubleshootin Tips
4
About the dishwasher control panel
Cycles
An indicator light above the selected pad ill be ON to indicate hich CYCLE has been selected, on some models.
POTS & PANS/ For heavily soiled dishes or cookware with dried-on or baked-on soils.
Everyday dishes may be included.
HEAVY WASH This cycle will not remove burned-on foods.
(on some models)
NORMAL/
For loads of everyday dishes, glasses and cookware with medium soils. NOTE: Many dishes have lighter
NORMAL WASH
soil than normal. Choosing
a cycle other than NORMAL WASH will save energy and water.
SHORT WASH For quickly washing loads of everyday dishes with medium soils
that have not dried on, such as loads
(on some models)
consisting mostly of glasses.
WATER SAVER For dishes with light soils.
L GHT WASH
(on some models)
R NSE ONLY For rinsing partial loads that will be washed later. Do not use detergent.
DRY NG For warming clean dishes and serving plates. This cycle will take approximately 30 minutes.
PLATE WARMER
HOT PREWASH Preheats wash water to the correct temperature.
HOT START
CH NA CRYSTAL For lightly soiled china and crystal.
(on some models)
Control Settings
Options
An indicator light above the selected pad ill be ON to indicate hich OPTION has been selected, on some models.
HI TEMP Turns on the heater in all final rinse cycles to help prevent spotting on dishware. This option may be
RINSE turned ON or OFF during the wash cycle.
(on some models)
HI TEMP Energizes the heater to boost water temperature in prewash and main wash fill cycles. Recommended
WASH for use with heavily soiled dishes. Option may be turned ON or OFF during the wash cycle.
HEATED DRY Shuts off the drying heat option. Dishes air dry naturally and energy is saved. Open the dishwasher door
OFF to speed drying.
HEATED DRY Turns the heater on for fast drying. This cycle will extend the time to your wash cycle by 30 minutes.
ON DO NOT use with RINSE ONLY cycle.
LOCK
When the LOCK pad is touched twice within 3 seconds, all pads become inoperative. You can lock the controls to
(electronic models
prevent any selections from being made. Or you can lock the controls after you have
started a cycle or selected
only)
DELAY START so the cycle or DELAY START is not interrupted.
Children cannot accidentally start dish asher by touching pads ith this option selected.
To unlock the dishwasher after it has been locked, touch the
LOCK
pad twice within 3 seconds. The light above
the
LOCK
pad will turn off.
DELAY HOURS Delays the start of a wash cycle for up to 8 hours.
(on some models)
RESET Touch RESET to cancel options.
(timer models)
START/RESET Touch START/RESET one time to start dishwasher cycle. Touch START/RESET a second time to pump out
(electronic models) and then turn off the dishwasher. Do not touch START/RESET more than one time unless you intend to
end the cycle.

eappliances.ca
Consumer SupportTroubleshootin TipsOperatin InstructionsSafety Instructions
5
Cycle Chart
Model Cycle Water Usage (litres) Cycle Time (min.)
GSD1100 Hot Start Option19.5 10
Heavy Wash 26.5 120
Normal Wash 21.6 117
Rinse Only 8.3 53
Plate Warmer 0.0 40
HDA1100 Hot PreWash Option19.5 10
ADW1100 Normal Wash 21.6 117
Drying 0.0 40
GSD1300 Hot Start Option19.5 10
GSD2100 Heavy Wash 26.5 120
GSD2101 Normal Wash 21.6 117
ight Wash 17.0 113
Rinse Only 8.3 53
Plate Warmer 0.0 40
HDA2100 Hot PreWash Option19.5 10
Heavy Wash 26.5 120
Normal Wash 21.6 117
Water Saver 17.0 113
Rinse Only 8.3 53
Drying 0.0 40
HDA3500 Hot PreWash Option19.5 12
Heavy Wash 26.5 118
Normal Wash* 21.6 118
Water Saver* 17.0 114
Rinse Only* 8.3 53
Plate Warmer 0.0 40
GSD2300 Hot Start Option19.5 12
GSD2301 Pots & Pans 26.5 118
GSM2200 Normal Wash* 21.6 118
ight Wash* 17.0 114
Rinse Only* 8.3 53
Plate Warmer 0.0 40
GSD2700 Hot Start Option19.5 12
Heavy Wash 26.5 118
Normal Wash* 21.6 118
Rinse Only* 8.3 53
Plate Warmer 0.0 40
GSD3300 Hot Start Option19.5 12
Pots & Pans 26.5 118
Normal Wash* 21.6 118
Rinse Only* 8.3 53
Plate Warmer 0.0 40
GHDA350 Hot Start Option14.9 3
Pots & Pans 31.0 103
Heavy Wash 26.5 103
Normal Wash* 21.6 103
ight Wash* 12.9 95
Rinse Only* 8.3 42
Plate Warmer 0.0 33
GSD4000 Pots & Pans 33.3 112
Heavy Wash 28.4 108
Normal Wash 21.6 105
China/Crystal 23.9 80
Rinse Only 4.9 3
1Hot Start Option adds water amount and cycle time shown when selected.
* Normal Wash button should be pushed to run this cycle.
Control Settings
NOTE: Not all models have every cycle listed.

6
About the dishwasher control panel
Operatin Instructions Safety Instructions
Consumer Support Troubleshootin Tips
You can locate your model number on the left tub all just inside the door. Throughout this manual,
features and appearance may vary from your model.
Please match the control panel for your unit to a similar control panel below.

Start (Models with a Dial)
Slowly turn the Dial to the START or ON position, or the selected cycle. Don’t turn it past the START,
ON or cycle position; you could accidentally miss a prewash.
There is a time delay between start-up and water fill so you will not hear any wash action right
away.
■atch the door to begin the cycle.
7
Consumer SupportTroubleshootin TipsOperatin InstructionsSafety Instructions
Operation of models with cycle dial eappliances.ca
Rinse Only
For rinsing partial loads that will be washed later. Do not use detergent.
Make sure HEATED DRY is not selected.
Slowly turn the Dial to RINSE ONLY.
Be sure the door is unlatched. atch the door to start the cycle.
42 31
Be sure the door is unlatched.
Slowly turn the Dial to SHORT WASH,
LIGHT WASH or WATER SAVER.
atch the door to start the cycle.
3
2
1
Plate Warmer or Dryin
oad clean dishware to be warmed.
Select HEATED DRY ON.
Be sure the door is unlatched.
Slowly turn the Dial to PLATE WARMER or
DRYING.
atch the door to start the cycle.
5
4
3
2
1
Start Delay (on some models)
The START DELAY will allow you to delay the start time of any cycle automatically up to 6 hours.
Hot Start or Hot Prewash Option
Preheats wash water.
Select the HOT START or HOT PREWASH
cycle and any other option on the push
button pad.
Be sure the door is unlatched.
Slowly turn the Dial to HOT START or
HOT PREWASH.
atch the door to start the cycle.
4
3
2
1
For warming clean dishes and serving plates. This cycle will take approximately 39 minutes.
Short Wash or Li ht Wash or Water Saver
For quickly washing loads of everyday dishes with light to medium soils that have not dried on.
Be sure the door is unlatched.
Select the wash cycle and option you want.
Slowly turn the Dial to the desired time.
The CYCLE ON light will come on.
atch the door to start the cycle.
4
3
2
1

Operatin Instructions Safety Instructions
Consumer Support Troubleshootin Tips
8
Operation of electronic models (model GSD4000 Only)
Li hts What It Means What To Do
This is normal. Allow the dishwasher to drain and reset before you start a new
The START/RESET pad wash cycle.
has been pressed.
Control Error Press the START/RESET pad to turn off the beeper. If the CLEAN
light continues to flash, call for service.
Control Error Press the START/RESET pad to turn off the beeper and the
dishwasher will attempt to reset. Restart the wash cycle.
If this error continues, turn off the power to the dishwasher at
the circuit breaker for 30 seconds. Try the dishwasher again.
If the error is still present, call for service.
PLUS A
BEEPING
SOUND
RESET
STARTSTART
CLEANCLEAN
PLUS A
BEEPING
SOUND
Usin the Dishwasher Door
The door must be closed and locked into place to select a LOAD SELECTION or an OPTION.
If the door is opened during a cycle and left open, the dish asher ill beep once every 30 seconds until the
door is closed and latched into place.
2
1
Start
Close and latch the door. Touch the START/RESET pad to begin the cycle. Water fill begins and
approximately 60 seconds later the wash action begins.
NOTE: The dishwasher remembers your last cycle so you don’t have to reprogram each time. When
the dishwasher is loaded and the door latch is in the locked position, the control panel lights will be ON
and display the last settings you selected.
If you don’t want to change any of the settings, simply touch the START/RESET pad to begin
the cycle.
Also, if a power failure occurs, NORMAL and HEATED DRY will automatically be programmed.
Make any new selections and touch the START/RESET pad to begin the cycle.
Clean
This light is illuminated when a wash cycle is complete. The light will stay ON until the door is opened.
Flashin Display Li hts

Consumer SupportTroubleshootin TipsOperatin InstructionsSafety Instructions
Fillin the Dispenser
Fill the rinse agent dispenser until it reaches the bottom of
lip inside the opening. Replace cap.
To check if rinse agent is needed, remove the cap and look
into the dispenser.
A full dispenser should last about one month.
If the rinse agent spills, ipe up the excess.
Check the Water Temperature
The entering water must be at least 49°C and
not more than 65°C, for effective cleaning and to
prevent dish damage. Check the water temperature
with a candy or meat thermometer. Turn on the
hot water faucet nearest the dishwasher, place
the thermometer in a glass and let the water
run continuously into the glass until the temperature
stops rising.
Adjust the maximum/minimum temperature of the
water heater if necessary to deliver water at the
proper temperature.
Use Jet-Dry®Rinse Agent
Proper Use of Detergent
Jet-Dry®or Cascade Crystal Clear®rinse agents remove spots and prevent new film buildup on dishes,
glasses, flatware, cookware and plastic.
Use only detergent specifically made for use in
dishwashers. Cascade®and Electrasol®Automatic
Dishwashing Detergents have been approved for use
in all GE dishwashers. Keep your detergent fresh and
dry. Don’t put powder detergent into the dispenser
until you’re ready to wash dishes.
The amount of detergent to use depends on whether
your water is hard or soft. With hard water, you need
extra detergent. With soft water, you need less
detergent.
Protect your dishes and dishwasher by contacting
your water department and asking how hard your
water is. Twelve or more grains is extremely hard
water. A water softener is recommended. Without it,
lime can build up in the water valve, which could
stick while open and cause flooding. Too much
detergent with soft water can cause a permanent
cloudiness of glassware, called etching.
Use the information in the table below as a guideline
to determine the amount of automatic dishwasher
detergent to place in the dispenser.
You’ll find two detergent dispensers on the inside door
of your dishwasher. All wash cycles require detergent
in the main cup.
When
using automatic dishwashing
detergent tabs, simply place one tab in the main cup
and close.
Be sure the Dial is OFF before adding detergent.
Otherwise, the
detergent cup will not close and latch
properly.
Add detergent; then close the main cup.
NOTE: To open detergent cup after it has been
closed, simply turn the detergent cup handle
counterclockwise until it releases. A snapping
sound may be heard.
DO NOT USE HAND DISH DETERGENT
NOTE: Using a detergent that is not specifically
designed for dish ashers ill cause the dish asher
to fill ith suds. During operation, these suds ill spill
out of the dish asher vents, covering the kitchen floor
and making the floor et.
Because so many detergent containers look alike,
store the dishwasher detergent in a separate space
from all other cleaners. Show anyone who may use
the dishwasher the correct detergent and where it
is stored.
While there will be no lasting damage to the
dishwasher, your dishes will not get clean using
a dishwashing detergent that is not formulated
to work with dishwashers.
Usin the dishwasher eappliances.ca
Deter ent Cups to Fill
Fill to 1/3 of main cup
Fill to 2/3 of main cup
Fill main cup
Fill
main cup and open cup
Number
of Grains
ess than 4
4 to 8
8 to 12
Greater than 12
Open cup
Main cup
9

Loadin the dishwasher racks
10
Operatin Instructions Safety Instructions
Consumer Support Troubleshootin Tips
Upper Rack
The upper rack is for glasses, cups and
saucers. Cups and glasses fit best along
the sides. This is also a secure place for
dishwasher-safe plastics. The upper rack is
good for all kinds of odd-shaped utensils.
Saucepans, mixing bowls and other items
should be placed face down.
Secure larger dish asher-safe plastics over
t o fingers hen possible.
Make sure small plastic items are secure so
they can’t fall onto the heating element.
Wash Tower
Keep the center area clear in the lo er
rack.
The wash tower rises through the
center of the lower rack during the
wash and rinse portions of the cycle.
Lower Rack
When loading the lo er rack, do not load
large platters or trays in the front right
corner. They may prevent detergent from
circulating during the ash cycle.
The lower rack is best used for plates,
saucers and cookware. arge items such as
broiler pans and racks should go along the
sides. oad platters, pots and bowls along
the sides, in corners or in the back. The
soiled side of items should face the center
of the rack.
For best dish ashing results, follo these loading guidelines. Features and appearance of racks and silver are
baskets may vary from your model.
Don’t block the ash
to er or load tall things
next to it.
Be sure items don’t fall
through rack and block
rotation of the spray arm.
Also, be careful not to
let a portion of an item
such as a pot or dish
handle extend through
the bottom rack. This
could block the wash
arm and cause poor
washing results.
Silverware Basket
Put flatware in the removable basket with
fork and knife handles up to protect your
hands. Place spoons in the basket with
handles down. Mix knives, forks and spoons
so they don’t nest together. Distribute
evenly. Small plastic items, such as
measuring spoons and lids from small
containers, should go in the bottom of the
silverware basket with silverware on top.
DON’T ET ANY ITEM EXTEND THROUGH
BOTTOM OF SI VERWARE BASKET AND
RACK, TO ENSURE PROPER FUNCTION
OF SPRAY ARM.
Do not cover upper rack tower
(not present on all models)
Tower
Don’t block the upper rack
ash to er.

Consumer SupportTroubleshootin TipsOperatin InstructionsSafety Instructions
Follo these guidelines for loading 10 place settings. Features and appearance of racks and silver are baskets
may vary from your model.
Upper Rack—10 place settin s Upper Rack—10 place settin s Lower Rack—10 place settin s
Loadin place settin s… eappliances.ca
Forget to Add a Dish?
A forgotten dish can be added any time before the main wash.
Push the door latch to the left.
Once the water calms, open the door. Steam may rise out of the dishwasher.
Add forgotten dish.
Close the door and push the latch to the far right.
4
3
2
1
Tips for Loading and Good Wash Performance
■Don’t block the lo er rack ash to er.
■Don’t let items fall through rack and
block spray arms.
11
Upper Rack—12 place settin s Upper Rack—12 place settin s Lower Rack—12 place settin s

Carin for the dishwasher
To clean the control panel, use a lightly dampened cloth, then dry thoroughly. To clean the exterior, use a good appliance
polish. Never use sharp objects, scouring pads or harsh cleaners on any part of the dish asher.
If your dishwasher is left in an unheated place
during the winter, ask a service technician to:
Cut off electrical power to the dishwasher.
Remove fuses or trip circuit breaker.
Turn off the water supply and disconnect the
water inlet line from the water valve.
Drain water from the inlet line and water
valve. (Use a pan to catch the water.)
Reconnect the water inlet line to the
water valve.
Remove the plastic sump cover in the tub
bottom and use a sponge to soak up water
in the rubber boot.
5
4
3
2
1
Sump cover screws
An air gap protects your dishwasher against
water backing up into it if a drain clogs.
The air gap is not a part of the dishwasher.
It is not covered by your warranty. Not all
plumbing codes require air gaps, so you may
not have one.
The air ap is easy to clean.
Turn off the dishwasher and lift off the
chrome cover.
Unscrew the plastic cap and clean with
a toothpick.
2
1
Check the air gap any time your
dish asher isn’t draining ell.
Air gap Does Your Dishwasher Have an Air Gap?
Protect A ainst Freezin
Operatin Instructions Safety Instructions
Consumer Support Troubleshootin Tips
12
The stainless steel panels can be cleaned
with Stainless Steel Magic or a similar
product using a clean, soft cloth.
Stainless Steel Panels
You can change the appearance of your
dishwasher by adding a custom panel trim kit.
1/4″ Wood panel trim kit—This accessory
contains trim and instructions for you to supply
and install a 1⁄ 4″thick decorative wood door:
■GPF25B (Black) GPF325B/GPF425B
■GPF25W (White) GPF325W/GPF425W
■GPF25C (Bisque) GPF325C/GPF425C
3/4″ Trimless wood panel kit—This accessory
contains parts and instructions for you to supply
and install a 3 ⁄ 4″thick decorative wood door:
■GPF375/GPF475
NOTE: The GPF100 dish asher door spring kit
must also be ordered and installed hen the
door panel eighs four lbs. or more. This kit is
included ith the 3/4”trim kits.
Non-wood countertop bracket kit—This is for
installations which have non-wood countertops
and includes side-mounting brackets and
instructions for securing the dishwasher:
■GPF65
Consult your GE Appliance dealer to get the correct
kit for your model.
Optional accessories (on some models)

Problem Possible Causes What To Do
Dishwasher won’t run Fuse is blown, or the • Replace fuse or reset circuit breaker. Remove any other appliances
circuit breaker tripped from the circuit.
•Try pressing the START/RESET pad (Electronic models) two times.
Power is turned off •In some installations, power to the dishwasher is provided through a wall
switch, often located next to the disposer switch. Make sure it is on.
Noise Some of the sounds • Soft food disposal shredding action.
you’ll hear are normal •Drain valve opening to pump water out.
•Timer control as cycle progresses.
•Detergent cup opening.
•The motor stopping during the drying period.
•Water draining out of tub immediately after touching the START/RESET pad.
Utensils are not secure • Make sure everything is secured in dishwasher.
in rack or something small
has dropped into rack
Rattling dishes when • Make sure dishes are properly loaded. See the Loading the
the spray arm rotates dish asher racks section.
Motor hums • Dishwasher has not been used on a regular basis. If you do not use
your dishwasher often, set it to fill and pump out once every week.
This will help keep the seal moist.
Water standin in This is normal • A small amount of clean water around the outlet on the tub bottom
the bottom of the tub at the back of the tub keeps the water seal lubricated.
Water won’t pump Drain is clogged • If you have an air gap, clean it.
out of the tub •Check to see if your kitchen sink is draining well. If not, you may need
a plumber.
•If the dishwasher drains into a disposer, run disposer clear.
Suds in the tub Wrong detergent • Use only automatic dishwasher detergents to avoid sudsing.
was used Cascade®, Cascade®Complete and Electrasol®Automatic Dishwashing
Detergents have been approved for use in all GE dishwashers.
•To remove suds from the tub, open the dishwasher and let suds
dissipate. Add 1 gallon of cold water to the tub. On Models with a Dial:
Close and latch the dishwasher. Pump out water by slowly turning the
Dial until a drain period is reached. Repeat if necessary. On Models with
Electronic Control: Pump out water by pressing the START/RESET pad,
then 10 seconds later, press START/RESET pad again. Repeat if necessary.
Rinse agent was spilled • Always wipe up rinse agent spills immediately.
Stained tub interior Some tomato-based • Use of the RINSE ONLY cycle after adding the dish to the load
foods can cause reddish can decrease the level of staining. GE recommends Cascade®
stains Plastic Booster to help remove these types of stains.
Tea or coffee stains • Remove the stain by hand, using a solution of 1/2 cup bleach
and 3 cups warm water.
WARNING
Before cleaning interior, wait at least 20 minutes after a cycle for the
heating elements to cool down. Failure to do so can result in burns.
An overall yellow or • A special filter in the water supply line is the only way to correct
brown film can be this problem. Contact a water softener company.
caused by iron deposits
in water
White film on inside • GE recommends Jet-Dry ®or Cascade Crystal Clear®to help
surface—hard water prevent hard water mineral deposits from forming.
minerals •Run dishwasher with citric acid to remove mineral deposits. Citric
acid (Part number: WD35X151) can be ordered through GE Parts.
See back cover for ordering information.
Consumer SupportTroubleshootin TipsOperatin InstructionsSafety Instructions
13
Before you call for service… eappliances.ca
Troubleshooting Tips
Save time and money! Revie the charts on the
follo ing pages, or visit www. eappliances.ca.
You may not need to call for service.

Problem Possible Causes What To Do
Dishes don’t dry Low inlet water • Make sure inlet water temperature is at least 49°C.
temperature •Select HEATED DRY.
•Use HOT START and ADDED HEAT options.
•Select a higher cycle, such as POTS & PANS or HEAVY WASH.
Rinse agent dispenser • Check the rinse agent dispenser and fill as required.
is empty
Dishes and flatware nlet water temperature • Raise the water heater temperature to 49°C.
not clean is below 49°C. •Use HOT START,POTS & PANS or HEAVY WASH and HI TEMP WASH.
Too little detergent • See Using the dish asher section, refer to Proper Use of Detergent for
detergent recommendations.
Old or damp powdered • See Using the dish asher section, refer to Proper Use of Detergent for
detergent detergent recommendations.
Water pressure is • Turn on a faucet. Is water coming out more slowly than usual? If so,
temporarily low wait until pressure is normal before using your dishwasher.
Air gap is clogged • Clean the air gap.
mproper rack loading • Make sure large dishware does not block detergent dispenser or wash arm.
No air gap or high • Verify that you have an air gap or a high drain loop. Refer to
drain loop the Installation Instructions.
Spots and filmin •Use Jet-Dry®or Cascade Crystal Clear®rinse agents to remove spots
on lasses and and prevent new film buildup.
flatware •To remove stubborn spots and pre-existing film from glassware:
1 Remove all metal utensils from the dishwasher.
2Do not add detergent.
3Select the longest cycle.
4Start the dishwasher and allow to run for 18 to 22 minutes.
Dishwasher will now be in the main wash.
5Open the door and pour 2 cups (500 ml) of white vinegar into the
bottom of the dishwasher.
6Close the door and allow to complete the cycle. If vinegar rinse
doesn’t work: Repeat as above, except use 1/4 cup (60 ml) of citric
acid crystals instead of vinegar.
Cloudiness on Combination of soft • This is called etching and is permanent. To prevent this from
lassware water and too much happening, use less detergent if you have soft water. Wash glassware in
detergent the shortest cycle that will get them clean.
Water temperature • ower the water heater temperature.
entering the dishwasher
exceeds 65°C.
Deter ent cup lid Dial is not in the OFF •Turn the Timer Dial to OFF.
won’t latch position
Deter ent left in Dishes are blocking the • Reposition the dishes.
dispenser cups detergent cups
Steam This is normal • Steam comes through the vent by the door latch during drying and
when water is being pumped out.
Black or ray Aluminum utensils have •Remove marks with a mild, abrasive cleaner.
marks on dishes rubbed against dishes
Control panel li hts Time too long between • Each pad must be touched within 30 seconds of the others. To relight,
o off when you are touching or selecting touch any pad again or unlatch and relatch the door.
settin controls pads
Control panel Door latch may not •Call for service.
responded to inputs be properly seated
but dishwasher never
filled with water
14
Operatin Instructions Safety Instructions
Consumer Support Troubleshootin Tips
Before you call for service…
Extremely hard water
Low inlet water
temperature
Overloading the
dishwasher
mproper loading
Old or damp powder
detergent
Rinse agent dispenser
empty
Too little detergent

15
Consumer SupportTroubleshootin TipsOperatin InstructionsSafety Instructions
What Is Not Covered:
■Service trips to your home to teach you how to use
the product.
■mproper installation.
If you have an installation problem, contact your dealer
or installer. You
are responsible for providing adequate
electrical, exhausting and other connecting facilities.
■Failure of the product if it is abused, misused, or used for
other than the intended purpose or used commercially.
■Replacement of house fuses or resetting of circuit breakers.
■Damage to the product caused by accident, fire, floods
or acts of God.
■Damage caused after delivery.
For The Period Of: We Will Replace:
One Year Any part of the dishwasher which fails due to a defect in materials or workmanship. During
From the date of the this limited one-year warranty, we will also provide, free of char e, all labor and in-home service
original purchase to replace the defective part.
This arranty is extended to the original purchaser and any succeeding o ner for products purchased for home use ithin Canada.
In home arranty service ill be provided in areas here it is available and deemed reasonable by Mabe to provide.
Staple your receipt here.
Proof of the original purchase
date is needed to obtain service
under the arranty.
Dishwasher Warranty
All arranty service provided by our Factory Service Centres,
or an authorized Customer Care®technician. To schedule service,
on-line, visit us at .geappliances.ca, or call 1.800.561.3344. Please
have serial number and model number available hen calling for
service.
WARRANTOR IS NOT RESPONSIB E FOR CONSEQUENTIA DAMAGES.
Warrantor: MABE CANADA INC.
EXCLUSION OF IMPLIED WARRANTIES—Your sole and exclusive remedy is product repair as provided in this Limited
Warranty. Any implied warranties, includin the implied warranties of merchantability or fitness for a particular
purpose, are limited to one year or the shortest period allowed by law.

Consumer Support.
Appliance Websites www. eappliances.ca
Have a question or need assistance with your appliance? Try the Appliance Websites, any day of the year! For
greater convenience and faster service, you can now download Owner’s Manuals, order parts or even schedule
service on-line.
Schedule Service www. eappliances.ca
Expert repair service is only one step away from your door. Get on-line and schedule your service at
your convenience 24 hours any day of the year! Or call 1.800.561.3344 during normal business hours.
Real Life Design Studio www. eappliances.ca
We support the Universal Design concept—products, services and environments that can be used by
people of all ages, sizes and capabilities. We recognize the need to design for a wide range of physical and
mental abilities and impairments. For details of Universal Design applications, including kitchen design ideas
for people with disabilities, please contact: Director, Consumer Relations, Mabe Canada Inc.
Suite 310, 1 Factory ane
Moncton, N.B. E1C 9M3
Extended Warranties www. eappliances.ca
Purchase an extended warranty and learn about special discounts that are available while your warranty
is still in effect. You can purchase it on-line anytime, or call 1.888.261.2133 during normal business hours.
Consumer Home Services will still be there after your warranty expires.
Parts and Accessories www. eappliances.ca
Individuals qualified to service their own appliances can have parts or accessories sent directly to their homes.
Order on-line, 24 hours every day, or by phone at 1.800.661.1616 during normal business hours.
Instructions contained in this manual cover procedures to be performed by any user. Other servicin
enerally should be referred to qualified service personnel. Caution must be exercised, since improper
servicin may cause unsafe operation.
Contact Us www. eappliances.ca
If you are not satisfied with the service you received:
FIRST, contact the people who serviced your appliance.
NEXT, if you are still not pleased, write all the details (including your phone number) to:
Director, Consumer Relations, Mabe Canada Inc.
Suite 310, 1 Factory ane
Moncton, N.B. E1C 9M3
Register Your Appliance www. eappliances.ca
Register your new appliance on-line—at your convenience! Timely product registration will allow for
enhanced communication and prompt service under the terms of your warranty, should the need arise.
You may also mail in the pre-printed registration card included in the packing material.
Printed in the United States
Printed on Recycled Paper

Manuel du
propriétaire
Lave-vaisselle
165D4700P368 49-55043 10-07 JR
Instructions de sécurité . . . . . 2, 3
Instructions de fonctionnement
Accessoires en option . . . . . . . . . . . . . . 12
Cycles du cadran . . . . . . . . . . . . . . . . . .7
Chargement des couverts . . . . . . . . . 11
Chargement des paniers . . . . . . . . . . . 10
Panneau de contrôle . . . . . . . . . . . . . . . .6
églages de contrôle . . . . . . . . . . . . .4–5
Soins et nettoyage . . . . . . . . . . . . . . . . . 12
Témoins lumineux clignotants . . . . . .8
Utilisation du lave-vaisselle . . . . . . . .8, 9
Conseils de dépannage . . . 13, 14
outien au consommateur
Garantie . . . . . . . . . . . . . . . . . . . . . . . . . . . . 15
Soutien au consommateur . . . . . . . . .16
Inscrire le modèle et le numéro
de série ici :
Modèle # __________________
érie # ____________________
Vous les trouverez sur la paroi de la
cuve juste à l’intérieur de la porte.

2
Instructions de
fonctionnement Instructions de sécurité
outien au consommateur Conseils de dépannage
INFORMATION IMPORTANTE UR LA ÉCURITÉ.
LI EZ TOUTE LE IN TRUCTION AVANT L’UTILI ATION —
CON ERVEZ CE IN TRUCTION
AVERTI EMENT !
Pour votre sécurité, les instructions de ce manuel doivent être suivies pour réduire le risque
d’incendie ou d’explosion, d’électrocution et pour éviter les dommages à la propriété, les
blessures ou la mort.
SÉCURITÉ DU CHAUFFE-EAU
CONFORMITÉ DE L’INSTALLATION ET ENTRETIEN
Ce lave-va sselle do t être correctement nstallé et placé en conform té avec les nstruct ons
d’ nstallat on avant d’être ut l sé. S vous n’avez pas reçu les nstruct ons d’ nstallat on
avec ce lave-va sselle, vous pouvez vous en procurer en allant sur notre s te web à
www.electromenagersge.ca.
■Les articles lavés avec le mode anti-bactérien,
s’il y a lieu, peuvent être chauds au toucher.
À manipuler avec précaution.
■L’utilisation d’un détergent
qui n’est pas conçu
spécifiquement pour le
lave-vaisselle remplira
celui-ci de mousse.
■Si le lave-vaisselle est raccordé à
un interrupteur mural, assurez-vous
que celui-ci est activé avant d’utiliser
cet appareil.
■Sur les lave-vaisselle dotés de
commandes électroniques et si vous
préférez fermer l’interrupteur mural entre les
cycles de lavage, attendez de 5 à 10 secondes
après avoir remis l’interrupteur avant de toucher
au bouton STA T/ ESET pour permettre à la
commande de se réinitialiser.
■Articles autres que la vaisselle : ne lavez pas des
articles comme les filtres de purificateur d’air, filtres
de chaudières ou pinceaux dans le lave-vaisselle.
Le lave-vaisselle pourrait être endommagé et une
décoloration ou des taches pourraient en résulter.
■Une surveillance attentive est nécessaire si cet
appareil est utilisé par ou près des enfants.
■Chargez les articles légers en plastique de
manière à ce qu’ils ne se déplacent pas et ne
tombent pas au fond; ils pourraient être en
contact avec l’élément de chauffage et être
endommagés.
■accordez l’appareil à un système électrique
permanent et mis à la terre ou installez un fil
de mise à la terre des appareils avec les fils
d’alimentation et raccordez-le à la borne ou
au fil de mise à la terre de l’appareil.
■Un mauvais raccordement au fil de mise
à la terre peut causer un risque de choc
électrique. Consultez un électricien compétent
ou un agent du service si vous ne savez pas si
l’appareil est correctement mis à la terre.
■Disposez des appareils électriques hors service
et des matériaux d’emballage ou d’expédition
correctement.
■Ne tentez pas de réparer ou de remplacer une
pièce de ce lave-vaisselle à moins que cela soit
spécifiquement recommandé dans ce manuel.
Tout autre entretien ou réparation devrait être
confié à un technicien compétent.
■Pour minimiser la possibilité d’électrocution,
débranchez l’appareil du circuit d’alimentation
avant tout entretien.
NOTE : l’arrêt du lave-va sselle ne débranche pas
l’appare l de l’al mentat on électr que. Nous
recommandons qu’un techn c en compétent
répare votre appare l.
AVERTI EMENT !
MI E EN GARDE : pour éviter les blessures mineures ou les
dommages matériels
Dans certa nes cond t ons, de l’hydrogène peut être présent dans un chauffe-eau qu n’a pas été
ut l sé pendant deux sema nes ou davantage. L’HYDROGÈNE E T UN GAZ EXPLO IF.
Si l’eau chaude n’a pas été utilisée pendant deux semaines ou plus, réduisez les risques de dommages
ou de blessure en ouvrant tous les robinets d’eau chaude pendant plusieurs minutes. Faites cela avant
d’utiliser tout appareil électrique raccordé à la canalisation d’eau chaude. Cette précaution permettra
à toute accumulation d’hydrogène de se dissiper. Étant donné que ce gaz est inflammable, ne fumez
pas et n’utilisez pas de flamme ou d’appareil pendant ce processus.

AVERTI EMENT ! RI QUE D’ENFANT PRI AU PIÈGE
BONNE DISPOSITION DE VOTRE LAVE-VAISSELLE
Les lave-vaisselle jetés ou abandonnés sont
dangereux…même si vous ne les laissez jetés que
quelques jours. Si vous voulez jeter votre vieux lave-
vaisselle, suivez les instructions pour empêcher les
accidents.
Avant de jeter votre vieux lave-vaisselle :
■Enlevez la porte du compartiment de lavage ou
enlevez le verrou de la porte (comme le montre
l’illustration).
electromenagersge.ca
3
outien au consommateurConseils de dépannage
Instructions de
fonctionnement
Instructions de sécurité
■N’utilisez cet appareil que pour l’objectif pour
lequel il a été conçu tel que décrit dans le Manuel
du propriétaire.
■N’utilisez que les détergents en poudre, en tablette
ou liquides, ou agents de rinçage, recommandés
pour les lave-vaisselle et gardez-les hors de la
portée des enfants. Les détergents pour lave-
vaisselle Cascade®, Cascade®Complete et
Electrasol®et les agents de rinçage Jet-Dry®
et Cascade Crystal Clear®sont approuvés
avec les lave-vaisselle GE.
■Placez les articles coupants de manière à ce qu’ils
n’abîment pas le sceau de la porte.
■Placez les couteaux avec le manche vers le haut
pour réduire les risques de coupures.
■Ne lavez pas les articles de plastique à moins qu’ils
n’aillent au lave-vaisselle ou l’équivalent. Si les
articles de plastique ne sont pas marqués en ce
sens, voyez les recommandations du fabricant.
■Ne touchez pas à l’élément chauffant pendant ou
immédiatement après l’utilisation.
■Ne faites pas fonctionner le lave-vaisselle si les
panneaux de l’habitacle ne sont pas installés.
■N’altérez pas les commandes.
■Ne maltraitez pas, ne vous assoyez pas et ne
montez pas sur la porte ou sur le plateau de
vaisselle.
■Ne laissez pas les enfants jouer autour du lave-
vaisselle lorsque vous ouvrez et fermez la porte
pour éviter que leurs petits doigts ne se coincent
dans la porte.
■Ne jetez pas un lave-vaisselle sans d’abord enlever
la porte du compartiment de lavage.
■N’entreposez pas et n’utilisez pas de produits
combustibles, de l’essence ou des vapeurs ou
liquides inflammables près de cet appareil ou
de tout autre appareil.
■Ne laissez pas les enfants s’amuser avec ou dans
cet appareil ou de tout appareil mis au rebut.
AVERTI EMENT ! Lors du fonctionnement, suivez les précautions
de base dont celles-ci :
LISEZ ET RESPECTEZ CES CONSIGNES DE SÉCURITÉ.
CON ERVEZ CE IN TRUCTION
Verrou de la porte

4
Le panneau de contrôle du lave-vaisselle
Réglage des contrôles
Instructions de
fonctionnement Instructions de sécurité
outien au consommateur Conseils de dépannage
Options
Un témo n lum neux s tuée au-dessus de la touche cho s e s’allume pour nd quer le Option cho s , sur certa ns modèles.
HI TEMP RIN E Allume l’élément chauffant à tous les cycles de rinçage finals pour prévenir l’apparition de taches
(rinçage haute temp.) sur la vaisselle. Cette option peut être activée ON ou désactivée OFF durant le cycle de lavage.
(sur certains modèles)
HI TEMP WA H Active l’élément chauffant pour augmenter la température de l’eau lors des cycles de remplissage
(lavage haute du prélavage et du lavage principal. ecommandé pour la vaisselle très sale. Cette option peut
temp.) être activée ON ou désactivée OFF durant le cycle de lavage.
HEATED DRY OFF Cette option éteint l’option de séchage chaud. La vaisselle est séchée naturellement ce qui économise
(séchage chaud OFF) de l’énergie. Ouvrez la porte du lave-vaisselle pour accélérer le séchage.
HEATED DRY ON Cette option met en marche le chauffage pour sécher rapidement. Ce cycle augmentera le cycle
(séchage chaud ON) de lavage de 30 minutes. NE PAS utiliser conjointement avec le cycle RIN E ONLY.
LOCK
Lorsque la touche LOCK est enfoncée deux fois dans un délai de 3 secondes, toutes les touches
(verrouillage)
deviennent inopérantes.
Vous pouvez verrou ller les contrôles pour év ter toute sélect on. Ou b en, vous
(electronic models only) pouvez verrou ller les contrôles après avo r cho s un cycle ou
DELAY TART sélect onné de façon à
(modèles électroniques
ne pas nterrompre le cycle ou DELAY TART.
seulement)
Les enfants ne peuvent pas mettre en marche acc dentellement votre lave-va sselle s vous avez cho s
cette opt on.
Pour déverrouiller le lave-vaisselle après qu’il ait été verrouillé, appuyez sur la touche
LOCK
deux fois dans
un délai de 3 secondes. Le témoin lumineux au-dessus de la touche
LOCK
s’éteindra.
DELAY HOUR etarde la mise en marche du cycle de lavage jusqu’à 8 heures.
(mise en marche
différée)
(sur certains modèles)
RE ET Appuyez sur RE ET pour annuler les options.
(remise à éro)
(modèles à minuterie)
TART/RE ET Appuyez une fois sur TART/RE ET pour démarrer le cycle de lave-vaisselle. Appuyez sur
(mise en marche/
TART/RE ET une deuxième fois pour vider puis éteignez le lave-vaisselle. N’appuyez pas sur
remise à éro) TART/RE ET plus d’une fois à moins de vouloir mettre fin au cycle.
(modèles électroniques)
Cycles
Un témo n lum ère s tuée au-dessus de la touche cho s e s’allume pour nd quer le Cycle cho s , sur certains modèles.
POTS & PANS/
Pour la vaisselle ou les casseroles très sales ou les casseroles contenant des aliments séchés ou
HEAVY WASH cuits. La vaisselle de tous les jours peut être incluse. Ce cycle ne déloge pas les aliments trop
(casseroles/ cuits qui ont adhéré.
lavage intensif)
(sur certains modèles)
NORMAL/
Pour la vaisselle de tous les jours, verres et batterie de cuisine modérément sales. NOTE : Plusieurs
NORMAL WASH
articles sont moins sales que la normale. Pour économiser
l’énergie et l’eau, choisir un autre cycle
(normal/lavage normal) que NORMAL WA H.
SHORT WASH Pour laver rapidement la vaisselle de tous les jours modérément sale sur laquelle les résidus
(
lavage rapide) n’ont pas séchés, par exemple les charges composées principalement de verres.
(sur certains modèles)
WATER SAVER Pour vaisselle légèrement sale.
LIGHT WASH
(économe en eau/
lavage léger)
(sur certains modèles)
RINSE ONLY Ce cycle est conçu pour rincer des charges partielles qui seront lavées plus tard. N’ut l sez pas
(rinçage seulement)
de détergent.
DRYING Pour réchauffer la vaisselle propre et les assiettes de service. Ce cycle dure environ 30 minutes.
PLATE WARMER
(séchage/chauffe-plats)
HOT PREWASH Préchauffe l’eau de lavage à la bonne température.
HOT START
(prélavage à chaud/
démarrage à chaud)
CHINA CRYSTAL Pour la porcelaine et les cristaux légèrement sales.
(porcelaine cristal)
(sur certains modèles)
Other manuals for Spacemaker GSM2200N
2
This manual suits for next models
4
Table of contents
Languages:
Other GE Dishwasher manuals

GE
GE PDWF800RBB - Profile 24 in. Dishwasher Manual

GE
GE GLD4604V Manual

GE
GE PDWF400PCC - Profile Dishwasher With SmartDispense... Manual

GE
GE GHD4309N10WW User manual

GE
GE Profile PDW7800R Manual

GE
GE PDT660SSF2SS User manual

GE
GE Dishwasher User manual

GE
GE monogram ZBD6900V00II User manual

GE
GE GDT720SSFSS Manual

GE
GE GLDT696T00SS User manual