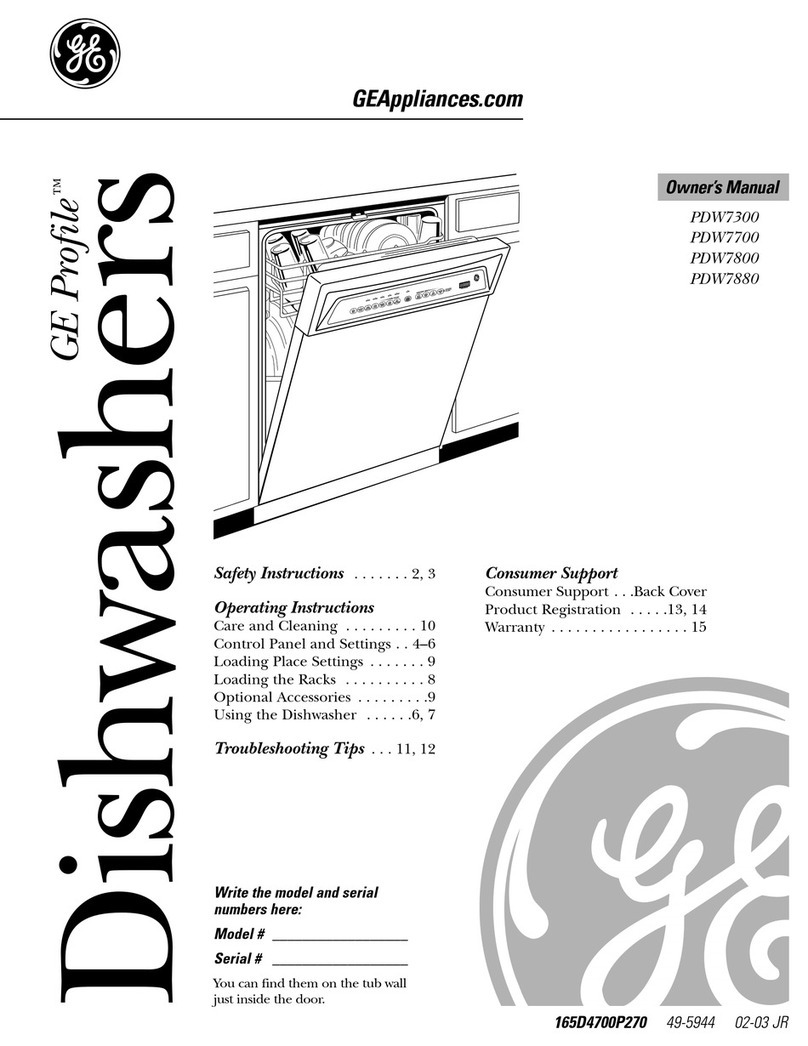
GE Triton GSD5110 User manual

GEAppliances
6SD5110
6SD5112
6S05120
6SD5122
6S05130
6S05132
6S05114
6S05124
6S05134
GSD5216
GSD5226
GSD5236
GSD5310
GSD5320
GSD5330
GSD5340
GSD5350
www.geappfiances.com P._t No. 165D4700P199 Pub.No. 49-5B73 lo-99JR

Congratulations!
YouAm Now Partof the GEFamily.
Welcome to file GE t?unily.
We're proud of our quality
products and we are
committed toproviding
dependable service. You'll
see it in this easy-to-use
O_mer's Manual and you'll
hem it in tile flJendly voices
of our customer service
department.
l_st of all, you'll experience
fllese values each time you
use your dishwasher. That's
important, because your new
dishwasher will be part of
your tamily tot many years.
And we hope you will be part
of ours tbr a long time to
coIne.
Wethank you tk_rbuying
GE.We appreciate your
purchase, and hope you
willcontinue 1orelyon us
whenever you need quality
appliances for your home.
Important!
Fill out and remm file Consumer Product
irealien Card. There me t:woeasy ways to
register your appliance.
Through the Internet at
_v.geappliances.com.
Complele and ulail file enclosed card.
Write the model and serial numbers
here.
#
#
Youcan find them on the tub wall just
inside the door.
Staple sales slip or cancelled check
here.
Proof of the original purchase date
is needed to obtain service under the
warranty.

GE&You,
A ServicePartnership_
Ask any GEappliance owner and they will
tefl you we stand behind our products with
unmatched quality service. However, did
you know that most questions result from
simple problems that you can easily fix
yourseff in just a few minutes? This
Owner's Manual can tefl you how.
ReadthisManual
Inside you _dll rind many
helpf_al hints on how to use
and mainlain your dishwasher
properly..lust a liule preventive
care on your part can save you a
Deat deal of time and money
over dm life of your dishwasher.
ReviewtheSection
onTroubleshooting
Tips
You'll find many answers to
common problems here.
If you rexdew our chin1 of
Troubleshooting Tips first,
you m W not need to call tbr
se_ice at all.
If YouNeedService
If you do need sewice, you can
relax know,ring help is only a
phone call away. A list of toll-tiee
customer se_Yicenumbers is
included in the back secdon.
Or you can alwws call tl_e
GE Answer Center ®at
800.626.2000, 24 hours a d W,
7 days a week.
Safety Information ...... 4-7
Operating instructions
ControlPaneland
Settings .............. 8-11
Usingthe Dishwasher ... I2-13
LoadingtheRacks ...... 14-16
OptionalAccessories ....... I7
Careand Cleaning ......... I8
Troubleshootingtips
Before You
CallForService ....... I9-23
CustomerService
ProductRegistration..... 29-30
Warranty ............. 3I
ServiceTelephone
Numbers ......... BackCover
3

iMPORTANTSAFETYiNFORMATION.
READALLiNSTRUCTiONSBEFOREUSING
m
For your safety, the information in this manual must be
followed to minimize the risk of fire, explosion, electric
shock, or to prevent property damage, personal injury,
or loss of life.
WATERHEATERSAFETY
Under certain conditions hydrogen gas may be produced in
a water heater that has not been used for two weeks or
more. HYDROGENGAS iS EXPLOSIVE.
If the hot water has not been used tbr t_voweeks or more, prevenl
the possibility of damage or injul Tby turning on all hot water
thucets and allow dram torun fbr several minutes. Do this bet_re
using aW elecn_ical appliance which is connecmd/o the hot water
system. This simple procedure _qll allow aW buih-up hydrogen gas
1oescape. Since d_e gas is flammable, do not smoke or use an open
flame or appliance dunng d_is process.
.............................................z]

Use this appliance only for its intended purpose as
described in this Owner's Manual
PROPERINSTALLATION
ANDMAINTENANCE
This dishwasher must be properly instated and located in
accordance with the Installation Instructions before it is
used. If you did not receive an Installation Instructions
sheet with your dishwasher, you can receive one by calling
us toll-free at the GEAnswer CenteP; 800.626.2000.
Connect 1o a grounded
metal, pennanenl wiring
syslem; or mn an equipmenl_
gTounding conduc/or _dfl_
tim circuil conductors and
connect _o II_e equipmenl_
gTounding lenninal or lead
of Ihe appliance.
Improper connection of
tim equipmem-grounding
conduclor can resuh in a risk
ofeleclric shock. Check wifl_
a qualified elecuician or
service represenlafive it
you me in doubt wheflmr
fl_e appliance is properly
,wounded.
Dispose of discarded
appliances and shipping or
packing mamfial properly.
Do nol at/erupt lo repair
or replace aW part of your
dishwasher unless it is
specifically recommended
in fl_ismanual. All oilier
se_icing should be retened
to a qualified mchnician.
To minimize ll_epossibili b, of
elecuic shock, disconnecl fl_is
appliance fiom the power
supply befbre attempting any
mainmnance. NOTE."Turning
tim dishwasher oitdoes nol
disconnect fl_e appliance
flom the power supply.
We recommend having a
qualified lechnician se_,ice
your appliance.

iMPORTANTSAFETYINFORMATION.
READALLiNSTRUCTiONSBEFOREUSING
AI!
m
gONOEl.
Do not lamper u4fl_ connols.
Do not abuse, sit on, or stand
on tim door or dish rack of
tim dishwasher.
Do not allow children 1o
playinside, on or _fl_ fl_is
appliance or aW discarded
appliance.
Do not discmd a dishwasher
uqthout first removing the
door of fl_e washing
companmenl.
Do not s/ore or use
combustible mamfials,
gasoline or other flalnmable
vapors and liquids in fl_e
vicinity of this or any other
appliance.

WHENUSINGYOURDISHWASHER
Use only powder, tabs,
liquid detergents or rinse
agents recommended for use
in a dishwasher and keep
them out of the reach of
children. Cascade +,
Automatic Dishwashing
Detergent has been approved
tbr use in all GE dishwashers.
D)cate sharp ilems so flint
they are not likely to damage
the door seal.
Dmd sharp knives with the
handles up to reduce the risk
()fcut,lype iqjuries.
Do not wash plastic items
unless marked dishwasher
safeor the equivalent. For
plastic items not st)marked,
check the manuf:acmrer's
recommendations.
Non-Dishware Items: Do not
wash items such aselectronic
air cleaner fihers, t;amace
fihers and paint brushes in
your dishwasher. Damage to
dishwasher and discoloration
or staining of dishwasher
may resuh.
Do not touch the heating
element during or
immediately after use.
Do not operate your
dishwasher unless all
enclosure panels me properly
in place.
Close superxdsion is necessaty
if this appliance is used by or
neat children.
Ixmd light, plastic imms
so troy _qll not become
dislodged and drop to the
bottom of the dishwashet_
they might come into contact
with the heating element and
be damaged.
Read and foflow this
Safety Information carefully.
SAVETHESEINSTRUCTIONS

Aboutthe dishwasher contro/pane/.
Youcan locate your model number on the tub wall just inside the door.
Throughout this manual, features and appearance may vary from your model
LOAD SELECTmONS OPTmONS CLEAN /
ControlSettings
!LoadSelections
Thelight abovetheselectedpad willbe ONtoindicate which LOADSELECTlONhas beenselected,
POTS&PANS Forheavilysoileddishesor cool<warewith dried-on orbaked-onsoils.Everyday
dishesmaybe included.This cyclewill notremoveburned-onfoods.
NORMAL Forloadsofeverydaydishesandglasswarewith mediumsoils.
LIGHTWASH Fordisheswith lightsoils.
CHINA CRYSTALForlightlysoiled chinaand crystal.
RINSEONLY Forrinsingpartial loadsthat will bewashedlater.Donotusedetergentwith thiscycle.
.............................................8

Options
Thelight abovethe selected pad will beON to indicate which OPTIONhasbeenselected.
HI TEMP Turnsonthe heaterin all postrinseandfinal rinsecyclesto helppreventspotting
RINSE ondishware.Thisoptionmaybeturned ONor OFFduringthewash cycle.
HI TEMP Energizesthe heaterto boostwatertemperaturein all prewashand mainwashfill
WASH cycles.Recommendedfor usewith heavilysoileddishes.Optionmaybeturned ON
or OFFduringthewash cycle.
HEATEDDRY Shutsoff thedryingheatoption.Dishesairdrynaturallyandenergyissaved.You
OFF canpropthedooropenafterthe CLEANlightilluminates.
HEATEDDRY Turnsthe heateronfor fast drying.Thiscyclewill extendthe timeto your wash
ON cycleby30 minutes.NOTE:Cannotbeselectedwith RINSE ONLYcycle.
LOCK Whenthe LOCKpadistouchedtwicewithin3seconds,allpadsbecomeinoperative.
Youcanlockthecontrolstopreventanyse/ectionsfrombeingmade.Oryoucanlockthe
controlsafteryouhavestartedacycleorse/ectedDEZAYSTARTsothecycleorDELAY
STARTisnotinterrupted
Children cannot accidentafly start dishwasher by touching pads with this
option selected.
Tounlockthedishwasherafterit hasbeenlocked,touchtheLOCKpadtwicewithin
3seconds.ThelightabovetheLOCKpadwill turnoff.
DELAYSTART Youcandelaythe startof awash cyclefor upto 8 hours.Pressthe DELAYSTART
padto choosethenumberof hoursyou wantto delaythestart ofthecycle.The
machinewill countdownandstart automaticallyatthe correcttime. Pressing the
START/RESETbutton will cancel the DELAYSTARTselection,
NOTE:If youforgetto latchthe doora remindersignalwill beepuntilyou doso.
RESET Tochangea cycleafter washing starts,touchtheSTART/RESETpadto cancel
thecycle.Afterwater is pumpedoutandthe motorstops,you canreprogramand
restartthe dishwasher.Thiswill take approximately90seconds.
Close and latch the door. Touch the START/RESETpadto begin the Q,cle. Water
till begins and approximately 40 seconds later the wash action begins.
NOTE'The dishwasher remembers your last cTcle so you don't have to reprogTam
each time. When the dishwasher is loaded and the door latch is in the locked
position, the control panel lights will be ONand display the last settings you
selected.
If you don't want to change any of the settings, simply touch the START/RESET
pad to begin the cycle.
Also, ifa power t_dlure occurs, NORMALand HEATEDDRYwillautomatically be
programmed. Make any new selections and louch the START/RESETpadIo begin
the cycle.
Clean
This lig]_t is illmninated when a wash (T(le is (omplete. The light will stay ON
until the door is opened.

Flashingdisplaylights.
L_h_ WhatIt Means
This isnomml.
TheStARt/RESETpad
has been pressed.
What ToDo
Allow the dishwasher todrain and
reset beik_re you start a new wash
_Tcle.
CLEAN
PLUS A
BEEPING
SOUND
PLUS A
BEEPING
SOUND
Control Error Press the START/RESETpad toturn
off the beeper. If the CLEANlight
conlinues to tlash, call t))r sex_qce.
Control Error Press the START/RESETpadto mrn
offthe beeper and tl_e dishwasher
will attempt twreset. Then restmt the
wash cycle. If Ibisenor continues,
call t)_rse_,ice.
............................................._0

Aboutthedishwashercyc sequence.
Youcan locate your model number on the tub waft just inside the door.
Throughout this manual, features and appearance may vary from your
model
Cycle Sequence
Cycles
POTS &PANS 11.5 gal.
_ORMAL 9.9 gal.
LIGHT WASH 8.3 gal.
,_HINA CRYSTAL 8.3 gal.
:rINSE ONLY 16 gal
Drying Options:
Water Time
(approx.) (approx.)
66 mhl
58 mhl
52 mhl
36 mhl
4 mhl
Cycle Sequence
PrewashPrewashPrewashPrewashMain wash PostrinsePostrinseFinal rinse
PrewashMain wash PostrinsePostrinse Final rinse
Rinse
HEATEDDRY ON. Available on all wash cycles excepl RINSEONLY.
Add approximately 30 minutes to tl_e cycle.
HEATEDDRYOFF,D_Ting heater is turned oif. Dishes d_T
naturally.
77

Usingthe dishwasher.
Checkthe WaterTemperature
The entering water must be at least 120°K and not more fl_an
150 °F., tbr effective cleaning and to prevenl dish damage. Check
t}_ewaler temperature wifl_ a candy or meat fl_eImolneter. Turn on
the hot water fhuceI nemest the dishwasher, place the thermometer
in a glass and let the water run conlinuous|y inlo the glass until the
temperature slops rising.
UseJet-Dry®RinseAgent
@ ,
Jat-Orll rinse agent removes spots and prevents new fihn buiM-up
on your dishes ,glasses, flatware, cookware and plastk.
Fill the rinse agent dispenser
undl it reaches the bottom of lip
inside tim opening. Do not ovedill
the dispenser. Replace cap.
To check if rinse agent is needed,
press |he clear center of the fill cap
2 or 3 times. If rinse agent tills the cenler of the till cap, you have
enough.
A full dispenser should last about one month.
If rinse agent is spilled, wipe up the excess.
l; tq
72
DishPreparationPriortoLoading
;, No pre-finsing of normal tbod soil is required.
_'rape off hmd soils, including bones, tood_picks, skins, and
seeds.
_' Remove lage quantifies of aW remaining fbod.
Remove leai_ vegetables, meal uimmings, and excessive amounls
of grease or oil.
Remove acidic fbod soils tl_at can discolor stainless steel.
UsbgtheDishwasherDoor
The door must be closed and locked into place to select a
LOeB SELECT/ONor an OPT/ON.
_:_ If the door is opened during a cycle and left open, the dishwasher
will beep once every minute umil the door is dosed and latched
imo place.

(<¸¸%?¸ ProperUseof Detergent
Use only detergent specifically made for use in dishwashers. Cascade'
Automatic Dishwashing Detergent has been approved tot use in all (;E
dishwashers. Keep your detergent tiesh and dU. Don'1 put detergent
into the dispenser undl you're ready to wash dishes.
You'll find t_vodetergent dispensers on the
inside door ofyour dishwasher. All wash Q_cles
require detergent in the main cup. Wash cycles
with a pro-wash and a main wash will also use the
open cup. The amount of detergent to use
depends on whether your water is hardor soft.
Wid_ hmd water, fill the main (up and open
cup completely. With soft water, fill both cups
hallwm,. When using automatic dishwashing detergent tabs simply
place one tab in the main cup and close.
Protect your dishes and dishwasher by contacting your water
depmlment and asking how hard your water is. Twelve or more grains
is extremely hard water. A water softener is recommended. Without
it, lime can build up in the water valve, which could stick while open
and cause flooding. Too much detergent with soft water can cause a
l:_rmm',ent cloudiness ofglasswme, called etchiog.
/VOTE:To open detergent cup 'ai}erit has
been closed, unlatch the door. Press the
sraRr/RESErpadthree times _dlhin t:wo
seconds and the detergent cup _dll release.
You may also turn the detergent cup handle
counte>clock_dse until it releases. A snapping sound may be heard.
ForgettoAdd a Dish?
A tbrgotten dish can be added any time before tl_e main wash.
Push dm door latch lo the left.
Do not open the door until the water spray action stops. Steam
Into, _Jse out of d_e dishwasher.
: Close_the door and push_the latch to the fro-_ight.
/3

Loadingthe dishwasherracks.
Forbest dishwashing results, follow these loading guidefines. Features and
appearance of racks and silverware baskets may vary from your model
Upper Rack
The upper rack is tbr glasses, cups and saucers.
Cups and glasses fit best akmg the sides. This is
also a secure place tbr dishwashe>sate plastics.
Thecup sheff (on some models) may be placed
in tl_e up or down position to arld flexibility.
A wine glass holder (on some models) secures wine
glasses at an angle tbr best washability, l_cause
_4ne glasses come in venous sues, 'aiderloading,
slowly push in tl_e rack to make sure riley_11 clear
tl_e top of the dishwasher.
The upper rack is gs)od tbr all kinds of odd-shaped
utensils. Saucepans, mixing bowls and odmr imms
should be placed t_tce do,re. Fold<lown fingers
(on some models) provide tlexibility tbr
extra-lingo and hard-to-fit items.
Securelargerdishwasher-safeplestlesovertwofingers
whenpossible.
Make sure smaflplestle items aresecure so they can't fail
onto the heater
Besure that items denotprotrude throwh thebottom of
the rack andblock rotation of the middle sprayarm. This
couldresult in poor washperformance for items in the
upperrack.
Checktomakesurethattaftitemswill notblockrotationof
thetopwasharm.
The Wash Tower
Keepthecenterareaclearin thelowerrack
The wash tower dses througt_ the center of the lower
rock during the wash and nnse pordons of the cycle.
The wash tower shoots water iron the mid-level wash
arm located under the upper rack. Blocking the
wash tower could resuh in poor wash pedbnnance
for items in the upper rock.
Don'tblockorleadtaftthlegsnexttothe
WashTower
74

Lower Rack
When/oadingthe/owerrack,donot/oad/argeplettersor
traysle thefrontrightcomerTheymaypreventdetergent
fromcirculatlegduringthewashcycle.
The lower rack is best used tbr plains, saucers, and
cookwme. Lmge items such as broiler pans and
racks should g,_along/l_e right:hand side. Load
platters, pots and bowls along tl_e sides, in comers,
or in tl_e back. The soiled side of items should t_tce
the center of the rack.
Also, be cmetul not to let a portion ()fan item such
as apot or dish handle extend through the bol/om
rack. This could block/be wash ann and resuh in
poor wash pedbnnance.
Fold-do,m fingers (on some models) provide
flexibility fbr extra-large and hmd-/o-fit items.
The fingers m W be left in the up position or folded
doom to customize the lower rack.
Don'tletany
itemextend
throughbottom.
Silverware Basket
Put flat,rare in fl_eremovable basket _ifl_ knite
bandies up to protect your bands. Place spoons in
the basket _ith bandies doom. Mix knives, tbrks
and spoons so they don't nest together. Disuibule
evenly. Small plasdc trams, such as measuring
spoons and lids flom small conlainers, should g_)in
the bottom of the silver,rare basket _ith silver,rare
on lop.
lids can be assembled to either end of the
silver,rare basket to contain small items.
To assemble an end lid, place tl_e outer lid stud
into the hole on the outside of the silverware
basket. Then place the inside lid stud into the
inner hole in the silverware basket. Repeat tbr
other side ifdesired. Long items can be placed
on the (upshelf in the upper ra, k. l¢I
The silver,rare basket can be placed in the flont,
side or back of the lower rack. {_{{{7

Loading10place settings...
Follow these guidelines for loading 10place settings. Features and
appearance of racks and silverware baskets may vary from your model
76
Upper Rack--lO place settings Lower Rack--lO place settings

Ab_Ab___o_u_t_o__ptional accessories.
You can change the door and lower access panel appearance of your
dishwasher by ordering one of these optional accessories:
Color Panels
I/4" Wood Panel Trim Kit
3/4" Trimless Panel Kit
These accessories are available at extra cost (VISA, MasterCard, or Discover
cards accepted) by calling 800-626-2002.
Specify accessory number when ordering.
Descriptionsof OptionalAccessories
Colorpanels-- Repla(ement door panels and loweI access panels
ave available in the ff)llowing colors:
_,GPF4OOA(Almond)
GPF4OOB(BlaclO
GPF4OOW(Wh#)
GPF400S(StainlessSteel)
GPF400C(Bisque)
NOTE."The GPFIOOdishwasherdoorspring kit isincluded with the
stain/asssteelcolor panelkitand must be installed _dth it (GPF400S).
Woodpaneltrim k#--This accessoiTcontains trim andinstructions
tbr you to supply and install a 1/4" thick decorative wood door and
lowe_ access panel:
GPF425A(almond)
GPF425B(Black)
_,GPF425W(White)
GPF425C(Bisque)
NOTE."The GPFfO0dishwasherdoorspring kit must also be ordeIed
and installed when the doorpanelweighs four Ibs.ormore.
Trimlesspanelkit--This accessorycontains parts and instructions
fbr you to supply, and install a 3/4" thick decorative wood door and
lowe_ access panel:
GPF475
NOTE."The GPFIO0dishwasherdoorspring kit is included with the
trimless panel k# and must be installed with it.
77

Caringforthedishwasher.
Toclean the control panel use a lightly dampened cloth then dry thoroughly.
Toclean the exterior use a good appfiance polish wax.
Never use sharp objects, scouring pads or harsh cleaners on any part of
the dishwasher.
airgaps
Checkthea/Ygapany
timeyourdishwasherisn't
dra/7_ingwell.
Protect Against Freezing
If your dishwasher is left in an unheated place dmin,g
file winter, askaservicetechnician to:
Cutoffele,t,_,alpower,,the_ishwasher.Remove
rusesor uip circuit breaker.
_ Turn off the water supply and disconnect fl_ewater
.......................iMet line flom the watervalve.
{all Drain water flom the water inlet line and water
valve. (Use a pan it, catch the water.)
onne..,e,,,ate,in,orlineto.,ewatervalve
Does YourDishwasher Have anAir Gap?
An air gap protects your dishwasher against water
backing up into it ira drain clogs. The air gap is not
a part of file dishwasher. It is not covered byyour
wanamy. Not all plumbing codes ,equire air gaps,
SO yOU ulay not have one.
Theair gap is easy to clean.
Turn oiTthe dishwasher and lit_oiTthe chrome
cover.
{_ Remove the plasticcap and clean,,_th a toothpick.
The StainlessSteel Panels
The stainless steel panels can be cleaned ,,4th Stainless Steel Magic or a
similar product using a clean, soft clofl_.
You can order StainlessSteel Magic #WXIOXI5through (;E Parts by
calling 800-626-2002.
78

Beforeyou call for service...
Troubleshooting tips
Review the charts on the following pages first and you may not
need to call for service.
Controlpanel lights go
off when you're setting
controls
Noise
Possible Causes What ToDo
Time too long between
touching of selected pads Each pad musl be louched
_4fl_in 30 seconds of the
others. To relighl, tv)ud_
aW pad again, or unlock
and relalch door.
Some of the sounds
you'll hear are normal
Utensils are not secure
in the rack or something
small has dropped into
the rack
Hard toDd disposal
shredding action.
Drain valve opening lo
pump waler out.
Timer connol as cycle
progTesses.
Dele_genl cup opening.
The motv)r stopping during
tl_e &Ting period.
Water draining out of tim
mb immediamly after you
u)uch START/RESETpad.
Make sure everything is
secured in dishwasher.
Detergentleft in
dispensercups
Detergentcup lid
latchedaccidentally
by user
Motor hums Dishwasher has not been
used on a regular basis. If
you do not use your
dishwasher often, set it to
fill and pump out once
eve Uweek. This _411help
keep the seal moist and
fl_e garbage disposer clear.
Dishes are blocking the Reposifion flaedishes.
detergent cups
Unlatch the door. Press
the SNRT/RESKrpad
three times x_qthin t_vo
seconds. The detergent
cup _qll trip.
/9

Beforeyou call for service...
2O
Waterstandingin
the boltomof thetub
Water won't pump
out of the tub
Possible Causes What ToDo
This is normal A small amount of clean
water around d_e outlet on
the tub bottom at the back
of tl_e tnb keeps the wamr
seal lubficamd.
Drain is clogged If you have an air gap,
clean it.
Suds in the tub Correct detergent
wasn't used
Stained tub interior
Check to see ffyour kitchen
sink is draining well. If not,
you may need a plumber.
If tl_e dishwasher drains into a
disposer, run disposer clem.
IJseonlyautomatic dishwasher
demrgents to avoid sudsing.
Cascade_°Automatic
Dishwashing Dem_gent has
been approved tbr use in all
GEdishwashers.
To remove suds tioln the tnb,
()pen the dishwasher and let
suds dissipate. Add 1 gallon
of cold water to the tub. Close
the door until it locks into
place. Pump out water by
pressing STRRT/RESET,then
immediately press SURT/RESEr
again. Repeat ifnecessm T.
Rinse agent
was spilled Alwayswipe up rinse agent
spillsimmediamly.
Detergent with Some detergents contain
colorantwas used colorant (pigment or dyes)
that will discolor the tub
interior wid_ exmnded use.
Check the demrgent cup
tot signs of any discoloration.
If cup is discolored, change tw
detergent wid_out any colorant.
Cascade _°Automatic
Dishwashing Dem_gent has
been approved tbr use in all
GE dishwashers.
Some tomato-based
foods can stain Use of the RINSEONLY(3,cle
(on some models) alier adding
ll_edish to the load can
decrease the level of staining.
Other manuals for Triton GSD5110
1
This manual suits for next models
16
Table of contents
Other GE Dishwasher manuals

GE
GE ZBD1870NSS User manual

GE
GE GSD4000NBB User manual

GE
GE GSD660P User manual

GE
GE Triton Profile GSD5610 User manual

GE
GE GSD700D Installation instructions

GE
GE Monogram ZBD6880NSS User guide

GE
GE GBF655 Series User manual

GE
GE Monogram ZBD6400 Series User manual

GE
GE monogram ZBD6900V00II User manual

GE
GE GDT720SSFSS Manual