GE GSD2000 series User manual

GEAppliances
J
GSD2000
GSD2020
GSD2030
GSD2200
GSD2220
GSD2230
GSD3210
GSD3220
GSD3230
PartNo. 165D4700P149 Pub,No, 49-5877-7 #az cG

Congratulations!
YouAreNow Partof theGEFamily.
Welcome/o file GE f_tmily.
We're proud of our quality
products and we are
commitmd toproviding
dependable se_Tice. You'll
see it in this easy-tw-use
Owner' s Mmmal and you'll
hem it in tile fliendly voices
of our customer se_qce
department.
Best of all, you'll expe_ience
fllese values each time you
use your dishwasher. That's
important, because your
new dishwasher will be part
of your f_tmily for ma W
years. And we hope you will
be part of ours f()i a long
time to come.
Wefllank you tbr bwing
GE. Weappreciate your
purchase, and hope you
_ill continue to rely on us
whenever you need quality
appliances fbr your home.
Fill out and renm_ tim Consumer Product
()_mership Regisuafion card lhat is packed
_dfll this product. If you cannot find it,
please send in tim duplicate card printed in
tim back of tllis manual.
Write the modeland serial
numbershere.
##
#
You can find them on the tub walUust
inside the door.
Staple sales slip or cancelled check
here.
Proof of the original purchase date is
needed to obtain service under the
warranty

GE& You,
A Service Partnership.
Ask any GEappliance owner and they will
tell you we stand behind our products with
unmatched quality service. However, did
you know that most questions result from
simple problems that you can easily fix
yourseff injust a few minutes? This
Owner's Manual can tellyou how.
ReadthisManual
Inside you _dll find many
helpflll }finis on how lo use and
maintain )x)ur dishwasher
properly..lust a lillle preventive
care on your part can save you a
greal deal of time and money
over the life of your dishwasher.
ReviewtheSectionon
TroubleshootingTips
You'll find many answers 1o
common problems here.
If you review our charl of
Troubleshooting Tips firsl,
you nlay nol need 1ocall for
service al all.
If YouNeedService
If you do need sewice, you can
relax knoxdng help isonly a
phone call mvay.A lislof loll-flee
cuslolner service nulnbers is
included in the back section.
()r)_m can always call the
GE Answer Cenler ®at
800.626.2000, 24 hours a day,
7 days a week.
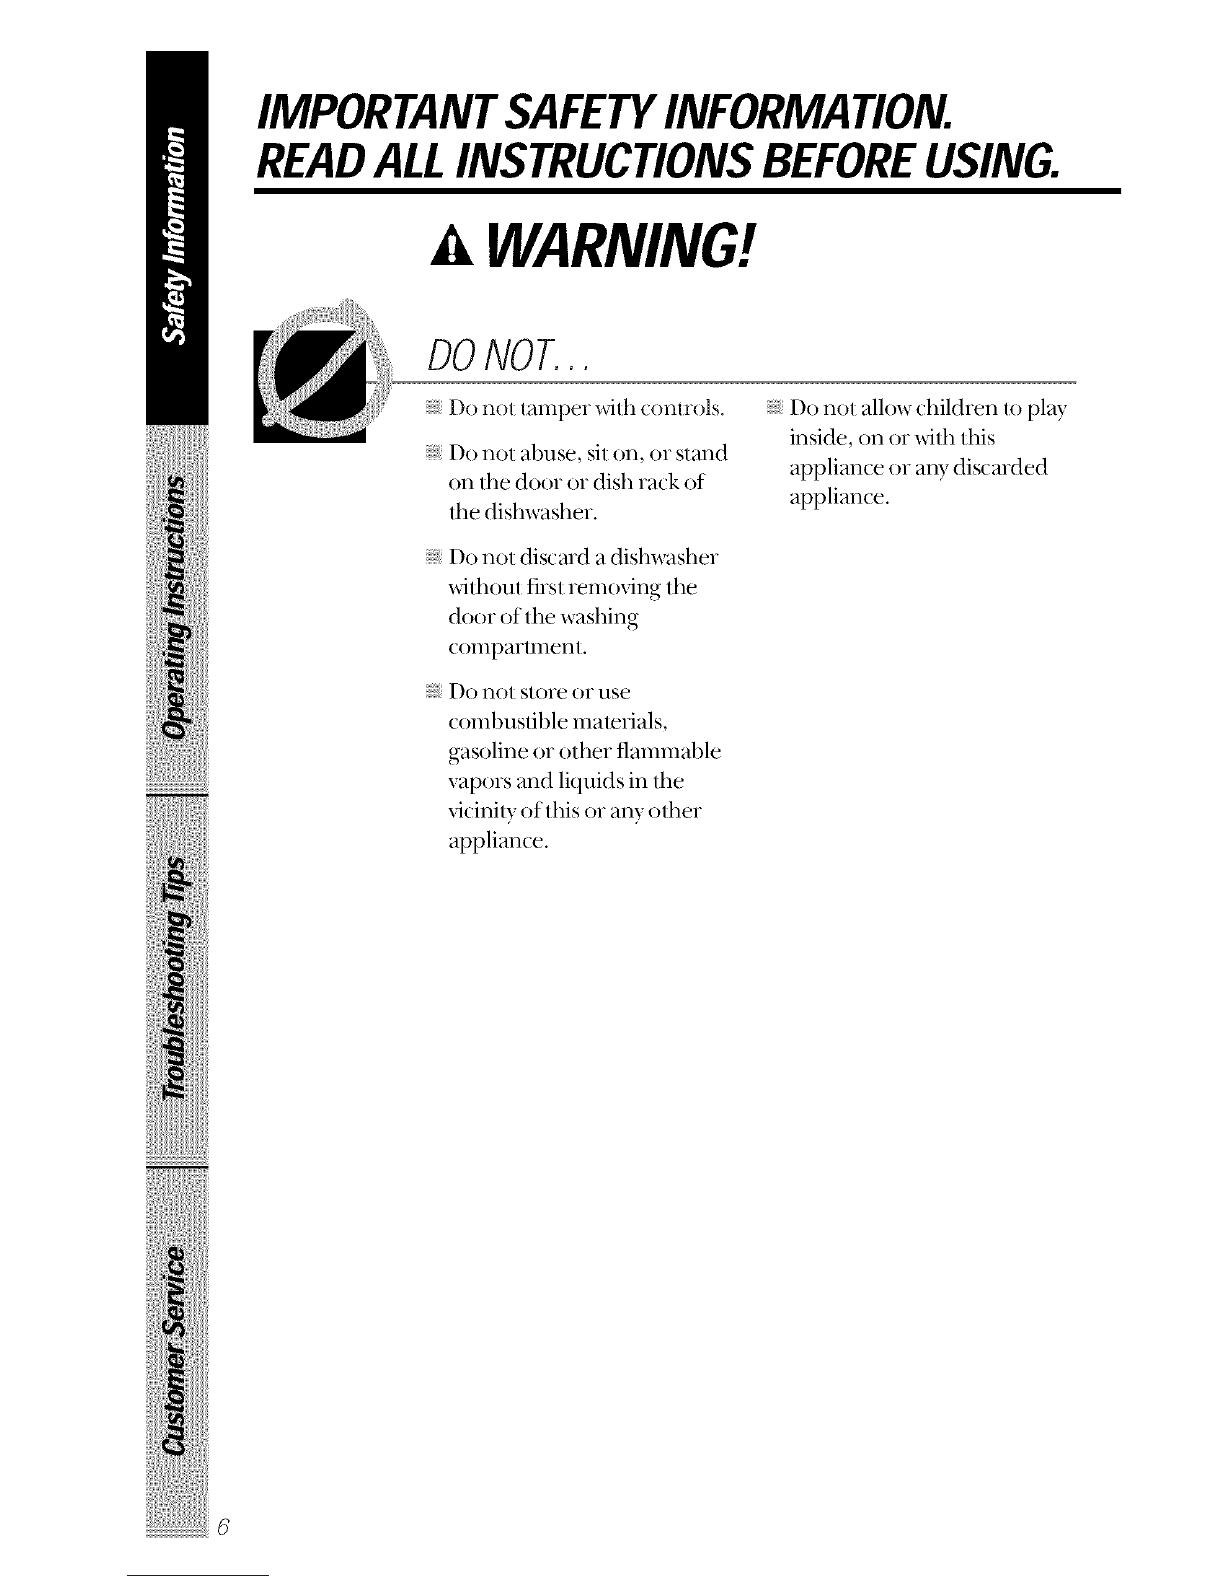
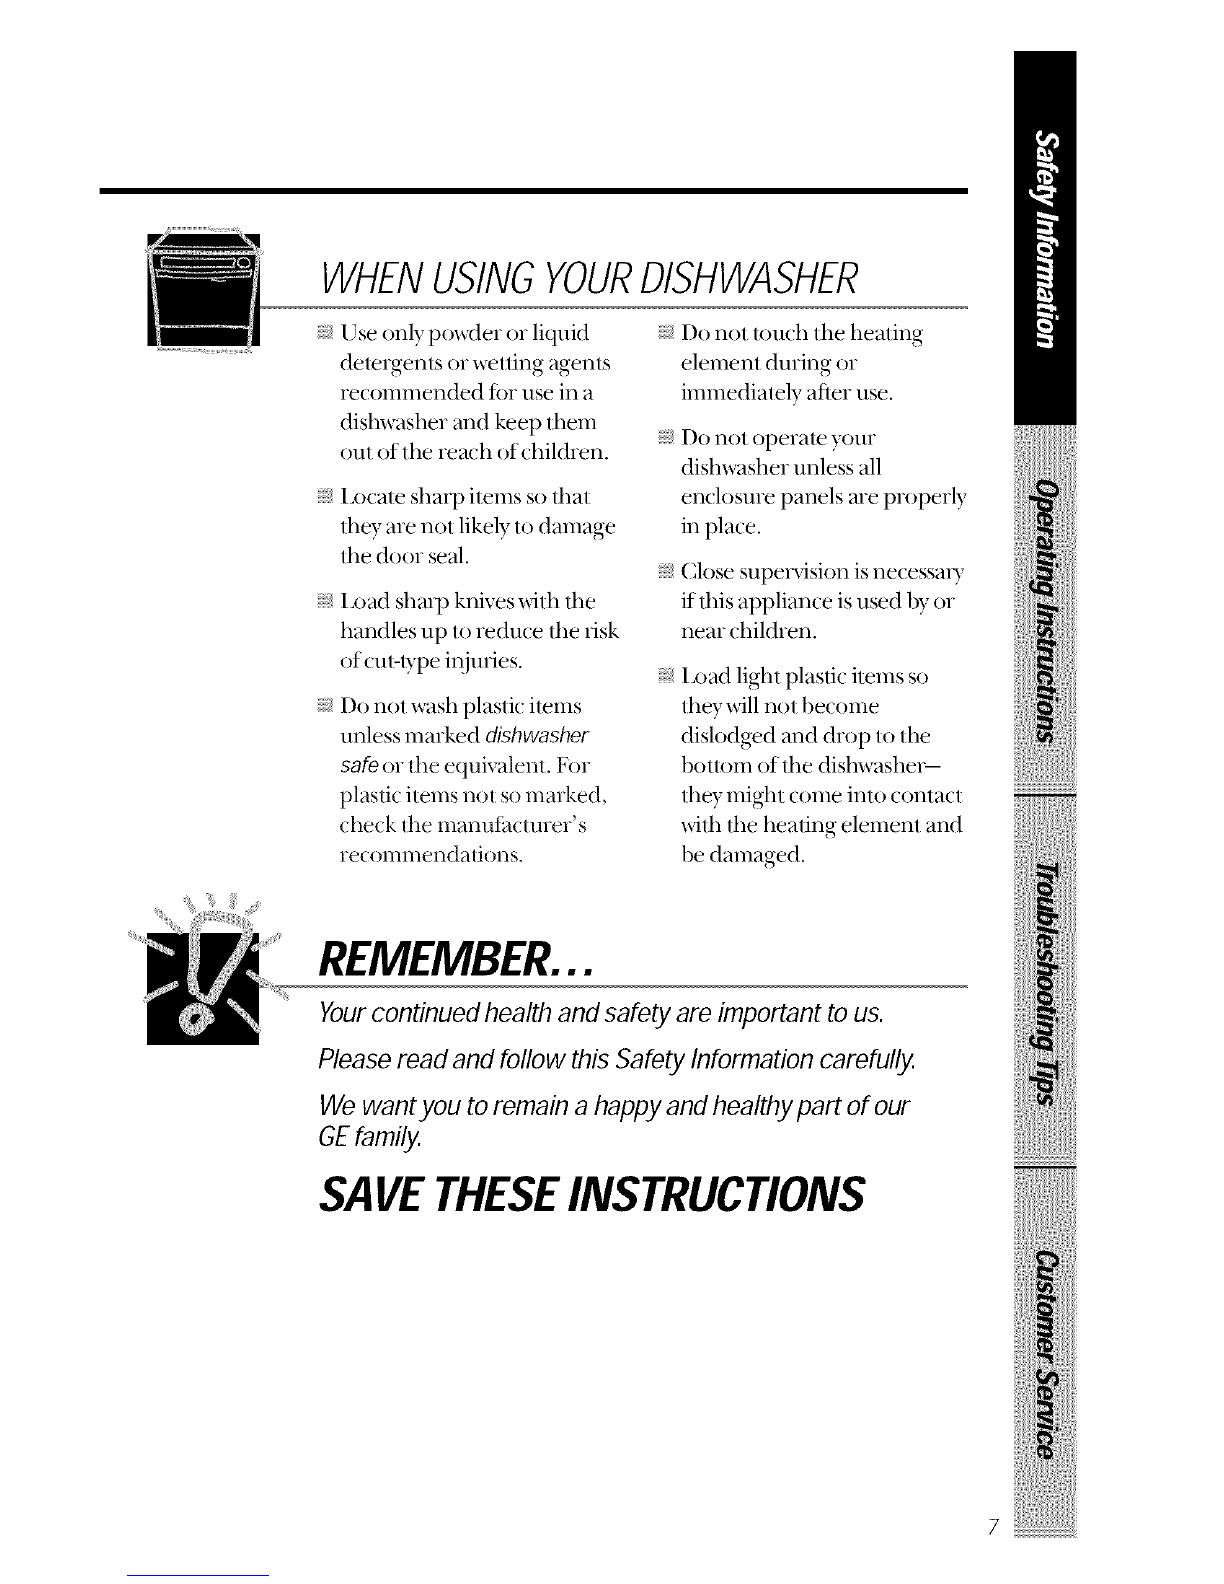
Safety Information ....... 4- 7
Operating Instructions
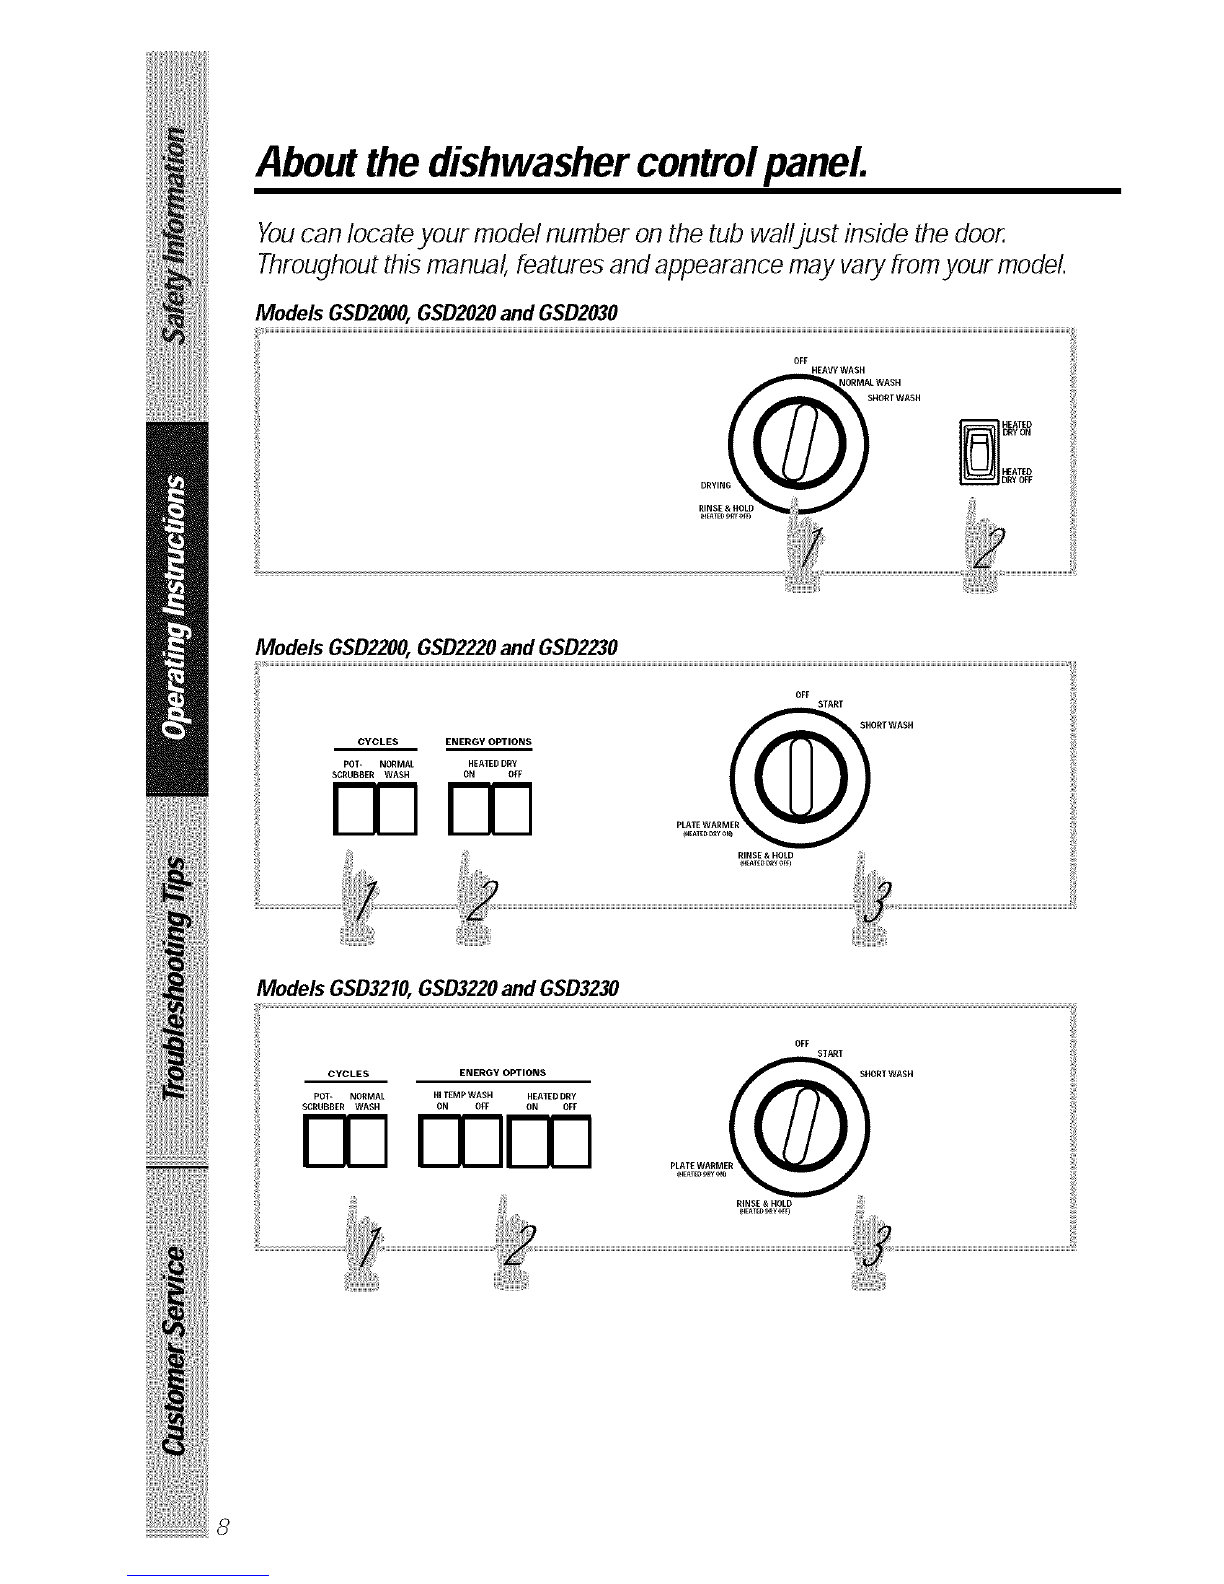
ControlPanel .............. 8
ControlSettings............ 8
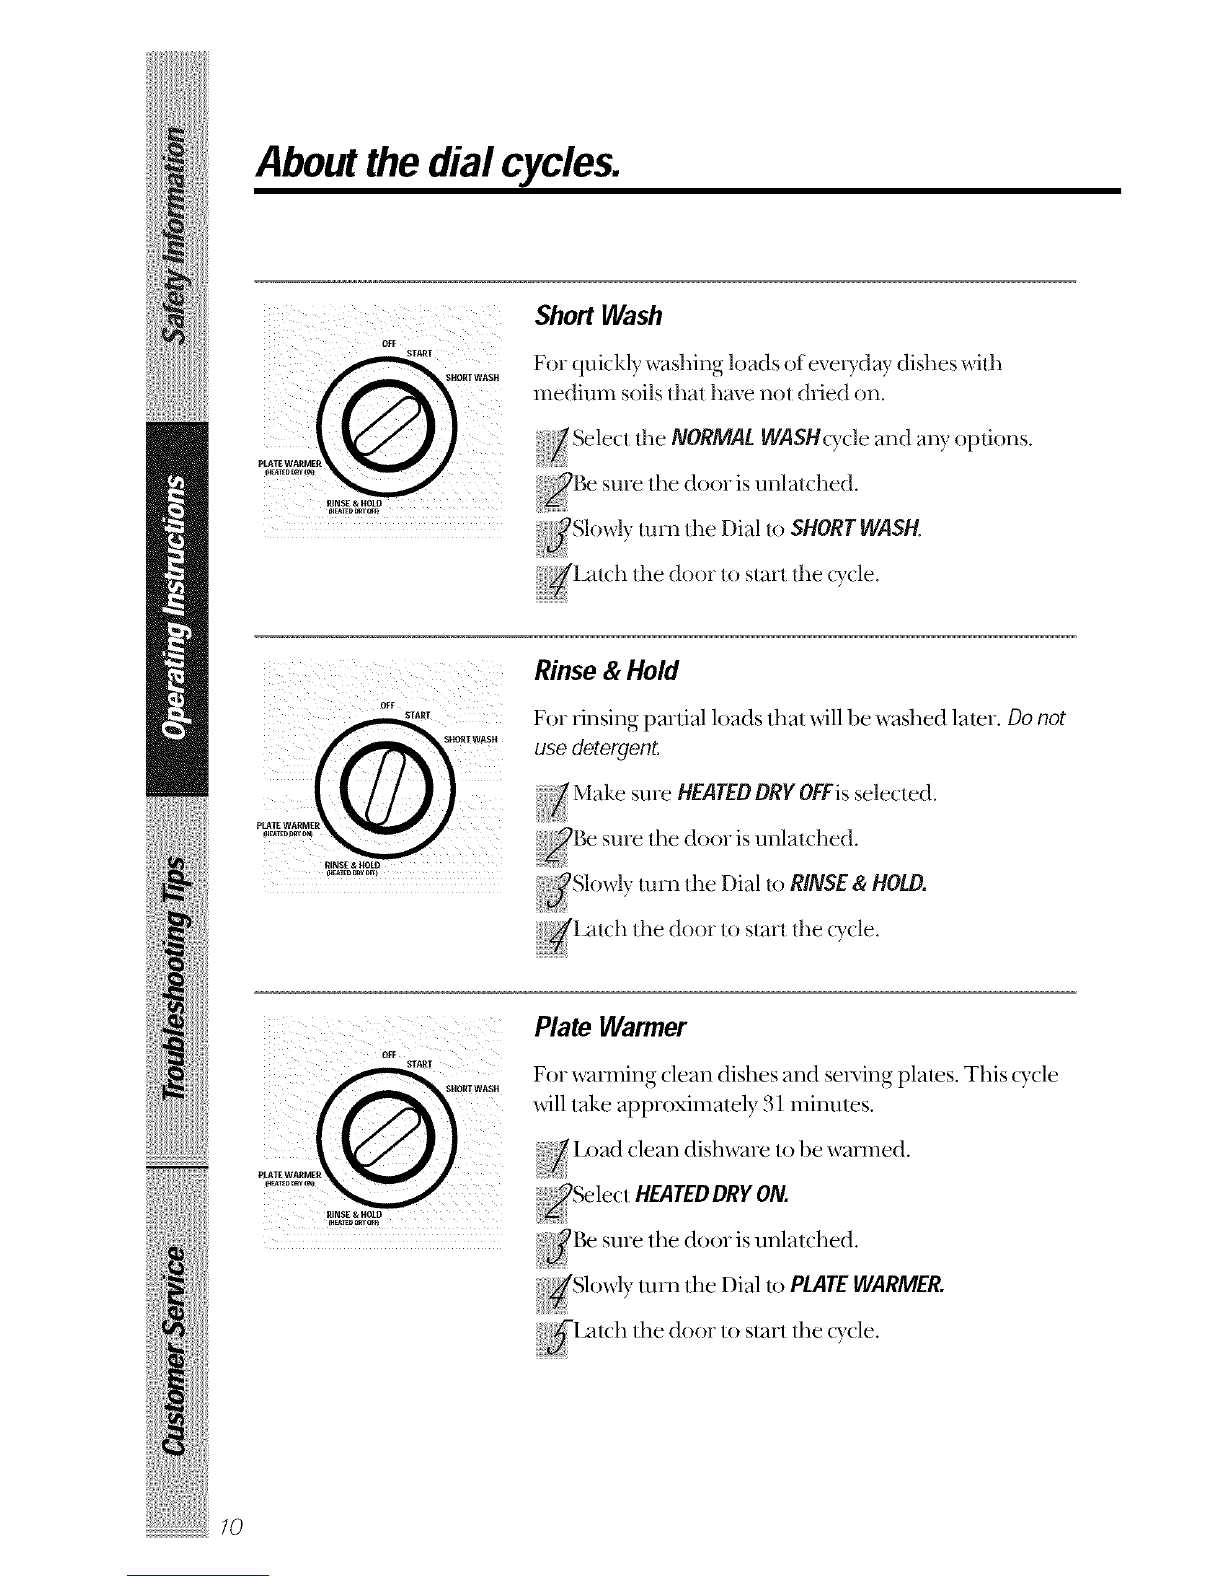
Dial Cycles............. 10-11
UsingtheDishwasher .... 7Z 13
Loadingthe
DishwasherRacks....... 74,15
CareandCleaning....... 16,17
OptionatAccessories........ 18
Troubleshooting Tips
BeforeYou
CallForService ...... 19-24
CustomerService
ProductRegistration ........ 29
Warranty ................. 31
ServiceTelephone
Numbers .......... BackCover
3

IMPORTANTSAFETYINFORMATION.
READALLINSTRUCTIONSBEFOREUSING.
WARNING!
Foryour safety, the information in this manual must be
followed to minimize the risk of fire, explosion, electric
shock, or toprevent property damage, personal injury,
or loss of life.
ii_iiiiii!iiiii_i!iiiii_iU!iiiiiii_
iiiiiiiiiiiiii!il_iii_iiii_iiiil
4
WATERHEATERSAFETY
Under certain conditions hydrogen gas may be produced in
a water heater that has not been used for two weeks or
more. HYDROGEN GAS iS EXPLOSIVE.
If lhe hot water has not been used tbr t_voweeks or more, prevent
the possibilily of damage or injm 7 by turning on all hot water
/hucets and allow them to run tbr several minums. Do fl_is betore
using any elecliica] appliance which is connecled/o the hol waler
sys/em. This simple procedure will allow aW buih-up hydrogen gas
to escape. Since the gas is flammable, do not smoke or use an open
flame or appliance dining ibis process.

Useyour dishwasher only for its intended purpose as
described in this Owner's Manual
PROPERINSTALLATION
ANDMAINTENANCE
This dishwasher must be properly installed and located in
accordance with the Installation Instructions before it is used.
Ifyou did not receive an Installation Instructions sheet with
your dishwasher, you can receive one by calling us toll-free
at the GEAnswer Center7800.626.2000.
Connect lo a grounded
metal, permanent _dfing
sysleln; or nln an equipmenl_
gTounding conductor _dth
lhe circuil conduclors and
connect 1olhe equipmenl:
gTounding lenninal or lead
of lhe appliance.
hnproper connection of the
equipment-grounding
conducu)r can result in a risk
of eleclfic shock. Check xdlh
a qualified eleclfician or
sel_ice represenlafive if}xm
are in doubl wheflmr lhe
appliance is properly
gTounded.
Dispose of discarded
appliances and shipping or
packing malefial properly.
Do not attempt to repair or
replace any part of)xmr
dishwasher unless it is
specifically recommended in
this manual. All other
sel_icing should be referred
u) a qualified technician.
To minimize lhe possibilily of
elecuic shock, disconnecl
lhis appliance flom lhe
power supply betbre
attempting any maintenance.
NOTE:Turning the
dishwasher offdoes not
disconnect the appliance
flom the pox_r supply. We
recommend hming a
qualified lechnician selaice
your appliance.
i
ii!i!i!iiiiii/ii_'_iii>_:ii:i:iiiiii_l_!_
iiiilii

IMPORTANTSAFETYINFORMATION.
READALLINSTRUCTIONSBEFOREUSING.
WARNING!
ii_iiiiii!iiiii_i!iiiii_iU!iiiiiii_
iiiiiiiiiiiiii!_il_iii_iii,i_iiiil
6
DONOT...
Do nol lamper wifl_ connols. Do nol allow children lo play
inside, on or _llh this
Do not abuse, sit on, or stand
on the door or dish rack of appliance or any discarded
the dishwasher, appliance.
Do not discard a dishwasher
_dd_ou! first removing the
door of the washing
conlpartnlenl.
Do not store or use
combustible mamfials,
gasoline or other flammable
vapors and liquids in lhe
x_cinily of this or any olher
appliance.

WHENUSINGYOURDISHWASHER
1Jse only powder or liquid
detergents or x_lling agenls
recommended fbr use in a
dishwasher and keep lhem
(Jill of lhe reach of children.
Locate shm1) items so that
lhey are not likely 1o damage
tile door seal.
Load shin 1)knives with tile
handles up to reduce the risk
of cul-lype injuries.
Do nol wash plastic ilems
unless marked dishwasher
safe or the equivalenl. For
plastic items not st) marked,
check the manui_tcmrer's
recommendations.
iiiiiiiiiiiii_iil
Do not touch the heating
element during or
immedialely after use.
Do not operate your
dishwasher unless all
enclosure panels me properly
in place.
Close supervision is necessm T
it this appliance is used 1)yor
near children.
Load light plastic ilems st)
lhey will nol become
dislodged and drop m lhe
bollom of lhe dishwashel_
lhey mighl come inlo conlact
wifll lhe heating elemenl and
be damaged.
REMEMBER...
Yourcontinued health and safety are important to us.
Please read and follow this Safety Information carefully.
We want you to remain a happy and healthy part of our
GE family.
SAVETHESEINSTRUCTIONS
i

Aboutthe dishwasher controlpanel.
Youcan Iocate your model number on the tub walljust inside the door.
Throughout this manual, features and appearance may vary from your model.
Models GSD2000, GSD2020and GSD2030
HEATED
[_IyON
HEATED
DRY OFF
Models GSD2200, GSD2220and GSD2230
CYCLES ENERGY OPTIONS
POT- NORMAL HEATED DRY
SCRUBBER WASH ON OFF
START
iiiiiiiiiiiiii!_il_iii_iii,i_ijjil
Models GSD3210,GSD3220and GSD3230
CYCLES ENERGY OPTIONS
POT- NORMAL Hi TEMP WASH HEATED DRY
SCRUBBER WASH ON OFF ON OFF
OFF START
%fE
8

Control Settings
cydo
POTSCRUBBER/Forheavilysoileddishesor cookwarewith dried-on
HEAVYWASH or baked-onsoilsiEverydaydishesmaybeincluded.
Thiscyclewill notremoveburned-onfoods.
NORMALWASH Forloadsof everydaydishes,glassesandcookware
with mediumsoils,NOTE:Manydisheshavelighter
soil than normal,Choosinga cycleotherthan
NORMAL WASHwillsaveenergyandwater,
SHORTWASH Forquicklywashingloadsof everydaydisheswith
mediumsoilsthat havenotdriedon,suchas loads
consistingmostlyof glasses,
RINSE& HOLDForrinsingpartial loadsthat will bewashedlater,
Donot usedetergenL
PLATEWARMER Forwarmingcleandishesandserving plates.This
cyclewill takeapproximately31minutes.
Make sure the Dial is at the OYYposition.
Latch the door.
111111111111111111111111111111111111111111111_
E.e,gyoptJo,,
HI TEMP Providesextraheat for bestperformance.It is used
WASH best with heavily-soileddishes.
HEATEDDRY Turnsthe dryingheateronfor fast drying.This
ON cyclewill extendthetime toyourwash cycle.
HEATEDDRY Shutsoff thedryingheatoptions.Dishesair dry
OFFnaturallyandenergyissaved.
Slowly mrn the Dial 1othe STARTposition. Don't mrn it
past the STARTposilion, or you could accidentally miss a
Hnse. There is a time delay between start-up and water
fill st) you _dll not hear aW wash action lig'ht away. iiiii

Aboutthe dial cycles.
OfF START
!!i!i
Short Wash
For quickly washing loads of eveuday dishes with
medium soils float have not dried on.
'i_lect tl_e NORMAL WaSH_ycle and any options.
sure the door is unlatched.
JSlowlv turn the Dial to SHORT WASH.
Rinse & Hold
For rinsing partial loads thai will be washed later. Do not
use detergent.
IVlakesure HEATEDDRYOFFisselected.
{_Be sure the door is unlatched.
i}_Slowly turn the Dial toRINSE&HOLD.
iiiiiiiiiiiiii!illii_iiiiiiiil
START
70
Plate Warmer
For wanning clean dishes and serving plates. This cycle
will take approximately 31 minutes.
Load clean dishware to be wanned.
Select HEATEDDRYON.
Be sure tlae door is unlatched.
Slowly mrn tl_e Dial to PLATEWARMER.
.atch the door to start the cycle.

Heavy,, Normal and Short Wash
(GSD2000,GSD2020andGSD2030only)
[k_sure the door is unlatched.
_Slowly mm the dial to lhe cycle you wanl. Don't
{_" 1111-11it past this position, or you could accidentally
miss a dnse.
Select anyoplions,
,//Latch the door to slarl the cycle.
{*t
Cycle Sequence
POTSCRUBBER 9.5 gal. 62 min. Rinse Rinse Rinse Main Wash Rinse Rinse Rinse
NORMAL WASH 8.0 gal. 62 min. Rinse Rinse Main Wash Rinse Rinse Rinse
RINSE & HOLD 3.9 gal. 12 min. Rinse Rinse Rinse
Drying Options:
HEATEDDRYON.Available on all wash cycles except
RINSE& HOLD.Add approximately 31 minules to the
cycle.
HEATEDDRYOFF.D_ying heater is mined off. Dishes &y
naturally.
11

Usingthe dishwasher.
Checkthe WaterTemperature
The entering waler must be at least 120°F. and not more titan
150 oF., tbr effective cleaning and u:)prevenl dish damage. Check
ll_e water tempera|ure _ifl_ a can@ or meat flmnnome/er. Turn on
the hot wa/er faucet nearest tim dishwasher, place the fl_ennometer
in a glass and let the water run continuously into tl_e glass until the
temperature stops rising.
Usinga RinseAgent
A rinse agent, such as JET-DRY,makes water flow off the dishes
quickly thereby reducing water spotting.
Fill the rinse agent; dispenser
until it;reaches the bottom of lip
inside tim opening. Replace cap.
To check if rinse agent: is needed,
remove the cap and look into the
dispenser.
Afull dispensershouldlastabout
onemonth.
Ifrinse agentspills,wipeit up immediately.
It can keepyour detergentfrom working.
iiiiiiiiiiiiii!_il_iii_iiii_iiiil
illllllllllllllllllllllllllllllllllllllllllli__2

ProperUseof Detergent
IJse only detergent specifically made fi)r use in dishwashers. Keep
your detergent fiesh and &T. Don't put powder detergent into the
dispense, until you're ready to wash dishes.
The amount of detergent to use depends on whether your water is
hard(:), soft.With hard water, you need exua detergent. With soft
water, you need less detergent.
Protect your dishes and dishwasher by contacting your water
department and asking how hard your water is. T,_vlve or more
grains is extremely hard water. A wamr softener is recommended.
Without it, lime can build up in the water valve, which could stick
while ()pen and cause flooding. Too much demrgent xdth soft wamr
can caum a permanent cloudiness of glassware, called etching.
You'll find two detergent dispensers on the OpenCup
inside door ofyour dishwasher. All wash (ycles
,equi,e dete,gent in the main cup. Wash Q,cles
with two washes x_5llalso use the open cup. ,
Be sure dm Dial is at 0YYposifion befbre
adding detergent. Othe,_vise, the detergent
cup will not close and latch properly. Add
dete,gent then close the main cup.
MainCup
NOTE:To open detergent cup after it has
been closed, simply mm the detergent cup
handle counter-clock_se until it releases. A
snapping sound may be heard. !
ForgettoAddaDish?
Afbrgotten dish can be added any time befi)re the main wash.
Push the door latch to the left
_Do not open the aoor until the ,,'ate,-spray a{lion stops. Steam
......' may ,ise out of the dishwasher.
!_Close the door and push the latch to the thrright.
iiiii

Loadingthe dishwasher racks.
For best dishwashing results, follow these loading guidelines. Features and
appearance of racks and silverware baskets may vary from your model.
Upper Rack
The upper rack is for glasses, cups and saucers.
(]ups and glasses fit best along the sides. This is
also a secure place for dishwasher-sale plastics.
The upper rack is good for all kinds of odd-
shaped ulensils. Saucepans, mixing bowls and
other items should be placed fitce down.
Securelargerdishwashe_:sa_e_fasticsovertwo_i_ge_
whenpossib/e,
MakesureSmallplasticitemsaresecuresotheycan?#of!
ontotheheatingelement,
iiiiiiiiiiiiii!il_iii_iiii_iiiil
mmmmmmmmm_
74
The Wash Tower
Keepthecenterareaclearin thelowerrack:
The wash tower _ises through the center of the
lower rack dining the wash and linse portions of
the cycle.
Don'tblockitorloadtallthingsnexttoit,
Also, be careflfl not to let a
portion of an item such as a pot or
dish handle extend through the
bottom rack. This could block the
wash ann and cruise poor washing
resuhs.

Lower Rack
Whenloadingthelowerrack,donotloadlargeplattersor
trail in thefrontrightcornerTheymaypreventdetergent
fromcirculatingduringthewashcycb.
The ltm_r rack is best used for plales, saucers,
and cookware. Large items such as broiler pans
and racks should go along the sides. Load
platmrs, pots and bowls along the sides, in
comers, or in the back. The soiled side of items
should fa(e the center of the rack.
Silverware Basket
Put flatware in tim removable basket xdth fork
and knife handles up to protect }_mr hands. Place
spoons in the basket x_th handles doxm. Mix
knives, torks and spoons so they don't nest
together. Distfibum evenly. Small plastic items,
such as measuring spoons and lids flom small
containers, should go in the bomm_ of the
silverware basket _dth silverware on top.
iiiii

Caringfor the dishwasher.
Toclean the control panel use a lightly dampened cloth then dry
thoroughly. Toclean the exterior use a good appliance polish wax.
Never use sharp objects, scouring pads or harsh cleaners on any
part of the dishwasher.
_umocoverscrews
Protect Against Freezing
If your dishwasher is left in an unheated place during
lhe winler, ask a seevice technician to:
_Cut offelectrical powe, tothedishwashe,.Remove
fhses c,r trip circuit breaker.
_mn off the water supply and disconnect the water
...................."-"*inlet line flom the water valve.
:_Drain water flom the inlet line and water valve.
{=i={{:,(1jsea pan to catch the water.)
i/Reconnect the water inlet line to the water valve.
{_Remove the plastic sump cover in the tub
b()ttoln and use a sponge to soak up water in the
rubber boot.
iiiiiiiiiiiiii!il_iii_iiiiiiiil

Ch_:k_Teairg3paCvtimeyour
disfTwashef isnt druining well,
Does YourDishwasher Have an Air Gap?
An ai_ gap p_omcts your dishwasher against wam_
backing up into it if a d_ain clogs. The ai_gap is not a
pa_l of the dishwasher. It is not cove_ed by your
wa_Tanly. Not all plumbing codes _equi_e ai_ gaps, so
you may not have one.
The air gap is easy to clean.
;:7Turn oftthe dishwasher and li/i oiithe ch_ome
coveI.
_Unsc_ew the plastic cap and clean with a toothpick.
17

Aboutoptionalaccessories.
Youcan change the door and lower access panel appearance ofyour
dishwasher by ordering one of these optional accessories:
,Color Panels
,1/4" Wood Panel TrimKit
,3/4" Trimless Panel Kit
These accessories are available at extra cost (VISA, MasterCard, or Discover
cards accepted) by calling 800-626-2002.
Specify accessory number when ordering.
!iiiiiii!i!iiiii!iiiiiiiiiii!ii!iii
/8
Descriptionsof OptionalAccessories
Colorpanels-- Replacelnent door panels and lower access [)anels
are available in d_e tallowing colors:
:_GPF3OOA(Almond)
GPF3OOB(Black)
GPF3OOW(White)
Woodpaneltrimkit--This accesso D-contains trim and instructions
for you to supply and inslall a 1/4" dfick decorative woc,d door and
lower access panel:
GPF325A(Almond)
GPF325B(Black)
GPF325W(White)
NOTE:The GPF100dishwasher door spring kit must also be ordered
and installed when the door panel weighs four Ibs. or more.
Trimlesspanelkit--This acce ssoD-contains parts and instructions
tar you lo supply and install a 3/4" thick decorative _od door and
lower access panel:
GPF375
NOTE:The GPFIO0dishwasherdoorspringkit _dll be included _dth
the trimlesspanel kitand must be installed xdth it.

Beforeyou call for service...
Troubleshooting tips
Review the charts on the following pages first and you may not
need to call for service.
Dishwasher won't tun
Possible Causes
Fuse is blown, or the
circuit breaker tripped
What ToDo
Replace fllse or reset
circuit breaker. Remove
any other appliances ftom
the cir(uiI.
No_e Some of the sounds
you'll hear are normal
Utensils are not secure
in the rack or something
small has dropped into
the rack
Soft tbod disposal
shredding action.
Drain valve opening to
pump water out.
Timer control as cycle
progTesses.
Detergent cup opening.
The motor stopping during
the &)qng period.
Make sure eveuthing is
secured in dishwasher.
Motor hums Dishwasher has not been
used on a regular basis. If
you do not use your
dishwasher often, set it to
fill and pump oul once
eveU x_ek. This x_qllhelp
keep the seal moist and
the garbage disposer clear.
iiii!ii_i!iHHiiii
mmmmmmmmm_
19

ii!iliiiiiiiliii!iiliiiiiii i i
Beforeyou call for service...
Troubleshooting Tips
po Jo o
Waterstanding in This is normal
thebottomofthetub
Water won'tpump Drain is clogged
outofthetub
Suds in the tub Correct detergent
wasn't used
Rinse agent
was spilled
What ToDo
A small mnount of clean
water mound the outlet on
the mb bottom at the back
of the tub keeps the water
seal lubricamd.
Ifyou have an air gap,
clean it.
Check to see ffyour kitchen
sink is draining well. If not,
you may need a plumber.
If the dishwasher drains
into a disposer, nm
disposer clear.
1Jse only automatic
dishwasher detergents to
avoid sudsing.
To remove suds fiom the
rob, ()pen the dishwasher
and let suds evaporam.
Add 1gallon of cold water
to the tub. Close and latch
the dishwasher. Pump out
water 1)yslowly mining the
Dial unlil a drain period
is reached. Repeat if
necessa U.
Alwaysxdpeup rinse agent
spillsimmediately.
20
Other manuals for GSD2000 series
3
This manual suits for next models
8
Table of contents
Other GE Dishwasher manuals

GE
GE GSD400Y-04 User manual

GE
GE PDT660SSF2SS User manual

GE
GE Triton GSD5900G User manual

GE
GE Profile GDT580SMF2ES User manual

GE
GE HLD4000 Series User manual

GE
GE Monogram ZBD1800K Series How to use

GE
GE GSD3200 Series User manual

GE
GE GSD580G Installation instructions

GE
GE GSCl120 User manual

GE
GE GSD3300KWW User manual

GE
GE CDT725SSFSS Manual

GE
GE Spacemaker PDW1800N Manual

GE
GE Built-In Dishwasher User manual

GE
GE Monogram ZBD3500 User manual

GE
GE Profile PDW8900 Series User manual

GE
GE Dishwasher User manual

GE
GE GPT225SGLWW User manual

GE
GE GDT550HGD How to use

GE
GE GSD6000 Series User manual

GE
GE Monogram ZBD5600 User manual